
MULTITALENT MCM3501M - Food Processor BOSCH - Free user manual and instructions
Find the device manual for free MULTITALENT MCM3501M BOSCH in PDF.
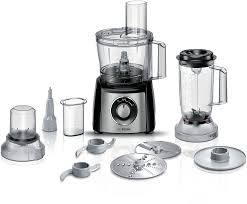


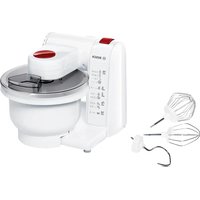
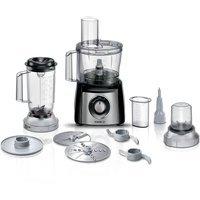
| Product type | Multifunction food processor |
| Brand | BOSCH |
| Model | MULTITALENT MCM3501M |
| Main functions | Mixing, kneading, whisking, cutting, grating, slicing, blending, grinding, chopping, milling |
| Included accessories | Universal blade, dough hook, whisk disc, reversible slicing disc (thick/fine), reversible grating disc (coarse/fine), reversible slicing/grating disc, blender (bowl and lid), universal mill (cup, mixer/grinder blade holder, grinding blade holder), pusher |
| Mixing bowl capacity | Up to 500 g flour for yeast dough |
| Blender capacity | 1.0 L liquid max. (0.4 L for hot or frothing liquid) |
| Universal mill capacity | Approx. 80 g of firm foods (indicative value) |
| Speeds | 1 (slow), 2 (fast), M (pulse max speed) |
| Power supply | 220-240 V, 50/60 Hz |
| Power cord | Integrated storage under the appliance |
| Mixing bowl material | Plastic (polycarbonate likely) |
| Cleaning | Removable parts are dishwasher safe (except motor base and blade holder, which are hand wash) |
| Safety | Automatic shut-off if bowl or lid is mispositioned; restart protection after power cut |
| Weight | Approx. 3.5 kg (estimate) |
| Dimensions (L x W x H) | Approx. 25 x 20 x 35 cm (estimate) |
| Warranty | According to distributor conditions |
| Customer service | Contact details provided in the manual; spare parts available (e.g. mill cup ref. 12005833) |
Frequently Asked Questions - MULTITALENT MCM3501M BOSCH
User questions about MULTITALENT MCM3501M BOSCH
0 question about this device. Answer the ones you know or ask your own.
Ask a new question about this device
Download the instructions for your Food Processor in PDF format for free! Find your manual MULTITALENT MCM3501M - BOSCH and take your electronic device back in hand. On this page are published all the documents necessary for the use of your device. MULTITALENT MCM3501M by BOSCH.
USER MANUAL MULTITALENT MCM3501M BOSCH
Register your new Bosch now: www.bosch-home.com/welcome
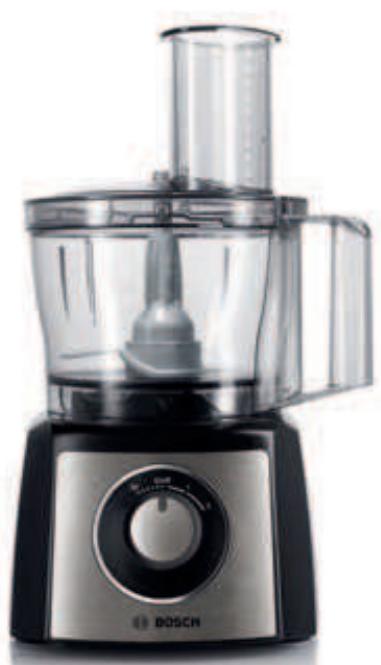
MCM3...

BOSCH
Congratulations on the purchase of your new BOSCH appliance.
You can find further information about our products on our web page.
Contents
For your safety 13
Overview 15
Operation 15
Cleaning and servicing 18
Storage 19
Troubleshooting 19
Recipes/Ingredients/Processing 19
Instructions on disposal 21
Warranty conditions 21
For your safety
Before use, read these instructions carefully to familiarize yourself with important safety and operating instructions for this appliance.
If the instructions for correct use of the appliance are not observed, the manufacturer's liability for any resulting damage will be excluded.
This appliance is designed for processing normal household quantities in the home or similar quantities in non-industrial applications. Non-industrial applications include, for example, use in employee kitchens in shops, offices, agricultural and other commercial businesses, as well as use by guests in boarding houses, small hotels, and similar dwellings.
Use the appliance for processing normal amounts of food for the household; see the "Recipe examples" section.
This appliance is suitable for mixing, kneading, beating, cutting, and shredding food. Other applications are possible if the accessories approved by the manufacturer are used. It must not be used for processing other objects or substances.
Use the appliance with original accessories only.
Please keep the operating instructions in a safe place. If passing on the appliance to a third party, always include the operating instructions.
A General safety instructions
Risk of electric shock
The appliance must not be used by children.
The appliance and its power cord must be kept away from children. Appliances can be used by persons with reduced physical, sensory, or mental capabilities or lack of experience and knowledge if they have been given supervision or instruction concerning use of the appliance in a safe way and if they understand the hazards involved.
Children shall not play with the appliance.
Connect and operate the appliance only in accordance with the specifications on the rating plate. Only use indoors. Do not use the appliance if the power cord and/or appliance are damaged.
Before replacing accessories or additional parts that move during operation, switch off the appliance and disconnect it from the power supply. Always disconnect the appliance from the supply if it is left unattended and before assembling, disassembling, or cleaning. Do not place the power cord over sharp edges or hot surfaces. To prevent injury, a damaged power cord must be replaced by the manufacturer, its customer service, or a similarly qualified person. Only our customer service may repair the appliance.
Safety instructions for this appliance
Risk of injury
Risk of electric shock
If the power is interrupted, the appliance remains switched on and restarts when the power is restored.
Never immerse the base unit in liquids or place under running water and do not clean in the dishwasher.
Before rectifying a fault, pull out the mains plug.
Risk of injury from the rotating tools!
While the appliance is operating, never place fingers in the mixing bowl. Always use the pusher for adding ingredients.
After switching off, the drive continues running for a short time.
Change tools only when the drive is at a standstill.
Risk of injury from sharp blades/rotating drive!
Never reach into the attached blender jug!
Do not remove/attach the blender jug until the drive has stopped.
Do not remove/attach the universal cutter jug until the drive has stopped.
Risk of injury from sharp blades!
Do not touch blades of the universal blade with bare hands. When not in use, always store the universal blade in the blade guard. Clean them with a brush.
Do not grip the sharp blades or edges of the cutting discs.
Grip the discs by the plastic part in the centre only!
Do not place fingers in the feed tube. Only use the pusher when adding more ingredients.
Do not touch blades of the blade insert with bare hands.
Clean them with a brush.
Risk of scalding!
If processing hot liquids, steam escapes through the funnel in the lid.
Add a max. 0.4 litres of hot or frothing liquid.
Risk of injury!
Never assemble accessories on the base unit.
Explanation of the symbols on the appliance or accessory

Caution! Rotating tools.
Do not place fingers in the feed tube.
Lock blade insert in the blender or universal cutter jug.
Remove blade insert from the blender or universal cutter jug.
Blade insert with blender/cutting blade
Blade insert with grinding blade
Overview
The instructions describe different features of the appliance. Figure 1 shows an overview of the model.
Please fold out the illustrated pages.
Fig. A
Base unit
1 Rotary switch 0/off = Stop M = Instantaneous switching at maximum speed, hold switch for required blending duration. Settings 1-2, Operating speed: 1 = low speed - slow, 2 = high speed - fast. 2 Drive 3 Cord store 4 Bowl 5 Tool holder 6 Tools *
a Universal blade with blade guard b Kneading hook c Chopping disc
7 Cutting discs *
a Slicing reversible disc - thick/thin b Shredding reversible disc - coarse/fine c Reversible slicing/shredding disc
8 Lid
a Filler opening bPusher
Accessories *
9 Blade insert with blender/cutting blade and seal 10 Blade insert with grinding blade and seal 11 Universal cutter jug
12 Blender jug 13 Lid for blender
a Filler opening b Funnel-shaped stopper
- for some models:
With the universal cutter use the appliance at full power (according to the recipe). You can find the recipe on the illustrated pages (Fig. F).
If the universal cutter is not included with the hand blender, it can be ordered from customer service (order no. 12005833).
Operation
Before operating the appliance and accessories for the first time, clean thoroughly; see "Cleaning and servicing".
Preparation
- Place the base unit on a smooth, clean surface.
- Pull cable out of the base unit to the required length.
i Important information
Use only the rotary switch to switch the appliance on or off. - Never switch the appliance off by rotating the bowl, the blender or a tool. - Do not switch the appliance on unless tools or accessories have been completely attached.
Bowl with accessories/tools

Risk of injury from the rotating tools!
While the appliance is operating, never place fingers in the mixing bowl. Always use the pusher for adding ingredients. After switching off, the drive continues running for a short time. Change tools only when the drive is at a standstill.
Warning!
When working with the bowl, the appliance cannot be switched on until the bowl has been attached and the lid has been attached and screwed on tight.
Universal blade
for cutting, mincing, mixing.


Risk of injury from sharp blades!
Do not touch blades of the universal blade with bare hands. When not in use, always store the universal blade in the blade guard. Grip the universal blade by the edge of the plastic handle only.
Kneading hook
for kneading dough and mixing-in ingredients that ought not be cut (e.g. raisins and chocolate chips).
Chopping disc
for cream, egg white and mayonnaise.

Fig. B
- Attach the bowl (arrow on bowl on dot on the appliance) and rotate as far as possible in a clockwise direction.
- Insert tool holder into the bowl.
- Insert universal blade, whisking disc or kneading hook into the tool holder and release.
Note position of the tools when inserting them! Press tools all the way down.
Warning!
Do not add ingredients until the tools have been inserted.
- Add ingredients.
- Attach lid with pusher (match arrow on lid on dot on bowl) and rotate in a clockwise direction. Lid lug must be located fully in the slot in the bowl handle.
- Insert the mains plug.
- Set the rotary switch to the desired setting.
- To add more ingredients, set the rotary switch to 0/off.
- Remove the pusher and add ingredients through the feed tube. Pusher can be used as a measuring cup.
Cutting discs

Risk of injury from sharp blades!
Do not grip the sharp blades or edges of the cutting discs. Take hold of discs by the edge only! Do not place fingers in the feed tube. Only use the pusher when adding more ingredients.
Slicing reversible disc - thick/thin
for slicing fruit and vegetables.

Process at setting 1.
Identification on the reversible slicing disc: "coarse" for the thick cutting side, "fine" for the thin cutting side
Warning!
The reversible slicing disc is not suitable for slicing hard cheese, bread, rolls or chocolate. Slice boiled, waxy potatoes only when they are cold.
Shredding reversible disc - coarse/fine

for shredding vegetables, fruit and cheese, except for hard cheese (e.g. Parmesan).
Process at setting 1.
Designation on the reversible shredding disc: "2" for the coarse shredding side "4" for the fine shredding side
Warning!
The reversible shredding disc is not suitable for shredding nuts. Shred soft cheese with the coarse side only at setting 2.
Reversible slicing/shredding disc

for slicing and shredding fruit, vegetables and cheese.
Process at setting 2.
Fig. 6
- Attach the bowl (arrow on bowl on dot on the appliance) and rotate as far as possible in a clockwise direction.
- Insert tool holder into the bowl.
Depending on the required use:
- Place cutting disc on tool holder. Turn required slicing/shredding side face up. Place disc on the disc holder so that the drivers on the tool holder grip the opening in the discs.
- Attach lid with pusher (match arrow on lid to arrow on bowl) and rotate in a clockwise direction. Lid lug must be located fully in the slot in the bowl handle.
- Insert the mains plug.
- Set the rotary switch to the desired setting.
- Fill with contents which are to be sliced or shredded.
- When adding contents which are to be sliced or shredded, apply only light pressure to the pusher. Remove the pusher and add ingredients through the feed tube.
Warning!
Empty the bowl before it becomes so full that the cutting or grating contents reach the carrier disc.
After using the appliance
- Set the rotary switch to 0/off.
- Remove mains plug.
- Rotate the lid in an anti-clockwise direction and remove.
- Remove tool:
Take tool holder together with universal blade, whisking disc or kneading hook out of the bowl. Remove the tools from the tool holder. Take out the cutting discs by the plastic stud in the centre. Take tool holder out of the bowl.
- Rotate bowl anti-clockwise and remove.
- Clean all parts, see "Cleaning and servicing".
Blender
Blade insert with blender/cutting blade for mixing liquid or semi-solid food, for cutting/ chopping raw fruit and vegetables, for puréeing food.

Risk of injury from sharp blades/ rotating drive!
Never place fingers in the attached blender!
Do not remove/attach the blender until the drive is at a standstill.
Do not touch blades of the blade insert with bare hands. Clean them with a brush.

Risk of scalding!
If processing hot liquids, steam escapes through the funnel in the lid. Add a max. 0,4 litres of hot or frothing liquid.
Warning!
Blender may be damaged. Do not process deep-frozen ingredients (except ice cubes). Do not operate blender when empty.
- Place seal on the blade insert. Ensure that the seal is positioned correctly.

Important information
If the seal is damaged or not correctly positioned, liquid may run out.
- Insert blade insert with blender/cutting blade into the blender jug and lock anti-clockwise (1).
- Turn blender jug over (blade insert face down).
- Attach the blender jug (match arrow on the jug to the arrow on the appliance) and rotate as far as possible in a clockwise direction.
- Add ingredients. Maximum capacity, liquid = 1.0 litres (frothing or hot liquids max. 0.4 litres). Optimal processing capacity - solids = 80 g.
- Attach lid and press firmly. Hold lid while working.
- Insert the mains plug.
- Set the rotary switch to the desired setting.
- To add more ingredients, set the rotary switch to 0/off.
- Remove the lid and add ingredients or
- remove the funnel and gradually add solid ingredients through the refill opening or
- pour liquid ingredients through the funnel.
After using the appliance
- Set the rotary switch to 0/off.
- Remove mains plug.
- Rotate the blender in an anti-clockwise direction and remove.
- Remove lid.
- Loosen blade insert clockwise and remove from the blender jug.
- Clean all parts, see "Cleaning and servicing".
Universal cutter
Use (depending on model):
- With the blade insert with blender/cutting blade for cutting and chopping meat, hard cheese, onions, herbs, garlic, fruit, vegetables. With the blade insert with grinding blade for grinding and cutting fairly small quantities of spices (e.g. pepper, cumin, juniper, cinnamon, dried anise, saffron), grain (e.g. wheat, millet, linseeds), coffee and sugar.

Risk of injury from sharp blades/ rotating drive!
Do not remove/attach the universal cutter until the drive has stopped. Do not touch blades of the blade insert with bare hands. Clean them with a brush.
Fig. F shows guide values for the maximum quantities and processing times when working with the universal cutter.
Fig. 3
- Put down universal cutter jug with the opening face up.
- Add food, which is to be cut, in the jug. Note MAX mark on the jug!
- Place seal on the blade insert. Ensure that the seal is positioned correctly.

Important information
If the seal is damaged or not correctly positioned, liquid may run out.
- Insert blade insert into the universal cutter jug and lock anticlockwise.
- Turn universal cutter over (blade insert face down).
- Attach the universal cutter (arrow on jug on dot on the appliance) and rotate all the way clockwise.
- Insert the mains plug.
- Set the rotary switch to the desired setting.
Note: The longer the appliance remains switched on, the finer the ingredients are cut. Recommendations on using the accessories can be found in the section "Recipes/Ingredients/Processing".
After using the appliance
- Set the rotary switch to 0/off.
- Remove mains plug.
- Rotate universal cutter anti-clockwise and remove.
- Turn universal cutter over (blade insert face up).
- Loosen blade insert clockwise () and remove from the universal cutter jug.
- Empty jug.
- Clean all parts, see "Cleaning and servicing".
Cleaning and servicing
The appliance requires no maintenance. Thorough cleaning protects the appliance from damage and keeps it functional. An overview of cleaning the individual parts can be found in Fig. 6.

Risk of electric shock!
Never immerse the base unit in water or place under running water.
Warning!
Surfaces may be damaged. Do not use abrasive cleaning agents.
Note: If processing e.g. carrots and red cabbage, the plastic parts will become discoloured by a red film which can be removed with a few drops of cooking oil.
Cleaning the base unit
- Remove mains plug.
- Wipe the base unit with a damp cloth. If required, use a little detergent.
- Then dry the base unit.
Cleaning the bowl and accessories

Risk of injury from sharp blades!
Do not touch blades of the universal blade with bare hands. Clean them with a brush. Do not grip the sharp blades or edges of the cutting discs. Take hold of discs by the edge only!
All parts are dishwasher-proof.
Do not wedge plastic parts in the dishwasher as they could warp.
Cleaning the blender/universal cutter

Risk of injury from sharp blades!
Do not touch blades of the blade insert with bare hands. When not in use, always store the universal blade in the blade guard. Clean them with a brush.
The blender jug (without blade insert), lid and funnel are dishwasher-proof.
Do not clean the blade insert in the dishwasher, but under running water (do not soak in water). Remove seal for cleaning.
Troubleshooting

Risk of injury!
Before rectifying a fault, pull out the mains plug.
Fault:
Appliance does not start or appliance switches off during operation.
Possible cause:
Bowl or lid or the accessory has not been attached correctly or has become detached.
Remedial action:
- Set the rotary switch to 0/off.
- Correctly attach bowl/lid or accessory and screw on all the way.
- Switch the appliance on again.

Important information
If the fault cannot be eliminated, please contact customer service (see customer service addresses at the end of this booklet).
Storage
Fig. H
The tools can be stored in the bowl to save space.
Recipes/Ingredients/Processing
| Tool | Speed | Time | Recipes/Ingredients/Processing |
| or | low | approx. 1–2 min | Yeast dough Max. 500 g flour 25 g yeast or 1 packet of dried yeast 220 ml milk 1 egg 1 pinch of salt 80 g sugar 60 g butter Graded rind of half a lemon • Add all ingredients (except the milk) to the bowl. • Set rotary switch to a low speed for 10 seconds. • Add milk and stir at low speed for about 1½ minutes. Ingredients should be at the same temperature. When the dough has a smooth appearance, place in a warm location. |
| M | Onions, garlic Amount: from 1 onion, quartered, up to 300 g from 1 clove of garlic up to 300 g • Process the onion/garlic until it has been chopped to the required size. | ||
| high | Parsley Amount: from 0 g up to 50 g • Process the onion/garlic until it has been chopped to the required size. | ||
| high | Meat, liver (for mince, steak tartare, etc.) Quantity: 50 g to 500 g • Remove bones, gristle and sinews. Dice the meat. Making sausage meat, stuffing and pâté: • Put meat (beef, pork, veal, poultry, or even fish, etc.) together with other ingredients and spices into the bowl and mix into a dough. | ||
| high | approx. 1.5 min-2 min | Strawberry sorbet 250 g frozen strawberries 100 g icing sugar 180 ml cream • Put all ingredients in the bowl. Switch on immediately, otherwise the mixture will go lumpy. Mix until a creamy sorbet forms. | |
| high | Beaten egg white Amount: 2 to 6 egg whites • Whisk at high speed. | ||
| high | Whipped cream Quantity: 200 g to 400 g • Whisk at high speed. | ||
| low/high | Mayonnaise 1 egg 1 tsp. mustard 150–200 ml oil 1 tbs. lemon juice or vinegar 1 pinch of salt 1 pinch of sugar Ingredients should be at the same temperature. • Mix all ingredients (except oil) for several seconds at setting 1. • Switch appliance to setting 2, slowly pour oil through the feed tube and mix until the mixture emulsifies. Eat the mayonnaise immediately, do not store. | ||
| high/M | Nuts, almonds Amount: 50g to 200 g • Remove shells completely, otherwise the blender blade will be blunted. • Process the onion/garlic until it has been chopped to the required size. | ||
| high/M | Puréeing fruit or vegetables (Apple sauce, spinach, carrot and tomato purée; raw or cooked) • Put ingredients and spices into the blender and purée. | ||
| high | Chocolate-milk 80 g-100 g cooled chocolate approx. 400 ml hot milk ● Chop up the chocolate in the blender, add the hot milk and mix briefly. | ||
| M | Honey and hazel nut spread 15 g hazelnuts 110 g blossom honey (room temperature) ● Put the nuts in the universal cutter jug and cut with the blender/cutting blade for 20 seconds on setting M. ● Remove the universal cutter jug, turn it over and take out the blade insert. ● Add the honey. Close the universal cutter jug again with the blade and put on the base unit. ● Wait until all the honey has run down over the blade. Then mix everything for 5 seconds on setting M. | ||
| Fig. 1 shows guide values for the maximum quantities and processing times when working with the universal cutter jug and the blade inserts. | |||
Instructions on disposal

This appliance is identified according to the European guideline 2012/19/EU on waste electrical and electronic equipment - WEEE.
The guideline specifies the framework for an EU-wide valid return and re-use of old appliances.
Please ask your dealer or inquire at your local authority about current means of disposal.
Warranty conditions
The guarantee conditions for this appliance are as defined by our representative in the country in which it is sold.
Details regarding these conditions can be obtained from the dealer from whom the appliance was purchased.
The bill of sale or receipt must be produced when making any claim under the terms of this guarantee.
You have just purchased this new BOSCH appliance and we sincerely congratulate you.
Recipes/ingredients/processing 77
Instructions for waste disposal 79
Consumer regulations 79
For your safety
Recipes/ingredients/processing
Kunpoc: Apx. MaKaapiou Γ' 39, 'EyKωμη -
Aeukwaia - AnykUnpiO tnλ.: 77778007
www.bosch-home.com/tr
www.bosch-yetkiliservisi.com
Do not immerse the main body in water, do not rinse it under running water, and do not put it in the dishwasher.
Pull the plug out of the socket before cleaning.
Risk of injury from rotating parts!
Never put your hands into the installed blender jug! The blender jug can only be removed/installed after the drive has stopped.
The universal chopper jug can only be removed/installed after the drive has stopped.
Risk of injury from sharp blades!
Do not touch the universal blade with bare hands.
Do not touch the sharp blades and the edges of the discs when cleaning.
Only hold the discs by the plastic elements in the middle!
Do not put your hands into the feed opening.
The appliance is intended for household use only.
Insert the nozzle by hand.
Do not insert hands into the hazardous opening.
Secure the nozzle in the universal power tool chuck.
Remove the nozzle from the universal power tool chuck.

Nozzle with knife for chopping
Nozzle with knife for grinding
Short instruction
The instruction describes different equipment of the device. On the drawing you will find the model designation.
Unfold the folding legs of the stand.
Drawing A
Main block
1 Turn the switch
«0 / off» = stop
«M» = momentary switching on
With the highest number of revolutions,
NepemnkauytmyBaTIN npotaROM
acy notpiboro dna nepepo6kn.
Ctyneni 1-2,po6oayuBvNdkictb:
《1》=Hn3bKe YncIIO o6oPoTiB - IOBilbHO,
«2» = BINGOKe YINCSNo O6OpOTiB - WBNIko.
2 PnVBiD 3 Bičík dnia kašéniho 4 Yawa 5 YtpnmyBaH hacaDOK
6 HacaKn*
a YHIBePcaJIbHn HIX i3axINCHM KOxyXOM b TaOK dJa 3aMiUyBaHHA C NICK DnA 36nBaHHA
7ДиСКДЯ NOДРIOHEHHA
aДвOCTOPOHHIДИСКДЯHAPI3aHHa -Ha TOBCTI/TOHKI CKN6KI bДBOCTOPOHHa WataKIBHnca-KpynHO/ DiPi6Ho CIOBCTOPOHHI pi3aJIbHNI DnCK- WATKIBHNU
Kpnska
a 3aBaHTaKyBaIbHn OTBip b ToBxau
Ppnaadn
9 Hix-BCTaBka HOXeM 6JIeHepa / HOXeM DnI NOpi6HeHHi yUciJIbHIOBaem 10 Hix-BCTaBA 3 HOXEM DnI nepeMeJIIOBaHH i yuJIbHIOBaayem 11 KeiNx yHibepcaIbHoro noDi6HIOBaHa
12 KeiNx 6IeHepa
13 Kpnika dIa 6JeHepa
a 3abaHaTaKaYBaIbHn OTBip b BopoHka
B 3aJIeKHOCTi BiD MoIeni
YHIBePcAJIbHnI NOpri6HIOBau 3a6e3Neueyec Bam BnKOpNCTaHHMaKcHMaJIbHOI nOTyHKHOCTi npHaLy (3a yMOBn D0TPMaHHB bKa3iBOK, npBeDeHNx B peuENT). PeeENT Bn 3HaJdTe Ha cTOpIHkax 3 MaJIHOHKAMn (MaJIHOHOK F).
Ykuo yHIBepcaIbHn noPi6HOBaH He BXOINb Do KOmPNeKTo, TOni Bi MoKeTe 3aMOBInu Ioro uepe3 cnyx6y cepBicy (Homep dJa 3aMOBHeHHr:12005833).
YnpabnHH
Ipeed nepwnm BnKOpncTaNHm npnlaTa npnaDra cnid peTeNbHO nouNCTHT, INB. «OunueHHr i DORJAD>.
Iirotobka
BctaHOBNtO OCHOBHn 6NoK Ha pIBHi, ctaibhHi Ta YnCTi NOBepxHi. Kabelb BNTaRHyTu 3 OCHOBHO 6IOKy Ha Heo6XiHy DOBxHHy.

Baxnbi Bka3iBkn
-Прилад ВИКаТи ТА ВИМКаТи ВИКЛЮЧNO NOBOPOTHM ПЕмИКачEM. Hi BЯkomy pa3i He BVMnKaTH npHnAid, NOBepTaOuN caUy, 6JIeHdEep HacaIky. - PpNJaJd MoKHa TIlbKn BMnKaTn, RkUO HacaJKN YI PpNJaJd JIOBHIСТО BCTAHOBЛEHI.
Usha 3 npnlaandm/hacaKaM

Hebe3neKa npaHennn o6epTOBmHn Hacaikamn!
Пд уас роботи hikоли He BCTpOMnTnyкн до чаш.Дпя пдштOBxuBaHнIHrpeDiEHTIB KOpNCTyBaTnC 3aBkDInIITOBxauem.
Nicra BmKHeHH npVBid ue deekn yac npoobkye pxyatnc. HacaKn MoKha MInrtn TInbKn Nicra 3ylnHKn npBody.
Warning
The device can only be operated with the installed bowl and with the installed and locked lid.
Universal

For chopping, mixing, blending.

Danger of injury from sharp blades!
Do not touch the universal blade with your hands. If the universal blade is not used, always store it in the protective housing. The universal blade can only be held by the plastic rim.
Dough for kneading

For kneading dough, mixing ingredients that should not be chopped (e.g., raisins, chocolate chips).
Disc for whipping
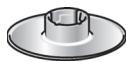
For whipping cream, beaten egg whites, and meringue.
Blender
Insert the drive shaft (arrow on the shaft pointing to the arrow on the appliance) and turn it clockwise to the stop. Insert the blender. Insert the universal blade, the whipping disc, or the dough hook for kneading into the blender and release. Pay attention to the position of the attachments when inserting! Press the attachments down to the stop.
Warning
Products for processing must be filled only after the attachments have been installed.
Fill in the ingredients. Place the lid with the filler opening (arrow on the lid pointing to the arrow on the appliance) and turn it clockwise. The lid lug must engage in the recess of the handle. Insert the mains plug into the socket. Set the rotary switch to the desired level. - First, add the ingredients, then set the rotary switch to «0/off».
Place the ingredients through the filling opening. The ingredients can be used as a measuring cup.
Discs for slicing

Danger! Sharp blades!
Do not touch the sharp blades or the edges of the discs.
Discard the blades!
Do not insert the filling opening. Use only the pusher for filling.
Double-sided disc for slicing/grating

For slicing fruits and vegetables.
In case of damage or incorrect placement, the blade may come out.
Insert the insert with the blender blade/chopper blade into the blender jug and lock it against the direction of the arrow (B). - Turn the blender jug over (with the blade insert facing down). Install the blender jug (arrow on the jug pointing to the mark on the base) and turn it clockwise until it stops.
Filling ingredients.
Maximum quantity for liquids = 1.0 liter (for thin or thick liquids, maximum 0.4 liters).
Optimal quantity for processing solid products = 80 grams.
Install the lid and lock it during operation. Insert the measuring cup into the opening. Set the rotary switch to the desired level. ... Turn the lid and fill with ingredients or pour through the filling opening.
or
Set the rotary switch to "0/off". Remove the plug from the socket. - Turn the blade counterclockwise and remove. Remove the lid. Turn the insert counterclockwise (B) and remove from the blender jug. - Clean all parts, see "Cleaning and care".
Universal chopper
Use (depending on model):
With chopper insert for chopping and grinding hard cheese, onions, herbs, nuts, fruits, vegetables.
With chopper insert for chopping and grinding small quantities of ingredients (e.g., pepper, grains, eggs, spices, dried beans, saffron), grains (e.g., wheat, oats, flaxseed), or sugar.

Danger of injury with sharp blades/rotating blade!
The universal chopper may only be used when the blade is properly installed. Do not touch the blade insert with your hands. For cleaning, use a brush.
Figure I shows reference values for maximum quantity and processing time for working with the universal chopper.
Figure E
Place the universal chopper lid with the opening facing up. Fill the products intended for chopping into the lid. Pay attention to the "MAX" marking on the lid! - Place the chopper insert. Check the correct placement of the insert.

Important notes
In case of damage or incorrect placement of the insert, liquid may leak out.
Insert the insert (@/OD) into the universal chopper lid and lock it by turning it clockwise (). - Turn the universal chopper upside down (with the chopper insert pointing down). - Place the universal chopper (arrow on the lid pointing to the mark on the device) and turn it clockwise until it stops. Insert the plug into the socket. Set the rotary switch to the desired speed.
Note: The device is filled with a screw, the type of which is indicated in the product. Recommendations for using the device are given in the section «Recipes/Ingredients/Processing».
Recipes
Set the rotary switch to «0/off». Remove the plug from the socket.
- Turn the universal chopper stand and remove.
- Turn the universal chopper (knife-insert) over. Unscrew the insert counterclockwise (and remove from the universal chopper. Empty the container.
- Clean all parts, see «Cleaning and care».
Cleaning and care
The device requires technical care. Regular cleaning prevents damage to the device and ensures its functionality. An overview of the individual parts is shown in figure B.

Danger of electric shock!
The main unit must never be immersed in water and never held under running water.
Attention!
Damage may occur on surfaces. Do not use sharp or abrasive cleaning agents.
Note: During processing, e.g. carrots and red cabbage, stains may form on plastic parts, which can be removed with a few drops of cooking oil.
Cleaning the main unit
Remove the plug from the socket. - Wipe the main unit with a damp cloth. If necessary, use a small amount of mild detergent. - Then wipe the device dry.

Unsafe rules for sharp knives!
Do not touch the universal knife blade with your hands. For cleaning, use a brush. Do not touch sharp knives and blades for adjustment. Take blades only by the edge!
All parts can be washed in the dishwasher.
Do not wash plastic parts in the dishwasher, as they may deform.
Cleaning the blender/universal chopper

Unsafe rules for sharp knives!
Do not touch the blade of the knife insert with your hands. When not in use, store the universal knife in a protective case. For cleaning, use a brush.
The blender jug (without the knife insert), lid, and funnel can be washed in the dishwasher.
Do not wash the knife insert in the dishwasher; rinse it under running water (do not soak it in water).
Do not immerse in water.
Help in case of malfunction.

Unsafe rules!
Unplug the appliance from the outlet before cleaning or maintenance.
Malfunction:
The device can be switched on or off during operation.
Possible cause:
The lid or cover of the device is not installed correctly or the cover is loose.
Troubleshooting:
Set the switch to "0 / off" - install the bowl/lid correctly and tighten it securely. Continue working with the device.

Important note
If you cannot fix the malfunction in this way, please contact the service center (see the service center address at the end of the user manual).
Storage
CLEANING
For storage, you can fold the bowl to save space.
Recycling/Disposal/Processing
| Hacá- ka | Часло обopotíв | Час | Peçети/нград ecntи/перозкa |
| aбо | HN3bKe | прибл. 1-2xb. | Дрixджове тICTО Мамс.500 r bорошna 25 r дріжджів abо 1 пakунok сухи дріжджів 220 мл молoka 1 ріцe 1 упіка coni 80 r укру 60 r вэрskовoro масla цedра 1/2 лимону (лимонné-apомат) Поклacr'tи Bci inhgradіeHTи (Крім молoka)В чашу. Поворотné поемпач Встанови на 10 секунд на нисьke часло обopotів. Дожати молoka i поемішувати на НИЗБКИХ обopot tax постягом р内的 1/2хвілін. Ингroducentи повини 6ути одані Temпературni.Коли тICTO Виглидатуме гадим, Иому неobхідно Datу піднітся В теллOMу Mісці. |
| Hacá- ka | Часло obopotíв | Час | Peçentwo/inhrpejdieichtn/inepepo6ka |
| «M» | Lizbya,часник Kilbkictb: bID 1 zicbyuhi, pozidileho no 4 chaftni, do 300 r bID 1 zibunka chachinky do 300 r • Перетроблелу do baxanoro styneha noopi6henna. | ||
| Виcoke | Зелень netpyushkn Kilbkictb: bID 10 r do 50 r • Перетроблелу do baxanoro styneha noopi6henna. | ||
| Виcoke | M'aco, nechinka (дя M'ac Horo phapuy, phapuy tapTap toso) Kilbkictb: 50 r do 500 r • Видаити kiCTkn, xprui, shkpuy ta cyxoxknilny. Hapizatni M'aco kybkamn. ПригOTуВанн M'acHnx phapsiB, naHinok ta naStetiv: • M'aco (Яковина, CBINHnA, TeJATNHa, PTTua, a TAKOJ pni6a toio) pa30m 3 iHsmmI nIngrejeHtAmn ta prinpabamn POKlaCTN B qauy ta nepero6bntu y φapu. | ||
| Виcoke | прибл. 1,5do 2xb. | Пolyunuchnyшmichebet 250 r zaamopojekhoi polynuichi 100 r zukpovoi niydri 180 ml vershkiv (1 helobnich stakah) • Yci inhrpejdieHTN pOKlaCTN B qauy. BiDpa3y Jx BBIMkhutyn prinlada, iHakse yTBOPaTbCra pydouckn. Peremiu7yBatn do yTBOpENH MOpO3HbA KpeMOBoI KOHCnCTeHci. | |
| Виcoke | 36nii 6ilkn Kilbkictb: bID 2 do 6 6ilknB • 36nbatn ha BvocnX o6bopotax. | ||
| Виcoke | 36nii Berukh Kilbkictb: bID 200 r do 400 r • 36nbatn ha BvocnX o6bopotax. | ||
| Hn3bKe/ Bvcoke | Maioone3 1 яиce 1ч.л. ripuichi 150 do 200 mI olii 1 st.л. liMoHnHOro coky abo outy 1 szinka coJI 1 szinka szkpy InhrpejdieHTN NOBHHI 6utn odnoi TempepaTypi. • Yci inhrpejdieHTN (kpim olii) nepeMi7yBatn dekiNbKa cekynd ha styneHi «1 ». •Прindam nepeKlnouHTN Ha cStupiHb «2», zaibvatn nobihno olii Que3 3aBaHTaJyBaJbHnI OTBip i nepeMi7yBatn Do THX nip, noKn Maca He emyIbIyE. Maioone3 BvKopructaTn AKNaiubnDiue, He 36epiratn Ioro. | ||
| Hacá- ka | Часло оборотов | Час | Рецень//Ингридиемп//перегбка |
| Висло/ «M» | Горixи, Могдан КиньICTь: 50 р do 200 r • Шкаралуни сдд видали по有关规定, на akше иж бileндар 3атупатя. • Перегблгы д do bajkanoro отуменя поpríбенни. | ||
| Висло/ «M» | ПригOTуВанноюpe 3 Фруktов abо овочь (Ясыунни мс,шинат, пюpe 3 морков, nomідорів; сирхаabo варени) • Иngreedientу та приправи полactи разом до SFlen'dеру ta перегботы в пюpe. | ||
| Вислоe | Шокадноюмоло 80 р do 100 r oxolodженогошокалду прибл. 400 мл rapячого мolyokа • Рождientушокалд в SFlen'depi, ддати rapяче мolyokо ta koperobstny в пюpe. | ||
| «M» | Буtersьрогда мacea 3 меду i ličobимн rolipaxamn 15 р nicobух rolipixib 110 р киткового мени (kimhahtоi temnepatуris) • Горixи полactи в Кени універсанlorо поpríбновачa i поpríбновати пожем SFlen'depa/hogжem Дял поpríбенни • Рождientу пюбл. 20 секунд на отумени «M».• Кени універсанlorо поpríбновачa 3нати, пederberpHTN i вийати SFIX-BCTABKY. • Ддати мд. Кени універсанlorо поpríбновачa 3akpnITN 3HOBy HOKem i yctahOBtIN ha ochOBHOMy 6лоцi. • 3aуесати поki мд понichtу ото doны STpe3 nIX. Notim перашиевати ССпогrom 5 секунд на отумени «M». | ||
| Намалонку [ ]Пробveledни opieHTOBHI дani за剂量 Мaksимальни K ilьковостi i чasy перегбки ду роботу 3 кенихом універсанlorо поpríбновачa i HOxamn- BCTabkamn. | |||
Recommendations for disposal

This device is marked in accordance with the European Directive
2012/19/EU on waste electrical and electronic equipment (WEEE).
The directive defines the framework for the collection and recycling of old devices in the EU.
For more information about current product updates, please contact your specialized dealer or the administration of your organization.
Warranty terms
Warranty terms are determined by our representative in the country where the device was sold.
Detailed terms can be obtained from the dealer where the device was purchased.
If any defects are found in accordance with this warranty, please contact the seller of the product or the warranty service.
From the bottom of our hearts, we congratulate you on your purchase of the device.
Additional information about our products can be found on our website on the Internet.
Table of contents
For your safety.156
Complete overview 158
Operation 159
Cleaning and care 162
Storage 163
Troubleshooting
Troubleshooting 163
Contents/Introduction/Processing ..164
Disposal instructions 166
Warranty terms 166
Do not touch the sharp blades of the grinding discs.
Hold the discs only by the plastic part in the middle!
Do not put your hands into the feed opening. For pushing, use only the pusher. Do not touch the blades with bare hands. For cleaning, use a brush.
Danger of scalding!
When processing hot products through the funnel, steam escapes through the hole in the lid. Fill a maximum of 0.4 liters of hot liquid.
Danger of injury!
Never assemble accessories on the main unit.

Explanation of symbols on the device and accessories


Caution! Rotating attachments.
Do not put your hands into the feed opening.
Insert the blade into the blender jar or universal grinder.
Remove the blade from the blender jar or universal grinder.

Knife insert with a blade for cutting

Knife insert with a blade for trimming
Complete set overview
The instructions describe various types of equipment. The figure shows an overview of the model.
Please open the page with the figures.
Figure A
Main unit
1 Rotary switch
"O/off" = stop
"M" = momentary switch-on at maximum speed, hold the switch for the required time
Steps 1-2, working speed:
"1" = low speed - slow,
"2" = high speed - fast.
2 Drive
3 Cable compartment
4 Cutting attachment
5 Blade guard
6 Blades*
a Universal knife with protective cover
b Meat blade
c Whisk blade
7 Grinding discs
a Double-sided cutting disc - thick/thin slices
b Double-sided shredding disc - coarse/fine
c Double-sided cutting/shredding disc
Lid
a Feed tube b Pusher
Accessories*
9 Blender knife with blade/chopping knife 10 Insert knife with chopping/compacting tool 11 Universal grinder cup 12 Blender cup 13 Lid for blender
a Feed tube b Funnel
- Remove from the model
The universal grinder ensures you can use the full power of the device (provided you follow the instructions given in the recipe). You will find the recipe on the pages with pictures (fig. F).
If the universal grinder is not included in the delivery package, it can be ordered through the service department (order number: 12005833).
Operation
Before first use, thoroughly clean the device and accessories, see "Cleaning and care".
Preparation
- Place the main unit on a smooth, stable, level surface. Pull the cable out of the main unit to the required length.

Important notes
- The device can only be switched on and off using the rotary switch.
- Never switch off the device by turning the mixing bowl, blender, or attachment.
- The device may only be switched on after the attachments or accessories have been fully installed.
Mixing bowl with accessories/attachments

Danger of injury from rotating attachments!
During operation, never put your hands in the mixing bowl. Always use the pusher to add ingredients.
After switching off, the drive continues to run for a short time. Attachments may only be replaced after the drive has stopped.
In rooms with a mixing unit, the device can only be switched on with the mixing unit installed, as well as with the tightly closed lid installed.
Universal knife

Do not touch the sharp blades protruding from the discs of the shredders.
Before troubleshooting, unplug the device from the outlet.
Malfunction:
Repairs/ingredients/processing
The device is intended for use at ambient temperatures from 0°C and relative humidity not exceeding 93%.
After operation, if the device is to be stored at negative temperatures, it must be kept in a room with a positive temperature for several hours.
The rules for the sale of products are determined by the manufacturer in accordance with the requirements of current legislation.
Instructions for the disposal of products are contained in the operating instructions and can be issued by municipal executive authorities.
For products manufactured within the expiration date, this expiration date is valid before sale, sale and use (use) during the service life established in accordance with Article 18 of the Law on Protection of Consumer Rights. The service life of the product is indicated by the manufacturer in the accompanying documentation.
The product is certified in the prescribed manner (mark EAC) and is supplied in the packaging (package) containing the accompanying documentation.
The set of operational documents provided by the manufacturer may include this information, instructions (manual) for operation, information about the service.
(waste electrical and electronic equipment - WEEE).
Therefore, {a} {i} = 1/2 ({a} {i} - 1)
Therefore, {1,2,3} {1,2}
4.15
a
J 1
1

aiee 1 aee
y j 1
(a + b)/(a - b) = (c + d)/(c - d)

Therefore, the area of triangle BCD equals the area of triangle COD plus the area of triangle BDO.
Therefore, (x - 1)(y - 2) = 0
1
.
(4)
J
(1) The minimum value of a i aai is k.
K
i







by

1 1




!
D

1
- = ( x1, y1 ), = ( x2, y2 )
∴ g'(x) = -1/x + 2/x + 1 = -1/x + 1/(1-x)x + 1 = -1/x + x/(1-x)x + 1 = 1/x + x/(1-x)x
∴ a1 = 2, an+1 = an/1 + an/2
∴ the original inequality holds
Bosch is
. 1234567890
L
G
ar-1 . ar-3 aole σ ar-4 jieill ar-7 4yj ar-8 Jube jililj 0e Lua ciai ar-8 jieeieieieie ar-9. 1 ar-11 jaii joi ulill ar-11
AE United Arab Emirates,
BSH Home Appliances FZE
Round About 13,
Plot Nr MO-0532A
Jebel Ali Free Zone – Dubai
Tel.: 04 881 4401
mailto:service.uae@bshg.com
www.bosch-home.com/ae
AL Republic of Albania
AERTECH SH.P.K.
Rruga Qemal Stafa
New building opposite the General Prosecutor's Office
General
Entrance C, 10th floor
Tirana
Tel.: 066 206 47 94
mailto:g.volina@aertech.al
HEATHERTON, Victoria 3202
Tel.: 1300 368 339
mailto:bshau-as@bshg.com
www.bosch-home.com.au
BA Bosnia and Herzegovina, Bosnia-Herzegovina
"HIGH" d.o.o.
Gradačačka 29b
71000 Sarajevo
Info-Line: 061 100 905
Fax: 033 213 513
mailto:delicnanda@hotmail.com
BE Belgium
BSH Home Appliances S.A.
European Trade Center Building, 5th floor
1784 Sofia
Tel.: 02 892 90 47
Fax: 02 878 79 72
newsletter:informacia.servis-bg@bshg.com
www.bosch.home.bg
BH Bahrain,
Khalaifat Est.
P.O.Box 5111
P.O. Box 5111
Manama
Tel.: 017400553
mailto:service@khalaifat.com
BY Belarus, Benaapycb
OOO "BCX Бытовая Тхиka"
TeJ.: 495 737 2961
mailto:mok-kdhl@bshg.com
CH Schweiz, Suisse, Svizzera, Switzerland
BSH Hausgeräte AG
+7snt/min (alv 24%
To arrange an engineer visit, to
order spare parts and accessories
or for product advice please visit
www.bosch-home.co.uk
or call
*Calls are charged at the basic rate, please check with your telephone service provider for exact charges
Greece, Ελλάς
BSH Ikiakes Siskeves A.B.E.
Central Branch Service
17 km E.O. Athinon-Lamias &
Potamou 20
14564 Kifisia
Unit 1 & 2, 3rd Floor
North Block, Skyway House
3 Sham Mong Road
Tai Kok Tsui, Kowloon
Hong Kong
Tel.: 2565 6151
Fax: 2565 6681
mailto:bosch.hk.service@bshg.com
www.bosch-home.cn
HR Croatia
BSH kućni uređaji d.o.o.
Kneza Branimira 22
10000 Zagreb
Tel.: 01 640 36 09
Fax: 01 640 36 03
mailto:informacije.servis-hr@bshg.com
bshg.com
www.bosch-home.com/hr
www.bosch-home.com/hu
IE Republic of Ireland
BSH Home Appliances Ltd.
Unit F4, Ballymount Drive
Ballymount Industrial Estate
Walkinstown
Dublin 12
Service Requests,
Spares and Accessories
Tel.: 01450 2655*
Fax: 01450 2520
www.bosch-home.co.uk
*0.03 € per minute at peak.
Off peak 0.0088 € per minute
IL Israel,
C/S/B Home Appliance Ltd.
Uiel Building
2, Hamelacha St.
Industrial Park North
71293 Lod
Tel.: 089777222
Fax: 089777245
mailto:csb-serv@zahav.net.il
www.bosch-home.co.il
IN India, Bharat,
BSH Household Appliances
Mfg. Pvt. Ltd.
Arena House, 2nd Floor, Main Bldg,
Plot No. 103, Road No. 12, MIDC,
Andheri East
Mumbai 400 093
www.bosch-home.com/in
IS Iceland
Smith & Norland hf.
Noatuni 4
105 Reykjavik
Tel.: 0520 3000
Fax: 05203011
www.sminor.is
IT Italia, Italy
www.bosch-home.com/it
KZ Kazakhstan, Kazakhstan
IP Turebekov Yerzhan
Nurmanovich
Jangeldina str. 15
Shimkent 160018
Tel.: 0252 31 00 06
mailto:evrika_kz@mail.ru
LB Lebanon,
Teheni, Hana & Co.
Boulevard Dora 4043 Beirut
P.O. Box 90449
Jdeideh 1202 2040
Tel.: 01 255 211
mailto:Info@Teheni-Hana.com
LT Lithuania
Senuku prekybos centras UAB
Jonavos g. 62
44192 Kaunas
Tel.: 0372 12146
Fax: 0372 12165
www.senukai.lt
LU Luxembourg
General Serviss Limited
Bullu street 70c
1067 Riga
Tel.: 07424137
mailto:bt@olimpeks.lv
Elkor Serviss
Brivibas gatte 201
1039 Riga
Tel.: 067 0705 20; -36
mailto:domoservice@elkor.lv
www.servisacentrs.lv
MD Moldova
S.R.L. "Rialto-Studio"
yI. UyceBa 98
2012 KuniHneB
TeJ./paKc: 022 23 81 80
mailto:bosch-md@mail.ru
ME Montenegro
Elektronika komerc
UI.Slobode 17
84000 Bijelo Polje
Tel./Fax: 050 432 575
Mobil: 069324812
mailto:ekobosch.servis@
t-com.me
MK Macedonia
GORENEC
Jane Sandanski 69 lok.3
1000 Skopje
Tel.: 022 454 600
Mobil: 070 697 463
mailto:gorenec@yahoo.com
MT Malta
Oxford House Ltd.
Notabile Road
Mriehel BKR 14
Tel.: 021 442 334
Fax: 021 488 656
www.oxfordhouse.com.mt
MV Raajeyge Jumhooriyyaa, Maledives
Lintel Investments
Ma. Maadheli, Majeedhee Magu Malé
Tel.: 0331 0742
mailto:mohamed.zuhuree@
lintel.com.mv
NL Nederland, Netherlands
Unit F 2, 4 Orbit Drive
Mairangi Bay
Auckland 0632
Tel.: 094770492
Fax: 094772647
mailto:bshnz-cs@bshg.com
www.bosch-home.co.nz
PL Polska, Poland
SA Kingdom Saudi Arabia,
Abdul Latif Jameel Electronics
and Airconditioning Co. Ltd.
BOSCH Service centre,
Kilo 5 Old Makkah Road
(Next to Toyota), Jamiah Dist.
P.O.Box 7997
Jeddah 21472
Tel.: 800 244 0043
mailto:kunnumalsp@alj.com
www.aljazeera.com.sa
SE Sverige, Sweden
BSH Hushållsapparater AB
Landsvägen 32
169 29 Solna
Tel.: 0771 11 22 77 local rate
mailto:Bosch-Service-SE@
bshg.com
www.bosch-home.se
SG Singapore, 新加坡
BSH Home Appliances Pte. Ltd.
TECHPLACE I and
Mo Kio Avenue 10
Block 4012 #01-01
569628 Singapore
Tel.: 6751 5000
Fax: 6751 5005
mailto:bshsgp.service@bshq.com
www.bosch-home.com.sg
SI Slovenija, Slovenia
BSH Hišni aparati d.o.o.
Litostrojska 48
1000 Ljubljana
Tel.: 01 583 07 01
Fax: 01 583 08 89
www.bosch-home.com/tr
4th floor, No. 112 Sec 1
Chung Hsiao E Road
Taipei ROC 100
Tel.: 02 2321 6222
mailto:Bosch@achelis.com.tw
UA Ukraine, Ukraine
LLC "BSH Household Appliances"
Tel.: 044 490 2095
mailto:bsh-service.ua@bshg.com
gama-electronics.com
XS Serbia, Serbia
BSH Home Appliances d.o.o.
Milutina Milankovica 11a
11070 Novi Beograd
Tel.: 011 205 23 97
Fax: 011 205 23 89
mailto:informacije.servis-sr@
bshg.com
www.bosch-home.rs
ZA South Africa
BSH Home Appliances (Pty) Ltd.
15th Road Randjespark
Private Bag X36, Randjespark
1685 Midrand - Johannesburg
Tel.: 086 002 6724
Fax: 086 617 1780
mailto:applianceserviceza@
bshg.com
www.bosch-home.com/zai
| MCM3100W | ||||||||
| MCM3110W | ||||||||
| MCM3200W | ||||||||
| MCM3201B | ||||||||
| MCM3401M | ||||||||
| MCM3501M | ||||||||
| MCM3100W | |||||
| MCM3110W | |||||
| MCM3200W | ✓ | ✓ | |||
| MCM3201B | ✓ | ✓ | |||
| MCM3401M | ✓ | ✓ | |||
| MCM3501M | ✓ | ✓ | ✓ | ✓ | |



- CONTENTS
- FOR YOUR SAFETY
- A GENERAL SAFETY INSTRUCTIONS
- RISK OF ELECTRIC SHOCK
- SAFETY INSTRUCTIONS FOR THIS APPLIANCE
- RISK OF INJURY
- RISK OF INJURY FROM THE ROTATING TOOLS
- RISK OF INJURY FROM SHARP BLADES/ROTATING DRIVE
- RISK OF INJURY FROM SHARP BLADES
- RISK OF SCALDING
- EXPLANATION OF THE SYMBOLS ON THE APPLIANCE OR ACCESSORY
- OVERVIEW
- BASE UNIT
- OPERATION
- PREPARATION
- I IMPORTANT INFORMATION
- BOWL WITH ACCESSORIES/TOOLS
- WARNING
- UNIVERSAL BLADE
- KNEADING HOOK
- CHOPPING DISC
- FIG. B
- NOTE POSITION OF THE TOOLS WHEN INSERTING THEM! PRESS TOOLS ALL THE WAY DOWN
- CUTTING DISCS
- SLICING REVERSIBLE DISC - THICK/THIN
- SHREDDING REVERSIBLE DISC - COARSE/FINE
- REVERSIBLE SLICING/SHREDDING DISC
- FIG
- AFTER USING THE APPLIANCE
- BLENDER
- RISK OF INJURY FROM SHARP BLADES/ ROTATING DRIVE
- IMPORTANT INFORMATION
- UNIVERSAL CUTTER
- USE (DEPENDING ON MODEL)
- CLEANING AND SERVICING
- CLEANING THE BASE UNIT
- CLEANING THE BOWL AND ACCESSORIES
- CLEANING THE BLENDER/UNIVERSAL CUTTER
- TROUBLESHOOTING
- FAULT
- POSSIBLE CAUSE
- REMEDIAL ACTION
- STORAGE
- FIG. H
- INSTRUCTIONS ON DISPOSAL
- WARRANTY CONDITIONS
- RECIPES/INGREDIENTS/PROCESSING
- SHORT INSTRUCTION
- MAIN BLOCK
- KEINX 6IEHEPA
- KPNIKA DIA 6JEHEPA
- YNPABNHH
- IIROTOBKA
- BAXNBI BKA3IBKN
- USHA 3 NPNLAANDM/HACAKAM
- HEBE3NEKA NPAHENNN O6EPTOBMHN HACAIKAMN
- UNIVERSAL
- DANGER OF INJURY FROM SHARP BLADES
- DOUGH FOR KNEADING
- DISC FOR WHIPPING
- DISCS FOR SLICING
- DANGER! SHARP BLADES
- DOUBLE-SIDED DISC FOR SLICING/GRATING
- OR
- UNIVERSAL CHOPPER
- DANGER OF INJURY WITH SHARP BLADES/ROTATING BLADE
- FIGURE E
- IMPORTANT NOTES
- RECIPES
- CLEANING AND CARE
- DANGER OF ELECTRIC SHOCK
- ATTENTION
- CLEANING THE MAIN UNIT
- UNSAFE RULES FOR SHARP KNIVES
- CLEANING THE BLENDER/UNIVERSAL CHOPPER
- HELP IN CASE OF MALFUNCTION
- UNSAFE RULES
- MALFUNCTION
- IMPORTANT NOTE
- CLEANING
- RECOMMENDATIONS FOR DISPOSAL
- WARRANTY TERMS
- TABLE OF CONTENTS
- DANGER OF SCALDING
- DANGER OF INJURY
- EXPLANATION OF SYMBOLS ON THE DEVICE AND ACCESSORIES
- COMPLETE SET OVERVIEW
- MAIN UNIT
- LID
- ACCESSORIES
- MIXING BOWL WITH ACCESSORIES/ATTACHMENTS
- DANGER OF INJURY FROM ROTATING ATTACHMENTS
- UNIVERSAL KNIFE
- I
- AE UNITED ARAB EMIRATES
- AL REPUBLIC OF ALBANIA
- BA BOSNIA AND HERZEGOVINA, BOSNIA-HERZEGOVINA
- BE BELGIUM
- KHALAIFAT EST
- BY BELARUS, BENAAPYCB
- CH SCHWEIZ, SUISSE, SVIZZERA, SWITZERLAND
- GREECE, ΕΛΛΆΣ
- HR CROATIA
- IE REPUBLIC OF IRELAND
- IL ISRAEL
- IN INDIA, BHARAT
- IS ICELAND
- IT ITALIA, ITALY
- KZ KAZAKHSTAN, KAZAKHSTAN
- LB LEBANON
- LT LITHUANIA
- LU LUXEMBOURG
- MD MOLDOVA
- ME MONTENEGRO
- MK MACEDONIA
- MT MALTA
- MV RAAJEYGE JUMHOORIYYAA, MALEDIVES
- NL NEDERLAND, NETHERLANDS
- PL POLSKA, POLAND
- SA KINGDOM SAUDI ARABIA
- SE SVERIGE, SWEDEN
- SG SINGAPORE, 新加坡
- SI SLOVENIJA, SLOVENIA
- UA UKRAINE, UKRAINE
- XS SERBIA, SERBIA
- ZA SOUTH AFRICA
Brand : BOSCH
Model : MULTITALENT MCM3501M
Category : Food Processor