
HHBS6.7FLLX - HHBS 6.7F LL X - Combined refrigerator HOTPOINT - Free user manual and instructions
Find the device manual for free HHBS6.7FLLX - HHBS 6.7F LL X HOTPOINT in PDF.
| Product type | Extractor/recirculation cooker hood |
| Brand | Hotpoint |
| Model | HHBS6.7FLLX / HHBS 6.7F LL X |
| Height (min-max) | 61.9 - 114 cm |
| Width | 59.8 cm |
| Depth | 45 cm |
| Air outlet diameter | 15 / 12.5 / 12 cm (reducible) |
| Power supply | 220-240 V ~ 50/60 Hz (typical, check rating plate) |
| Total power consumption | See rating plate (not specified in the manual) |
| Lighting | Integrated LED (power not specified) |
| Control type | Soft Button panel with LCD display |
| Suction speeds | Silent, low, medium, high, intensive (timed 5 min) |
| Automatic high temperature function | Yes (temperature sensor activates medium speed) |
| Filter saturation indicator | Yes (grease and carbon filters) |
| Grease filter type | Washable metal (dishwasher safe) |
| Carbon filter (optional) | For recirculation mode: accessory kit required, max lifespan 4 months |
| Minimum safety distance | 50 cm (electric cooking) / 65 cm (gas or mixed) |
| Installation | Ducted or recirculation (kit sold separately) |
| Cleaning | Damp cloth, neutral detergent; grease filters: monthly; perimeter panel: same frequency |
| Lamp replacement | LED: contact technical support |
| Standards | Safety: EN/IEC 60335; Performance: EN/IEC 61591; EMC: EN 55014 |
Frequently Asked Questions - HHBS6.7FLLX - HHBS 6.7F LL X HOTPOINT
User questions about HHBS6.7FLLX - HHBS 6.7F LL X HOTPOINT
0 question about this device. Answer the ones you know or ask your own.
Ask a new question about this device
Download the instructions for your Combined refrigerator in PDF format for free! Find your manual HHBS6.7FLLX - HHBS 6.7F LL X - HOTPOINT and take your electronic device back in hand. On this page are published all the documents necessary for the use of your device. HHBS6.7FLLX - HHBS 6.7F LL X by HOTPOINT.
USER MANUAL HHBS6.7FLLX - HHBS 6.7F LL X HOTPOINT
HHF 6.4 F AM X
HHF 6.4 F AM K
HHF 9.4 F AM X
HHF 9.5 F AM X
RHHF 9.7F LB X
HHF 6.7F LL X
HHF 9.7F LB X
HHF 6.7F LB X
RHHGC 9.7F LB X
HHGC 9.7F LB X
HHGC 6.7F LB X
HHGC 6.5F AB X
HHGC 9.4F AM X
HHGC 6.4F AM X
HHBS 9.5F AM X
RHHBS 9.7F LB X
HHBS 9.7F LLI X
HHBS 9.5F AB X
HHBS 9.7F LBI X
HHBS 9.7F LB X
HHBS 6.5F AM X HHBS 6.7F LL X HHBS 6.7F LB X


3


15


SICUREZZA GENERALE
HHBS 6.5F AM X - HHBS 9.5F AM X - HHF 6.4 F AM X - HHF 6.4 F AM K HHF 9.4 F AM X - HHF 9.5 F AM X - HHGC 9.4F AM X - HHGC 6.4F AM X
RHHF 9.7F LB X - RHHBS 9.7F LB X - RHHGC 9.7F LB X

HHBS 9.5F AB X - HHBS 9.7F LBI X - HHBS 9.7F LB X
HHBS 6.7F LB X - HHGC 9.7F LB X - HHGC 6.7F LB X
HHGC 6.5F AB X - HHF 9.7F LB X - HHF 6.7F LB X

T1

T2


T3

T4
HHBS 6.7F LL X - RHHF 9.7F LB X - RHHBS 9.7F LB X - RHHGCS 9.7F LB X - HHBS 9.7F LLI X - HHF 6.7F LL X - HHBS 9.7F LBI X - HHBS 9.7F LB X - HHBS 6.7F LB X - HHGC 9.7F LB X
HHGC 6.7F LB X - HHF 9.7F LB X - HHF 6.7F LB X
HHBS 6.7F LL X - RHHF 9.7F LB X - RHHBS 9.7F LB X - HHBS 9.7F LLI X - HHF 6.7F LL X - HHBS 9.7F LBI X - HHBS 9.7F LB X - HHBS 6.7F LB X - HHGC 9.7F LB X
HHGC 6.7F LB X - HHF 9.7F LB X - HHF 6.7F LB X
Before any cleaning or maintenance operation, disconnect hood from the mains by removing the plug or disconnecting the mains electrical supply.
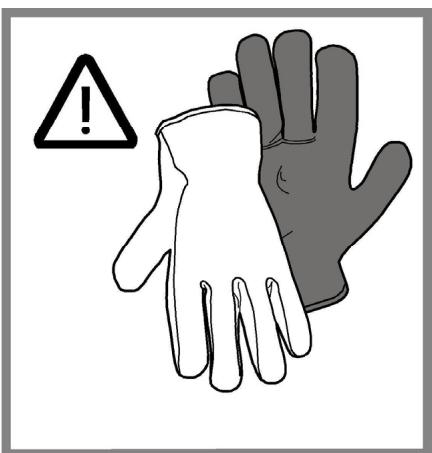
Always wear work gloves for all installation and maintenance operations.
This appliance can be used by children aged from 8 years and above and persons with reduced physical, sensory or mental capabilities or lack of experience and knowledge if they have been given supervision or instruction concerning use of the appliance in a safe way and understand the hazards involved.
Children shall not be allowed to tamper with the controls or play with the appliance.
Cleaning and user maintenance shall not be made by children without supervision.
The premises where the appliance is installed must be sufficiently ventilated, when the kitchen hood is used together with other gas combustion devices or other fuels.
The hood must be regularly cleaned on both the inside and outside (AT LEAST ONCE A MONTH).
This must be completed in accordance with the maintenance instructions provided in this manual. Failure to follow the instructions provided in this user guide regarding the cleaning of the hood and filters will lead to the risk of fires.
The flaming of foods beneath the hood itself is severely prohibited.
The use of exposed flames is detrimental to the filters and may cause a fire risk, and must therefore be avoided in all circumstances.
Any frying must be done with care in order to make sure that the oil does not overheat and ignite.
CAUTION: Accessible parts of the hood may become hot when used with cooking appliances.
For lamp replacement use only lamp type indicated in the Maintenance/Replacing lamps section of this manual.
WARNING! Do not connect the appliance to the mains until the installation is fully complete.
With regards to the technical and safety measures to be adopted for fume discharging it is important to closely follow the regulations provided by the local authorities.
The ducting system for this appliance must not be connected to any existing ventilation system which is being used for any other purpose such as discharging exhaust fumes from appliances burning gas or other fuels.
Do not use or leave the hood without the lamp correctly mounted due to the possible risk of electric shocks.
Never use the hood without effectively mounted grids.
The hood must NEVER be used as a support surface unless specifically indicated.
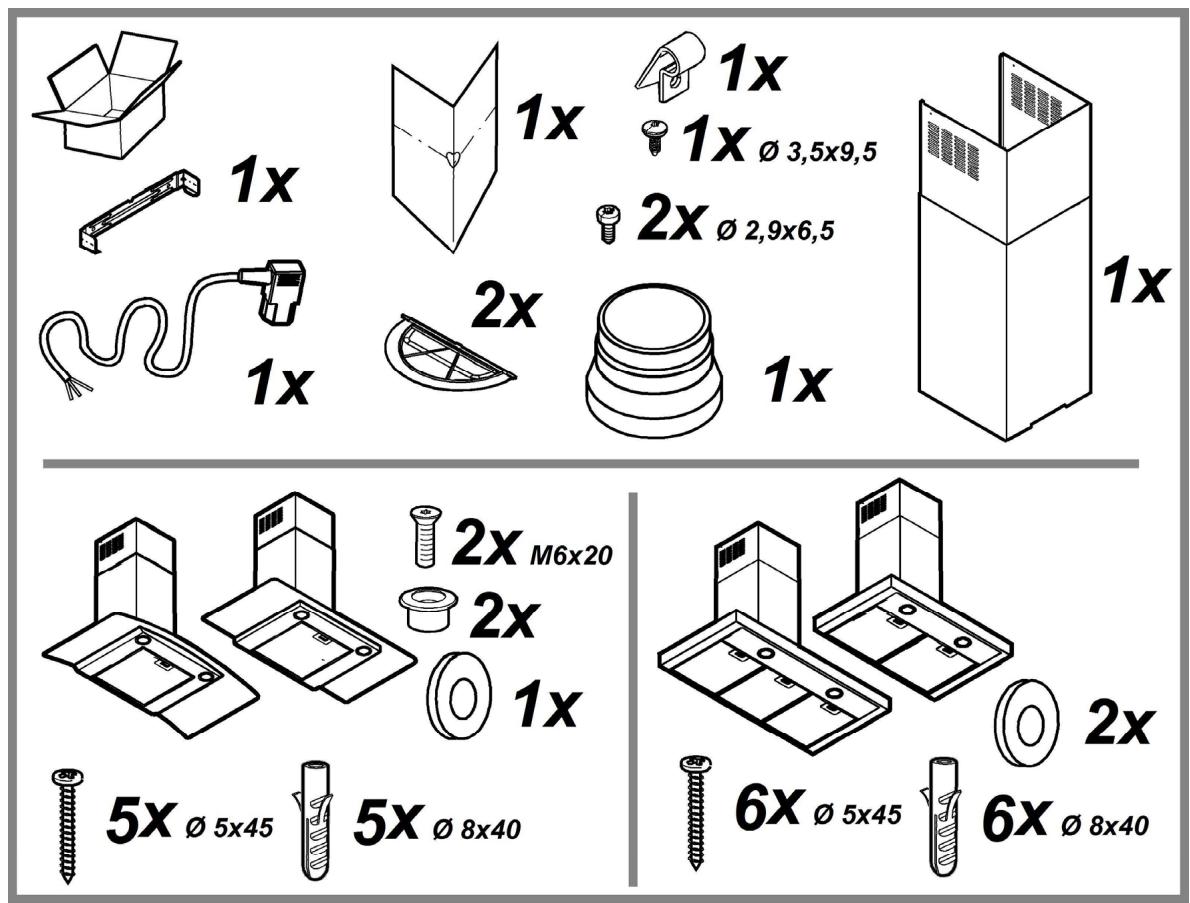
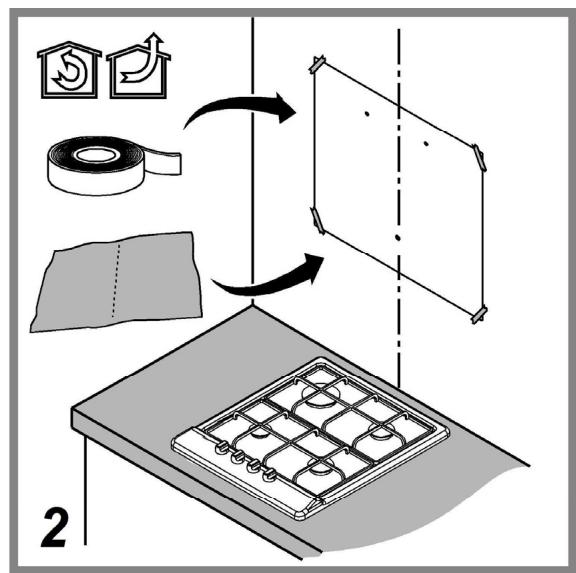
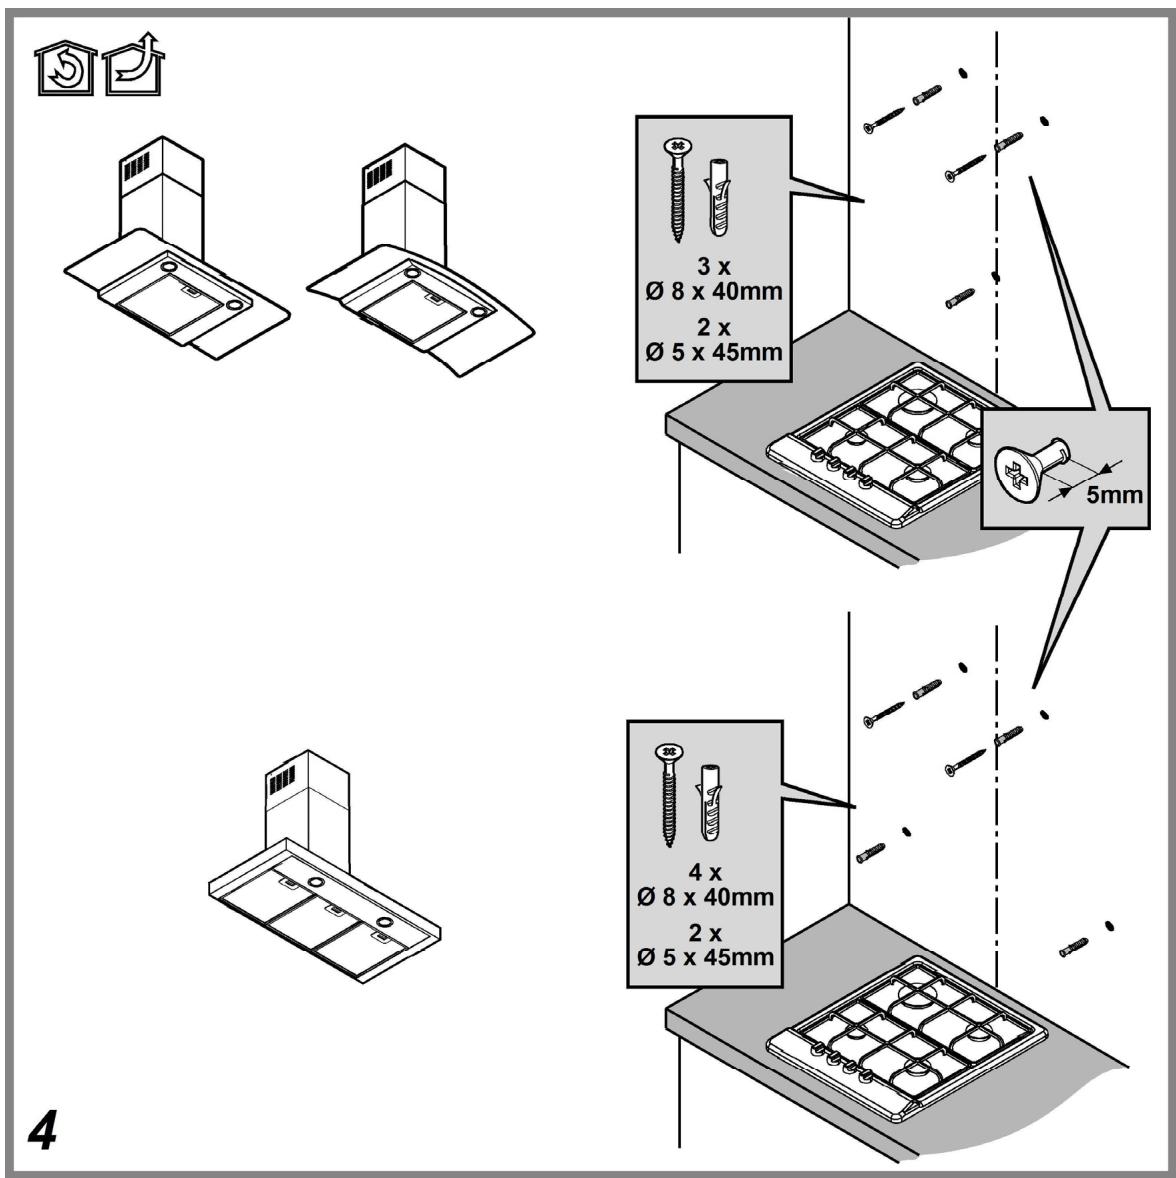
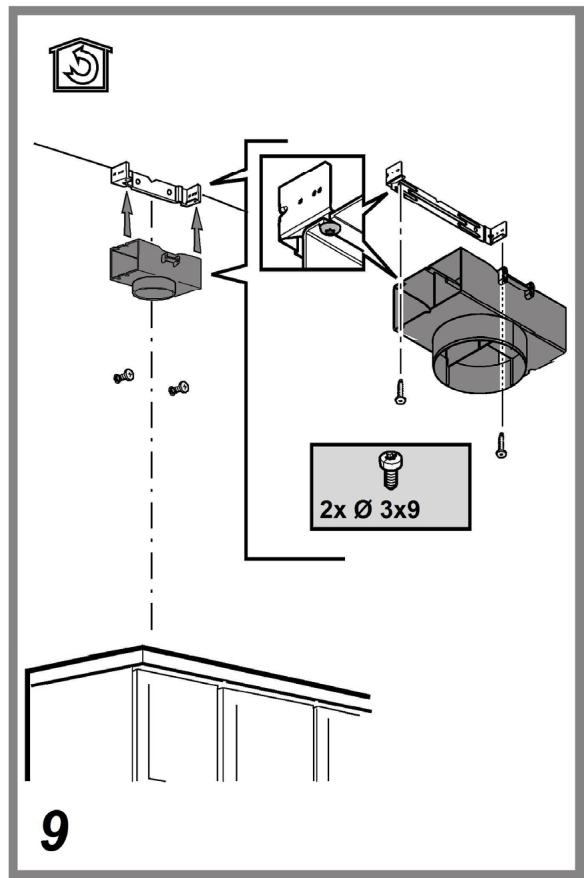
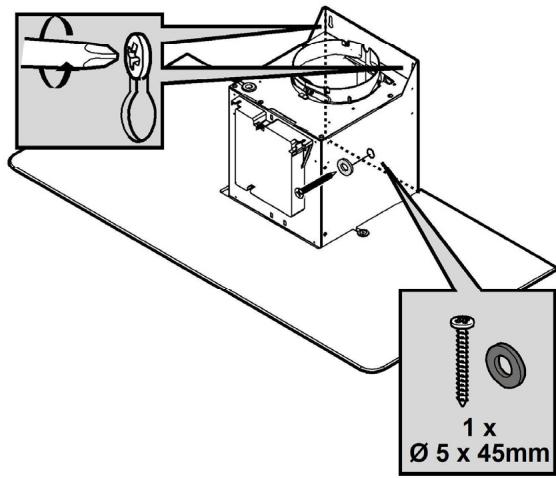
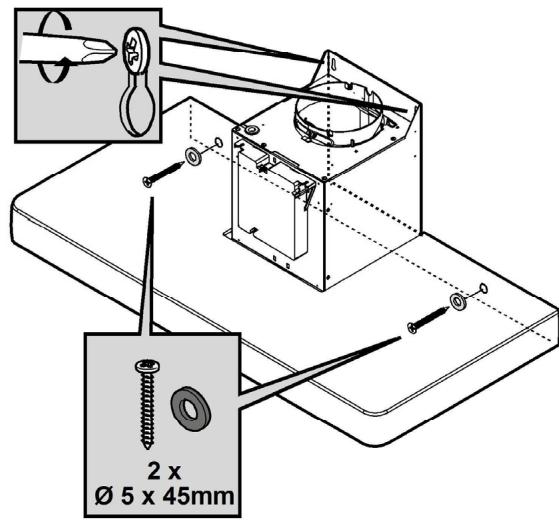
Use only the fixing screws supplied with the product for installation or, if not supplied, purchase the correct screws type.
Use the correct length for the screws which are identified in the Installation Guide.
In case of doubt, consult an authorised service assistance centre or similar qualified person.
WARNING! Failure to install the screws or fixing device in accordance with these
instructions may result in electrical hazards.
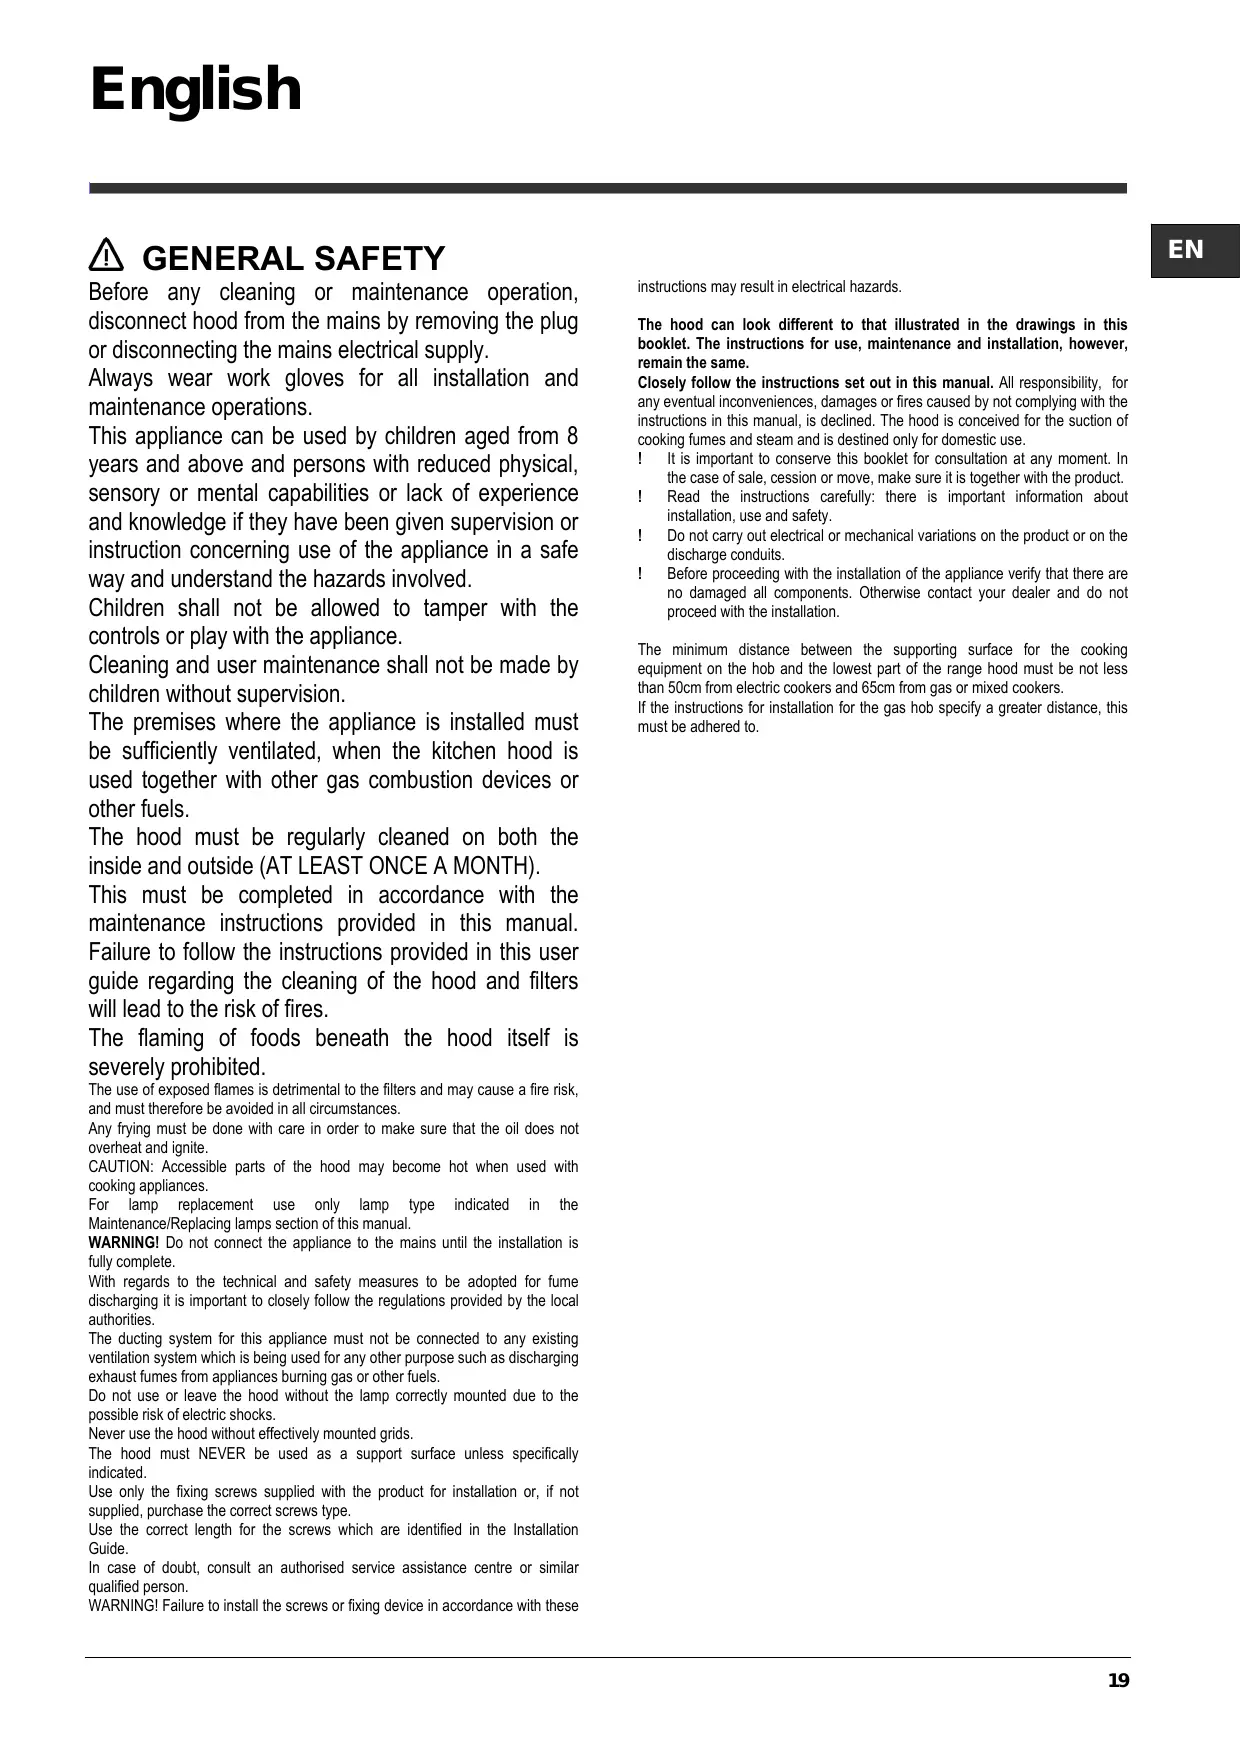
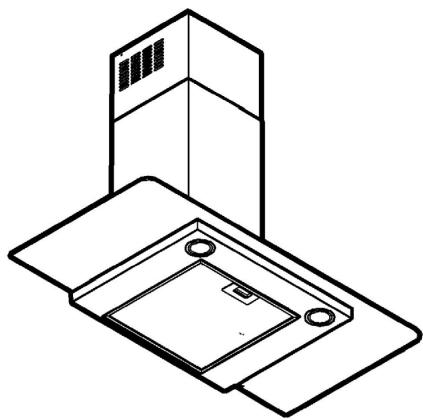
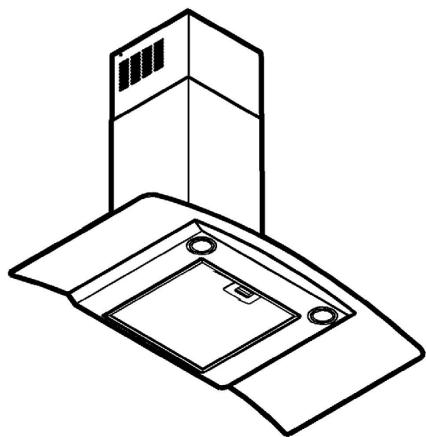
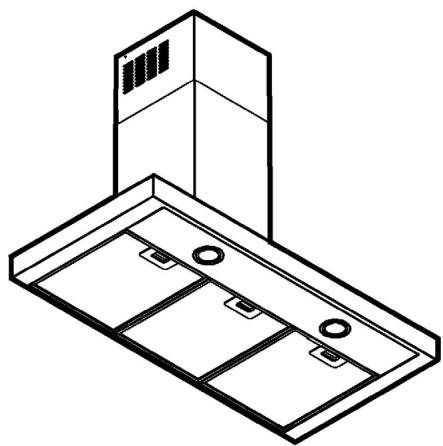
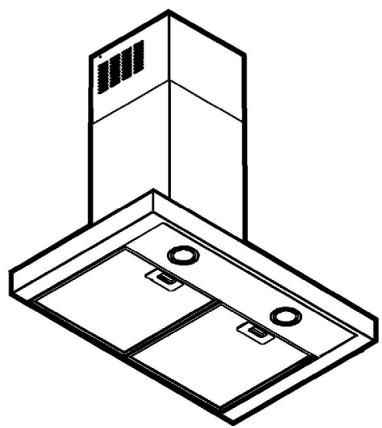
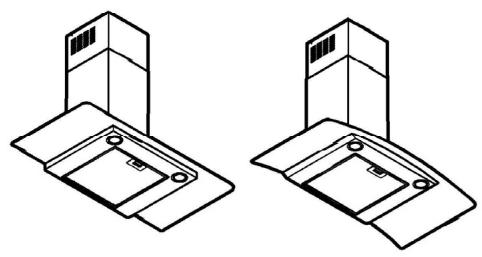
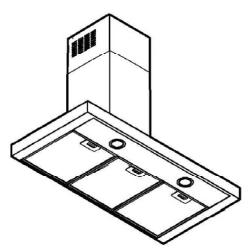
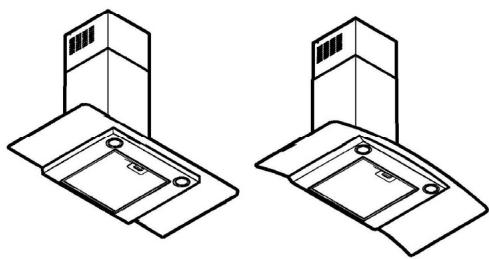
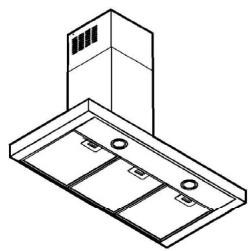
The hood can look different to that illustrated in the drawings in this booklet. The instructions for use, maintenance and installation, however, remain the same.
Closely follow the instructions set out in this manual. All responsibility, for any eventual inconveniences, damages or fires caused by not complying with the instructions in this manual, is declined. The hood is conceived for the suction of cooking fumes and steam and is destined only for domestic use.
It is important to conserve this booklet for consultation at any moment. In the case of sale, cession or move, make sure it is together with the product.
! Read the instructions carefully: there is important information about installation, use and safety.
! Do not carry out electrical or mechanical variations on the product or on the discharge conduits.
! Before proceeding with the installation of the appliance verify that there are no damaged all components. Otherwise contact your dealer and do not proceed with the installation.
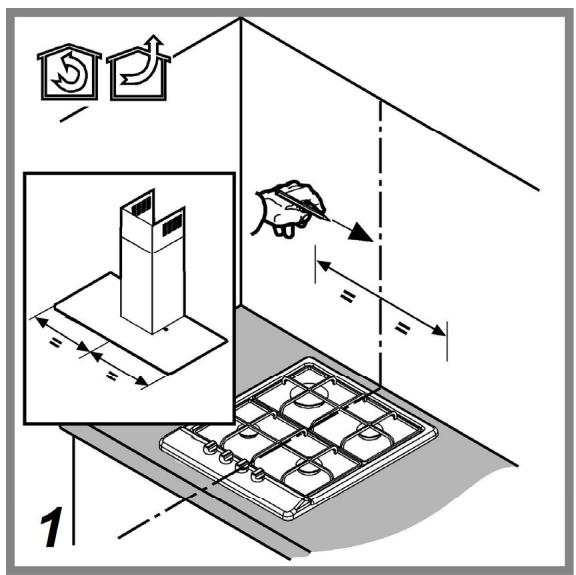
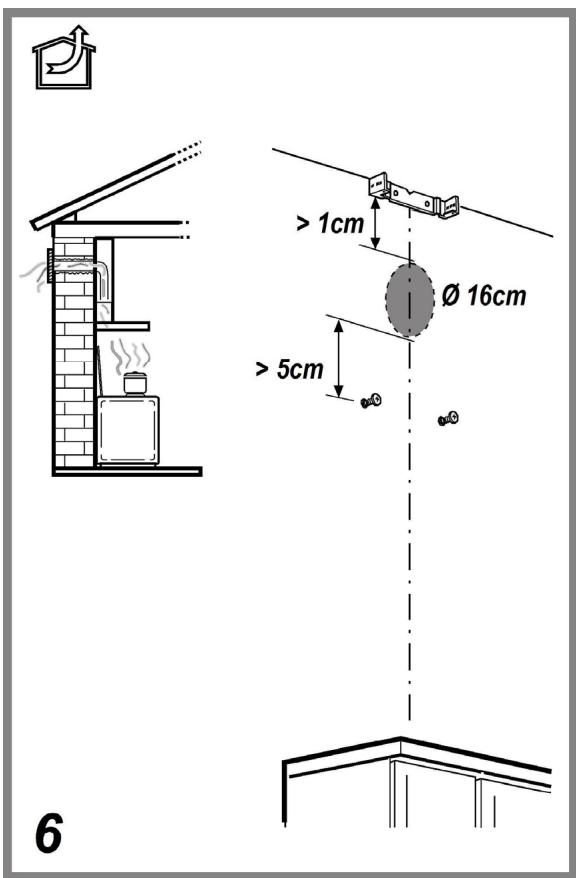
The minimum distance between the supporting surface for the cooking equipment on the hob and the lowest part of the range hood must be not less than 50cm from electric cookers and 65cm from gas or mixed cookers.
If the instructions for installation for the gas hob specify a greater distance, this must be adhered to.
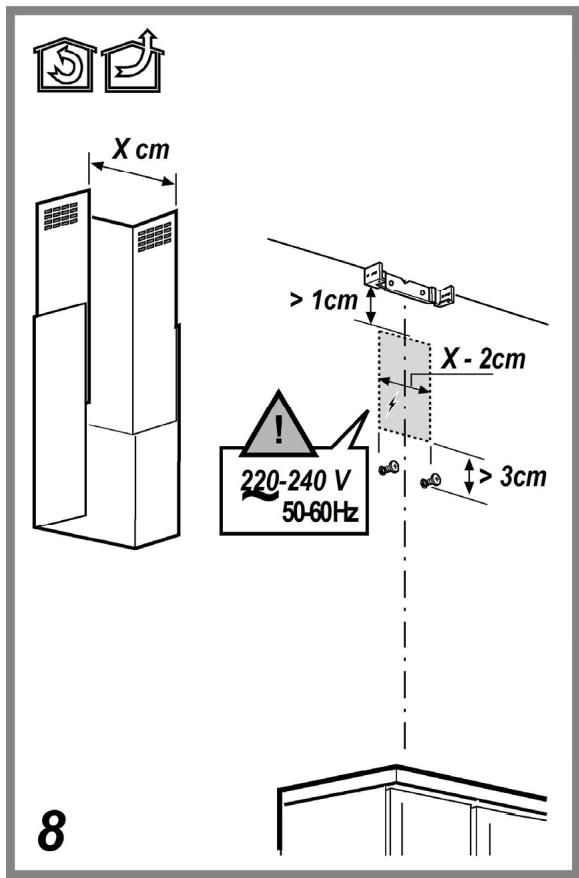
ELECTRICAL CONNECTION
The mains power supply must correspond to the rating indicated on the plate situated inside the hood. If provided with a plug connect the hood to a socket in compliance with current regulations and positioned in an accessible area, after installation. If it not fitted with a plug (direct mains connection) or if the plug is not located in an accessible area, after installation, apply a double pole switch in accordance with standards which assures the complete disconnection of the mains under conditions relating to over-current category III, in accordance with installation instructions.
Warning! Before re-connecting the hood circuit to the mains supply and checking the efficient function, always check that the mains cable is correctly assembled.
Replacing the power cable
The hood is provided with a special power cable; if the cable is damaged, request a new one from Technical Service.
AIR VENT
(for the suction versions)
Connect the hood and discharge holes on the walls with a diameter equivalent to the air outlet (connection flange).
Using the tubes and discharge holes on walls with smaller dimensions will cause a diminution of the suction performance and a drastic increase in noise.
Any responsibility in the matter is therefore declined.
Use a duct of the minimum indispensable length.
Use a duct with as few elbows as possible (maximum elbow angle: 90^
Avoid drastic changes in the duct cross-section.
The company declines any responsibility whenever these regulations are not respected.
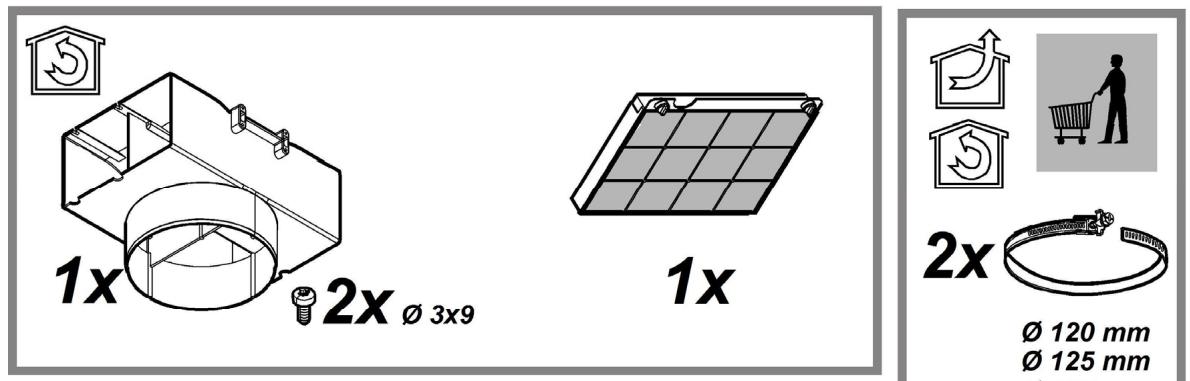
FILTERING OR DUCTING?
Your cooker hood is ready to be used in suction version.
To use the hood in filtering version the special ACCESSORY KIT must be installed.
Check on the first pages of this manual if the ACCESSORY KIT is furnished or must be bought separately.
Note: If furnished, in certain cases, the additional activated carbon filtering system may be installed on the hood.
Information about the conversion of the hood from suction version to filtering version is present in this manual.

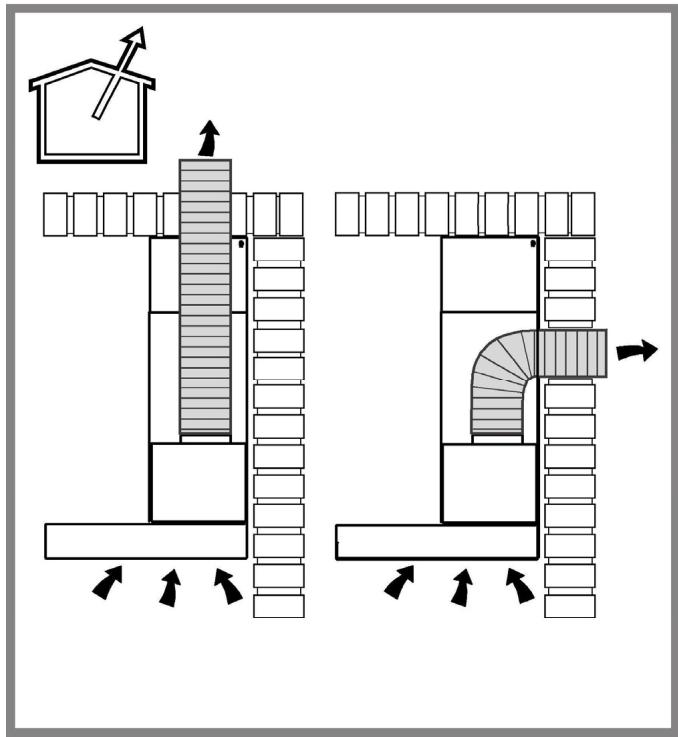
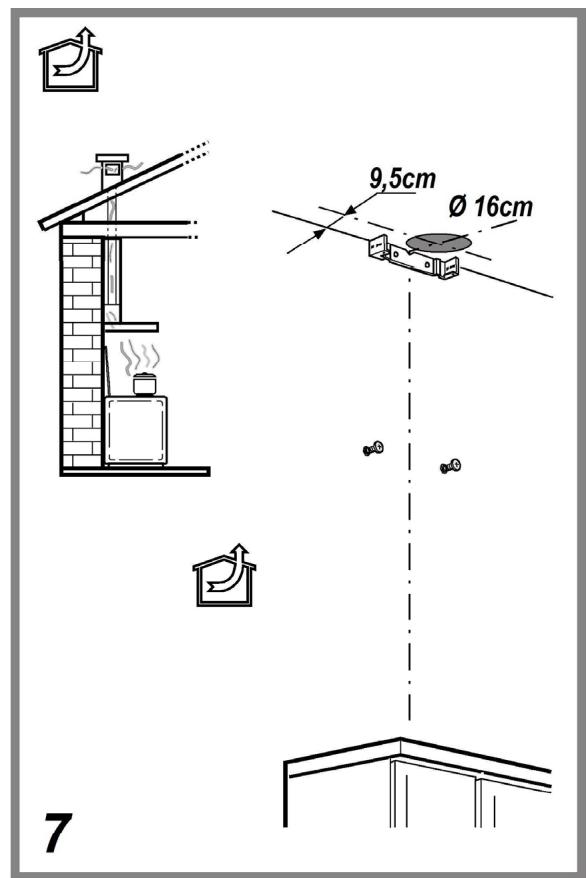
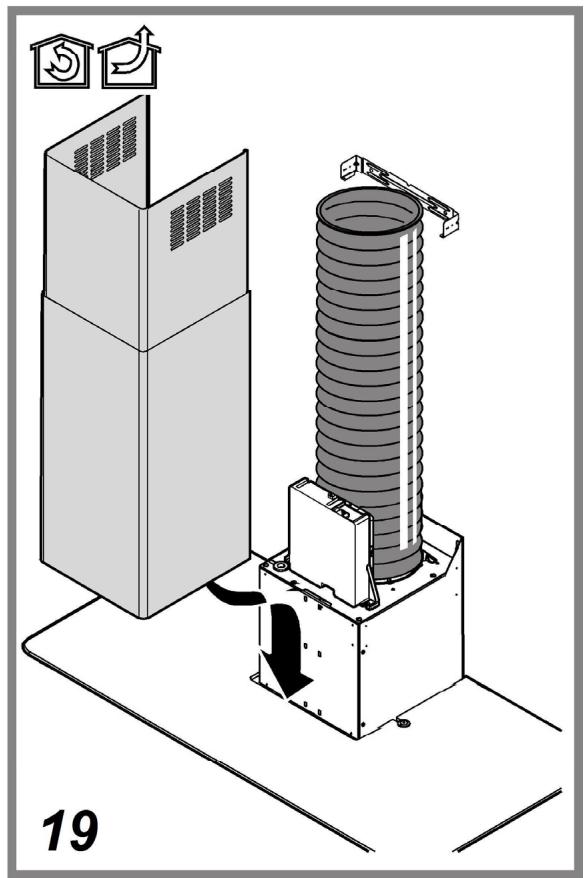
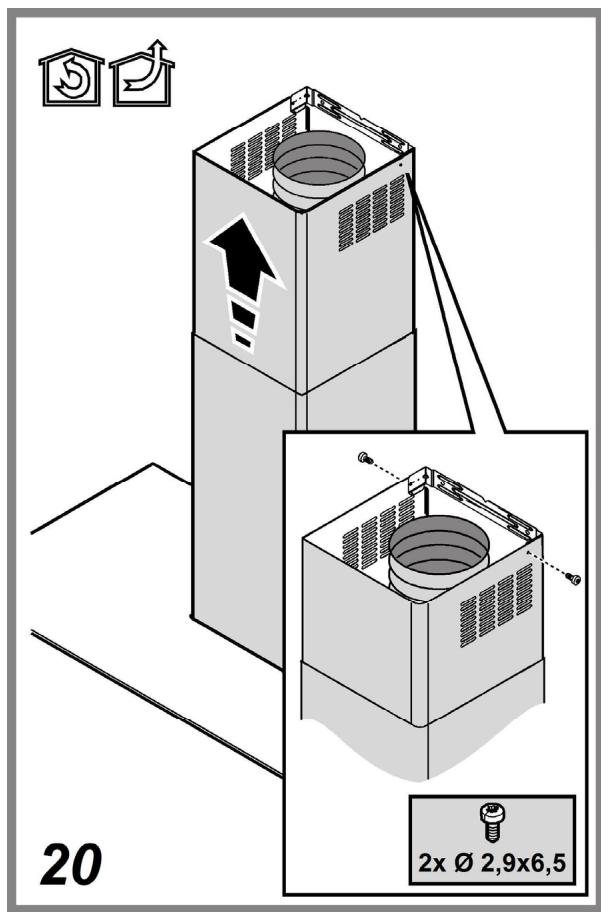
Ducting version
In this case the fumes are conveyed outside of the building by means of a special pipe connected with the connection ring located on top of the hood.
Attention! The exhausting pipe is not supplied and must be purchased apart. Diameter of the exhausting pipe must be equal to that of the connection ring.
Attention! If the hood is supplied with active charcoal filter, then it must be removed.

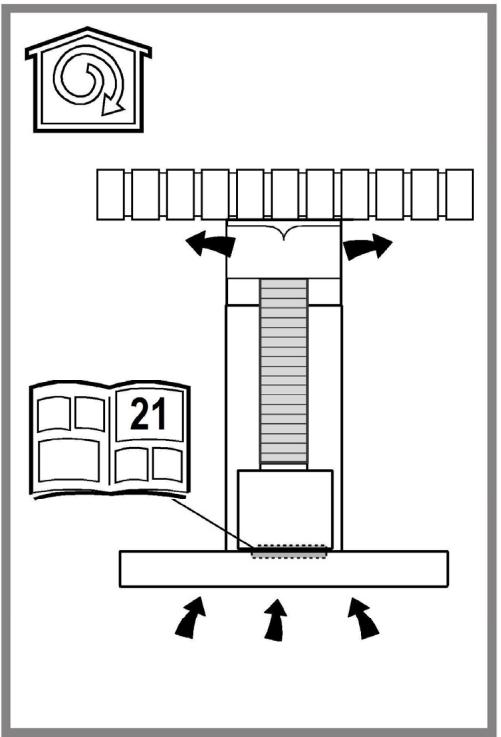
Filter version
The aspirated air will be degreased and deodorised before being fed back into the room.
In order to use the hood in this version, you have to install a system of additional filtering based on activated charcoal.
CONTROLS
The hood is fitted with a control panel with aspiration speed selection control and a light switch to control cooking area lights.
Models with mechanical control panel
HHBS 6.5F AM X - HHBS 9.5F AM X - HHF 6.4 F AM X - HHF 6.4 F AM K HHF 9.4 F AM X - HHF 9.5 F AM X - HHGC 9.4F AM X - HHGC 6.4F AM X

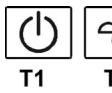
T1. ON/OFF light switch
T2. Speed 1/OFF switch
T3. 2-speed selection
T4. 3-speed selection
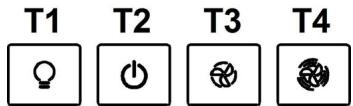
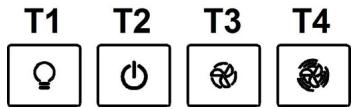
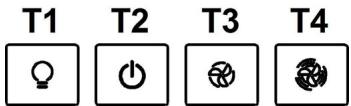
Models with Soft Button panel + LCD Display
HHBS 6.7F LL X - HHBS 9.7F LLI X - HHF 6.7F LL X

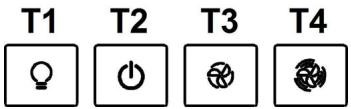
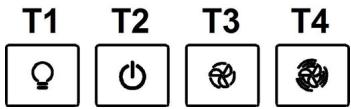
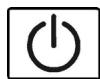
T1. Button ON/OFF suction motor
T2. Selection button for medium, high and intensive operating suction speed (power).
Note: Intensive suction speed (power) intensiva (LED L1 flashing) lasts for approximately 5 minutes, then the medium suction speed (power) is automatically set.
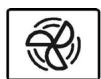
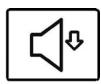
T3. Selection button for 'silent' suction speed (power)
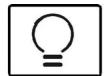
T4. Button ON/OFF lighting
L1. Status icon suction speeds (powers)
L2. Status icon saturation indicator for grease filter
L3. Status icon low (silent) suction speed (power)
L4. Status icon saturation indicator charcoal filter
L5. Status icon lighting
Reset filter saturation indicator
After performing maintenance of the filter, press and hold button T3, the icon indicating saturation will switch off. Repeat the operation if both icons indicating saturation (grease and charcoal) are on.
Activation of the icon for charcoal filter saturation
The icon for charcoal filter saturation is normally disabled. To activate it, proceed as follows:
With the hood off, press and hold for a long time and simultaneously T1 and T3: L4 flashes at first then it switches on with steady light to indicate successful activation.
Disabling the icon for charcoal filter saturation: repeat the above operation, L4 switches on with steady light then flashes and in the end switches off to indicate successful disabling.
Automatic operation at high temperature
The hood is fitted with a sensor that detects the temperature. When this becomes too high, the sensor automatically activates the medium suction speed (power). The hood switches off when the temperature detected by the sensor has lowered significantly.
Models with Soft Button panel + Delay OFF
RHHF 9.7F LB X - RHHBS 9.7F LB X - RHHGC 9.7F LB X

T1. Button ON/OFF suction motor
T2. Selection button operating suction speed (power)
Note: The intensive suction speed (power) (LED L3 flashing) lasts for approximately 5 minutes, then the medium suction speed (power) is automatically set (LED L2 on)
T3. Button ON/OFF lighting
T4. Automatic shutdown button:
Note: press this button to set the automatic shutdown after:
Low suction speed (power): 20 minutes
Medium suction speed (power): 15 minutes
High suction speed (power): 10 minutes
Intensive suction speed (power): 5 minutes
L1. LED low suction speed (power)
L2. LED medium suction speed (power)
L3. LED high suction speed (power)
L4 LED intensive suction speed (power) - timed (5 min.).
L5 LED for filter saturation:
flashing: carry out maintenance of the charcoal filter;
on: carry out maintenance of grease filters.
L1+L2+L3 flashing in sequence: automatic operation at high temperature (see related section)
Reset filter saturation
After carrying out filter maintenance, press and hold button T1, LED L5 switches off.
Activation of the LED for charcoal filter saturation
The LED for charcoal filter saturation is normally disabled. To activate it, proceed as follows:
With the hood off, press and hold for a long time and simultaneously T1 and T4: L1 flashes at first, then L2 as well, to indicate successful activation.
Disabling the LED for charcoal filter saturation: repeat the above operation, first L1 and L2 start flashing then only L1 to indicate successful disabling.
Automatic operation at high temperature
The hood is fitted with a sensor that detects the temperature. When this becomes too high, the sensor automatically switches on the medium suction speed (power). The hood switches off when the temperature detected by the sensor has lowered significantly.
Models with Soft Button panel + Silent Speed
HHBS 9.5F AB X - HHBS 9.7F LBI X - HHBS 9.7F LB X
HHBS 6.7F LB X - HHGC 9.7F LB X - HHGC 6.7F LB X
HHGC 6.5F AB X - HHF 9.7F LB X - HHF 6.7F LB X

T1

T2


T3
T4
T1. Button ON/OFF suction motor
T2. Selection button operating suction speed (power)
Note: The intensive suction speed (power) (LED L3 flashing) lasts for approximately 5 minutes, then the medium suction speed (power) is automatically set (LED L2 on)
T3. Button ON/OFF lighting
T4. Selection button 'silent' suction speed (power)
L1. LED medium suction speed (power)
L2. LED high suction speed (power)
L3 LED intensive suction speed (power) - timed (5 min.).
L4 LED filter saturation:
flashing: carry out maintenance of the charcoal filter; on: carry out maintenance of grease filters.
L5 LED low (silent) suction speed (power)
L1+L2+L3 flashing in sequence: automatic operation at high temperature (see related section)
Reset filter saturation
After carrying out filter maintenance, press and hold button T1, LED L4 switches off.
Activation of the LED for charcoal filter saturation
The LED for charcoal filter saturation is normally disabled. To activate it, proceed as follows:
With the hood off, press and hold for a long time and simultaneously T1 and T4: L1 flashes first then L2 as well, to indicate successful activation.
Disabling the LED for charcoal filter saturation: repeat the above operation, L1 and L2 start flashing first, then only L1, to indicate successful disabling.
Automatic operation at high temperature
The hood is fitted with a sensor that detects the temperature. When this becomes too high, the sensor automatically activates the medium suction speed (power). The hood switches off when the temperature detected by the sensor has lowered significantly.
MAINTENANCE
Cleaning
Clean using ONLY the cloth dampened with neutral liquid detergent. DO NOT CLEAN WITH TOOLS OR INSTRUMENTS. Do not use abrasive products. DO NOT USE ALCOHOL!
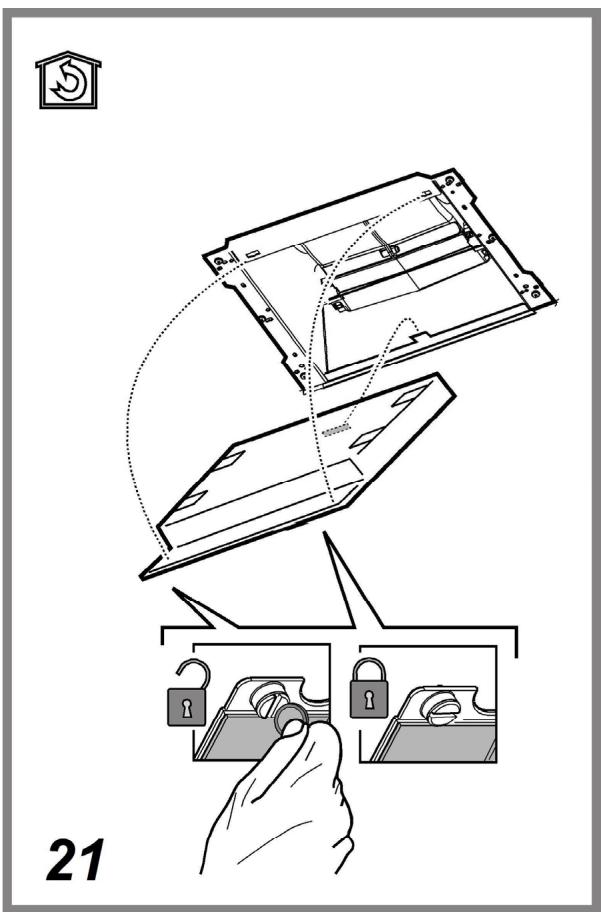
Perimeter aspiration panel
Clean the perimeter aspiration panel with the same frequency as the ant-fats filter, using a cloth and not too concentrated liquid detergent. Do not use abrasive substances.
Maintenance of the anti-grease filters
Traps cooking grease particles.
This must be cleaned once a month (or when the filter saturation indication system - if envisaged on the model in possession - indicates this necessity) using non aggressive detergents, either by hand or in the dishwasher, which must be set to a low temperature and a short cycle.
When washed in a dishwasher, the grease filter may discolour slightly, but this does not affect its filtering capacity.
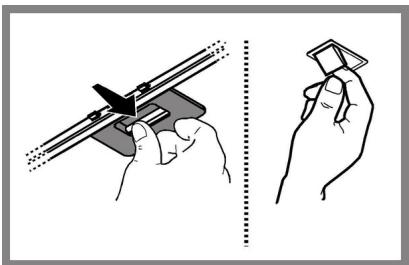
To remove the grease filter, pull the spring release handle.
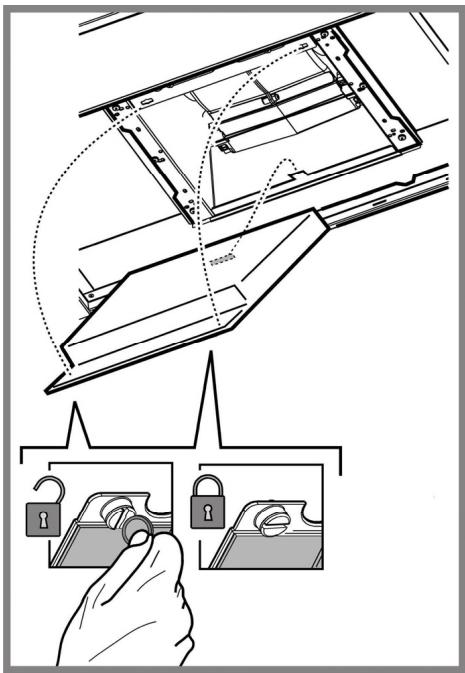
Maintenance of the charcoal filter
It absorbs unpleasant odours caused by cooking.
The saturation of the charcoal filter occurs after more or less prolonged use, depending on the type of cooking and the regularity of cleaning of the grease filter.
In any case it is necessary to replace the cartridge at least every four mounths (or when the filter saturation indication system - if envisaged on the model in possession - indicates this necessity). The charcoal filter may NOT be washed or regenerated.
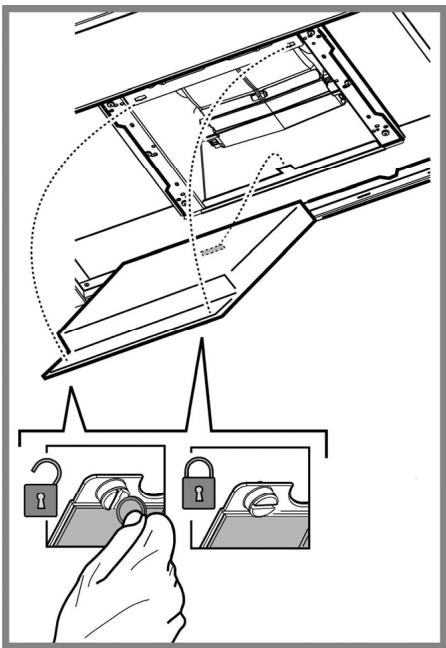
Assembly: Hook the charcoal filter at the back on the metal tongue of the hood first, then on the front with the two knobs.
Disassembly
Remove the charcoal filter by turning the knobs fixing it to the hood by 90^ .
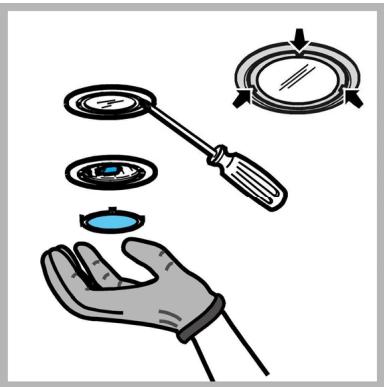
Replacing lamps
HHBS 6.5F AM X, HHBS 9.5F AM X, HHF 6.4 F AM X, HHF 6.4 F AM K,HHF 9.4 F AM X,HHF 9.5 F AM X, HHBS 9.5F AB X, HHGC 6.5F AB X, HHGC 9.4F AM X, HHGC 6.4F AM X
Disconnect the appliance from the electricity.
Warning! Prior to touching the light bulbs ensure they are cooled down.
Replace the old light bulb with the one of the same type as specified in the feature label or near the light lamp on the hood.
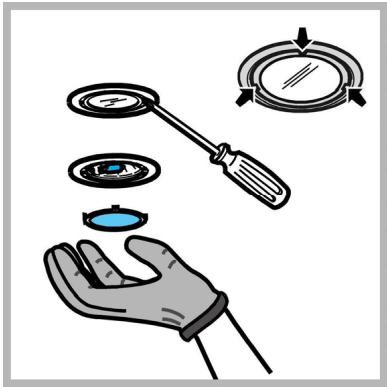
- Using a flat head screwdriver or equivalent tool, carefully pry loose the light cover.
- Remove the damaged light and replace with a new 12 Volt, 20 Watt (Maximum) halogen light made for a G-4 base SUITABLE FOR USE IN OPEN LUMINAIREs. Follow package directions and do not touch new light with bare hands.
- Reinstall the light cover. (it will snap shut).
HHBS 6.7F LL X - RHHF 9.7F LB X - RHHBS 9.7F LB X - HHBS 9.7F LLI X - HHF 6.7F LL X - HHBS 9.7F LBI X - HHBS 9.7F LB X - HHBS 6.7F LB X - HHGC 9.7F LB X
HHGC 6.7F LB X - HHF 9.7F LB X - HHF 6.7F LB X
The hood is equipped with a lighting system based on LED technology.
The LEDs guarantee an optimum lighting, a duration up to 10 times as long as the traditional lamps and allow to save 90% electrical energy.
For replacement, contact the technical service.
DISPOSAL
This appliance is marked according to the European directive 2012/19/EC on Waste Electrical and Electronic Equipment (WEEE). By ensuring this product is disposed of correctly, you will help prevent potential negative consequences for the environment and human health, which could otherwise be caused by inappropriate waste handling of this product.

The symbol on the product, or on the documents accompanying the product, indicates that this appliance may not be treated as household waste. Instead it should be taken to the appropriate collection point for the recycling of electrical and electronic equipment. Disposal must be carried out in accordance with local environmental regulations for waste disposal.
For further detailed information regarding the process, collection and recycling of this product, please contact the appropriate department of your local authorities or the local department for household waste or the shop where you purchased this product.
Appliance designed, tested and manufactured according to:
- Safety: EN/IEC 60335-1; EN/IEC 60335-2-31, EN/IEC 62233
-
Performance: EN/IEC 61591; ISO 5167-1; ISO 5167-3; ISO 5168; EN/IEC 60704-1; EN/IEC 60704-2-13; EN/IEC 60704-3; ISO 3741; EN 50564; IEC 62301.
-
EMC: EN 55014-1; CISPR 14-1; EN 55014-2; CISPR 14-2; EN/IEC 61000-3-2; EN/IEC 61000-3-3. Suggestions for a correct use in order to reduce the environmental impact: Switch ON the hood at minimum speed when you start cooking and kept it running for few minutes after cooking is finished. Increase the speed only in case of large amount of smoke and vapour and use boost speed(s) only in extreme situations. Replace the charcoal filter(s) when necessary to maintain a good odour reduction efficiency. Clean the grease filter(s) when necessary to maintain a good grease filter efficiency. Use the maximum diameter of the ducting system indicated in this manual to optimize efficiency and minimize noise.
MALFUNCTIONS
If something appears not to be working properly, do the following simple checks before calling Technical Service:
If the hood is not working:
Check that:
- The power has not been disconnected.
- A speed has been selected.
If the hood performs inefficiently: Check that:
- The motor speed selected is sufficient for the amount of smoke and vapours released.
- The kitchen is sufficiently ventilated to allow air intake.
- The charcoal filter is not worn (hood in filtering version).
If the hood has turned off during normal functioning:
Check that:
- The power has not been disconnected.
- the omnipolar disconnection device has not tripped.
If the hood fails to operate correctly, briefly disconnect it from the mains power supply for almost 5 sec. by pulling out the plug. Then plug it in again and try once more before contacting the Technical Assistance Service.
TECHNICAL DATA
| Model | Height (cm) | Width (cm) | Tiefe (cm) | Ø of exhaust tube (cm) |
| HHBS6.5FAMX HHBS6.7FLLX HHBS6.7FLBX | 61,9 - 114 70,4 - 114 | 59,8 | 45 | 15-12,5-12 |
| HHBS9.5FAMX RHHBS9.7FLBX HHBS9.7FLLIX HHBS9.5FABX HHBS9.7FLBIX HHBS9.7FLBX | 61,9 - 114 70,4 - 114 | 89,8 | 45 | 15-12,5-12 |
| HHF6.4 FAMX HHF6.4 FAMK HHF6.7FLLX HHGc6.7FLBX HHGc6.5FABX HHF6.7FLBX HHGC6.4FAMX | 60 - 112,5 68,5 - 112,5 | 59,8 | 45 | 15-12,5-12 |
| HHF9.4FAMX HHF9.5FAMX RHHF9.7FLBX HHF9.7FLBX | 60 - 112,5 68,5 - 112,5 | 89,8 | 45 | 15-12,5-12 |
| RHHGC9.7FLBX HHGC9.7FLBX HHGC9.4FAMX | 62,3- 114,8 70,8 - 114,8 | 89,8 | 45 | 15-12,5-12 |
Please check the plate in order to verify the total absorption and the light absorption.
HHBS 6.5F AM X, HHBS 9.5F AM X, HHF 6.4 F AM X, HHF 6.4 F AM K, HHF 9.4 F AM X,HHF 9.5 F AM X, HHBS 9.5F AB X, HHGC 6.5F AB X, HHGC 9.4F AM X, HHGC 6.4F AM X
| Power (W) | Voltage (V) | Cap | Dimensions (mm) | |
| Halogen | 2 x 20W | 12 | G4 | 33xØ10 |
HHBS 6.7F LL X - RHHF 9.7F LB X - RHHBS 9.7F LB X - HHBS 9.7F LLI X - HHF 6.7F LL X - HHBS 9.7F LBI X - HHBS 9.7F LB X - HHBS 6.7F LB X - HHGC 9.7F LB X
HHGC 6.7F LB X - HHF 9.7F LB X - HHF 6.7F LB X
The hood is equipped with a lighting system based on LED technology. For replacement, contact the technical service.

Components not provided with the product
SÉCURITÉ GÉNÉRALE
HHBS 6.5F AM X - HHBS 9.5F AM X - HHF 6.4 F AM X - HHF 6.4 F AM K HHF 9.4 F AM X - HHF 9.5 F AM X - HHGC 9.4F AM X - HHGC 6.4F AM X
RHHF 9.7F LB X - RHHBS 9.7F LB X - RHHGC 9.7F LB X

HHBS 9.5F AB X - HHBS 9.7F LBI X - HHBS 9.7F LB X
HHBS 6.7F LB X - HHGC 9.7F LB X - HHGC 6.7F LB X
HHGC 6.5F AB X - HHF 9.7F LB X - HHF 6.7F LB X

T1

T2


T3

T4
HHBS 6.7F LL X - RHHF 9.7F LB X - RHHBS 9.7F LB X - HHBS 9.7F LLI X - HHF 6.7F LL X - HHBS 9.7F LBI X - HHBS 9.7F LB X - HHBS 6.7F LB X - HHGC 9.7F LB X
HHGC 6.7F LB X - HHF 9.7F LB X - HHF 6.7F LB X
HHBS 6.7F LL X - RHHF 9.7F LB X - RHHBS 9.7F LB X - HHBS 9.7F LLI X - HHF 6.7F LL X - HHBS 9.7F LBI X - HHBS 9.7F LB X - HHBS 6.7F LB X - HHGC 9.7F LB X
HHGC 6.7F LB X - HHF 9.7F LB X - HHF 6.7F LB X
HHBS 6.5F AM X - HHBS 9.5F AM X - HHF 6.4 F AM X - HHF 6.4 F AM K HHF 9.4 F AM X - HHF 9.5 F AM X - HHGC 9.4F AM X - HHGC 6.4F AM X

Reset filter verzadiging indicator
RHHF 9.7F LB X - RHHBS 9.7F LB X - RHHGC 9.7F LB X

Reset filter verzadiging indicator
HHBS 9.5F AB X - HHBS 9.7F LBI X - HHBS 9.7F LB X
HHBS 6.7F LB X - HHGC 9.7F LB X - HHGC 6.7F LB X
HHGC 6.5F AB X - HHF 9.7F LB X - HHF 6.7F LB X

T1
T2


T3

T4
Reset filter verzadiging
HHBS 6.7F LL X - RHHF 9.7F LB X - RHHBS 9.7F LB X - HHBS 9.7F LLI X - HHF 6.7F LL X - HHBS 9.7F LBI X - HHBS 9.7F LB X - HHBS 6.7F LB X - HHGC 9.7F LB X
HHGC 6.7F LB X - HHF 9.7F LB X - HHF 6.7F LB X
Controller of: Controller dat:
HHBS 6.7F LL X - RHHF 9.7F LB X - RHHBS 9.7F LB X - HHBS 9.7F LLI X - HHF 6.7F LL X - HHBS 9.7F LBI X - HHBS 9.7F LB X - HHBS 6.7F LB X - HHGC 9.7F LB X
HHGC 6.7F LB X - HHF 9.7F LB X - HHF 6.7F LB X
HHBS 6.5F AM X - HHBS 9.5F AM X - HHF 6.4 F AM X - HHF 6.4 F AM K HHF 9.4 F AM X - HHF 9.5 F AM X - HHGC 9.4F AM X - HHGC 6.4F AM X

RHHF 9.7F LB X - RHHBS 9.7F LB X - RHHGC 9.7F LB X

HHBS 9.5F AB X - HHBS 9.7F LBI X - HHBS 9.7F LB X
HHBS 6.7F LB X - HHGC 9.7F LB X - HHGC 6.7F LB X
HHGC 6.5F AB X - HHF 9.7F LB X - HHF 6.7F LB X

T1

T2


T3

T4
HHBS 6.7F LL X - RHHF 9.7F LB X - RHHBS 9.7F LB X - HHBS 9.7F LLI X - HHF 6.7F LL X - HHBS 9.7F LBI X - HHBS 9.7F LB X - HHBS 6.7F LB X - HHGC 9.7F LB X
HHGC 6.7F LB X - HHF 9.7F LB X - HHF 6.7F LB X
HHBS 6.7F LL X - RHHF 9.7F LB X - RHHBS 9.7F LB X - RHHGCS 9.7F LB X - HHBS 9.7F LLI X - HHF 6.7F LL X - HHBS 9.7F LBI X - HHBS 9.7F LB X - HHBS 6.7F LB X - HHGC 9.7F LB X
HHGC 6.7F LB X - HHF 9.7F LB X - HHF 6.7F LB X
HHBS 6.5F AM X - HHBS 9.5F AM X - HHF 6.4 F AM X - HHF 6.4 F AM K HHF 9.4 F AM X - HHF 9.5 F AM X - HHGC 9.4F AM X - HHGC 6.4F AM X

RHHF 9.7F LB X - RHHBS 9.7F LB X - RHHGC 9.7F LB X

HHBS 9.5F AB X - HHBS 9.7F LBI X - HHBS 9.7F LB X
HHBS 6.7F LB X - HHGC 9.7F LB X - HHGC 6.7F LB X
HHGC 6.5F AB X - HHF 9.7F LB X - HHF 6.7F LB X

T1
T2


T3

T4
T1. Emme motoru ON/OFF butonu
T2. Emme hizi (gucu) butonu
Not: Cihaz yogun emme hizinda (gucu) (LED L3 yanip soner) 5 dakika boyunca calistiktan sonra, otomatik olarak orta emme hizina (gucune) geleer (LED L2 yanar).
T3. Aydinlatma ON/OFF butonu
T4. "Sessiz" emme hizi (gucü) butonu
HHBS 6.7F LL X - RHHF 9.7F LB X - RHHBS 9.7F LB X - HHBS 9.7F LLI X - HHF 6.7F LL X - HHBS 9.7F LBI X - HHBS 9.7F LB X - HHBS 6.7F LB X - HHGC 9.7F LB X
HHGC 6.7F LB X - HHF 9.7F LB X - HHF 6.7F LB X
HHBS 6.7F LL X - RHHF 9.7F LB X - RHHBS 9.7F LB X - HHBS 9.7F LLI X - HHF 6.7F LL X - HHBS 9.7F LBI X - HHBS 9.7F LB X - HHBS 6.7F LB X - HHGC 9.7F LB X
HHGC 6.7F LB X - HHF 9.7F LB X - HHF 6.7F LB X
BhImaHne! He noKJINoUaTb npIbOp do 3JeKTPuYeCKo CeTu Do Tex nop, noka yCTAHOBKa pOJIHOCTbO He 3aKOHeHa.
To yto kacaetc texhnecknx MEP n MEP be3onacchoB v npimehenno do 6bpoca napob cTporo DoepxnbatcB toro yTO npedymatpmbaetcno Hopmam IOKaJIbHbIX KOMPeTeHTbIX OpraHOB.
BcabsbAembBo3dyx He donJKeH bItb BblnycaTbCra Tpy6y, nCnObn3yEmyo dIy Bbl6pocob DblMOB np6opamn, yTo pa6oTaIOT Ha rase nn Dpyrnx TOIINBax.
He nCnoJIb3OBAt bIIM octabJIaTb BbITJAKy 6e3 IaMIOeK npaBnIbHO yCTAHOBJIeHHbIX C pNCKOM POJIyUHTb yIap 3NeKTpUeCKM TOKOM.
HInKOrJa He nCnOJIb3OBAb TbBtJgKky 6e3 npaBnIbHO yCTaHOBJIeHHo peWetKn! BtJgKka HIKoTDA He dOJIgKHa nCnOJIb3OBAbTa, KaK onOpHra NOBepxHocTb, ecnToJIbKO He yKa3aHO.
IcnoIb30BaT ToIbKO BnHTbI DnIe KcNPOBAHn B KomIIeKeT C npOyKTOM dIy yCTaHOBKn IIN, ecIn Het B KomIIeKeT, pInoBpcttn BnHTbI npABnIBHO TnTa. IcnoIb30BaT npABnIBHyIO DmIHy BnHTOB UTO yKa3aHa B pyKOBoCTBe no yCTaHOBKe. B cnyan comHeHH, KOHCylbTIPOBaTbCBA B aTOp3uPobAHHom
ZeHTpe no 06cIyKbBaHnIO nI C KBaIINΦuIpOBaHHbIM nepcoHaIOM.
BHIMAHIE! He yctaHObKa COOTBETCTBYUxN BHTOB N pncnOc6JIeHn dIpy 1KcnpoBaHnB CooTBeTCTBnC 3TmMn HnCTpyKuYMaM MOKet npnbctn KpNCAM 3NeKTPnuCeCKOrO POnCXOXJDeHn.
BbITJXka MoKet HMeT bI3aH, OTNmuOuNcra O T BbITJXk NOKa3AHHO Ha pncyHKax daHHORo pyKOBOCTBa, TEM He MeHee, pyKOBOCTBO NO 3KcNpyatauTN, TEsNHueckoe o6cnyXnBAHne uYctAHOBKa OCTaOTcra Te JKe. N3denue XO3aUcmeEHNO-6bIMo8O2O HA3NaueHn. IpnOH3BOUNTeB CHINMaET C c68 BCkyO OTBETCTBeHHOCt 3a HEnOJaIK, yUep6 nIN NoKap, KOtOpBle BO3HNKn PnIP NcNoJIb3OBAHn Pnp6opa BCNECDTBHe HecO6JIIODeHn INHCTpyKsi, PnINBeEHbIX B DAHHOM pyKOBOCTBe. BbITJXka cNyKnt dIg BAcCbIAhAni DbIMa N npA prn pInrTOBnEHN NiUsn I npEdHa3Haeha TOIbko dIbTOBO rNCNlOB3OBAHn.
! OyeH BaxHo CoxpaHnTb 3Ty IHCTpyKuHIO, YTO6bl MOXHO 6blIO o6paTntbcra K HeB bIIO6o MOMeH. EcIn n3dJeMe npOaetc, nepeJaETc nI IN peHocHtC SoEcecneHTb, YTO6bl IHCTpyKuNBA CERda 6blJa C HIM.
I BnMaTeIbHo npOHTaIe HNCTpyKlIO. B Hei HaxoDITcBaKHaI INΦOpMaIgno yCTaHOBKe, 3KcPnyatauNi 6e3oNaCHOCTN.
1 3anpeaetcBbIOINHbN3MeHeHHB3NeKTPnueckoMIMexAHnuecko 华actnN3dEJIINMIBTPy6axpaccenBaHH.
! Ppeed Hauanom yctahOBKN obopyoBaHnry y6eInteCB u cIIOCTHO t coxpaHHOCTN BCEX KOMNOHETOB. Ipi HAnuHN JIObIx NOBpeJxHn ObaTtEcb K NOCTABUkny Hn B KOem CInyae He HaunHaTe MOHTAK obopyoBaHnry.
PacctoHne HnKHeI rpaHbBITJxKn HAD ONOPHO NIOCKOCTbIO NOcCyoIbHa KxOHHO pINTe DOJXHO 6bITb He Mehee 50cm-dn3NeKTpueecknx PINT, n He Mehee 65cm dJa ra3OBbIX mN KOM6HINPOBAHHbIX pINT.
EcnB INHCTpyKUHXNo yCTAHOBKe ra3OBoI nnTbI orOBopeHO 60nbweepacctoHnE,To yHTNE 3TO.
3NEKTPNUECKOE COEINHEHNE
Hanpajekhe Me cTe N DoJHKHO COOTBcTcBOBaT h AnpajekHeHyo, yka3aHHOMy Ha Ta6JIuKHe texnuecknx daHbIx, KOtopa pa3MeueHa BHytpn np6opa. Ecnn BbITAKKa Ch6jeka BUNKO, NOJIOUChte BbITJKKY K STenCebHOMy pa3bemy. OH DoJIKEN OTBeuATb DeiCTByOuMm npabunam m 6bItb pacNOJOeH B JERKOcO7ynHom MeTe. BKJIOUHT b PO3ETky MOJHO NocJe YcTaHOBKn. Ecnn JKe BbITAKKa He Ch6jeka BUNKO (PpAmoe NIOKIOUeHn K cTeN), ININ WtENCeHbY pa3bEm He pacNOJOeH B OcTOynHom MecTe, TAKKe n NocJe YcTaHOBKn, To IcNObl3yIte HAdJexKaUH DByXNoHOCbY BkJIIOUcATENb, O6eNCeNuBAIoUm NOnHOe pa3MbKAnHe cTeN npR Bo3NHKHOBeHn ycNobn nepenapjekHeHn 3-e KaterOpn, B COOTBcTcBN C IHCTpyKUmaMn No yCTaHOBKe.
BhImaHne! npExJe Yem NOkJIOUHTb K cETn NITAHN 3eKTPuYeCKyO CNTeMy BblTjXKn I npOBepntb NcPpABHOe FyHKUHOHPOBaHne ee y6eIITecB B TOM, UTO Ka6BeJI NITAHN IpabINbHO CMOHTPOBaH.
3aMeHa 3JIeKTpoka6eIa
BbIyKka IMeet CneuNaJIbHbI Ka6eJIb 3NeKtpOnITAHn; B cIyuae NOBpeXJeHnKa6eJI, Heo6xOIMO 3aKa3aTb erO b ClyX6e No TexHueckomy O6cIyXnBaHnIO.
BbIbPOC BO3dYXA
HHBS 6.5F AM X - HHBS 9.5F AM X - HHF 6.4F AM X - HHF 6.4F AM K HHF 9.4F AM X - HHF 9.5F AM X - HHGC 9.4F AM X - HHGC 6.4F AM X
T1. BbIKJIOUaTeJIb OcBeueHnA ON/OFF.
T2. BbiknioateIb OFF/ckopoocb 1
T3. IpeeknHouateIb ckopocTn 2
T4. IpekeKIOHouateJIb CKOpOCTn 3
Moden C nyltom Soft Button + Ducnne LCD
HHBS 6.7F LL X - HHBS 9.7F LLI X - HHF 6.7F LL X


T1. Khonka BKI/BblKI motop BCaCbBaHn
T2. Khonka Bblbopa ckopoctn (Moohocn) BCacbIBaHna cpehdne, Bbcoko n HNTehCNBHO paobtI. PImmeaHne: CkOPOCTb (MoHOCtb) INHTeHCNBHO rBCacbIAHna (LED L1 MrraIOUy) dNITcR pNpIM3ntEhNo 5 mHyT, nocne yero 6ydet abTomATnCeCKn YCTaHOJIeHa CKOPoCTb (MoOHocT) cpeHrero BCacbIBaHna.
T3. Khonka Bb6opa ckopoctb (Mouchoctb) "BecyMHoro" BCaCbBaHna.
T4. Khonka BKN/BbIK OcBeueHne
L1. 3haok coctoHne ckopoCTn (MOUHOCTn) BCacbIbAHne
L2. 3haok coctoHne HndkaTopa HaebiueHnaJbtpa XnpoB
L3. 3NaOH COCTOHN ECKOPoCTN (MOHOCTN) Hn3KOr BCaCbIBaHn (6ecwymhoro)
L4. 3NaOc coCToHnue HndkaTopa HacbIeHnaФnIbTp aKTINBnPOBaHHoro yrr
L5. 3haOK coCToHne ocBeueHn
Reset INHdkaTOP hacbIeHnФINbTPOB
Iocne toro kak 6bIIO npObeHNO 06cIyXnBaHne fIbTa hXaTb Ha IINITeNbHO Bpem KONIKY T3, 3NaOHK YTO yKa3bIBaET HacBJeHne BIKIOuHTbcra. IOBTopNTb OepaMIO B cnyan BkNIOeHn OBeHX 3NaKOB, KOtOpble yKa3bIAHOt HacBJeHne fIbTPOB (XnPob n AKTNBnPoBaHnHO yrJI).
BkIIOUeHne 3NaHa NaCbIeHne FnIbTp aKTHBnPoBaHOro yTn
3HaouK HacbIeHnfaNtBpa aKnTbnpoBaHOrO yrJn, KaK npaBnIO, OTKIOueH. YoTo bBkIOuHTb erpoBectn cneIyUOme onepaun: PIn BbIKIOueHHO BbITRAKE Haxatb n DerXbTa HaxATOn Ha IINTeJIbHOE BpEM OAnOBpeMeHHO T1 n T3: L4 Chayana MIRaET, NOTOM BKIOuHTbCf KNCIPoBaHHbIM CBETOM Yka3bIBaPnON3OweDWee BKIOueHHe. OTKIOueHne 3HaQc FbIbTa aKnTbnpoBaHOrO yrJn: NOBTOpTb ORePAUHIO, ONICAHNYO BbIe, L4 BKIOuHTbCf KNCIPoBaHHbIM CBETOM, NOTOM MIRaET DO BbIKIOueHn iYka3bIBaET pON3OweDWee OTKIOueHHe.
AbTomatnuecka pa60ta npu BbICOKo TEMnepaType
BbIyKka OcHaSeHa CeHCOPM, YTO ONpeJenrTe TEMpeaTpy. EcIn OHa CTaHOBTbCnIiHKOM BbICOKO CEHCOP ABOTMaTHUeCKN BKIIIOHaeT CKOpOCTb (MOuHOCt) CpeHero BCacIBaHn. BbITXKA BblKnIOHTcK, KAK TOnbKO TEMpepaTpyoONpeJIeHHa CeHCOPM 3HaHTeINbHO ONyCTNTcR.
Moden C npbTom Soft Button + Delay OFF
RHHF 9.7F LB X - RHHBS 9.7F LB X - RHHGC 9.7F LB X
T1

T2
T3

T4
T1. Khonka BKJI/BblKIJ MOTOP BCaCbIbAHIN
T2. Khonka BbIbopa ckOpocTN (MoUHOCTN) pa6Oyero BCacbIBAHNn
PpmeaHne: CkOPOCTb (MOUHOCTB) INTHeCNBHOr BOcABCbIHAN (LED L3
MIRaHounn) dINITC pRbIIN3HTeJIbHO 5 MmHyT, nOcNe Yero 6ydet
ABOMATueckEn cYctAHOBHeHa CkOPOCTb (MOUHOCTB) cpeJHero BCacbIBAHN
(LED L2 BKIOUeH)
T3. KhoNka BKJI/BblKJI ocBeuHne
T4. Khonika abTomatnueckoro BbIKHoueHn:
PnimeaHne: Haxab Ta 3Ty KhONKY, YTO6bl yCTaHOBt b ABtomATnueckoe BbIKHoueHne NocLe:
Ckopoctb (MOUHOCTb) HN3KOrO BCaCbIBaHnR: 20 MNHyT
Ckopoctb (MOUHOCTb) cpeHero BCaCbIBaHnR: 15 MNHyT
Ckopoctb (MOUHOCTb) BcICoRr BCaCbIBaHnR: 10 MNHyT
Ckopoctb (MOUHOCTb) INTeHCNBHO BCaCbIBaHnR: 5 MNHyT
L1. LED CKOpocTb (MOUHOCTh) HN3KOrO BCaCbBaHn
L2. LED ckopocTb (MOUHOCTB) cpeDHeRo BCaCbIBaHnA
L3. LED ckopocTb (MoUHOCTb) BbICOKO BCaCbIbAHn
L4 LED CKOpocTb (MOUHOCtB) INHTeHCNBHO BCaCbIBaHH - BpeMeHHa (5 MmH.).
L5 LED hacbIeHnI nIbTPOB: MraUoIiN : npOBCTn o6cIyKINBaHne nIbTpa aKTNBipOBAHHoro yrIIa. BKIOueHbI : npOBCTn o6cIyKINBaHne nIbTPOB KINPOB.
L1+L2+L3 Mmraoune B onpeDenHno nocneObaTeNbHocTN: aBTOMaTnueckay pa6ota npn CnIuKOM BbICOKo TemnepaType (CMOTpn OTHOCNTeNbHn naparpaΦ)
Reset hacbuiuHne pfNbTpoB
Iocne npoBeHnO6cbNyKbAHnHnΦnIbTpoB HaxKaTb Ha nIITeJIbHOe BpeM KhoNky T1,LED L5 BbIKIOHTcR.
BkIouhene LED hacbIeHnA fNbTpoB aKtmbuPoBaHHoro yIJIaLED hacbIeHnA fNbTpoB aKtmbuPoBaHHoro yIJIa, Ka npabIno,OTkIoueh. UTo6bl BkIouHt b er npobectn cneDyUOme onepaun:
HHBS 9.5F AB X - HHBS 9.7F LBI X - HHBS 9.7F LB X HHBS 6.7F LB X - HHGC 9.7F LB X - HHGC 6.7F LB X
HHGC 6.5F AB X - HHF 9.7F LB X - HHF 6.7F LB X

T1
T2

L2

O O L4 L5

T3

T4
T1. Khonka BKJI/BblKI MOTOPE BCaCbBaHnI
T2. Khonka BbIbopa ckopocTN (moUHcTN) pa6Oyero BCaCbIbAHn
Ппмочи:СКОРOCТ(MOUHOCT)ИНTEHCINBHorO BCaCbIBAHЯ(LED L3 MINGAIOUI)ДПNTСРпИБИЗNTeHbHO5MHHT,NOCNE YERO 6ydet ABOTMATNUCHECKYCTAHOBJIeHAСКОРOCТ(MOUHOCTb)CpeDHERO BCaCbIBAHЯ (LED L2 BKNIOUeH)
T3. Khonka BKJI/BbIKOcBeueHne
T4. Khonka Bb6opa ckopocTN (MoHOCTN) "6ecwMHORO" BCaCbBaHIN
L1. LED ckopoctb (Mouchoctb) cpeHero BCacbHaHHa
L2. LED ckopoctb (MoHoctb) BbICOKOr BCaCbIbAHn
L3 LED ckopoctb (MOUHOCTb) INHTEHCNBHO BCaCbIBAHn - BpeMeHHa (5MH).
L4 LED hacbIeHnФЛьТрOB:
Mnraioi: npoBectn 0cbIyXNBaHne pIbTPOB aKTHBnPOBaHOrO yTJI. BKNIOeHHbI: npoBectn 0cbIyXNBaHne pINbTPOB XIMPOB.
HHBS 6.7F LL X - RHHF 9.7F LB X - RHHBS 9.7F LB X - RHHGC 9.7F LB X - HHBS 9.7F LLI X - HHF 6.7F LL X - HHBS 9.7F LBI X - HHBS 9.7F LB X - HHBS 6.7F LB X - HHGC 9.7F LB X
HHGC 6.7F LB X - HHF 9.7F LB X - HHF 6.7F LB X
BbItjraKka O6OpyOboBaHa OcBeuIeHnEM Ha CBeToDIOaX LED.
CbeTOnoDbI o6ceNueBaHOT ONTMaIbHoe OcBeJeHne, IN cPOK cnYk6bI B 10
pa3 npebblaaet cpoK pa60TbI TpaDnHbIX lammoey, n IO3BOJIAOT
3KOHOMHTb 90% 3NeKtpo3Heprnn
Дязамени CBETODIOOB Obaaatabca B cnykbyTexnueckoro 06cnykBaHna.
YTNIN3AUIN
UcpoCTBO pa3pa6oTaHO, nCbTaHO uN3rOToBHeHO B COOTBeTCTBn C:
- Bezonaachoctb: EN/IEC 60335-1; EN/IEC 60335-2-31, EN/IEC 62233.
- 3KcIpyaTauHbIe XapakTepcntn: EN/IEC 61591; ISO 5167-1; ISO 5167-3; ISO 5168; EN/IEC 60704-1; EN/IEC 60704-2-13; EN/IEC 60704-3; ISO 3741; EN 50564; IEC 62301.
EMC:EN 55014-1; CISPR 14-1; EN 55014-2; CISPR 14-2; EN/IEC 61000-3-2; EN/IEC 61000-3-3. Празлочьни Крахьюсусусусусусусусусусусусусусусусусусусусусусусусусусусусусусусусусусусусусусусусусусусусусусусусусусусuн Крахьюсусусусусусусусусусусусусусусусусусусусусусусусусусусусусусусусусусусусусусусусусусусусусусусусu Спразлочьни Крахьюсоьюн Крахьюсоьюн Крахьюсоьюн Крахьюсоьюн Крахьюсоьюн Крахьюсоьюн Крахьюсоьюн Крахьюсоьюн Крахьюсоьюн Крахьюсоьюн К? K? K? K? K? K? K? K? K? K? K? K? K? K? K? K? K? K? K? K? K? K? K? K? K? K? K? K? K? K? K? K? K? K? K? K? K? K? K? K? K? K? K? K? K? K? K? K? K? K? K? K? K? K? K? K? K? K? K? K? K? K? K? K? K? K? K; K? K? K? K? K? K? K? K? K? K? K? K? K? K? K? K? K? K? K? K? K? K? K? K? K? K? K? K? K? K? K? K? K? K? K? K? K? K? K? K? K? K? K? K? K? K? K? K? K? K. K YeHIMNBAHTe COKOCTb TOLKBoB CnUyae BoJbIOWO KOnJIcHcTBA DbIMa N npapa, n PnIbEaJIte K N CNOJbIOBAHIN ONoBIeHHeHbIX COKOcTe TOLKBo B 3cTpeMAnbHbIX CnTuayaIrx. 3AmehJe TyolbHbI ΦIbTp(b), KOrda 3To Heo6XoMDMO, nДоПОдгЖАИЗ XopoWSe 3ФФeKTNUBOCTN UMeHbIeHIN 3aIaxOB. OuIaJIte JxIWOBiB/YФЛtp(b), KOrda 3To Heo6XoMDMO, nДоПОдгЖАИЗ XopoWSe 3ФФeKTNUBOCTN JxIWOBOrOФЛbTa. IcNoJIb3yIte MaKCIMaHbI bДиMAteTp CnCTeMbI Bo3dYxOBoDOb, Yka3aHHbI B DaHHom pyKOBoDcTBe, ДЯ ONTMMn3aIzni 3ФФeKTNUBOCTN MmHNIMn3aIzni yOBHnB UyMa.
AHOMAJINB PABOTE
EcnuTO-To He pa6oTaET DoJXHbIM Oba3OM,pePeT TEM KAK o6paTntBcA B CnyK6y no Texnueckomy 06CnyKmbAHIO,BblOInHte CneDyUOme Ipoctble npOBePK:
Ecnn BbTJkKa He pa60tae:
Поверпь:
- yTO 6bI He 6bIa npepBaHa nOdaHa Toka.
- yTo 6bl 6blna BblbpaHa ckopoctb.
- EcIN BbITaKka NIOxO pa6oTaET: PpOBepuTb:
- UTO BbIbpaHHa NcKOpOCTb DnIraTeJI DoCTaToUHa IJa BbIpa6oTaHHoro KOnHecTBA DbIMa I napa.
- YTO KXYH NOCTaTOUHO NPOBETpeHa DnT TORO, YTObI BbITJxKa MoJIa BblONHHT b36Op BO3dyxa.
- YTO yIOrNbHbI ΦnIbTp He OtpaB0TaH (BbITaJka BpeKIMe C peuRkpyIaIeuN Bo3Dyxa).
- EcIN BbITaKKa BbIKJIouHnIacb B XOe HOpMaIbHoI pa60TbI: PpOBepNTb:
- YTO He npepBaHa noDaHa Toka.
- YTO He cpa6oTal ODHNOHIOCHbI BbIKIOUOUI annapaT.
B clyuae Bo3moKbIbIX aHOMaJIIN B pa6Ote, npeI TEM KAK o6paTnTcBcRA Cnyk6y TeXHueCKOrO 6cLuyKbAHHaON OTKIIOnHTb OT 3eKTPoNtAHnA anPapAT MInHMym Ha 5 ckyHd, BbIHIMaBnIKy INOTOM IOdCoEHNITb erO cHOBA. EcNI aHOMaJIIN B pa6Ote npdoJIkaet cyIecCTBOBaT b6paTnTcBcBcYk6y TExo6cLyKbAHHa.
TEXHNUECKNE DAHHbIE
| Модаль | Выковая (cm) | ШирINA (cm) | Глубшиа (cm) | Ø Быковский Труselfь (cm) |
| HHBS6.5FAMX HHBS6.7FLLX HHBS6.7FLBX | 61,9 - 114 70,4 - 114 | 59,8 | 45 | 15-12,5-12 |
| HHBS9.5FAMX RHHBS9.7FLBX HHBS9.7FLLIX HHBS9.5FABX HHBS9.7FLBIX HHBS9.7FLBX | 61,9 - 114 70,4 - 114 | 89,8 | 45 | 15-12,5-12 |
| HHF6.4 FAMX HHF6.4 FAMK HHF6.7FLLX HHGC6.7FLBX HHGC6.5FABX HHF6.7FLBX HHGC6.4FAMX | 60 - 112,5 68,5 - 112,5 | 59,8 | 45 | 15-12,5-12 |
| HHF9.4FAMX HHF9.5FAMX RHHF9.7FLBX HHF9.7FLBX | 60 - 112,5 68,5 - 112,5 | 89,8 | 45 | 15-12,5-12 |
| RHHGC9.7FLBX HHGC9.7FLBX HHGC9.4FAMX | 62,3- 114,8 70,8 - 114,8 | 89,8 | 45 | 15-12,5-12 |
CMOTPN Tabnukx xapaKepcTmKn dny nonHoro norgoohn i norloeHne lambl.
HHBS 6.5F AM X, HHBS 9.5F AM X, HHF 6.4 F AM X, HHF 6.4 F AM K, HHF 9.4 F AM X, HHF 9.5 F AM X, HHBS 9.5F AB X, HHGC 6.5F AB X, HHGC 9.4F AM X, HHGC 6.4F AM X
HHBS 6.7F LL X - RHHF 9.7F LB X - RHHBS 9.7F LB X - HHBS 9.7F LLI X - HHF 6.7F LL X - HHBS 9.7F LBI X - HHBS 9.7F LB X - HHBS 6.7F LB X - HHGC 9.7F LB X
HHGC 6.7F LB X - HHF 9.7F LB X - HHF 6.7F LB X
BbTjraKka o6bpyoBaHa ocBeuHHeHnHa cBeToDnOaX LED.
Onepaui no quHHeHTo Ta o6cIyROByBaHHIO He NOBHHI npOBOuNTscA dItbMn 6e3 Hargny.
Примишни NOBHHO MaTN DoCTaTHIO BeHTnIaIIO KOJIIN BNTJXKa BNKOPNCTOBYETbCЯ OJHOuacHO 3 iHsIMNI pIncTpoMn IIO npaIooTb Ha ra3i a60 iHxN x naHBax. BNTJXKa NOBHHa 6yTu NcIeHa BCEpeDnHi Ta Na3OBHI (XOUYA5 ODNH PA3 HA MICaLb), DOTpIMyBaTnCra IHCTpyKci nO o6cIyROvBaHHIO npVBedeHnx B cIbOMy noci6nky. He dOtprImaHnH HOpM YIeHHN BNTJXKn Ta 3amHn i ChIeHHa φIbTpiv MoKe npVBecTIdo 3aRopAHn.
Cybopo 3aboponeho npirotoybaHHa HbIDKpntOMY BOrHi NiD BVITJXKOHO.
BukopinactnH BIDKpntoTO nOlym'm HaOnCtB 36ntok qIbtpam i Moke npIn3BcTeN Do 3aRopAnH, TOMy NToPi6HO yNkATu B6yDb YKOMy BUnaKy.
KapennoBnHNO npoBODITNCI nd Hargldom 06 yHnKHytn 0 pO3irpita oniia 3aropntbcra.
YBAG: Kony nobepxna Bapinna npaoc Docyni HactnH MoxyTb Harpibatncra.
ДязамилamnoчкOBcITJIeHньКОрсТОВуВATN TIlБКТПлamnoчКВka3aHmВpoZdiniOcClyrOByBaHn/3aMiHaJ lamnoчKU bToIoc6Hnka.
Ybara! He niiKIOUATn npICTpI Do eNEKTPuHoiCITKN Do Tnx nip, NOKn He 6ynde NOBHiCTHO 3akIHueHa yCTaHOBka.
IIO CTOCyETbCRA TexHInx MIP Ta MIP Be3neKu y BnKOpNCTaHHI IIO BiDnOHTbcr Do BnKnDiB napib, cyBopo DToTPmYBaTcR HOPM MiCueBnx KOMnTeHTHNX OprAHIB.
Повитра lo BТягуься, He NOВИнно BИнчытись Tpyбу ра ВИКОпСТОВУЕТССДЯ ВИКИДу ДИМIB пИСТРОМи lo npaцЮюТь Ha razi Ta iHux naiBax.
He BnKOpNCTOByBatn a6o 3aIiMaTn BITaRkKy 6e3 npabInbHO BcTaHOBHeHn JAMNOOK 3 pN3IKOM OTPmAtn yDap eJKeTpMHM TOKOM.
Hikon He BnKopncToBvBatu BtJkky 63 npabunbHO BCTaHOBneHO peWitK! Bntjka HIKOJI He nobHHa BnKopncToBvBatncr k onopna NobepxH, kUo TJIbKn He BkA3yctbCra.
BukopocToBvBaTn TbHnTn DnIaFicKcBaHnB Habopi 3 npOdykTom DnIyctahOBKn, kUeHmE B Habopi, npuD6bTu TbHnTn npabNbHoro Tnny.
BnKOpNCTOByBatn npaBnIbHy DOJbXmHy TBnHTIb Ika Bka3ayETbcra B noci6HNY no BCTAHOBJIeHHIO. Y BnAIDky CymHiBIB, KOHCyIbTyBaTnCBA B aBTOpN3ObaHOMy CEHTpi a60 3 KBaIIipikOBaHIM NepcoHaIOM.
YBAIa! He BCTaHOBIOBaHnB IBDIOBIDHN TBINTIB i npCTpoB i nla fikCyBaHHy bIbNOBIDHOCTi 3 cIMM INCTpyKJIMM MOKe npNBeCTn Do pImKIB eJeKTPuHoro
NOXODKeHHa.
Kyxohna BnTjkKa MoKe MaTH dN3aH, 10o BiDpI3HcTbcra BiD BnTjKKn 3O6paXeHHoi Ha MaJIHOHKax iCic IHCTpyKii aNe B IIObOMy BInaJky IHCTpyKii 3 MOHTaxy, TexHiYHOMy OcCnyroByBaHHa Ta ekCnIpyatai 3aIIuAioTc 6e3 3Min.
Yitko DotpmyBaTncn npBedeHnx B daHomy KepiBnUcTi bIhctpykui. Bbo6bHK 3Hima 3 ce6e BCaKy BiDnoiidaIbHic7b 3a HenoJaK, 36ntK a6o Noxap, 0o Moke Matn Mlcue pRn BnKOpNCtHaH nPbOpy BhaCniok HEbIKOHHH INCTpyKuJ, npBedeHnx B daHomy KepiBnUcTi. BnTjHKn KObnak CnpoeKTobAHn I DCMOKTuBaHH NmDu Ta npCy, 0o YtBopIOCTBCN iZac npriroTuBAHH iKi Ta nprihauen mIne dI no6yTOBOrO BnKOpNCtHaH..
! Baxnbo 36epertn ci ihctpykuii dIra toro, uO6 moKHa 6byo 3eBepHytncdo Hnx B IIO6h qac. Y BInaKn Ky npOdaKy, nepeaui cy npeei3dy, nepekoHATncB TOMy uO6 ihctpykuii 6byn pa3om 3 Bnpo6om.
!YBaXHo npOHTaTn IHCTpyKu: B HxN MiCTNbCBA XbXnBa IHOpMaJz3 BCTaHOBJIeHNH, BnKOpNCtAHN Ta 63neKn.
1 3a6bopoHeNo BnKoHbTaN eNeKtpuHi cN MexaHcHi 3MiHN y BnPo6i cN y BnBIDHX KAnIax.
!IepuHix npncTyntn Do MOHTaxy Bnpo6y nepebipe Tc Bci KOMnoHeHn HemaIoTB deeKtib Ta He e NsOkoJKeHmM. Y npOTnEHXomy BnpaKy 3BepTaTnca B Micce npoDaKy Ta 3ynHnHTn MOHTyaBaHHa Bnp6y.
BiDcTaHb HNKhBoi BiUcaCTnH BNTaKKn Do nOcyDu Ha KkyoHni PInTi MaC 6yTu He MeHue 50cm, y BnnaKny eJekTpnuHnx PInT, ta 65cm, y BnnaKny ra3OBx TA KOM6IHOBaHnx PInT.
Heo6xio npinmatn do ybarn BiDCTahi, kkuo Bka3yOToBcra B iHCTpyKuji 3 iHctanlaqii raoBOoi nHTn.
ENEKTPNUEHNEIIDCDAHNN
Hanpyra B eeneKtpomepeksi Mae BiJIOBIAdTu BkazAHm XapaKTePcTnKam Ha etNKeTci, JKA 3hAXoNDtBcR BcePeDNIH BNTXKKM. JIoo B KOMPiEeK TBXODntb BnKia ndiEChAHnB EeneKtpomepexy, To cIiD niiEChHaTI BNTXKx DO pO3eTKI, 10o BiIDNOBIAe ICHyOHm HOpMAM Ta 3hAXoNDtBcB DIOCTynHomy MlCi, 10o MoKHa BnKOHaTI NicJIr IHCTaJIqJI. JIoo J BNlKa He BXoNDtB KOMPiEeT (npame NiDiEHHN B eEneKtpomepexy), aOo pO3eTKa HE 3hAXoNDtCB R DOCTynHomy MCI, TAKOIX i nicJI r hCTaJIqI, To cIiD BMOTyBaTI HaneKHN DBOx-NoIOChH BnMKaH, JIIM 3a6e3neuTb NOBHe BiJKNIOUeHHN BiD MepeXi B yMOBax nepehanpyr III kateropii, B nobHI BiINOBIDHOcti 3 npabINAMn IHCTaJIqJI.
Ybara! nepeT TmK 3HOBy NiIKNHOnTN BnTjXkU yO eNeKTpOMepexi i nepeBipTN npabInbHicTB po6OTn, 3aBXdN KOHTpONHe TcO6 shyP MepeXi 6by 3MOHTOBAHIN BIPHO.
3amHa eIektpoka6eJia
Bntjxhnn KOBnak Mae cneiaJIbHnn npoBID kJINBHeHHa; y BnAnky nouKoDxHeHH npoBOy, 3amOBte Ioro y cny6i texHnHoro o6cnyroByaHH.
BNUIIOBITPRA
(Дя ВИКОнаня 3 BiDyOOM)ПiД'ЕнATи KOBnAк Do NaCTIHNoI BvBiHOnI Tpy6n Ta BvBiDHorO OTOBOPy 3 OndaKOBIM DiamETpOM BxOyI NOBITpR (3'EDHyOuN IФlaHeueb).
BukopncTahnHaCTIHnx BvBIDHx Tpy6 Ta OTbOpB 3 MeHsM DiAmetpom npBBeDo 3MeHsEHHe epeKTHBHOCTI BCMOKTyBaHHa Ta 3HaHe 36JIbWeHHa pIBH yMy.
Tomy Mn 3HimaMo 3 c6e Bc8ky BiNObiDaJIbHicTb NO BUNCEcka3aHomy.!. BInkopnctatn kOMORA KOPOTK NITJKNK H KaHAn.
! BnKOpNCTaTbBtJHmKaHaJI3 kOMORA hAmeHIO KINbKiCtIO NOBOPOTIB (MAKcImaIbHm KyT NOBOPOTy: 90^
YHnKaTn pi3KxN 3mH nNooJi nepepi3y BntJxHOrO KaHaNy.
IπiπpncmctBO 3Himae 3ce6b-yky BiNobiaJbnHicTb, kIIO diChi
3PEUKNPKYJLJIeIcIeOuN3BIDBODOM
! BaSHA BNTJXKA roTOBA Do BVKOpNCTaHnB B pexnMI BiDbOy.
ДЯ TOrO ⅢOБ bNKOpNCTOBYBATn BNTJXKBy B pexnMI peuRpyJIaIi
Heo6XiIDHO BCTAHOBtIN DODATKOBNI KOMJINEKT.
IpeeBiTe Ha nepuix CstopInkax DaHoro noci6hMa, YI BXOnITb
DOATKOBNI KOMJIKET y noctabky a60 IorO Heo6XiIDNo npI6aTn OKDEM.
Pnmuitka: KxuBxOuHb B NoCTaBky O6naDHaHnB, B DeKnx BnuAdkax, DoaTKOBm KOMnEKT ByIbHnx φInbTpIB MoKe BBe 6yTn BCTaHOBJIeHn Ha BVtJU.
Ihopmauiy 10o npeBeBENH BnTAAK3 pexmBy BiDBeEHN BpekmpeunpkyIaII BxE BXOINb y daHnn nociHK.

BnKoHaHHa 3 BIDBODOM
Iapn BIVBODTbcg H30BHi Ype3 BVBiHy Tpy6y 3akpiInHeHy Do fnaHcy 3'cDHaHH.
Iaimetp Bvibnoi Tpyb noBHe BIDNOBiaTn iAmetpy 3eDnhyBaIbHOro Kijbua.
Ybara! BvBiHa Tpy6a He noctaacbca i TOMy Heo6XiHIO ii npid6aTn Okpmo.
KIOBnKOBnK MaByiNbiHfIbTp,ToixTpe6a3HrTm.

BnKoHaHH 3 peunpkyIaicIO
Btrrhyte nobitpr 3HexnpiOeTbcTa ounuTybTa 3HOby NOBepTaetcbc B npmiueHH. Ira toro, uob BNkOpncTOByBatn KObnak y cboMy peKmI, Heo6xidHO BCTaHOBTN DoaATKOBY CNTeMy pfjIbTpIB 3 AKTNBOAHIM ByrillnM.
KOMAHДИ
Bntjka oIaHaHa naneHIO KOmaHd 3 KOHTpone m WbNIOKcTI BNTryBaHn Ta KOHTpone Cbitna dny OcBtIeHHa BapInbHOIO NOBepxHi.
MoJeni 3 mexanichuHm IyIbTom
HHBS 6.5F AM X - HHBS 9.5F AM X - HHF 6.4 F AM X - HHF 6.4 F AM K HHF 9.4 F AM X - HHF 9.5 F AM X - HHGC 9.4F AM X - HHGC 6.4F AM X
RHHF 9.7F LB X - RHHBS 9.7F LB X - RHHGC 9.7F LB X

T1. Khonka BKJI/BNKJ MOTOP BCMOKTYBaHHa
T2. Khonka Bn6bopy uBnKocti (notyXhOcti) pOboOTO BCMOKTyBaHHa 3ayBaXaeHNa: UBnKCTb (notyXhICTb) IHTeCNBHOro BCMOKTyBaHHa (LED L3 mHaOHu) TpBnAc npNl3HO 5 XbInH, nCJIra yOro 6yde ABtOMaTHHO BCTaHOBnEHa UBnKCTb (notyXhICTb) cepEnHbOro BCMOKTyBaHHa (LED L2 BKNIOUeHnI)
T3. Khonka BKJI/BNKI ocBtJIeHHa
T4.KhONka aBtOMaTHUHOro BnKlOueHHa:
PnIMtKa:HaNTCHyTN 10 KHOKNy 106 BCTAHOBHTN aBTOMaTHHe BnKlOueHHNcIe:
LbNDkICTb (notyXhICTb) BCMOKTYBaHHr H3bKO rO pIBHr:20 xBNiINH
LbNDkICTb (notyXhICTb) BCMOKTYBaHHr cepeHbO rO pIBHr:15 xBNiINH
LbNDkICTb (notyXhICTb) BCMOKTYBaHHr BnCOKOr pIBHr:10 xBNiINH
LbNDkICTb (notyXhICTb) BCMOKTYBaHHr iHTeHCNBHO rO pIBHr:5 xBNiINH
L1. LED wBnDkiCTb (notyKhiCtB) Hn3bKOro BCMOKtyBaHHa
L2. LED wBnDkictb (notyXHicTb) cepedhboRCMOKtYBaHHA
L3. LED wBndkicTB (notyXHcTB) BnCOKO BCMOKtYBaHHa
L4 LED uBnKicTb (noTyXHicTb) iHTeHCNBHO BCMOKtYBaHHa - yacoba (5xbn.).
L5 LED hacuehn haipbip: Mrauch: npoBcTn ocbnyroByaHna fipbpi akTuBOBaHO ByrIJI. BKIOUeHm: npoBcTn ocbnyroByaHna fipbpi Kpivib.
L1+L2+L3 mraoyn B nociobHOcti: abTOMaTHyHa po6Ota npu Bn3HaueHHI HADTO BnCOKo TEMnepatypn (DnBnc BiNObiHn naparpaΦ)
Reset hacnueHHaipbtpB
Iicn npoBeeHn oBcnyroByBaHn fInbTpiv HATNCHTn Ha DOBm Yac KhoNk T1,LED L5 BIKJIIOUHTbcra.
BknHouenHaLED hauuHnHn pInbtpiB aKTHBOaHO ByrInnLEDAHcHHeHHn pInbtpiB aKTHBOaHOByrInnRAk npAINIO BKnHoueHH.106 BKnOHTnI noPOBeCTn HactynHii:
Пи ВИКЛЮЧЕН BИТЯKKI HATИСЧУТИ TIPМАТИ HATИСЧУТIMИ HA NPOТЯЗIOBOWORO YACY OДИОЧАСН T1 I T4: CNOTIM BKЛHOUHTbCRA TAKOK L2 BKA3YUH NPOBEDEHE BKNIOHQUH.N.
BnKIOUeHn LED HacuHHe nIbtpy akTbBOaHO rByrIINa: NOBtOpTN ONEpaIIO ONICAHY BnIe, cNoaTky MIRaOTb L1 i L2 ni3HIe IInIe L1 Bka3yOHN pOBeDE He BnKIOUeHH.
A B T O M A T N U H a p o b o t a n p r n H a m i p h O B C O K I T E M P e p a t y p i
BnTjXka Hndineha ceHCOP Bn3HaueHnra TempeaTpyn. KoN BOHa noUHaac 6yTN HAdmipHO BnCOKOHO CEHCOP aBTOMaTHNO BKNIOuAc epeDIO uBnDKiCTb (notyHKiCTb) BCMOKTyBaHHn. BnTjXka BnKlIOuHTbcra k TijbKn Bu3HaueHa ceHCOPo TMepaTaPnnoH3ntbca.
Mogeni 3 nyltom Soft Button + Silent Speed
HHBS 9.5F AB X - HHBS 9.7F LBI X - HHBS 9.7F LB X
HHBS 6.7F LB X - HHGC 9.7F LB X - HHGC 6.7F LB X
HHGC 6.5F AB X - HHF 9.7F LB X - HHF 6.7F LB X

T1

T2


T3
T4
T1. Khonka BKJI/BNKJ MOTOP BCMOKTYBaHHa
T2. Khonka Bn6bopy wBnKocTi (notyXhOcTi) po6oOro BCMOKTyBaHnPrnIMtKa: 1wBnKicTB (notyXhCtB) iHTeHCMHOrO BCMOKTyBaHn (LED L3MnAHOuN) TpBnE np6mI3Ho 5 XbUInH, nCnIa 0rO 6yDe aBTOMaTHUOyCTaHOBHeHa 1wBnKicTB (notyXhCtB) cepEnHbOro BCMOKTyBaHn (LED L2BKlNoHneH)
T3. Khonka BKΠ/BNKΩ ocbitneHHa
T4. Khonka Bn60py 乌Kocti (noTyXHocTi) "6e3yMHO" BCMOKTyBaHHA
L1. LED wBnDkicTb (notyXHcTb) cepEnbIoro BCMOKtYBaHHa
L2. LED トBnDkictb (notyXhictb) BnCOKOro BCMOKtBuHaH
L3 LED uBnKicTB (notyHicTB) iHTeHCNBHOro BcMOkTyBaHHa - yacoba (5XBNI.).
L4 LED hacuehn qinbtpib: Mraouh: npoBectn o6cnyrobyBaHHa qInbtpib AKTINBOBAHO Byrnil. BKIOUeHm: npoBectn o6cnyrobyBaHH aInbtpib Xpipib.
L5 LED wBnDkiCTb (notyXHICTb) Hn3bKOro BCMOKTyBaHn (6e3wymHoro)
L1+L2+L3 mrauohn B noclioBnocti: abTomatnuHa po6oTa npn Bu3naeHHi HndTo Bncokoi Tempeatypn (DINBCb BiDnOBiDn naparpa)
BkIIOUeHnLE HacuHnHnФinbtpy akTINBOBaHOrO ByrInn
LED hacuHnH pIbTpiB akTBOBaHOro ByrJIJa kP npAByIO BkHIOeHn. 106 BKIOHTn Ioro npOBeCTn Hactyni Dii:
Пи ВИКЛЮЧЕHи BИТЯЖUи I TrPIMATи HИСЧУТМи И npOTЯЗI IOBШОу Yacy OДИОЧАСН T1 i T4: CNoYaTky MIne L1 NOTIM BKЛHOHTbCЯ TAKOЖ L2 BKA3Iучи nPoBeDEHe BVIJOUHENH.
BnKIOUeHn LED hacuHHe nIbtpy akTbBOaHO rByrInn: nobTOPn Onpauio Onncany BnIe, cNoaTKy MrraOt b L1 i L2 ni3HIe IINe L1 Bkaayn npoBeHe BnKIOUeHH.
AbTomatuHa pO6To npn haMipHo BvCoki Tempepatypi
Bntjxka hainieha ceHCOP Bn3hauhenH TempeaTpyn. KoJn BOHa nouHae 6ytn HaidmipHO BnCOKO CEHCOP aBTOMaTHNO BKIOHAc epeDIO WBNKICtB (notyHKtB) BCMOKTyBaHH. Bntjxka BnKIOHTbcsr K TINbKN Bu3hauhe Ha ceHCOPo TMepaTpaNoHN3NTbCra.
TEXHlYHE O6CJyTOBvBAHHr
UH
Дя чstки ВИКОПICTOBУТЕ ЛшЕ Cпeцajьну Серетку, Намочни Heɪтравлим рддим миocуз 3acobom. HE BИКОПICTOBУТЕ 3ACOBIB ABO IHCTPMERTIB ДЯ OЧиЕHH!
He BnKOpNCtOByIe 3ac06n IIO MaIOMb a6pa3nBHi MaTepiAIn. HE BnKOpNCtOByIe CnIPT!
IepmEpnuHa paHeJIb BCMOKTyBaHHa
YnCTNTI 3OBHIHIO napeJI BCMOKTYBAHHI 3 OINHAKOBOO YacTOIOI 0o i JxipOBNI pInbTp, BnKOpNCTOBYBatN Ipy CboR O cepBeTKy Ta He KOHcHTPobAHm MHOHm 3aic6. HikOnn He BnKOpNCTOBYBatn a6pa3NBHi peOBOHN.
06cnyroByBaHHJxHnOpBnxΦiNbtpiB
3aTpmye KnpoBi cnoJyueHH, 0o BnHkaHb npnrOtyBaHH iKi.
Повинен чьтпся одн ра B Міць (аоб кол сстем iндакaii nepenOBHHeNФиьтрib,якpo Eу вайш моdeni,вka3ye Ha dany Heo6xDiHicTB), 3 ВИКорисаннem海报свнix MнOчox 3ac06iB bpyHy ab O nobCydomuoyi MaunHi pri n Hn3bki TempepaTypi i KOPOTKOMU zukni.
PnMNTI B NocydomnOHi MaunH MoKe MaTn MicCe DeKe 3He6apBHeHnHa fInbTp,npote Ioro fInbTpuyoi XapaKTePncTkn 3aImuAOTbcS He3MiHNHMn.
BukopocobyTeIaIbOToIIneIraIoreHnIaMnHa12V-20W MaKc-G4, HeDtOpKyUOnCbDoHnxpykAmn.
- 3aKpIte pIafoh (kpIInHeHH 3acyBkoHO).

HHBS 6.7F LL X - RHHF 9.7F LB X - RHHBS 9.7F LB X - HHBS 9.7F LLI X - HHF 6.7F LL X - HHBS 9.7F LBI X - HHBS 9.7F LB X - HHBS 6.7F LB X - HHGC 9.7F LB X
HHGC 6.7F LB X - HHF 9.7F LB X - HHF 6.7F LB X
BnTjKa 6bIaHaHa CNTeMO OCBiTeHnHa H OCHoBI TexHOJIOTI iOIOIB (LED). IODIN3a6e3neuyToB ONTMaNbHe OCBiTeHnH, TpBAnICTb IX B 10 pa3 Bnua bID 3BnuaHnX lamNoOHK Ta daIoTB 90% ekOHOMI eEnkTpoEHepri.
Iooio ix 3amHn 3BeptaTece do cny6b texHnHoro o6cnyroBaHHa.
YTNJI3AUJIA
DanBn Bnip6 npomapKOBaHn BiIDNoIHO do CbponecBkoI DnpeKTnBn 2012/19/EC, ytniia3uaJI eJeKTPuHOrO i eJeKTPoHOrO obnadHaHn (WEEE). 3aBe3neUyOn bIpy Hytinla3uo IbOro BnOpoBy, Bn OdoMoJxote nonepaTn noTeHunH HeratunHi hAcniqk nJa oToHyOHorO cepeBOnuia i 3dOpob' JIOHNH, KOTpi MOrN 6 MaTH MiCue B nPoTIneXKHOmy BnnaDky.

Cnmbon Ha camomy Bnpo6i a6o Ha cynpobodkyohmy Ioro dokymenti Bka3ye, 0 np npyntiaaui b0ro Bnpo6y 3 Hm He moxha nobodntncr k3 3bnuahnnn nooytoBnmi BIDxoDAMn. BIn Mae 3dabatncr y BiNobHnnyHKT npniomy eneKTPnHOrO i eEeKPTPOHORO oIaNpaHnHn DnnaNoaIbwoi ytniiaaui. 3DaabHHa 3nam NobHHNO BKNOHBYATNCr 3IHO 3MicceBnM npabnAmn no ytniiaaui BiXODJ. Dnna 6bnwe Detanbhoi IHOpmaui np npabnna NOBDXKeHHa TAKMN Bnpo6amn, ix ytniiaaui i nepepob6kn 3eptaiTeCB B Miccbei oprahn BnAa, B cnky6no ytniiaaui BIXxoDIB, a6o B mara3HH, B kamy Bu npnd6an daHH Bpi6.
Ppnilad cnpoeKTOBaHO, BnIPO6yBaHO i BnroTOBNeHO 3riHNO 3:
- Bezneka: EN/IEC 60335-1; EN/IEC 60335-2-31, EN/IEC 62233.
- Eκυπηγαταιδιν κούστι: EN/IEC 61591; ISO 5167-1; ISO 5167-3; ISO 5168; EN/IEC 60704-1; EN/IEC 60704-2-13; EN/IEC 60704-3; ISO 3741; EN 50564; IEC 62301.
EMC: EN 55014-1; CISPR 14-1; EN 55014-2; CISPR 14-2; EN/IEC 61000-3-2; EN/IEC 61000-3-3. Nopadn nprabinbhoj ekcnnyatau t na d3nHexnna BnInbhy na cepedobuince: Bmkaite BntTakky ha mihimalbny uBndkictb nepeD noaytKom npriotybaHH iki, i zanlmae ii npaoubatn Ha deeklnbka xBNHIN nic3aikHeHH npriotybaHH. 36Ibwyte uBndkictb tInbky paai BeNkoi KInbKOti DMy i napy ta BnKOpNCtBuHTe NaDyB tInbky y kpaHix BnAqdax. DnpiTpMaHH BnCOKOi eFeKTNBHOCT BnDAleHH 3anaxi, 3a Heo6xDiHOCTi, BnOKHyTe a3miHy ByirblHoRO(-ix) pifbtpy(-ib). DnpiNidTpMaHH BnCOKOi eFeKTNBHOCTi pifbtpyXkpB, 3a Heo6xDiHOCTi, BnOKHyTe YnCTKy pifbtpy(-ib) XkpB. BnKOpNCtBuHTe MaksmaHbNH diametp CnCTEm NoBITPOBID, zo Bkazahnn y IHcTpyuii dno ONImi3auii eFeKTNBHOCT ta MIHIMi3auii wymy.
350I Y ΦYHKLIOHYBAHHI
Kiio 0oB He npaHoe HaneXHM YINOM, nepeTUM K3bepHyTCB Cnyk6y no TexniHOMy 0cbnyroByBaHHO, BOKohTe HactynH Ipocti nepeBipKn:
-ЯкsoВNTЯЖКа He npaцоe:
nepebipnT:
- Yu He 6yIoo nepepBaHO nOaCy CTpyM.
- YuNo 6bpaNo 6yNb-jKy uBvNdkicTb.
- RaKIO BNTRAKKa IOraHO npaHc: nepeBipTuN:
- Yu onba nBvNkicTb DnryHa DoCTaTHy dIy Bnpo6HeoKiNbKocTi duMy i napi.
-у КУХЯ Достатуль повитрена Дд.TORO,цБ ВИТЯЖКМоглаВИКОHAн 3a6ip NOBITРЯ. - Cn ByilbHnΦiIbTp He BiJnpaucBoAHn (BNTXKA B pexm3peuPKyIaIeIO nobITp).
- RaKIO BNTRAKKA BUMKHynacB XoDi HOpMaIbHOi pO6OTn: nepeBipNTn:
- Yu He 6yIIO nepepbAHO NOaHy CTpyM.
- Yu He cnpaioBab OndHOpOJIocHm BmMkaay anapaTy.
Ypasi moxknBnX 360iB y poboti, nepe TmK 3BepHyTnc DO cnyk6b texHIOO bcnyroByaHHN BIDKIOUHTN BID eIeKToPoxNBHeHHA anapat MIHIMy HA 5cekyND, BmMaOH N BuIKy i Notim 3HOBy NiD'EdHATN NoRo. Kaio anHomaiB poboti npodBky ichyBatn 3BepHyTnc B cnyk6by texo6cnyroByaHHN.
TEXHIYI DAHI
| Модаль | Висota (cm) | ШирINA (cm) | Глибиña (cm) | Ø Вивідноі TrруБи (cm) |
| HHBS6.5FAMX HHBS6.7FLLX HHBS6.7FLBX | 61,9 - 114 70,4 - 114 | 59,8 | 45 | 15-12,5-12 |
| HHBS9.5FAMX RHHBS9.7FLBX HHBS9.7FLLIX HHBS9.5FABX HHBS9.7FLBIX HHBS9.7FLBX | 61,9 - 114 70,4 - 114 | 89,8 | 45 | 15-12,5-12 |
| HHF6.4 FAMX HHF6.4 FAMK HHF6.7FLLX HHGC6.7FLBX HHGC6.5FABX HHF6.7FLBX HHGC6.4FAMX | 60 - 112,5 68,5 - 112,5 | 59,8 | 45 | 15-12,5-12 |
| HHF9.4FAMX HHF9.5FAMX RHHF9.7FLBX HHF9.7FLBX | 60 - 112,5 68,5 - 112,5 | 89,8 | 45 | 15-12,5-12 |
| RHHGC9.7FLBX HHGC9.7FLBX HHGC9.4FAMX | 62,3- 114,8 70,8 - 114,8 | 89,8 | 45 | 15-12,5-12 |
ДиВись tabичу xapaKTePcTnKI ДЯ NOBHorO noRINHaHHa T a noRINHaHHaJIamm.
HHBS 6.5F AM X, HHBS 9.5F AM X, HHF 6.4 F AM X, HHF 6.4 F AM K,HHF 9.4 F AM X,HHF 9.5 F AM X, HHBS 9.5F AB X, HHGC 6.5F AB X, HHGC 9.4F AM X, HHGC 6.4F AM X
HHBS 6.7F LL X - RHHF 9.7F LB X - RHHBS 9.7F LB X - RHHG C 9.7F LB X - HHBS 9.7F LLI X - HHF 6.7F LL X - HHBS 9.7F LBI X - HHBS 9.7F LB X - HHBS 6.7F LB X - HHGC 9.7F LB X
HHGC 6.7F LB X - HHF 9.7F LB X - HHF 6.7F LB X
Bntjka oIaHa hA cIeMOO ocBIIeHnHa oCHOBI texHOJIOTI iOIOB (LED). 0do ix 3amHN 3eptaTecra Do cnKbN texHnHO 6cnyroBaHn.


KOMPNeKTyOuI, He BXoJrTb y KOMPNeKT Detanei do Bnpo6y
VŠEOBECNÁ BEZPEČNOSTNÍ OPATřENÍ
HHBS 6.5F AM X - HHBS 9.5F AM X - HHF 6.4 F AM X - HHF 6.4 F AM K HHF 9.4 F AM X - HHF 9.5 F AM X - HHGC 9.4F AM X - HHGC 6.4F AM X

Modely s ovladaci Soft Button + Delay OFF
RHHF 9.7F LB X - RHHBS 9.7F LB X - RHHGC 9.7F LB X

HHBS 9.5F AB X - HHBS 9.7F LBI X - HHBS 9.7F LB X HHBS 6.7F LB X - HHGC 9.7F LB X HHGC 6.7F LB X HHGC 6.5F AB X - HHE 9.7F LB X - HHE 6.7F LB X


T1
T2
T3
T4
HHBS 6.7F LL X - RHHF 9.7F LB X - RHHBS 9.7F LB X - RHHGC 9.7F LB X - HHBS 9.7F LLI X - HHF 6.7F LL X - HHBS 9.7F LBI X - HHBS 9.7F LB X -
HHBS 6.7F LB X - HHGC 9.7F LB X
HHGC 6.7F LB X - HHF 9.7F LB X - HHF 6.7F LB X
HHBS 6.7F LL X - RHHF 9.7F LB X - RHHBS 9.7F LB X - RHHG C 9.7F LB X - HHBS 9.7F LLI X - HHF 6.7F LL X - HHBS 9.7F LBI X - HHBS 9.7F LB X - HHBS 6.7F LB X - HHGC 9.7F LB X
HHGC 6.7F LB X - HHF 9.7F LB X - HHF 6.7F LB X
Digesto' je vybavena osvetlovacim systemem zalozenym na technologii DIOD.
Modely's mechanickym tlacidlovym panelom
HHBS 6.5F AM X - HHBS 9.5F AM X - HHF 6.4 F AM X - HHF 6.4 F AM K HHF 9.4 F AM X - HHF 9.5 F AM X - HHGC 9.4F AM X - HHGC 6.4F AM X

T1. Vypinač svetla ON/OFF.
T2. Vypinač svetla OFF/rychlost 1
T3. Volba rychlosti 2
T4. Volba rychlosti 3
Modely s tlacidlovym panelom Soft Button + Displej LCD
HHBS 6.7F LL X - HHBS 9.7F LLI X - HHF 6.7F LL X

RHHF 9.7F LB X - RHHBS 9.7F LB X - RHHGC 9.7F LB X

HHBS 9.5F AB X - HHBS 9.7F LBI X - HHBS 9.7F LB X
HHBS 6.7F LB X - HHGC 9.7F LB X - HHGC 6.7F LB X
HHGC 6.5F AB X - HHF 9.7F LB X - HHF 6.7F LB X
T1

T2


T3

T4
T1. Tlacidlo ON/OFF motora odsávania
T2. Tlačidlo vol'by preváždkovej rychlosti (vykonu) odśavania
Poznamka: Intenzívna rychlost (vykon) odsávania (LED L3 bliká) má tvanie asi 5 minút, potom sa automaticky nastávi na stredné rychlost (vykon) odsávania (LED L2 svieti)
T3. Tlacidlo ON/OFF osvetlenia
T4. Tlacidlo volby "tichej" rychlosti (vykonu) odsavania
HHBS 6.7F LL X - RHHF 9.7F LB X - RHHBS 9.7F LB X - HHBS 9.7F LLI X - HHF 6.7F LL X - HHBS 9.7F LBI X - HHBS 9.7F LB X - HHBS 6.7F LB X - HHGC 9.7F LB X
HHGC 6.7F LB X - HHF 9.7F LB X - HHF 6.7F LB X
Odsávač pary je vybavený systémom osvetlenia založenom na technologoğii LED.
Kontrolky LED zarucuju optimáne osvetlenie, trvanie až 10 krát dhlhsie ako tradicné ziarovsky a umoznju usetrit' 90% elektricnej energia.
Pre vymenu, obrat'sa na technicky servis.
LIKVIDÁCIA
HHBS 6.7F LL X - RHHF 9.7F LB X - RHHBS 9.7F LB X - HHBS 9.7F LLI X - HHF 6.7F LL X - HHBS 9.7F LBI X - HHBS 9.7F LB X - HHBS 6.7F LB X - HHGC 9.7F LB X
HHGC 6.7F LB X - HHF 9.7F LB X - HHF 6.7F LB X
Odsávač pary je vybavený systémom osvetlenia založenom na technologoğii LED.
Pre yvmenu, obrit sa na technicky servis.

TEXHnKaJIbIK Kbl3MeT KepcTeY
HvckaynapbHa cMKeC Ky3ere acbipy KepeK.
Ocbi naIdaIaNHybI HyCKayIbIfbIHda copfbln nen cy3rIepdi Ta3aIayfa KaTbICTbl 6epijreH HyCKayIapDbI opbIHdaMay opt Kaynihe eKen coFaDbI.
TamaKtbl TikeJeN COPfblu aCTbIHda XaHDbipyfa KaTaH, TblbIM CaJIbHaDbI.
Ausbik kajalbHdbi naJdaJahy cy3riep yuH 3nH xHe ept KayniH TybIHdATyb MyMKiH, COHdbIKTaH OFaH eWkaJaan Jokl 6epMey Kepek.
MaHbIH 7aMaHaH TbIC KbI3bH HeMece XaHbIN KeTneyIH KaMTaMaCbI3 eTy yWIn, TamaKtB I abaiJAN Kybpy Kaxket.
CAK BOJIbIHbI3: CopfbluTbIH KOJIkeTImdi 6eJIkTepi TaMaK daBbIHday KpyblnFbInapbl naDanaHaBlnFaH Ke3De KbI3bIN KeTyi MymkiH.
UamdbaybcIpyyuihTeKocblHyckaybIKbIH《TexHnKaNbIK Kbi3Met Kepcety/UamapdbaybcIpy》6eimihde KepceTinreH 1wamTypiHaanDaHaBhl3.
ECKEPTY! Ophaty ToJIbIK aAaTaNMaBbIHHa KypblfblHbI 3JeKTP JeNiciHe KocnaHbI3.
Будын 曲ыгына Kapсы Колданыпатын Textнкалык xэн Kayincizik shapanapbyн eckepe OTbypin, Jepriikti bniK opranaDapbyбekitken epexeleperdi MyknyT opbyHday MaHy3bl.
Ocbl KpyblfblHbTytik apkblbl 6afttay kynecih ra3 hemece 6acka otblblj kafatbln Kpyblfblnapan sblkhan 6ynapbl 6bIrpaby cnKbbl 6aca da MaKcaTAPda naJaIaNbIbTaht Ke3 keIReh KondaHbCTafl JeNdety kynecHe KaJFay kaxet. 3neKtp Torblblcofry KayIIne 6aJIaNbHctbl 7MaBldy dpybc 6ekITImereh copfbltbl naJaIaNbHaB3 xHe KaNbpMaHb3.
Topnapi Tnicti Typde 6ekitimeren copfbltbeuKaah naaanaHa6aHbI3.
AphaikepcetimmeHwe, copfbluTbEUKAAJAH tipeK 6eipetinnde naiaanah6aHbI3.
Tek opnaty yuishen eHimmen biPRE bepiRhen 6eKITy 6paHaIapbHn naIaHaHbIHb3, erep 6epiImce, 6paHaHaBIn TnicTI typH catbIn aJIbHbI3.
BypaHdapanapdbiOpHaTy HcyaybIfbIHda KepcetinreH dypbic 3bHdbfbiH naJaanaHbIbI3.
KymehdahcaHb3, eKiIeTTi Kbl3MeT KepcTe 6oBbHua XepDem KepcTeOpTaJIbFbHa Hemece Tnicti MAmaHdaHFaH TylFaFa xa6apnaCbHb3.
ECKEPTY! BypaHdnapdbI Hemece 6eKiTy Kpyblfbcih OcbIHyckaynapfa caikec opHaTnay 3neKtpniik KayinTepre eKeenyiMymkiH.
KaKnak ocbi kitanwada Kepcetinreh cypTepeH e3rewe 6onbln KepiHy i MyMkn. DereHMeH, KondaHy, texHkAnbIK KbImET KepCety XHe opHaTy HcyKaynapbl 6ipdeB6oNaBl.
DaihDayb acnantb naananybapbcihda 6yn Hcykaa 6eineHren KOndany hapTtapbIn caKtamaFaHHbH KecipiHekonfAH ONkblbIK ept ne3akbIM yuih kayan 6epMei. Copfbiu TeK KaHa Yne naananaHaf Bonahtdai etin xobanaHaf.
! Ke3keJrH yaKbTTa 6yH NyckayMeH naIaIaNHy wIH aKtaFaH MaHbI3bl. BybIM catbJfAH, TancbIPFAH Hemece KoBjIFAH Ke3de OI OHbIMeH bipre KaJfAHaHa Ke3 KeTki3iH3.
! HUCKaydbI MyKnT OKbHb3: OHda 6yMaMdbI KOHNbIpy, naaJanaHy XeHe Kaybinci3dIK XeHiHDe MaHb3dbI MJIIMET 6ap.
! ByiIMhIH 3NeKTPoHdbIK HeMece MexaHkaJIbIK KOHCTpyKUINcBHaHda HEmece Copfbl W BHTINJcHJIbIK KaHaIapbIHda eWkaHdai da e3repicTej KacaMaHbI3.
! OpHaTydbI opbIHdAmac 6ypbH 6epiInreH 6apNbIK KypamdaTapdbIH 3aKbIMdaMfArBaHbIH TeKcepiH3 HemeCe opHaTydbIXaNfactbIpMac 6ypbH DeIDanra xaBapnacbHbI3.
CopfbltbH ToMeHri Kblpbi MeH bDlc acTbIHdArbl Tipeiyu Xa3bIKtBflHbH apa KaIbIKtblbl 3neKtp PnITacbl yuiH 50cm, an ra3 Hemece 6ipiktipinre nnTanapyuiH 65cm DeH KEM 6oJmaybl Tnic.
Erep Hcyka da ra3 nIITacbIH opHaTyf apTbIFbIPAkapa KaUbIKTBK 6beJIreHReh Bonca, OHb eckepii3.
3NEKTPBAIJIAHbICbl
KeiHKepeHyacnTbH iHde Ophalackan TaKaIwada
BeJIrHeHReh TexHkAblk DepeKTepe Kepeyre cKeke KEnyi
Kepe. Erep copbB BuIKaMeH XabkTaIaHa 6oJCa,
OpHaTbIraHHa KeIH de icteyre bOaTbIH, KOJ XeTePNIk Xepde
6oNybl Tnic, icten TypFa H epexeNepre Cek anMaJIb-CanMaJIb
WtencBle copbIbTb KocBhl3. Erep copbB BuIKaMeH
XabkItaHaMAFaH BOnca (KeIire Typa Kocblny), HeMece anMaJIb-
CaMaJIb WtencCeb opHaTbIraHHa KeIH De KOJ XeTePNIk
Xepde BOnMaCA, OHJa opHAty HcKayblHa cAkec 3-dapeXeJeri
ACKH KepeHydi BoIdbipMaITbH XHe JxJIiH TOblk aBlbYbH
KAMTaMaCCb3 eTeTIH Tnici EkinONIOCTK axbIpAaTbIbTb
naIdaNaHbHb3.
ECKEPTY! Kopek Jeicine CopfbltBn 3JIeKtpJik JyueciH Kocy aIbIHda Kopek KaBeJI dypbc MOHTaXdAnFaHbHa Ke3 KeTki3iH3.
KyaT Ka6eniH aybIcTbipy
CybypKaIaFbI apHaiIbI Hep 6epywi CbIMxenImeH Ja6bIbIKtanFaH. CbIMxeni 63bIyHaF JxafdaJia OHbI aybcIbpy ywIH Tnicti Kbl3MeKepcety opTaIbIKTapbHa 6apbIH3.
AYA TAPTY CAHbIJIAYbl
(copy hyckanapbI yuiH)
Copfbltki Ka6biprafaBc copfblk Ky6bipnapbi Meh aya blfapatbH TecikTepei, coI dAmetpreri TecikTrepre KocbHb3 (bipiktpuyi pfnaheu). Ka6biprafaBc copfblk Ky6bipnapbi Meh KEmdey dAmetpreri TecikTi naaDanany, copy KyaTBn HaapnTaBn, rypinDeiy H KyweeTei.
Kaketti MMHImaIbI y3bIhIbIKTaftby TykTI KOnDaHbIbI3.
!BapbHwaKenniniMi6apTytikTI KOJdaHbIHbI3 (NIIMHHMAKcMmaJIbI 6ypbUbI:90°).
TytiktnKeIeHeN KImacbIHnA Ty6ereiNe3repictepi 60nlbpMaHbI3.
! Byn epexenep opbHdAmFaH JxafdaJa KOMTaHnaeW6ip XayanKepeiNikTi KeTepeMeDi.
CY3ΓIJEY HEMECE TYTIK APKbIJbI BAFbITTAY?
! New KaKnaFbI copy HcyckacbHa da naJaIaNyHa da bH.
KaKNaKTb cy3rinye fynKUncBcI 6ap Hcycka naaJanaH yuiH apHaBcI CAAHADAP XnHAfbl opHaTbIybl Tnic.
Ocby HcyaybIbTH 6ipHni 6betepiHne CAIMAHJAP XNHAFBiHBHJI XaBbIKTaHaHbIFH Hemece Xeke catbn any KaekettirH TeKcepH3.
Eckenptne: Ka6biktanfah 6oIca, KaKnaKaKa Kei6ip KaFdaIa KocBIMla 6bcNepinreH Kemip cy3riney Kyuecih Ophaty KaXET 60JIby MyMkiH.
KaKnakTbI copy HcCKacbHaHc cyiriney HcCKacbHa aybictby typaBt bKnapat ocbl HcyckaylbkTa 6epinreH.

Tyrik apkblbl 6aftlay Hycacbl
By cbytka biipiktipuyi pfnaheueke kocbInfah copfbu Ky6blip apkblnb wlrapblnadbl.
Copfbl Ky6bipdbH dnaMeTp i 6ipiktipuyi caKHaHbIH dnaMeTpimEn TeHdec 60ny Kepek.
Ha3ap aydpbIbI3! CopfblI K6bIbpbl copfblI XINHaKTamacbIme HKeTkiJIMeiDi, OHI bEneK caTbn any Kepek.

Cy3ri HycKacbi
On yuih bip kemip cyrici kaxet, OHbl eDetteri catyubnapan AH anyf a 60labl. Cy3ri ubrapunfaah ayahbXOFAPBb Ubbfc TOpbl apkblb6Jlmere KaTata Xibepy andbda OHb MaH MeH nictepen TaapraDbI.
BACKAPY 3JEMEHTTEPI
CybypJxenTkiuHInXbIaMdbfbHb6akblayYuHJXeNITaHbHytteKapbIK TycipyUwHcybipyKaNaFbIbackapkyKaKaHbImeXabkTanFaH.
MexahkaJIbIK 6aCKapy naHeni 6ap yIrrinep
HHBS 6.5F AM X - HHBS 9.5F AM X - HHF 6.4 F AM X - HHF 6.4 F AM K HHF 9.4 F AM X - HHF 9.5 F AM X - HHGC 9.4F AM X - HHGC 6.4F AM X

T1. Kapbiktbi KOCY/ΘιΠPy KockbluBi
T2. 1-Жылдамдьк/эшIPу KOCKышы
T3. 2-KbIJaMbIKTbTaHday
T4. 3-KbIJaMdbIbIKTbI TaHday
BnptyaIbI tyme naHeni xeKd dincnnei 6ap ynlirep
HHBS 6.7F LL X - HHBS 9.7F LLI X - HHF 6.7F LL X

T1. Copy MOTopbIHbI Kocy/ewipy TyuMeci
T2. Optaа, xorapbl xHaHe KapKbIHdbI bAckapy copy KbldAmdbIfbH (KyaTbH) TaHay TyMeci. Eckeptne: KapKbIHdbI copy XblIDbIMdbIfb (KyaTbI) (L1 JkapblI dIObl XblIbIKTaIdbI) IaMaMeH 5 MNHyTk aCo3blNaDb, cOaN coH optaab copy XbldAmdbIfb (KyaTbI) aBTOMaTbI Tpye opHaTbIaNbI.
T3.《Дыбьсьз》copy XbIДaMДыIFbIH (KyaTbIH) TaHday Tymeci
T4. Kapbiktbkocy/ewipy Tymecci
L1. Copy xblan damdbkTapbl (KyaTapbl) kyn 6enriweci
L2. Mai cy3ricih KaHbIKtbIK INHdNKaTOpbl Ky6eNriueci
L3. TeMeH (dbl6blicb3) copy XblIaMdbIfbl (KyaTbl) KYN 6enriupeci
L4. Kemip cy3ricih KaHbIKtbIK HnDnKaTOpbI 6eNriciH Kyi
L5. Xapbiktahdbipydbn kyn 6enriueci
CytiriHIn KaHbIKTbIK INHdNKaTopbIH 6actanKbl KaNNbHa KeTTipy
Cy3ire TexHnKaIbIK KbI3MeT KePcTeKHe COH, T3 TyImeCIn 6acbln TypbIbI3, CODaH COH KaHbIKTbIKbI KePcTeTeIH 6enriWe eWesi. Erep KaHbIKTbIKbI KePcTeTIe Ki 6enriWe (MaJ XeHe KEmip) Kocbln Typca, apekeTTi KaTalaHbI3.
Kemip cy3ricih KahbIKtbk 6enriwecin 6eJceHdipy
Kemip cy3ricihin KaHbIKTBk 6bnriupeci aedTte 8wipyni 6oanaIb. OHbl 6enceHdipy yuhi, Keleci KaamapdbOpbHaiaI3: Copfbiu eWipnyi 6oRaHa, T1 Xane T3 tymmepei 6ip yaKbTTa 6acbl typbH3: Catti 6encHdpinyi Kepcety uhi, anDbimHe L4 kbinblkTaNbl, codah coH TypakTb JkapbIKneh KocbinaIaIb.
Kemip cy3ricih Kahtbiktbk 6enriwecin eWipy: KofapbdaftbepekeTTi KaTalaHb3, L4 TypaTbI JkapbIKneH KOcbIbN KaHaDbI, coaH COH CoBHdA cTtI axbipatyBkepcTe yuH eEJI.
KorapbI TemnepaTypa aBTOMaTTbXyMbIC
CopbIu TEmnepaTpaHbI aHbIKTaIbIH DaTcNKeH JxabIbIKTaIaNfAH. TemnepaTya TbIM XOFapbl BoIFAH Ke3de, DaTcNK abTomaTTbI TypDe opTaWa copy KbldAmdbfbIH (KyATbIH) BeIceHdipei. DaTcNKeH aHbIKTaIaNfAH TemnepaTpy eJayip TeMeHdereHne, copbIu ewedi.
BnptyaIbI Tyme naHeni XeHe kiDipicTi eWipy fynKcIyra6ap ynrinep
RHHF 9.7F LB X - RHHBS 9.7F LB X - RHHGC 9.7F LB X

T1. Copy MOTopbIHbIK Kocy/ewipy TyuMeci
T2. Baccapy copy kblndaMdbIbH (KyaTbH) TaHday Tymeci Eckeptne: KapkblDb copy kbldbIMdbIfbl (KyaTbl) (L3 KabPk DIObl KblnbTaNbI) WAmMaMe 5 MNHyTka CO3bIaNbI, CoaDH cOpaWc copy kblndAdbIbF (KyaTb) ABTomatbl Tpyde opHaTbNAbI (L2 KabPk DIObl XaHaadbl).
T3. KapbiktbI Kocy/ewipy TyuMeci
T4. ABTomaTTbI eipy TyMeci:
Eckptne: aBToMaTTbI eippydi keNeci apaJIbIKtAH KeiH
OpHaTy UsiH MblHa TyImehi 6acblHb3:
TeMeH copy XblJaDAMdbIfbl (KyaTbI): 20 MNHT
OptaHa copy XblJaDAMdbIfbl (KyaTbI): 15 MNHT
Xorapbl copy XblJaDAMdbIfbl (KyaTbI): 10 MNHT
KapKbIHdbI copy XblJaDAMdbIfbl (KyaTbI): 5 MNHT
L1. Temeh copy XbIJaMdbIfbl (KyaTbI) Japblk dnoDbI
L2. Optawa copy kblndamdbIfb (KyaTbI) XapbIK dnoDbI
L3. XorapbI copy kblaMdbIfbl (KyaTb) japbIK dnoDbI
L4 KapKbIHDbI copy XblJaMdbIfbl Xapblk dnoDbI - yaKblTbi 6enrJIeHreH (5 MmH.).
L5 Cy3ri KaHbIKTbIFbHa apHaIraH XapbIK dIObbl: KblbIbIKTaIbI: KEmip cy3ricHe TexHnKaIbIK KbI3MeT Kepcetyi opbIHday; KocylbI:
L1+L2+L3 Keneci peTirikTe XbInbIbIKTaIaDbI: KOFapbi TeMnepaTypa aBTOMaTTbI XyMbIC (6aJNaHbICTb I 6eJIIMdi KapaHbI3)
Cy3ri KaHbIKtbIFbIH 6actanKbI KaJNbHa KeJTtipy
Cy3rireTexHnKaIbIK KbI3MeT KePcTeKHe COH, T1 TYmeciH 6acbln TypbHb3, codaH coH L5 XapbIK IIOdbI eWedi.
Kemip cy3rici KaHbIKtbIbIHxapbIK dIObIH 6eJIceHdipy
Kemip cy3rici KaHbIKtbIbIHxapbIK dIObI eDeTte eIipyJI
boJaIbI. OHbI benceHdipy yUHH, KeNeci KaamdapdbOpbHaDbIc: Copfbiu eipyJIi bONFaHda, T1 XHe T4 TymEnepiH bip yaBHTa
bacIn typbIH3:CtTI beJeHdipyKepcTe yUHH, anDbimEn L1,
coDaH coH L2 KbINbIKTaIbI.
Kemip cy3rici KaHbIKbIFHbIH JxapbIK dnoobih eWipy: KofapbIdaIbI apekeTTi KaTaNbI3, anDbIMeH L1 meh L2 6pire XblnbIKtaIbI, coaHa coH L1 rana cTti eWipydi Kepcety YwIH KbIbIKTaIbI.
XorapbI temnepaTpaJa ABTomaTTbIXyMbIC
CopfblttemnepaTpaHbI aHbIKTaIbTH daTunKneH JxabkbIaTaNFaH. TemnepaTpa TbIM KOFapbl 6oFHaB Ke3e, DaTUnk ABTomaTTbI Typde optaasa copy XbIJaMdbIbHIN (KyaTbH) KocaDbI. DaTUnKneH aHbIKtaIaNFaH TemnepaTpa eJayip TeMeHderEHe, copfbltseedi.
BnpyaIbI TyIme naHeni XeHe dIbIbICbI3 XbIJaMdbIK MymkiHdi6ap yIriJep
HHBS 9.5F AB X - HHBS 9.7F LBI X - HHBS 9.7F LB X HHBS 6.7F LB X - HHGC 9.7F LB X - HHGC 6.7F LB X HHGC 6.5F AB X - HHF 9.7F LB X - HHF 6.7F LB X
T1

T2


T3

T4
T1. Copy MOTopbIHbIH Kocy/əwipIy TyIMeci
T2. Bapkayp copy Kblldamdbfbih (KyaTbH) TaHday Tymeci Eckeptne: KapkbHdbl copy XbldbIMdbfbl (KyaTbI) (L3 Jkapblk DINObl XblblbIKTaNbbl) 5 MmHTka CO3blnabdl, COnaH CoH opTaHa copy XbldAmdbfbI (KyaTbI) aBTOMATbTI TypDe opHaTbIaNbI (L2 Kapblk DINObl KaHaNb).
T3. Kapbiktbl Kocy/ewipy Tymeci
T4. «Дыбicb3» copy XbIДaMdbIfbIH (KyaTbIH) TaHday Tymeci
L1. Optawa copy kbldAmdbfb (KyaTb) kapbIK dNOdb
L2. Xorapbl copy kbldAmdbifbl (KyaTb) Japblk dnoDbbl
L3 KapKbIHDbI copy XblJaMdbIfbl Xapblk dnoDbI - yaKbITbl 6enrJIeHreH (5 mN.H.).
L4 Cy3ri KaHbIKTbIFbHa apHaIraH XapbIK dIObbl: KblbIbIKTaIbI: KEMip cy3ricHe TexHnKaIbIK KbI3MET KepcTeYdiOpBHday; KocylbI: MauCy3rIepiHe TexHnKaIbIK KbI3MET KepcTeYdi OpBHday.
L5 TeMeH (bIbIbICbI3) copy XbIaMdbIfbl (KyaTbI) Xapblk dIObI
L1+L2+L3 KeNeci peTTiJIkTe XbIbJIbIKTaIbI: XOFapbl TemnepaTypa aBTOMaTbI XyMbIC (6aIIaHbICTbI 6eJIIMdi KapaHbI3)
Cy3ri KaHbIKTbIFbIH 6actanKbI KannbHa KeNtipy
Cy3rireTexHnKaIbIK Kbl3MeT KepeTeKHeCoh, T1 TyMeciH 6acbin TypblHbI3, coaHaH CoH L4 Xapblk DIOBbl EweJI. Kemip cy3rici KaHbIKTBIfbIHbIH Xapblk DIOBbl
6eInceHidpy
Kemip cy3rici KaHbIKTBkTBIFbIHbIH XapbIK DIObI eTeTte eWipyNi 60anaBb. OHb6eNceHipy ywiH, Keleci KaamdapdbOpbIHdaHb3:
Copfblw eWipyni 6oIraHda, T1 KHe T4 TuMmepiH 6ip yaKbTTa 6acbl Tpyblb3: CAtTI beCenHdpydi KepeSy ywiH, anDbimEn L1, coDaH coH L2 XblnblkTaunbl.
Kemip cy3rici KaHbIKtbIFbIHbIH JapbIK dNODbIH eWipy: KofapbldafbI apekeTTi KaTanaHbI3, anDbIMeH L1 MeH L2 6ipre XbInblbIKtaNbI, coaHa coH L1 rHa cETTI eWipydi KepcTeY yUH XbINblbIKtaNbI.
XorapbI temnepaTpaJa aBtOMaTTbIXyMbIC
CopbIu TEmnepaTpaHbI aHbIKTaIbIH daTcHKneH Xa6dbIKtaIaNfAH. TemnepaTpa TbIM KOFapbl BoIFraH Ke3de, DaTcHK abTOMaTTbI typDe optaW copy KbIaMdbfBn (KyaTbIH) 6eNceHdipei. DaTcHKneH aHbIKtaIaNfAH TemnepaTpa eDyip TeMeHderEHe, copbIu Ewei.
TEXHINKANbIK KbI3MET KOPCETY
Ta3anay
Ta3anay yin TEK 6eTapan Jyfbls 3aTneh cynaHaf anapha bI
ybepekti naDanaHbIbI. KpyblfblbI HEMECE TA3ANAY
KPAbln PAJDAHAHAHbI3! A6pa3nJIbIK Kocnacbl 6ap
3aTTbI naDaHaHaHaHbI3. CnIPTTI PAJDAHAHAHbI3!
Pepimetprik copy naneji
Kymca Ky6epti Xhe apaIacTbIpbIinah KYfbl 3aTTb naIanaHbIn, TYTH bIfapy Ky6bIpbHbN KeJeMdi TaKTacBn Ma cy3ricmen Bipde JnnlIkneh Ta3aIaNbI3. Ekaaah abpa3nBTi Ta3anay eHIMdepin naIdaHaB6aHbI3.
Maɪɒbɪ Ta3apTy cy3rɪnepiHé TexHnKʌlɒk Kɒl3Mæt KəpceTy
Ac daBbHdayaFbMaM 6eIweKtepiH yctan KaIaDbI.
Фильтдіа саьин Куфыш 3аTTapмен КОЛМЕн Hemece TэмeH TemnepaТураДа ЖэгУнemdi Jжу UNКИн德i bIDcIб Xуфыш MaUNHacbIHДa Tazalan Tpy Kepek (Hemece Фильтдік KaныктБурж Унeci, ergp cizdIN Yngide BoNca, Берпген KakketTinikTi KEpCtKeH KafDaiDA).
MaNbI Ta3anay fynbpi bIbc JyfbI MaunHacbIme HyaHaJa Ehci3deHyi MymKiH. BIPAk OHbIH Ta3anay CnATb MyJNe e3repMeNdi.
MaCy3rici anbIn Tactay yuih cepinneni 6ocaty TyTKacbiH TapTbHb3

Kemip cy3riche Kbl3met Kepcty
Ac nicipren Ke3eJxapamcbI3 niCTi yCTan KaIaNbl.
Kemip fnhbtpinH KaHbIybi, acydiH Tpyi MeH KEmip fnhbTpHJxHyeni TaanaabHbIyBa HaaNahhctBi Y3AK YaBt KOnDaHaHAn H KeHH 60nabU. KaHdai KaFda 60nMaCbH, KaTpNxDJI KEMHe 4 a CaiH aYbCTbPbIn TypKaXeT (HEmece fnhbTpHIN KaHbY INDkAtop XyNeci, erep ciDHI MOnenHI3re OphatbIraH 60nla, aybCTbpyDbH KaXet EKeHH KepcTeKH XaFdaJaA).
XyyfA Hemece KaJIbHa KeJItpyRe BOJMAIdbI.
Kypacctbipy
Kemip cy3ricih KaKnaTbH anDbimeh MeTaJII DeHeC JepiHi apTbHa, OdaH KeiH anDbHa eki TyHMeMeH iini3.
Bennwecktey
Kemip cy3ricin KaKnakka 90^ 6ypbIbHna yCTaTbIH TTKanapdbI 6py apkblalbIn TactAh3.
Jaamnanapdbiaaybictbipy
HHBS 6.5F AM X, HHBS 9.5F AM X, HHF 6.4 F AM X, HHF 6.4 F AM K, HHF 9.4 F AM X, HHF 9.5 F AM X, HHBS 9.5F AB X, HHGC 6.5F AB X, HHGC 9.4F AM X, HHGC 6.4F AM X
Acnantb 3neKtp KyuEciHEn oWipiH3
Eckepty! lampanhbl yctaydaH 6pybIH, oIap cybifaHdbIfbHa Ke3 keTki3iH3.
KacneTrep JanaCbipMaCbHnda Hemece KopnyctaFlaam lamnacbHda KepceTinreHdei, ecki 7am lamnacbH bipdei Typderi lamnamen anMactblpbl3.
- KiškeHTaB 6byaybH Hemece yKcac acnan apKbIbI KOpraTbH nHaHeNdi WbIFapBn anbHbI3.
- By3bIJaH WAmDbI ayBICbIpbIbIbI3.
MaKc.12V -20W - G4 ranoreHnik waamapdbf raHa KQJdaHbHb3. KQJdaPbHbI3dbTtiri36eH3.
- KopfainbH nahEni XaybIn KOyblbI3 (fNkCaTOp KemerimeH).
HHBS 6.7F LL X - RHHF 9.7F LB X - RHHBS 9.7F LB X - HHBS 9.7F LLI X - HHF 6.7F LL X - HHBS 9.7F LBI X - HHBS 9.7F LB X - HHBS 6.7F LB X - HHGC 9.7F LB X
HHGC 6.7F LB X - HHF 9.7F LB X - HHF 6.7F LB X
Kopnyc xapbIK DIOOD TexHOJIOgRcBHa Heri3dJeTReH xapbIK Kyyecimeh Xa6DbIKtanFaH.
KapbIK DnOITapbl OHTaINbI KApbIKTbI, eDetteri WAMdapdAn 10 ece aptbIK Y3aKTbIKTbI KAMTaMaCbI3 eTeDi JxHe 90% 3JNEKTP 3HeprmaCbIH CaKTayfamMkiHdk 6epei.
AbyICTbipy yuHInTexHnKanBik Kbi3Met Kepcety 6eJIiMe HxabapnacblHbI3.
KoIO
3JneKtpnIK XeHe 3JneKtpOnDbIK acnTnTapDbI KaTa naiJaFa acbipy XeHiHderi 2012/19/EC EbponabIK DnpeKTnBke (WEEE) cAnkec 6epinre HIm TaHbaHaNbI.
Bepinren Ehimdi Dypbc Kaeta naDafa acbpydbi KAMtamacc3 etymen, Ciz Kopuafah optara XHe aam deHcaynbIbHa Kepi ecepih Tnri3y di 60bnipmayfa KEMeKTececic3.

AcnantTaHHeMece XoJdama KxKaTtAfb TaH6acbTaepinre acnantB KaTna naTdara acbIpyda 3eTeRr TyPmbCTbIK KaIdbK petInHe nRepyre 60MaTbIHkEpeTei. OHbHOpHbHa 3eKeTpNik XeHe 3eKeTPOhBik acnantapDbKaTn aNdara acbpyfa aphanfah KaBJnday nyHKTIhe Tancbipy KEpek.
By3yfa tancbipy acnantb Kaia Ta naanda f acbyxHHeiJei xepriikti epexenepre caikec sbifapblnytnc.
Byndai eHIMdepdi naiDanahy, KaTaNaIdaFa acbipy epexenepi KHeHHTeToNkAknapaTbI JepriinkTI eKIMuINIK opbIHapbHaH, KaNbIKTapbl KaTaNaIdaFa acbipy Kb3metiHememe 6epinre HEmiDi C3 catbn anfah DyKeHen ana anacb3.
KypbIbnIkeNecinepre caJxobanaHraH, cblHaIraH xHe Xacan 1blFapblnFAH:
- Kayinciizk: EN/IEC 60335-1; EN/IEC 60335-2-31, EN/IEC 62233.
- ΘΗΜιδιπε: EN/IEC 61591; ISO 5167-1; ISO 5167-3; ISO 5168; EN/IEC 60704-
1; EN/IEC 60704-2-13; EN/IEC 60704-3; ISO 3741; EN 50564; IEC 62301. - EMC: EN 55014-1; CISPR 14-1; EN 55014-2; CISPR 14-2; EN/IEC 61000-3-2; EN/IEC 61000-3-3.
Kopshafah opTara ocepdi a3aIy yuin dupbic naIdanaHy tpaIbI Hcyaynap:
3zipnyi6bactaHaDa KaKnakTbe h a3 KblIaMdBkHne KocbHb3 XeHe 3epneyayKaTaNFaHHah KeinBipa3 MHyT BoJIy MyMbIC icTeHi3.
XbIaMbIbTKaTeK TYtIHnH XaHe 6yDbH YJKeH MeIupei XaFdaBHaD aPTbIbH3 KHe KYSeTu XbIaMdbfBtH(KTapbH) TeK WeKTI
JaFdaInapda naaDanaHbHb3. JKaCbI kaFbIMCbI nicti a3aHTy TImdInirih CaKtay yuH kajet 6oRanDa KEMip cy3ricIH (nepiH) aybCTbPbHb3. JKaCbI MaJ cy3rici TImdInirih CaKtay yuH kajet 6oRanDa MaJ cy3ricIH (nepiH) aybCTbPbHb3. TImdInikTI OHtaNaHdbpy xhe uDbl bapbHa a3aHTy yuH HcckaynbkTA KepeTinreH eTKi3y KjueciH IH eYnKeH dnaMeTpH naDanaHbHb3.
AKAYIbIKTAP
Erep KpybInfbHbH 6ip 6niri dpybc Kymbc icteMece, TexHnKaIbIK Kb3Met KepcTe 6nimihe KOhbpay wamac 6pybH keneci apeketteri opbHaB3:
KaKnaK XMyMbic icTeMece:
TemeHderinepeiTekcepiH3:
-KyataxbipatbImFaH.
KbIaambik TaHdaFaH.
KaNaK XeTKeJIiKcI3 KbI3MeT aTKapca:
TemeHderiinepeTi teKcepiH3:
-TaHdAnFaH MOTOP XbIaDAMdbIfb 6ocatbIraH TYtIH MeH 6yDbH MJIWepi yuiH xekTkiKti.
-Acynaya kipici yuin xekjnlkti xendetinei.
-Kemip cy3rici To36faHn (KaKnak cy3y HcckacbHa).
KaKaNaK KaIbInTb epeket bapbcInHa eWipincce:
TemeHderinepiTekcepiH3:
-KyataxibipatbImMaHaH.
- KEN nonHcti axbipaty Kypbunfbicbi Ewhipimereh.
ErepKaKnakTmicHweKymbicictMece,OhbCbIMdbTapTy apKbIbI jKeiNilip03eKaJaan5 cekyHnka KbICKa yaKbITKa axkbpatbHb3.Coan Kein OHkaJtaaH JcNraHbI Ta,TexHnKaBik KOnlay KblMeTIhe xaapJIacy aIbIHdaKaItaKocbinKepiH3.
TEXHINKAJIbIK DEPEKTEP
| Улri | Биiktiri (cm) | Ени (cm) | Калындьíflы (cm) | Шытapy Тугирin Ø (cm) |
| HHBS6.5FAMX HHBS6.7FLLX HHBS6.7FLBX | 61,9 - 114 70,4 - 114 | 59,8 | 45 | 15-12,5-12 |
| HHBS9.5FAMX RHHBS9.7FLBIX HHBS9.7FLLIX HHBS9.5FABX HHBS9.7FLBIX HHBS9.7FLBX | 61,9 - 114 70,4 - 114 | 89,8 | 45 | 15-12,5-12 |
| HHF6.4 FAMX HHF6.4 FAMK HHF6.7FLLX HHGC6.7FLBIX HHGC6.5FABX HHF6.7FLBIX HHGC6.4FAMX | 60 - 112,5 68,5 - 112,5 | 59,8 | 45 | 15-12,5-12 |
| HHF9.4FAMX HHF9.5FAMX RHHF9.7FLBIX HHF9.7FLBX | 60 - 112,5 68,5 - 112,5 | 89,8 | 45 | 15-12,5-12 |
| RHHGC9.7FLBX HHGC9.7FLBIX HHGC9.4FAMX | 62,3- 114,8 70,8 - 114,8 | 89,8 | 45 | 15-12,5-12 |
XaIIbI ciHpy MeH XapbIK ciHipydi Tekcepy yuIH TaKtHaBl TeKcepH3.
HHBS 6.5F AM X, HHBS 9.5F AM X, HHF 6.4 F AM X, HHF 6.4 F AM K,HHF 9.4 F AM X,HHF 9.5 F AM X, HHBS 9.5F AB X, HHGC 6.5F AB X, HHGC 9.4F AM X, HHGC 6.4F AM X
| Куат(BТ) | Керney(B) | Кашик | Θлшемер(mm) | |
| Alogena | 2 x 20W | 12 | G4 | 33xØ10 |
HHBS 6.7F LL X - RHHF 9.7F LB X - RHHBS 9.7F LB X - HHBS 9.7F LLI X - HHF 6.7F LL X - HHBS 9.7F LBI X - HHBS 9.7F LB X - HHBS 6.7F LB X - HHGC 9.7F LB X
HHGC 6.7F LB X - HHF 9.7F LB X - HHF 6.7F LB X
Kopnyc JapbIK DIOID TexHIOIgNcBHa Heri3dJeTRe HJapbIK JyIecimEn Jaa6DbIKtanFaH.
AbyICTbpy Yuih TexHnKaIbIK Kb3MeT KepcTeY 6aBaplaCbHbI3.

EHHMMe6ipre6epinmenerKypamdactap
- SICUREZZA GENERALE
- ELECTRICAL CONNECTION
- Replacing the power cable
- AIR VENT
- FILTERING OR DUCTING?
- Ducting version
- Filter version
- CONTROLS
- Reset filter saturation indicator
- Activation of the icon for charcoal filter saturation
- Automatic operation at high temperature
- Reset filter saturation
- Activation of the LED for charcoal filter saturation
- MAINTENANCE
- Cleaning
- Perimeter aspiration panel
- Maintenance of the anti-grease filters
- Traps cooking grease particles.
- Maintenance of the charcoal filter
- It absorbs unpleasant odours caused by cooking.
- Disassembly
- Replacing lamps
- HHGC 6.7F LB X - HHF 9.7F LB X - HHF 6.7F LB X
- DISPOSAL
- MALFUNCTIONS
- SÉCURITÉ GÉNÉRALE
- HHBS 6.7F LL X - RHHF 9.7F LB X - RHHBS 9.7F LB X - HHBS 9.7F LLI X - HHF 6.7F LL X - HHBS 9.7F LBI X - HHBS 9.7F LB X - HHBS 6.7F LB X - HHGC 9.7F LB X
- Reset filter verzadiging indicator
- Reset filter verzadiging
- 3NEKTPNUECKOE COEINHEHNE
- 3aMeHa 3JIeKTpoka6eIa
- BbIbPOC BO3dYXA
- Reset INHdkaTOP hacbIeHnФINbTPOB
- BkIIOUeHne 3NaHa NaCbIeHne FnIbTp aKTHBnPoBaHOro yTn
- AbTomatnuecka pa60ta npu BbICOKo TEMnepaType
- Reset hacbuiuHne pfNbTpoB
- HHBS 6.7F LL X - RHHF 9.7F LB X - RHHBS 9.7F LB X - RHHGC 9.7F LB X - HHBS 9.7F LLI X - HHF 6.7F LL X - HHBS 9.7F LBI X - HHBS 9.7F LB X - HHBS 6.7F LB X - HHGC 9.7F LB X
- YTNIN3AUIN
- AHOMAJINB PABOTE
- ENEKTPNUEHNEIIDCDAHNN
- 3amHa eIektpoka6eJia
- BNUIIOBITPRA
- 3PEUKNPKYJLJIeIcIeOuN3BIDBODOM
- BnKoHaHHa 3 BIDBODOM
- BnKoHaHH 3 peunpkyIaicIO
- KOMAHДИ
- Reset hacnueHHaipbtpB
- A B T O M A T N U H a p o b o t a n p r n H a m i p h O B C O K I T E M P e p a t y p i
- AbTomatuHa pO6To npn haMipHo BvCoki Tempepatypi
- TEXHlYHE O6CJyTOBvBAHHr
- UH
- IepmEpnuHa paHeJIb BCMOKTyBaHHa
- 06cnyroByBaHHJxHnOpBnxΦiNbtpiB
- YTNJI3AUJIA
- 350I Y ΦYHKLIOHYBAHHI
- VŠEOBECNÁ BEZPEČNOSTNÍ OPATřENÍ
- LIKVIDÁCIA
- 3NEKTPBAIJIAHbICbl
- KyaT Ka6eniH aybIcTbipy
- AYA TAPTY CAHbIJIAYbl
- CY3ΓIJEY HEMECE TYTIK APKbIJbI BAFbITTAY?
- Tyrik apkblbl 6aftlay Hycacbl
- Cy3ri HycKacbi
- BACKAPY 3JEMEHTTEPI
- MexahkaJIbIK 6aCKapy naHeni 6ap yIrrinep
- BnptyaIbI tyme naHeni xeKd dincnnei 6ap ynlirep
- 6eInceHidpy
- XorapbI temnepaTpaJa aBtOMaTTbIXyMbIC
- TEXHINKANbIK KbI3MET KOPCETY
- Ta3anay
- Pepimetprik copy naneji
- Maɪɒbɪ Ta3apTy cy3rɪnepiHé TexHnKʌlɒk Kɒl3Mæt KəpceTy
- Ac daBbHdayaFbMaM 6eIweKtepiH yctan KaIaDbI.
- Kemip cy3riche Kbl3met Kepcty
- Ac nicipren Ke3eJxapamcbI3 niCTi yCTan KaIaNbl.
- Kypacctbipy
- Bennwecktey
- Jaamnanapdbiaaybictbipy
- KoIO
- AKAYIbIKTAP
Brand : HOTPOINT
Model : HHBS6.7FLLX - HHBS 6.7F LL X
Category : Combined refrigerator