
DAP-2660 - Wireless Access Point D-LINK - Free user manual and instructions
Find the device manual for free DAP-2660 D-LINK in PDF.
| Product Type | Wireless Access Point |
| Brand | D-Link |
| Model | DAP-2660 |
| Wi-Fi Standard | 802.11ac (dual-band) |
| Maximum Data Rate | 1200 Mbps (AC1200) |
| Ports | 1 Ethernet port 10/100/1000 with PoE |
| Power Supply | Power adapter (5 V/2 A) or PoE 802.3af |
| Mounting | Ceiling or wall (mounting brackets included) |
| LEDs | 1 bi-color LED (green/red) for power/status |
| Operating Temperature | 0°C to 40°C |
| Operating Humidity | 10% to 90% (non-condensing) |
| Dimensions | Approximately 200 x 200 x 35 mm |
| Weight | Approximately 300 g |
| Wireless Security | WPA/WPA2, WEP, MAC filtering |
| Management | Web interface via browser |
| System Requirements | Modern browser (IE 7+, Safari 5+, Firefox 3.5+, Chrome 20+) |
| Box Contents | Access point, power adapter, Ethernet cable, mounting brackets, CD-ROM |
| Warranty | Standard (2 years) |
| Maintenance and Cleaning | Clean with a dry, soft cloth. Do not use chemicals. |
| Safety | Do not expose to moisture or extreme temperatures. Use only the supplied adapter. |
| Spare Parts and Repairability | No user-serviceable parts. Contact technical support for any issues. |
| Support | Website: www.dlink.com, Phone: 01 76 54 84 17 (Mon-Fri 9am-7pm) |
Frequently Asked Questions - DAP-2660 D-LINK
User questions about DAP-2660 D-LINK
0 question about this device. Answer the ones you know or ask your own.
Ask a new question about this device
Download the instructions for your Wireless Access Point in PDF format for free! Find your manual DAP-2660 - D-LINK and take your electronic device back in hand. On this page are published all the documents necessary for the use of your device. DAP-2660 by D-LINK.
USER MANUAL DAP-2660 D-LINK
Quick Installation Guide
Wireless AC1200 Concurrent Dual Band PoE Access Point
This document will guide you through the basic installation process for your new D-Link Wireless AC Access Point.
DAP-2660

Documentation also available on CD and via the D-Link Website
DAP-2660 Quick Install Guide
This installation guide provides basic instructions for installing the DAP-2660 Wireless Access Point on your network. For additional information about how to use the Access Point, please see the User's Manual which is available on the CD included in this package or from the D-Link support website.
System Requirements
Minimum System Requirements:
- CD-ROM Drive
- an Ethernet port, or an installed Ethernet adapter
- Internet Explorer 7.0, Safari 5.0, Firefox 3.5, Chrome 20 or later versions of these browsers
1. Package Contents
DAP-2660 802.11ac Access Point
Power Adapter
- Mounting Brackets
- Ethernet Cable
CD-ROM
If any of the above items are missing, please contact your reseller.
Note: Using a power supply with a different voltage than the one included with the DAP-2660 will cause damage and void the warranty for this product.
2. Hardware Overview
LED
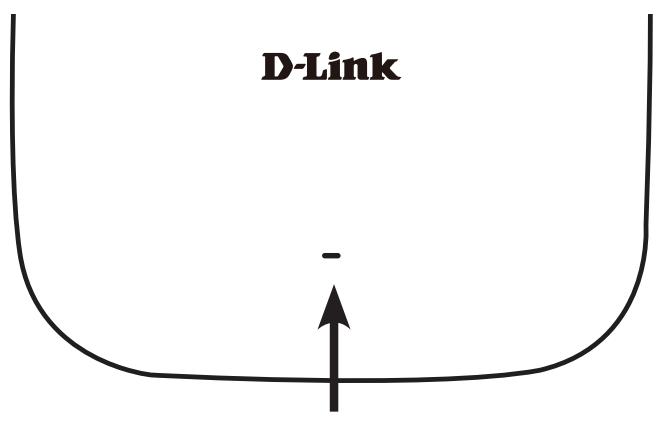
Power/Status LED - Dual color (Red/green)
. Flash Red during booting up or malfunction
. Static Green while it's ready/working
1. Solid Red while boot up fail
. Flash Green while traffic is passing through.
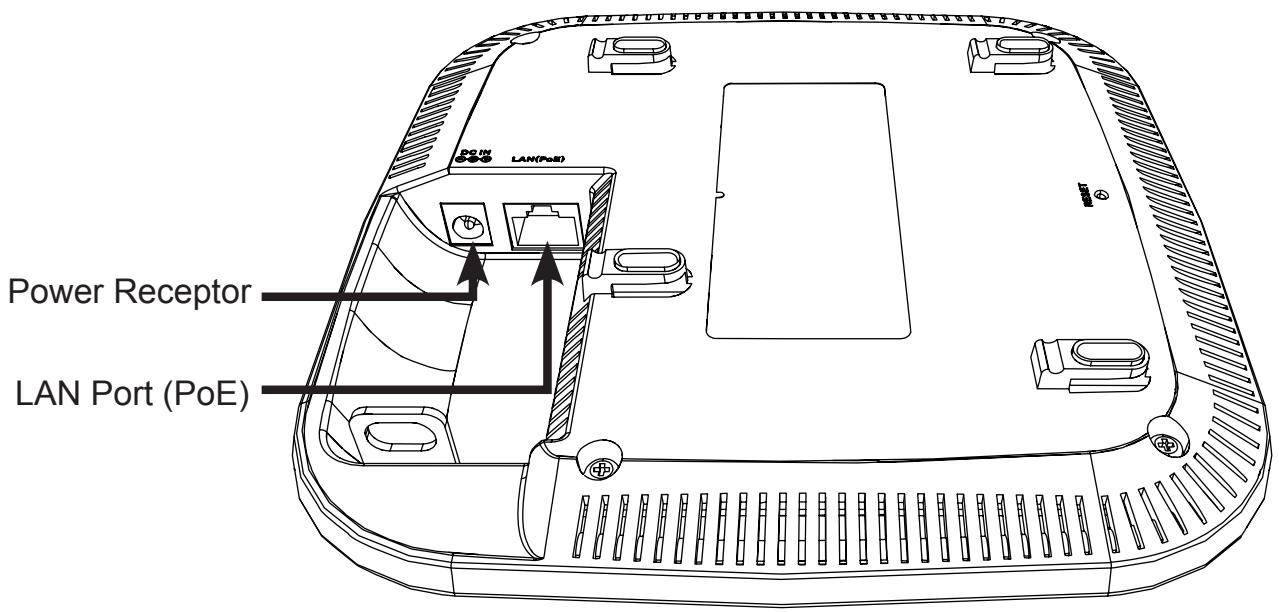
Interfaces
3. Installation
Power on the access point
To power on the DAP-2660, you can use ONE of the following methods:
- Connect the supplied power adapter, OR
- Plug one end of your Ethernet cable into the LAN port of the DAP-2660, and the other end into a port on a PoE switch.
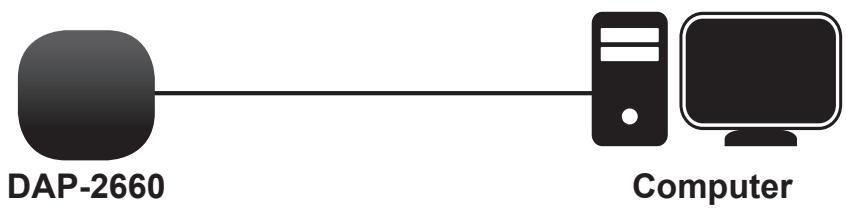
Configure the access point
To set up and manage the DAP-2660, use one of the following methods:
- Connect the access point and your computer directly via a straight-through Ethernet cable. Manage the access point from the computer.
Ensure your computer is configured with a static IP address in 192.168.0.0/24 subnet.
Launch a web browser, type the default IP address of the access point (http://192.168.0.50) and then press Enter.
Log in to the Administration Web pages. The default login information is:
Username: admin
Password: (Leave the password field blank)
- Connect the access point and your computer to the same switch. Manage the access point from the computer.
Enter 192.168.0.50 in the address field of your browser, which is the default IP address of the access point.
Log in to the Administration Web pages. The default login information is:
Username: admin
Password: (Leave the password field blank)

Solid wall or ceiling
Installation
- Place the mounting bracket on a wall or ceiling.
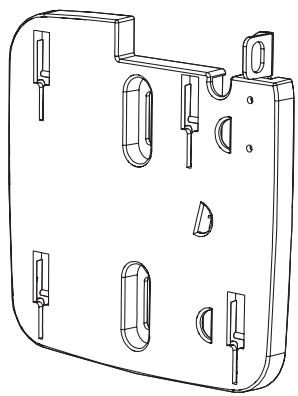
- Mark the points where you will insert the screws. Take out the mounting ring.
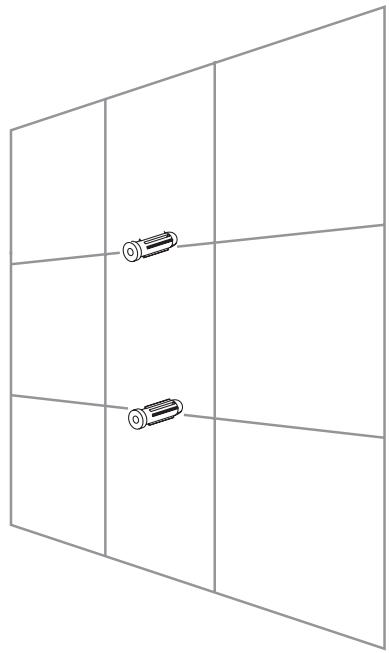
- Drill holes in the marked points and insert the plastic wall anchors.
- Use the supplied screws to attach the mounting ring to the wall.
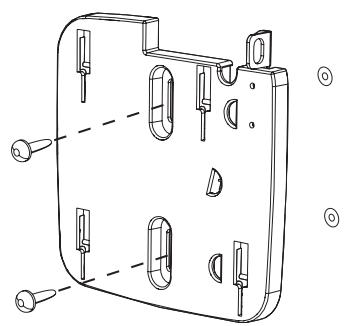
- Plug the Ethernet cable into the LAN port on the access point.
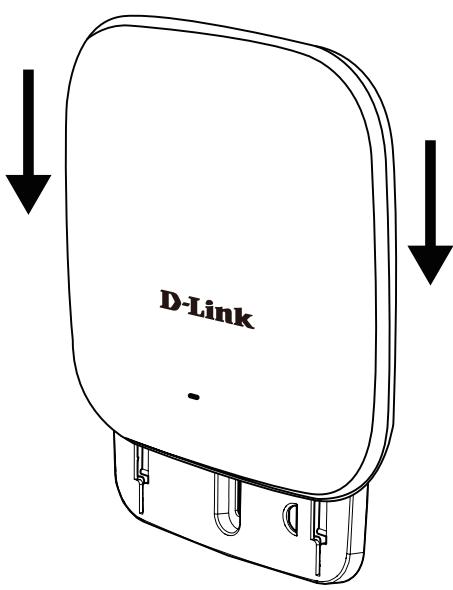
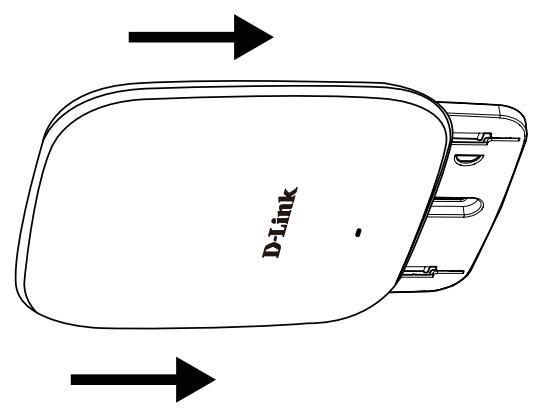
- To attach the access point to the mounting bracket.
Mounting with a ceiling bracket
Installation
- Clip two ceiling brackets onto the ceiling panels. Make sure both brackets are in line with each other.

- Use the provided screws to attach the mounting ring to the ceiling bracket.
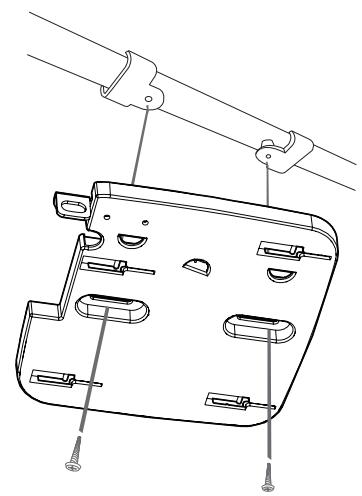
- Plug the Ethernet cable into the LAN port on the access point.
- Place the DAP-2660's male bracket in the mounting bracket's female bracket. Click DAP-2660 and the mounting bracket to lock in position.
TECHNICAL SUPPORT
United Kingdom (Mon-Fri), Website: http://www.dlink.com
Home Wireless/Broadband 0871 873 3000 (9.00am-06.00pm, Sat 10.00am-02.00pm)
Managed, Smart, & Wireless Switches, or Firewalls 0871 873 0909 (09.00am- 05.30pm)
(BT 10ppm, other carriers may vary.)
Ireland (Mon-Fri), Website: http://www.dlink.com
All Products 1890 886 899 (09.00am-06.00pm, Sat 10.00am-02.00pm)
Phone rates: €0.05ppm peak, €0.045ppm off peak times
Username (Benutzername): admin