
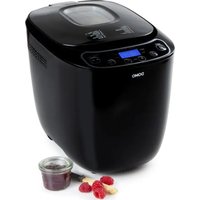
B3971 - Bread maker DOMO - Free user manual and instructions
Find the device manual for free B3971 DOMO in PDF.
| Product type | Bread machine |
| Model | B3971 |
| Brand | DOMO |
| Maximum capacity | 1000 g (total weight of ingredients) |
| Bread weight | 500 g, 750 g, 1000 g |
| Number of programs | 18 automatic programs (Normal, French, Whole wheat, Sweet, Rice, Gluten free, Rapid, Fruits, Cake, Sandwich, Raisin/nut, Rye, Kneading, Dough, Brioche, Bake, Home Made, Italian) |
| Crust color | 3 adjustable levels: light, medium, dark |
| Delay timer | Yes, up to 15 hours |
| Keep warm function | Up to 60 minutes after baking |
| Memory function | 10 minutes in case of power outage |
| Ingredient dispenser | Yes, for automatic addition |
| Baking pan and kneading hook | Non-stick coating, removable kneading hook |
| Power supply | 220-240 V ~ 50 Hz |
| Power | Approximately 500-700 W (estimated) |
| Dimensions (W x D x H) | Approximately 30 x 25 x 35 cm (estimated) |
| Weight | Approximately 6 kg (estimated) |
| Included accessories | Baking pan, kneading hook, measuring cup, measuring spoon, extraction hook |
| Maintenance and cleaning | Clean the pan and hook with hot water; do not immerse the housing; do not use abrasive products |
| Safety | Automatic shut-off, overheating protection, panel lock |
| Warranty | 2 years (accessories and wear parts: 6 months) |
Frequently Asked Questions - B3971 DOMO
User questions about B3971 DOMO
0 question about this device. Answer the ones you know or ask your own.
Ask a new question about this device
Download the instructions for your Bread maker in PDF format for free! Find your manual B3971 - DOMO and take your electronic device back in hand. On this page are published all the documents necessary for the use of your device. B3971 by DOMO.
USER MANUAL B3971 DOMO
H. Start- pauze/stop
- Volkoren (whole wheat)
3. Pain comple (whole wheat)
6. Sans gluten (gluten free)
18. Italian (Italian)
3. Vollkorn (whole wheat)
6. Glutenfrei (gluten free)
All of our products are always submitted to a strict quality control before they are sold to you.
Should you nevertheless experience problems with your device, we sincerely regret this.
In that case, we kindly request you to contact our customer service.
Our staff will gladly assist you.

+32 14 21 71 91

info@linea2ooo.be
Monday-Thursday:8.30-12.00 and 13.00-17.00
Friday: 8.30-12.00 and 13.00-16.30
This appliance has a two year warranty period. The warranty on accessories and components that are liable to wear-and-tear is only 6 months. During this period the manufacturer is responsible for any failures that are the direct result of construction failure. When these failures occur the appliance will be repaired or replaced if necessary. The warranty will not be valid when the damage to the appliance is caused by wrong use, not following the instructions or repairs executed by a third party. The guarantee is issued with the original till receipt. All parts, which are subject to wear, are excluded from the warranty. If your device breaks down within the 2-year warranty period, you can return the device together with your receipt to the shop where you purchased it.
The guarantee on accessories and components that are liable to wear-and-tear is only 6 months.
The guarantee and responsibility of the supplier and manufacturer lapse automatically in the following cases:
If the instructions in this manual have not been followed.
In case of incorrect connection, e.g., electrical voltage that is too high.
In case of incorrect, rough or abnormal use.
In case of insufficient or incorrect maintenance.
In case of repairs or alterations to the device by the consumer or non-authorised third parties.
If the customer used parts or accessories that are not recommended or provided by the supplier / manufacturer.
SAFETY INSTRUCTIONS
When using electrical appliances, basic safety precautions should always be taken, including the following:
- Read all instructions carefully. Keep this manual for future reference.
- Make sure all packaging materials and promotional stickers have been removed before using the appliance for the first time. Make sure children cannot play with the packaging materials.
This appliance is intended to be used in household and similar applications such as:
staff kitchen areas in shops, offices and other working environments;
farmhouses;
by clients in hotels, motels and other residential type environments;
bed and breakfast type environments.
Children should be supervised to ensure that they do not play with the appliance.
This appliance can be used by children aged from 16 years and above and persons with reduced physical, sensory or mental capabilities or lack of experience and knowledge if they have been given supervision or instruction concerning use of the appliance in a safe way and understand the hazards involved. Children shall not play with the appliance. Cleaning and user maintenance shall not be made by children unless they are older than 16 and supervised.
- Keep the appliance and its cord out of reach of children younger than 16 years.
- Attention: This appliance cannot be used with an external timer or a separate remote control.
The appliance can become hot during use. Keep the power cord away from hot parts and don't cover the appliance.
- Before use, check if the voltage stated on the appliance corresponds with the voltage of the power net at your home.
Do not let the cord hang on a hot surface or on the edge of a table or counter top. - Never use the appliance when the cord or plug is damaged, after malfunction or when the appliance itself is damaged. In that case, take the appliance to the nearest qualified service center for check-up and repair.
- The use of accessories that are not recommended or sold by the manufacturer can cause fire, electrical shock or injuries.
- Unplug the appliance when it is not in use, before assembling or disassembling any parts and before cleaning the appliance. Put all buttons and knobs into the 'off' position and unplug the appliance by grasping the plug. Never unplug by pulling the cord.
- Do not leave a working appliance unattended.
- Never place this appliance near a gas stove or electrical stove or in a place where it may come into contact with a warm appliance.
Do not use the appliance outdoors.
Only use the appliance for its intended use.
Always use the appliance on a steady, dry and level surface. - Only use the appliance for domestic use. The manufacturer can not be held responsible for accidents that result from improper use of the appliance or not following the instructions described in this manual.
All repairs should be carried out by the manufacturer or its aftersales service. - Never immerse the appliance, the cord or the plug in water or any other liquid.
- Keep the cord away from sharp edges and hot parts or other heat sources.
- Do not place the appliance near inflammable materials or explosive and/or self-igniting gasses.
Make sure the holes of the appliance are not covered. - You can only use an extension cord when the electrical rating (check on label) is higher than or equal to that of the bread maker.
Plug in the extension cord in a way no one can trip over the cord or accidentally pull it.
Do not place objects on the appliance and do not cover it, when it's activated, to reduce the risk of fire. - The bread maker can become warm. Only touch the handles and buttons of the appliance and use, if necessary, oven mitts.
- Make sure the appliance is fully cooled down and pull the plug out of the wall socket, before adding or taking out the parts from the appliance.
- Do not move the bread maker, if the appliance contains warm ingredients or liquids.
-
Avoid contact with the rotating kneading paddles, when the appliance is activated, to reduce the risk of injury.
-
Please turn off the appliance and remove the plug from the socket, when you want to clean the appliance or when it's not in use.
- Do not use the bread maker as storage for food or kitchen utensils.
- Do not clean the appliance with a cleaning sponge. Small parts of the sponge can get in touch with the electrical parts and cause electrical shocks.
- Do not use the bread maker to dry food or other objects.
The total weight of all the ingredients cannot be higher than 1000 g. - Never use more than 715 ~g of flour per bread.
- Never use more than 22g of fresh yeast or 4 + 1 / 4 teaspoons of dry yeast per bread.
- Never use more than 460 ml of water per bread.
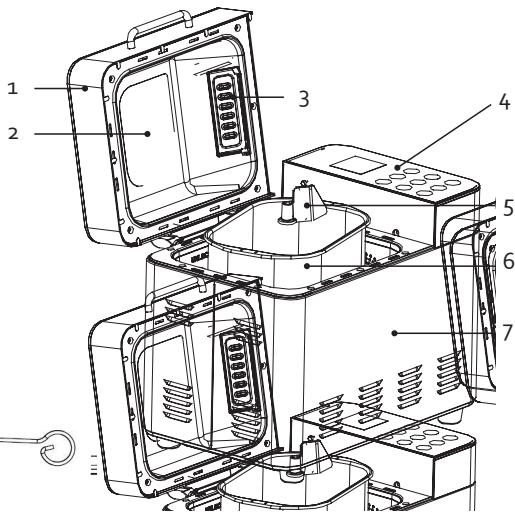
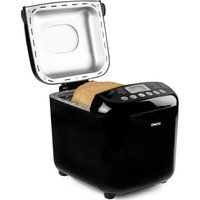
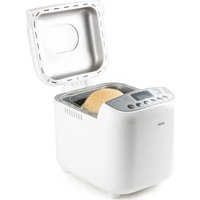
PARTS
- Lid
- Viewing window
- dispenser for additional ingredients
- Control panel
- Kneading paddle
- Bread pan
- Housing
- Measuring cup
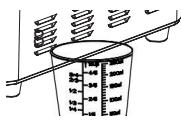
- Measuring spoon
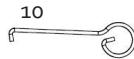
- Hook for removing the kneading paddle
BEFORE THE FIRST USE
- Make sure all packaging materials and promotional stickers have been removed before using the appliance for the first time.
Clean your bread maker, bread pan and kneading paddle with a damp cloth. The bread pan and the kneading paddle both have a non-stick coating to prevent dough from sticking to it. You must therefore never clean these parts with cleaning products, a sponge or a dishwashing brush. A damp cloth will do to clean them. Remove the protective film from the display.
It is perfectly common and harmless for your appliance to emit a bit of smoke when you use it for the first time.
Before the first use it is recommended to first bake with an empty bread pan with the program BAKE. This for 10 minutes. Afterwards, let everything cool down and clean the parts again.
Before using for the first time, grease the non-stick coating of the loaf tin and the kneading paddle with a little butter or margarine.
USE
BASIC RECIPE
The recipe below is for a loaf of simple white bread.
630gflour
370 ml water
5gof dried yeast
1 tsp salt
1 tbsp sugar
INGREDIENTS
Baking a great bread will largely depend on 3 main factors: quality, freshness and correct measurement of quantities.
Caution: never exceed the maximum capacity of your bread maker! (1000 g) Never use more than these maximum quantities of the following ingredients for 1 baking session:
Flour: 715 g max.
Yeast: 22 g fresh yeast or 4 + 1 / 4 teaspoons dry yeast max.
Water: 460 ml max.
FLOUR
Flour is the basic component of bread. The weight of the flour varies, depending on the type of flour used. It is therefore absolutely necesary that you weigh the right quantity on a pair of scales. Please make sure you buy a variety of flour which is suitable for bread making. Check the packaging.
GLUTEN
Gluten is a natural ingredient of flour and stimulates the bread to rise.
YEAST
Yeast is a micro-organism found on several vegetable foodstuffs. Yeast converts sugars into alcohol and carbon dioxide. This ability is ideal for the bread to rise and to make it lighter and easier to digest. We recommend the use of dry yeast for this bread maker. This (granular) yeast is easier to work with, keeps for a longer time than fresh yeast and generally gives you a better result as well.
SALT
Salt does not only lend the bread a certain flavour but equally regulates the activity of the yeast, strengthens the dough and prevents the bread from rising too hard.
BUTTER/OIL
Butter and oil improve the general taste of the bread and equally soften it. Butter or oil should both be at room temperature when you add them to the other ingredients.
SUGAR
Sugar is the nutritional source for the yeast and is of great importance for the bread's rising process. You can use plain white sugar, brown sugar, syrup or honey. Sugar lends the bread a certain soft and delicate flavour, increases its nutritional value and also renders the bread less perishable. Attention: you should not use unrefined sugar or sugar lumps, when you want to make e.g. cinnamon bread, for they can damage the non-stick coating of the bread pan.
WATER
When the flour mixes with the water, the gluten will form and air can no longer enter, thus enabling the bread to rise. At normal temperature you should use tepid water (± 20 à 25 °C) to make bread: cold water will not activate the yeast and warm water will achieve the opposite result.
MILK
Milk adds greatly to the color of the bread (brown for the crust, creamy on the inside), improves the overall taste of the bread and increases its nutritional value. Should you choose to use fresh milk, do not forget to reduce the amount of water, in order to maintain the right level of humidity.
Attention: do not use fresh milk if you are going to choose the baking program with the time delay function, for the milk could turn sour.
OTHERINGREDIENTS
Always use fresh ingredients. When you want to use nuts, sunflower seeds, dried fruit or similar ingredients, we recommend that they be soaked in water and dried before adding them to the dough. Always ensure these ingredients are not too large, for they may damage the non-stick coating.
CONTROL PANEL
Controller
A. Menu: program selection
B. Weight: choose weight (size) of bread
C. Color: how brown the crust is
D. Time +: increase time
E. Bake: button for the Bake program
F. Knead: button for the Knead program
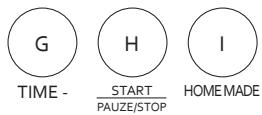
G. Time-: decrease time
H. Start-pause/stop: on/off button
I. Home made: button for the Home made program


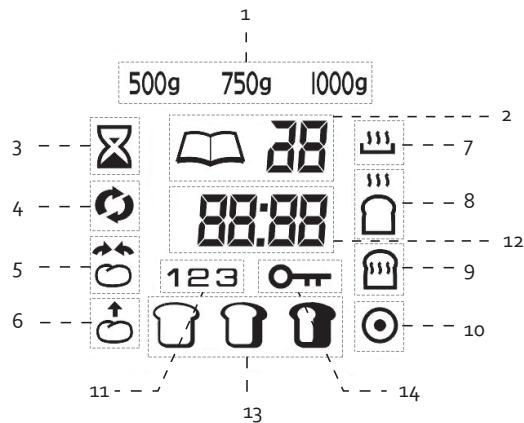
Display
- Choose weight (size) of bread
- Menu
- Timer
- Program phase: kneading
- Program phase: resting
- Program phase: rising
- Program phase: heating
- Program phase: baking
- Program phase: warming
- Program Phase: ready
- Program phase: number of the phase
- Time remaining in minutes
- Browning of the crust: light, medium, dark
- Locking the control panel
A. 'Menu' button
This button is used to select the desired baking program. With every touch of this button, you will hear a bleeping signal, thus indicating a change in the selected type. The selected program and the corresponding baking time will appear on the display.
B. 'Weight' button
You use this button to select the weight of the bread you wish to make, either 500, 750 or 1000 g. Do bear in mind that the added sum of the ingredients listed in the recipe is about the weight of the bread you are about to make.
C. 'Color' button
You use this button to determine whether you want a light, medium or dark crust.
For recipes you try out for the first time, we advise you to choose the medium crust color.
D. Time + and G. Time -
You can select delayed start and set the timer for certain programs using these buttons. You can adjust the program time for the other programs.
E. Bake
This button is for the Bake program. Press start-pause/stop to confirm the program.
F. Knead
This button is for the Knead program. Press start-pause/stop to confirm the program.
H. Start-pause/stop
You start the selected program, or pause/cancel a running program using this button. Press briefly to pause a program. Press the button again to resume. If you do not resume a program within 3 minutes, the operation will automatically stop.
To end a program, press the button for a few seconds until you hear a beep.
I. Home made
This button is for the Home made program. See 'Set up Home made' under the Use section. Press start-pause/stop to confirm the program.
PROGRAMS
Program times:
| Program | 500 g | 750 g | 1000 g |
| 1. Basic | 3:05 | 3:10 | 3:15 |
| 2. French | 3:35 | 3:40 | 3:45 |
| 3. Whole wheat | 4:05 | 4:10 | 4:15 |
| 4. Sweet | 3:35 | 3:40 | 3:45 |
| 5. Rice | 2:50 | 2:55 | 3:00 |
| 6. Gluten free | 3:05 | 3:10 | 3:15 |
| 7. Quick | 2:10 | 2:15 | 2:20 |
| 8. Fruit | 3:05 | 3:10 | 3:15 |
| 9. Cake | 2:20* | ||
| 10. Sandwich | 3:00 | 3:05 | 3:10 |
| 11. Raisin/nut | 3:05 | 3:10 | 3:15 |
| 12. Rye | 4:05 | 4:10 | 4:15 |
| 13. Knead | 0:08* | ||
| 14. Dough | 1:30* | ||
| 15. Brioche | 3:35 | 3:40 | 3:45 |
| 16. Bake | 0:30* | ||
| 17. Homemade | -- | -- | -- |
| 18. Italian | 3:05 | 3:10 | 3:15 |
*Programs that do not allow you to choose the weight of the bread.
The time on the display is indicated in hours and minutes. Example: program 1, basic, making a bread of 750 g should take 3 hours 10 minutes.
1. Basic
This is the program most commonly used to make a regular white loaf of bread.
2. French
With this type of baking program, the time to knead and to rise will be longer than this of the first program. The result is a crispcrust and a lighter texture.
3. Whole wheat
This program is most suitable for the confection of heavier types of bread, such as wholemeal bread or multi-grain bread. Generally, these types of bread tend to be slightly smaller than regular white bread, due to the bigger weight of the flour. It is best not to use the time delay function with this program, since the results might not be as good.
4. Sweet
This program is suitable for making raisin bread, sugar bread, chocolate bread, etc.
5. Rice
Use this program for a bread based on rice flour. After kneading, the dough can rise before being baked. The crust of a rice bread is thinner and softer than a normal bread.
6. Gluten free
This is the program for making gluten free bread. The dough of a gluten free bread is moister and has the consistency of a batter. Therefore, the dough should not be kneaded or allowed to rise for too long. The baking time, on the other hand, is longer. It is better not to use delayed programming with this program, as this can lead to results that are not as good. It is best to add all the ingredients at the beginning.
7. Quick
For kneading, rising and baking bread with baking soda or baking powder. The result usually is a smaller bread with a denser texture. It is recommended that you briefly stir the ingredients with a wooden spoon before you press start.
8. Fruit
Use the dispenser to add ingredients such as raisins or other dried fruits. The machine will add the ingredients itself from the dispenser at the right time. If you would like to add fresh or juicier fruit to your bread, it is best to do so directly in the loaf tin when you hear a beep.
9. Cake
This program allows you to make bread that is confected with e.g. baking powder. With this type of baking program, your loaf of bread will be less high and more solid. If you use this program to bake a cake, we recommend that you put the ingredients in the bread pan, program the bread maker and briefly stir the ingredients with a wooden spoon before pressing the 'start-pauze/stop' button. You can't choose the weight yourself if using this program.
10. Sandwich
Select this program to make a very light white dough suitable for e.g. little bread rolls. Please note! With this program you cannot set a crust color, the machine will do so itself.
11. Raisin/nut bread
Use the dispenser to add ingredients such as raisins or nuts. The machine will add the ingredients itself from the dispenser at the right time.
12. Rye
This program is ideal for loaves with a heavier variety of grain such as rye. The bread itself is also firmer and heavier than normal bread.
13. Knead
The machine will only knead the dough during this program; it won't bake it or let it rise. You can use this program to knead pizza dough, for example. You can adjust the operation time using the Time + and Time - buttons.
14. Dough
You can only have the machine knead the dough and let it rise with this program.
15. Brioche
This program is suitable for breads with additional ingredients that have a high sugar, fat, and protein content (e.g. chocolate, sugar, etc.). These ingredients create a darker crust. The rising program phase will take more time, giving you a light and airy result.
16. Bake
For ready-made dough which you perhaps had already made in advance. This program can only be used for the final stage of the baking process. Program 12 also allows you to reheat bread that you had already baked.
17. Home made
This button can be programmed with your personalised time settings. See 'Set up Home made' under the Use section.
18. Italian
Make a tasty Mediterranean bread with this program. You can add additional ingredients such as herbs, sun-dried tomatoes, olives, etc.
OPERATING INSTRUCTIONS
- Take the bread pan out of the bread maker, by turning it a quarter of a turn to the right. You can lift the bread pan out, straight up, by pulling the handle.
- Place the kneading paddle on the axis in the bread pan. Please position the kneading paddle carefully and appropriately, so all ingredients can be sufficiently mixed and kneaded.
- When putting the ingredients into the bread pan, please do so in the following manner and order:
Water / milk
Butter / oil
- Eggs (optional)
Salt (salt on one side)
Sugar (put the sugar on the opposite side)
Flour
- Yeast (concentrate the yeast in a little hole in the middle)
Make sure the yeast is kept away from the sugar, salt and water, for the yeast might be activated before all ingredients have been properly blended and kneaded.
Additional ingredients, such as nuts, herbs, dried fruits, etc., can be added to the dispenser or can be added afterwards. See the 'Adding additional ingredients' section.
- Remove all remnants of the ingredients on the outside of the bread pan. Put the bread pan back in the bread maker. Turn the bread pan clockwise so it locks into place.
- Close the lid.
- Plug in the appliance.
- Select the program you require, using the 'menu' button. Each input is confirmed by a bleeping signal.
- Set the color of the crust using the Color button. You can choose between light, medium, or dark. Set the size of the bread (500 g, 750 g, or 1000 g) with the Weight button.
- Program the time delay function, if so desired.
- Press the 'start-pauze/stop' button. The colon will start flashing, which indicates the bread maker has started the process. When you have programmed the time delay function, the program will start after the programmed time delay has expired.
- The machine will beep when the bread is ready. The display shows 0:oo. Press and hold start-pause/stop for a few seconds. The machine will beep again to confirm that you have stopped the program. If you do not stop the program with this button, the bread will be kept warm for another 60 minutes thanks to the warming function. Remove the plug from the socket and open the machine lid. Remove the loaf tin using oven mitts.
- Allow the bread to cool down for approximately 10 minutes. Turn the bread pan upside down above the sink and gently shake it to remove the bread. Please make sure the bread and the bread pan are never placed on the exterior of the appliance. Nor must they ever be placed directly on a plastic table-cloth. Should you have difficulty removing the bread from the bread pan, carefully turn the kneading paddle at the bottom of the bread pan until the bread comes loose. Never use sharp objects to remove the bread so as not to damage the non-stick coating of the loaf tin.
- If a kneading paddle should get stuck in the bread, try and remove it as gently as you can. If necessary, you can allow the bread to cool down a little more so you can remove the kneading paddle with your hands afterwards. Beware that you only touch the kneading paddle with your hands if it has sufficiently cooled down. We recommend that you wait 15 to 20 minutes before cutting the bread.
WARMING FUNCTION
In case you should not make it home in time, the bread maker will continue
to heat the bread for another 60 minutes. This additional time is not included in the
program time. Press the 'start-pauze/stop' button for a few seconds, if you want to interrupt this part of the process. If you leave the bread in the bread maker for more than an hour, it will become moist.
Rinse the bread pan immediately with warm water, after you've taken out the bread, to make sure the kneading paddles don't keep stuck to the axle.
Do not activate the bread maker, if the appliance hasn't cooled down or warmed up yet.
ADDING ADDITIONAL INGREDIENTS
During the kneading process of the following programs, there will be a beep after kneading: Normal, French, Whole Wheat, Sweet, Rice, Gluten free, Fast, Fruit, Cake, Raisins/Nuts, Rye, Brioche, Italian. This beep indicates that you can add additional ingredients such as raisins, nuts, seeds, etc. You can add the ingredients through the dispenser or manually.
Dispenser
Open the dispenser by sliding the lid to the left. Add the ingredients. Close the lid.
The ingredients in the dispenser will automatically be added to the bread after kneading and rising.
Caution:
- Do not add moist, liquid, or powdered ingredients through the dispenser.
- Never overfill the dispenser.
It is best to chop large nuts into finer pieces before adding them to the dispenser.
Before adding ingredients to the dispenser, make sure that the valve on the inside of the appliance is closed.
Manual
You can also add ingredients manually. When you hear the beep, pause the program, open the lid, add the additional ingredients, then close the lid and press the start button again. This manual method is best used for moist, runny, or powdered ingredients or larger quantities.
MEMORY FUNCTION
If the appliance fails due to a power failure, the memory function will work for 10 minutes.
This way, you do not have to restart the program when the power is back. If the outage lasts longer than 10 minutes, the program will be cancelled.
SETTING HOME MADE
The Home made button is reserved for your own baking program. You can determine the time for all program phases yourself. If you want to skip certain phases, set the time to 0:00.
Attention: the settings of this button will not be saved when the power cord is unplugged.
- Press the Home made button or select program 17 using the Menu button.
- Press the Home made button again to start programming. The time and the program phase icon will flash on the display. See the table of program phases and default time settings below.
-
Set the desired time for each phase using the Time + (increase time) and Time-(decrease time) buttons. Confirm the selected time by pressing the Home made button.
-
When all phases have been completed, you will see the total duration of the program on the display. The standard total duration is 3 hours. You can then start the set program by pressing the Start button. If you press the start button while setting the phases, the programming will stop early.
If desired, you can also have this program start delayed; see 'Delayed programming'.
| Program phases | Icon | Default setting | Adjustable time lock |
| Knead 1 | 1 | 0:10 | 1-30 min. |
| Rest 1 | 1 | 0:03 | 0-30 min. |
| Knead 2 | 2 | 0:05 | 0-30 min. |
| Rest 2 | 2 | 0:10 | 0-30 min. |
| Knead 3 | 3 | 0:20 | 0-25 min. |
| Rise 1 | 1 | 0:42 | 0-60 min. |
| Rise 2 | 2 | 0:40 | 0-60 min. |
| Rise 3 | 3 | 0:00 | 0-60 min. |
| Bake | 0:50 | 0-80 min. | |
| Warming function | 1:00 | 0-60 min. |
REMOVING THE KNEADING PADDLE BEFORE BAKING
You can remove the kneading paddle, after the dough has been kneaded for the last time.
- Shortly press the 'start-pause/stop' button to interrupt the baking process or disconnect the plug from the power socket.
- Open the lid and take out the bread pan. Take out the dough with floured hands and remove the kneading paddle.
- Place the dough back in the bread pan and close the lid.
- Insert the plug into the power socket and press the 'start-pauze/stop' button. The program will be continued.
TIME DELAY FUNCTION
You can program the machine so that the preparation will be completed at a time of your choice.
Calculate the time difference between the time you start the program and the time you want the preparation to be ready. The bread maker will automatically add the duration of the program cycles to this.
By pressing the keys, the time will increase or decrease by 10 minutes at a time.
You will see the hourglass icon on the display.
- Delayed programming is not possible with kneading and baking. The program time will be adjusted if you press the Time + and Time - buttons with these programs.
Example:
The time is 9 am and you want your bread to be ready by 5 pm. Put all ingredients in the bread pan. Place the bread pan in your bread maker. Close the lid and select the program using the MENU button. Press the Color button to set the crust color and choose the desired weight of the bread. Press the Time + button until 8:00 appears on the display. After all, 8 hours will have passed from the moment you pressed the start button to the moment the bread should be ready (5 p.m.).
Press the start button. The colon will start flashing on the display and the hourglass icon will be visible. The time will now count down until the time is reached when the bread maker has to start kneading. The bread maker will now run through the entire set program so that the bread is ready at the chosen time.
Caution: Do not use the timer program if you are using ingredients that have a limited shelf life, such as fresh milk, eggs, yoghurt, cheese and fresh fruit.
TIP
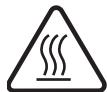
Please make sure your ingredients are at room temperature and that they are carefully weighed.
- You can verify the freshness of your yeast by submitting it to the following test: dissolve 1 teaspoonful of sugar in half a cup of lukewarm water and subsequently add the yeast to this mixture. If the substance starts bubbling and boiling after a few minutes, you can be sure that you are using fresh yeast.
Salt breaks the effect of the yeast and sugar exactly does the opposite. If you are not allowed to use either sugar or salt for dietary reasons, you must not add the other ingredient either. Your bread will not contain sugar or salt.
Home-made bread, made with this bread maker, does not contain any preservatives and is therefore perishable. If you wrap the bread in a vacuum package after cooling down, you will be able to keep it for a few days. Of course you can also freeze the bread.
Grease the axle in the loaf tin with a little butter to ensure that the kneading paddle comes off easier.
CLEANING AND MAINTENANCE
Before cleaning your bread maker, please make sure it's no longer activated, it has sufficiently cooled down and the plug has been disconnected from the power socket.
Clean the appliance thoroughly after each use. If the loaf tin, axle in the loaf tin, and kneading paddle are not clean before use, this may affect the operation and service life of the bread maker.
Thoroughly dry the appliance and all parts. Leave the lid open for half an hour so that all parts are sufficiently dry before storage or reuse.
Attention: Never submerge the appliance in water.
EXTERIOR
Clean the outside of the appliance and the lid with a damp cloth or sponge. Take out the bread pan before you start cleaning. If necessary, you can clean the outside of the appliance using a mild detergent.
INSIDE
The inside of the device can be carefully cleaned with a slightly damp cloth. Be careful when cleaning the heater element.
LOAFTIN
Remove the loaf tin from the machine by turning it a quarter turn counterclockwise using the handle and lifting straight up. The loaf tin can be cleaned with warm water. Make sure that you do not damage the non-stick coating. If it is not possible to remove the dough hook from the loaf tin, let the tin cool completely. Pour a little warm water into the loaf tin so that the dough hook is under water. The water will now ensure that the sticky particles dissolve and the dough hook can be removed.
Do not use detergents or washing up brushes as they can damage the non-stick coating of the loaf tin.
The loaf tin is not suitable for cleaning in the dishwasher.
FREQUENTLY ASKED QUESTIONS
| Problem | Solution |
| I am not getting the desired result. | The composition of the dough is very important to achieve a good result. Also, different brands of flour can give different results. The best way to learn to use the device is to use it. We recommend that you try the basic recipe. A ready-made bread mix is another great way to get started. If this does not help, please contact our customer service department. The ingredients have not been accurately weighed. The ingredients are not fresh. The ingredients are not at room temperature. |
| Can I check whether the dough is working during the process? | The dough should look like a smooth, elastic round ball. After 5 to 10 minutes (during kneading), open the lid and touch the top of the dough ball with your fingers. The dough should stick to your fingers a little. If the dough is too sticky, it is too moist and you need to add some flour. If the dough does not stick at all, it is too dry and you need to add a little water. Do not open the lid while rising. This could cause the bread to collapse. |
| I want to bake several loaves of bread one after the other. | Allow the appliance to cool for 20 minutes with the lid open. A heated device will cause the yeast to start working too quickly, which will harm the result. |
| The bread has collapsed. | If the bread seems to have collapsed on all sides, this means that the dough was too moist. Try adding a little less water. When using preserved fruit or vegetables, drain it well and rub dry before using. It has been soaked for a long time, meaning it will contain excess moisture. You can try using a lighter flour variety. It may also have risen too much. The dough has risen so much that it cannot cope with the rising. Try to add a little less yeast (1 to 2 grams). If the dough has risen too fast, it may have risen out of the loaf tin at the top. Unplug the device and let it cool off. Then clean the heating element. |
| The inside of the loaf is not ready. | If the bread is too soft in the middle, this may be due to the type of flour used. This is usually the result of using heavier flours, such as rye flour or wholemeal flour. Try using one more kneading process when using these types of flours. When the bread maker has finished the first kneading process, stop the machine. Then reset the unit and press Start. The machine will start kneading again; there will now be a larger amount of air in the dough. |
| The bottom of the bread is too thick. | You left the bread in the appliance a bit longer with the warming function on. The water will evaporate, giving you a thicker bottom. Remove the bread from the appliance immediately after the program. |
| The bread has overflowed. | You used too much yeast. The yeast has been too strongly activated, e.g. by too much sugar or too high a temperature. You used too much dough. Do not use more than 1000 g. |
| H:HH appears on the display. | The unit is still too hot. Allow the appliance to cool first. |
| E:EO appears on the display. | There is a problem with the temperature sensor. Send the device to our after-sales service. |
| Why can't I add extra ingredients at the start of the program? | The extra ingredients (such as currants or nuts), will be kneaded to pieces and the bread will not be kneaded properly. It will also affect the rising. Only add the extra ingredients once the appliance beeps, after kneading/rising. |
| Can I use milk instead of water? | Yes! Always make sure that the complete volume of moisture is correct. The ratio of milk and water makes no difference. |
| The crust is sometimes lighter and sometimes darker. | These can be selected with the ‘Color’ button. Preparations with more sugar will also make the crust darker. |
| The bread machine is kneading slower than normal. | This can happen with heavy flours, causing the engine to work harder. However, this is not a problem for the machine. Add a tablespoon of liquid. |
| The kneading paddle is stuck in the baking mould. | Remove the bread from the mould. Fill the mould with warm water and leave to soak for 15 minutes. The stuck dough will come loose. |
| There is condensation on the inside of the inspection window. | This is normal. This is due to the heat. |
| I used a ready-made mix, but the bread still came out wrong. | Before sending the device in for repair, we recommend that you try the basic recipe again. Ready-made mixes can sometimes also contain ingredients that produce poor results. |
ENVIRONMENTAL GUIDELINES

This symbol on the product or on its packaging indicates that this product may not be treated as household waste. Instead it must be brought to the applicable collection point for recycling of electrical and electronic equipment. By ensuring this product is disposed of correctly, you will help prevent potential negative consequences for the environment and human health, which could otherwise be caused by inappropriate waste handling of this product. For more detailed information about recycling of this product, please contact your local city office, your household waste disposal service or the shop where you purchased the product.

The packaging is recyclable. Please treat the packaging ecologically.
GARANTIA
3. Integral (Whole wheat)
- Home made
- Italiano (Italian)
--
3:05
--
3:10
--
3:15
- Integrale (whole wheat)
D. Time+ a (G) Time-
5. Ryzovy, r'ze = rice
D. Time+ a (G) Time-
- Whole wheat = celozrnny
- Domace vlastny chlieb = home made
- Taliansky chlieb = Italian
Tymto programom si upeciete chutn y stredomorsk y chlieb. Mozete prdat dalsie prisady, ako su bylky, suSené paradajky, olivy atd'.
POUZITIE PRISTROJA
FUNKCIE UDRZANIE TEPLEHO CHLEBA
CASTO KLADENE OTÁZKY
- Pain comple (whole wheat)
- Sans gluten (gluten free)
- Italian (Italian)
- Vollkorn (whole wheat)
- Glutenfrei (gluten free)
- SAFETY INSTRUCTIONS
- PARTS
- BEFORE THE FIRST USE
- USE
- BASIC RECIPE
- INGREDIENTS
- FLOUR
- GLUTEN
- YEAST
- SALT
- BUTTER/OIL
- SUGAR
- WATER
- MILK
- OTHERINGREDIENTS
- CONTROL PANEL
- Controller
- Display
- PROGRAMS
- Basic
- French
- Whole wheat
- Sweet
- Rice
- Gluten free
- Quick
- Fruit
- Cake
- Sandwich
- Raisin/nut bread
- Rye
- Knead
- Dough
- Brioche
- Bake
- Home made
- Italian
- OPERATING INSTRUCTIONS
- WARMING FUNCTION
- ADDING ADDITIONAL INGREDIENTS
- Dispenser
- Caution:
- Manual
- MEMORY FUNCTION
- SETTING HOME MADE
- REMOVING THE KNEADING PADDLE BEFORE BAKING
- TIME DELAY FUNCTION
- Example:
- TIP
- CLEANING AND MAINTENANCE
- EXTERIOR
- INSIDE
- LOAFTIN
- ENVIRONMENTAL GUIDELINES
- GARANTIA
- Integral (Whole wheat)
- Ryzovy, r'ze = rice
- Time+ a (G) Time-
- POUZITIE PRISTROJA
- FUNKCIE UDRZANIE TEPLEHO CHLEBA
- CASTO KLADENE OTÁZKY
Brand : DOMO
Model : B3971
Category : Bread maker