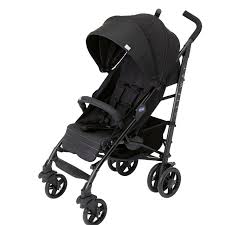
USER MANUAL OHLALA CHICCO
IMPORTANT: READ THESE INSTRUCTIONS CAREFULLY BEFORE USE AND KEEP THEM FOR FUTURE REFERENCE. YOUR CHILD'S SAFETY MAY BE AFFECTED IF YOU DO NOT FOLLOW THESE INSTRUCTIONS.
WARNING: BEFORE USE, REMOVE AND DISPOSE OF ALL PLASTIC BAGS AND PACKAGING MATERIALS AND KEEP THEM OUT OF REACH OF CHILDREN.
WARNING
WARNING: It may be dangerous to leave your child unattended.
WARNING: A CHILD'S SAFETY IS YOUR RE-SPONSIBILITY.
WARNING: Children should be harnessed in at all times and should never be left unattended.
WARNING: The child should be clear of moving parts while making adjustments.
This vehicle requires regular maintenance by the user. Overloading, incorrect folding and the use of non-approved accessories may damage or break.
WARNING: before assembly, check that the product and all of its components have not been damaged during transportation. Should any part be damaged do not use, and keep out of reach of children.
WARNING: This vehicle is intended for use for children aged between 0 and 36 months of age and up to weighing up to 15kg
- It is recommended that the backrest should be used in its most reclined position for children from birth to 6 months of age.
- WARNING: Ensure that all the locking devices are engaged before use. In particular, ensure that the stroller is locked in the open position, by checking that the rear locking device is effectively locked.
- Do not overload the storage basket. Maximum weight 3kg .
- Do not carry more than one child at a time.
- Do not use accessories, spare parts, or any component not supplied or approved by the manufacturer, as they may make the stroller unsafe.
WARNING: Any load attached to the handle affects the stability of the pushchair.
WARNING: the use of the crotch strap and safety harness is necessary to guarantee the safety of your child. Always use the crotch strap in combination with the waist belt.
- Ensure that the person using the stroller knows how to use it safely.
- WARNING: when opening or closing the stroller, ensure that your child is at a safe distance. Do not attempt to open or close the stroller with a child on board. Ensure that during these operations, the movable parts of the stroller do not come into contact with your child.
Always apply the brakes whenever the stroller is stationary.
WARNING: never leave the stroller on a sloped surface with a child on board, even with the brakes applied.
- Do not let other children play unattended close to the stroller or climb on it.
- To prevent the risk of choking, do not give to your child, or place near it, any objects with strings.
WARNING: Do not use the stroller on stairs or elevators: it could cause the loss of control of the stroller. Pay special attention when manoeuvring the stroller up or down pavements or a step.
- If the stroller is left exposed to direct sunlight for a long time, allow it to cool before placing your child in it. Prolonged exposure to direct sunlight may cause the materials and fabric to fade.
- Do not use the product if some of its parts are broken, torn or missing.
WARNING: When it is not used, the stroller must be kept away from the reach of children.
WARNING: This product is not suitable for running or skating.
- Prevent the stroller from coming into contact with salt water. It may cause the formation of rust.
- Do not use the stroller on the beach.
WARNING: This product must only be pushed by an adult.
CLEANING AND MAINTENANCE
The cleaning and maintenance of this product must be carried out on a regular basis by the user. The cleaning and maintenance of the stroller must only be carried out by an adult.
CLEANING
The cover can be removed (please refer to the section "How to Remove the Fabric Cover").
Please refer to the care labels for instructions on how to clean the fabric parts. Below are the cleaning symbols and their meanings:

Wash by hand in cold water.

Do not bleach.

Do not tumble dry.

Do not iron.

Do not dry clean.
Periodically wipe clean plastic parts with a soft damp cloth. Always dry the metal parts to prevent the formation of rust if the stroller has come into contact with water.
MAINTENANCE
Lubricate the moving parts only if necessary, with a light application of a silicone based lubricant. Regularly check the condition of the wheels and, keep them clean of dust and sand. To avoid friction that may prevent the correct operation of the stroller, ensure that all the movable plastic parts placed along the metal frame are clean of dust, dirt or sand. Keep the stroller in a dry place.
GENERAL INSTRUCTIONS
HOW TO ASSEMBLE THE FRONT WHEELS
- Assemble the front wheel, inserting it into the appropriate joint. A click will be heard, indicating that it is locked correctly into position (diag. 1). Repeat this operation with the other wheel. WARNING: Before use, ensure that the wheels are safely locked into position.
WARNING: When opening the stroller, ensure that your child, or other children, are at a safe distance.
Ensure that during these operations, the movable parts of the stroller do not come into contact with your child.
2. Release the closing device and push the front part of the stroller forward (diag. 2).
3. Push the rear primary locking mechanism downward with your foot (diag. 3). Ensure that the stroller is open and locked in the correct position.
WARNING: Before use, ensure that the stroller is locked in the open position, by checking that the locking mechanism, at the rear of the stroller, is effectively locked.
HOW TO USE THE SAFETY HARNES
This stroller has a five-point safety harness featuring two shoulder straps, two adjustment holes, a waist strap and a crotch strap with buckle.
WARNING: When using the safety harness with children from birth up to approximately 6 months of age, it is necessary to first fit the shoulder straps through the two adjustment holes.
4. If necessary, adjust the height of the shoulder straps, inserting them into the adjustment hole, as shown in diagram 4. After sitting your child in the stroller, fasten the safety harness, first inserting the two prongs into the hole located on the shoulder straps (diag. 4A and 4B) and then into the buckle of the crotch strap (diag. 4C). Adjust the length of the straps, ensuring that they adhere to the child's shoulders and body correctly. To unfasten the waist strap, press and pull the side prongs.
WARNING: Children should be harnessed in at all times. To ensure your child's safety, it is necessary to always use the safety harness.
5. For extra safety, "D" rings are provided for the attachment of a separate safety harness approved to BS6684. They are
located inside the seat on the left and right, see diagram 5 above.
HOW TO ADJUST THE BACKREST
The backrest can be adjusted to 5 positions.
6. Fit the two fabric panels to the rear tubes by fastening the two press studs, as shown in diagram 6.
7. To adjust the inclination of the backrest, press the button located on the backrest. Release the button to lock the backrest in the nearest position (diag. 7).
8. To raise the backrest to the desired position, simply push it in an upward direction (diag. 8).
WARNING: The child's weight can make these operations more difficult.
HOW TO ADJUST THE LEG REST
The stroller's leg rest can be adjusted to 2 positions to offer extra comfort to your child.
9. Press simultaneously the two side buttons, as shown in diagram 9, to adjust the leg rest to the desired position.
REAR BRAKES
The rear wheels have linked brakes, which can be applied simultaneously to the two rear wheel units by using only one pedal.
10. To apply the brakes, push one of the two levers located at the centre of the rear wheel units in a downward direction, as shown in diagram 10.
11. To unlock the braking system, push one of the two levers located at the centre of the rear wheel units in an upward direction, as shown in diagram 11.
WARNING: Always apply the brakes whenever the stroller is stationary. Never leave the stroller on a sloped surface, with a child onboard, even with the brakes applied.
WARNING: After operating the brake lever, ensure that the brakes have been correctly applied to both of the rear wheel units.
FRONT SWIVEL WHEELS
The stroller has front swivel/forced wheels.
It is recommended to use the wheels in the fixed mode when manoeuvring the stroller on particularly uneven surfaces. The use of the wheels in the swivel mode is recommended to increase the manoeuvrability of the stroller on a normal road surface.
- To use the front wheels in the swivel mode, push the front lever in an upward direction with your foot, as shown in diagram 12. To use the front wheels in the fixed mode, lower the lever with the foot. The wheel will lock in the straight position, regardless of its previous position.
WARNING: Both wheels must always be locked or unlocked at the same time.
SUMMER/WINTER HOOD
- To fit the hood, fasten the plastic clip in the appropriate positions, as shown in diagram 13.
WARNING: the hood must be fixed on both sides of the stroller.
Ensure that the hood is correctly secured into position.
- Open the hood as shown in diagram 14A, and lock it by pressing the two side calliper shaped mechanisms (diag. 14B). WARNING: If you wish to close the hood, always unlock the two side calliper shaped mechanisms.
- The hood can become a summer sun-canopy. The rear panel may be removed by unfastening the zip (diag. 15).
WARNING: When closing the stroller, ensure that your child, or other children, are kept at a safe distance. Ensure that during
these operations the moveable parts of the stroller do not come into contact with your child. Before closing the stroller, ensure that the storage basket is empty.
- If it is open, fold the hood, raising the two side calliper shaped mechanisms (diagram 16A) and pulling the front part towards you, as shown in diagram 16B.
- To close the stroller, pull the rear locking mechanism in an upward direction (diag. 17A), and unlock the pedal, located on the right side of the stroller, with your foot (see diag. 17B).
- To close the stroller completely, push the handles forward (diag. 18).
- When the stroller is closed, the locking device located on the side of the stroller will automatically lock it in the close position (see diag. 19), therefore preventing any accidental opening of the stroller.
HOW TO REMOVE THE FABRIC COVER
The fabric cover of the stroller can be removed.
- To remove the fabric cover, raise the leg rest (diag. 20A). Unfasten the buckles (diag. 20B) and the press studs located on the seat (diag. 20C); remove the fabric cover, taking care to slide the safety harness through the appropriate hole.
- Unfasten the press studs located on the rear tubes of the stroller, as shown in diagram 21A. Unfasten the press stud C and remove the two hooks D and E, located under the fabric panel on the side of the stroller (diag. 21B). Lastly, remove the fabric cover from the backrest, pulling it in an upward direction.
To fit the fabric cover to the stroller, carry out the following operations.
- Fit the fabric cover on the backrest of the stroller.
- Fasten the two hooks, D and E, and the press stud C, as shown in diagram 22.
- Fix the two fabric panels to the rear tubes with the press studs, as shown in diagram 23.
- Fasten the press studs (diag. 24A). Fit the fabric cover to the leg rest, then fasten the buckles (diag. 24B -24C).
ACCESSORIES
WARNING: The accessories described below may not be available for some versions of this product.
Please read carefully the instructions on the accessories available for the model purchased.
STORAGE BASKET
The stroller may come with a storage basket.
- Fit the storage basket, sliding the straps around the tubes of the stroller and fastening the press studs in the positions shown in diag. 25.
- The storage basket can also be used by the parents as a practical rucksack, as shown in diagram 26.
WARNING: When the storage basket is not fitted to the stroller, keep it out of reach of children.
Warning: Do not overload the storage basket. Maximum weight 3Kg
RAIN COVER
The stroller may come with a rain cover.
- To fit the rain cover, fasten the straps around the stroller's frame, in the positions shown in diagram 27. After use, if the rain cover is wet, let it dry in the air before folding the rain cover to store it.
WARNING: Be extremely careful when using the rain cover.
WARNING: Do not use the rain cover if the stroller is not fitted with the hood or sun canopy to prevent the risk of suffocation. To prevent the risk of suffocation, never leave the stroller under the sun with the rain cover fitted to it.
Some versions have a fleece footmuff, which is ideal in cold weather.
- Fit the fleece footmuff as shown in diagram 28, fastening the press studs in the positions shown.
- The upper part of the fleece footmuff has a comfortable hood, that can be opened and closed with the velcro (diag. 29).
- The footmuff has holes that allow you to slide through the safety harness when you use the footmuff (diag. 30).
WARNING: Always use the fleece footmuff with the safety harness inserted through the appropriate holes.
LEGCOVER
- The footmuff can be used as a legcover by opening the zip and removing the lower part in fleece (diag. 31).
- To fit the legcover, fasten the clips, fastening the straps around the stroller's tubes, in the positions shown in diagram 32.
Important Note: The pictures and instructions contained in the booklet refer to the complete stroller model. Some of the components and functions described here may vary according to the model purchased.
Chicco UK Ltd
Prospect Close
Lowmoor Road Business Park
Kirkby in Ashfield - Nottinghamshire NG17 7LF
Customer Services Helpline Tel: 01623 750870
(office hours only) - Website:www.chicco.com
AVISO IMPORTANTE
IMPORTANTE: ANTES DEL USO LEA ATENTAMENTE Este MANUAL DE INSTRUCCIONES PARA EVITAR PELIGROS Y CONSERVULO PARA FUTURAS CONSULTAS.
ATENCION: ANTES DEL USO QUITAR Y ELIMINAR LAS BOLSAS DE PLASTICO Y TODOS LOS ELEMENTOS QUE FORMEN PARTE DE LA CAJA DEL PRODUCTO Y MANTENERLOS FUERA DEL ALCANCE DE LOS NINOS.
ADVERTENCIAS
Nota importante: as他们在某一个地方,只要在某个地方,就不要去。
Nota importante: as in some places, it is important to go to a place where there are people.
Nota importante: as in some places, it is important to go to a place where there are people.
Farsana Portugal, S.A.
Pharsana NV
Maccabilaan 34-2660 Hoboken-Belgiè
Tel 03/828 08 80 - Fax 03/828 40 59
Website: www.chicco.com
VIKTIGT MEDDELANDE
VIKTIGT: LÁS DENNA BRUKSANVISNING NOGA INNAN VAGNEN ANVANDS FOR ATT UNDIVIKA FAROR OCH SPA-RA DEN FÜR FRAMTIDA BRUK. DITT BARNS SÄKERHET KAN AVENTYRAS OM DU INTE NOGA FÖLJER BRUKSANVISINGENGENS INSTRUKTIONER.
VARNING: INNAN ANVANDNING SKA EVENTUELLA PLA-STPASAR OCH ALLA DE DELAR SOM TILLHOR PRODUKTENS FORPACKING AVLAGSNAS, ELIMINERAS OCH HALLAS UTOM RACKHALL FOR BARN.
OBSERVERA
SOMMAR-VINTERSUFFLETT
Postaddress: Artsana Spa
Hnlat npuOmuεtae 5 0Eoeic.
- Štepewote ta δύo upaσματiva tμŋμata OTouc, mιω σωληνε, με ta autóμata kouπiǎ οπιώνιθοδεikvúεται ΘΟ έχέδio 6.
- Ieovtac to nAnktpo otnv nAtn Tou kopoiou, nTopeite va puOiaete tnV kian. Aqivovtac to nnKtpo n nAtn mlokapei otynn Kovtivn Eon (ox. 7).
- Iia va avebaoTe Tnv nlatn apkei va Tnv nioeTe npoc ta eIavw (Ox. 8).
IPOZOxH:Me toaPoc tou naiaoiou oEvpeyiec autecmuopei va evai duokolotepc.
MEPbI IPEIOCTOPOXHOCTN
BHIMAHINE: B3OJACHOCTb PEBEHKA TAKJE 3ABNCIT N OT BAC!
BHIMAHHE: Heo6xOdmo Bcerda npicTeRnBaTb pe6eHka pemHMy 6e3OnaCHOCTN HNKOrDa He octabJrTB erO odHoro 6e3 npincMOTpa.
BHIMAHHE: npBbIOpHeHn Oepaun NopeyInopOBaHIO DePKeTe pe6EHN Ka BdaN OT MOINbHbIX qAteN pOpyNoHON KOJIACKN.
JTa IpoRyIouHna KOLIACKa HJxJaetCBA nepiOnnueckOM TeXOBcNyKINBaHN CO CTOpOhBI nOTpe6MIIeTNeA.
Ipeperpy3kn, HenpaBnBbHoe CKNaBbHaBme INCNoJIb3OBAHnE HeoIObOpEHhBx IpoN3BOJNTeTEM AkeCCcApOB MOYr TIOBPeDIny NINI NIOOMaTb KOJIaCKy.
BHIMAHIE: onacho octablaTb pe6eHka odHoro 6e3 npncmToPa.
BHIMAHIE: neped c60pKo y6eHtbc8, yTO n3dEme n BCE eRO KOMnOHeNTb He NOBpeXdEhBi BCNECTBn TpaHCnOpTnPOBKn. B npOTNBHom Cnyae He NpIb3OBaTbc n3dJIeM m depKaTb erO BdaNOr DTet.
IcnoIb3OBAtB npOryIoHyIO KOnlACKy IJIpeBo3KnIeTeB Bo3pacte OT poKdHnN IO 36 MecaueB, Bec pe6EHa He DoJXHe NPeBbIaTaB 15 Kr.
PnI nepeBO3ke B pOryLOuOH KOJIaCKe DeTeENOT POJKeHEnyIOMoCEMaIEBCVNHKA DJOKNHa HAOJNTCBA B NOJHOCTbIO pa3JNOXGEHOM NIOJNOXEHIM.
BHMAHIE: nepeid nCNoIb3OBAHnEm pIpyoUHOJ KOJIaCKN y6eINtbcY, YTO BCE mExAHm3Mb 6e3OpNaCHOCtN npAIBNbHc QcEpJIeHb. B qactHOCTN, y6eINtbcY, YTO npGryoUHaj KOLaCKs 3aΦIKCnPOBaHa B OTKpbITOM NIOJoxEHn n 3a6LOKIpOBaHa 3aDHA KPeCTOBNHa.
Ipy3B KOp3nHKe He DoJIkeH npeBbIaTb 3 Kr.
He caɪntb b Kɔjlačky 6oJIee oJHOrO pe6eHka.
He ykpeJIbTa Hn pOryNoHoi KOJIaCKe akCEccyapbl, 3aNaChbIe qactn KOMNHOENTbl dpyInx PpOnBDOJNTeJe nIi HeoDobpeHbIe npOn3BOJNTeEM.
BHIMAHIE: cymkn n HbIe npedMeTbI, NOBWeHbIe Ha puKn PpOryIoUHOJ KOJIACKN, MOryT PruDaTb KOLIACKHe HeyCTOnuBOCTb.
BHIMAHNE:утбы obecneuHTb 6e3ONaCHOCtB Baweemy pe6eHky, Heo6xOAnMo BCEgda npucTeuBaT erO pemHjem 6e3ONaCHOCtN pa3delenTeNbHM pemHem MekJy HOr. Bcerda nCOnb3OBAt b ODHOBpeMeHHo pa3delenTeNbHn peMeHb MekJy HOr n peMeHb 6e3ONaCHOCtN.
Y6eIHTbc, YTO IINU, KOTOPbIE NcPONb3yHOT npOryIouHyIO KOLJCKy, 3HaIOT O TOM, KaK fYHKlUNOHpyIe eMekaHn3MbI.
BHIMAHIE:packknaDbBaa nnncknaDbBaanpOrylOuHnyoKoJrACKy,yBeiNTecb,yTOpeBcHaxOaITcHa6e3oNacHompacCToHHn:HeCKNaDbBAbN He pACKlaDbBaTb npOrylOuHyoKoJrACKy,ecnBHehXaoITcPa6eHOK.CneIte,YtObpiBbInoJIeHHnonepaunnopeYnilnpOBaHHIOPOrylOuHNOKoiJrackn eMoobNbHbIyeactnHeKaCaIncbKpeBcHKy.
- IcnpoIb3yIte Topmo3Hoe yCTpoIcTBO KaJdbi pa3, KOrDa BblOCTaHaBnIBaTe ToKJIaCKy.
BHIMAHINE: HNkoIgda He octablan Te nporylOHyIO KOJIaCKy C HaxoJIAUIMcB He pe6EhKOM Ha NaKIOHNO pIoCKOCTn, daJe ecIn Bb I BBeN TopMO3.
He npo3B0JnTe Dpyrnm DeTm nIgpaTb 6e3 npncMOTpa PAnOM C npOryNoCHNO KOLaCKO nn Kapa6KaTbCra Ha Hee.
YTO6bI He IOnyCTNb BepoarTHOcTb UdyuHnA, He DaBaIte pe6eHky N He KlaIaTe pRdOM C Hm PpeMTe, IMeUoiNe BepEbkN.
BHIMAHINE: He KaTnTe KOnaRcKy No JeCTHnCe ⅢckalataTopy: eCTb BEPOrTHoCTb yNcyTnTB eE. BydTe KpaIHe BHmAteIbHbMIn npN noDBeMe IJIN CnTyCKe C TpO TYapa Nn CO CTynEhKn.
- Ecni nporylouhna KOLRA B TeueHne DInTeBHORO BPEMeHN HxOJINLAcb POn COINHeM, IpxJe YcAaNTb B Hee pe6EHKa POIOXJNITe, NOKA OHa HcOCTbIeT. DInTeBHOe HaxOxJDeHne IOd COINHeM MOKeT N3MeHnTb LBeT MaTePnAIOB INTKaHei KOJIACKN.
He noJIb3OBAbCS n3dJIeJIeM,ecNI OTdJIbHbIe erO. yactn POJOMaHbI,pa3OpBaHbI INI OTCyTCTBYOT.
BHIMMAHIE:JepeKnte nporyuOnHyIO KONaCKy BdaIOn OT DeTei, KOrDa Bby eO He NoJIb3YeTEcb.
BHIMMAHIE: He nepeBo3nte B nporyuOHyo KOLJcKe JeTei, ecn Bbl DOnJXhbl 6exaTb nnecn Bbl CTOnTE Ha KOhbKax.
- П repodoxpanhy Te KOLIACKY OTOJIeHON BObl, TAK KaK OHa MoKeT Bbl3BaTb 6Opa3OBAHnE PxJaBUnHb.
He nCloIb3yIte KojIcKy Ha nIJaXe.
BHIMAHHE:ynpabnTbKoJACKOJdoJIkhblTOJbKO B3pocIbIe.
COBETbI IO YXOdy I TEXOBCLyKUBAHNIO
3To n3dJIeHnJaTaC T BnepmoNueeCKOM Texo6cLyXnBaHN. Onpaunno yxOdy n Texo6cLyXnBaHNIO DOnJXbI npOn3BODNTb ToJIbKO B3POCSJIbe.
yXoI
C nporyuohno KOnaCKn MoXHO ChTb yexoN (cneyTe yka3aHnM, OINcaHHbIM B rnaBe "KaC hTb yexoJ").
Yactn n3 TkaHn YIcTnTb, npndepKJBaRcB INCTpyKcN Ha 3TNKeTKaX NO CTnKe.
Hnke npnbedehby ycnOBhble o6o3haeHnno CTnpKe n nx paacunphiobka:

Puchna CTnPKa B TeIIOB BoJe

He 076eJINBaTb XIopCoepeKaaZIM BcEeCTBOM

He npimehaTb cyuKv B 6apa6ahe

Tpaenne 3aepeeno

Cyxaynctka 3anpeeHa
IpeHOnDUnueckn YIcHTNb IJIaCTMaCCOBbIe YacTn N3dEINr C NOMOsbIO BIAJXHO TKAHN.
Ecnn Ha MetaJIHueckne Yactn 13eJIInna nonana B0da, Heo6xOIMMo BVitepeTb e, YTO6bl He dOnyCTntb o6pa3OBaHne pJxABuHbl.
TEXO6CJLYKUBAHNE
IIO Heo6xOJIMMOCTN CMA3bIBaTb MO6nJIbHbIe qACTn CyXM CNIINKOHOBbIM MACNM. IepnoDInueckn npOBpeBpTa COCTOHNHe KOnc (IHcN, NOpejXeHnI) IN OCHUdAeNIX OX NT NcKa INbIi. BO n36exBaHne TpEHnI, KOTOpoe MOeKOTmPOMETnPOBaTb HADExHNOEHNHO BnOpyLIOuHON KOJAKCN, Heo6xOJIMNo pOBpeBtB, YTO6bI BCE NpAACTMaCCObBe DeTaN, KOtOpBE HAXODTCA B KOHTAKTE C MeTAJIuNECKIMM Tpy6kAMN, He 6blN cNpaCkaHbI, 3aNBJeHbI IN NOKpbTb NECKOM. DepKAtb KOJIACKy C CYXOM MecTe.
OBUAA INHCTPYKUN
MOHTAX IEPEDHIX KOJIEC
- HadehBeTne nepeJHHee KOleO ha CnEuaJIbHyIOcB,doJIKeH npOn3oITn XapakTePnhI 5eJIyOK 6bOkIpOBKn (pnc.1). BbInOHnTe Ty ke camYIO onepaIIO CdpYIM KOleCOM.
BHIMAHINE: nepei nCpOJIb3OBAHnEM KOLIaCKn y6eIITecb, YTO KOIeCa npaBInbHO 3aФNKcIpOBaHbl.
KAK PA3IOXNUt b KOJIaCKy
BHIMAHHE: PnBbIIOJIHeHHN 3nIX DeIcTBn y6eIITecb, 1TO Bau pe6EHOK IN DpyrNE Detn HaxOJATcH Na 6e3OnaChom pacCToHnn.
Cneinte, yTO6bI npn BbIIOHHeHH 3TINX Opeaun MO6NlbHbIe. qactn nporylouHOJ KOJIaCKN He Kacalncb K pe6EHNy.
2. OtkpoTe 3aTbOpHb KpOuOc N ToJIKnTe BpePeIeHHoU qactb npOryIoUHOH KOJIaCKn (PNC. 2).
3. Hockom HOrn haxmnte BHN3 Ha 3aJHIOU KpeCTOBuHy (pnc.3).
y6eTeTcB TOM, YTO pOryNoHaj KOJIaCKa IpaBInbHO
pa3IooHeHa 3a6IoKIpObaHa.
BHIMAHINE: nepei nCnoJb3ObaHnem y6eDntEcB, YTO KOJIaCKa 3aФИКСИРОВАВа B pa3IOnJKeHOM IonoJKeHIn, N UTO 3aДнЯ KpeCTOBINHa DeIcTBtEblHO 3a6IOnKIpOBAHa.
NCIOJIb3OBAHNE PEMHENBE3OJNACHOCTN
PemHe63eOnaCHOCTn pOryIoUHOI KOJIACKI IMeet TITb TOteK KpeJIeHnI N COCTOIT M3 DByX HAnIeYHnKOB, DByX peryIInpyUxN neTeJb, ODoHOr NOrCHOrPO emHnI ODoHOr pa3dEnIteNbHO RPEMH MEKdy HOr C 3aKMOM.
BHIMAHHE: ecnB KOLIaCKe HaxoJNTcRA pe6EHOK B Bo3paCTe oT pOxJKeHn I PnIMeHPo DO 6 MecJUEB, Heo6XoDMIO nCpOJIb3OaTB HaJIpeuHKnI, PpeBaprTeNbHO npOBedAix uepe3 DBe perynipuOJne netm.
4. OTPerynipyTe HAnneuHnKn NO Bicote, npOBea Ix No Mepe Heo6xoJIMocTn Chee3 perynpyUcIyU nTIIIO, KaN 3No6paxHeo Ha PucNyKe 4. YcaINB pe6EhKa B KOnAcy, npCtErHInTe pEmHn: CHaayana npOBeDInTe Dbe BVInK B nTIIIO HAnneuHnKOB (Pnc.4A IN 4B), a 3aTEM BCTaBbTe IN B ZAMOK paZdEnIbIteBHorO pEmHbI Mekdy Hor (Pnc.4C); OTPerynpyTe dInHy pEmHeN TaK, UTo6b OHN npinEraNN K nIpeam N TynobNiyepe6EhKa. UTo6b PaCtErHytB nOcHOn pEmeHb, HaxMITE n NotAHInTe 3a 60KOBle BVInK.
BHIMAHIE: Yo6bI 06ceNeuTb 63oNaChocTb BaWemy pe6eHky, Heo6xOJIMO Bcerda NcNoJIb3OBaTb pemHn 63oNaChocTn.
5.уобьюбеспуньбolyшуюбezоансочь,нанрогулонов
коляcke IMeHOTcRd“D”-обраимье кольca, kotopbie NO3BOJAHOT
пикоединчы дОПОнHTeЛьньй ремehb 6ezoanchocTи,
COOTBETCTByUJOH僧PEMBS6684.ЗТи кOLьcaHAxOДТСВ
BHTpnCnDEHЯnpогулонКOLЯСКИСправои ИльоВ
сторн,КakИЗБбржЕнопсунke 5.
PEYJIMPOBAHNE HAKJOHA CINIHKN
CπnHKa npogylnoHNo KOLaCKN IMeET 5 NaKIOHbIX NOLOXeHnI.
- C nOMOsbIO IByx KHOIOp 3aKpeINTe DBe HaKaJIaNk N3 TKAHN Ha 3aDnHex Tpy6kax, KaK N3O6paXeHO Ha pncyHke 6.
- Haxab Ha KhONky, KOtopaa HaxoJntcHa cNINKe npOryNoHOn KOJIaCKn, MOxHO peYrIpOBaTb HaKIOH cNINHK; OTyCtNB KhONky, cNINKa 3a6IokpyetcB 60nee 6Ii3KOM noLoXeHN (pnc.7).
- TTo6bI PNOHnTb CINNHy B XKeNaEMO NOLOXHeHc,IOCTaTOUHO ToJKNHyB eE NO HApPabJIeHnO BBepx (pnc. 8).
BHIMAHNE: BbIOnHHeNe pErynOpBaHHa MoKet 6bTb HeCKoBko 3aTpduHeHO, eCIn B nPoYrOuHoi KOnAChE hXoDnTcpe6EHOK.
PEYUNPOBAHNE ONOPbI JIA HO
YtO6bI pe6eHky 6bIIO yD06Ho CnTeB B KOnAe, OOnpy dIra HOr MoKHO yCTaHOBnTB B 2NoJIOXeHnX.
9. OndHOBpeMeHHo HaxMnte Ha DBe 60KOBbIe KHOPIK, KaK n3O6paKeHO Ha pCynKe 9, I yCTaHOBITe ONOpy dIry HOB B JxelaEMOE NOJIOKeHne.
3ADHEETOPMO3HOEYCTPOICTBO
3aHnne KJIeCa npGryNoCHNO KJIaCKN OCHASeHbI CnapeHHbIM TOPM3HbIM yCTPOIcTBOM, KOtOPOE N03BOJHeT BO3JeCTBOBaTb ODHOBPeMeHHO A obe rpyPbI 3aHnIX KJIeC HkaJATmE ToIbKo HO aOnHy peJaIb.
10. TTo6bI BBecTn TOPMO3, HaxMMTe BHN3 Ha OINH 3 DBYx pbYuArOB, paCNoJoxKeHHbIX B ceHTpe 3aDnHex rpyPiK KOIEc, KaK n3o6paXeHO ha pnc. 10.
11.чтобу pa36лбноровытtopmo3Hoe yctpoiCTBO,ТOLKHITe BверхОдИн ИЗ ДВУХ рьчагов,paCNoLOJOKeHHbIX BцEHтpe 3адин Гупг колс,кak ИЗБОРжЕноHa псунke 11.
BHIMAHINE: Icnpnb3yIe Topm03Hoe ycTpoCTBO KaJbIb pa3, KOrIa Bb ocTaHabnBaete KOncky. HkKoJa He octAubTe KOncky C hXoJaUmmCBA He nepeBekOM Ha NaKIOHNOI pNOCKOCTN, DaKe eCNl Bb BeEN Topm03.
BHIMAHINE: nocle BO3deICTBna Ha pbyar TopMO3HOrO yctpoiCTBa y6eIntecb, cyTO TOPMO3a npaBnIbHO BBeJeHb Ha o6eix rpynnax 3aDnHex KOIE.
IPEPDHNE IJIABAIOUIE KOJEA
Iporynohna KOLNAcKa IMeet nepeHne nlaBaoUne/ 3aΦHKnPOBaHbHe KOneca. PnI nepeDnKHeHHN Ha pbXLOM rpyHTe peKOMeHyETc 3abNOKInPOBaTb KOneca. T06bI oBeCneuHTb 6Ooee BbICKOYIO MaHEBpeHHocTb pIpyNoHoi KOLANK HOpMaJbHO HopMaJIbHO DOpore, peKOMeHyETc NCNoJIb3OBaTb PnlaBaoUne KOneca.
12. Tc06bI KOneca CBo6oJHO BpaAanlncb (b6JIIN PnlaBaIoUmmi), TOLIKHNTe BBepx nepedHn PBuAr, KaK N3O6paxeHo Ha pucyHke 12. Tc06bI ZaboknpoBtB nepedHne KOneca, HOCOM HOrn OpyCTnte PbUar. He3aBNCmO OT TOR, B KaKOM NOLOXKeHHN HxODITcK ONo 3aΦNKCpyeTcB INPROMM NOLOXeHHN.
BHIMAHINE: O6a koneca dOnJxHb 6bTb OndOBpeMeHHo nIi 3a6JIoKIpObaHbI, nII pa36JIoKIpObaHbI.
KANIOsoH“JIeTO/3IMA"
- Tó6bly KŋpεπɪtB kaIIOUH, 3aKpεπɪte pIaCTMaCCOBbIe kIINcBb COOTBETCTBYUOxIM MecTAX, KaYyKa3AHO ha PnCvHKe 13. BHIMAHINE: KpεΠηne HαKIpOsoHa Heo6XoJIMBO bIbONHITb c 06eHX CTOpOH pIpyOuHoi KOJIaCKN. IpoBepbTe, npabINbHO nI OH 3a6JIoKIPOBaH.
- PackpoiteKaIIOsoH, KaIIO6paJKeHO ha pnc. 14A uKpeIInTe erO, BO3deIcTBya Ha dBa 6oKOBbIX cIpKyIa (pnc. 14B).
BHIMAHHE:ecnBbXOTTe CNOKHTb KaHIOsoh,BCerda
chaua pa36nokny Te 6okobie cnpkyn.
- KaHIOHO MOXHO ppeo6pa3OBAbB JIeTHNI
COJHue3aunThbI TeHT:pacCTeHNTe 3AMOK
MOJIHNIOI CHIMMITE 3aJHIOHaKJIaDKy (pnc.15).
KAK CLOXNUTB KOJRACKY
BHIMAHHE: npn BbINOHHeHm 3tNx DeIcTBn y6eIntecB, yTO BaW pe6eHok n DpyrHe DeTn HaxoJATcH Na DOJIKNHOM 6e3Opanchom paccToHNHm: cIeJeTne, yTObI npn BbINOHHeH m3tN Opeaun MObIbHbe qAChn pOrgyNoHOn KOJIACKn He Kacalncb K pe6eHky. IpeXe Yem CNOXHTb IpOrgyNoHyIO KOJIACKy, npOBepeTe TaKke, yTObI B KOp3NKe dJa npEmdTOB HnUero He HxOAnIOCb.
- Ecni OTKpbT KaHIOOH, 3aKpOte ero: NOdHMnTE DaBa 6OkOBbIX cIpykUyra (pnc. 16A) IN TAHNTe NOp HApBaJIeHNO K Ce6e npeepHIO uacb TaHIOHO, KAK I3O6paJKeHO Ha pnc. 16B.
- T'06bI cNoKtB KOJcKy, NOHIMUte BBePx 3aDHIoU KpctOBuNH (PNC. 17A) n paz6NoKpuyTe HOrO neJaNb, KOtopa HaxoJntc C npabO bT cToPOhbl npOryNoUHO KoJIaCKn (CMOTPrE pncyHOK 17B).
- Yto6bI 3aBepuHtB cKnaDbBaHne npOpyNoCHo KOnAeKn, ToJKNHTe BnpeEpd pyKn (pnc. 18).
- No 3aBepuHn CKnaDbBaHnna KpUcok, KOtOpbI haxoDITcHa bOkoBOJ cactn, ABOTMaTHeCKN 3abNOKpyET npOryNoHcy KOLrCKy B CLOKeHHOM BHe (CMOTPte pnc.19). 3To He nO3BOnIT npOryNoHoi KOLrCKe CaONpOn3BOnbHO paACKpbITcBc.
KAK CHaTb YEXOJ
C nporyuoh KOJIACKMOXHO NOHOCtBu OCHrB YexOJI.
- 706bl CHbTb xexOn, npnOndHmnte onOpny Ira Hor (pnc. 20A).3aTe m paCteTrHne 3amKn (pnc. 20B) n KhoNk, HxoadJusHe na CnHdeBn (pnc. 20C); CHmnte yexOn, cIeJe 3a pnoXoJenHeM empeHm he6zonacHOCTn.
- PacCTeHnITE KHOJKN Ha 3aDHnX Tpy6kax npOryNoUHOI KOJACKN, KAK I3o6paXeHo Ha pUCyHKe 21A; pacCTeHnITE KHOJKY C NByHbTe IBa KpUOKa D E N, KOtOpBie HAXOJaTcN IOd HAKlaJKn OI 3TKAH Na H6KOBOB CTOpOHe npOryNoUHOI KOJACKN (pnc. 21B).3aTEM CHIMITE YeXON Co CnHNK, NOrHYB ERO BBePx. UTo6bi CHObA HAdetb YeXON Ha pOryNoUHyO KOJACKY, BblONHnTE HnKeONCaHHbIe DeiCTBnI.
- Hanahebte yexon n3 TkaHn Ha cnHky npOryNoHOn KOJRACKN.
23.Зakpenite Два кючka Dи Eи ЗастгнITE KhoIGNky C,кak yka3aHOHa pucyHke 22.
- 3akpenite DBe Haklaikn n3 TkaHn Ha 3aHnx Tpy6kax, 3acterHyB DBe KHOPIKn, KaK yKa3aHO Ha pnyHke 23.
- 3acteHnTe KhoNKn (pnc. 24A); NahehTe yexon Ha onopy dIra HOr, 3acteHnTe 3amKn (pnc. 24B-24C).
AKCECCYAPbl
BHIMAHIE: HnkeoNcHbIe akceccyapbl MOrTy OTCYTCTBOBaTb Ha HEKOTOpBx BapnaHTax 3ToJ MoJeJI.
BhIMaTeIbHo npOHTne INCTpyKcIIO Ha akCEccyapbl, IMeIoUmeCn Hn pnpOBepeHHO Bamn KOHfHycauNn3dEInna.
MHOROΦYHKUHOHAJIbHAR KOP3NHKAДЛПРΕΜETOB
Iporynohna KOJIaCKa MoKeT 6bITb OChaUeHa KOp3nHKoI nIpeB0zKn IpeDMeTOB.
- Ykpeneite Kop3iHky, npoBeda IeHTOChn BOKpyr Tpy6 npoTyIOuHoi KOJIaCKN 3aCTeRHyB KHOJKN B MeCTax, yka3aHHbIX Ha pnc.25.
27.эткорзИнka может 6ытБИСПОЛБЗOBаHa рoДиTeЯIMnВ kaueCTbe yIooBHorpoIko3aKa,ΚakИЗбрaxeHo Ha pUcynKe 26.
BHIMAHIE: KOrda 3OT akceccayap He yKpePnIeH Ha npOryNoHOn KOJace, depXHTe erO B HeIOCTyHOM DnA DeTeMeCTe.
BHIMAHHE:py3B KOp3nHKe He JOnJxH npeBbIaTb 3 Kr.
HAKINDAOTDOXIA
K nporylouHoi KOJIaCKe MoXe TnpIlaTaBcH aKnIka OTdoXd.
28. Tó6bI yKpεπɪtB hAκɪŋkY oT Μɔːŋd, pɒɒBeɪnTe uHþyB BOKpyr Tpy6 npʊrŋIoʊHò N KɔJæCKN B MecTx, yKa3aHbIx Ha pɪncyHke 27.
Iocne nCnOlb3OBAHn npexKe yem CBepybHaKnIky, OCTaBbTe eey CyuNTbcra Ha OTKpbITOM BO3dyxe, eCIn OHa MOKpa.
BHIMAHHE: npn nCnoJIb3OBAHmHaKnIKn OTdoJy peKOMeHNyETcN IOBblSeHHe BHMaHHe.
BHIMAHIE: He nCnONb3OBaTb HAKNkUy OT DoxJ, ecn Ha npOryIooHNo KOLKSe HET TENTA NIN CONHue3aunTHORO KaIIOoHa -pe6eHOK MOKeT 3aDOxHytCBsC. ECn Ha KOJIaCKe yKpeIeHa HAKnKa OT DoXdY, He octBaJrTe pe6eHka B KOJIaCKe NOI CONHcEM -pe6eHOK MOKeT neperpeTbC.
TENbIM MEWOK
B 3aBcMnOCTn OT BapnaHTa nporyLoyHoi KOLaCKN K HeM MoKET npinlaTaTbCra TefIbI MeWOk, NdeaIbHbI dJa XoIoDHorO BpeMeHr Ioda.
29. PacnoIoxnTe TneBmMeWOk, KaK n3o6paJxHo Ha pncyHke 28, 3aTeTHyB KhoNkB Yka3aHHbIX P03uJxq (pnc.28).
30. Ha Bæxphejæt cμnτe TennorO Mεmɪka Nmɪeɪcτ yUɒbHbɪ Kʌpɪŋoʊh, Kɔtɒpβɪ Oɪkpɒbɪ AɪkɒpɒbɪAeTcR ⅢaKɒpɒbɪAeTcR C NOMOʌbɪ O 3aTeckxN ha Iʌnnyuke (pɪnc. 29).
31. Ha Těn lòm Mei shke ectb neTl, B KOTOpbIe Heo6xOДIMOBCTaBNTb peMHN 6e3OJaNCHOCTn PpN IcNoIb3OBAHmN 3TOrOakceccyapa (pnc.30).
BHIMAHINE: npinncnolb3OBaHmN TeIIOrOmeka Heo6xOJIMO Bcerda npobOnTb pemHn 6e0NaCHOCTN B CneuaNbHbIe netTI.
NOKPbIBAIOДЛHOr
- Těnlým ŠémoK OMOHNO PNEBBPaTb B NOKpbBaNo DnI HOr, ДЯ NOTO HOE6XOIMBO BO3dECTBOBaTb Ha 3aMOK-MONHIO VByHbYN HNKKHO IOAChbTb I3 TKAHn NaJIn (PNC. 31).
- YTo6bI yKpeNITb 3OT akceccyap, 3aTeHnTe KInncbl npOBeINTE uHybBI BOKpyr Tpy6 npOryLIOuHOJ KOJIaCKN B MeCTax, KaK yKa3aHO Ha pucyHke 32.
Baxhoe npmueahne: INJIIOCTpaUN INHCTpyKUIN, IN3NOXeHHbIe B DAHOH 6poUHope, OTHOCYK KOHOJ MOdENI pOryLNoOH KOJRAck; HEKOToPbE 3DeCb ONiCAHbIE KOMnHOENTbI yOHyNKUN MOrYT OTONuAChc TOTex KOTOpBe IMeHTcH Na PpMO6peTehHom BamN BapnaHTe MOdENI.
3A BOJEE IODPOBHOI INHΦOPMAUÇEINOBPAUAITECb:
ARTSANA SPA
OTdENnO6cIyXINBaHnIO KIneHTOB
Via Saldarini Catelli 1
22070 Grandate COMO - ITALY
Ten: +39 031 382 086
www.chicco.com

LITEWAY
ola olae
jolio gaii iig aag oai jL: ciSll iio oie Jiaoo 1
Jaiinll g aieybl aliae, loa: pailg plaii
gagag aacwll waa 1y gog aal Jlaa
JLalj81 Jglioe LooLejy pJg j
l_g·s
gaii11 13 20 2020202020
jglguladagdngdallalalao glaaiygl aai:aa
jgsi = 12hgvi
Jalol Jolal Jolal Jolal aojg jolal lla aajl Jllaeiwl
J 1
aillbgy aolldl oLogell yIgIy Ie Jz no seall Jgeoi w sll
m : x = 1 或 3x + 4y + 1 = 0
A. d C. u1l2L = j2l1l3C . Lonic J( g,q - 1) . z2a = ag^ g^ . c : c1L2c3S2 > 1 .
Jc Jc Jc Jc Jc Jc Jc Jc Jc Jc Jc Jc Jc Jc Jc Jc Jc Jc Jc Jc Jc Jc Jc
i 1
a3 = 12a2,a4 = 12a3.
a_ij = 1 - 12
0g5:Loaic ailll 1e Jaoiell eao iJ gai Lailis aai
a1 = 12,a2 = 32,b1 = 2,b2 = - 4
aegsji paoegaijolno jgajlln eao jgajl Jlae 1jipac
a( 1 + k) t = ^2k( 1 + k) !
.
aai jLsoyL:aynnll aJLwJg aJLwJgl e aill JIaeWpsc:auii
aaijagaii jgiil gajgaii iiaai jai
JbuiyIg no jol no algboa Juaill aie yjoe Jgill ae o jpc
a 1 a
aai jai aai g jgi hac g ai hao allg gciill Jlceiwipc
Jglio jc luea aie Jgnil ae Jgwl jolgi li sic duii
J( a + b) = a + b + c . 如果 a > 0 ,则 b > 0 ; 如果 a < 0 ,
jglg jalJg jao Jaeiw psc ajj
(1) (2)
JbL Jc Jgill Jll Jgwlp
gill yinw Jie no hao zhi li jiaow
ailllgl aillll
ii 1
y
b1 = 2,b2 = - 4
(“aIcIaIJIyIyIyIyIyIyIyIyIyIyIyIyIyIyIyIyIy
yilil jiySglg cagj ma
JLo81 Jooj JLooeiwoo loaill Loia ool jlo5la bJLO81 JLoai:aa
Lololololololololololololololololololololololololololololololololololololololololololololololololololololololololololololololol
Jc aee Joo J12 Jio8o o Jiaol 6684BS o, JooL8j ooc
S OBC = S COD + S BOC - S BOC
y1b1 即
Lg5 gB
Jn Jn Jn Jn Jn Jn Jn Jn Jn Jn Jn Jn Jn Jn Jn Jn Jn Jn Jn Jn Jn Jn Jn Jn Jn Jn Jn Jn Jn Jn Jn Jn Jn Jn Jn Jn Jn Jn
6.8 gJgJLcQoogLaLio
jll jilg jilg jilg jilg jilg jilg jilg jilg jilg jilg jilg jilg jilg jilg jilg jilg jilg jilg jilg jilg jilg jilg jilg jilg jilg jilg jilg jilg jilg jilg jilg jilg jilg jilg
(7)gag gag gag gag gag
(8) a : a A且b : b A
aLl l c 1g1 j2jg (20B g) Lc JJ J J J J (20A gJJI)
.1081 p1j> 236 aic w#d1 g o 236 LJI (20C o
21A aagaae gaoa Lalio aaiiai 1Lgaiiaiaiaiaiaiaiaiaiaiaiaiaiaiaiaiaiaiaiaiaiaiaiaiaiaiaiaiaiaiaiaiaiaiaiaiaiaiaiaiaiaiaiaiaiaiaiaiaiaiaiaiaiaiaiaiaiaiaiaiaiaiaiaiaiaia
eao jie 1c buii i 8iLgID gE yieill wG C JLogj2jJJl
cIol3 2011 10000000000000000000000000000000000000000
jLao aonagll caleell gai jil Jgill sae aieJ
Jgill 1al gll ilw glc gll lil .22
.22 8gJ11 C gIogjgl jll l 1g DgE J<,uill uill .23
LaLogg21jz81gcbcJc aalil 11111111.24
- a_n + 1 = 1n + 1
LwJgJyJL JwJyJyJL.24A aLogg21 yJx1 25
(24C-24Bg)UcLzX
aLcSlll
aLo 8oSi jLsOly Lao aangll aol ooll
Jggl 20 agaiol ad aol sll lalally alalil lalalei ojra yic Jy pall
a1 = 2,a2 = - 4
pLuswIosseio Jolj Loo alu Jgill eo jg3
Jgjll Jao yuui Jg jaiyjll jayai Jgjll Jao dc aLwJ c.26
.25g)0g1gL 1
Jouai Ialio aIoc aiaS aIaW! JIaei! 27
26
JglioocLoos! JlgssllaoaIc aiooic alwUgSloaic:aa
Jb81
53 1000
S OBC = S BOC + S_ BOC
jLHJ 10000000000000000000000
ainggll gialgl sic Jlgaii iao auiu Jg ayabiyjuyy jall fllac 28
5hj 1i j i j 1111 j g j 10000000000000000000000000000000000
1.11J11s1gJ1
jlll jilho JIgaiwiic 124 yjdl:
jao jgnil aeao jgS loaic ball shic JLoeW! JSoyJau
sIgS:Loic Jai jgi 1 a8 aiaa alho ng gai
gS: aIJI g o uuui I Jyoo dSj puc uJlgaxill eao glc uio bll
aigwJbja Jai 5aij Lai j LaJI
LwJ LwS
.02LJg>JJUJJUJJUJJUJJUJJU
gIgIu IaIogIg21 JjJzI 28 oJgUul no cuaL aS uLwUuS SJI g.29
.28 a g a Jy G a g o g LoLio