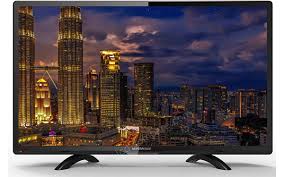
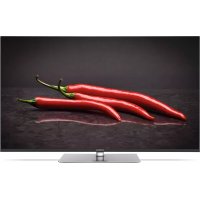
26 TFT LCD - TV NORDMENDE - Free user manual and instructions
Find the device manual for free 26 TFT LCD NORDMENDE in PDF.



| Product Type | 26-inch LCD TV |
| Brand | NORDMENDE |
| Model | 26 TFT LCD |
| Screen Diagonal | 26 inches (66 cm) |
| Display Technology | TFT LCD |
| Video Connectivity | HDMI (x2), VGA, SCART, Component (YPbPr), S-Video, AV (peritel) |
| Audio Connectivity | RCA audio input (R/L), audio output (AV out) |
| Antenna Connectivity | RF antenna (ANT IN) |
| Remote Control | Infrared with batteries (2 x AA 1.5 V) |
| Teletext Functions | Yes (TXT, MIX, HOLD, CANCEL, INDEX, REVEAL, FAST TEXT) |
| Image Settings | Brightness, contrast, color, sharpness, hue (NTSC), color temperature, backlight, preset modes (Custom, Standard, Soft, Dynamic, Rich) |
| Sound Settings | Volume, balance, 5-band equalizer, preset modes (Custom, News, Music, Cinema), AVL (Auto Volume Level), NICAM |
| Timer | Sleep Timer, scheduled on/off, reminder |
| Advanced Functions | DCDI (Diagonal Correction), MADI (Motion Adaptive Deinterlacing), CCS (Color Suppression), temporal and MPEG noise reduction |
| PC Mode | VGA input with automatic and manual adjustments (position, phase, clock) |
| Tuner | Analog, auto/manual search, program exchange, parental control (password lock) |
| Hotel Mode | Yes (restricts settings, max volume, default program) |
| Power Supply | AC (100-240 V, 50/60 Hz) - estimated |
| Dimensions (approx.) | 64 x 40 x 8 cm (without stand) - estimated |
| Weight (approx.) | 5-7 kg - estimated |
| Maintenance | Soft dry cloth; do not use chemical products |
| Safety | Do not expose to moisture, do not open the casing, unplug before cleaning |
| Warranty | 2 years (manufacturer) |
| Included Accessories | Remote control, batteries, antenna cable (coaxial), wall mounting guide (optional) |
Frequently Asked Questions - 26 TFT LCD NORDMENDE
User questions about 26 TFT LCD NORDMENDE
0 question about this device. Answer the ones you know or ask your own.
Ask a new question about this device
Download the instructions for your TV in PDF format for free! Find your manual 26 TFT LCD - NORDMENDE and take your electronic device back in hand. On this page are published all the documents necessary for the use of your device. 26 TFT LCD by NORDMENDE.
USER MANUAL 26 TFT LCD NORDMENDE
You can connect antenna, external equipment such as VCR, Camcorder, DVD player and PC to your set. Examples are shown below.
Connect Antenna cable to the ANT IN socket on rear of the TV.
For good operation of the set, good signal is required. In the strong signal area an indoor antenna could be used but otherwise an outdoor antenna should be used
NOTE:
- It is recommended that the 75-ohm coaxial cable be used to eliminate interference and noise which may occur due to radio wave conditions.
- The aerial cable should not be bundled to the power cord and like.
3.It is recommended to use coaxial cable supplied with set to eliminate interference and noise,if any Refer cable / antenna installation with supplied RF cable for better picture.
- Connect the component outputs (YCbCr / YPbPr) on a DVD player to the COMPONENT (YPbPr) INPUT on the TV.
- Connect audio outputs (R,L) on a DVD player to the audio input (R,L) on the TV as shown in figure.
- Press the TV/AV button on set or on remote then with CH+/CH- keys on remote or on TV set select to (YPbPr) and press VOL+/VOL- keys on remote or on TV to select (YPbPr) mode.
- Press the PLAY button on the DVD player.
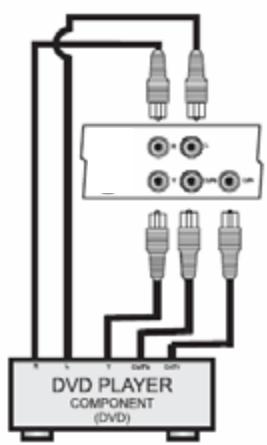
INGRESSO (YCbCr / YPbPr) COMPONENT DVD
- Connect the VIDEO out/S-Video out on the VCR/Cable receiver /DVD player to AV1 or AV2 / S-Video on the TV. (When S-VIDEO is connected, audio input (R,L) of AV AV 1 receiver / DVD player from which S-VIDEO Input is PBPRS-VIDEOgiven).
- Press the TV/AV button on set or on remote then with CH+/CH- keys on remote or on TV set select AV1 orAV2 / S-VIDEO and press VOL+/VOLkeys on remote or on TV to select AV1 or AV2 / S-VIDEO mode.
- The VCR playback/Cable receiver / DVD player picture appears on the screen
- Connect the VGA cable from the monitor output socket of the PC to the VGA IN socket of the TV.
- Connect the audio cable from the PC to the VGA AUDIO IN of the set.
- Press the TV/AV button on set or source (TV/AV) button on remote then with CH + / CH -keys on remote or on TV select VGA and press VOL+/VOL keys on remote or on TV to select VGA mode.
- Switch on the PC and PC screen appears on the set. The set can be operated as PC monitor.
NOTE:
A.If the set is cold, there may be a small flicker when the set is switched on. This is normal, there is nothing wrong with the set.
B.Some dot defects may appear on the screen, like Red, Green or Blue spots. However, this will have no impact or effect on the TV/Monitor performance.
INGRESSO VGA
- Connect the HDMI(High-Definition Multimedia Interface) cable from the DVD HDMI output socket to the HDMI socket (HDMI 1/HDMI 2) on the TV.
- Set HDMI mode in DVD(Refer User Manual of DVD)
- Press the TV/AV button on set or on remote then with CH+/CH- keys on remote or on TV select (HDMI 1/HDMI 2)
Press VOL+/VOL- keys on remote or on TV set to select HDMI 1/HDMI 2 mode.
NOTE:
TV can receive the Video and Audio Signal simultaneously by using HDMI cable
INGRESSO HDMI
- Connect the Scart output on a DVD player to the SCART input (SCART) on the TV with SCART connector.
- Press the TV/AV button on set or on remote then with CH+/CH- keys on remote or on TV set select to (SCART) and press VOL+/VOL- keys on remote or on TV to select (SCART) mode.
- Press the PLAY button on the DVD player
PRESA SCART
This connection is for connecting the RF, AV, S-VIDEO signal from TV SET1 to TV SET2.
USCITA AV
NAMES AND FUNCTIONS OF CONTROLS- Front / Back
Turn set by 90^ so that front surface downword (surface should be soft to avoid scratch on panel) remove base stand by unscrewing 6 screws.
Base stand has been separated
MOUNTING OF YOUR LCD TV ON THE WALL (wall mounting assembly is optional)
Fix Braket to wall with 10 screws (use the screws provided in the kit)
Fix 2 plates to Braket to wall with 4 screws (use the screws provided in the kit)
Insert assembled LCD TV in slots of rocket (LCD TV not shown in the figure below)
Fix 2 screw locate in hole at bottom side and tighten the screws
The remote control uses two 1.5V batteries. For battery installation and replacement follow the procedure:
- Turn the remote control unit upside down. Press down the grip of battery compartment and slide the cover in the direction of the arrow.
- Install two new batteries. Make sure that battery polarity matches with the "+" , - " marks inside the battery compartment or else it could damage the unit.
- Close the battery compartment cover.
- Do not mix new and used batteries.
- Do not use rechargeable batteries.
- Do not mix battery types (alkaline with carbon, zinc etc.).
- Do not expose batteries to excessive heat, throw them on the fire, recharge then or try to open them as
- this could cause them to leak or explode.
- Remove the batteries from the remote control if you are not using it for a long period of time (several
- weeks).
NOTE:
This marking shown on the product or its literature, indicates that it should not be disposed with other household wastes at the end of its working life. To prevent possible harm to the environment or human health from uncontrolled waste disposal, please separate this from other types of wastes and recycle it responsibly to promote the sustainable reuse of material resources. Household users should contact either the retailer where they purchased this product, or their local government office, for details of where and how they can take this item for environmentally safe recycling. This product should not be mixed with other commercial wastes for disposal.
THE COMPANY RESERVES THE RIGHT TO BRING TECHNOLOGICAL, AESTHETICAL AND DIMENSIONAL CHANGES, FOR PRODUCT IMPROVEMENT OR FOR MANUFACTURING NEEDS, WITHOUT NOTICE.
AL FINE DI MIGLIORARE I PROPRI PRODOTTI E PER ESIGENZE DI PRODUZIONE, L'AZIENDA SI RISERVA IL DIRITTO DI APPORTARE MODIFICHE TECNOLOGICHE, ESTETICHE E DI DIMENSIONI SENZA PREAVVISO.
AFIN D'AMELIORER SES PRODUITS ET POUR LES EXIGENCES DE LA PRODUCTION, L'ENTREPRISE SE RESERVE LE DROIT D'APPORTER DES MODIFICATIONS TECHNOLOGIQUES, ESTHETIQUES ET DE DIMENSIONS SANS PREAVIS.
Thank you for choosing our product.
To ensure your complete understanding, please read this manual thoroughly before operation.
INDEX
- WARNINGS AND SAFETY PRECAUTIONS 19
- NAMES AND FUNCTION OF CONTROLS ON REMOTE 20
- PICTURE 21
- SOUND 22
- TIMER 23
- OSD SETTING 24
- TUNER 26
- PROCESSING 28
- VGA SETTING 28
- TELETEXT OPERATION 29
- TROUBLESHOOTING 30
- WARRANTY CERTIFICATE 91
1. WARNINGS AND SAFETY PRECAUTIONS
Warning :
To prevent damage to the TV which may result in a fire or electrical shock hazard, do not expose the TV set to rain or excessive moisture.
Do not rub or strike the Active matrix LCD with any thing hard as this may scratch, mar or damage the active matrix LCD permanently.
For safety, do not place vessels or any container which contain fluids including water, on or near the TV. Do not insert any objects in the ventilation slots.
Service :
Do not remove the back cover of the set as this can expose you to very high voltage and other hazards. If the set does not operate properly, unplug it and call service person.
Antenna:
Connect the antenna cable to the socket marked ANT IN on the back cover. For the best reception an outdoor antenna should be used.
Location:
Position the set so that no bright light or sunlight falls directly on to the scre en. Reflections on the screen affect the picture quality.
Soft and indirect lighting is recommended for comfortable viewing. Care should be taken not to expose the set to any unnecessary vibration, moisture, dust or heat.
Adequate ventilation is essential to prevent set failure.
Ensure that the set is placed in a position to allow a free flow of air. Do not cover ventilation opening on the back cover. Do not place the set in an enclosure or very close to walls.
Avoid excessively warm locations to prevent possible damages to the set. Place the television on a solid and flat surface.
Cleaning:
For safety, remove the AC plug from the wall outlet before cleaning the set. Clean the dust on set by wiping the screen and the cabinet with a soft, clean cloth. If the screen requires additional cleaning, use a clean, damp cloth.
Do not use liquid cleaners or aerosol cleaners or liquid containing benzol, petroleum or a chemicals.
Power :
Do not allow anything to rest upon or roll over the power cord, and do not place the set where the power cord is subject to damage.
Remove the AC plug from the wall outlet when the TV set is not used for a prolonged period of time. In the event of thunder storms or power cuts please remove the mains power plug and the aerial plug. Unplug the set in case of abnormal operation i.e. smoke, odd sound or smells.
Use the mains power cord provided for connecting TV to the mains.
Caution:
No warranty claims are accepted for damage caused by incorrect handling. This LCD TV Set is designed to receive and display video and audio signals and for use as PC monitor. Any other use is prohibited.
- NAMES AND FUNCTION OF CONTROLS ON REMOTE
| POWER Turns TV ON from STANDBY or from ON to STANDBY | |
| DIRECT DIGIT NUMBER SELECTION Keys (0 to 9) Selects program number 1 - 200 directly by using direct digit keys - To select 1 digit program number press desired program number & wait for few seconds selected program number will appears on screen. - To select 2 digit or 3 digit program number press 1st,2nd or 3rd digit within 2 sec. After pressing 1 & 2 digit respectively. | |
| P+CH-P- | PROGRAM UP / DOWN (CH+/CH-)Navigates up through the valid channels.Navigates vertically up through the Menu / sub menu. Used to set the time and Channel name. |
| TV/AV | SOURCE SELECTION (TV/AV) Display OSD for source selection. The input source can be selected with CH+/CH- keys & press on VOL+/VOL- keys on remote or on TV set as follows: TV→AV1→AV2→S-VIDEO→SCART→HDMI1→HDMI2→YPbPr→VGA |
| DISPLAY Displays present source in formation with details of input signal connected. | |
| →IPK- | PICTURE PRESET (→|P|←) Recall preset picture settings. Custom, Standard, Soft, Dynamic, Rich can be set. |
| QUICK VIEW (Q.V) Selectes to previously viewed channel. | |
| TELETEXT TXT, MIX, HOLD, CANCEL, INDEX, REVEAL, SUGPG are the keys for teletext function. | |
| ZOOM Zoom is for aspect ratio control. Full screen, 4:3, Expand, Panoramic are available for selection. | |
| RED, GREEN, BLUE, YELLOW The RED, GREEN, YELLOW & BLUE keys are used for quick access to colour coded pages transmitted by FAST TEXT broadcast. | |
| →SK← | SOUND PRESET (→|S|←) Recalls preset sound settings. Custom, News, Music, Cinema can be set |
| MENU Selected MENU OSD window. Exit from MENU OSD window when menu window is displayed on screen. | |
| V+V0 Vol V- | VOLUME CONTROL (V+/V-)Increase volume / decreases VolumeSelect submenu when menu is displayedIncreases / decrease value of selected item, select submenu itemsExecutes menu and submenu item selection.- Selects characters of channel name , select hours & minutes in timer menu.- Adjust settings of selected item- Adjust channel number in Tuning, Exchange, Timer menu.- Adjust feares to ON/OFF. |
| NICAM (I/II)If received signal is NICAM signal, by pressing I/II key sound will be selected Stereo /Mono.If received signal is NICAM dual signal sound can be selected dual I / dual II and mono. | |
| MUTETurns sound OFF or ON.Press [MUTE] again, or Volume Up [V+], and sound Volume will return. | |
| SLEEPSet sleep timer. Maximum time can be set 120 minutes in steps of 5 minutes.NOTE:Sleep Timer is deactivated when set is switch to stand by or mains power supply is switched Off. |
3. PICTURE
Select the Picture menu by pressing the [ MENU ] key.
Press VOL+ / VOL- keys on remote or on TV set to select the picture parameters in the Picture menu Brightness is selected
BRIGHTNESS, SUPER CONTRAST, COLOUR, SHARPNESS
- Press CH+/CH- keys on remote or on TV set to select Brightness, Super Contrast, Tint, Colour, Sharpness.
- Press VOL+/VOL- keys on remote or on TV set to select the Brightness Super Contrast, Colour, Sharpness..
- Press VOL+/VOL- keys on remote or on TV set to adjust the selected parameter.
- Press the [ MENU ] key to confirm your choice. Press the [ MENU ] key to exit.
NOTE:
TINT is available only for NTSC
This function is to adjust tint of picture for NTSC signal
COLOUR TEMP.
Colour Temperature adjust the colour temperature of the picture to Normal, Warm (reddish) or Cool (bluish).
- Press CH+/CH- keys on remote or TV set to select Colour Temp. Parameter in picture menu
- Press VOL+ /VOL- keys on remote or TV set to set the colour temperature to Warm , Normal or Cool.
- Press the [ MENU ] key to confirm your choice. Press the [ MENU ] key to exit.
BACK LIGHT
Back Light adjust panel brightness.
- Press CH+/CH- keys on remote or TV set to select Back Light parameter in picture menu
- Press VOL+/VOL- keys on remote or on TV set to adjust Back Light (0-5).
- Press the [ MENU ] key to confirm. Press the [ MENU ] key to exit.
PICTURE MODE
This menu is for selecting the preset picture setting. Preprogramed setting are available as well as the user setting also available in addition you can also use |P| button on remote to select various picture settings.
- Press CH+/CH- keys on remote or TV set to select Picture Mode parameter in picture menu.
- Press VOL+/VOL- keys on remote or on TV set to select picture setting Custom Standard Soft Dynamic Rich
- Press the [ MENU ] key to confirm. Press the [ MENU ] key to exit.
4. SOUND
Select the sound menu by pressing the [MENU] and [CH + ] / [CH - ] keys on remote or on TV set.
Press VOL+/VOL- keys on remote or on TV set to select sound parameters in the sound menu.
Equalizer is selected
EQUALIZER
- Press VOL+/VOL- keys on remote or on TV set to enter into equalizer submenu.
- Press CH+/CH- keys on remote or on TV set to select
120Hz
500Hz
1.5KHz
5KHz
10KHz band
- With VOL+/VOL- keys on remote or on TV set adjust these bands.
- Press the [ MENU ] key to confirm. Press the [ MENU ] key to exit.
VOLUME, BALANCE
- Press CH+/CH- keys on remote or TV set to select Volume or Balance parameter in Sound menu,
- With VOL+/VOL- keys on remote or on TV set to adjust Balance(-10 to +10) and Volume from (0-100).
- Press the [ MENU ] key to confirm. Press the [ MENU ] key to exit.
AVL
AVL is used for Automatic Volume Level. If it is on then sound volume is adjusted automatically. In case of distorted Audio due to high audio modulation index, make AVL On in sound menu.
- Use CH+/CH- keys on remote or on TV set to select AVL parameter in Sound menu
- Press VOL+/VOL- keys on remote or on TV set to switch it On or Off.
- Press the [ MENU ] key to confirm. Press the [ MENU ] key to exit.
5. TIMER
Select the Timer menu by pressing [MENU] and [CH + ] / [CH-] keys on remote or on TV set.
Press [VOL+] / [VOL-] keys on remote or on TV set to enter into Timer menu parameters.
Clock is selected
CLOCK
Clock displays the time set by user as a Current Time.
- Press VOL+/VOL- keys on remote or on TV set to select Hours and set hours by CH+/CH- keys on remote or on TV set. Hours can be set from 00÷23 .
- Press VOL+/VOL- keys on remote or on TV set to select Minutes and set minutes by CH+/CH- keys on remote or on TV set. Minutes can be set from 00÷59.
- Press the [ MENU ] key to confirm. Press the [ MENU ] key to exit.
OFF TIMER
Off Timer switches the set off after presetted time.
- Press CH+/CH- keys on remote or on TV set to select Off Timer parameter in Timer menu.
- Press VOL+/VOL- keys on remote or on TV set to select Hours and set hours by P CH+/CH- keys on remote or on TV set. Hours can be set from 00÷23 .
- Press VOL+/VOL- keys n remote or on TV set to select Minutes and set minutes by CH+/CH- keys on remote or on TV set. Minutes can be set from 00÷59 .
- Press the [ MENU ] key to confirm. Press the [ MENU ] key to exit.
NOTE:
Off Timer is deactivated when set is switch to stand by or mains power supply is switched Off.
ON TIMER, ON PROGRAM
On Timer and On Program switches the set on after presetted time to presetted program.
To execute the On Timer and On Program the TV set should be in stand by mode.
- Press CH+/CH- keys on remote or on TV set to select On Timer and On Program in Timer menu.
- Press VOL+/VOL- keys on remote or on TV set to select Hours and set hours by CH+/CH- keys on remote or on TV set. Hours can be set from 00÷23.
- Press VOL+ /VOL- keys on remote or on TV set to select Minutes and set minutes by CH+/CH- keys on remote or on TV set. Minutes can be set from 00:59.
- Press VOL+/VOL- keys on remote or on TV set to set program number in On Program from 1-200 after switch off by mains power supply by default on channel will preset to 1 .
- Press the [ MENU ] key to confirm. Press the [ MENU ] key to exit.
NOTE:
On Timer gets deactivated when set is switched off by mains power
REMIND TIMER, REMIND PROG.
This is reminder and presently viewed channel gets changed to the remind program number if Remind prog. is set otherwise only Remind Timer OSD will be displayed during last 10 Seconds of reaching Remind Timer .
- Press CH+/CH- keys on remote or on TV set to select Remind Timer / Remind Prog. inTimer menu.
- Press VOL+ /VOL keys on remote or on TV set to select Hours and set hours by CH+/CH- keys on remote or on TV set in Remind Timer menu. Hours can be set from 00÷23.
- Press VOL+/VOL- keys on remote or on TV set to select Minutes and set minutes by CH+/CH- on remote or on TV set in Remind Timer menu. Minutes can be set from 00:59.
- Press VOL+/VOL- keys on remote or on TV set to set channel number in Remind Program menu from to 1-200.
- Press the [ MENU ] key to confirm. Press the [ MENU ] key to exit.
NOTE:
Remind Timer gets deactivated and Remind prog. resets to '1' when set is switched off by mains power.
SLEEP TIMER
TV set going to standby after the preset time in Sleep Timer
- Press CH+/CH- keys on remote or on TV set to select Sleep Timer in Timer menu.
- Press VOL+/VOL- keys on remote or on TV set to select Minutes and set minutes.
- Press the [ MENU ] key to confirm. Press the [ MENU ] key to exit
NOTE:
Sleep Timer is deactivated when set is switch to stand by or mains power supply is switched Off.
6. OSD SETTING
Select the OSD Setting menu by pressing [MENU] and [CH + ] / [CH - ] keys on remote or on TV set. Press [VOL + ] / [VOL - ] keys on remote or on TV set to enter into OSD Setting menu parameters.
OSD Language is selected
OSD LANGUAGE (15 languages)
OSD Language is used to select OSD display Language as per requirement.
- Press VOL+/VOL- keys on remote or on TV set to select required OSD Language: English, Italiano, Espanol, Francais, Deutsch , Russian, Turkish, Polish, Dutch, Portugese, Croatian, Greek, Swedish, Hungarian,Norwegian,.
- Press the [ MENU ] key to confirm. Press the [ MENU ] key to exit.
OSD H POS.(OSD Horizontal Position)
User can adjust OSD horizontal position by OSD H Pos. parameter in OSD Setting menu.
- Press CH+/CH- keys on remote or on TV set to select OSD H Pos. parameter in OSD Setting menu
- Press VOL+/VOL- keys on remote or on TV set to set OSD H Pos.
- Press the [ MENU ] key to confirm. Press the [ MENU ] key to exit.
OSD V POS.(OSD Vertical Position)
User can adjust OSD vertical position by OSD V Pos. parameter in OSD Setting menu.
- Press CH+/CH- keys on remote or TV set to select OSD V Pos. parameter in OSD setting menu.
- Press VOL+/VOL- keys on remote or on TV set to set OSD V Pos.
- Press the [ MENU ] key to confirm. Press the [ MENU ] key to exit.
OSD TIMER
OSD Timer decides when OSD should disappear from screen.
- Press CH+/CH- keys on remote or TV set to select OSD Timer parameter in OSD Setting menu .
- Press VOL+/VOL- keys on remote or on TV set to set OSD Timer.
- Press the [ MENU ] key to confirm. Press the [ MENU ] key to exit.
TELETEXT LANG. (5)
Teletext Language parameters is used to select teletext language.
- Press CH+/CH- keys on remote or TV set to select Teletext Lang. parameter in OSD Setting menu.
- Press VOL+VOL- keys on remote or on TV set to set Teletext Lang: Arabic, Farsi, Western, Eastern, Russian.
- Press the [ MENU ] key to confirm. Press the [ MENU ] key to exit.
FACTORY RESET
If you have changed some settings when you are using TV set, but now you want to restore to factory settings, you can use this function to reset all setting.
- Press CH+/CH- keys on remote or TV set to select Factory Reset parameter in OSD Setting menu .
- Press VOL+/VOL- keys on remote or on TV set to restore the factory settings.
- Press the [ MENU ] key to confirm. Press the [ MENU ] key to exit.
TRANSPARENCY
You can adjust transparency of menu OSD window by using this function.
- Select the Transparency menu by pressing CH+/CH- keys on remote or TV set in OSD Setting menu.
- Press VOL+/VOL- keys on remote or on TV set to adjust OSD Transparency (o to10)
- Press the [ MENU ] key to confirm. Press the [ MENU ] key to exit.
USER MODE SETUP (Hotel Mode)
The HOTEL MODE is a special state for the TV set.
In this state TUNER and PROCESSING menu cannot be entered. In Hotel Mode tuning is disabled.
The maximum volume can be set to a certain value in the Hotel menu.
When the set is switched on, the system always tune to a pre set hotel program, and thereafter a normal program selection is possible.
- SelectUser Mode Setup by pressing CH+/CH- keys on remote or TV set in OSD Setting menu.
- Press [VOL+] / [VOL-] keys on remote or on TV set to enter in Hotel Mode window.
- Type Password to Enter in Hotel Mode window.
The password is " 0000" by default.
HOTEL MODE
- Press [VOL+] / [VOL-] keys on remote or on TV set Hotel mode: ON/OFF
- Press CH+/CH- keys on remote or TV set to select Max Volume
- Press [VOL+] / [VOL-] keys on remote or on TV set the maximum volume
- Press CH+/CH- keys on remote or TV set to select On Program
- Press [VOL+] / [VOL-] keys on remote or on TV set to pre set an hotel program
- Press CH+/CH- keys on remote or TV set to select Change Password
- Press [VOL+] / [VOL-] keys on remote or on TV set a New Password
- Input any new password.
- Press CH+/CH- keys on remote or TV set to select Confirm Password
- Input same password as in step nr. 8.
NOTE:
If HOTEL MODE is ON, the menu "TUNER" and "PROCESSING" are not available.
7. TUNER
Select the Tuner menu by pressing the MENU and CH+/CH- keys on remote or on TV set.
Press VOL+/VOL- keys on remote or on TV set to select The Tuner menu parameters
PROGRAM EDIT is selected
Press VOL+/VOL- keys on remote or on TV set to select the Program Edit menu.
Program No. is selected
PROGRAM NO.
This indicates current program number.
You can adjust program number by pressing VOL+/VOL- keys on remote or on TV set.
COLOUR SYSTEM
This setting is necessary if the picture is not reproduced Correctly.
- Select the Colour System by pressing the CH+/CH keys on remote or on TV set in Program Edit submenu.
- Press VOL+/VOL- keys on remote or on TV set to adjust the Colour System required.
- Press the [ MENU ] key to confirm. Press the [ MENU ] key to exit.
SOUND SYSTEM
This setting is necessary if the sound is not reproduced Correctly.
- Select the Sound System by pressing the CH+/CH-keys on remote or on TV set in Program Edit submenu.
- Press VOL+/VOL- keys on remote or on TV set to adjust the Sound System required.
- Press the [ MENU ] key to confirm. Press the [ MENU ] key to exit
PROGRAM NAME
This setting is necessary if you would assign the name to a channel (max 7 char.)
- Select the Program Name by pressing the CH+/CH-keys on remote or on TV set in Program Edit menu.
- Press VOL+VOL- keys on remote or on TV set to write the channel name
- Select the characters/numbers by pressing the CH+/CH-keys on remote or on TV set (you can shift by pressing [V+]/[V-] button.
- Press the [ MENU ] key to confirm. Press the [ MENU ] key to exit
SKIP
You can skip unwanted channels in this menu, skipped channels will not be selected with CH+ /CH- keys on remote or TV set, but skipped channels can be selected by pressing skipped program number by direct digit number selection keys on remote.
- Select the Channel No. Parameter in Program Edit submenu by pressing CH+/CH- keys on remote or on TV set.
- Select the channel number to be skipped with VOL+/VOL- keys on remote or on TV set.
- Press CH+/CH- keys on remote or on TV set to select Skip parameter in Program Edit submenu and press VOL+/Vol- keys on remote or TV set to switch it On.
- Press the [ MENU ] key to confirm. Press the [ MENU ] key to exit
- To unskip the channel follow the above steps by selecting skipped Channel No. and select Skip parameters, press VOL+/VOL- keys on remote or TV set to switch Skip to Off.
MANUAL SEARCH
By Manual Search channels can be tuned manually, it is only necessary in case of new channel is not stored in Auto Search and you do not want to change the individual order of preset stations.
- Press CH+/CH- keys on remote or onTV set to select Manual Search parameter in Program Edit submenu.
- Press VOL+/VOL- keys on remote or TV set for Manual Search.
- Press the [ MENU ] key to stop the search. Press the [ MENU ] key to exit
FINE TUNE
Select the Channel No. Parameter in Program Edit submenu by pressing CH+/CH- keys on remote or on TV set.
Set the channel number to be Fine Tune with VOL+/VOL- keys on remote or on set.
- Press CH+/CH- keys on remote or on TV set to select Fine Tune parameter in Program Edit menu.
- Press VOL+/VOL- keys on remote or on TV set to Fine Tune the channel.
- Press the [ MENU ] key to confirm. Press the [ MENU ] key to exit
Select the Tuner menu by pressing the MENU and CH+/CH- keys on remote or on TV set.
Press VOL+VOL- keys on remote or on TV set to select the TUNER menu parameters
CHANNEL EDIT is selected
Press VOL+/VOL- keys on remote or on TV set to select the Channel Edit submenu.
Current Prog. is selected
CURRENT PROG.
This indicates current program number.
You can adjust program number by pressing VOL+/VOL- keys on remote or on TV set.
EXCHANGE
The Exchange menu is for swapping or moving a Channel to a desired program number.
- Press CH+/CH- keys on remote or on TV set to Select Exchange prog
- Press VOL+/VOL- keys on remote or on TV set to Select the number of channel to be exchanged with
- Select the channel number to be exchanged i.e. Current Prog. with VOL+/VOL- keys on remote or on TV set.
- Press CH+/CH- keys on remote or on TV set to select Exchange and press VOL+/VOL- keys on remote or on TV set to execute the Exchnage function.
- Press the [MENU] key to exit
DELETE CURRENT CH.
This setting is necessary if you want delete the channels not desired.
- Press CH+/CH- keys on remote or on TV set to Select Delete Current Ch.
- Press VOL+/VOL- keys on remote or on TV set to Select the number of channel to be delete
- Press [MENU] to return to the submenu
- Press [Vol+] to delete current channel.
AUTO SEARCH
- Press CH+/CH- keys on remote or on TV set to select Auto Search parameter in Tuner menu.
- Press VOL+VOL- keys on remote or on TV set to start Auto Search.
- Press [MENU] key on remote or on TV set to stop Auto Search.
CHANNEL LOCK
This setting is necessary if you want lock or unlock channels not desired.
- Select Channel Lock by pressing CH+/CH- keys on remote or TV set in Tuner menu.
- Press [VOL+] / [VOL-] keys on remote or on TV set to enter in Input Password window.
- Type Password to enter in Lock setting window.
The password is "0000" by default.
- Press CH+/CH- keys on remote or TV set to select Change Password
- Press [VOL+] / [VOL-] keys on remote or on TV set a New Password
- Input any new password
- Press CH+/CH- keys on remote or TV set to select Confirm Password
-
Input same number as in above item again.
-
Press [CH+] / [CH-] keys on remote or on TV set to select Channel Lock
- Press [VOL+] / [VOL-] keys on remote or on TV set to select ON/OFF
- Press the [MENU] key to confirm.
- Press the [CH + ] / [CH - ] keys on remote or on TV set to exit: the channel is locked.
To unlock the channel follow the above steps by selecting Channel No. and typing the password.
NOTE:
If Channel Lock is ON, the sub menu "Autosearch", "Manual Search" and "Fine Tune" are not available.
APS (AUTO PROGRAM SORTING)
Auto Program Sorting feature will label and sort the programs automatically after Auto Search.
- Press CH+/CH- keys on remote or on TV set to select APS in Tuner Menu
- Press VOL+/VOL- keys on remote or on TV set ON/OFF
- Press the [ MENU ] key to confirm. Press the [ MENU ] key to exit
NOTE:
This TV set is equipped with functions ACI (Automatic Channel Installation) and ATS (Automatic Sorting)
A. If the broadcasted program has the ID code, the function ACI automatically assigns the name to the found channels.
B. The system ATS memorizes and sorts the channels.
During the automatic search, the functions APS require about 30 sec. for every channel.
These functions are activated if APS is ON
COUNTRY
By selecting Country, TV set will automatically adjust colour and sound system corresponding to that country.
- Press CH+/CH- keys on remote or TV set to select Country parameter in Tuner menu.
- Press VOL+/VOL- on remote or on TV set to keys select Country.
- Press the [ MENU ] key to confirm. Press the [ MENU ] key to exit
8. PROCESSING
Select the Processing menu by pressing MENU & CH+/CH- keys on remote or on TV set.
Press VOL+/VOL- keys on remote or on TV set to enter in PROCESSING parameters.
DCDI is selected
DCDI (Directional Correlational De-interlacing)
DCDI function gives a crisp & more realistic picture by eliminating objectionable stair casing on diagonal lines, by enhancing picture clarity & realism, by enhancing dynamic contrast, colour,saturation correction, flesh tone & green colour stretch.
DCDI has two modes On, Off.
DCDI On will improve the objectionable stair casing on diagonal lines & make images crisp & more realistic.
- Press VOL+ / VOL- keys on remote or on TV set to select On, Off mode.
- Press the [ MENU ] key to confirm. Press the [ MENU ] key to exit
NOTE:
DCDI is not available for VGA mode
MADI Mode(Motion Adaptive De-Interlacing)
Motion Adaptive De-Interlacing is a pixel base 2 phase process .
It measure degree of motion.
Depending on this values it select the appropriate de-interlacing technique.
As a result, area of an image that are not moving will be fully static(flicker free),and moving object have smooth edges.
- Press CH+/CH- keys on remote or onTV set to select MADI parameter in Processing menu.
- Press VOL+/VOL- keys on remote or on TV set to select Off/Adaptive/Normal mode.
- Press the [ MENU ] key to confirm. Press the [ MENU ] key to exit
CCS Mode(Cross Colour Suppression)
The cross colour suppressor helps to eliminate objectionable cross-color artifacts produced when composite NTSC and PAL signal is decoded.
- Press CH+/CH- keys on remote or on TV set to select CCS Mode
- Press VOL+/VOL- keys on remote or on TV set to select to Off/Adaptive/Normal
- Press the [ MENU ] key to confirm. Press the [ MENU ] key to exit
Temporal NR Mode
Noise reduction is implemented by applying temporal and spatial noise reduction filters to the video data.
- Press CH+/CH- keys on remote or on TV set to select Temporal NR Mode parameter in processing menu.
- Press VOL+/VOL- keys on remote or on TV set to select Off/Adaptive/Low/Medium/High mode.
- Press the [ MENU ] key to confirm. Press the [ MENU ] key to exit
MPEG NR Mode
The MPEG encoders block removes ringing and block noise from images that have undergone MPEG and JPEG compression and decompression.
This smoothes checker box and discrete noise artifacts around large edge transitions.
- Press CH+/CH- keys on remote or on TV set to select MPEG NR Mode parameter in processing menu.
- Press VOL+/VOL- keys on remote or on TV set to select On/ Off mode.
- Press the [ MENU ] key to confirm. Press the [ MENU ] key to exit
9. VGA SETTING
Setting function is available only for VGA input and deactivated for other input sources.
Auto adjust, Manual (H-Position, V-Position, Phase, Clock) adjust in VGA mode of TV set with personal computer will be done in VGA Setting menu.
Select the Adjust menu by pressing the MENU & CH+/CH- keys on remote or on TV set, press VOL+/VOL- keys on remote or on TV set to enter into VGA Setting menu. Auto Adjust will be selected.
AUTO ADJUST
Auto Adjust is for Auto configuration of LCD TV with PC.
This automatically sets the H-Position, V-Position, Phase & Clock.
Press VOL+/VOL- keys on remote or on TV set to execute auto adjust.
If picture is not ok with Auto Adjust then adjust H-Position, V-Position, Phase and Clock to adjust the picture.
10. TELEXT OPERATION
Select the channel which is broadcasting the TELETEXT program you want to watch.
| SELECT TELETEXT MODE Press [TV / TEXT] button on the remote control unit and enter to TELETEXT mode. By this button, mode will be changed as: TV ←→ Picture Teletext The overview station page or the last page viewed (in case you already watched TELETEXT at this channel previously) appears. If you need to return to TV mode, press again the [TV / TEXT] button on the remote control. | |
| PAGE SELECTION You can enter directly desired page number with the remote control 0 - 9 numeric buttons. You can sequentially select page by pressing [P+] or [P-] button. | |
| REVEAL Some TELETEXT pages contain quiz or game questions with hidden answers. Press the [REVEAL] button to see the answers. Press the [REVEAL] button again to hide the answers. | |
| SIZE (T/B/F Top/Bottom/Full) To enable easier reading (larger display). Press the [SIZE] button to display the TOP HALF of the page. Press again to display the BOTTOM HALF of the page. Press again to return to a FULL PAGE display. Note: changing pages reverts to a FULL PAGE display. | |
| MIX Press the [MIX] button to turn on/off TELETEXT background. | |
| CANCEL When a page is selected in TELETEXT mode it may take some time before it becomes available, pressing the [CANCEL] button will switch to the TV mode. When the required page is found the page number will appear at the top of the TV picture, press the [CANCEL] button to return to the selected TELETEXT page. Note: You cannot change TV program while in this mode. | |
| SUB CODE Periodically revised NEWS FLASHES can be obtained from TELETEXT broadcasts. Select the NEWS FLASH page in TELETEXT mode then press the [SUBCODE] button. You can now watch the TV program and every time the News Flash page is updated it will be automatically displayed in the TV picture. Press the [SUBCODE] button to cause the news flash to disappear. | |
| INDEX Press the [INDEX] button to return to index page. | |
| STOP Some TELETEXT information is contained on more than one page, the pages automatically changing after a given reading time. Press [STOP] button to stop the page changing. Press [STOP] button again to allow the page to change. | |
| FAST TEXT (For possible future reference) The RED, GREEN, YELLOW & BLUE buttons are used for quick access to colour coded pages transmitted by FAST TEXT broadcast. |
11. TROUBLESHOOTING
Before you call the service person, check the following points.
Please bear in mind that malfunctions can also be caused by external devices.
| PROBLEM | POSSIBLE CAUSES |
| No picture, no sound | Mains adapter is not plugged in. |
| The TV is not switched on. | |
| Picture but no sound | Volume is set to minimum or mute. |
| Incorrect sound system setting. | |
| No TV picture | TV is switched to AV. |
| Antenna is not plugged in. | |
| TV is not installed correctly. | |
| Picture has pale colours, is too dark or blurred | Set colour, brightness and contrast. |
| There is no colour on all channels | Antenna cable does not contact adequately. |
| Antenna cable is broken. | |
| Aerial system is faulty. | |
| Bad picture with interference | Tune the affected channels, if necessary, perform fine tuning. |
| No colour on individual channels | |
| No colour | Check the colour system. |
| Snowy picture | Antenna cable does not contact adequately. |
| Antenna cable is broken. | |
| Aerial system is faulty. | |
| Ghosting | Antenna is twisted. Direct the antenna at the station. |
| Teletext missing or faulty | Station has no teletext. |
| Ghosting | |
| Weak broadcasting signal. | |
| Remote control does not work | TV is not switched on. |
| The batteries are flat or inserted incorrectly. | |
| Bright external light is falling on the receiver or remote control signals. | |
| Obstacles between remote control and remote control receiver affect data transmission. |
MODALITA' PICTURE (IMMAGINE)
PROGRAM NAME (NOME PROGRAMMA)
Selectionare CHANNEL EDIT (MODIFICA CANALI)
OSD V POS. (OSD Position Verticale)
DCDI (Directional Correlational De-interlacing)
Mode CCS (Cross Colour Suppression)
DCDI (Directional Correlational De-interlacing)
CCS Mode (Cross Colour Suppression)
DCDI (Directional Correlational De-interlacing)
CCS Mode(Cross Colour Suppression) (Modo CCS)
10. OPERACAO DO TELETEXTO (Teletext Operation)
This symbol certifies that the product has been manufactured in compliance with the European Standards.
Guarantee Terms and conditions for LCD/Plasma Products
Thank you for purchasing this product.
We are confident you will enjoy using it for many years to come.
The Product warranty is for a period of 24 (twenty four) months from the date of original purchase (date of receipt) against defective materials and workmanship.
If, after reading the instruction book trouble-shooting guide, you believe that there is a technical fault with the product, you should return it to the retailer where you purchase it.
NORDMENDE will comply with the warranty on the same terms and conditions as those normally offered to consumers in that country.
In case of difficulty, details of our authorized Service Department, who will also be pleased to help you with regard to queries concerning the guarantee or the use of your product.
Warranty Terms And Conditions
- This warranty is only valid when accompanied by the original Invoice, sales receipt or confirmation from NORDMENDE of the warranty period. If the serial number is defaced, missing or illegible, the warranty with NORDEMNDE is null and void. In this case you should contact the dealer from whom the product was purchased.
- NORDMENDE's obligations are limited to the successful repair or, all its discretion, replacement of the product of defective component(s).
- NORDMENDE invests heavily in its Service Network to ensure all repairs are completed in a speedy and professional manner. For this reason Warranty repairs must be carried out by either the original dealer, or an authorized NORDMENDE dealer or an authorized NORDMENDE Service Centre. The cost of repairs carried out by non-authorised dealer in warranty will not be re-imbursed unless preauthorized by NORDMENDEService Department. In the event of an unauthorized warranty repair failing, NORDMENDE will not accept liability for the cost of rectification or for any damage caused by such unauthorized repair work.
- TV set are intended for use in the country where it was sold. NORDMENDE do not therefore accept liability for the cost of adaptation from one television broadcast system to another (eg from PAL-I to PAL BG or SECAM). Should you choose to have this product adapted, the NORDMENDE warranty will not cover and no reimbursement will be made for the adaptation.
- The NORDMENDE warranty does not cover any of the following actions:
a. Periodic check ups, maintenance and repair of replacement of parts due to normal wear and tear.
b. Cost relating to transport, removal or installation of the product.
c. Misuse, including failure to use the product for its normal purposes or incorrect installation.
d. Damage caused by Lightning, Water, Fire, Acts of God, War, Public Disturbances, incorrect mains voltage, improper or insufficient ventilation or any other cause beyond the reasonable control of NORDMENDE.
-
This warranty is valid for any person who has legally acquired possession of the product during the initial warranty period.
-
The consumer statutory rights in any applicable national legislation whether against the retailer arising from the purchase contract or otherwise are not affected by this warranty. Unless there is national legislation to the contrary, the right under this warranty are the consumers sole rights and NORDMENDE. Its subsidiaries and distributors shall not be liable for any indirect or consequential loss or damage to records, compact discs, video or audio tapes or any other related equipment, software or material.
For assistance, please visit www.nordmende.eu
Model and serial number
NORDMENDE is a trademark of THOMSON used under license to VDC Technologies SpA ITALY.


- NOTE:
- INGRESSO (YCbCr / YPbPr) COMPONENT DVD
- INGRESSO VGA
- INGRESSO HDMI
- PRESA SCART
- INDEX
- WARNINGS AND SAFETY PRECAUTIONS
- Warning :
- Service :
- Antenna:
- Location:
- Cleaning:
- Power :
- Caution:
- PICTURE
- BRIGHTNESS, SUPER CONTRAST, COLOUR, SHARPNESS
- COLOUR TEMP.
- BACK LIGHT
- PICTURE MODE
- SOUND
- EQUALIZER
- VOLUME, BALANCE
- AVL
- TIMER
- CLOCK
- OFF TIMER
- ON TIMER, ON PROGRAM
- REMIND TIMER, REMIND PROG.
- SLEEP TIMER
- OSD SETTING
- OSD LANGUAGE (15 languages)
- OSD H POS.(OSD Horizontal Position)
- OSD V POS.(OSD Vertical Position)
- OSD TIMER
- TELETEXT LANG. (5)
- FACTORY RESET
- TRANSPARENCY
- USER MODE SETUP (Hotel Mode)
- HOTEL MODE
- TUNER
- PROGRAM NO.
- COLOUR SYSTEM
- SOUND SYSTEM
- PROGRAM NAME
- SKIP
- MANUAL SEARCH
- FINE TUNE
- CHANNEL EDIT is selected
- CURRENT PROG.
- EXCHANGE
- DELETE CURRENT CH.
- AUTO SEARCH
- CHANNEL LOCK
- APS (AUTO PROGRAM SORTING)
- COUNTRY
- PROCESSING
- DCDI (Directional Correlational De-interlacing)
- MADI Mode(Motion Adaptive De-Interlacing)
- CCS Mode(Cross Colour Suppression)
- Temporal NR Mode
- MPEG NR Mode
- VGA SETTING
- AUTO ADJUST
- TELEXT OPERATION
- TROUBLESHOOTING
- MODALITA' PICTURE (IMMAGINE)
- PROGRAM NAME (NOME PROGRAMMA)
- OSD V POS. (OSD Position Verticale)
- Mode CCS (Cross Colour Suppression)
- CCS Mode (Cross Colour Suppression)
- CCS Mode(Cross Colour Suppression) (Modo CCS)
- OPERACAO DO TELETEXTO (Teletext Operation)
- Guarantee Terms and conditions for LCD/Plasma Products
- Warranty Terms And Conditions
Brand : NORDMENDE
Model : 26 TFT LCD
Category : TV