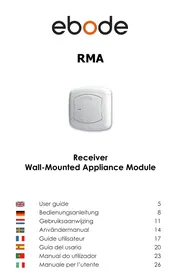
XDOM RMA - Security alarm EDOBE - Free user manual and instructions
Find the device manual for free XDOM RMA EDOBE in PDF.


| Brand | EDOBE |
| Model | XDOM RMA |
| Product Type | Recessed wall switch for alarm system |
| Power Supply | 230 V ~ 50 Hz |
| Consumption | Not specified |
| Max number of channels (X10 mode) | 32 |
| Max number of channels (ebode secure mode) | 16 |
| Operating modes | X10 mode, ebode secure mode |
| LED indicator | Green (radio command reception), Red (command reception/transmission) |
| Main functions | Turn on/off devices, repeater/converter of radio commands, channel initialization, reset |
| Installation type | Recessed in a box of diameter 65 mm, depth 40 mm |
| Wiring | Terminal block L (phase), N (neutral), C (not connected), phase output for controlled circuit |
| Safety instructions | Do not open, risk of electrocution. Any intervention by a qualified professional. |
| Maintenance | No user-replaceable parts. Avoid shocks, extreme temperatures, humidity. |
| Repairability | Not repairable by the user. Entrust to a professional repairer. |
| Certification | Compliant with directive 1999/5/EC |
| Device dimensions | Not specified (fits standard recessed box) |
| Weight | Approximately 100 g (estimate) |
| Operating temperature | Not specified |
Frequently Asked Questions - XDOM RMA EDOBE
User questions about XDOM RMA EDOBE
0 question about this device. Answer the ones you know or ask your own.
Ask a new question about this device
Download the instructions for your Security alarm in PDF format for free! Find your manual XDOM RMA - EDOBE and take your electronic device back in hand. On this page are published all the documents necessary for the use of your device. XDOM RMA by EDOBE.
USER MANUAL XDOM RMA EDOBE
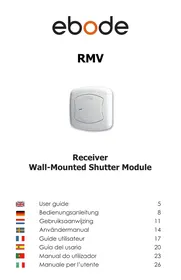
Receiver Wall-Mounted Appliance Module
User guide 5
Bedienungsanleitung 8
Gebruiksaanwijzing 11
Anvandermanual 14
Guideutilisateur 17
Guia del uso 20
Manual do utiliser 23
Manuale per l'utente 26

General Security Note
For carefree and safe use of this product, please read this manual and safety information carefully and follow the instructions. Technical manipulation of the product or any changes to the product are forbidden, due to security and approval issues.
Please take care to set up the device correctly - consult your user guide. WARNING: Do Not Open! Risk of Electrical Shock. Voltages in this equipment are hazardous to life. No user-serviceable parts inside. Refer all servicing to qualified service personnel.
Important: the product must be used according the instructions in this manual and is not suitable for other purposes.
Please avoid the following: strong mechanical wear and tear, high temperature, strong vibrations, and high humidity.
Please also respect the additional security notes in the various user guide chapters. To ensure correct set up please read the manual and security notes carefully.

Pls bear in mind to shut off general mains in the electrical panel.

To connect the in-wall switch.
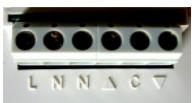
CONNECTING BLOCK
Connect all wires as indicated (refer to wiring diagram 1)
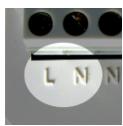
How to connect Live + Neutral Input
L : stands for input Live 230V - 50 Hz
N:stands for input Neutral 230V - 50Hz
Up to 10 Amps
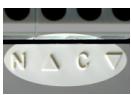
Wiring up Live + Neutral outputs
N:Neutral
C: (do not connect, only for low voltage)
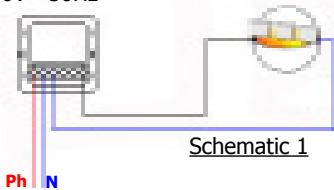
: Output Live appliance or light to control

How to instal wall mount switch.
Wall insert box : dia. 65mm, 40mm deep
1.Gently take off paddle from wall switch.
2.Wire up Wall Switch within wall insert box, then fix receiver along with provided screws against wall insert box.
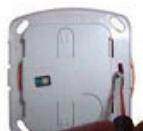
Please note that the general mains in the electrical panel should be turned on again before you start programming.

To learn one address on wall switch (unique addressable control)
An address is made of a HOUSE code and UNIT code, please refer to the manual of the transmitter to properly fix the code to learn by the receiver.
The following procedure consists of learning one (or even more than one) address from the transmitter into the RMA receiver.
FYI:
- Once powered on, the RMA receiver is in the mode to acknowledge X10 standard controls (To secure communication between transmitter and receiver pls refer to step 4).
- The RMA receiver takes into control any Radio Frequency Order coming in from any transmitter, then translate and transmit over the home existing electrical wirings.
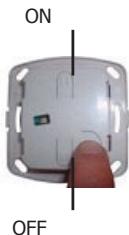
1.Take off the paddle of the receiver.
2. Press shortly the key PROG, LED blinks quickly in green showing the receiver is awaiting an order from any transmitter (can be either RF or PLC mode).
3. Choose and press the choosen key of a remote or transmitter (RF remote, PLC command/programmer) to automatically learn the address.
4.Green LED blinks off to acknowledge the order.
5. The unique address is now confirmed.
6.In case of you would like to learn more than one command (RF remote, PLC command/programmer) just proceed same way from step 2 up to 4.
7.Once learning is complete, just put the paddle back onto the receiver.
NOTE : For proper installation, make sure logo ebode shown on the paddle is positioned on the bottom right side.

To switch from standard to secure communication protocol.
The secure mode ebode can be enabled in case of safety requested mode. To do so, ONLY transmitters TPC, EM and IMRF can be in control of receivers appliance/lighting RMA, shutter RMV and plug in module RPT.
The ebode communication protocol can be associated as a professional security communication, mostly used in alarm systems.
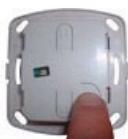
- Take off the paddle of the receiver.
- Press and keep pressed the key PROG till LED lights up green (after 3 seconds).
- Release PROG key.
- Press/release minimum 10 times the key PROG, the LED starts blinking for 5 times then to blink off. You are now in secured mode.
- Just put on again the paddle (make sure ebode log is located on the bottom right side).

To erase all recorded addresses on the receiver (overall RESET). This procedure consists of erasing all addresses you may entered over time which are not valid to control your Home Automation system.
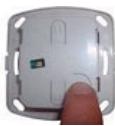
- Take off the paddle from the receiver.
- Press and keep pressed the key PROG till LED lights up green (after 3 seconds).
- Release key PROG. both green and red LEDs blinks quickly on, to turn of after after several seconds (LED to blink orange). Time to reuse depends on the number of entered valid addresses.
- All addresses are now erased, receiver goes back as well in X10 standard communication protocol.
- Put on again the paddle (make sure ebode log is located on the bottom right side).

Operating the RMA receiver
Gently press the upper key (ON) to turn on the appliance/light.
Gently press the lower key (OFF) to turn off the appliance/light.
Make use of a remote control, RF wall switch, programmer to check remote control of the appliance, light, etc.
Troubleshooting: please check FAQ and technical support on www.ebodeelectronics.eu
RMA cannot be controlled anymore from either an RF or PLC remote/programmer?
- Check and/or change the battery of your remote.
- Go for an overall RESET of the receiver as it may have lost the address due to too many manipulations (starts from point 5), then re-initialize transmitter and receiver both together (starts from point 3).
- Red or Green LED blinks randomly even if no remote control is performed : RF or PLC interference may occur (ie Fluo lamps, Reversible A/C, PC monitor) please add either a filter FD10 in the main control panel or a plug in module FM10 to filter the product in cause.
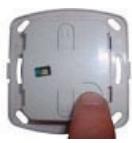
- Retire a tampa do receptor.
CE DECLARATION OF CONFORMITY
UK - We, BMB Electronics BV, Kortakker 10 - 4264 AE Veen - The Netherlands, herewith declare that the following designated product RMA, is in compliance with the essential requirements and other relevant provisions of Directive 1999/5/EC.
Device: The use of the symbol indicates that this product may not be treated as household waste. By ensuring this product is disposed of correctly, you will help prevent potential negative consequences for the environment and human health, which could otherwise be caused by inappropriate waste handling of this product. For more detailed information about recycling of this product, please contact your local city office, your household waste disposal service or the shop where you purchased the product.
Batteries: Do not dispose of used batteries in the household rubbish! They should be deposited at a collection point for used batteries.

Also available from ebode electronics:
On-Wall Modules
| Product | Description |
| EM | 2-position RF wall switch, ideal for retro fit installations to e.g. control blinds, shutter, home cinema screens but also lighting or appliances. |
| IMRF | Single position RF wall switch, ideal for retro fit installations to e.g. control applications or an inside or outside light. |
| RMV | Control your shutter, blind or e.g. cinema screen via the front panel keys, or remotely via any ebode / X10 compatible controller. |
| RMA | Control your appliance, light or e.g. pump via the front panel keys, or remotely via any ebode / X10 compatible controller. |
| RPA, RPL, RPT | Ideal for retro fit installations, the classic X10 plugin module in a new and stylish jacket. Control your appliance or lamps etc, via any ebode or X10 compatible controller via PLC AND RF! |
| TPC/ TMML | New stylish RF remote to control any ebode or X10 compatible RF receiver. |
In-Wall Modules
| Product | Description |
| EMML | 2-position RF in-wall module to install behind any mechanical wall switch. The EMML is battery operated. |
| RMML | In-wall RF receiver, ideal for any switches lights and appliances up to 300W. |
| PMML | A package containing both the EMML and the RMML. |
Under development
| Product | Description |
| RMP | Update on existing RMV with dry contact output. Ideal to control e.g a motorized gate. |
| RMSN | In-wall RF receiver without Neutral for light applications including incandescent, halogen, fluorescent, LED (even 0.5W charge). |
ebode
www.ebodeelectronics.eu


- RECEIVER WALL-MOUNTED APPLIANCE MODULE
- GENERAL SECURITY NOTE
- PLS BEAR IN MIND TO SHUT OFF GENERAL MAINS IN THE ELECTRICAL PANEL
- TO CONNECT THE IN-WALL SWITCH
- CONNECTING BLOCK
- HOW TO CONNECT LIVE + NEUTRAL INPUT
- WIRING UP LIVE + NEUTRAL OUTPUTS
- C: (DO NOT CONNECT, ONLY FOR LOW VOLTAGE)
- HOW TO INSTAL WALL MOUNT SWITCH
- PLEASE NOTE THAT THE GENERAL MAINS IN THE ELECTRICAL PANEL SHOULD BE TURNED ON AGAIN BEFORE YOU START PROGRAMMING
- TO LEARN ONE ADDRESS ON WALL SWITCH (UNIQUE ADDRESSABLE CONTROL)
- FYI
- TO SWITCH FROM STANDARD TO SECURE COMMUNICATION PROTOCOL
- OPERATING THE RMA RECEIVER
- RMA CANNOT BE CONTROLLED ANYMORE FROM EITHER AN RF OR PLC REMOTE/PROGRAMMER
- CE DECLARATION OF CONFORMITY
- ALSO AVAILABLE FROM EBODE ELECTRONICS
- EBODE
Brand : EDOBE
Model : XDOM RMA
Category : Security alarm