
PD-H300MKIII - CD Player TEAC - Free user manual and instructions
Find the device manual for free PD-H300MKIII TEAC in PDF.
| Product type | CD player |
| Brand | TEAC |
| Model | PD-H300MKIII |
| Dimensions (W x H x D) | 215 x 93 x 305 mm |
| Net weight | 2.8 kg |
| Power supply | 230 V~ 50 Hz |
| Power consumption | 13 W |
| Frequency response | 20 Hz to 20 kHz ±2 dB |
| Total harmonic distortion | Less than 0.02% (1 kHz) |
| Signal-to-noise ratio | Greater than 90 dB (IHF-A) |
| Analog output | 2.0 Vrms (RCA) |
| Digital output | TOSLINK optical |
| Laser type | Semiconductor, 3-beam |
| Compatible disc formats | Audio CD, CD-R, CD-RW, CD MP3, WMA |
| Playback functions | Play, pause, stop, skip, search, random, repeat (1/ALL/A-B), program (up to 32 tracks), MP3 folder selection |
| Display | Track number, elapsed time, MP3/WMA information |
| Remote control | RC-1039 supplied, AA batteries (supplied) |
| Supplied accessories | RCA cable (x1), remote control cord (x1), RC-1039 (x1), AA batteries (x2), user manual (x1), warranty card |
| Operating temperature | +5°C to +35°C |
| Operating humidity | 5% to 85% (without condensation) |
| Maintenance and cleaning | Clean with a soft dry cloth or slightly dampened with mild soap. Do not use thinner, benzene, or alcohol. |
| Safety instructions | Do not open the unit. Do not expose to water or moisture. Leave ventilation space. Disconnect before moving. Do not use stabilizers or non-standard shaped discs. |
| Warranty | Warranty card included (details according to dealer) |
Frequently Asked Questions - PD-H300MKIII TEAC
User questions about PD-H300MKIII TEAC
0 question about this device. Answer the ones you know or ask your own.
Ask a new question about this device
Download the instructions for your CD Player in PDF format for free! Find your manual PD-H300MKIII - TEAC and take your electronic device back in hand. On this page are published all the documents necessary for the use of your device. PD-H300MKIII by TEAC.
USER MANUAL PD-H300MKIII TEAC
The lightning flash with arrowhead symbol, within an equilateral triangle, is intended to alert the user to the presence of uninsulated "dangerous voltage" within the product's enclosure that may be of sufficient magnitude to constitute a risk of electric shock to persons.

The exclamation point within an equilateral triangle is intended to alert the user to the presence of important operating and maintenance (servicing) instructions in the literature accompanying the appliance.
IMPORTANT SAFETY INSTRUCTIONS
1) Read these instructions.
2) Keep these instructions.
3) Heed all warnings.
4) Follow all instructions.
5) Do not use this apparatus near water.
6) Clean only with dry cloth.
7) Do not block any ventilation openings. Install in accordance with the manufacturer's instructions.
8) Do not install near any heat sources such as radiators, heat registers, stoves, or other apparatus (including amplifiers) that produce heat.
9) Do not defeat the safety purpose of the polarized or grounding-type plug. A polarized plug has two blades with one wider than the other. A grounding type plug has two blades and a third grounding prong. The wide blade or the third prong are provided for your safety. If the provided plug does not fit into your outlet, consult an electrician for replacement of the obsolete outlet.
10) Protect the power cord from being walked on or pinched particularly at plugs, convenience receptacles, and the point where they exit from the apparatus.
11)Only use attachments/accessories specified by the manufacturer.
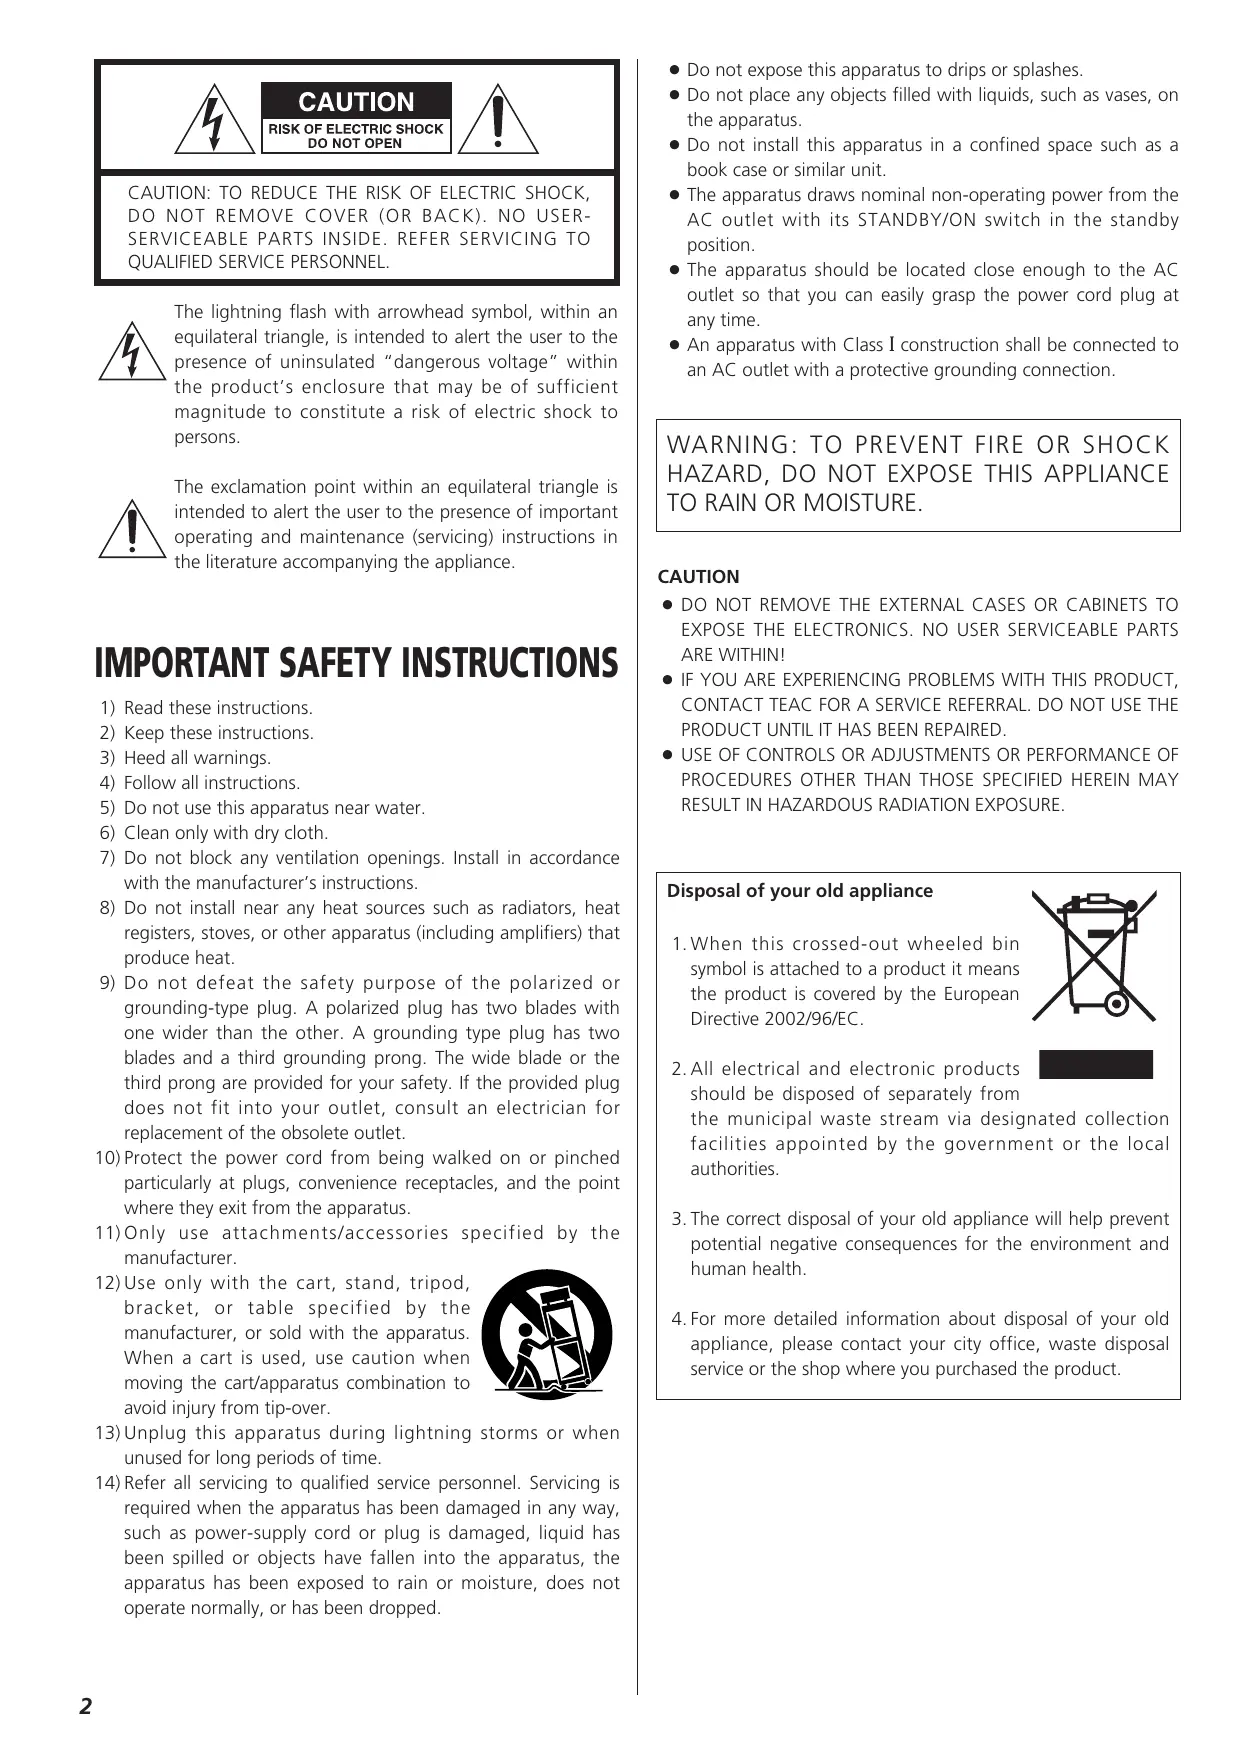
12) Use only with the cart, stand, tripod, bracket, or table specified by the manufacturer, or sold with the apparatus. When a cart is used, use caution when moving the cart/apparatus combination to avoid injury from tip-over.
13) Unplug this apparatus during lightning storms or when unused for long periods of time.
14) Refer all servicing to qualified service personnel. Servicing is required when the apparatus has been damaged in any way, such as power-supply cord or plug is damaged, liquid has been spilled or objects have fallen into the apparatus, the apparatus has been exposed to rain or moisture, does not operate normally, or has been dropped.
- Do not expose this apparatus to drips or splashes.
- Do not place any objects filled with liquids, such as vases, on the apparatus.
- Do not install this apparatus in a confined space such as a book case or similar unit.
- The apparatus draws nominal non-operating power from the AC outlet with its STANDBY/ON switch in the standby position.
- The apparatus should be located close enough to the AC outlet so that you can easily grasp the power cord plug at any time.
- An apparatus with Class I construction shall be connected to an AC outlet with a protective grounding connection.
WARNING: TO PREVENT FIRE OR SHOCK HAZARD, DO NOT EXPOSE THIS APPLIANCE TO RAIN OR MOISTURE.
CAUTION
- DO NOT REMOVE THE EXTERNAL CASES OR CABINETS TO EXPOSE THE ELECTRONICS. NO USER SERVICEABLE PARTS ARE WITHIN!
- IF YOU ARE EXPERIENCING PROBLEMS WITH THIS PRODUCT, CONTACT TEAC FOR A SERVICE REFERRAL. DO NOT USE THE PRODUCT UNTIL IT HAS BEEN REPAIRED.
- USE OF CONTROLS OR ADJUSTMENTS OR PERFORMANCE OF PROCEDURES OTHER THAN THOSE SPECIFIED HEREIN MAY RESULT IN HAZARDOUS RADIATION EXPOSURE.
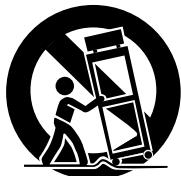
Disposal of your old appliance
- When this crossed-out wheeled bin symbol is attached to a product it means the product is covered by the European Directive 2002/96/EC.
- All electrical and electronic products should be disposed of separately from

the municipal waste stream via designated collection facilities appointed by the government or the local authorities.
- The correct disposal of your old appliance will help prevent potential negative consequences for the environment and human health.
- For more detailed information about disposal of your old appliance, please contact your city office, waste disposal service or the shop where you purchased the product.
Contents
Thank you for choosing TEAC. Read this manual carefully to get the best performance from this unit.
Before Use 3
Remote Control Unit. 3
Discs. 4
Connection. 5
Names of Each Control 6
Playback 8
Search 10
ShufflePlayback 10
RepeatPlayback 11
ProgrammedPlayback. 12
Time Display 13
Display 14
Specifications 14
Troubleshooting 15
Before Use
Read this before operation
- As the unit may become warm during operation, always leaves sufficient space around the unit for ventilation.
- The voltage supplied to the unit should match the voltage as printed on the rear panel. If you are in any doubt regarding this matter, consult an electrician.
- Choose the installation location of your unit carefully. Avoid placing it in direct sunlight or close to a source of heat. Also avoid locations subject to vibrations and excessive dust, heat, cold or moisture.
- Do not place the unit on the amplifier/receiver.
- Do not open the cabinet as this might result in damage to the circuitry or electrical shock. If a foreign object should get into the unit, contact your dealer or service company.
- When removing the power plug from the wall outlet, always pull directly on the plug, never yank the cord.
- To keep the laser pickup clean, do not touch it, and always close the disc tray.
- Do not attempt to clean the unit with chemical solvents as this might damage the finish. Use a clean, dry cloth.
- Keep this manual in a safe place for future reference.
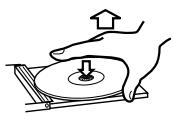
DO NOT MOVE THE UNIT DURING PLAYBACK
During playback, the disc rotates at high speed. Do NOT lift or move the unit during playback. Doing so may damage the disc or the unit.
WHEN MOVING THIS UNIT
When changing places of installation or packing the unit for moving, be sure to remove the disc and return the disc tray to its closed position in the player. Then, press the power switch to turn the power off, and disconnect the power cord. Moving this unit with the disc loaded may result in damage to this unit.
Remote Control Unit
The provided Remote Control Unit allows the unit to be operated from a distance.
When operating the remote control unit, point it towards the REMOTE SENSOR on the front panel of the unit.
- Even if the remote control unit is operated within the effective range, remote control operation may be impossible if there are any obstacles between the unit and the remote control.
- If the remote control unit is operated near other appliances which generate infrared rays, or if other remote control devices using infrared rays are used near the unit, it may operate incorrectly. Conversely, the other appliances may operate incorrectly.
Battery Installation
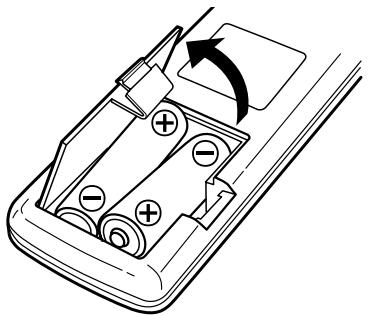
- Remove the battery compartment cover.
- Insert two 'AA' dry batteries. Make sure that the batteries are inserted with their positive and negative poles positioned correctly.
- Close the cover.
Battery Replacement
If the distance required between the remote control unit and main unit decreases, the batteries are exhausted. In this case replace the batteries with new ones.
Precautions concerning batteries
- Be sure to insert the batteries with correct positive ^ and negative ^ polarities.
- Use batteries of the same type. Never use different types of batteries together.
- Rechargeable and non-rechargeable batteries can be used. Refer to the precautions on their labels.
- When the remote control unit is not to be used for a long time (more than a month), remove the batteries from the remote control unit to prevent them from leaking. If they leak, wipe away the liquid inside the battery compartment and replace the batteries with new ones.
- Do not heat or disassemble batteries and never dispose of old batteries by throwing them in a fire.
Discs which can be played on this unit:
- Conventional audio CDs bearing the COMPACT DISC DIGITAL AUDIO logo on the label:

- Properly finalized CD-R and CD-RW discs
- MP3 CDs
Note:
- Depending on the quality of the disc and/or the condition of the recording, some CD-R/CD-RW discs may not be playable.
- Copy-protected discs and other discs that do not conform to the CD standard may not play back correctly in this player. If you use such discs in this unit, TEAC Corporation and its subsidiaries cannot be responsible for any consequences or guarantee the quality of reproduction. If you experience problems with such non-standard discs, you should contact the producers of the disc.
- Always place the disc on the disc tray with the label side up. (Compact discs can be played or recorded only on one side.)
- To remove a disc from its storage case, press down on the center of the case and lift the disc out, holding it carefully by the edges.
How to remove the disc

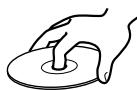
How to hold the disc
- Should the disc become dirty, wipe the surface radially (from the center hole outward towards the outer edge) with a soft, dry cloth:
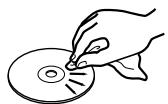
- Never use such chemicals as record sprays, antistatic sprays or fluid, benzine or thinner to clean the discs. Such chemicals will do irreparable damage to the disc's plastic surface.
- Discs should be returned to their cases after use to avoid dust and scratches that could cause the laser pickup to "skip."
- Do not expose discs to direct sunlight or high humidity and temperature for extended periods. Long exposure to high temperatures will warp the disc.
- Do not play any disc that is warped, deformed or damaged. Playing such discs may cause irreparable harm to the playing mechanisms.
-
CD-R and CD-RW discs are more sensitive to the effects of heat and ultraviolet rays than ordinary CDs. It is important that they are not stored in a location where direct sunlight will fall on them, and away from sources of heat such as radiators or heat-generating electrical devices.
-
Printable CD-R and CD-RW discs aren't recommended, as the label side might be sticky and damage the unit.
- Do not stick papers or protective sheets on the discs and do not use any protective coating spray.
- Use a soft oil-based felt-tipped pen to write the information on the label side. Never use a ball-point or hard-tipped pen, as this may cause damage to the recorded side.
- Never use a stabilizer. Using commercially available CD stabilizers with this unit will damage the mechanisms and cause them to malfunction.
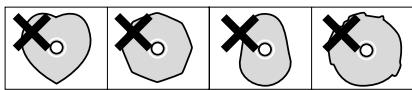
- Do not use CDs with an irregular shape (octagonal, heart shaped, business card size, etc.). CDs of this sort can damage the unit:
- If you are in any doubt as to the care and handling of a CD-R/CD-RW disc, read the precautions supplied with the disc, or contact the disc manufacturer directly.
MP3 and Windows Media-formatted audio files
- This unit can play MP3 and Windows Media-formatted audio files recorded on a CD-R or CD-RW.
(Windows Media is a trademark of Microsoft Corporation.) - File names of MP3 or WMA should be alphanumeric characters. This unit cannot display symbols and full-size or double-byte characters (such as Japanese, Chinese, etc.) correctly. Also, be sure to use the file extension. ('.mp3' for MP3 files, '.wma' for WMA files.)
- MP3 files are monaural or stereo MPEG-1 Audio Layer 3 format. This unit can play MP3 files with sampling frequency 44.1kHz or 48kHz , bit-rate 320kbps or less.
- This unit can play WMA files with sampling frequency 44.1 kHz, bit-rate 192 kbps or less.
- The disc must be finalized in order to play.
The CD-ROM must be ISO 9660 compatible. - When more than 255 files (including folders) are recorded on the disc, or when more than 128 folders are recorded on the disc, the unit might not be able to play it correctly.
- When a MP3 disc is loaded, it may take several minutes until the unit can start to play depending on the numbers of recorded files or the complexity of the folder tree.
CAUTION:
- Switch off the power to all equipment before making connections.
- Read the instructions of each component you intend to use with this unit.
- Be sure to insert each plug securely. To prevent hum and noise, avoid bundling the signal interconnection cables together with the AC power cord or speaker cables.
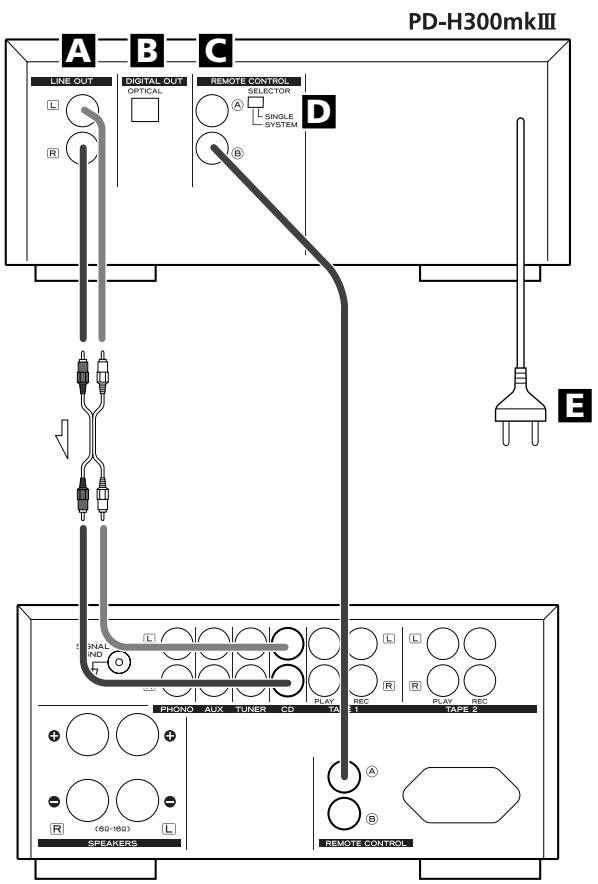
Amplifier (A-H300mkIII)
A LINE OUT jack
Analog 2-channel audio signal is output from this jack. Connect this jack to the CD input jack of the amplifier with an RCA cable.
Make sure to connect :
white plug white jack (L: left channel)
red plug red jack (R: right channel)
B DIGITAL OUT terminal
Connect the digital output terminal to the digital input terminal of a digital device such as a decoder, CD recorder, MD deck, etc. Use a commercially-available optical digital cable.
- Keep the supplied cap to cover the terminal when it is not in use.
C REMOTE CONTROL jacks
If you have TEAC A-H300mkIII, convenient system control operations are available:
- When you press the PLAY button, the input selector of the A-H300mkIII is set to "CD" automatically.
- You can use the system remote control unit RC-957 (provided with A-H300mkIII) to operate this unit.
Connect the REMOTE CONTROL jack (A or B) to the REMOTE CONTROL jack of A-H300mkIII or T-H300(DAB)mkIII with the provided remote control connection cord.
Turn the SELECTOR switch to SYSTEM.
Read the owner's manual of A-H300mkIII for details.
SELECTOR switch
If you use the provided remote control unit RC-1039 instead of the system remote control connection, turn this switch to SINGLE.
E AC Power Cord
After all other connections are complete, connect the plug to the AC wall socket.
Be sure to connect the power cord to an AC outlet which supplies the correct voltage.
Hold the power plug when plugging or unplugging the power cord.
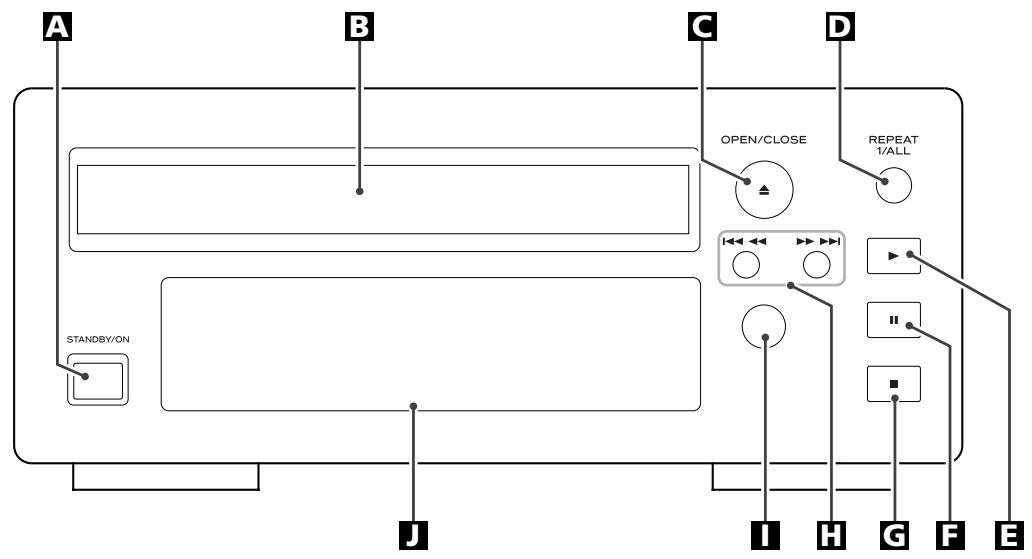
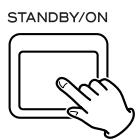
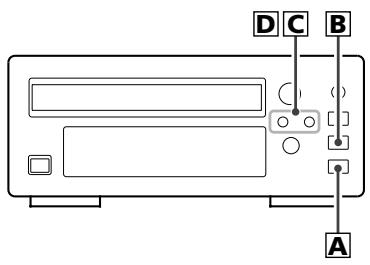
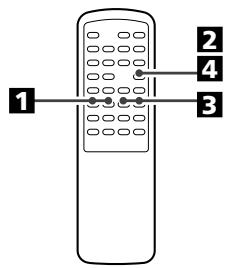
A STANDBY/ON
Press this button to turn the unit on or standby. The standby indicator surrounding the STANDBY/ON button lights when the unit is in the standby mode. When the unit is turned on, it goes off.
The equipment draws nominal non-operating power from the AC outlet with its STANDBY/ON switch in the STANDBY position.
B Disc tray
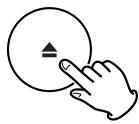
C OPEN/CLOSE
Use this button to open and close the disc tray.
REPEAT 1/ALL
Use this button to select the repeat mode.
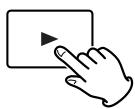
PLAY
Use this button to start playback.
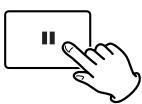
FAUSE (II)
Use this button to pause playback.
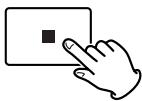
STOP
Use this button to stop playback.
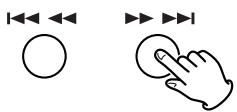
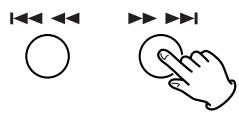
SKIP/SCAN
Use these buttons to skip or search tracks.
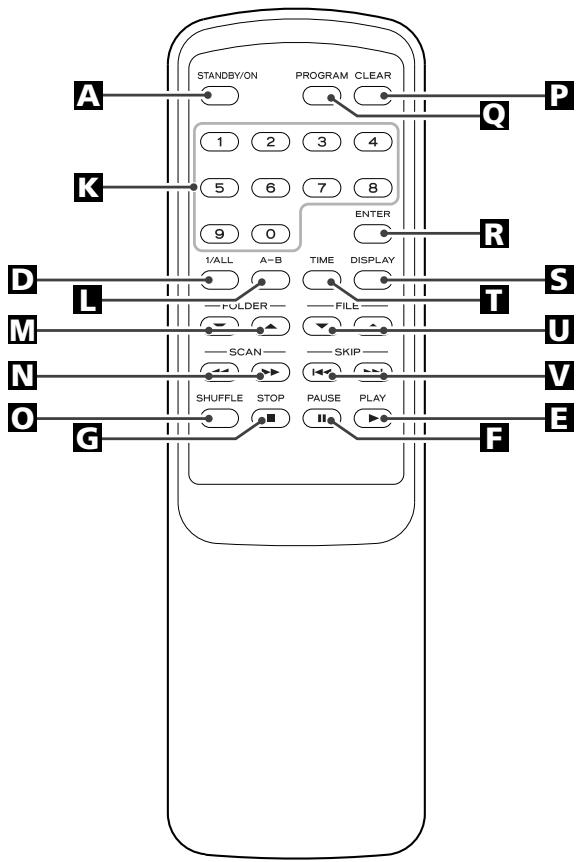
Remote Sensor
When operating the remote control unit, point it towards the remote sensor.
Display
Numeric buttons
Use these buttons to select a track number.
For instance, to select track number 35, press '3' and '5'.
A-B
Use this button to set the point for A-B repeat.
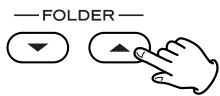
M FOLDER ( ,)
Use these buttons to select a folder of MP3/WMA.
N SCAN()
During playback, use these buttons to search the part you want to listen to.
SHUFFLE
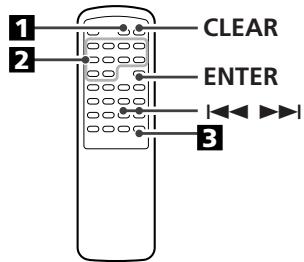
Use this button for shuffle playback.
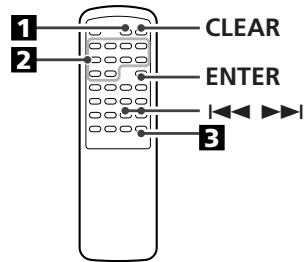
P CLEAR
Use this button to clear a program.
PROGRAM
Use this button to enter the program mode. In program mode, use this button to enter the selection.
R ENTER
Use this button to enter the selection.
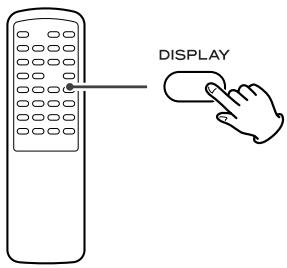
DISPLAY
During MP3/WMA playback, use this button to change what information is displayed.
TIME
During playback, use this button to change the time display.
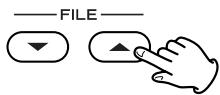
UFILE ( ,)
Use these buttons to select a file of MP3/WMA.
VSKIP(11)
Use these buttons to skip tracks/files.
Note:
To simplify explanations, instructions in this manual refer to the names of the buttons and controls on the front panel only. Associated controls on the remote control will also operate similarly.
Press the STANDBY/ON button to turn the unit on.
- If the PD-H300mkIII is connected to the A-H300mkIII with a remote control cord, you can switch ON/standby both the A-H300mkIII and the PD-H300mkIII by pressing the STANDBY/ON button of the A-H300mkIII.
Press the OPEN/CLOSE button (△).

Place a disc on the tray with the printed label face up.
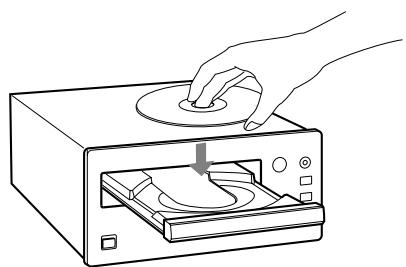
- Never place more than one disc on the tray.
- The disc must be loaded centrally into the disc tray. If the disc is not correctly loaded, it may not be possible to open the tray again once it has closed, so you should ensure the disc is always centrally loaded in the tray.
- Do not force the tray by hand during opening and closing operations.
4 Press the OPEN/CLOSE button () to close the tray.
OPEN/CLOSE
(Audio CD)
The total number of the tracks and total play time of the disc is displayed.

(MP3/WMA disc)
The total number of files of the disc is displayed.

- It may take several minutes to display the number of files.
Press the PLAY button () to start playback.
(Audio CD)

(MP3/WMA disc)
Disc playback starts from the first track/file.
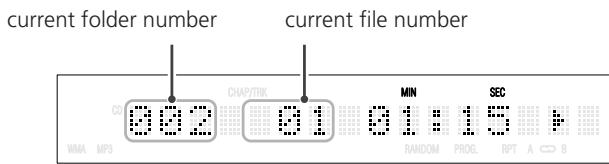
- MP3/WMA files recorded out of folders are automatically put in the '001' folder, and playback starts from the first file of the 001 folder.
- If there are folders that has no MP3/WMA file, this unit skips them.
- If you load the disc, and then press the PLAY button (or the numeric buttons of the remote control unit) without having first closed the disc tray, the disc tray closes and playback starts.
A To stop playback
Press the STOP button (■) to stop playback.
B To suspend playback temporarily (pause mode)
Press the PAUSE button (I) during playback. Playback stops at the current position, and I is displayed.
To resume playback, press the PLAY button (▶) or PAUSE button (■).
To skip to the next or a previous track/file
During playback, repeatedly press the SKIP button (I or ) until the desired track/file is found. The selected track/file will be played from the beginning.
In the stop or pause mode, press the SKIP button (I or ) repeatedly until the track you want to listen to is found. Press the PLAY button to start playback from the selected track.
- When the 14 button is pressed during playback, the track being played will be played from the beginning. To return to the beginning of the previous track, press the 14 button twice.
- During programmed playback, the next or previous track in the program is played.
D Search for a part of a track/file
During playback, hold down the 山山山山 or 山山山山 button and release it when the part you want to listen to is found.
On the remote control use the or button.
E Direct Playback
While in stop or playback mode, you can use the numeric buttons of the remote control to select a track/file.
Press the numeric buttons to select a track/file. Playback starts from the selected track/file.
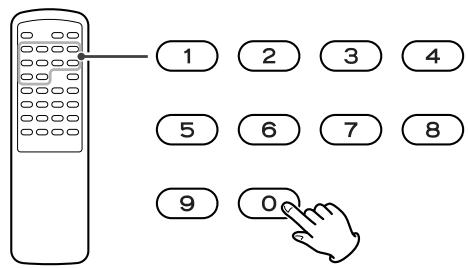
For instance, to select track number 35, press "3" and "5".
To select a MP3 or WMA file, enter 3 digit numbers. As an example, to select number 5, press "0", "0" and "5". (Optionally, you may press just the number "5" and then wait a few seconds.)
Search
You can select a desired directory and an MP3 or WMA file during playback or when stopped.
Press the FOLDER buttons ( /) to select a directory.
Press the ENTER button.

If you want to select a file, press the FILE buttons ( /)
4 Press the ENTER button.
The selected track/file will be played from the beginning.

ShufflePlayback
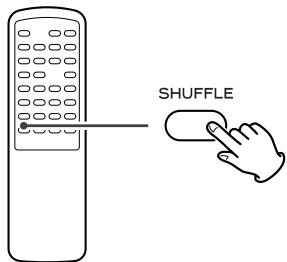
The tracks or files can be played randomly. In the stop or play mode, press the SHUFFLE button.
RANDOM indicator lights.
When the shuffle playback of all the tracks or files has been finished, the unit stops and the shuffle playback mode is cancelled.
-
If you press the button during shuffle playback, next track/file will be randomly selected and played. If you press the button, the currently played track/file will be played from the beginning. A track/file cannot be replayed during shuffle playback.
-
If one of the following buttons is pressed, shuffle mode will be cancelled:
SHUFFLE, STOP, STANDBY/ON, OPEN/CLOSE
- The numeric buttons does not work during shuffle playback.
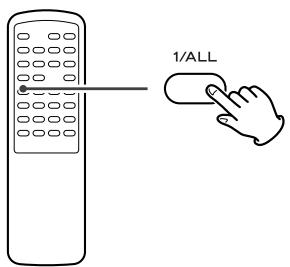
Every time the REPEAT 1/ALL button is pressed, the mode is changed as follows:
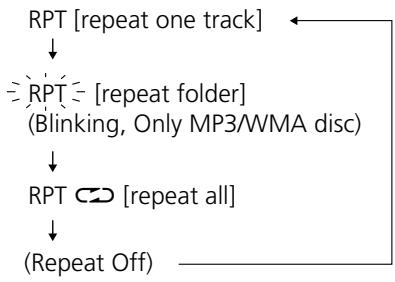
Repeat One Track
The track/file being played will be played repeatedly. If you select another track/file in Repeat 1 mode, the track/file you selected will be played repeatedly.
Repeat Folder (Only MP3/WMA disc)
All the tracks or files in the folder will be played repeatedly.
- When the disc has no folder (all files are in the 001 folder), this mode will be skipped.
Repeat All
All the tracks or files will be played repeatedly.
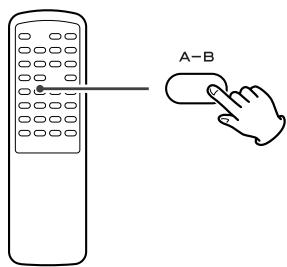
Repeat A-B
This function allows repeat playback of any desired portion of the disc.
1 Designate the point at which repeat playback should start by pressing the A-B button.
'Repeat A-' lights up and 'B' blinks.
2 When the point at which repeat playback should end is reached, press the A-B button again.
Repeat A-B' lights up.
The designated point with A-B button will be played back repeatedly.
-
To return to normal play, press A-B button until 'Repeat A-B' disappears from the display.
It must be more than 3 seconds between A and B. -
If one of the following buttons is pressed, A-B repeat mode will be cancelled:
STOP,SKIP,1/ALL,A-B,SHUFFLE,OPEN/CLOSE, STANDBY/ON
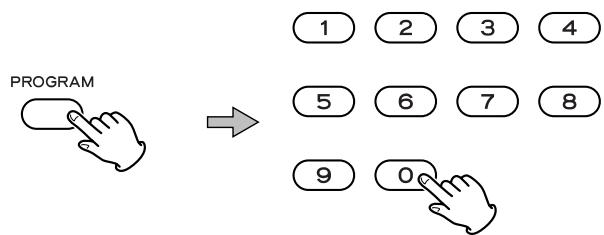
Up to 32 tracks can be programmed in the desired order.
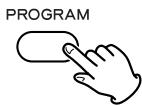
Press the PROGRAM button in the stop mode.

'PROG.' lights on the display.
Press the numeric button to select a track.


program number track/file number
To select a track in the audio CD, enter 2 digit numbers.
To select a MP3 or WMA file, enter 3 digit numbers.
Optionally, you may press just the number "5", and then wait a few seconds or press the PROGRAM button.
You can also use the SKIP button and the PROGRAM button to program tracks. Select a track using the SKIP buttons (I▶▶), and within 5 seconds press the PROGRAM button.
Repeat this step to program more.
- If you made a mistake, press the CLEAR button. The last programmed number will be deleted.
- Up to 32 tracks can be programmed.
3 When programming has been finished, press the PLAY button to start programmed playback.

When the playback of all the programmed tracks has finished, or if one of the following buttons is pressed, the PROGRAM indicator will go off and the program mode will be cancelled:
STOP, STANDBY/ON
But the programmed contents aren't lost. You can return to the programmed playback by pressing the PROGRAM button and the PLAY button.
- If the disc tray is opened or the power cord is unplugged, the programmed contents will be erased.
To check the programmed order
In the stop mode, press the PROGRAM button repeatedly. The track number and program number will be shown on the display.
To add a track/file to the program
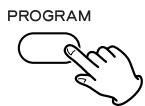
In the stop mode, press the PROGRAM button repeatedly until the program number you want to insert a track/file appears on the display. If you want to add a track/file to the end of the program, press the PROGRAM button repeatedly until 'P-End' briefly appears on the display.
Then select a track number using the numeric buttons. The track/file is added to the program.
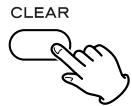
To delete a track/file from the program

PROGRAM


CLEAR
In the stop mode, press the PROGRAM button repeatedly until the program number to be deleted appears on the display, then press the CLEAR button. The selected track/file is deleted from the program.
To clear the program
- In the stop mode, press the PROGRAM button.
- Hold down the CLEAR button for more than 4 seconds.
- If the OPEN/CLOSE button (▲) is pressed, the programmed contents will also be cleared.
- If the unit is disconnected from the power supply, the programmed contents will be cleared.

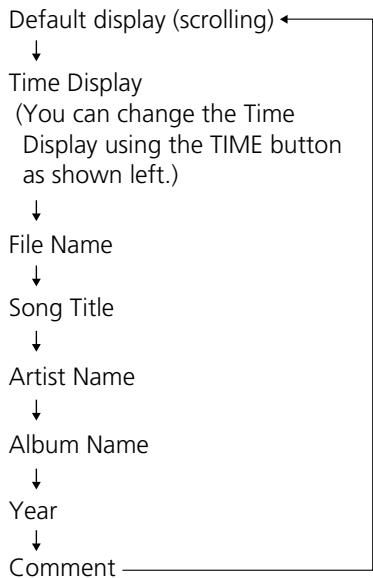
During playback, each time the TIME button is pressed the display changes as follows:

During MP3/WMA playback, press the DISPLAY button repeatedly to change what information is displayed.
Default display (scrolling):

Display changes as follows:
Specifications
CD Player
Pickup 3-beam, semiconductor laser
Frequency Response 20 Hz - 20 kHz, ±2dB
Total Harmonic Distortion . . . Less than 0.02 % (1 kHz)
Signal-to-Noise Ratio (S/N) . . . More than 90 dB (IHF-A)
Output Analog: 2.0 Vrms (RCA)
Power Consumption 13 W
Dimensions (W x H x D) 215 x 93 x 305 mm
Weight (Net). 2.8 kg
Operating temperature. +5^ - + 35^
Operating humidity . . . . . . . . . . . . . . . . . . . . . . . . . . . . . . . . . . . . . . . . . . . . . . . . . . . . . . . . . . . . . . . . . . . . . . . . . . . . . . . . . . . . . . . . . . . . . . 1Operating temperature 25 °C to 30 °C (no condensation)
Storage temperature. -20^ + 55^
Standard Accessory. RCA cable x 1
Remote control connection cord x 1
Remote control unit (RC-1039) x1
Batteries (AA) x2
Owner's manual x1
Warranty card x1
- Design and specifications are subject to change without notice.
- Weight and dimensions are approximate.
- Illustrations may differ slightly from production models.
If you experience any problems with the unit, please take a moment to look through this chart and see if you can solve the problem yourself before you call your dealer or a TEAC service center.
General
No power
Check the connection to the AC power supply. Check and make sure the AC source is not a switched outlet and that, if it is, the switch is turned on. Make sure there is power to the AC outlet by plugging another item such as a lamp or fan.
No sound
Check the connection to the amplifier.
Check the operation of the amplifier.
Cannot play.
Load a disc with the playback side facing down.
If the disc is dirty, clean the surface of the disc.
A blank disc has been loaded. Load a prerecorded disc.
Depending on the disc, etc. it may not be possible to play back CD-R/CD-RW discs. Try again with another disc.
You cannot play back unfinalized CD-R/CD-RW discs. Finalize such a disc in a CD recorder and try again.
Sound skips.
Place the unit on a stable place to avoid vibration and shock.
If the disc is dirty, clean the surface of the disc.
Don't use scratched, damaged or warped discs.
Remote Control Unit
Remote control doesn't work.
If the batteries are exhausted, change the batteries.
Use remote control unit within the range (5m) and point at the front panel.
Clear obstacles between the remote control unit and the main unit.
If a fluorescent light is near the unit, turn it off.
MP3/WMA
There is no sound even if the PLAY button () is pressed.
Non-playable file formats (e.g MPEG 1 LAYER 2 file) cannot be played.
'No song title No artist No album' appears on the display.
There is no ID3 tag information for the music file. Edit the song title, artist, and album information of the song on a PC using the MP3 or WMA making application.
Some unknown characters are displayed on the display panel.
This unit cannot display symbols and full-size or double-byte characters (such as Japanese, Chinese, etc.) correctly. File name of MP3 or WMA should be alphanumeric characters.
If normal operation cannot be recovered, unplug the power cord from the outlet and plug it again.
Beware of condensation
When the unit (or a disc) is moved from a cold to a warm place, or used after a sudden temperature change, there is a danger of condensation; vapor in the air could condense on the internal mechanism, making correct operation impossible. To prevent this, or if this occurs, leave the unit for one or two hours with the power turned on. Then the unit will stabilize at the temperature of its surroundings.
Maintenance
If the surface of the unit gets dirty, wipe with a soft cloth or use diluted neutral cleaning liquid. Be sure to remove any fluid completely. Do not use thinner, benzine or alcohol as they may damage the surface of the unit.
Sommaire
SHUFFLE, STOP, STANDBY/ON, OPEN/CLOSE
STOP,SKIP,1/ALL,A-B,SHUFFLE,OPEN/CLOSE, STANDBY/ON
SHUFFLE, STOP, STANDBY/ON, OPEN/CLOSE
STOP,SKIP,1/ALL,A-B,SHUFFLE,OPEN/CLOSE, STANDBY/ON

This appliance has a serial number located on the rear panel. Please record the model number and serial number and retain them for your records.
- IMPORTANT SAFETY INSTRUCTIONS
- CAUTION
- Disposal of your old appliance
- Contents
- Thank you for choosing TEAC. Read this manual carefully to get the best performance from this unit.
- Before Use
- Read this before operation
- DO NOT MOVE THE UNIT DURING PLAYBACK
- WHEN MOVING THIS UNIT
- Remote Control Unit
- Battery Installation
- Battery Replacement
- Precautions concerning batteries
- Discs which can be played on this unit:
- Note:
- MP3 and Windows Media-formatted audio files
- CAUTION:
- A LINE OUT jack
- B DIGITAL OUT terminal
- C REMOTE CONTROL jacks
- SELECTOR switch
- E AC Power Cord
- A STANDBY/ON
- B Disc tray
- C OPEN/CLOSE
- REPEAT 1/ALL
- PLAY
- FAUSE (II)
- STOP
- SKIP/SCAN
- Remote Sensor
- Display
- Numeric buttons
- A-B
- M FOLDER ( ,)
- N SCAN()
- SHUFFLE
- P CLEAR
- PROGRAM
- R ENTER
- TIME
- UFILE ( ,)
- VSKIP(11)
- A To stop playback
- B To suspend playback temporarily (pause mode)
- To skip to the next or a previous track/file
- D Search for a part of a track/file
- E Direct Playback
- Search
- ShufflePlayback
- Repeat One Track
- Repeat Folder (Only MP3/WMA disc)
- Repeat All
- Repeat A-B
- Designate the point at which repeat playback should start by pressing the A-B button.
- When the point at which repeat playback should end is reached, press the A-B button again.
- Press the PROGRAM button in the stop mode.
- Press the numeric button to select a track.
- STOP, STANDBY/ON
- To check the programmed order
- To add a track/file to the program
- To delete a track/file from the program
- To clear the program
- Specifications
- CD Player
- General
- No power
- No sound
- Cannot play.
- Sound skips.
- Remote control doesn't work.
- MP3/WMA
- There is no sound even if the PLAY button () is pressed.
- 'No song title No artist No album' appears on the display.
- Some unknown characters are displayed on the display panel.
- Beware of condensation
- Maintenance
- Sommaire
Brand : TEAC
Model : PD-H300MKIII
Category : CD Player