APOLLO ULTRA LIGHT - Stroller HAUCK - Free user manual and instructions
Find the device manual for free APOLLO ULTRA LIGHT HAUCK in PDF.



| Product type | Stroller |
| Brand | HAUCK |
| Model | APOLLO ULTRA LIGHT |
| Recommended age | 0 to approx. 36 months (up to 20 kg) |
| Maximum weight capacity | 20 kg |
| Safety standard | Compliant with standard prEN 1888:2002-4 |
| Harness | 5-point: crotch strap, waist belt, shoulder straps |
| Backrest adjustment | Continuous via cord at the back |
| Handlebar height adjustment | Yes, with side buttons |
| Front wheels | Swivel with lock |
| Rear wheels | Fixed, axle unit |
| Brake | Foot-operated (bar) |
| Canopy | Removable, clip-on |
| Front bar | Removable with button |
| Folding | Yes, with unlocking mechanism and transport safety |
| Stroller weight | Approx. 7 kg |
| Unfolded dimensions | Approx. 85 x 50 x 100 cm |
| Folded dimensions | Approx. 100 x 45 x 30 cm |
| Frame material | Steel or aluminum (not specified) |
| Cover | Removable fabric, hand wash |
| Chassis care | Mild soap and warm water; do not expose to intense sunlight |
| Spare parts | Only original HAUCK |
Frequently Asked Questions - APOLLO ULTRA LIGHT HAUCK
User questions about APOLLO ULTRA LIGHT HAUCK
0 question about this device. Answer the ones you know or ask your own.
Ask a new question about this device
Download the instructions for your Stroller in PDF format for free! Find your manual APOLLO ULTRA LIGHT - HAUCK and take your electronic device back in hand. On this page are published all the documents necessary for the use of your device. APOLLO ULTRA LIGHT by HAUCK.
USER MANUAL APOLLO ULTRA LIGHT HAUCK
natural_image
Black and white photo of a baby stroller with a checkered pattern on the backrest, no visible text or symbols.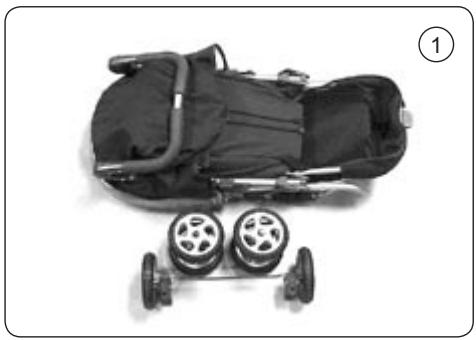
natural_image
Top-down view of a black stroller with two wheels and a numbered label (1) in the corner, no text or symbols on the main subjects.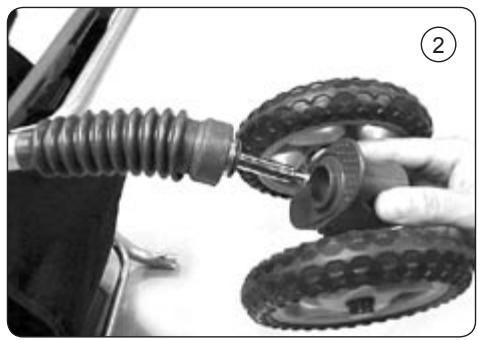
natural_image
Close-up of a hand adjusting a mechanical component with two wheels (no visible text or symbols)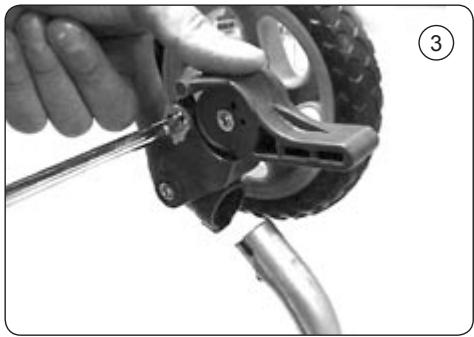
natural_image
Close-up of a hand using a screwdriver to adjust a tire component (no text or symbols visible)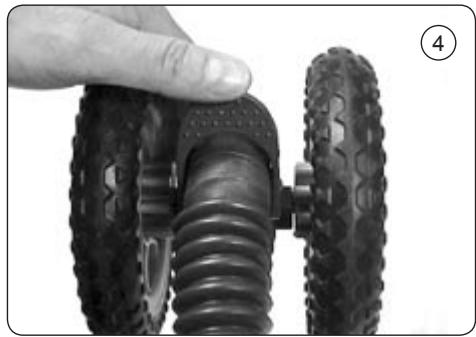
natural_image
Close-up of a hand adjusting a mechanical tire component (no text or symbols visible)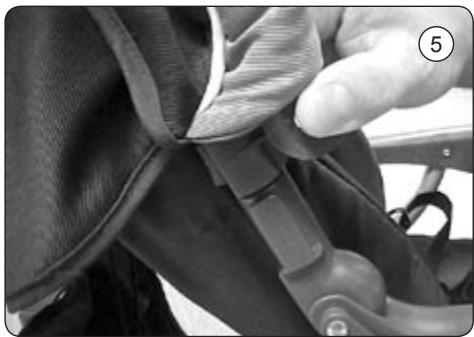
natural_image
Close-up of a person's seatbelt being adjusted, showing straps and seat (no text or symbols visible)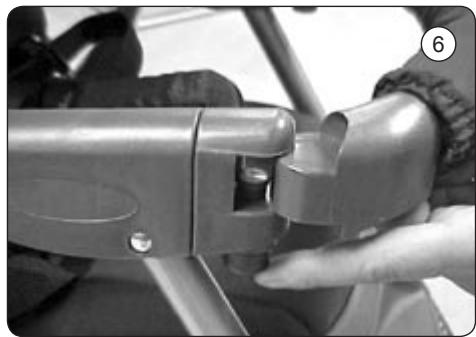
natural_image
Close-up of a hand using a mechanical clamp or crimping tool to adjust a component (no visible text or symbols)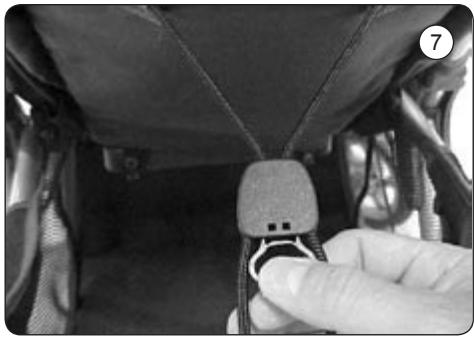
natural_image
Close-up of a hand inserting a cable to a car seatbelt component (no text or symbols visible)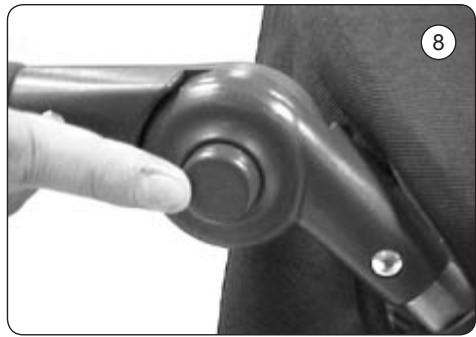
natural_image
Close-up of a finger pressing a button on a mechanical component (no visible text or symbols)Congratulations on the purchase of your Hauck stroller. You have chosen top quality and safety. Please remember that this is not a shopping trolley. Shopping nets and bags which are hung on the handle greatly affect the stroller's stability. The wheels of your Hauck stroller require no maintenance. But from time to time you should give a few drops of oil on the axle and you should delete the wheels from mud and dust. If you follow these instructions your Hauck stroller will give you years of trouble free pleasure.
Warnings and points of attention
Read these instructions carefully before use and keep them for future reference. Your child's safety may be affected if you do not follow these instructions.
- The vehicle is intended for children from 0 and up to 20 kg; when used in combination with a car seat or a prambody, the maximum weight as indicated on the car seat or prambody applies.
- Do not use the stroller as a pushchair, until your child is able to sit unassisted and is not younger than 6 months.
• Never leave your child unattended in or with the stroller. - Keep plastic packaging materials out of reach of children to avoid the danger of asphyxiation.
- Prior to each use make sure that all locks on the frame are anchored (frame lock, seat on frame, wheels, bumper bar, and hood).
• Always strap your child in with the safety belts, always use the crotch strap in combination with lap and shoulder belts. - When parking always use the parking brake.
- Avoid situations of extreme use that decrease your control over the child and the stroller. When using the stroller for your child, your speed should be limited to a walking speed, so no running, jogging, or skating. Do not use escalators or stairs and be careful when using the elevators while your child is in the stroller.
-
Loads or baskets attached to the push bar negatively influence the stability and the durability of the stroller. Only use the indicated storage spaces and do not exceed the maximum permitted weight.
-
Check, clean and oil this stroller regularly. Use non-aggressive cleansing agents and lubricants.
• The stroller may only be used for the transportation of one child. - No accessories may be used on the stroller unless they have been explicitly permitted by hauck for the stroller.
- Make sure that the child's hands stay out of range of possible pinching areas when the stroller or parts thereof are being folded, unfolded, or otherwise changed.
- WARNING: Bear in mind that small parts, such as the valve caps on the wheels, can be swallowed by your child, and may cause your child to choke.
Please use only original hauck accessories and original hauck spare parts.
THIS PRODUCT CONFORMS TO THE STANDARD: prEN 1888:2002-4
Instructions of use
Scope of supply (fig. 1)
1. Assembly
Release transport safeguard.
Push pushchair forward to unfold. Pull slide bar up until you can hear and see that both locking levers have engaged.
2. Mounting the front wheels (fig. 2)
Fit the swivel wheels to the front frame elements. Check that the locking button has engaged and that the wheels are properly fixed.
3. Mounting the rear axle unit (fig. 3)
Fit the rear axle unit at the same time to the rear wheel fittings until the locking button engages. Check that it is fixed properly to the pushchair.
4. Fixing the swivel wheels (fig. 4)
Press the locking lever down to fix the wheels. Pull the locking lever up for the wheels to swivel again.
5. Mounting the hood (fig. 5)
Push the hood connectors to the fittings on the frame.
6. Mounting the front bar (fig. 6)
Press the button underneath the front bar guide and hold; insert the front bar. Release the button to fix the front bar.
7. Adjusting the back rest (fig. 7)
The back rest is fully variable. Adjust the backrest by changing the setting of the cord tie at the back.
8. Adjusting the height of the push bar (fig. 8)
Press the adjusting buttons on both sides and adjust the required height.
Release the buttons to fix the selected height.
9. Brakes
To lock the foot brake, press the brake bar down with your foot. To release it again, lift the brake bar with your foot.
Caution! Always lock the brake when you park the pushchair.
10. 5-point safety belt
Fit the belt between the legs and around the hips and lock. Then fasten the shoulder belts and hook into the hip belt. Adjust the width of the belts to fit your child.
Caution! To avoid any injuries, you should always secure your child with the safety belt.
11. Collapsing
Fold the hood down, put the back rest in sitting position.
Pull the unlocking mechanism on the push bar up (underneath the height adjustment for the push bar) and push the push bar forwards. Secure with the transport safeguard.
Care and washing instructions
To clean the seat of your pram, remove the screws and plastic clips and wash the seat by hand using lukewarm soapy water. Do not put the seat in the tumble dryer as the seat contains plastic struts. Only attach the seat again when it is completely dry. To wash the removable cover (if your pram has one of these) we recommend hand laundry.
PLEASE DO NOT USE BLEACH! Please check from time to time whether there are any loose screws, broken plastic parts or torn parts in your pram. Replace broken or worn parts immediately. Do not continue to use your pram if it is damaged. To clean the frame of your pram, please only use lukewarm water with a mild detergent! If your pram is exposed to excessive sunshine, the plastic parts and material covers can fade.
IMPORTANT- KEEP IT FOR LATER READING
CONSERVER CE MODE D'EMPLOI POUR UN
USAGE ULTERIEUR ET LE LIRE ATTENTIVEMENT
BELANGRIJK - BEWAAR ALS NASLAGWERK