HA147 - Humidifier PUR LINE - Free user manual and instructions
Find the device manual for free HA147 PUR LINE in PDF.

| Product type | Evaporative humidifier |
| Brand | PUR LINE |
| Model | HA147 |
| Dimensions (L x D x H) | 625 x 316 x 720 mm |
| Net weight | 18.6 kg |
| Power supply | 230 V ~ 50 Hz |
| Power consumption | 53 W |
| Tank capacity | 34 litres |
| Humidification per 24h | 60 litres (AHAM test) |
| Air flow (speed 1) | 790 m³/h |
| Air flow (speed 2) | 490 m³/h |
| Adjustable hygrostat | Yes |
| Indicator lights | Water level (red), humidity (orange), operation (green) |
| Automatic shutdown | Yes, in case of low water level |
| Filters | Evaporation pads (set of 2) - reference PUR358 |
| Automatic refill option | WIN1610 kit available |
| Warranty | 1 year |
| Maintenance | Clean the pads with vinegar water or descaling solution; replace annually |
| Safety | Residual current circuit breaker 30 mA recommended; disconnect before maintenance |
Frequently Asked Questions - HA147 PUR LINE
User questions about HA147 PUR LINE
0 question about this device. Answer the ones you know or ask your own.
Ask a new question about this device
Download the instructions for your Humidifier in PDF format for free! Find your manual HA147 - PUR LINE and take your electronic device back in hand. On this page are published all the documents necessary for the use of your device. HA147 by PUR LINE.
USER MANUAL HA147 PUR LINE
text_image
(FR) F Pur LineHUMIDIFICATEUR HA147
GUIDE D'UTILISATION
natural_image
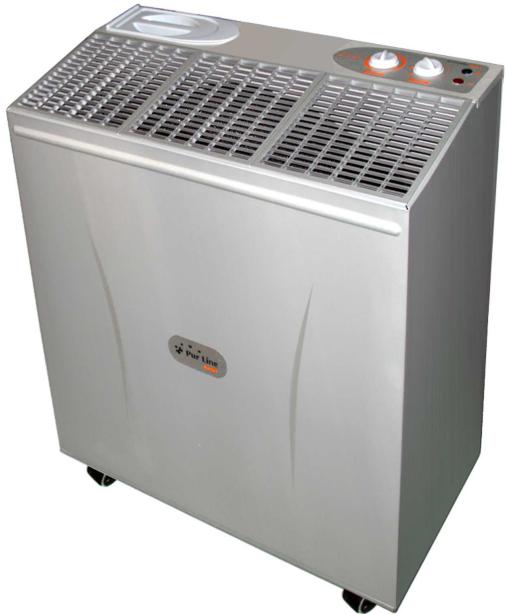
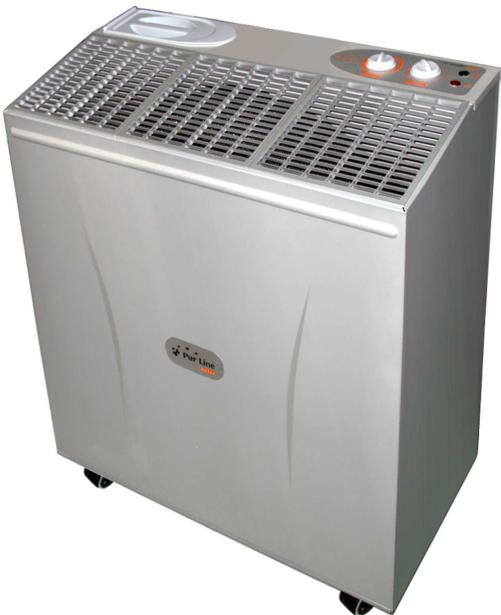
Exterior view of a modern stainless steel industrial air purifier unit (no visible text or symbols)Félicitations !
natural_image
Simple line drawing of a rectangular metal bracket inside a circle (no text or symbols)natural_image
Line drawing of a stainless steel kitchen appliance with ventilation grilles and control buttons (no text or symbols)↓

natural_image
Exterior view of a modern stainless steel air purifier with ventilation grilles and control knobs (no visible text or symbols)Congratulations!
We thank you for choosing our Humidifier. This equipment has been designed to bring you comfort with optimum energy saving.

READ and SAVE these operating instructions as well as basic safety precautions before using your Humidifier.
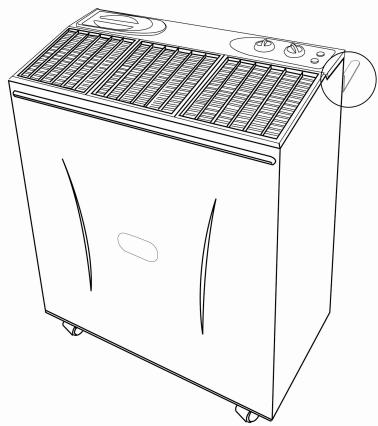
Get to know your unit.
Read this guide carefully and note all recommended safety precautions prior and after using this equipment; keep your humidifier in good working condition.
Make yourself familiar with instructions and safety guides related to the use of your unit prior to operation.
Keep this user guide for future reference.
Carton content
Humidifier body
Evaporative pad holder (drum) with pads
Water tank

SAFETY PRECAUTIONS
- People or children who have not read this manual or are not use to this kind of product should not be allowed to use the unit.
- Your humidifier is designed to be used with AC current. No other than alternative current should be used for this unit.
• Always switch off and unplug your unit when not in operation. - For more safety, it is recommended to include in the installation a high sensitivity default circuit breaker (30 mA). If you do not know the specifications of your installation, please ask a qualified electrician.. If you do not have a high sensitivity circuit breaker, we recommend you have one installed.
- Before using the humidifier, make sure that it is NOT in the "ON" position and all assembly and installations procedures have been followed.
- Connect the supply cord to an electrical wall socket with ground. (Do not use a non earthed supply like an extension cord, a light bulb socket...) or others.
- Place on/off switch to off position and disconnect from wall socket prior to refilling the unit.
- If the supply cord is damaged, it must be replaced by the manufacturer or its service agent or similar qualified person in order to avoid a hazard.
Read all instructions before using this new appliance.
P1- Unpack unit from packing.
P2 - Completely unravel power cord. Do not damage it.
P3 - Remove adhesive tape from top cover.
P4 - Remove wedge which holds circular foam holder, then remove holder from humidifier taking hold of its axis.
P5 - Place drum inside humidifier.
P6 - Pull slightly outward water tank.
P7 – Place water reservoir in its initial setting.

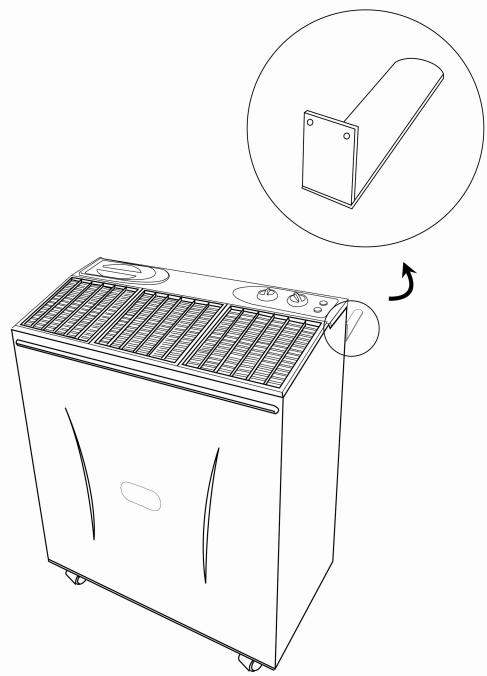
P8 - Make sure you have set the 2 brackets the back of the humidifier to allow free 10cm at the rear of the humidifier.
natural_image
Line drawing of a portable air conditioner unit with a magnified inset showing a side panel detail (no text or symbols)
Locating your Humidifier:
For best results we recommend you locate your unit in the middle of premises. If room if heated by pulsed air please set unit near source of pulsed air.
Do not place humidifier near furniture, paintings or any other object which humidity could damage.
Connecting to mains
S1 - Before using the humidifier, extend the cord and inspect for any signs of damage, inspect plug and socket. You should use earth socket.
S2 -Connect the unit to mains (230Volt-50 Hz 10Amps).
Humidifier consumption does not exceed 0.5 Amps (110Wh)
Filling up humidifier.
R1 - Make sure the humidifier is switched OFF.
R2 - Unplug unit from mains.
R3 – Flip open filling cover.
R4 - Be very careful while filling up reservoir, do not spill water on unit controls, or on inside sides of unit. STOP filling 2 cm under water level indicated.
R5 - Wipe dry any spilled water from control panel. Make sure unit is quite dry before proceeding.
R6 - Connect humidifier to mains.
HOW TO USE YOUR HUMIDIFIER
Please become familiar with the various commands of your humidifier.
F1 – To turn off unit, switch it "OFF". To turn it on switch it to the "ON" position. There are 2 speeds (speed 1, speed 2) to choose from.
F2 – The humidistat (% humidity) allows you to regulate the humidity level in the premises.
If your turn backward the humidistat it will stop the unit. On the contrary if you turn it to its maximum, the unit will run continuously.
F3 – The reservoir float, will stop the humidifier when the amount of water is below 2cm.
F4 – The warning lights (WATER), (% HUMIDITY) and (ON) indicate at all times if the unit is in good working order.
When the red warning light (WATER) is "ON" the reservoir water level is insufficient. See filling up procedure.
When the orange warning light is ON (% HUMIDITY) the room humidity level is either the same or higher than the Humidistat setting. If a higher level of humidity is required, turn the humidistat clock wise to the required level. The green warning light comes “ON” when the fan is operating, this also means the water level in the reservoir is yet sufficient and the humidistat setting level is yet higher than the room relative humidity level (%humidity).
HUMIDIFIER FUNCTION
U1 – The humidistat keeps the humidity level of the room at the required level; the evaporative pads and the fan start and stop automatically when the humidistat indicate it. The comfort zone is reached depending on the room temperature and the hygrometry level. The higher humidity output is required if the room temperature is raised; this phenomena is even more noticeable if the outside temperature is lower. When the required humidity level is reached, the orange warning light comes on.
(% humidity)
U2 – There are 2 fan speed available. In SPEED 2, the humidity level required will be reached earlier. We recommend you begin in using speed 2 and when the room humidity level is higher, the unit can be set on speed 1 to maintain the best humidity level possible while a lower noise level.
U3 – When the water level is too low, the humidifier stops automatically and the red warning light comes on (WATER).
Use and care
Frequent cleaning is necessary to maximize and extend the life of your humidifier.
Always disconnect the unit from the wall socket before cleaning and maintenance.
N1- Evaporative pads
The humidifier evaporative pads have several functions. They are the most important parts of your humidifier since they perform the following functions:
- Air cleaning
- Water filtration
-
Moisture Evaporation
It is essential to keep the pads clean and replace them periodically (yearly) depending on the amount of use, water hardness, local air pollution. To exchange the pads, remove the humidifier top cover. Grab the wheel axle and remove the red plastic clips holding the outer foam-pad; remove the white clips holding the circular foam-disk.
Clean the foam pads with white vinegar or de-scaling agent or replace with new ones if too old. Relocate in original position. Fix foam pads in correct position with clips and washers.
N2 – Water reservoir
Open the rear door and remove the water reservoir while insuring not to damage the float. Clean all remaining scale with scouring pad. Relocate water reservoir while insuring not to damage the float. Replace back door in position (see P7 and P10, to open and close back door).
N3 – Cleaning inside and outside
Use a soft cloth with mild soap to clean the outside and other inside parts with possible scale deposits of your humidifier.
SPECIFICATIONS
Adjustable humidistat
Power
53 Watts
| Evaporating Capacity / 24h | 60 Litres (at 21°C x 30% RH) |
| Air flow Speed 1 | 490 m3 / H |
| Speed 2 | 790 m3 / H |
| Reservoir capacity | 34 Litres |
| Power consumption | 53 Watts |
| Approvals | CE |
| Dimensions (mm) | 625 x 316 x 720 |
| Net weight | 18.6 Kg |
| Shipping dimensions | 670 x 365 x 780 |
| Shipping weight | 21.2 Kg |
| Replacement pads ( set of 2 filters) | PUR358 |
| Automatic refill kit (option) | WIN1610 |
WARRANTY:
1 year from the date of purchase.
To use the warranty, please bring or send (PREPAID) the device to your reseller along with the proof of sale indicating the purchase date.
Removal of used domestic appliances
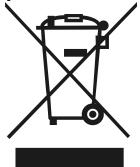
European directive 2002/96/EC on the Electric and Electronic Equipment Waste requires that domestic appliances not be thrown out together with the rest of municipal waste. Used devices must be collected separately in order to optimize recuperation and recycling rates of the materials that make them up and so reduce the impact on human health and the environment.
The symbol of the crossed out garbage can appears on all the products to remind the obligations regarding separated collection. Consumers must contact local authorities or resellers regarding the procedure to follow for the device's removal.
text_image
E (ES) • • • • Pur LineHUMEDECEDOR
HA147
MANUAL DE EMPLEO
natural_image
Exterior view of a modern stainless steel air purifier with ventilation grilles and control knobs (no visible text or symbols)email : info@purline.com
Aprenda a conocer su aparato
natural_image
Simple line drawing of a rectangular object with a circular border (no text or symbols)
natural_image
Line drawing of a portable air conditioner unit with ventilation grilles and control buttons (no text or symbols)[NO TEXT]
natural_image
Exterior view of a modern stainless steel air purifier with ventilation grilles and control knobs (no visible text or symbols)Gefeliciteerd!
email : info@purline.com
Leer uw apparaat kennen
natural_image
Line drawing of a refrigerant appliance with ventilation grilles and a warning symbol (no text or labels)natural_image
Exterior view of a modern stainless steel air purifier with control panel and ventilation grilles (no visible text or symbols)e-mail: info@purline.com
natural_image
Simple line drawing of a rectangular object with a circular border (no text or symbols)