
MPS710C - Multifunction Printer OKI - Free user manual and instructions
Find the device manual for free MPS710C OKI in PDF.
| Product type | Multifunction printer (print, copy, scan) |
| Model | MPS710C |
| Brand | OKI |
| Supported paper sizes (tray 1) | Letter, Legal 14, Legal 13.5, Legal 13, Executive, A4, A5, A6, B5 |
| Tray 1 capacity | 530 sheets (75 g/m²) |
| Multipurpose tray capacity | 100 sheets, 10 envelopes, 20 labels, 50 transparencies |
| Supported media weight (tray 1) | 64 to 188 g/m² |
| Supported media weight (MP tray) | 189 to 220 g/m² |
| Upper output tray (face down) | Capacity: 250 sheets (75 g/m²), max 176 g/m² |
| Rear output tray (face up) | Capacity: 100 sheets (75 g/m²), max 220 g/m² |
| Duplex printing | Yes, with optional duplex unit |
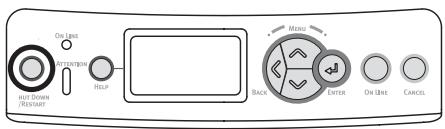
| Display and navigation | Display with ENTER, arrow keys, ON LINE, HELP buttons |
| Power saving function | Adjustable sleep mode (default 5 min) |
| Report printing | Configuration report, system information |
| Administration | Admin menu with password (default: aaaaaa) |
| Special media types | Envelopes, labels, transparencies, banners (up to 1220 mm) |
| Clearing jams | Built-in guide via HELP button and detailed procedure |
| Supplies | Toner and drum cartridges (Cyan, Magenta, Yellow, Black) |
Frequently Asked Questions - MPS710C OKI
User questions about MPS710C OKI
0 question about this device. Answer the ones you know or ask your own.
Ask a new question about this device
Download the instructions for your Multifunction Printer in PDF format for free! Find your manual MPS710C - OKI and take your electronic device back in hand. On this page are published all the documents necessary for the use of your device. MPS710C by OKI.
USER MANUAL MPS710C OKI
Print Media Settings. 6
Tray 1 and Optional Trays 2 and 3. 8
Usable Print Media 8
Loading Paper 9
Multi-Purpose Tray. 10
Usable Print Media . . . . . .10
Loading Print Media 11
Exit Trays 12
Power Save Mode. 13
Clearing Media Jams. 14
Troubleshooting 22
Ordering Replacement Supplies 23
Service & Support. 24
Table des matieres
Service et support 45
Contedio
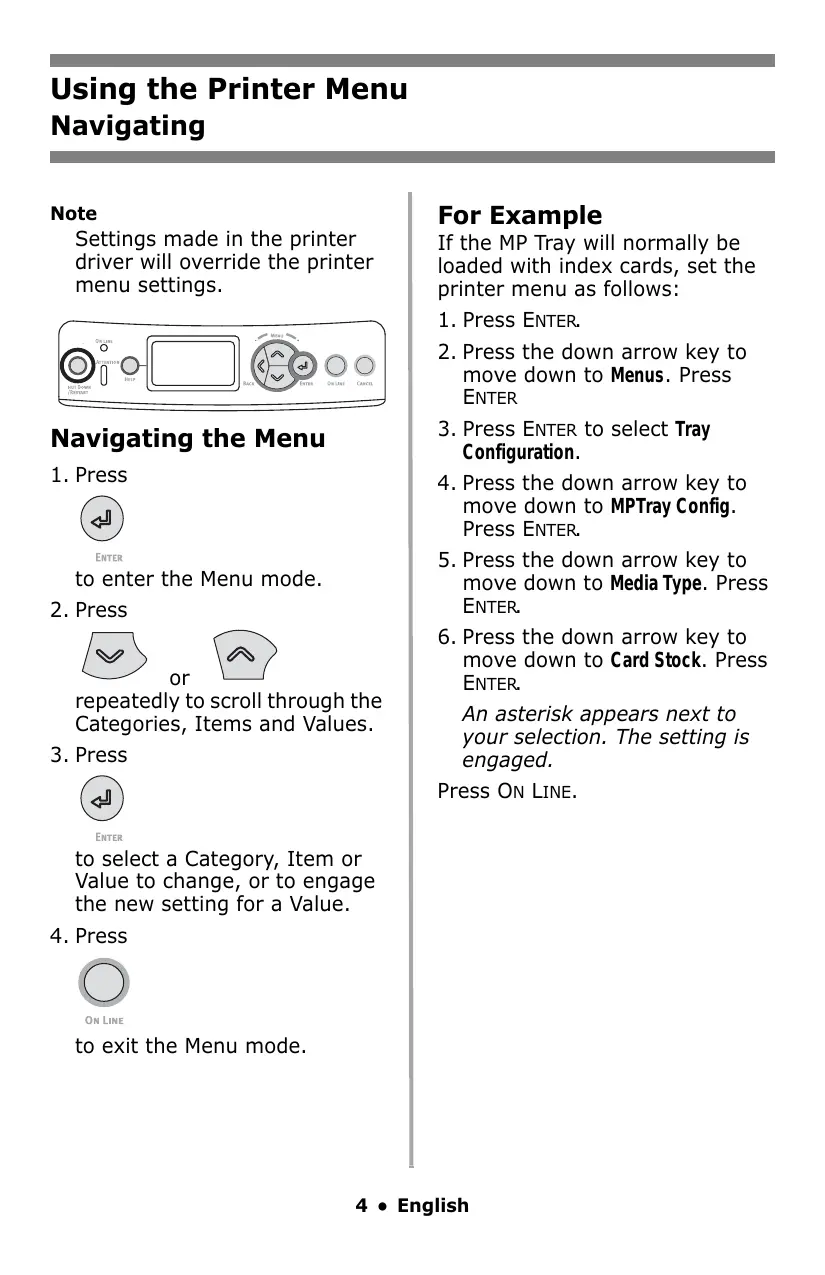
Settings made in the printer driver will override the printer menu settings.
Navigating the Menu
1. Press

ENTER
to enter the Menu mode.
2. Press

or

repeatedly to scroll through the Categories, Items and Values.
3. Press

ENTER
to select a Category, Item or Value to change, or to engage the new setting for a Value.
4. Press

ON LINE
to exit the Menu mode.
For Example
If the MP Tray will normally be loaded with index cards, set the printer menu as follows:
- Press ENTER.
- Press the down arrow key to move down to Menus. Press ENTER
- Press ENTER to select Tray Configuration.
- Press the down arrow key to move down to MPTray Config. Press ENTER.
- Press the down arrow key to move down to Media Type. Press ENTER.
- Press the down arrow key to move down to Card Stock. Press ENTER.
An asterisk appears next to your selection. The setting is engaged.
Press ON LINE.
Using the Printer Menu
Menu Summary
Summary of Menu Categories
Configuration
Page Count
Supplies Life
Network
System
Print Information
Menus
- Tray Configuration
- MPTray Config
System Adjust
Admin Setup
For use by the System Administrator. To access this menu you must enter the password. If you have no administrator, the default password is aaaaa.
Calibration
Printing the Configuration Report
The Configuration report provides a listing of the current printer menu settings.
- Press ENTER.
- Press the down arrow key to select Print Information.
- Press ENTER.
- Press ENTER to select Configuration.
- Press ENTER to select Execute. The Configuration report prints and the printer goes back on line.
Always make sure the media setting matches the print media you are using.
Improper media settings:
- cause poor quality printing
- cause flaking
can damage the printer
Note
Printer driver settings override printer menu settings.
Default Settings
The default media weight setting for Tray1 is Light.
The default setting for the MP (Multi Purpose) Tray is Medium.
Resetting to the Defaults
Note
A password is required to access this area of the printer menu. If you have a System Administrator, only they can reset the defaults.
- Press ENTER.
- Press the down arrow key to move down to Admin Setup. Press ENTER.
- Enter the administrative password (the default password is aaaaaa).
a. Press the up arrow key (a to z, 0 to 9) or the down arrow key (9 to 0, z to a) to scan through the various numbers and letters of the alphabet.
b. Press Enter.
c. Repeat a and b above for each digit of the password.
- Press ENTER.
- Press the down arrow key to move down to Settings. Press ENTER.
- Press ENTER to select Reset Settings.
- Press ENTER to select Execute. The printer resets and returns to the on-line state.
Temporarily Changing the Media Weight for an Individual Print Job
If you are printing a job on special media, you can temporarily load the media in a tray and change the media settings for that tray in the driver as you print the job.
Media Weight Settings
Media weight settings can be made in the printer menu or the printer driver.
Light: 17-19 lb. US Bond (64-74 g/m²)
Medium Light: 20-21 lb. US Bond (75-82 g/m²)
Medium: 22-30 lb. US Bond (83-104 g/m²)
Heavy: 28-32 lb. US Bond (105-120 g/m²)
- Ultra Heavy1 (Tray 1): 32-50 lb. US Bond (121-188 g/m²)
- Ultra Heavy2
-Trays 2 and 3: 32-54 lb. US Bond (121-203 g/m²)
-MP Tray: 32-58 lb. US Bond (189-220 g/m²)
Tray 1 and Optional Trays 2 and 3
Usable Print Media
Media Specifications
| Weight Range | Tray 1: 17-50 lb. US Bond (64-188 g/m2) Optional Trays 2 and 3: 17-54 lb. US Bond (64-203 g/m2) |
| Standard Sizes: | Tray 1: Letter, Legal-14, Legal-13.5, Legal-13, Executive, A4, A5, A6, B5. Optional Trays 2 and 3: Letter, Legal-14, Legal-13.5, Legal-13, Executive, A4, A5, B5. |
| Custom Sizes: | • Min.: 5.5 x 8.3" (140 x 211 mm) • Max.: 8.5 x 14" (216 x 356 mm) Must be defined in driver before printing: see your on-line User's Guide. |
| Capacity: | 530 sheets of 20-lb. (75 g/m2) paper |
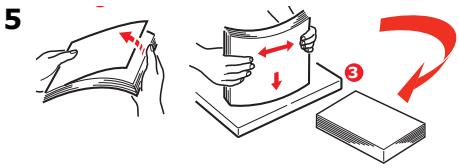
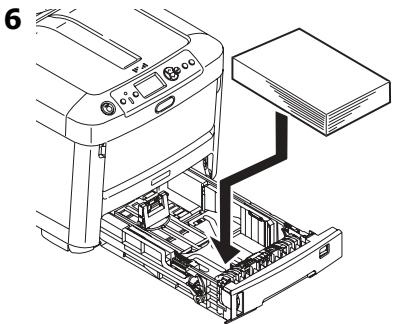
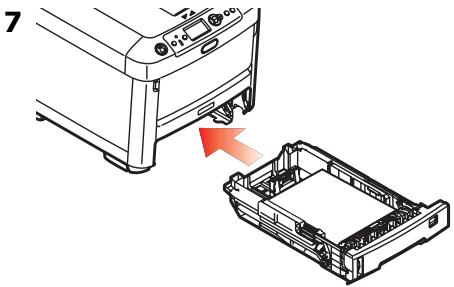
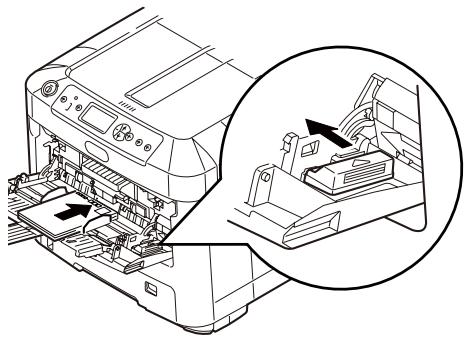
Tray 1 and Optional Trays 2 and 3 (cont.) Loading Paper
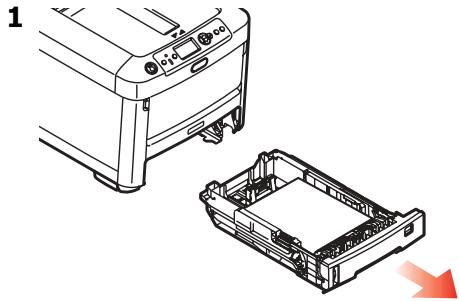
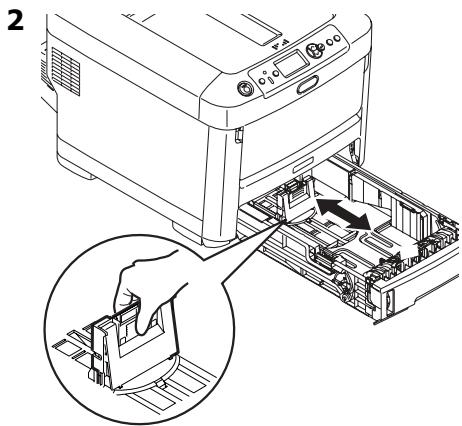

4 Important! Adjust the paper size dial to the size of the paper being used.

Media Specifications
| Weight Range | 32-58 lb. US Bond (189-220 g/m2) |
| Standard Sizes: | Letter, Legal-14, Legal-13.5, Legal-13, Executive, A4, A5, A6, B5, Com-10 envelopes. |
| Custom Sizes: | Min. 3 x 11.7" (76 x 297 mm) Max. 5" x 14" (127 x 356 mm) Banners: 8.25 to 11.7" (216 to 297 mm) wide by up to 47.25"" (1220 mm) long. Must be fed one sheet at a time. Must be defined in driver before printing: see your on-line User's Guide. |
| Takes: | • 100 sheets 20-lb. (75 g/m2) paper • 10 envelopes • 20 sheets of labels • 50 transparencies • Banners, one at a time |
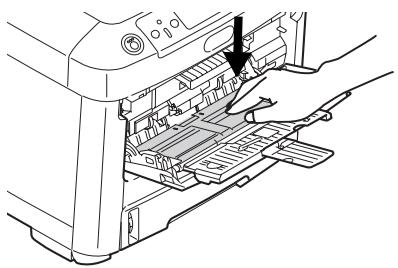
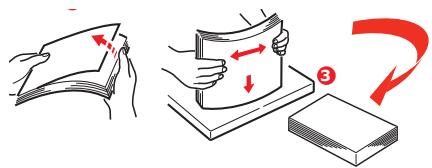
Multi-Purpose Tray (cont.)
Loading Print Media
1
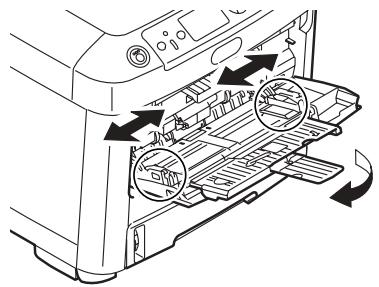
2
3
4
5
Letterhead Stationery
- Load face up, top edge into the printer.
Envelopes
- Load print side up (flap down) with top edge aimed into the printer.
Top (Face Down) Exit Tray
This is the exit tray that is normally used.
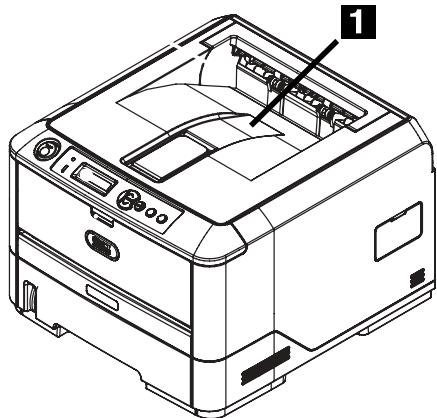
- For papers up to 47 lb. US Bond (176 g/m²).
- Holds up to 250 sheets of 20-lb. US Bond (75 g/m²) paper.
- Sheets exit face down.
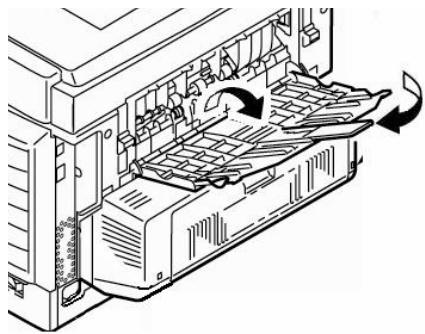
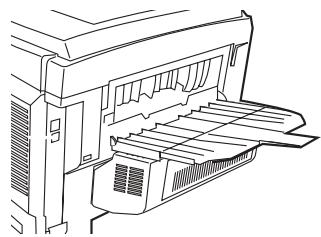
Rear (Face Up) Exit Tray
- Provides straight-through, curl-free print path for transparencies, envelopes, labels and heavy paper.
- Handles paper from 17 to 58 lb. US Bond (64 to 220g / m^2
- Holds up to 100 sheets of 20-lb. US Bond (75 g/m²) paper.
- Sheets exit face up (for multi-page documents, select reverse order printing in your application Print dialog box).
Note
If the rear tray is open, all printed pages will exit there regardless of the printer driver setting.
Opening the Rear-Feed Tray
Power Save Mode
Power Save sets how long the printer waits before going into standby mode. The default is 5 minutes.
This saves energy, but the printer requires time to warm up when it receives a print job or if you want to enter the menu and change settings.
For more information, see your on-line User's Guide.
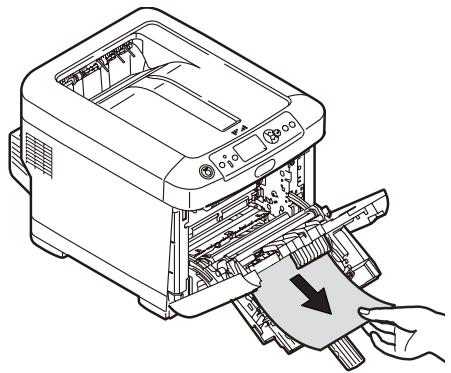
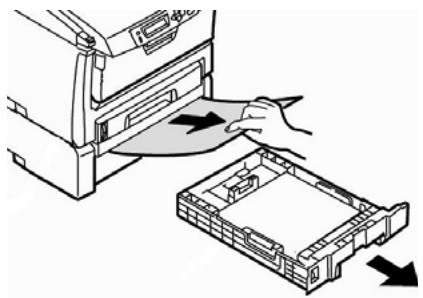
Clearing Media Jams
When "Paper Jam" appears on the second line of the display, there is print media jammed in the printer.
Depending on where the media is jammed, there may be more than one sheet stuck in the printer.
If one sheet is removed and there are still more sheets in the printer, the initial message will go away temporarily, then "Paper Jam" will appear again.
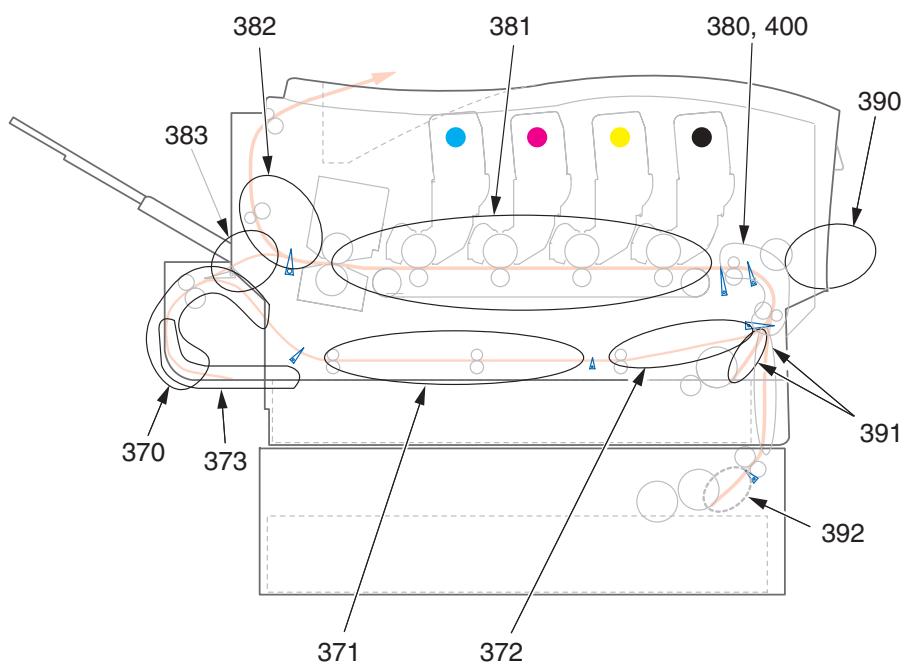
Paper Jam Error Message Summary
| Error No. | Location of Jam | Error No. | Location of Jam |
| 370 | Duplex unit1 | 382 | Paper exit |
| 371 | Duplex unit* | 383 | Duplex unit* |
| 372 | Duplex unit* | 390 | MP Tray |
| 373 | Duplex unit* | 391 | Paper Tray |
| 380 | Paper feed | 392 | 2ndPaper tray* |
| 381 | Paper path | 400 | Paper size |
- Applies only if this option is installed.
Clearing Media Jams (cont.)
The box below contains a summary of the basic process for clearing jams.
For more details see the pages which follow.
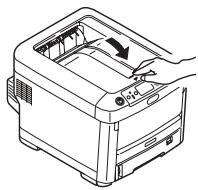
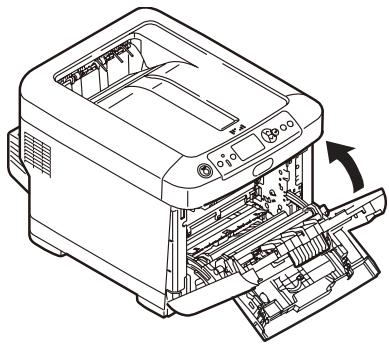
Lower cover, but do not latch

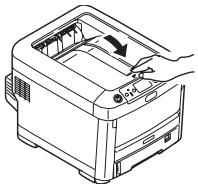
Clearing Media Jams (cont.)
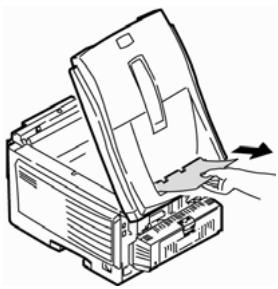
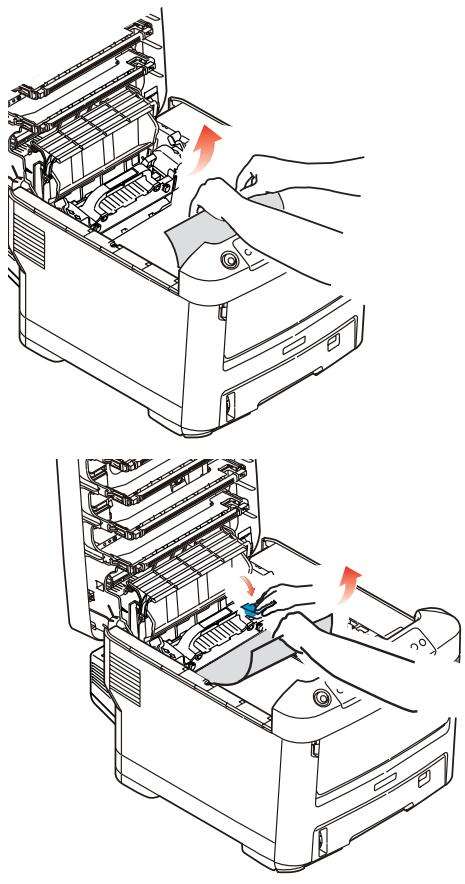
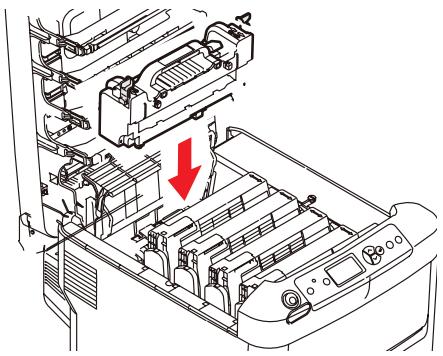
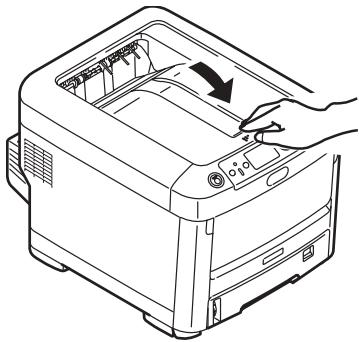
- Open the top cover.
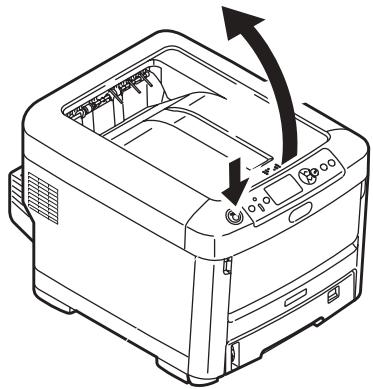
- If a sheet is well advanced out of the top of the printer, grip it and pull gently to draw it fully out.
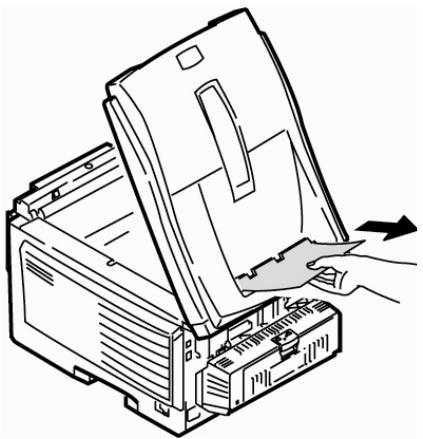
Caution
The fuser may be hot! It is clearly labelled. Do not touch it.
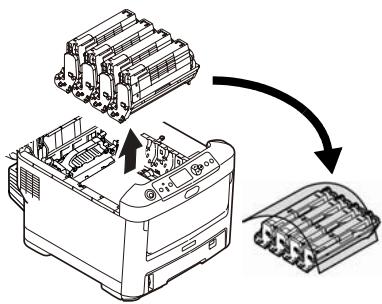
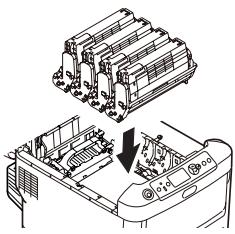
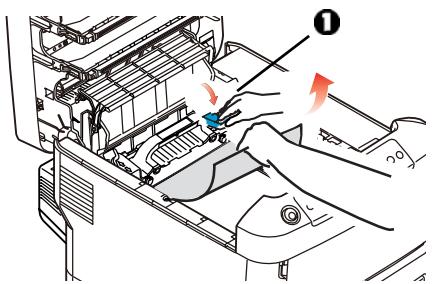
Note the location of the various color toner cartridges.
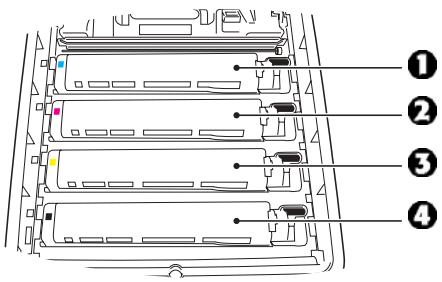
1 = Cyan
2 = Magenta
3 = Yellow
4 = Black
Caution!
Do not touch the green image drum surface or expose it to light for more than 5 minutes.
Clearing Media Jams (cont.)
- Remove all the image drums/toner cartridges, and place them on a flat surface.
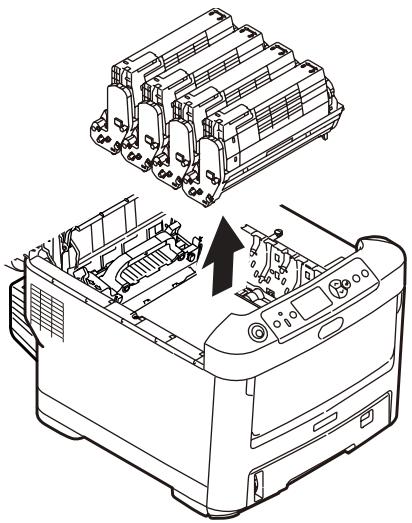
- Cover them to protect them from light.
- Gently remove any jammed sheet(s).
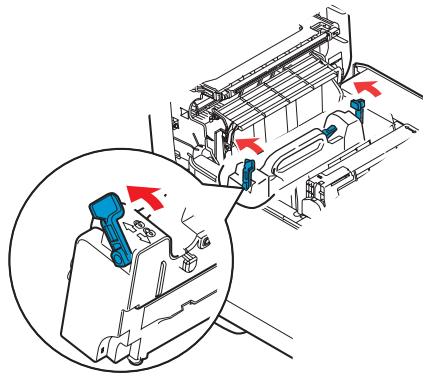
Clearing Media Jams (cont.)
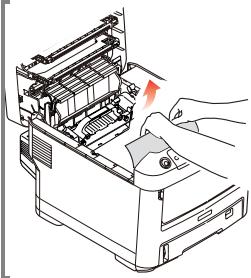
- To remove a sheet just entering the fuser, separate the trailing edge of the sheet from the belt, pull the fuser pressure release lever (1) towards the front and remove the sheet. Then release the lever.
- If the sheet is well advanced into the fuser:
a. Push the two retaining levers (1) towards the front of the printer to release the fuser. Withdraw the fuser unit using the handle.
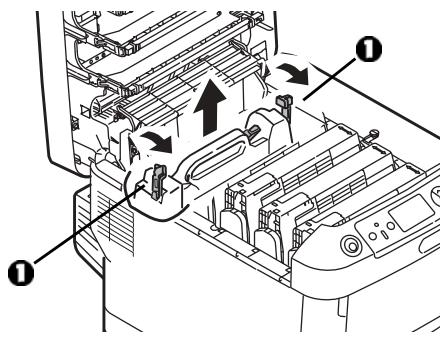
b. Press release lever (1) and pull the trapped paper from the fuser.
c. Replace the fuser unit and push the lock levers toward the rear of the printer.
Clearing Media Jams (cont.)
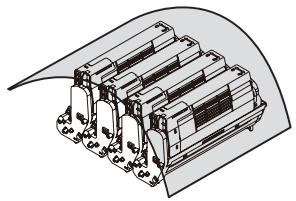
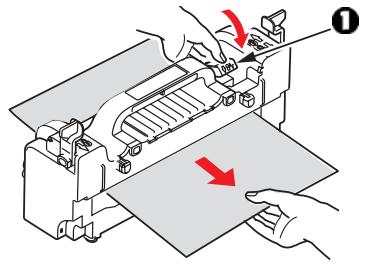
- \Replace the image drums/toners, being careful to install them in the proper sequence.
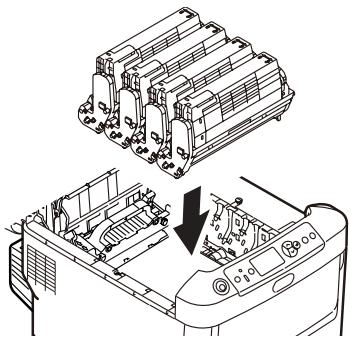

1 = Cyan
2 = Magenta
3 = Yellow
4 = Black
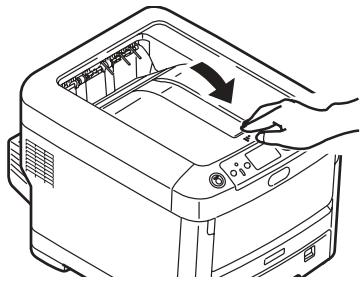
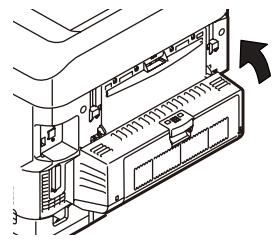
- Lower the printer cover to protect the image drums from light, but do not latch it.
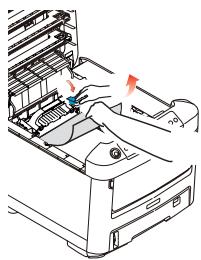
- Open the rear exit tray and pull out any sheets found in this area.
For printers equipped with the optional duplexer:
Open the duplex unit cover and remove any sheets.
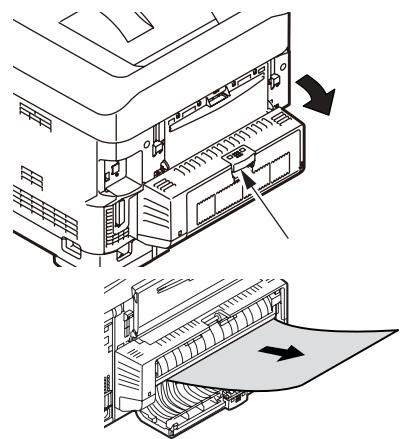
Close the duplex unit cover.
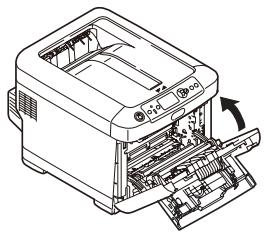
Clearing Media Jams (cont.)
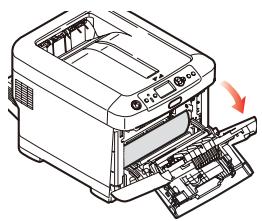
- Lift the front cover release and open the front cover.
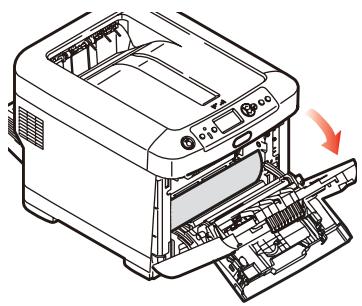
- Remove any jammed paper.
- Close the front cover.
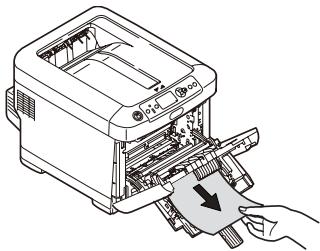
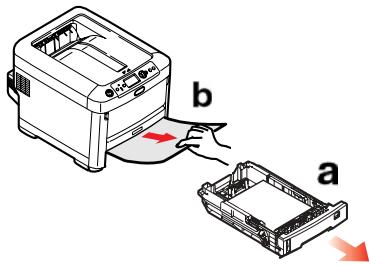
- Pull out the paper tray and remove any jammed paper.
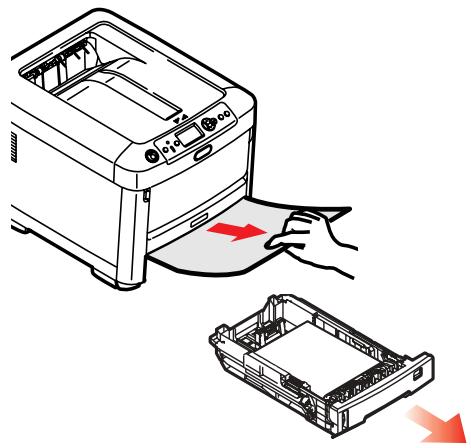
- Close the tray.

Clearing Media Jams (cont.)
For printers equipped with the optional second paper tray:
Pull out the second paper tray and remove any jammed paper.
Close the tray.
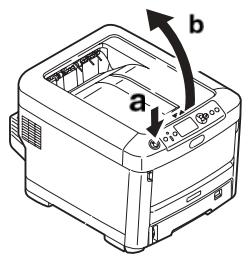
- Press down on the printer cover to latch it.
The Help Key
Your printer has a built-in help system.
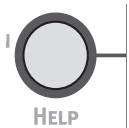
When an error message appears on the display, press HELP. The display shows information that will help you correct the error, including clearing paper jams.
Use the ON LINE key to move through the Help information.
For more information on clearing paper jams, see pages 14, ff.
Ordering Replacement Supplies
How to Order
- Consult the dealer where you purchased your printer.
- Consult an Oki Data Authorized Sales or Service Dealer. For your nearest dealer, call 1-800-654-3282.
U.S., Puerto Rico, Guam, U.S. Virgin Islands only: Order on the Internet at www.OKIPRINTINGSOLUTIONS.COM
U.S. only: Order toll-free by phone at 1-800-654-3282, using VISA®, MasterCard®, or AMEX®.
Installation
These items include installation instructions.
First ...
Consult the store where you purchased your printer.
Additional OKI Resources
-
Visit MY.OKIDATA.COM 24 hours a day, 7 days a week for the latest information on
-
drivers and utilities
troubleshooting - Product news
-
and much more!
-
Call 1-800-654-3282.
OKI is a registered trademark of Oki Electric Industry Company, Ltd.
AmEx is a registered trademark of American Express Co.
MasterCard is a registered trademark of MasterCard International, Inc.
VISA is a registered trademark of Visa.
Windows is either a registered trademark or trademark of Microsoft Corporation in the United States and other countries.
1 = Cian
2 = Magenta
3 = Amarillo
4 = Negro