
URW 240 - Radio Silva Schneider - Free user manual and instructions
Find the device manual for free URW 240 Silva Schneider in PDF.
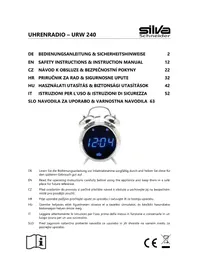


| Product type | Radio |
| Brand | Silva Schneider |
| Model | URW 240 |
| Color | Black |
| Dimensions (W x H x D) | Approx. 200 x 120 x 60 mm |
| Weight | Approx. 500 g |
| Power supply | 230V power adapter and 4 x AA batteries |
| Radio functions | FM, AM, LW |
| Digital radio | DAB+ |
| Display | LCD with backlight |
| Speaker | Built-in speaker |
| Headphone jack | 3.5 mm jack |
| Antenna | Wire antenna / telescopic |
| Additional functions | Alarm clock and sleep timer |
| Cleaning | Wipe with a soft cloth |
| Safety | Use indoors only |
| Repair | Open only by qualified personnel |
| Information | Instruction manual available as PDF |
Frequently Asked Questions - URW 240 Silva Schneider
User questions about URW 240 Silva Schneider
0 question about this device. Answer the ones you know or ask your own.
Ask a new question about this device
Download the instructions for your Radio in PDF format for free! Find your manual URW 240 - Silva Schneider and take your electronic device back in hand. On this page are published all the documents necessary for the use of your device. URW 240 by Silva Schneider.
USER MANUAL URW 240 Silva Schneider
EN Read the operating instructions carefully before using the appliance and keep them in a safe place for future reference.
Privately Operated Industrial, District, ShiYong,
532600 Heng Li Town, Dong Guan,
Guangdong, PRC
- For safety reasons, the housing of the device may only

be removed by a qualified technician. There are no controls inside.
- Repairs may only be carried out by qualified

electricians. Improper repairs can pose significant risks and cause damage to the device. The housing of the device must not be opened - RISK OF ELECTRIC SHOCK!
- When plugging or unplugging the device, always grasp the power plug. Never pull on the power cable - this may cause damage to the cable.
- Never touch the device or the power plug with wet or damp hands.
- Place the device on a stable, vibration-free, flat surface.
- The device must not be exposed to excessive heat or direct sunlight and must not be placed directly next to devices or radiators that generate radiation.
- The device should not be used in extreme cold.
- Operate the device as far away as possible from other receivers, amplifiers, PCs -, TVs and microwaves.
- Never cover the ventilation openings of the device (e.g. with blankets, curtains, newspapers, etc.)
- To avoid impairing the ventilation of the device, do not install it in cramped boxes or shelves. A clearance of at least 20 cm above the device and at least 5 cm around the device should be maintained.
- Do not push nails, pins or other objects into the speaker grille or any other openings in the device.
-
Objects filled with liquids (drinking glasses, flower vases, etc.) must not be placed on the device.
-
Do not place burning candles on the device and keep it away from open flames.
- The device must not be operated in rooms with high humidity. Do not use the device near water sources, e.g. bathtub, kitchen sink, washbasin, etc.
- The device is not suitable for use in tropical countries with high humidity.
- Do not expose the device to dirt or dust.
- Protect the cable. The cable must not be walked on, crushed, or trapped between two objects or a door.
- Check the charging cable from time to time for any damage. If the cable is damaged, the device must not be used; replace the cable with a new, undamaged cable.
- Disconnect the device from the power supply
■ during a thunderstorm;
■ if not used for a long time;
■ before cleaning the device;
■ if you notice burning smell and/or smoke;
Take the device in for service before using it again. - Only use accessories supplied or recommended in the instructions.
- Please note the instructions under "Cleaning and care" at the end of the instructions.
Children:
– Never let children use or play with electrical devices unsupervised.
– Give children appropriate instructions before operating the appliance.
- Also keep the packaging foil away from children. There is a risk of suffocation.
- Batteries/rechargeable batteries can be life-threatening if swallowed. Therefore, keep the device and the batteries out of the reach of small children. If a battery is swallowed, medical help must be sought immediately.
- After unpacking, check the device for damage. If the device is damaged, do not use it and contact your specialist retailer immediately.
- Scope of delivery:
Device
USB cable (Type C)
USB charging adapter
operating instructions
- Packaging materials such as plastic bags or polystyrene parts are dangerous for children (risk of suffocation). Therefore, keep these parts away from children.
- Many packaging materials are recycled – so make sure they are disposed of correctly, as you are making an important contribution to protecting the environment.
- Remove transport safety devices: The device and its interior parts are appropriately secured for transport. Remove all adhesive strips and protective films.
Keys:


-
Ring
-
Alarm 1 / Wake up with radio
-
Alarm 1 / Wake up with bell
-
PM display afternoon on 12-hour display
-
time display
-
hour display
-
sleep timer display
-
bobbin
-
Alarm 2 / Wake up with radio
-
Alarm 2 / Wake up with bell
-
FM display for VHF waveband
-
MHz Megahertz
-
minute display
-
VOL+ / ALM2 Volume up / Setting alarm time 2
-
TUN+ / MIN Next station / Minute setting
-
POWER Turn radio on/off
-
SET TIME time setting button
-
SLEEP setting button sleep timer
-
DC 5V IN connector socket USB-C / power supply
-
VOL- / ALM1 Volume down / Setting alarm time 1
-
TUN- / HOUR Previous station / hour setting
-
ALM-OFF Turn off alarm
-
MEMORY Save station stations
-
DIMMER Dim display
-
battery compartment backup battery
-
USB OUT USB charging socket for external devices
-
SNOOZE alarm snooze
-
Connect the supplied USB cable to the supplied USB power adapter (5 V / 1 A) and to the USB port on the back of the device.
- Connect the power adapter to a properly installed, easily accessible household socket.
- As soon as the device is connected to the power supply, "0:00" flashes on the display and the time can be set (standby function).
- Disconnect the device from the power supply if the device is not used for a long period of time.
backup battery:
To ensure that the time and alarm times are retained even during a power failure, insert a battery into the battery compartment on the back of the device:
1) Open the battery compartment on the back of the device and remove the small cover.
2) Insert a button cell (CR 2032 / 3 V - not included) into the compartment, observing the correct polarity +/-.
3) Replace the cover on the battery compartment and close it.
Please note:
- In the event of a power failure, nothing will appear on the display, but time and alarm settings will remain saved and continue to function in the background. As soon as the power interruption is over, the display will reappear.
- Do not disconnect the device from the power supply when changing the battery, otherwise the stored data (time, alarm times, radio stations) will be lost and will have to be saved again.
- Check the battery's functionality from time to time and replace it with a new one when it becomes weak.
Safety instructions for batteries:
- If necessary, clean the battery and device contacts before inserting.
- Remove used batteries from the device promptly and immediately! Increased risk of leakage!
- If a battery does leak, carefully wipe out the spilled liquid and insert new batteries.
- Always insert batteries according to the specified polarity, otherwise the device may be damaged.
– Never expose batteries to excessive heat, such as sunlight, fire or the like!
- Never immerse batteries in water.
- Always replace all batteries at the same time.
- Only use batteries of the same brand and type.
- Do not use new and old batteries together.
– Remove batteries from the device if it is not going to be used for a long period of time.
General functions
Dimmer:
You have the option of dimming the brightness of the display (2 levels). To do so, press the "DIMMER" button.
USB OUT charging function:
You have the option of charging an external device (e.g. mobile phone) via this clock radio. Connect your external device to the USB charging socket "USB OUT" on the back of the device using a USB charging cable (not included).
clock / alarm clock
Set the time:
The time setting can only be made in standby mode (radio off).
- Press the "SET TIME" button. The time display flashes. Use the "HOUR" button to set the hours and the "MIN" button to set the minutes. Confirm with the "SET TIME" button.
- Now "24H" flashes on the display. Press the "MIN" or "HOUR" button to choose between 12 and 24 hour display and confirm with the "SET TIME" button.
- Now "d1" flashes in the display. Set the current day of the week here: 1 = Monday, 2 = Tuesday, etc. Confirm again with the "SET TIME" button.
- The time now appears on the display.
Set alarm times:
You have the option of setting 2 independent alarm times.
The alarm time can only be set in standby mode (radio off).
- Press and hold the alarm button "ALM1" for alarm time 1 or "ALM2" for alarm time 2 until the time display flashes.
- Use the "HOUR" button to set the hours and the "MIN" button to set the minutes of the alarm time. Confirm with the "SET TIME" button.
- Now you can choose on which days you want to be woken up at the set time:
1 – 7: Wake up every 7 days
1 – 5: Wake up from Monday – Friday
6 - 7: Wake up on Saturday + Sunday = weekend mode
Confirm with the "SET TIME" button.
- Select alarm mode:


Briefly press the "ALM1" or "ALM2" button:
Alarm bell indicator;
At the set time, you will be woken up by the classic alarm clock ringing. The ringing stops after 45 seconds and starts again after 9 minutes if the alarm is not stopped in the meantime.

: display for alarm with radio;
You will be woken up by the last station you tuned in. The alarm volume corresponds to the volume that was previously set in radio mode.
OFF Alarm switched off;
- If you want to stop the alarm, press the "ALM OFF" button. The alarm function will remain active, as shown by the LED display - you will be woken up at the same time the next day.
Alarm snooze / SNOOZE:
- The "SNOOZE" alarm button is located on the lower rear edge of the device. The button is activated by pressing the device from above (bracket).
- After the alarm has started, press the top of the device/bracket to pause the alarm for approximately 9 minutes. During the "snooze time" the LED alarm indicator flashes.
- After 9 minutes the alarm starts again.
- To turn off the alarm, press the "ALM Off" button.
- You can repeat the alarm several times.
- If you do not complete the alarm process, the device will switch off automatically after a while.
radio operation
- Turn on the device using the "POWER" button.
- Manual channel setting:
" and "TU " +buttons to select –the desired station. Pay attention to the frequency shown on the display.
Automatic channel search:
Press and hold one of the two buttons "TU -" and "TU +": The automatic station search begins and the previous/next station with a sufficiently strong signal is tuned in. Repeat until the desired station is tuned in - pay attention to the frequency display on the screen.
-
Once a station is tuned in, the station frequency appears briefly on the display and then changes back to the time display. If you want to briefly switch to the frequency display during the time display, press one of the "TU—" or "TU+" buttons.
-
Antenna:
Unwind the antenna completely and adjust it for the best possible reception.
-
Adjust the volume using the volume controls "VOL-" and "VOL-" (00 to 16).
-
If you want to stop the radio operation, press "POWER".
Save station:
You have the option of saving up to 20 radio stations:
- Press the "MEMORY" button until "P01" appears on the display. The automatic station search begins and all stations (max. 20) with a sufficiently strong signal are stored one after the other.
- Radio playback starts at the first station.
- Set the station of the desired transmitter by repeatedly pressing the "MEMORY" button until the corresponding memory location number appears on the display.
Setting the sleep timer (SLEEP):
This function allows you to fall asleep while listening to the radio, with the device automatically switching off after a selected period of time (10 – 90 minutes).
- Press the "SLEEP" button, "90" appears on the display
- Press the "SLEEP" button repeatedly until the desired number of minutes after which the device will switch off appears on the display. The sleep timer indicator " " appears on the display.
- If you want to end the sleep timer before the set time has elapsed, press the "POWER" button.
cleaning and care
- Disconnect the device from the power supply.
- Wipe the housing with a soft, possibly slightly damp cloth.
– Never use cleaning agents containing alcohol, petrol or other harsh cleaning agents. - Do not use abrasive cleaning utensils to avoid scratching the surface of the device.
- Make sure that no water enters the housing.
- ⚠️ Never immerse the device or the charging cable in water or other liquids. RISK OF ELECTRIC SHOCK!

Technical data
power supply
USB -charging adapter / input 100-240V \~50/60Hz 0.3A Max
Output DC 5V 1.0 A

Model:GQ05B-050100-ZG
Manufacturer: Dong Guan City GangQi Electronic Co., Ltd.
Privately Operated Industrial, District, ShiYong,
532600 Heng Li Town, Dong Guan,
Guangdong, PRC
Battery for support function
(not included): 1 x button cell CR 2032
FM radio frequency range: 87.5 – 108 MHz
Device dimensions (W x H x D): 1 1.5 x 16 x 6 cm
Net weight: approx. 310 g
When off, the device has a power consumption of 0 watts.
In standby mode, the device has a power consumption of 0.14 watts.
* Typing errors, design and technical changes reserved! *

Simplified Declaration of Conformity
Silva-Schneider Handelsges.mbH, Karolingerstraße 1, A-5020 Salzburg hereby declares that the clock radio URW 240 complies with Directive 2014/53/EU.
The full text of the EU declaration of conformity is available at the following internet address: www.silva-schneider.at.
Notes on Environmental Protection

At the end of its working life, this product must not be disposed of with normal household waste. Instead, it must be handed over to a collection point for the recycling of electrical and electronic equipment. This is indicated by the symbol on the product, in the instructions for use or on the packaging.
The materials are recyclable according to their labeling. By reusing, recycling or other forms of recycling old devices, you are making an important contribution to protecting our environment.
Please ask your local authority for the responsible disposal facility.
Warranty / Guarantee
In addition to the statutory warranty, we grant a 24-month warranty on this device, calculated from the date of issue of the invoice or delivery bill. Within this warranty period, all manufacturing and/or material defects will be repaired and/or replaced free of charge, or (at our discretion) exchanged for an item of equal value and in perfect condition, on presentation of the invoice or delivery bill. The prerequisite for such a guarantee is that the appliance has been handled and maintained properly. Claims beyond our warranty services are excluded. In justified cases, the guarantee only covers the repair of the appliance. Further claims and liability for any consequential damage are excluded. No guarantee can be given for parts that are subject to natural wear and tear or for damage caused by impact, incorrect operation, exposure to moisture or other external influences or by intervention by unauthorized third parties. In the event of a warranty claim, the appliance must be returned to your specialist dealer together with the invoice or delivery bill.
The warranty is expressly stipulated by law and only applies to defects that existed at the time the goods were handed over. The claim is always directed against the contractual partner (dealer), who must remedy the defect free of charge (for the consumer) or arrange for it to be remedied.
Guarantee:
The guarantee is a voluntary, contractual promise by the manufacturer (general importer) for which there are no minimum requirements in terms of content or form. However, many warranties only cover part of the costs incurred in remedying defects, but they usually apply to all defects that occur within a certain period.
Bezpečnostní pokyny
532600 Heng Li Town, Dong Guan,
Guangdong, ČLR
532600 Heng Li Town, Dong Guan,
Guangdong, NR Kina

- CHILDREN
- KEYS
- BACKUP BATTERY
- PLEASE NOTE
- SAFETY INSTRUCTIONS FOR BATTERIES
- GENERAL FUNCTIONS
- DIMMER
- USB OUT CHARGING FUNCTION
- SET THE TIME
- SET ALARM TIMES
- ALARM SNOOZE / SNOOZE
- RADIO OPERATION
- AUTOMATIC CHANNEL SEARCH
- SAVE STATION
- SETTING THE SLEEP TIMER (SLEEP)
- CLEANING AND CARE
- TECHNICAL DATA
- SIMPLIFIED DECLARATION OF CONFORMITY
- NOTES ON ENVIRONMENTAL PROTECTION
- WARRANTY / GUARANTEE
- GUARANTEE
- BEZPEČNOSTNÍ POKYNY
Brand : Silva Schneider
Model : URW 240
Category : Radio