
CCD 16 - Radio Silva Schneider - Free user manual and instructions
Find the device manual for free CCD 16 Silva Schneider in PDF.
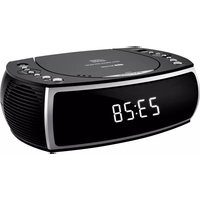


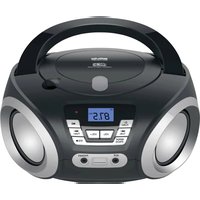
| Product Type | Portable Radio |
| Brand | Silva Schneider |
| Model | CCD 16 |
| Tuning Bands | AM / FM |
| Power Source | 2 x AA batteries (not included) / AC adapter (not included) |
| Dimensions (approx) | 200 x 100 x 50 mm |
| Weight (approx) | 300 g (without batteries) |
| Antenna | Telescopic antenna for FM |
| Speaker | Built-in mono speaker, 3 W output |
| Headphone Jack | 3.5 mm stereo jack |
| Volume Control | Rotary knob |
| Tuning Control | Rotary knob with analog scale |
| Indicator Light | Power on/off LED |
| Housing Material | Plastic |
| Cleaning Instructions | Wipe with a soft, dry cloth. Do not use solvents. |
| Safety Warnings | Do not expose to water, extreme heat, or direct sunlight. Keep out of reach of children. |
| Battery Disposal | Dispose of used batteries according to local regulations. |
| Availability of Spare Parts | Contact Silva Schneider customer service or authorized dealers. |
| Repairability | Refer to qualified service personnel. No user-serviceable parts inside. |
Frequently Asked Questions - CCD 16 Silva Schneider
User questions about CCD 16 Silva Schneider
0 question about this device. Answer the ones you know or ask your own.
Ask a new question about this device
Download the instructions for your Radio in PDF format for free! Find your manual CCD 16 - Silva Schneider and take your electronic device back in hand. On this page are published all the documents necessary for the use of your device. CCD 16 by Silva Schneider.
USER MANUAL CCD 16 Silva Schneider
Model: CDR20 / CD Clock Radio
Safety information
IMPORTANT SAFETY INSTRUCTIONS
TO PREVENT FIRE OR SHOCK HAZARD, DO NOT USE THIS PLUG WITH AN EXTENSION CORD, RECEPTACLE OR OTHER OUTLET UNLESS THE BLADES CAN BE FULLY INSERTED TO PREVENT BLADE EXPOSURE. TO PREVENT FIRE OR SHOCK HAZARD, DO NOT EXPOSE THIS APPLIANCE TO RAIN OR MOISTURE.

The lightning flash with arrow-head symbol, within an equilateral triangle is
intended to alert the user to the presence of un-insulated ‘dangerous voltage’ within the product’s enclosure that may be of sufficient magnitude to constitute a risk of electric shock to persons.

The exclamation point within an equilateral triangle is intended to alert the user to the presence of important operating and maintenance (servicing) instructions in the literature accompanying the appliance.
CAUTION
RISK OF ELECTRIC SHOCK DO NOT OPEN
WARNING: TO REDUCE THE RISK OF ELECTRIC SHOCK, DO NOT REMOVE COVER (OR BACK). NO USER SERVICEABLE PARTS INSIDE, REFER SERVICING TO QUALIFIED SERVICE PERSONNEL.
- READ INSTRUCTIONS - All the safety and operating instructions should be read before the product is operated.
- RETAIN INSTRUCTIONS - The safety and operating instructions should be retained for future reference.
- HEED WARNINGS - All warnings on the product and in the operating instructions should be adhered to.
- FOLLOW INSTRUCTIONS - All operating and use instructions should be followed.
- CLEANING - Unplug this product from the wall outlet before cleaning. Do not use liquid cleaners or aerosol cleaners. Use a damp cloth for cleaning.
- ATTACHMENTS - Do not use attachments not recommended by the product manufacturer
as they may cause hazards.
- WATER AND MOISTURE - Do not use this product near water - for example, near a bath tub, wash bowl, kitchen sink, or laundry tub; in a wet basement; or near a swimming pool; and the like. This appliance shall not be exposed to dripping or splashing water and no object filled with liquids such as vases shall be placed on the apparatus.
- ACCESSORIES - Do not place this product on an unstable cart, stand, tripod, bracket, or table. The product may fall, causing serious injury to a child or adult and serious damage to the product. Use only with a cart, stand, tripod, bracket, or table recommended by the manufacturer, or sold with the product. Any mounting of the product should follow the manufacturer instructions, and should use a mounting accessory recommended by the manufacturer. A product and cart combination should be moved with care - quick stops, excessive force and uneven surfaces may cause the product and cart combination to overturn.
- VENTILATION - Slots and openings in the cabinet are provided for ventilation and to ensure reliable operation of the product and to protect it from overheating, and these openings must not be blocked or covered. The openings should never be blocked by placing the product on a bed, sofa, rug or other similar surface. This product should not be placed in a built-in installation, such as a bookcase or rack, unless proper ventilation is provided or the manufacturer's instructions have been adhered to.
- POWER SOURCES - This product should be operated only from the type of power source indicated on the marking label. If you are not sure of the type of power supply to your home, consult your product dealer or local power company. For products intended to operate from battery power, or other sources, refer to the operating instructions.
- POWER-CORD PROTECTION - Power-supply cords should be routed so that they are not likely to be walked on or pinched by items placed upon or against them, paying particular attention to cords at plugs, convenience receptacles, and the point of exit from the product.
- NON-USE PERIODS - The power cord of the product should be unplugged from the outlet when left unused for long periods of time.
- LIGHTNING - For added protection for this product during a lightning storm, or when it is left unattended and unused for long periods of time, unplug it from the wall outlet and disconnect the antenna or cable system. This will prevent damage to the product due to lightning and power-line surges.
- POWER LINES - An outside antenna system should not be located in the vicinity of overhead power lines or other electric light or power circuits, or where it can fall into such power lines or circuits. When installing an outside antenna system, extreme care should be taken to keep from touching such power lines or circuits as contact with them might be fatal.
- OVERLOADING - Do not overload wall outlets, extension cords, or integral convenience receptacles as this can result in a risk of fire or electric shock.
- OBJECT AND LIQUID ENTRY - Never push objects of any kind into this product through openings as they may touch dangerous voltage points or short-out parts that could result in a fire or electric shock. Never spill liquid of any kind on the product.
- SERVICING - Do not attempt to service this product yourself as opening or removing covers may expose you to dangerous voltage or other hazards. Refer all servicing to qualified service personnel.
- DAMAGES REQUIRING SERVICE - Unplug this product from the wall outlet and refer servicing to qualified service personnel under the following conditions.
a) When the power-supply cord or plug is damaged. b) If liquid has been spilled, or objects have fallen into the product. c) If the product has been exposed to rain or water. d) If the product does not operate normally by following the operating instructions. Adjust only those controls that are covered by the operating instructions as an improper adjustment of other controls may result in damage and will often require extensive work by a qualified technician to restore the product to its normal operation. e) When the product exhibits a distinct change in performance - this indicates a need for service. 19. REPLACEMENT PARTS - When replacement parts are required, be sure the service technician has used replacement parts specified by the manufacturer or having the same characteristics as the original part. Unauthorized substitutions may result in fire, electric shock or other hazards.
Safety information
- SAFETY CHECK - Upon completion of any service or repair to this product, ask the service technician to perform safety checks to determine that the product is in proper operating condition.
- HEAT - The product should be situated away from heat sources such as radiators, heat registers, stoves, or other products (including amplifiers) that produce heat.
- Caution: Changes or modifications not expressly approved by the party responsible for compliance could void the user's authority to operate the equipment. Changes or modifications made without written approval may void the user's authority to operate this equipment.
- Excess sound pressure from earphones and headphones can cause hearing loss.
- Marking plate located on the bottom of the appliance.
- WARNING: Only use attachments/accessories specified or provided by the manufacturer (such as the exclusive supply adapter, battery, etc.).
- WARNING: To reduce the risk of fire or electric shock, do not expose this apparatus to rain or moisture. The apparatus shall not be exposed to dripping or splashing, and objects filled with liquids, such as vases, shall not be placed on the apparatus.
- WARNING: The batteries shall not be exposed to excessive heat such as sunshine, fire, or the like.
- WARNING: The mains plug is used as the disconnect device; the disconnect device shall remain readily operable.
- WARNING: Do not open. No user replaceable parts inside, refer servicing to qualified technician.
- No naked flame sources, such as lighted candles, should be placed on the apparatus.
- The rating information is located at the bottom of the unit.


To prevent possible hearing damage, do not listen at high volume levels for long periods.

Class II construction double insulated. This product must not be connected to earth.
WARNING: DANGER OF RADIATION
These labels tell you that the unit contains a laser component. Opening the CD compartment lid and defeating the safety interlocks will expose the user to radiation from the laser beam. Do not stare into the laser while it is operating.
CAUTION!
HAZARDOUS LASER RADIATION WHEN OPEN AND INTERLOCK FAILED OR DEFEATED. AVOID EXPOSURE TO BEAM

CLASS 1 LASER PRODUCT

Waste electrical and electronic products must not be disposed of with household waste. Please refer to the retailer from whom you purchased this item for disposal instructions. Batteries and packaging materials can be recycled using your local collection facilities. All electrical and electronic products including batteries should be disposed of separately from the municipal waste stream via designated collection facilities appointed by the government or the local authorities.
Unpacking the unit
Carefully remove the unit from the carton and remove all packing material from the unit. Make sure that you have all the following items:
- Main unit (x1)
- User manual
If any item is missing, consult your dealer immediately. We suggest that you retain the original carton and packing materials in case it is necessary to return your unit for service. This is the only way to protect the unit from damage in transit. When you dispose of the carton and packing materials, please do so properly. We care about our environment. Remove any descriptive labels or stickers from the front panel of the unit. Do not remove any labels or stickers that may be affixed to the bottom of the main unit or the speakers.
Precautions for the unit
Security
- Before operation, check if the voltage of the unit is in line with the local voltage.
- Hold the plug to disconnect it from the mains outlet. Do not pull the power cord.
- When the plug of the unit is connected to the mains outlet, the unit will be still connected to AC even of the power is turned off.
- Disconnect the plug as soon as liquid or objects enter the unit. The unit cannot be used until being checked by experts.
- Do not open the cabinet. Laser rays employed by the unit may damage eyes. Any servicing should be done by qualified service personnel.
Placement
- Put the unit where ventilation is good enough to prevent overheating.
- Never put the unit in direct sunlight or near heat sources.
- To protect the pickup, do not place the unit in a dusty environment. If dust accumulates on the pickup, use a cleaning disc to clean it. Refer to the operating instructions of the cleaning disc you purchased.
Condensation
- The unit is suddenly moved from a cold place to a warm place.
- Use of the unit in a humid place.
- In these cases, the unit will not work. Unloading the disc and leaving the unit on for about one hour will evaporate the water, allowing the unit to function normally again.
Cleaning
- Use a soft cloth with a little neutral detergent to wipe the cabinet, panel, and controls. Never use abrasive paper, polishing powder, or any solvent such as alcohol or gasoline.
General controls
Main unit


- CD DOOR
- 5V1A USB CHARGING PORT
- ALARM 1 ON / OFF
-
- CLOCK SET/PROG.
- FUNCTION
- ⏻ STANDBY
- SNOOZE / DIMMER
- 3.5MM HEADPHONE JACK
- ALARM 2 ON / OFF
- TUNE UP
- TUNE DOWN
- PLAY MODE (REPEAT 1 / ALL / RANDOM)
- SLEEP / MEM
- MUST
- LED DISPLAY
- BATTERY COMPARTMENT FOR CLOCK BACK ONLY
Display information:
A. SLEEP indicator B. CD mode: PLAY/ PAUSE indicator PLAY MODE: Random play indicator C. CD Mode D. Clock PM indicator E. Showing Clock Time / CD track / Radio frequency status F. FM Stereo indicator G. Alarm 1 / Alarm 2 indicator H. CD mode: Repeat 1 / Repeat All indicator
Radio mode: As frequency 0.05 MHz indicator
General controls
Switch on or off the unit
- Press

Control the audio output
- Press VOLUME - / + (symbols , ) to adjust the sound level.
The current volume shows on the display before returning to the previous display.
Eco power saving mode
- This unit has a built-in power saving control which will automatically switch into STANDBY mode to reduce power consumption when it detects that the unit is not in use (idle).
- This automatic switching to STANDBY mode will happen approximately 10-15 minutes after CD playback has stopped.
• To re-activate the unit after it has automatically switched to standby mode, press the

STANDBY
key to switch on the unit.
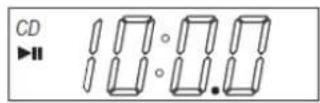
Press PLAYMODE key:
- Repeat 1
Repeat All
Random


Clock timer and sleep function
Clock
To set the time:
- Switch the unit to Standby mode, the display will show 00:00.
- Press CLOCK.SET key to setup the Clock.
Press TUNE or to select 12 or 24HR then press CLOCK.SET to confirm.
Display shows

- Press or to set the hour time then press CLOCK.SET to confirm.
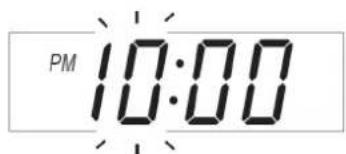
- Press or to set the minute time then press CLOCK.SET to confirm.

Note:
- You can install DC 3V (AAA x 2) battery for clock backup. • To zero the clock, take out the battery from battery compartment and unplug the AC power 20-30 seconds.
- When AC cut out or no battery installed, the clock will be automatic backup in 20 seconds.
P.5
Clock Alarm function
Alarm
This unit includes a dual alarm function. Make sure you have correctly set the clock time before setting up the alarm function.
To activate the alarm:
- When the unit is turned to standby mode, press the ALARM 1 or ALARM 2 key.
- The display shows as below. Press the or to set the hour and minute respectively.


- Press the ALARM key to confirm.
- Press the 'or' repeatedly to select the sound source to play when the alarm activates. bu = Buzzer, cd = CD disc, rd = FM Radio.

Note: Please make sure a CD disc is available when setting the alarm source to CD. If the CD disc is not available, FM radio will be the default source.
- Press the ALARM key to confirm.
- ALARM 2 setup is the same as ALARM 1.
- After completing the setup, press the ALARM key to activate ALARM 1 or ALARM 2 or both.

To deactivate the alarm:
- When the alarm sounds, press

STANDBY
ALARM 1
ON/OFF
ALARM 2
ON/OFF key to deactivate the alarm sound.
- To snooze the alarm sound, press SNOOZE key, the alarm sounds again after 9 minutes.
SLEEP FUNCTION
- Select the desired source.

SLEEP
- Press and hold the key to adjust the sleep time until the desired period
is set (10/ 20/ 30.....90) then release. The unit stops playing after the chosen time has elapsed.

- To cancel the sleep function, press the key

STANDBY
P.6
CD playback
Compatible disc types
This unit supports playback of CD discs of the following types:
- CD Audio
- CD-R
- CD-RW
The ability to play certain recordable discs may depend on the quality or physical condition of the disc, the quality of the recording, or characteristics of the recording device or software application. Playback cannot be guaranteed in all situations.
This is not an indication of any problem with the unit.
CD playback operations
To access the CD mode:
- Press FUNCTION key repeatedly until CD mode is selected.
- The CD icon lights on the display when CD mode is selected.
To start CD playback:
- Press the OPEN / CLOSE position on CD door to open the disc compartment door. "---" shows on the display.
- Load an audio CD or data CD onto the CD tray.
- Press the CD door at the edge to close the disc compartment door. The unit should read the disc information. Audio CD: Total number of tracks

To operate the playback:
- Press to start playback.
- During playback, press ▶ to pause it. Press again to resume.
- Press or to skip to the previous or next track.
- Press and hold or to scan backward or forward within the same track/file. Release the button to resume playback at normal speed.
- Press to stop the playback.
To program the playback:
The program playback mode lets you program a total of 20 tracks in any desired order.
You can also program the same track to play several times within a program sequence.
- In CD mode, press ■ to stop any disc playback.
CLOCK SET/
- While playback is stopped, press the PROG key.
- P01 is displayed and blinking.
P stands for program mode, while 01 stands for the first program location.

- Press to select the track for the first program location.
CLOCK SET/
- Press to store the selected track into the program location.
- Repeat steps 3 and 4 to program more tracks. Up to 20 tracks can be programmed.
- Press to start playback of the programmed tracks. Playback will stop after all programmed tracks are played.
- To play back the programmed tracks again, press ▶/II

- To cancel the programmed sequence from the memory, press twice in the program mode, or open the disc compartment door.
P.7
FM Tuner
To access the Tuner mode:
- Press FUNCTION key repeatedly until Tuner mode is selected
• The FM frequency will show on the display
To perform auto search
- Press and hold 2 seconds on the or key, this unit will perform automatic scan and stop when a station is caught.
To perform manual search:
- Press or to adjust the frequency. Use this method to tune to weak or distant stations that are not strong enough to be recognized by the automatic searching. Note: One press is 0.05 MHz, the indicator will blink on the display.
e.g: 88.45 MHz

To store a station as a preset:
- In Radio mode, press or key to adjust the frequency then press
CLOCK SET/PROG.
CLOCK SET/
- Display will show "P01" and then press key to store in P01.
SLEEP You can also select the program number P01 - 20 by pressing key. / MEM
• You can save up to 20 channels in FM band. To listen to a preset station
SLEEP
• In FM mode, press the key to recall the preset station.
To turn on or off the stereo sound in FM mode:
- Press the ▶■ MO ST key to turn on or off the stereo sound.
Antenna
FM antenna
- Pull out the telescopic antenna. Incline and turn the antenna. Reduce its length if the signal is too strong (very close to a transmitter).
USB connection to charge device
USB 5V --- 1000mA
USB cable not included.
Care and maintenance
Compact Disc Care
To remove a disc from its storage case, press down on the center of the case and lift the disc out, holding it carefully by the edges.


Fingerprints and dust should be carefully wiped off the disc's recorded surface with a soft cloth. Unlike conventional records, compact discs have no grooves to collect dust and microscopic debris, so gently wiping with a soft cloth should remove most particles. Wipe in a straight line from the inside to the outside of the disc. Small dust particles and light stains will have absolutely no effect on reproduction quality.


Clean the disc periodically with a soft, lint-free, dry cloth. Never use detergents or abrasive cleaners to clean the disc. If necessary, use a CD cleaning kit. Never write on or stick any labels to the surface of compact discs.
Care of the cabinet
If the cabinet becomes dusty, wipe it with a soft dry dust cloth. Do not use any wax, polish sprays or abrasive cleaners on the cabinet.
Caution
Never allow any water or other liquids to get inside the unit while cleaning.
Technical specifications
1. General
Power requirements:
AC 230V~50Hz
DC 3V (UM-4 x 2) for clock backup function.
USB port for charging only, 5V === 1A
Power consumption: 15W (operation), 1W (standby)
Weight of main unit: 0.85 kgs
2. Amplifier section
Power Output: 2 x 1 Watt
3. Tuner
FM Tuning range: 87.5 MHz to 108 MHz
Preset memory stations: FM-20
4. CD player section
Playback system: Compact Disc Digital Audio

- MODEL: CDR20 / CD CLOCK RADIO
- SAFETY INFORMATION
- IMPORTANT SAFETY INSTRUCTIONS
- CAUTION
- WARNING: DANGER OF RADIATION
- UNPACKING THE UNIT
- PRECAUTIONS FOR THE UNIT
- SECURITY
- PLACEMENT
- CONDENSATION
- CLEANING
- GENERAL CONTROLS
- MAIN UNIT
- CONTROL THE AUDIO OUTPUT
- ECO POWER SAVING MODE
- STANDBY
- PRESS PLAYMODE KEY
- CLOCK TIMER AND SLEEP FUNCTION
- CLOCK
- TO SET THE TIME
- NOTE
- CLOCK ALARM FUNCTION
- ALARM
- TO ACTIVATE THE ALARM
- TO DEACTIVATE THE ALARM
- SLEEP FUNCTION
- CD PLAYBACK
- COMPATIBLE DISC TYPES
- CD PLAYBACK OPERATIONS
- TO ACCESS THE CD MODE
- TO START CD PLAYBACK
- TO OPERATE THE PLAYBACK
- TO PROGRAM THE PLAYBACK
- FM TUNER
- TO PERFORM AUTO SEARCH
- TO PERFORM MANUAL SEARCH
- TO STORE A STATION AS A PRESET
- ANTENNA
- FM ANTENNA
- USB CONNECTION TO CHARGE DEVICE
- CARE AND MAINTENANCE
- COMPACT DISC CARE
- CARE OF THE CABINET
- TECHNICAL SPECIFICATIONS
- GENERAL
- AMPLIFIER SECTION
- TUNER
- CD PLAYER SECTION
Brand : Silva Schneider
Model : CCD 16
Category : Radio