NETWORK ATTACHED STORAGE - Network Storage IOMEGA - Free user manual and instructions
Find the device manual for free NETWORK ATTACHED STORAGE IOMEGA in PDF.
| Product Type | Network Storage (NAS) |
| Brand | Iomega |
| Model | Network Attached Storage |
| Main Features | Hot-swap hard drives, RAID 1 and RAID 5 support, email alert notifications, automatic RAID rebuild |
| Power Supply | Mains (via external adapter) |
| Maintenance and Cleaning | Follow hard drive replacement instructions, use only Iomega replacement drives. |
| Safety | Use an uninterruptible power supply (UPS) to protect against power outages and surges. Regularly back up data. |
| Spare Parts and Repairability | Iomega replacement hard drives available, recovery DVD provided. Contact technical support for system disk replacement. |
| General Information | System designed for optimal accessibility and ease of maintenance. Warranty void if non-Iomega disks are used. |
Frequently Asked Questions - NETWORK ATTACHED STORAGE IOMEGA
User questions about NETWORK ATTACHED STORAGE IOMEGA
0 question about this device. Answer the ones you know or ask your own.
Ask a new question about this device
Download the instructions for your Network Storage in PDF format for free! Find your manual NETWORK ATTACHED STORAGE - IOMEGA and take your electronic device back in hand. On this page are published all the documents necessary for the use of your device. NETWORK ATTACHED STORAGE by IOMEGA.
USER MANUAL NETWORK ATTACHED STORAGE IOMEGA
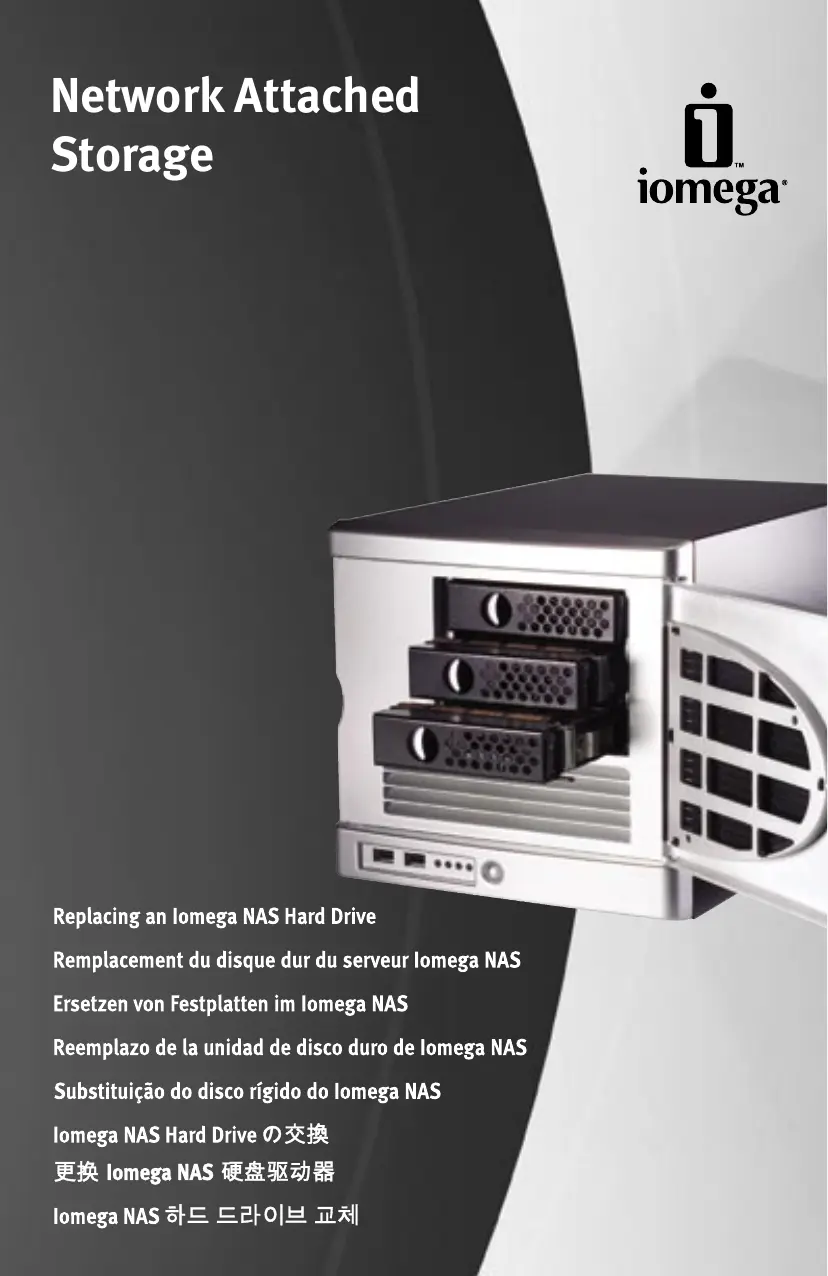
Network Attached Storage
i iomega®
natural_image
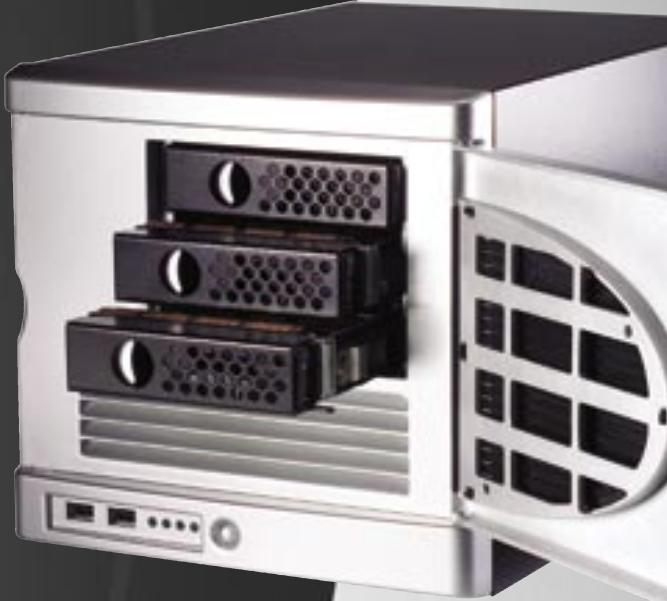
Exterior view of a server rack with three drive bays and an open door (no text or symbols visible)HARD DRIVE REPLACEMENT
Thank you for purchasing an lomega® NAS server. Your lomega NAS has replaceable hard drives for increased data accessibility and ease of maintenance. To enhance your experience with your lomega NAS, it is very important to become familiar with the basics of drive handling.
DURING NORMAL OPERATION
ALWAYS:
As with any computer hardware or peripheral, it is highly recommended that you back up your NAS device. A backup can be performed over a TCP/IP network.
USE AN UNINTERRUPTIBLE POWER SUPPLY (UPS)
To protect your NAS device against power loss and/or power surges, an external UPS device is recommended.
HAVE A SPARE IOMEGA NAS HARD DRIVE AVAILABLE
Your NAS device has been designed to allow a single hard drive to be replaced after the unit has been shut down. As a result, lomega recommends that you have a spare hard drive available in the event of a hard drive failure. This will permit a faster return to normal performance speeds.
ENABLE EMAIL ALERT NOTIFICATIONS
Your NAS device has been designed with an email alert notification system. During initial device setup, specify the administrator's email address and an appropriate SMTP server.
IN THE EVENT OF A HARD DRIVE FAILURE
ALWAYS:
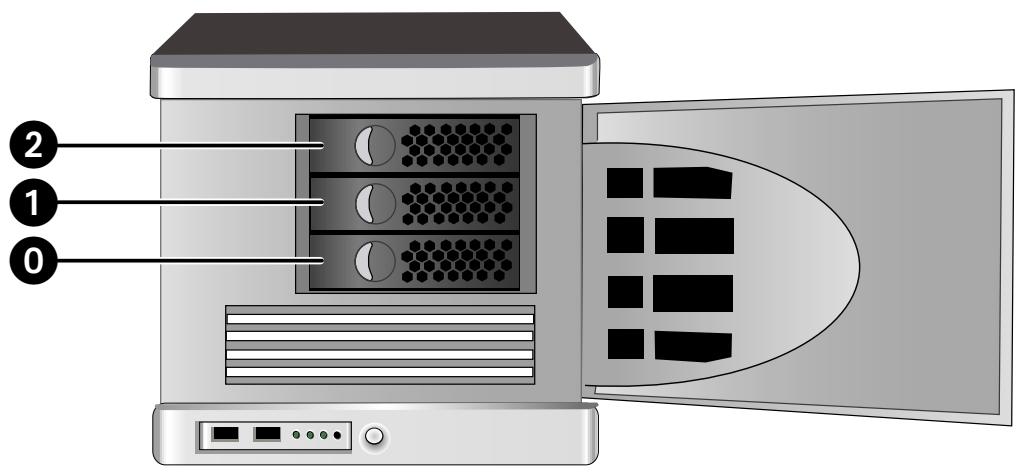
VERIFY THE FAILED HARD DRIVE NUMBER
Before removing a hard drive, verify the location of the failed drive by checking email notifications, administration UI alerts and logs, and the status LEDs on the front of your lomega NAS. If any drive in addition to the failed drive is removed, data loss will result!
CAUTION! Always shutdown your lomega NAS before removing a hard drive. Failure to shutdown your lomega NAS will result in data loss!
NEVER:
☑ REMOVE MORE THAN ONE HARD DRIVE AT A TIME
In RAID 1 and RAID 5 data protection modes, your lomega NAS device can continue operating after a single drive failure. Do NOT remove any other drive while there is a failed drive in the system or while the replacement drive is being restored.
INTERRUPT THE SYSTEM REBUILD PROCESS
After inserting the replacement drive, you MUST allow the RAID volume to restore. Active restoration is indicated by either a flashing power/status LED and continuous hard drive activity, or by continuous hard drive activity. During the rebuild process, do NOT remove any of the hard drives or power down the Iomega NAS device. This process may take many hours depending on the capacity of the RAID volume and the amount of data that is being restored.
REPLACING A NON-OS HARD DRIVE
In the event of a drive failure, you can quickly and easily a replace drive. Simply shut down the lomega NAS and replace the damaged drive. When using RAID 1 or 5, all data on the defective drive will be restored.
CAUTION! Use lomega replacement drives only! Failure to use lomega drives will void your warranty.
Before you replace a drive:
CAUTION! The Iomega NAS will restore your data on RAID 1 and 5 systems. Replacing the wrong hard drive will result in data loss. Always verify you are replacing the damaged drive.
- Double click the Iomega NAS in the Iomega NAS Discovery utility.
- Log onto the lomega NAS.
- Click Administer this server appliance.
- Log onto the lomega NAS.
- Click on Disks.
- Click on Disks and Volumes. This will launch Terminal Services.
- Log onto the lomega NAS.
- Terminal Services will open with the Disk Management tool open.
- Check Disk Management for a failed hard drive.
- Replace only the damaged drive!
text_image
Diagram of a server rack with labeled ports and internal components, showing connections from port 0 to port 2.To Replace a Hard Drive:
Follow these instructions to replace any single hard drive in your lomega NAS.
CAUTION! Never replace more than one hard drive at a time.
- Determine which drive has failed. Follow the steps above or check the System Log if you are unsure.
- Shut down the lomega NAS.
- Open the front door of the Iomega NAS.
- Press in on the latch.
- Pull the lever to eject the drive. Ejecting the drive automatically unplugs the power and data connector.
- Slide the drive completely out of the bay.
- Slide the replacement drive into the open bay.
CAUTION! Use Iomega replacement drives only! Failure to do so will void your warranty.
-
Once the drive assembly is in, push the eject lever forward until it locks into place.
-
Start up the lomega NAS.
After inserting a new drive, the lomega NAS performance will be degraded until the RAID has been rebuilt. RAID 5 configurations may take up to 8 hours to rebuild your data.
CAUTION! Shutting down or restarting the lomega NAS during the rebuild process will cause irreparable damage to your data or the lomega NAS operating system.
RECOVERING THE IOMEGA NAS FROM THE IOMEGA NAS RECOVERY DVD
CAUTION! This utility will restore the lomega NAS to its original factory state. All data will be lost! Make sure your data is backed up before proceeding.
- Connect a monitor, USB keyboard, and a USB DVD drive to the lomega NAS.
- Insert the Iomega NAS Recovery disc into the DVD drive and boot the Iomega NAS.
-
The Iomega NAS Recovery utility will run automatically. Follow the on-screen instructions.
-
Reboot the Iomega NAS and disconnect the keyboard and DVD drive.
NOTE: If you are unable to disconnect the keyboard and DVD drive before the lomega NAS reboots, let the lomega NAS boot completely into the recovery environment and then select cancel. The lomega NAS will reboot and you can then unplug the keyboard and DVD drive. - Allow the Iomega NAS to finish the automated rebuild process. The NAS will restart several times during this process. Do NOT disturb or shutdown the NAS during this process. The Iomega NAS will shutdown automatically when the rebuild is complete.
REPLACING THE OS DRIVE
If you need to replace the OS Drive, please contact Iomega Technical Support. An Iomega Technical Service Representative will help you order a replacement OS drive and provide you with step-by-step replacement instructions.