DB 2546 - Iron CLATRONIC - Free user manual and instructions
Find the device manual for free DB 2546 CLATRONIC in PDF.

User questions about DB 2546 CLATRONIC
0 question about this device. Answer the ones you know or ask your own.
Ask a new question about this device
Download the instructions for your Iron in PDF format for free! Find your manual DB 2546 - CLATRONIC and take your electronic device back in hand. On this page are published all the documents necessary for the use of your device. DB 2546 by CLATRONIC.
USER MANUAL DB 2546 CLATRONIC
Selvrensning (Self-Clean)
Autonettoyant (Self-clean)
Autolimpieza (Self-Clean)
Autolimpeza (Self-Clean)
Autopolizia (Self-Clean)
General safety instructions
- Before commissioning this device please read the instruction manual carefully.
- Please keep these instructions, the guaranty certificate, the sales receipt and, if possible, the carton with the inner packaging!
- The device is intended exclusively for private and not for commercial use!
- Always remove the plug from the socket whenever the device is not in use, when attaching accessory parts, cleaning the device or whenever a disturbance occurs. Switch off the device beforehand. Pull on the plug, not on the cable.
- In order to protect children from the dangers of electrical appliances, never leave them unsupervised with the device. Consequently, when selecting the location for your device, do so in such a way that children do not have access to the device. Take care to ensure that the cable does not hang down.
- Test the device and the cable regularly for damage. If there is damage of any kind, the device should not be used.
- Do not repair the device yourself, but rather consult an authorised expert.
- For safety reasons a broken or damaged mains lead may only be replaced by an equivalent lead from the manufacturer, our customer service department or a similar qualified person.
- Keep the device and the cable away from heat, direct sunlight, moisture, sharp edges and suchlike.
- Never use the device unsupervised! Switch off the device whenever you are not using it, even if this is only for a moment.
- Use only original accessories.
- Do not use the device outdoors*.
- Under no circumstances must the device be placed in water or other liquid, or come into contact with such). Do not use the device with wet or moist hands.
- Should the device become moist or wet, remove the mains plug from the socket immediately*). Do not reach into the water.
- Use the device only for the intended purpose.
*) Please note the following „Special safety instructions...".
Special Safety Instructions
WARNING! The ironing base becomes hot very quickly and takes a long time to cool down. Do not touch! Danger of burning!
- When the iron is not in use it should be placed on its stand.
- Before filling the water tank remove the mains lead. Please do not fill the water tank higher than the MAX mark.
GB
GB
First Use of the Machine
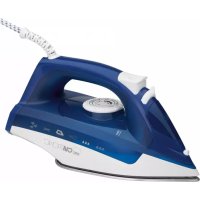
Numbering of the Controls
1 Steam jet button
6 Control lamp
2 Steam regulator with self-clean function
7 Base
3 Filler opening for the water tank
8 Temperature regulator
4 Spray nozzle
9 Water tank
5 Spray button
- Clean the ironing base with a slightly damp cloth.
- The water tank (9) is filled through the replenishing hole (3) with cold water. If the water is hard, please use distilled water. Use a replenishing container if necessary.
Using the Machine
NOTE: Only clothes should to be ironed with this machine.
Ironing without Steam (Steam quantity regulator set to MIN)
- Place the iron on its stand (7).
- Electrical connection
Make sure that the iron voltage (see name plate) and the line voltage match.
- Sort out the garments according to their ironing temperatures. Start with the lower temperatures. It is set with the thermostat (8):
Synthetics, silk (low temperature)
- Wool (medium temperature)
Cotton, linen (high temperature)
- Insert the plug into a socket with earthing protection.
- The control lamp (6) lights up. As soon as it shuts off, the set temperature is reached (approximately 3 min.). Now you can start to iron.
- Always pull the plug out of the socket after using the iron.
Steam Ironing
For this a high temperature is needed (cotton, linen). The quantity of steam can be regulated using the steam quantity regulator (2). Extra steam can be added with the steam jet function (1).
Vertical Steam: This can be used to produce a jet of steam in a vertical direction.
Self-Cleaning
- Half fill the water tank with water.
- Heat the machine up to its maximum temperature. After the control lamp (6) goes off remove the machine from the mains supply.
-
Now hold the machine horizontally above a sink, turn the steam quantity control (2) to the self-cleaning symbol and rock it to and fro until the tank is empty. When pressed and turned the control switch then returns to the 喜 position.
-
Place the machine back on its stand (7) and heat it up again. To clean the base now iron over a clean cotton cloth.
GB
Spray Function
In order to moisten a section to be ironed press the spray button (5).
Cleaning and Storage
Always remove the mains lead before cleaning!
Clean the casing with a slightly damp cloth.
- Please do not use any abrasive cleaning agents!
- Always switch the steam quantity control to "OFF/0" in order to prevent the contents of the tank from leaking.
This appliance conforms with the CE directives for radio interference suppression and low-voltage safety and has been built to meet current safety requirements. Subject to technical changes without prior notice!
Warranty
We undertake to guarantee the appliance sold by our company for 24 months as of the date of purchase (cash receipt).
During the life of the warranty we shall provide for the repair or replacement of the appliance owing to material or manufacturing defects absolutely free of charge.
Proof for the warranty is provided by the purchase document. The replacement and repair will not be performed free of charge without this proof of purchase.
Should the warranty be valid, please consign the complete appliance in its original packing together with the cash receipt to your local dealer.
You are not entitled to the replacement of the appliance owing to broken glass parts and faulty accessories. However, said parts will be replaced free of charge. In this case only the faulty accessory needs to be ordered without sending back the whole appliance!
The cleaning, servicing and replacement of wear parts are not covered by this warranty and hence are to be paid for.
The warranty is terminated in case of handling on the part of Third parties.
After the warranty
Once the warranty has expired, repairs can be carried out by specialized technicians or repair services against the payment of the service.
PL
Samoczynne ocyszczanie (Self-Clean)
Samostici fungce (Self-Clean)
Öntisztlatas (Self-Clean)
Pekn m camoochctkn (Self-Clean)
- HanoHnTe BOJHOI 6aOK Ha noJIOBHy BOIoN.
- PaoorpeIte npmbop Do MaKcImaJIbHOn TeMnepaTpyb.IocIe toro, KaK KOHTPOJIbHaJaMNoUka (6) nOraCHeT, OTKJIIOHnTe erO, noXaJIyNCTa, OT cETN.
- YdepKbBap np60bp HAD MOkOB B rOpN3OHTaBbHOM POLOXeHN, nepeKIOUHTe peryJIaTOp NOaJa napa (2) Ha cIMBOI CAMOOICTKN 1 NOKaYBaJTe np60bp BnepE-Na3d Do tex nop, NOKA HE KOHNTcB ODa. B zAKIOUeHN hAekMTE Ha peryJIaTOp IN NOBEpHIne erO oBpaTHO B NOLOXeHne
- YctanobHTe npi6Op o6pato HA noCTabky (7) n pa3orpeIte ero eIe pa3. IaOnCHKn pIoOuBbI yTOrA npOrnaIbTe KaKoe-HN6ydbX IIOHaTo6bMaHKe HONOTHeJc.
Pexm - A3p030lb
ÄlaryBlaJaxHeHnO TDeJIbHbIX YacteI OExDbI HaxImaTe KhoNky (5) A3po3OJIb (Spray).
Yxoid 3a npnbopom n xpaheHne
- Пара д устков BCERДа Bынмай Te BUNKу n3 po3eTkn!
- Постupaite Корпсс Лжно Травков.
Ipoouby npotpaite Taekce cnerka BnaKhoT PrrKnK. He nCnoB3yTe Ira 3TOrO uNnFobAaBbHe cpeCTBa NNn NaCTb!!
Длпгпггггггьыгдддддддддддддддддддддддддддддддддддддддддддддддддддддддддддддддддддддддддддддддддддддддддддддддддддд徴унгггггьыгdбскогогабскогогабскогогабскогогабскогогабскогогабскогогабскогогабскогогабскогогабскогогабскогогабскогогабскогогабскогогабскогогабскогогабскerga"
3TOT npn60 cop COOTBETCTBye TnpkeTnBAM CE NO nckpo3aunTe nTexHnke 6e3oNACHOCTN Dn HmK3KOJbIbTHbIX np6OBPO8; OH cKOHCTpynPoBAH B COOTBETCTBN C HOEBNIUM ppeNDcaHnMI N TO TEXHnke 6e3oNACHOCTN. Mbl octabnEM 3a cOBoI npAO h TeXnueChKe NImHeHnI!
RapaHTnHoe 683aTeNbCTBO
Mbydaem Ha KynIeHHbI y Hac npIbOp rapaHTIO Ha 24 MecaIeB, HauHna C DaTbI NOKyIKN npIbOpa (KaccobB yE).
B TeueHnraapTmHOro cPoka MbI 6eCnlaTHO yCTpaHMM Bce HeoctaTK nI OJLOMKN, KOTOpBe BO3NHKInI NO BIHe 3aBOJa-I3rTOBtTeJI, IPOBeJe pEMONT nIi 3aMeHny pri6bopa.
DokymentomIraIraHTMN CnyKt Kaccobyuek.6e3IpeIbYBHeHn 3ToTO DOKymenta6cIIaTHbI peMOHT IIN 3aMeHa npIbopa HeBO3MOXHbl.
B cnyae pnoomkn npinbopa npcnmbepnyb ero B maarznh B noHOn KOMPNEKTAuIN N opunHaJIbHOY ypaKOBKe, pnpIOXmB KACCobBy YeK.
Pa3bItoe CTEKIO JINI DEeKTHBIE PnIHADJIEXHHOCTN HE YBIAIOTC NOBODOMI JI 3aMeHbI PnIbOpa, A 6yDyT BcEcnIaTHO PnICsIaNbI B3aMeH Na DEeKTHBIE. B TAKHX cUYAAR Heo6bOIMMO 3aka3bBaTb TOBko DEeKTHBIE PnIHADJIEXHOCHTN, a HE nocbJaTb BeCb PnIbObp HA 3aMeHy!
Iop rapaHTnIO He nOpaIaOT: YnCTKa, TeXOCMToP uIN 3aMeHa TpyuNXcJeTeaJIe npIbopa, OHI DeIaIOTc 3a DoNOLHInTeMbHyIO ONaTy.
TapaHTnA TepaTeTc npN BCKpbTm npi6opa NoCTOpOHmIMn Liuamn.
No okoHuaHn rapaHTnn
IIO nCTeueHn cPoka rapaHTn Ipi6Op MOxHO cdaTb Ha peMOHT B CnEuaJIIN3NPOBaHHbI MaRa3IN IIN peMOHTHyIO MaCTepCKyIO 3a ONJaTy.
RUS
Technische Daten
Modell: DB 2546