
STORAGEBIRD SOLO 25-UP - External hard drive FUJITSU SIEMENS - Free user manual and instructions
Find the device manual for free STORAGEBIRD SOLO 25-UP FUJITSU SIEMENS in PDF.

User questions about STORAGEBIRD SOLO 25-UP FUJITSU SIEMENS
0 question about this device. Answer the ones you know or ask your own.
Ask a new question about this device
Download the instructions for your External hard drive in PDF format for free! Find your manual STORAGEBIRD SOLO 25-UP - FUJITSU SIEMENS and take your electronic device back in hand. On this page are published all the documents necessary for the use of your device. STORAGEBIRD SOLO 25-UP by FUJITSU SIEMENS.
USER MANUAL STORAGEBIRD SOLO 25-UP FUJITSU SIEMENS
... any technical problems or other questions you need clarified?
Please contact:
our Help Desk
- your sales partner
- your sales outlet
The latest information on our products, tips, updates, etc., can be found on the Internet under: "www.fujitsu-siemens.com"
Help Desk list on the internet: "www.fujitsu-siemens.com/rl/servicesupport/helpdesks"
This manual was produced by Xerox Global Services
Published by Fujitsu Siemens Computers GmbH
AG 01/08
Edition 1
A26381-F103-Z104-1-8N19

STORAGEBIRD Solo 25-UP
Operating Manual
Deutsch
English
Français
Espanol
Italiano
Copyright © Fujitsu Siemens Computers GmbH 2008
MS, MS-DOS, Windows, Windows NT, Windows XP and Windows VISTA are registered trademarks of Microsoft Corporation.
All other trademarks referenced are trademarks or registered trademarks of their respective owners, whose protected rights are acknowledged.
All rights, including rights of translation, reproduction by printing, copying or similar methods, even of parts are reserved.
Offenders will be liable for damages.
All rights, including rights created by patent grant or registration of a utility model or design, are reserved.
Delivery subject to availability. Right of technical modification reserved.
Inhalt
STORAGEBIRD 1
System requirements 1
Safety information 2
CE marking 2
Installation/Removal 3
Installation under Windows XP/Windows Vista 3
External power supply 3
Registration of a fingerprint under Windows 4
Changing a fingerprint or registering a new one 5
Changing a password or registering a new one 6
7
Changing drive sizes 7
Removing the device 8
Removal under Windows XP / Windows Vista 8
Troubleshooting and tips 9
Technical data 11
STORAGEBIRD
The STORAGEBIRD is a Plug&Play device - simply connect it to your computer with the supplied USB cable.
The STORAGEBIRD is automatically recognised as another disk drive.
An external power supply is only needed if the STORAGEBIRD is connected to a USB hub without a power supply, or to a system with insufficient power on the USB cable.
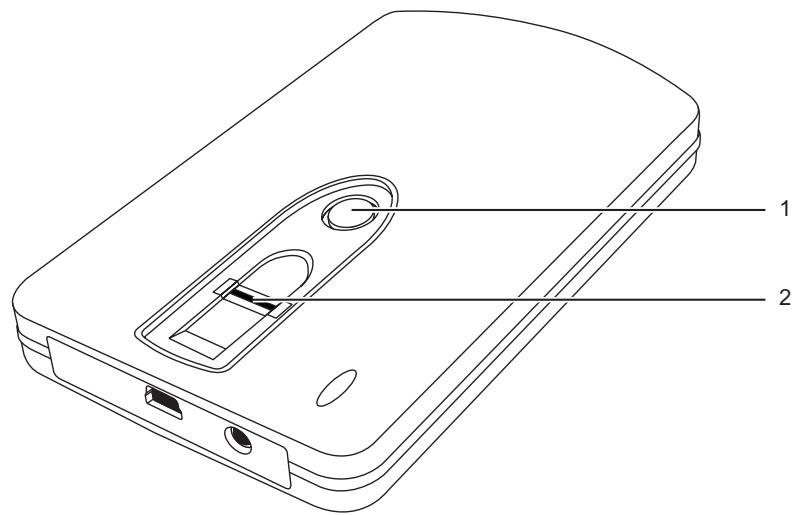
Backup key (1) - Use this key to launch the Nero BackiTUp Essentials software. Instructions for installation and use of this software can be found in the user guide included on the "Nero BackiTUp Essentials CD-ROM".
Your device is equipped with a fingerprint sensor (2), which you can use to protect your data from unauthorised access.
System requirements
Computer with Windows XP, Windows Vista
- At least one free USB port
Safety information


In order to prevent the risk of fire, the STORAGEBIRD Solo 25-UP must only be operated with the original adapter Sunny SYS1193-1005-W2E 5V DC / 2.0 A.

The supplied AC/DC mains adapter must only be used with the STORAGEBIRD 25-UP.
CE marking

CE marking for devices without wireless component supplied at launch from 20.07.2007
The shipped version of this device complies with the requirements of EEC directives 2004/108/EC "Electromagnetic compatibility" and 2006/95/EC "Low voltage directive".
Installation/Removal

The device does not require partitioning or formatting. The device has been formatted in the factory. Reformating is possible, but all data stored on the device will be irrevocably deleted.
If you do wish to reformat, please refer to the chapter "Changing drive sizes", Page 7.
Installation under Windows XP/Windows Vista
Connect the device to the computer via the USB port.
Two new drives will be recognised and the LED on the device will light up.
External power supply
If the computer does not recognise the STORAGEBIRD, or if data cannot be transferred to and from the device, it is possible the USB port is not providing enough power. In that case, use the Fujitsu Siemens Computers external power supply. Depending on the model you have purchased, an external power supply is provided, or you can purchase a suitable power supply as an accessory. Contact your Fujitsu Siemens Computers dealer.
Registration of a fingerprint under Windows
Your device is partitioned into two drives which are denoted as the "AP" and "public" drives in Windows Explorer.

The "public" drive is not encrypted and can be used without registration.
Connect the device to the computer via the USB port.
The "AP" and "public" drives will be displayed in Windows Explorer.
Open the "AP" drive.
Start the fingerverify.exe application.
The Fingerprint Registration selection window appears.
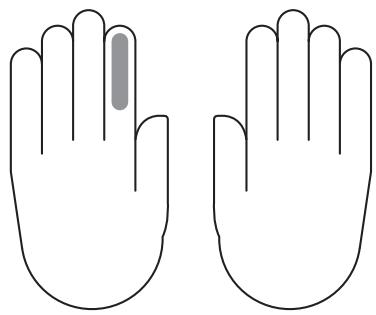
Use the mouse to select the finger required and go to Next.
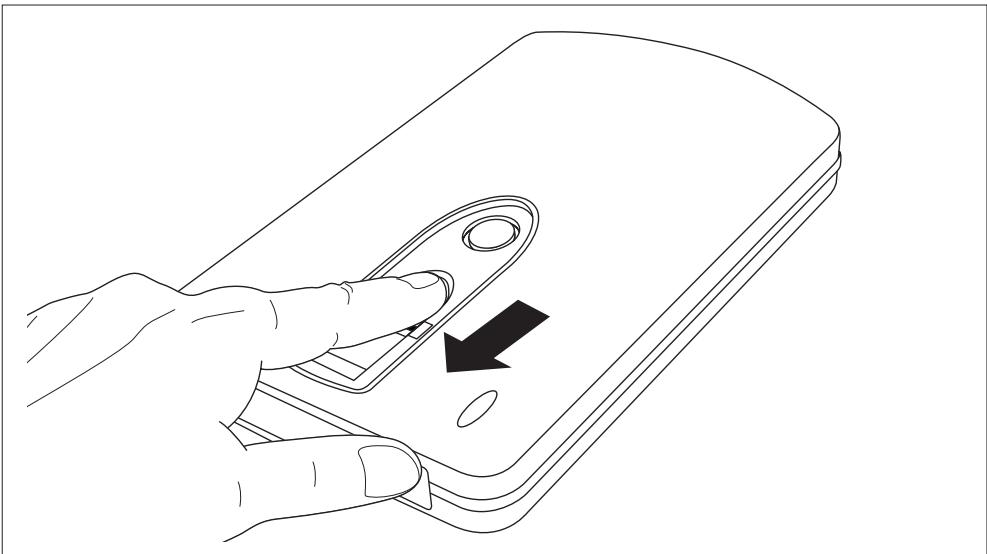
Firmly run the selected finger at least three times over the fingerprint sensor of your device.
After successful registration of the finger, the Fingerprint Registration selection window reappears.
Select another finger for registration.
or
Select Exit.
A window for setting a password appears.
Enter a password and a hint for your password.
Select Confirm.
The "AP" drive will disappear. The encrypted "security" drive will be decrypted and displayed. It can only be accessed after Fingerprint Verification is successful.
Changing a fingerprint or registering a new one
Requirement: You have already logged in by fingerprint or password and the "security" drive is available.
Left-click on the FingerVerify application in the symbol area of your task bar.
Select User Settings - Fingerprint Registration.
Follow the instructions given in the chapter "Registration of a fingerprint under Windows", Page 4.
Changing a password or registering a new one
Requirement: You have already logged in by fingerprint or password and the "security" drive is available.
Left-click on the FingerVerify application in the symbol area of your task bar.
Select User Settings - Set Fingerprint Password.
The dialogue box for changing or registering a new password appears.
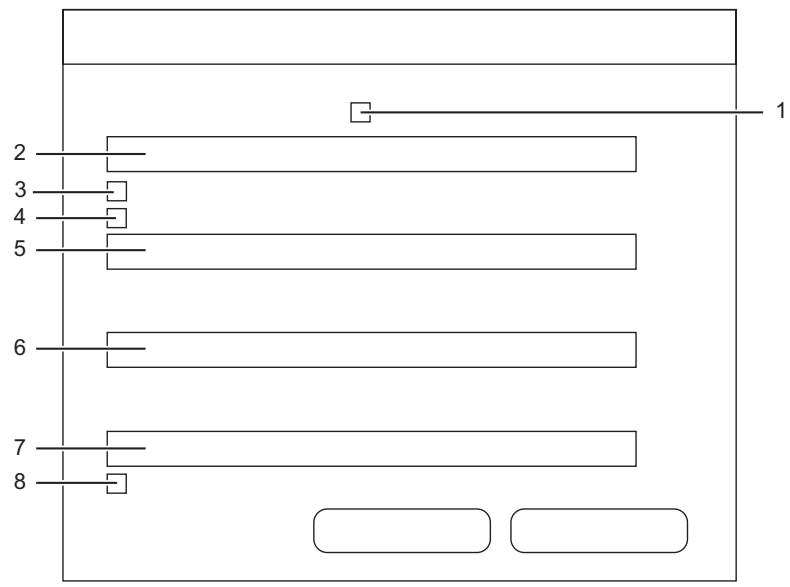
▶ Enable box 1 if a password hint should be displayed for every password entry.
Enter a password hint in field 2.
▶ Enable box 3 if you would like only your fingerprint to be used for verification of your identity.
▶ Enable box 4 if you would like only your password to be used for verification of your identity.
Enter your previous password in field 5.
Enter your new password in field 6.
Re-enter your new password in field 7.
▶ Enable box 8 if the FingerVerify functionality should be protected by the password.
Logging into the "security" drive
Connect the device to the computer via the USB port.
The "AP" and "public" drives are available in Windows Explorer.
Open the "AP" drive.
Start the fingerverify.exe application.
The fingerprint verification dialogue will be displayed.
Run your registered finger over the fingerprint sensor.
A green circle confirms successful registration.
The dialogue closes, the "AP" drive is replaced by the "security" drive.
Your encrypted data is available.
or
A red cross means that an error has occurred.
Run your finger over the sensor again.

After several unsuccessful attempts you must enter the password which you assigned at registration.
Changing drive sizes
Connect the device to the computer via the USB port.
Place the "STORAGEBIRD Solo 25-UP" CD in your computer drive.
Start the initial.exe programme.
The dialogue for setting the public region and the security region will appear on the screen.
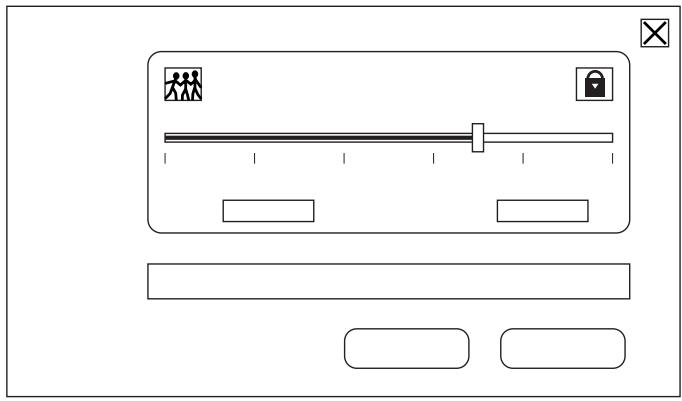
▶ Slide the control to the required position.
Click on START to confirm.
Removing the device

Before removing your device from the USB port or shutting down and/or restarting your computer, you must close the FingerVerify programme in your desktop task bar.
Right-click on the FingerVerify application in the symbol area of your task bar.
Select Exit.
All data on the "security" drive will be encrypted, it will be replaced by the "AP" drive. The drive is protected against unauthorized access.
Follow the instructions given in chapter "Removal under Windows XP / Windows Vista", Page 8 to remove the device from the USB port of your computer.
Removal under Windows XP / Windows Vista

You must always deactivate the device before removing it.
You can deactivate a "USB mass storage device" using the corresponding taskbar button.
Double-click on the taskbar button.
You are then asked to select the hardware device to unplug or eject.
Select the relevant device.
Click on Deactivate to confirm.
Troubleshooting and tips
| Cause | Troubleshooting |
| If you attempt to copy more than 4 GB of data to the device then Microsoft Windows willabort the process and display an error message. | In order to ensure maximum compatibility with all standard operating systems and potential applications, the device has been pre-formatted with the FAT32 file system. This file system does not support data files which are larger than 4 GB. Data which might exceed this limit include for example DVD image files, digital TV recordings etc.The device must be converted to NTFS to allow files larger than 4GB to be stored.Always back up any data stored on the device before performing the steps described below. It is possible that operating systems other than Microsoft Windows may no longer be able to recognise the data.• Make a note of the drive letter (e.g. F:) of your drive.• Press and hold the Windows key on your keyboard and press the "R" key.An input window appears.• Enter "cmd" in the input field.• Enter the command "vol F:" . "F:" is a placeholder. Rather than "F: ", enter the drive letter for your drive.A message is then displayed showing the name of your device.• Make a note of the name of your device.• Enter "convert F: /FS:NTFS". Again, use your particular drive letter in place of the placeholder "F:".Some versions of Windows require the name of the drive as confirmation:• If you are asked for the name of the drive, enter the name you wrote down before.The file system of the device will be converted to NTFS without loss of data. |
| The Safely Remove Hardware function does not work. | • Close all programs that might access the drive (e.g. Norton Protected Recycle Bin). |
| Can the device be attacked by a virus? | The device behaves like a hard drive. It can be infected by a virus through any file that you save on it. For this reason we recommend the use of an anti-virus program. |
| Do I have to turn off my computer when I want to install the device? | The STORAGEBIRD is a "Plug & Play"device. You can install it whenever you like - even while the computer is switched on. |
Technical data
| Port | USB 2.0 (backwards-compatible) |
| Transfer rate | Up to 480 MB/s with USB 2.0 |
| Operating system | Windows XP / Windows Vista |
| Data transfer indication | LED flickers |
| Power supply | Via the computer's USB port. |
| External power supply | 5 V DC/ 2.0 A |
| Dimensions (LxWxH) | 136 mm x 80 mm x 17 mm |
| Weight | approx. 260 g (340 g including power supply) |
| Backup key | Use this key to launch Nero BackITUp Essentials. Instructions for installation and use of this software can be found in the user guide included on the Nero BackItUp Essentials CD. |
| Fingerprint software | "AP" hard disk drive: fingerprintverify.exe to open encrypted data "STORAGEBIRD Solo 25-UP" CD: initial.exe to change drive sizes |
Sommaire
STORAGEBIRD 1
Installation/retrait

Instalacion/Quitar hardware 3
Instalar en Windows XP/Windows Vista 3