
Scaleoview H17-1 - Monitor FUJITSU SIEMENS - Free user manual and instructions
Find the device manual for free Scaleoview H17-1 FUJITSU SIEMENS in PDF.


| Product Type | LCD Monitor |
| Brand | Fujitsu Siemens |
| Model | Scaleoview H17-1 |
| Display Technology | TFT Active Matrix |
| Screen Size (Diagonal) | 43 cm (17 inches) |
| Display Area | 337.9 mm x 270.3 mm |
| Native Resolution | 1280 x 1024 |
| Dot Pitch | 0.264 mm |
| Color Support | Up to 16.2 million |
| Horizontal Frequency | 30 - 83 kHz |
| Vertical Frequency (Refresh Rate) | 55 - 75 Hz |
| Maximum Pixel Rate | 135 MHz |
| Power Consumption (Normal) | < 42 W |
| Power Consumption (Standby) | < 1 W |
| Power Supply | 100 - 240 V AC, 50/60 Hz |
| Dimensions (W x H x D) with Base | 383 x 412.7 x 180 mm |
| Weight (Monitor Only) | 3.75 kg |
| Weight (with Packaging) | 4.45 kg |
| Video Inputs | 1 x D-SUB (Analog), 1 x DVI-D (Digital) |
| Audio | 2 x 2 W speakers, headphone out, microphone in |
| USB Ports | 1 upstream, 1 downstream |
| VESA Mount | 100 mm x 100 mm |
| Security | Kensington Lock slot |
| Energy Star Compliant | Yes |
| TCO Certified | Yes (TCO'03) |
Frequently Asked Questions - Scaleoview H17-1 FUJITSU SIEMENS
User questions about Scaleoview H17-1 FUJITSU SIEMENS
0 question about this device. Answer the ones you know or ask your own.
Ask a new question about this device
Download the instructions for your Monitor in PDF format for free! Find your manual Scaleoview H17-1 - FUJITSU SIEMENS and take your electronic device back in hand. On this page are published all the documents necessary for the use of your device. Scaleoview H17-1 by FUJITSU SIEMENS.
USER MANUAL Scaleoview H17-1 FUJITSU SIEMENS
... any technical problems or other questions which you would like to be clarified?
Please contact
our help desk (see Warranty Booklet).
The latest information on our products, tips, updates, etc., can be found on the internet under:
http://www.fujitsu-siemens.com
This manual was produced by
Xerox Global Services
Published by
Fujitsu Siemens Computers GmbH
AG 08/06
Edition 2
Order no.: A26361-K1086-Z120-1-7619
SCALEOVIEW H17-1/H19-1/H19-1W
Operating Manual
VESA, DDC and DPMS are registered trademarks of Video Electronics Standards Association.
Copyright © Fujitsu Siemens Computers GmbH 2006
All rights, including rights of translation, reproduction by printing, copying or similar methods, in part or in whole, are reserved.
Offenders will be liable for damages.
All rights, including rights created by patent grant or registration of a utility model or design, are reserved.
Delivery subject to availability. Right of technical modification reserved.
Contents
Introduction....1
Important notes....2
Safety notes....2
Power cable....3
Transport 4
Cleaning 4
CE marking....4
FCC Class B Compliance Statement 4
Declaration of Conformity....5
Energy Star Guidelines....5
Disposal and recycling 6
Checking the contents of the consignment....6
Installing an ergonomic video workstation....7
Mounting and removing the monitor base 8
Mounting monitor base 8
Removing monitor base 8
Connecting the monitor 9
Connecting cables to the monitor....9
Connecting cables to the computer.... 10
Operation of the monitor.... 11
Adjusting rake....11
Switching the monitor on/off 11
Notes on power management 12
Changing the monitor settings.... 13
Monitor settings using the OSD menu.... 14
Troubleshooting....18
Notes regarding the DIN EN ISO 13406-2 standard 20
Technical data 21
VESA-DDC-compatible VGA interface....22
Preset operating modes 22
Power supply plug 23
Monitor port DVI-D/DVI-I 24
Pin assignment D-SUB 25
Introduction
Your new LCD (Liquid Crystal Display) monitor SCALEOVIEW H17-1/H19-1/H19-1W offers numerous features and functions, for example:
- TFT display (Thin Film Transistor; active matrix)
- minimal space requirements thanks to slim casing
- optimum ergonomic characteristics (totally distortion-free, excellent picture definition and colour purity right into the corners)
- high degree of brightness and good contrast
- high resolution: H17-1/H19-1 (1280 x 1024); H19-1W (1440 x 900)
- size of the display area comparable to that of a 19" (H17-1) or 21" (H19-1) CRT (Cathode Ray Tube) monitor
• presentation of up to 16.2 million colours (in conjunction with an appropriate graphics card)
- automatic scanning of horizontal frequencies from 30 to 83 kHz and refresh rates (vertical frequencies) from 55 to 75 Hz (absolutely flicker-free)
- digital screen controller with microprocessor for storing 49 different display modes
- freely adjustable colour alignment for matching the screen colours to the colours of various input and output devices
- convenient operation via integrated OSD (On-Screen-display) menu
• VESA-DDC compatibility
- VESA-FPMPMI compatibility (Flat Panel Monitor Physical Mounting Interface) - mechanical interface to swivel arm and wall bracket)
- plug&play capability
• power management for reducing power consumption when the computer is not in use
- compliance with the recommendations in accordance with TCO'03
In normal screen mode (dark characters against a light background) the monitor satisfies the ergonomic requirements for the GS symbol.
This operating manual contains important information you require to start up and run your LCD monitor.
A graphics card (screen controller) with VGA interface or a digital graphics card with DVI interface is required to control the SCALEOVIEW H17-1/H19-1/H19-1W LCD monitor. The monitor processes the data supplied to it by the screen controller. The screen controller/the associated driver software is responsible for setting the modes (resolution and refresh rate).
When putting the monitor into operation for the first time, the screen display should be optimally adapted to the screen controller used and adjusted in accordance with your needs (see the "Changing the monitor settings" section in the "Operation of the monitor" chapter).
Target group
You don't need to be an "expert" to perform the operations described here. Do, however, read the "Important notes" chapter in the operating manual of the computer and in this operating manual.
In the event of any problems occurring, please contact your sales outlet or our help desk.
Notational conventions
The meanings of the symbols and fonts used in this manual are as follows:

Pay particular attention to text marked with this symbol. Failure to observe this warning endangers your life, destroys the device, or may lead to loss of data.

Supplementary information, remarks, and tips follow this symbol.
▶ Text which follows this symbol describes activities that must be performed in the order shown.
"Quotation marks" indicate names of chapters or terms.
This font indicates filenames and menu items.
This font indicates screen outputs.
Additional information
Details of how you set the resolution and refresh rate are provided in the documentation on your screen controller/the associated driver software.
Important notes

In this chapter you will find information regarding safety which is essential to take note of with your monitor.
Safety notes
This device complies with the relevant safety regulations for data processing equipment, including electronic office machines for use in an office environment. If you have any questions, contact your sales outlet or our help desk.
- The display surface of the LCD monitor is sensitive to pressure and scratches. You should therefore be careful with the display surface so as to avoid lasting damage (Newton rings, scratches).
- If the device is brought into the installation site from a cold environment, condensation can form. Before operating the device, wait until it is absolutely dry and has reached approximately the same temperature as the installation site.
- During installing and operating the device, please observe the instructions on environmental conditions in the "Technical data" chapter as well as the instructions in the "Installing an ergonomic video workstation" chapter.
- To ensure sufficient ventilation, the intake and exhaust air openings of the monitor must never be blocked.
- The monitor automatically sets itself to a mains voltage in the range of 100 V to 240 V. Ensure that the local mains voltage lies within these limits.
- Ensure that the power socket on the device or the grounded mains outlet is freely accessible.
-
The ON/OFF switch does not disconnect the device from the mains voltage. To completely disconnect the mains voltage, remove the power plug from the socket.
-
The monitor is equipped with a power cable that complies with safety standards.
- Lay all cables so that nobody can stand on them or trip over them. When attaching the device, observe the relevant notes in the "Connecting the monitor" chapter.
- If you use a different data cable from the one supplied, ensure that it is adequately shielded. CE conformance and optimum picture quality are guaranteed only if you use the data cables supplied.
- No data transfer cables should be connected or disconnected during a thunderstorm.
- Make sure that no objects (e.g. jewellery chains, paper clips, etc.) or liquids get inside the device (danger of electric shock, short circuit).
- The device is not waterproof! Never immerse the device in water and protect it from spray water (rain, sea water).
- In emergencies (e.g. damaged casing, elements or cables, penetration of liquids or foreign matter), switch off the unit, disconnect the power plug and contact your sales outlet or our help desk.
- The monitor must be disposed of in accordance with the local regulations for disposal of special waste. The screen background lighting contains mercury. You must observe the applicable handling and disposal safety regulations for fluorescent tubes.
- Only qualified technicians should repair the device. Unauthorised opening and incorrect repair may greatly endanger the user (electric shock, fire risk).
- You may set only those resolutions and refresh rates specified in the "Technical data" chapter. Otherwise you may damage your monitor. If you are in any doubt, contact your sales outlet or our help desk.
- Use a screen saver with moving images and activate the power management for your monitor to prevent still images from "burning in".
- If you operate the monitor with the swivel arm or wall bracket, it may not be turned by 180^ .
- We recommend that you place your device on an insensitive, non-slip surface. In view of the multitude of different finishes and varnishes used on furniture, it is possible that the feet of the device will mark the surface they stand on.
Power cable
To guarantee safe operation, use the cable supplied. Use the following guidelines if it is necessary to replace the original cable set.
- The female/male receptacles of the cord set must meet IEC60320/CEE-22 requirements.
- The cable has to be HAR-certified or VDE-certified. The mark HAR or VDE will appear on the outer sheath.
- For devices which are mounted on a desk or table, type SVT or SJT cable sets may be used. For devices which sit on the floor, only SJT type cable sets may be used.
- The cable set must be selected according to the rated current for your device.
- If necessary, replace the original power cable with a regular grounded 3-core mains lead.
Transport
- Transport the monitor with care and only in its original packaging or another corresponding packaging fit to protect it against knocks and jolts.
- Never drop the LCD monitor (danger of glass breakage).
Cleaning
- Always pull out the power plug before you clean the monitor.
- Do not clean any interior parts yourself, leave this job to a service technician.
- Do not use any cleaning agents that contain abrasives or may corrode plastic.
- Ensure that no liquid will run into the system.
- Ensure that the ventilation areas of the monitor are free.
- The display surface of the LCD monitor is sensitive to pressure and scratches. Clean it only using a soft, slightly moistened cloth.
Wipe the monitor casing with a dry cloth. If the monitor is particularly dirty, use a cloth which has been moistened in mild domestic detergent and then carefully wrung out.
CE marking

The shipped version of this device complies with the requirements of the EEC directives 89/336/EEC "Electromagnetic compatibility" and 73/23/EEC "Low voltage directive".
FCC Class B Compliance Statement
The following statement applies to the products covered in this manual, unless otherwise specified herein. The statement for other products will appear in the accompanying documentation.
NOTE:
This equipment has been tested and found to comply with the limits for a "Class B" digital device, pursuant to Part 15 of the FCC rules and meets all requirements of the Canadian Interference-Causing Equipment Standard ICES-003 for digital apparatus. These limits are designed to provide reasonable protection against harmful interference in a residential installation. This equipment generates, uses and can radiate radio frequency energy and, if not installed and used in strict accordance with the instructions, may cause harmful interference to radio communications. However, there is no guarantee that interference will not occur in a particular installation. If this equipment does cause harmful interference to radio or television reception, which can be determined by turning the equipment off and on, the user is encouraged to try to correct the interference by one or more of the following measures:
- Reorient or relocate the receiving antenna.
- Increase the separation between equipment and the receiver.
- Connect the equipment into an outlet on a circuit different from that to which the receiver is connected.
- Consult the dealer or an experienced radio/TV technician for help.
Fujitsu Siemens Computers GmbH is not responsible for any radio or television interference caused by unauthorised modifications of this equipment or the substitution or attachment of connecting cables and equipment other than those specified by Fujitsu Siemens Computers GmbH. The correction of interferences caused by such unauthorised modification, substitution or attachment will be the responsibility of the user.
The use of shielded I/O cables is required when connecting this equipment to any and all optional peripheral or host devices. Failure to do so may violate FCC and ICES rules.
Declaration of Conformity
This device complies with Part 15 of the FCC Rules. Operation is subject to the following two conditions: (1) this device may not cause harmful interference, and (2) this device must accept any interference received, including interference that may cause undesired operation.
Product name: Colour LCD Monitor
Trade name: Fujitsu Siemens Computers Inc.
Model number(s): SCALEOVIEW H17-1/H19-1/H19-1W
Name of responsible party: Fujitsu Siemens Computers Inc.
1250E. Arques Avenue
Sunnyvale, CA 94085
U.S.A.
Contact person: Schroettle-Henning, Bernd
Phone No.: (408) 746-8256
Fax No.: (408) 746-8299
We, Fujitsu Siemens Computers Inc., hereby declare that the equipment bearing the trade name and model number specified above was tested confirming to the applicable FCC Rules under the most accurate measurement standards possible, and that all the necessary steps have been taken and are in force to assure that production units of the same equipment will continue to comply with the Commissions requirements.
Energy Star Guidelines

ENERGY STAR
The Fujitsu Siemens LCD colour monitor SCALEOVIEW H17-1/H19-1/H19-1W is designed to conserve electricity by dropping to less than 2 W when it goes into standby, suspend and OFF mode. With this new power management the monitor SCALEOVIEW H17-1/H19-1/H19-1W qualifies for the U.S. Environmental Protection Agency's (EPA) Energy Star Computers award.
The EPA estimates that computer equipment uses 5 % percent of all business electricity and that this is growing rapidly. If all desktop computers and peripherals enter a low-power mode when not in use, the overall savings in electricity could amount to \$ 2 thousand million annually. These savings could also prevent the emission of 20 million tons of carbon dioxide into the atmosphere - the equivalent of 5 million automobiles.
As an Energy Star Partner, Fujitsu Siemens Computers GmbH has determined that this product meets the Energy Star guidelines for energy efficiency.
Disposal and recycling
This device has been manufactured to the highest possible degree from materials which can be recycled or disposed of in a manner that is not environmentally damaging. The device may be taken back after use to be recycled, provided that it is returned in a condition that is the result of normal use. Any components not reclaimed will be disposed of in an environmentally acceptable manner.
If you have any questions on disposal, please contact your local office, our help desk, or:
| Germany | Belgium | Switzerland |
| Fujitsu Siemens ComputersGmbHRemarketing und RecyclingD-33106 PaderbornTel.: +49 5251 / 81 80 10Fax: +49 5251 / 81 80 15http://www.fujitsu-siemens.de/wvm | RECUPELBoulevard Reyers, 80B-1030 BrusselsTel.: +32 2 / 706 86 16Fax: +32 2 / 706 86 13E-Mail: info@recupel.behttp://www.recupel.be | SWICOSchweizerischerWirtschaftsverband derInformations-,Kommunikations- undOrganisationstechnikA list of the SWICOAcceptance places can be found at:http://www.swico.ch |
Checking the contents of the consignment

The display surface of the LCD monitor is sensitive to pressure and scratches. Always hold the device by the casing!
▶ Unpack all the individual parts.
▶ Check the delivery for damage incurred during transportation.
▶ Check whether the delivery agrees with the details in the delivery note.
The complete LCD monitor package includes:
- one monitor
- one monitor base
- one cover
- one data cable (D-SUB)
- one data cable (DVI-D: H17-1/H19-1)
- two audio cables
- one USB cable for the computer
- one power cable
- one CD
- one Warranty Booklet
- one "Getting Started" manual
Should you discover that the delivery does not correspond to the delivery note, notify your local sales outlet immediately.

We recommend that you keep the original packaging material. You may need the packaging in the future if you need to transport your device.
Installing an ergonomic video workstation
Before you set up your equipment, you should select a suitable position for working at the monitor. Please observe the following advice when installing a video workstation.

1 = Windows
Avoid direct and reflected glare.
Avoid glare from electric lighting.
1 = approx. 90^ and more
2 = approx. 90°
Remember to maintain correct posture.

1 = Bearing surface for palms of hands
2 = Reaching area for frequently used equipment
Position the keyboard where it is easiest to reach.
Example layout of monitor, keyboard and copy-holder

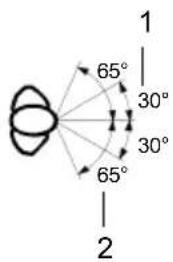
1 = Preferable viewing sector
2 = Permissible viewing sector
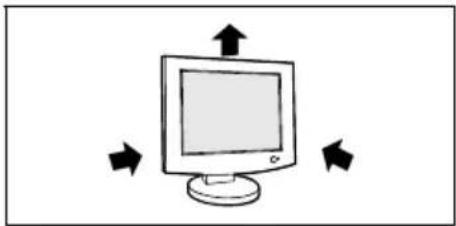
Position the monitor for optimum viewing. The viewing distance to the monitor should be approximately 50 cm.
natural_image
Simple line drawing of a computer monitor with directional arrows indicating orientation (no text or symbols)
Keep ventilated areas clear.
Depending on the situation, the use of a swivel arm or wall bracket (VESA FPMPMI), are available from specialised dealers, may be advisable. For this purpose the monitor base must be removed beforehand as described in the "Mounting and removing the monitor base" chapter.
Mounting and removing the monitor base
Mounting monitor base
When delivered the lower section of the monitor base is removed.
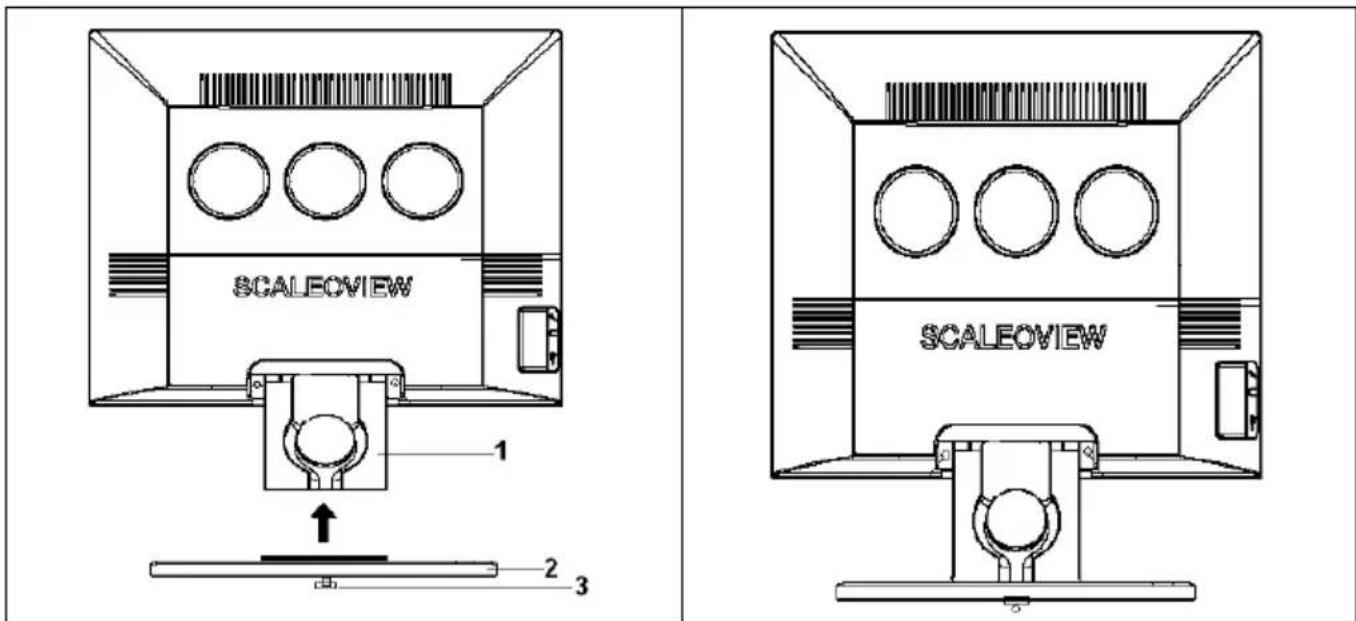
▶ Push the lower section of the monitor base (2) in the upper section (1).
▶ Fasten the screw (3).
Removing monitor base
Before you can use a swivel arm or a wall bracket, you must remove the entire monitor base.
▶ Switch off the monitor and pull the power plug out of the power socket.

The display surface is susceptible to scratching!
▶ Lay the monitor on its face on a soft surface.

▶ Remove the cover (3) and disconnect all cables.
▶ Remove the two screws under the covers (1 and 2).
You can now mount a swivel arm or a wall bracket as per VESA FPMPMI with 100 mm hole spacing.
For instructions on how to mount the swivel arm or wall bracket, please see the documentation for the swivel arm or wall bracket.
Connecting the monitor

Please take note of the safety information in the "Important notes" chapter.
CE conformance and optimum picture quality are guaranteed only if you use the data cables supplied.
Do not cover the ventilation openings of the monitor.
The computer power plug must be pulled out!
▶ Be sure that the monitor and the computer are switched off.
Connecting cables to the monitor
The monitor ports are protected by a cover.
▶ Remove the cover.

1 = Power connector
2 = DVI-I connector (DIGITAL: H17-1/H19-1)
3 = D-SUB connector (ANALOG)
4 = AUDIO-IN connectors (green: loudspeaker/headphones; pink: microphone)
5 = Microphone port to computer
6 = USB port to computer
7 = Headphones outlet
8 = Microphone input
9 = USB port
10 = Security slot for "Kensington Lock"
11 = Holes for fixing swivel arm or wall bracket
The data cables supplied have two 15-pin D-SUB connectors or two 24-pin DVI connectors for connection to the monitor and to the computer.
▶ Select the suitable data cable for your computer.
Digital graphics card with DVI interface: DVI-I or DVI-D connector (H17-1/H19-1)
Graphics card with VGA interface: D-SUB connector
Information on the computer connections and interfaces is contained in the operating manual for your computer.
Connect one of the connectors of the data cable to the D-SUB connector (3) or the DVI-I connector (2) on the monitor and secure the plug-in connection by tightening the safety screws.

The monitor automatically detects the input when only one signal source is connected.
If necessary, insert one plug of each audio cable in the AUDIO IN (4) sockets on the monitor and make sure they are properly engaged.

Green: loudspeakers/headphones

Pink: microphone
If necessary, insert one plug of the USB cable in the USB port (6) on the monitor and make sure it is properly engaged.
▶ Plug the power cable supplied into the power connector (1) of the monitor.
▶ Mount the cover over the connections.

A lock (Kensington Lock) can be mounted in the security slot (10) to protect the monitor from theft. A Kensington Lock is not included in the consignment of the monitor.
Connecting cables to the computer
Information on the computer connections and interfaces is contained in the operating manual for your computer.
If your computer has two monitor ports ("onboard" screen controller and separate graphics card), the monitor port for the separate graphics card is usually active.
▶ Connect the data cable to the (active) monitor port on the computer and secure the plug-in connection by tightening the safety screws.
▶ Insert the other plug of the each audio cable in the audio ports of the computer.
▶ Insert the other plug of the USB cable into a USB port of the computer.
Plug the connector of the mains cable provided into the monitor outlet of the computer or into a properly earthed outlet and ensure a safe connection.
▶ Plug the power connector of the computer into a properly grounded mains outlet.

When you start working with your monitor for the first time you should install the appropriate graphics drivers for your application software. Details of how to do this are provided in the documentation on your screen controller/the associated driver software.
Operation of the monitor
The monitor offers the following possibilities that enable it to be optimally adjusted for the respective user and the respective situation.
Adjusting rake
The rake of the monitor can be adjusted by -5^ (forward) and +20^ (back) from its vertical position.
▶ Grasp the monitor with both hands on the right and left edge of the casing and adjust it to the desired rake.
Switching the monitor on/off

1 = Buttons for the OSD menu (On-Screen-display)
2 = ON/OFF switch
3 = Power indicator
The ON/OFF switch (2) is used for switching the monitor on and off.
The power indicator (3) lights up blue when the monitor and computer are switched on. The power indicator lights up orange when the monitor does not receive a video signal or is in the energy saving mode. The power indicator goes off when the monitor is switched off.
When you switch the computer system on, you must proceed in the following order:
▶ First switch on the LCD monitor with the ON/OFF switch (2).
▶ Then switch on the computer.

If your computer has a power management function (energy-saving mode), you should read the "Notes on power management" section in this chapter.
Notes on power management
If your computer is equipped with power management, the monitor can support this function fully. Here the monitor does not distinguish between the individual energy-saving modes of the computer (standby mode, suspend mode and OFF mode), as it is capable of immediately switching into the mode with the highest energy-saving effect.
| Stage ON Power-Saving Mode | ||
| Power indicator lights up blue lights up orange | ||
| Function | the monitor is working normally | is working the screen is dark |
| Power consumption normal | < 42 W (H17-1)normal < 45 W (H19-1)normal < 50 W (H19-1W) | reduced to < 1 W |
If your computer detects inactivity (no input) it sends an appropriate signal to the monitor to reduce the power consumption (energy-saving mode). The power indicator of the monitor changes colour to indicate the status change.
Once an input is made at the computer the screen contents are redrawn and full power is restored.
For detailed information on how energy-saving mode operates refer to the operating manual or technical manual of the computer.

When the monitor is switched to the energy-saving mode by the power management system a power consumption of up to 1 W is maintained to feed the circuit for redrawing the screen contents.
To completely switch off the power consumption, switch off the computer or pull the plug of the monitor power cable out of the monitor socket of the computer.
Changing the monitor settings
When putting the monitor into operation for the first time, the screen display should be optimally adapted to the screen controller used and adjusted in accordance with your needs.
Basic monitor settings with the CD supplied
If one of the operating systems Windows 95/98, Windows NT, Windows Me, Windows 2000, Windows XP or OS/2 (with Windows emulation installed) is used, the basic monitor settings can be set with the CD supplied.
▶ Insert the supplied CD into the CD-ROM drive.
▶ Open theReadme file on the CD and follow the instructions in the file.
Your monitor should now already be properly adjusted. If none of the above operating systems is used or minor corrections are to be made to the screen display, then change the monitor settings with the OSD menu.
Changing the monitor settings with the buttons of the control panel

1 = Buttons for the OSD menu (On-Screen-display)
2 = ON/OFF switch with power indicator
Use the buttons of the control panel to make the following monitor settings directly while the OSD menu is switched off.
Performing auto-adjustment of the monitor
▶ Press the EXIT/AUTO button for approx. 1 second while the OSD menu is switched off.
The Auto Processing message is displayed.
Picture quality and position are set to optimum values for your system.
Selecting input signal: H17-1/H19-1 (Analog1/Analog2/Digital); H19-1W (Analog1/Analog2)
▶ Press the /INPUT button for approx. 1 second for calling the Input select setting window.
▶ Press the / for ▲/INPUT button to select the desired input (analogue or digital DVI-D).
Selecting colour optimisation (MODE)
▶ Press the MODE button for calling the Mode setting window.
▶ Press the / For ▲/INPUT button to choose the desired colour optimisation.
The following settings are offered:
Office suitable and optimised for word processing
Photo suitable and optimised for photo editing
Video suitable and optimised for videos
Games suitable and optimised for games
Max Speed suitable only for application with optimal response time. Not suitable for office applications.
Activating/deactivating muting
▶ Press the / Button to switch the sound off and on again.
A message is displayed that the action has been performed.
Monitor settings using the OSD menu
With the buttons on the control panel, call up and use the integrated OSD (On-Screen display) menu.

The OSD menu is available in different languages. The English menu names are used in the following description (default setting). With the OSD function Language in the OSD Setup you can select another language.
To set the OSD menu, perform the following steps:
▶ Press the SELECT/MENU button to activate the OSD menu.
The main menu appears on the screen (on the left-hand side) with icons for the setting functions.

The first symbol (Brightness/Contrast) is highlighted. In the right-hand part of the display the associated functions are shown.
▶ If necessary, press the ▼ / for ▲ / INPUT button to mark another icon (e.g. Image adjust).
▶ Press the SELECT/MENU button to select the highlighted icon.
The corresponding setting window (here: Image Adjust) is displayed (on the right-hand side).

The first function (H-Position) is highlighted.
▶ If necessary, press the ▼/Par ▲/INPUT button to mark another function.
▶ Press the SELECT/MENU button to select the highlighted function.
▶ Press the / For ▲ /INPUT button to adjust the value for the selected function.
▶ Press the EXIT/AUTO button to exit the function.
▶ If necessary, press the ▼/□/□/INPUT button to mark another function or press the EXIT/AUTO button to return to the main menu.
All changes are stored automatically.
If you want to change other settings, select the corresponding function from the OSD main menu. All possible adjustments of the main menu are described in the following.
Adjusting the brightness and contrast
| Calling the Brightness / Contrast setting window | |
| Brightness | Setting the brightness of the displayWith this function you change the brightness of the background lighting. |
| Contrast | Setting the contrast of the displayWith this function you modify the contrast of bright colour tones. |
| Black Level | Setting the brightness of the displayWith this function you modify the contrast of dark colour tones. |
| Auto Level | Setting the brightness of the displayWith this function you can automatically set the contrast.Press the SELECT/MENU button to activate the function. |

If the contrast is set too high, bright surfaces can no longer be distinguished from very bright surfaces. If the contrast is set too low, the maximum brightness will not be achieved.
Adjusting size and position
 | Calling the Image adjust setting window |
| H-Position | Adjusting the horizontal positionWith this function you move the picture to the left or to the right. |
| V-Position | Adjusting the vertical positionWith this function you move the picture up or down. |
| Clock | Setting synchronisationWith this function you adjust the picture width to eliminate vertical picture disturbances. |
| Phase | Eliminating picture interferenceWith this function you fine-tune your monitor to eliminate picture interference. |
Adjusting the volume
 | Calling the Audio setting window |
| Volume | Setting the volume for playback with the integrated loudspeakers |
| Mute | Switching the loudspeakers off or on |
Setting colour temperature and colours
 | Calling theColoursetting window |
| Selecting the colour temperature - "Office Mode"The "warmth" of the screen colours is set using the colour temperature. The colour temperature is measured in K (= Kelvin). You can select from sRGB, 6500 K, 7500 K, 9300 K, Native and Custom Colour.Native = Original colour of the LCD displayCustom Colour = User-defined coloursIn the user-defined setting you can change the colour ratios of the basic colours (red, green, blue) as required. |
Setting display of the OSD menu
| Calling the OSD Setup setting window | |||
| Language | Setting language for the OSD menuWith this function you select the language for the OSD menu. The following languages are offered:FrenchSwedishEnglishSpanishDutchItalianRussian | ||
| OSDH-Position | Setting the horizontal position of the OSD menuWith this function you move the OSD menu to the left or to the right. | ||
| OSDV-Position | Setting the vertical position of the OSD menuWith this function you move the OSD menu up or down. | ||
| OSDTimeout | Setting the display duration of the OSD menuWith this function you select a value from 10 to 120 seconds.If the set time expires without a setting being made, the OSD menu is automatically faded out. | ||
Setting functions in the "Advanced" menu
| Calling the Advanced setting window | |
| Input Select | Selecting input signalWith this function you switch the monitor from the analogue to the digital mode and vice versa, when two signal sources are connected (H17-1/H19-1).The condition is that the graphic card used supports this function. |
| Resolution Notifier | Displaying monitor dataThe optimum resolution for the H17-1/H19-1 monitor is 1280 x 1024 pixels (H19-1W: 1440 x 900). With the function activated (On), a message appears on the screen after approx. 30 seconds if a different resolution is set.Change the resolution to 1280 x 1024 (H17-1/H19-1), 1440 x 900 (H19-1W) to achieve optimum picture quality. With the function deactivated (Off), no message appears. |
| Factory Recall | Activating the factory settingsWith this function all settings are reset to the factory settings without prompting for confirmation.Press the SELECT/MENU button to activate the function. The Auto Processing message is displayed. |
Displaying information
| i | Calling the Information setting windowWith this function the model designation, serial number, resolution, H/V frequency, input signal and polarity of the synchronisation signal are displayed. |
Troubleshooting
Should an error occur, first check the following points. If the distortion is still not eliminated, the monitor should, if possible, be checked on another computer.
If you are unable to solve the problem, please inform our help desk.
| Having this problem? Check the following points: | |
| No screen display(power indicator does not light) | ▶ Check whether the monitor is switched on.▶ Check whether the power cable on the monitor is connected correctly.▶ Check whether the computer is switched on. |
| No screen display(power indicator lights) | ▶ Check whether the computer is switched on.▶ Check whether the data cable for the monitor is correctly attached to the monitor port on the computer.▶ Press any key on the computer keyboard – the computer may be in energy saving mode.▶ Alter the brightness and/or contrast until you get a picture. |
| Message:No Signal | ▶ Check whether the data cable for the monitor is correctly attached to the monitor port on the computer.▶ Check whether the computer is switched on. |
| Message:Frequency out of range:## kHz / ## HzPlease change the display mode to 1280 x 1024 (1440 x 900) with 60 Hz. | The input signal (horizontal frequency and refresh rate) at the displayed input does not correspond to the technical monitor data.▶ Adjust the video frequency range using the computer software (see documentation for your computer or your graphics card). |
| Message:For best picture quality,please change resolution to 1280 x 1024(1440 x 900).SELECT: Disable EXIT: Clear | ▶ Set the resolution to 1280 x 1024 (H17-1/H19-1) or 1440 x 900 (H19-1W) using the computer software. |
| Picture position not correct The monitor | recognises an undefined mode (see the "Technical data" chapter).► Press the EXIT/AUTO button to perform the auto-adjustment of the screen.► Set the picture position with the OSD menu (see the "Operation of the monitor" chapter). |
| Picture is shaking | ► Check whether the data cable for the monitor is correctly attached to the monitor port on the computer.► Press the EXIT/AUTO button to perform the auto-adjustment of the screen. |
| Picture is wrongly adjusted | ► Press the SELECT/MENU button to activate the function Factory Recall. The Auto Processing message is displayed. |
Picture disturbances (vertical lines)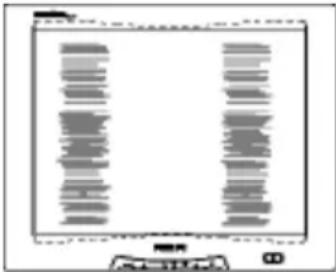 | ► Press the EXIT/AUTO button to perform the auto-adjustment of the screen. |
Picture disturbances (horizontal lines, picture noise)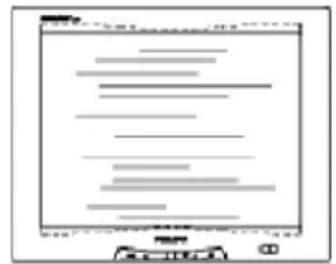 | ► Press the EXIT/AUTO button to perform the auto-adjustment of the screen. |
| The screen becomes darker | The background lighting has a limited lifetime. If your monitor display should become too dark, the background lighting will have to be exchanged.► Please contact our help desk. |
Notes regarding the DIN EN ISO 13406-2 standard
Permanently unlit or lit pixels
The standard of production techniques today cannot guarantee an absolutely fault-free screen display. A few isolated constant lit or unlit pixels (picture elements) may be present. The maximum permitted number of pixels faults is stipulated in the stringent international standard ISO 13406-2 (Class II).
Example:
A 17" or 19" flat-screen monitor with a resolution of 1280 x 1024 has 1280 x 1024 = 1310720 pixels. Each pixel consists of three subpixels (red, green and blue), so there are almost 4 million subpixels in total. In accordance with ISO 13406-2 (Class II), a maximum of 6 pixels and 7 subpixels may be faulty.
Pixel A pixel consists of 3 subpixels, normally red, green and blue. A pixel is the smallest element that can be generated by complete functionality of the display.
Subpixel A subpixel is a separately addressable internal structure within a pixel that enhances the pixel function.
Cluster A cluster contains two or more defective pixels or subpixels in a 5 x 5 pixel block.
Technical data
Dimensions and weight (LCD monitor)
Visible diagonals: 43 cm (H17-1); 48 cm (H19-1)
Dot pitch: 0.264 mm (H17-1); 0.294 mm (H19-1); 0.285 mm (H19-1W)
Screen size: 337.9 mm x 270.3 mm (H17-1)
376.2 mm x 301 mm (H19-1)
410.4 mm x 256.5 mm (H19-1W)
Maximal resolution: 1280 x 1024 pixels (H17-1/H19-1)
1440 x 900 pixels (H19-1W)
Dimensions (W x H x D) incl. monitor 383 mm x 412.7 mm x 180 mm (H17-1)
base: 416.9 mm x 449 mm x 189.5 mm (H19-1)
447.8 mm × 404.4 mm × 189.5 mm (H19-1W)
Dimensions box (W x H x D): 454 mm x 129 mm x 487 mm (H17-1)
487 mm x 157 mm x 505 mm (H19-1)
498 mm x 154 mm x 475 mm (H19-1W)
Weight: 3.75 kg (H17-1), 4.45 kg (including packaging)
5.1 kg (H19-1), 6.1 kg (including packaging)
Accessories: Power cable (1.8 m)
D-SUB data cable (1.8 m)
DVI-D data cable (1.8 m) (H17-1/H19-1)
2 x audio cable (1.8 m)
USB cable (1.8 m)
Storable display modes: 49
Electrical data
Video: analogue, positive, 0.7 V
pp, 75 Ω
digital: DVI-I/DVI-D
Synchronisation:
Separate
Sync. TTL, positive or negative
Horizontal frequency: 30 kHz .... 83 kHz (multi-scanning)
Refresh rate: 55 Hz .... 75 Hz
Maximum pixel rate: 135 MHz
Power supply: switches automatically
100 V - 240 V, 50 Hz - 60 Hz ± 2 Hz, 1.5 A - 0.7 A
Total power consumption: < 42 W (H17-1); < 45 W (H19-1); < 50 W (H19-1W)
in normal mode
< 1 W (Standby mode)
Sound output: 2 W left; 2 W right (type 7496SA)
Environmental conditions
Environment class 3K2, IEC 721
Rated range of operation: 15 °C .... 35 °C
Humidity: 20 % .... 85 %
Limit range of operation: 5 °C .... 35 °C
Humidity: 20% .... 85%
Condensation must be avoided.
VESA-DDC-compatible VGA interface
Your monitor is equipped with a VESA-DDC-compatible VGA interface. VESA-DDC (Video Electronics Standard Association, Display Data Channel) is used as the communications interface between the monitor and the computer. If your computer is equipped with a VESA-DDC-compatible VGA interface, it can automatically read the data for ensuring optimum operation from your monitor and select the appropriate settings.

If the monitor SCALEOVIEW H17-1/H19-1/H19-1W is not yet displayed in the list of monitors, you can select the following monitor instead:
Fujitsu Siemens B17-1, B19-1, P17-1, P19-1, B17-2, B19-2, P17-2, P19-2, W19-1
Preset operating modes

The picture position and size have been set to optimum values at the factory for the operating modes listed above. Depending on the screen controller used, it may be necessary to adjust the display position and size. In this case, you can change and save the settings (see the "Operation of the monitor" chapter).
The following are the most frequently used of the preset operating modes:
SCALEOVIEW H17-1/H19-1
| Horizontal frequency Refresh rate Screen resolution | ||
| 31.5 kHz | 70 Hz | 720 x 400 |
| 31.5 kHz | 60 Hz | 640 x 480 |
| 37.5 kHz | 75 Hz | 640 x 480 |
| 37.9 kHz | 60 Hz | 800 x 600 |
| 46.9 kHz | 75 Hz | 800 x 600 |
| 48.4 kHz | 60 Hz | 1024 x 768 |
| 60.0 kHz | 75 Hz | 1024 x 768 |
| 64.0 kHz | 60 Hz | 1280 x 1024 |
| 79.9 kHz | 75 Hz | 1280 x 1024 |
For ergonomic reasons, a screen resolution of 1280 x 1024 pixels is recommended. Because of the technology used (active matrix) an LCD monitor provides a totally flicker-free picture even with a refresh rate of 60 Hz.
SCALEOVIEW H19-1W
| Horizontal frequency Refresh rate Screen resolution | ||
| 31.5 kHz | 70 Hz | 720 x 400 |
| 31.5 kHz | 60 Hz | 640 x 480 |
| 37.5 kHz | 75 Hz | 640 x 480 |
| 37.9 kHz | 60 Hz | 800 x 600 |
| 46.9 kHz | 75 Hz | 800 x 600 |
| 48.4 kHz | 60 Hz | 1024 x 768 |
| 60.0 kHz | 75 Hz | 1024 x 768 |
| 64.0 kHz | 60 Hz | 1280 x 1024 |
| 44.96 kHz | 60 Hz | 1280 x 720 |
| 49.7 kHz | 60 Hz | 1280 x 800 |
| 59.9 kHz | 60 Hz | 1440 x 900 |
For ergonomic reasons, a screen resolution of 1440 x 900 pixels is recommended. Because of the technology used (active matrix) an LCD monitor provides a totally flicker-free picture even with a refresh rate of 60 Hz.
Power supply plug
![0 V —— [●] —— +12 V DC](/content/2026/05/1003946/images/29b3d5d35c370e8c151b3e3f960761d9eabe56adc5435361f1478f1487594465.jpg)
Monitor port DVI-D/DVI-I

| Pin | Meaning |
| 1 | TMDS Data2- 11 TMDS |
| 2 | TMDS Data2+ 12 not co |
| 3 | TMDS Data 2/4 Shield 1 |
| 4 | not connected 14 +5V P |
| 5 | not connected |
| 6 | DDC Clock 16 Hot Plug |
| 7 | DDC Data |
| 8 | Analogue Vertical Sync |
| 9 | TMDS Data1- 19 TMDS |
| 10 | TMDS Data1+ 20 not o |
| Pin | Meaning |
| Data 1/3 | Shield 21 not connected |
| connected | 22 TMDS Clock Shield |
| not connected | 23 TMDS Cloc |
| Power 24 | TMDS Clock- |
| 15 | Earth |
| Detect | C1 Analog R V |
| 17 | TMD S Data0- C2 Analog |
| 18 | T M DS Data0+ C3 Analc |
| Data 0/5 | Shield C4 Analogue |
| connected | C5 Analog Common |
| Pin | Meaning |
| Video Out (*) | |
| G Video Out (*) | |
| g B Video Out (*) | |
| H-Sync. (*) | |
| GND | Return (*) |
(*) = Not connected with DVI-D version
Pin assignment D-SUB

| Pin | Meaning |
| 1 Video input red 9 +5 V (DDC) | |
| 2 Video input green 10 Sync. earth | |
| 3 Video input blue 11 Earth | |
| 4 | Earth |
| 5 | Earth |
| 6 | Red video earth |
| 7 | Green video earth |
| 8 Blue video earth | |
| Pin | Meaning | |
| 12 | DDC-Data | |
| 13 | H. sync | |
| 14 | V. sync | |
| 15 | DDC Clock | |
- Published by
- SCALEOVIEW H17-1/H19-1/H19-1W
- Contents
- Introduction
- Target group
- Notational conventions
- Additional information
- Important notes
- Safety notes
- Power cable
- Transport
- Cleaning
- CE marking
- FCC Class B Compliance Statement
- NOTE:
- Declaration of Conformity
- Energy Star Guidelines
- ENERGY STAR
- Disposal and recycling
- Checking the contents of the consignment
- Installing an ergonomic video workstation
- Mounting and removing the monitor base
- Mounting monitor base
- Removing monitor base
- Connecting the monitor
- Connecting cables to the monitor
- Connecting cables to the computer
- Operation of the monitor
- Adjusting rake
- Switching the monitor on/off
- Notes on power management
- Changing the monitor settings
- Basic monitor settings with the CD supplied
- Changing the monitor settings with the buttons of the control panel
- Performing auto-adjustment of the monitor
- Selecting input signal: H17-1/H19-1 (Analog1/Analog2/Digital); H19-1W (Analog1/Analog2)
- Selecting colour optimisation (MODE)
- Activating/deactivating muting
- Monitor settings using the OSD menu
- Troubleshooting
- Notes regarding the DIN EN ISO 13406-2 standard
- Permanently unlit or lit pixels
- Technical data
- Dimensions and weight (LCD monitor)
- Electrical data
- Environmental conditions
- VESA-DDC-compatible VGA interface
- Preset operating modes
- Power supply plug
- Monitor port DVI-D/DVI-I
- Pin assignment D-SUB
Brand : FUJITSU SIEMENS
Model : Scaleoview H17-1
Category : Monitor