Cecofrygrill Smokinprime 4000 - Deep fryer CECOTEC - Free user manual and instructions
Find the device manual for free Cecofrygrill Smokinprime 4000 CECOTEC in PDF.


User questions about Cecofrygrill Smokinprime 4000 CECOTEC
0 question about this device. Answer the ones you know or ask your own.
Ask a new question about this device
Download the instructions for your Deep fryer in PDF format for free! Find your manual Cecofrygrill Smokinprime 4000 - CECOTEC and take your electronic device back in hand. On this page are published all the documents necessary for the use of your device. Cecofrygrill Smokinprime 4000 by CECOTEC.
USER MANUAL Cecofrygrill Smokinprime 4000 CECOTEC
Safety instructions 8
- Parts and components 64
- Before use 65
- Installation 65
- Operation 66
- Troubleshooting 72
- Cleaning and maintenance 74
- Recycling of electrical and electronic equipment 75
- Copyright 75
- Declaration of Conformity 75
SOMMAIRE
EU01_102085 - Cecofry&Grill Smokin' Prime 4000
EN · The coding in this manual is generic and applies to all code variants of the appliance.
Read the following instructions carefully before using the appliance. Keep this instruction manual for future reference or new users.
- All safety instructions must be closely followed when using the appliance.
- When using electrical and electronic appliances, basic precautions must always be followed to reduce the risk of fire, electrical shock, and injury.
- This appliance can be used by children aged 8 years and above and people with reduced physical, sensory, or mental capabilities or lack of experience and knowledge if they have been given supervision or instruction concerning the use of the appliance in a safe way and understand the hazards involved. Children must not play with the appliance. Cleaning and user maintenance must not be carried out by children without supervision.
- Keep this appliance and its power cord out of reach of children under the age of 8.
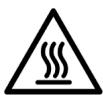
This symbol means “caution, hot surface.” The temperature of the accessible surfaces may be high when the appliance is in operation.
- This appliance is not intended to be operated by means of an external timer or separate remote-control system.
- Do not immerse the cord, plug, or any other non-removable part of the appliance in water or any other liquid. Do not expose electrical connections to water.
- This appliance is intended for domestic use only and is not suitable for use in commercial establishments such as bars, restaurants, farms, hotels, motels, and offices.
- Position the appliance in such a way to avoid spillage of hot liquids. Be especially careful with the handle.
- Make sure the voltage of your mains supply matches the voltage requirements specified in the rating label of the appliance.
- We recommend that the room where you intend to use the appliance is equipped with a working kitchen hood or is well ventilated.
- Incorrect or improper use can damage the appliance and be dangerous for the user. Use the appliance only for the purposes described in this manual.
- Unplug the appliance from the mains supply before moving it, carrying out any cleaning or maintenance task, or when not in use.
- Do not use outdoors.
- Check the power cord regularly for visible damage. If the cord is damaged, it must be repaired by Cecotec's Official Technical Support Service to avoid any hazard.
- Do not twist, bend, pull, or damage the power cord. Protect it from sharp edges and heat sources. Never let the power cord come into contact with hot surfaces. Do not let the cord hang over the edge of the working surface or worktop.
- Do not use extension cords, unless advised by a qualified electrician. Using the wrong type of extension cord could cause damage to the appliance or injuries to the user.
- Do not operate the appliance if its cord, plug, or body show visible damage, do not operate properly, or have been dropped.
- The appliance should not be used in potentially dangerous locations, such as flammable, explosive, chemical-laden, or wet atmospheres.
- Place the appliance on an even, heat-resistant surface. Be careful when placing the basket out of the air fryer. Place the handle inwards to prevent spillage of what's inside. Do not place the appliance near heat sources, places with high humidity levels, or combustible materials.
- Do not insert or allow fingers or foreign objects to enter any ventilation or exhaust openings, as it could cause electrical shock or fire.
- Do not fill the basket with oil to avoid causing a fire hazard.
- Do not touch the interior of the appliance while in operation.
- Always place the ingredients to be cooked inside the basket to prevent them from touching the heating elements.
- Make sure your hands are completely dry before handling the plug or switching on the appliance.
- Unplug the appliance from the outlet when not in use or when it is being cleaned. Allow it to cool down completely before attaching or removing parts and before cleaning the appliance.
- Do not leave the appliance unsupervised while plugged to the mains.
-
Cleaning and maintenance must be carried out according to this instruction manual to make sure the appliance operates properly.
-
Do not place the appliance against the wall. Leave a safety distance of 10 cm on the back of the appliance and 10 cm on each side. Do not place any object on top of the appliance when in use.
- Hot steam is released through the air outlet openings during operation. Keep your hands and face at a safety distance from the steam and from the air outlet openings. Hot air may come out when removing the basket from inside the appliance.
- Immediately unplug the appliance if you notice black smoke coming out of it. Wait until the smoke disappears to remove the basket from the appliance.
- We recommend the use of gloves when touching the basket and rack.
- Do not attempt to repair the appliance yourself.
- Supervise children to ensure they do not play with the appliance.
INSTRUCTIONS DE SÉCURITÉ
3. INSTALACIÓN
- Basket
- Smoker lid
- Grill rack
- Touch control panel
- Air outlet
- Dual heating element
Control panel. Fig. 2
- Temperature increase touch icon
- Temperature increase/decrease indicator light
- Temperature decrease touch icon
- Preheating programme touch icon
- Smoking programme touch icon
- Power and Start/Stop touch icon
- Interior light touch icon
- Dual heating element touch icon
- Timer touch icon
- Temperature decrease touch icon
- Temperature increase/decrease indicator light
- Temperature increase touch icon
- Variable temperature indicator light
- Variable time indicator light
- Display
- Preset menus
a) Steak
b) Frozen chips
c) Pizza
d) Chicken wings/drumsticks
e) Fish
f) Vegetables
g) Dessert
h) Barbecue
i) Fermentation
j) DIY (manual function)
Note: The graphics in this manual are schematic representations and may not exactly match the device.
2. BEFORE USE
- This appliance includes a safety package to protect it during transport. Unpack the appliance and keep the original packaging and materials in a safe place. It will help prevent any damage if the appliance needs to be transported in the future. If you wish to dispose of the original packaging, make sure all items are recycled properly. Do not remove the product's serial number in order to keep proper traceability if technical assistance is required.
- Check that all parts and components are included and in good condition. If any of them are missing or damaged, please contact Cecotec's Official Technical Support Service immediately.
Box content:
- Air fryer
- Instruction manual
- Smoker lid
- 15 g bag of wood chips
Purchase wood chips using the following QR code:

3. INSTALLATION
- Remove all packaging materials from the appliance.
- Clean the interior and the exterior of the appliance with a damp cloth. Do not wet the heating elements.
- Clean the basket and rack thoroughly with hot water, washing-up liquid, and a non-abrasive sponge.
- Place the rack properly in the basket and place the basket back in the appliance for use.
- Do not fill the appliance with oil or any other liquid.
- Place the air fryer on a flat, stable, and heat-resistant surface, away from any possible splashing water or heat source. Leave at least 10 cm clearance between the device and any wall or object to ensure proper air evacuation.
- Do not place any objects on top of the product to avoid interrupting the air flow.
- Connect the power cable to an earthed outlet, the power touch icon will illuminate.
- Carefully remove the air fryer basket and add the ingredients.
ENGLISH
- Use the control panel as detailed in the following section.
- When using for the first time, you may notice a slight plastic odour, which is completely normal. If this occurs, preheat the appliance for several minutes to eliminate this odour entirely.
4. OPERATION
Power touch icon
Once the basket and rack are properly positioned in the air fryer, the power icon will illuminate. When pressing the power icon, the remaining indicators and touch buttons will light up, allowing you to adjust the cooking process as desired. A specific programme must be selected to begin cooking. If you press the power icon again after selecting a cooking mode, the cooking process will begin. When the process starts, the fan and heating element will activate. Press this touch icon again to pause cooking. Press and hold this touch icon for 3 seconds to switch off the air fryer.
Preset menus touch icons
These icons allow you to choose from the 10 preset menus. Once the desired option has been selected, the cooking time and temperature values will be set by default (see "Table of preset menus" in this section). To adjust your own cooking programme, press any preset, then manually adjust the temperature and/or time using the increase and decrease icons. Each mode is designed for a specific food type, allowing value adjustments within a logical range.
NOTE:
- To customise your own cooking programme, you may also select the DIY mode (manual function), which allows full adjustment of the appliance's time and temperature range.
- The Barbecue mode only functions when paired with another mode. Its operation is detailed later in this manual. Pressing the barbecue mode without first selecting a cooking mode will trigger a sound but perform no function.
Time control touch icons
Press the clock symbol icon on the centre-right, then use the touch icons to increase and/or decrease time. This allows cooking time adjustment within permitted ranges (see 'Table of preset menus' in this section).
Temperature control touch icons
Press the thermometer symbol icon on the centre-left, then use the touch icons to increase and/or decrease temperature. This allows cooking temperature adjustment within permitted ranges (see 'Table of preset menus' in this section).
Light touch icon
Press this icon during cooking to activate the internal basket light and monitor your food's cooking status. When pressed during cooking, the light remains permanently on until the icon is pressed again. If not in a cooking cycle, the light automatically turns off after 30 seconds.
Dual heating element operation
The appliance features dual heating elements: an upper element generating more heat and a lower element for increasing basket base temperature.
Using the dual heating function is recommended as it cooks food using two heat sources, yielding optimal results. The dual heating function is particularly recommended for programmes requiring preheating, allowing the basket grill to reach higher temperatures for food searing.
The grill rack features a flatter side for foods like pizzas and a ridged side for searing meats, fish, or vegetables.
Dual heating element touch icon
When selecting a cooking programme, the dual heating option is activated by default, with its touch icon remaining static. The upper and lower heating elements synchronise, operating alternately to maintain the selected cooking temperature.
To deactivate the dual heating function and maintain only the upper heat source, press the dual heating touch icon. The icon will flash, indicating that dual heating is deactivated and only the upper element is heating. For best results, keeping the dual heating function activated is recommended.
Barbecue function
The appliance features a special mode that cooks, smokes, and sears food like a barbecue. This mode runs for 14 minutes (Preheating + smoking). Follow these steps for proper operation:
- Bring food to room temperature.
- Open the basket and place wood chips in the centre. One layer of chips (2–4 g) is sufficient, covering the surface uniformly. Ensure no loose wood chips are in the basket. They must be contained within the smoker frame in the centre.
- Place the smoker cover over the wood chips. This component is essential for safe and satisfactory smoking results. It also prevents direct contact between food and wood chips.
- Position the grill above the smoker cover and close the basket.
- First select your desired cooking. If needed, adjust cooking time or temperature now.
- Then select the barbecue mode. Press the Start/Stop icon, and the barbecue mode ('bb') will start. When complete, your initially selected cooking mode will begin automatically. You'll notice the preheating and Smoking icons flashing.
ENGLISH
NOTE: The Barbecue function is not available with "Chip", "Dessert" and "Fermentation" modes. Selecting these modes will hide the barbecue function icon. Pressing the barbecue mode without first selecting a cooking mode will trigger a sound but perform no function.
- Halfway through barbecue mode (at 5 minutes), the appliance will prompt you to insert food via an audible signal and display message ("Add"). After adding food and closing the basket, barbecue mode continues with 6 minutes of smoking, during which the fan intentionally stops, and smoke exits through the rear of the appliance. This is entirely normal.
- After smoking completes, barbecue mode ends, and your pre-selected cooking mode begins. Do not open the basket or turn food yet.
- Depending on the chosen cooking mode, halfway through cooking, the appliance will emit an audible signal and display "trn" (Turn). This indicates it's time to turn the food.
- Once cooking time ends, remove food from the basket. Leave the basket slightly open to cool and prevent moisture condensation inside.
Practical example:
To cook meat using barbecue mode for special flavour and appealing sear marks, simply select these touch icons in order: "steak + barbecue + start". (Fig. 3)
The appliance will begin by preheating the grill rack and wood chips (inserted at the start). When the display shows "Add", add the meat and the appliance automatically begins smoking. This entire process takes 14 minutes. Then the actual meat cooking begins (Cooking mode = steak). In this case, the display will alert you halfway through to turn the meat. Close again and wait for cooking to complete. (Fig. 4)
NOTE: This function automatically reduces the selected mode's cooking time to prevent overcooking. You may still adjust cooking time to preference after barbecue mode.
Preheating operation
The appliance features an 8-minute preheating function, achieving suitable internal basket temperature for cooking. This function comes pre-activated for meat, pizza, and fish modes, though it can be manually activated for other modes (except fermentation) or deactivated if unwanted. Pressing the preheating touch icon will activate (flashing icon) or deactivate (static icon) the preheating function. It can also be activated independently, without linking to a subsequent cooking mode, for preheating only.
NOTE: When preheating completes, the appliance will emit several audible signals and display "Add" to indicate food should be added.
Smoking operation
This appliance has a 9-minute Smoking function that provides a unique flavour and special aroma to the cooked food. Follow these steps to use this function:
- Bring food to room temperature.
- Open the basket and place wood chips in the centre. One layer of chips (2-4 g) is sufficient, covering the surface uniformly. Ensure no loose wood chips are in the basket. They must be contained within the smoker frame in the centre.
- Place the smoker cover over the wood chips. This component is essential for safe and satisfactory smoking results. It also prevents direct contact between food and wood chips.
- Position the grill rack above the smoker cover with the raised pattern facing upward.
- Place food on the grill rack and close the basket.
- Select a preset programme, then press the smoking programme touch icon. The smoking function can also be activated without selecting a prior cooking programme.
- Remember to press the Start/Stop touch icon to begin smoking.
When smoking completes, if no subsequent cooking programme was selected, the appliance will emit several signals and display "OFF". If a cooking programme was selected to follow smoking, it will start automatically.
NOTE:
- When selecting a smoking programme followed by fish, meat, or wings programme, cooking time reduces by 20% for better results.
- Using the appliance under an extractor hood or in a well-ventilated area is recommended to minimise smoke accumulation.
- Let the air fryer cool after smoking.
- Be careful when removing smoking programme components as they may be very hot.
Smoking programme touch icon
The smoking function is active when the smoking programme touch icon flashes. The Smoking function is deactivated when the touch icon remains static.
Timer operation
The appliance features a timer function for programming cooking start time, ranging from 30 minutes to 24 hours. After selecting the cooking programme, activate the timer by pressing the timer touch icon and adjust time using the time control touch icons. To deactivate the timer, simply press the timer touch icon again.
Remember to press the Start/Stop touch icon to begin countdown. When the selected time elapses, the programmed cooking process will begin.
ENGLISH
Timer function touch icon
The timer is active when the timer icon flashes. The timer is deactivated when the corresponding icon remains steady on.
Table of preset menus
| Symbol | Type | Preheating | Temperature (°C) | Time (min) | Temperature range (min.-max.) | Time range (min.-max.) | Notes |
 | Steak | 8 min | 200 | 6 | 170-200 | 1-30 | Food addition warning after preheating ("Add") - Turn warning ("trn") |
 | French fries | 195 | 20 | 120-200 | 1-60 | ||
 | Pizza | 8 min | 180 | 10 | 100-200 | 1-60 | Food addition warning after preheating ("Add") |
 | Chicken | 200 | 25 | 150-200 | 1-60 | ||
 | Fish | 8 min | 190 | 14 | 140-200 | 1-60 | Food addition warning after preheating ("Add") |
 | Vegetables | 175 | 16 | 160-200 | 1-60 | ||
 | Dessert | 160 | 20 | 100-190 | 1-60 | ||
 | Barbecue | 8 min | 200 | 14 min | - | - | Food addition warning after preheating ("Add") - Turn warning depending on the associated cooking mode ("trn") |
 | Fermentation | 40 | 8 h | 40-90 | 1-24 h | ||
 | DIY | 200 | 20 | 40-200 | 1-60 | Message to turn over (TRN) |
NOTE:
- The steak and DIY programmes are special programmes that beep to turn over the food in the middle of the cooking cycle. When the cooking cycle reaches its halfway point, the appliance will emit several audible signals and display “trn” to indicate that you should turn the food over.
- When you hear the beeping, the set cooking time will have elapsed. Remove the basket from the appliance and place it on a heat-resistant surface. Make sure the food is cooked. If the food isn't cooked enough, slide the basket back into the fryer and add a few more minutes.
- To remove food, e.g. chips, remove the basket from the air fryer and place it on a heat-resistant surface. Use non-metallic tongs to remove the ingredients. Be careful not to burn yourself. Do not place the basket upside down to remove the food.
- As ingredients differ in origin, size, shape, and brand, we cannot guarantee the best setting for the ingredients that you are using. If necessary, change the times and/or temperature values to adjust the cooking to the type of ingredient.
Tips for cooking
- Smaller ingredients require a shorter preparation time than larger ones.
- A larger quantity of ingredients only requires a slightly longer preparation time, and a smaller quantity of ingredients only requires a slightly shorter preparation time.
- Shaking smaller food midway through the cooking process optimises the end result and prevents uneven cooking.
- Add some oil to the fresh potatoes for a crispier result. Cook the food in the air fryer just after adding oil to it.
- Do not cook extremely fatty ingredients such as sausages in the air fryer.
ENGLISH
- Oven-ready food can also be cooked in the air fryer. The optimal amount for preparing potato chips is 500 grams.
- Pre-made dough requires a shorter preparation time. Pre-made dough requires a shorter preparation time than home-made dough.
- Place a baking pan or baking dish in the air-fryer's basket if you want to bake a cake or quiche or if you want to fry fragile or stuffed foods.
- You can also use the air fryer to reheat food.
- Never exceed the basket's MAX indicator, as this could affect both the final cooking results and the appliance's integrity.
- For excellent food results, it is recommended to cover the basket surface without stacking food items, as this ensures even cooking.
- To enhance the results of certain foods, ingredients can be shaken halfway through the cooking process. To shake or turn ingredients, remove the basket from the appliance using the handle and either shake it or turn the ingredients inside the basket using heat-resistant wooden or silicone tongs. Put the basket back in the air fryer.
WARNING:
- Be very careful when shaking the basket, as it contains hot food.
- Do not use metal utensils, as they could damage the inner coating of the basket.
- Do not touch the basket during or immediately after operation to avoid burns. Hold the basket only by the handle.
Access the recipe book through the following QR code

5. TROUBLESHOOTING
| Problem | Possible causes | Possible solution |
| E1 | The upper temperature sensor is not working properly. | Please contact Cecotec's Official Technical Support Service. |
| E2 | The lower temperature sensor is not working properly. | Please contact Cecotec's Official Technical Support Service |
| The air fryer does not work. | The appliance is not plugged in. | Plug the appliance to an earthed wall socket. |
| You have not pressed the power touch icon. | Press the power icon to turn on the air fryer. | |
| The dual heating element is not noticeable. | The food is not cooking. | The use of special programmes with preheating is recommended to improve the final results. |
| The ingredients fried with the air fryer are not done. | The food is too big. | Put smaller batches of food in the basket. Food cooks faster if small. |
| The temperature used is too low. | Increase the cooking temperature (see “Operation” section). | |
| The preparation time is too short. | Increase the cooking time (see “Operation” section). | |
| The ingredients have been cooked unevenly. | Some types of food need to be shaken during the cooking process. | Ingredients that lie on top of or across each other (e.g. chips) need to be shaken halfway through the preparation time. Refer to the “Operation” section. |
| Fried foods are not crispy when they are removed from the air fryer. | You used a type of food that is meant to be prepared in a traditional deep fryer. | Cook oven food or brush food with a little oil for crispier results. |
| The basket does not slide into the appliance properly. | There are too many ingredients in the basket. | Do not fill the basket beyond the max. indication. |
| The grill rack is not properly placed inside the basket. | Push the grill rack down into the basket. | |
| White smoke comes out of the appliance. | You are preparing greasy ingredients. | When cooking fatty foods in the air fryer, a large amount of oil seeps into the basket. Oil produces white smoke. This does not affect the appliance or the result. |
| The basket still contains grease residue from previous use. | The white smoke is due to the fat heating up in the basket. Make sure you clean the appliance properly after each use. | |
| Chips are unevenly fried. | You did not use the right potato type. | Use fresh potatoes and make sure they stay put during frying. Use potatoes of the types suggested. |
| You did not rinse the potato sticks properly before you fried them. | Rinse the potatoes well in water for 3 minutes to remove the starch and dry thoroughly afterwards. | |
| Chips are not crispy when they come out of the air fryer. | The right kind of potato is not being used. | Make sure you dry the potato sticks properly before adding the oil. |
| Cut potatoes into smaller pieces. | ||
| Add a little bit more of oil for a crispier result. |
6. CLEANING AND MAINTENANCE
- Clean the appliance after every use.
- The basket and rack have a non-stick coating. Do not use metal utensils or abrasive products to clean the basket and/or rack, as this may damage their non-stick surface.
- After each use, do not leave hot food inside the appliance as condensation may affect the metal parts of the appliance.
- Unplug the appliance and allow it to cool down before cleaning. NOTE: remove the basket to let the appliance cool down more quickly.
- Clean the interior and the exterior of the appliance with a damp cloth.
- Clean the basket and grill rack thoroughly with hot water, mild detergent and a non-abrasive sponge. If the smoker lid is used, repeat the same cleaning process.
- The use of a degreasing liquid is recommended to remove any remains.
- Clean the inside of the appliance with hot water and a non-abrasive sponge.
- Clean the heating element with a soft brush to remove any food residue. Make sure all its parts are clean and dry before using the appliance again.
Storage
- Unplug the appliance and let it cool down.
- Make sure all its parts are clean and dry before storing the product again.
7. RECYCLING OF ELECTRICAL AND ELECTRONIC EQUIPMENT
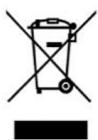
This symbol indicates that, according to the applicable regulations, the product and/or battery must be disposed of separately from household waste. When this product reaches the end of its service life, you must remove the batteries/accumulators and take it to a collection point designated by local authorities.
Consumers must contact their local authorities or retailer for information concerning the correct disposal of old electrical and electronic appliances and/
or their batteries. Compliance with the above guidelines will help protecting the environment.
8. COPYRIGHT
The intellectual property rights over the texts in this manual belong to CECOTEC INNOVACIONES, S.L. All rights reserved. The content of this publication may not, either in part or in its entirety, be reproduced, stored in a retrieval system, transmitted or distributed by any means (electronic, mechanical, photocopying, recording or similar) without prior authorisation from CECOTEC INNOVACIONES, S.L.
9. DECLARATION OF CONFORMITY
CE Cecotec Innovaciones hereby declares that this product complies with the essential requirements and other relevant provisions of the regulations applicable in the European Union. This appliance has been designed, manufactured and tested in compliance with required safety and quality standards. The full text of the EU Declaration of Conformity can be found on the following website: https://cecotec.es/es/information/declaration-of-conformity
FRANÇAIS
1. PIÈCES ET COMPOSANTS
Appareil. Img. 1
3. INSTALLATION
- RÉSOLUTION DE PROBLÈMES
3. INSTALLATION
- PROBLEMBEHEBUNG
3. INSTALLAZIONE
3. INSTALAÇÃO
3. INSTALLATIE
- PROBLEMEN OPLOSSEN
- ROZWIAZYWANIE PROBLEMÓW
3. ZAŘÍZENÍ
5. ŘEŠENÍ PROBLÉMŮ
3. TESIS
- PROBLEM ÇÖZME
- PROBLÉMAMEGOLDÁS
3. INSTAL·LACIÓ
3. ΕΥΚΟΛΙΑ
- ΕΠΙΛΥΣΗ ΠΡΟΒΛΗΜΑΤΩΝ
- ت Connectivity Applicability (Agricultural, Forestry, Animal Husbandry)

RECIPE BOOK
ONE SCAN, THOUSANDS OF RECIPES
المشكلات

.5
Fig./Img./Abb./Afb./Rys.1

Fig./Img./Abb./Afb./Rys. 2

Fig./Img./Abb./Afb./Rys. 3

Fig./Img./Abb./Afb./Rys. 4
www.cecotec.es
- SOMMAIRE
- INSTRUCTIONS DE SÉCURITÉ
- INSTALACIÓN
- Control panel. Fig. 2
- BEFORE USE
- Box content:
- INSTALLATION
- ENGLISH
- OPERATION
- Power touch icon
- Preset menus touch icons
- NOTE:
- Time control touch icons
- Temperature control touch icons
- Light touch icon
- Dual heating element operation
- Dual heating element touch icon
- Barbecue function
- Practical example:
- Preheating operation
- Smoking operation
- Smoking programme touch icon
- Timer operation
- Timer function touch icon
- Tips for cooking
- WARNING:
- TROUBLESHOOTING
- CLEANING AND MAINTENANCE
- Storage
- RECYCLING OF ELECTRICAL AND ELECTRONIC EQUIPMENT
- COPYRIGHT
- DECLARATION OF CONFORMITY
- FRANÇAIS
- PIÈCES ET COMPOSANTS
- Appareil. Img. 1
- INSTALLAZIONE
- INSTALAÇÃO
- INSTALLATIE
- ZAŘÍZENÍ
- ŘEŠENÍ PROBLÉMŮ
- TESIS
- INSTAL·LACIÓ
- ΕΥΚΟΛΙΑ
Brand : CECOTEC
Model : Cecofrygrill Smokinprime 4000
Category : Deep fryer