Cecofry Foodcourt 18000 4pizza - Deep fryer CECOTEC - Free user manual and instructions
Find the device manual for free Cecofry Foodcourt 18000 4pizza CECOTEC in PDF.


User questions about Cecofry Foodcourt 18000 4pizza CECOTEC
0 question about this device. Answer the ones you know or ask your own.
Ask a new question about this device
Download the instructions for your Deep fryer in PDF format for free! Find your manual Cecofry Foodcourt 18000 4pizza - CECOTEC and take your electronic device back in hand. On this page are published all the documents necessary for the use of your device. Cecofry Foodcourt 18000 4pizza by CECOTEC.
USER MANUAL Cecofry Foodcourt 18000 4pizza CECOTEC
Safety instructions 10
- Parts and components 68
- Before use 69
- Installation 69
- Operation 70
- Troubleshooting 72
- Cleaning and maintenance 73
- Disposal of old electrical and electronic appliances 73
- Copyright 74
- Declaration of Conformity 74
74
SOMMAIRE
EU01_109979 - Cecofry FoodCourt 18000 4Pizza
EN · The coding in this manual is generic and applies to all code variants of the appliance.
Read the following instructions carefully before using the appliance. Keep this instruction manual for future reference or new users.
- All safety instructions must be closely followed when using the appliance.
- When using electrical and electronic appliances, basic precautions must always be followed to reduce the risk of fire, electrical shock, and injury.
- This appliance can be used by children aged 8 years and above and people with reduced physical, sensory, or mental capabilities or lack of experience and knowledge if they have been given supervision or instruction concerning the use of the appliance in a safe way and understand the hazards involved. Children must not play with the appliance. Cleaning and user maintenance must not be carried out by children without supervision.
- Keep this appliance and its power cable out of reach of children under the age of 8.
This symbol means “caution, hot surface.” The temperature of the accessible surfaces may be high when the appliance is in operation.
- This appliance is not intended to be operated by means of an external timer or separate remote-control system.
- Do not immerse the cord, plug, or any other non-removable part of the appliance in water or any other liquid. Do not expose electrical connections to water.
- This appliance is intended for domestic use only and is not suitable for use in commercial establishments such as bars, restaurants, farms, hotels, motels, and offices.

- Position the appliance in such a way to avoid spillage of hot liquids. Be especially careful with the handle.
- Make sure the voltage of your mains supply matches the voltage requirements specified in the rating label of the appliance.
- We recommend that the room where you intend to use the appliance is equipped with a working kitchen hood or is well ventilated.
- Incorrect or improper use can damage the appliance and be dangerous for the user. Use the appliance only for the purposes described in this manual.
- Unplug the appliance from the mains supply before moving it, carrying out any cleaning or maintenance task, or when not in use.
- Do not use outdoors.
- Check the power cord regularly for visible damage. If the cord is damaged, it must be repaired by Cecotec's Official Technical Support Service to avoid any hazard.
- Do not twist, bend, pull, or damage the power cord. Protect it from sharp edges and heat sources. Never let the power cord come into contact with hot surfaces. Do not let the cord hang over the edge of the working surface or worktop.
- Do not use extension cords, unless advised by a qualified electrician. Using the wrong type of extension cord could cause damage to the appliance or injuries to the user.
- Do not operate the appliance if its cord, plug, or body show visible damage, do not operate properly, or have been dropped.
- The appliance should not be used in potentially dangerous locations, such as flammable, explosive, chemical-laden, or wet atmospheres.
- Place the appliance on an even, heat-resistant surface. Be careful when placing the basket out of the air fryer. Place
ENGLISH
the handle inwards to prevent spillage of what's inside. Do not place the appliance near heat sources, places with high humidity levels, or combustible materials.
- Do not insert or allow fingers or foreign objects to enter any ventilation or exhaust openings, as it could cause electrical shock or fire.
- Do not fill the basket with oil to avoid causing a fire hazard.
- Do not touch the interior of the appliance while in operation.
- Always place the ingredients to be cooked inside the basket to prevent them from touching the heating elements.
- Make sure your hands are completely dry before handling the plug or switching on the appliance.
- Unplug the appliance from the outlet when not in use or when it is being cleaned. Allow it to cool down completely before attaching or removing parts and before cleaning the appliance.
- Do not leave the appliance unsupervised while plugged to the mains.
- Cleaning and maintenance must be carried out according to this instruction manual to make sure the appliance operates properly.
- Do not place the appliance against the wall. Leave a safety distance of 10 cm on the back of the appliance and 10 cm on each side. Do not place any object on top of the appliance when in use.
- Hot steam is released through the air outlet openings during operation. Keep your hands and face at a safety distance from the steam and from the air outlet openings. Hot air may come out when removing the basket from inside the appliance.
-
Immediately unplug the appliance if you notice black smoke coming out of it. Wait until the smoke disappears to remove the basket from the appliance.
-
We recommend the use of gloves when touching the basket and rack.
- Do not attempt to repair the appliance yourself.
- Supervise children to ensure they do not play with the appliance.
INSTRUCTIONS DE SÉCURITÉ
- Divider
- Racks
- Upper basket
- Pizza stone
- Pizza tray
- Control panel
- Dual heating element
- Air outlet
Control panel. Fig. 2
- Menu function touch icon
- Left chamber selection touch icon
- Right chamber selection touch icon
- Temperature/Time decrease touch icon
- Temperature/Time selection touch icon
- Temperature/Time increase touch icon
- Lower basket selection touch icon
- Start/Cancel function touch icon
- Sync function touch icon
- Interior light touch icon
- Left chamber indicator light
- Right chamber indicator light
- Lower basket indicator light
Preset programmes
a. Steak
b. Chicken wings
C. Fish
d. Vegetables
e. Frozen chips
f. Dessert
g. Dehydration
h. DIY
Note:
The graphics in this manual are schematic representations and may not exactly match the product.
2. BEFORE USE
- This appliance comes in a packaging designed to protect it during transport. Remove the appliance from its box. You can keep the original box and other packaging materials in a safe place to prevent damage to the appliance if you need to transport it in the future. If you wish to dispose of the original packaging, make sure all items are recycled properly.
- Check that all parts and components are included and in good condition. If any of them are missing or damaged, please contact Cecotec's Official Technical Support Service immediately.
Box content:
- Air fryer
- Pizza stone
- Racks
- Basket divider
- Instruction manual
- Do not remove the product's serial number in order to keep proper traceability if technical assistance is required.
3. INSTALLATION
Note: When using the air fryer for the first time, it may emit some smoke or odour. This is normal and will soon disappear. It is essential to ensure sufficient ventilation around the air fryer.
Using the air fryer
- Place the air fryer on a flat, stable, heat-resistant surface, away from any potential water splashes or heat sources.
- Place the baskets in the air fryer correctly.
- Do not place any objects on top of the product to avoid disrupting airflow.
- Connect the power cord to an earthed socket; the Start/Cancel touch icon will illuminate.
- Remove the baskets from the air fryer carefully.
- Place ingredients in the basket.
- Use the control panel as detailed below:
NOTE:
- Never exceed the MAX indicator on the basket, as this could negatively affect cooking results and the appliance's lifespan.
- For best results, it is recommended to cover the basket surface without stacking food items, as this ensures even cooking.
ENGLISH
4. OPERATION
AirFryer Mode (Upper basket)
- In standby mode, select the Start/Cancel touch icon to turn on the display.
- Select the left or right chamber (if the divider is inserted) or the entire basket if the divider is not in use.
- Press the Menu touch icon to navigate through the different preset programmes. Stop at the icon you wish to select. If you want to modify the cooking time or temperature, do so now as detailed below.
- Then press the Start/Cancel touch icon to start the programme. (See preset programmes table).
NOTE: If the divider is not inserted in the upper basket, it will not be possible to select left or right chamber or the Sync function, as the air fryer will interpret it as a single basket.
Pizza Mode (Lower pizza basket)
This basket is designed for traditional-style pizza cooking. Therefore, Pizza mode begins with a non-adjustable 10-minute preheating phase, the time needed for the stone to reach the ideal temperature for traditional-style pizza cooking.
- Select the lower basket ("Pizza").
- Ensure the stone is in place and press the Start/Cancel touch icon. The corresponding display will show "Pre-heat".
- When preheating is complete, the display will show "Add food" indicating you can now insert the pizza. Do so and close the basket.
- When the preset time has elapsed, the pizza will be cooked in authentic traditional style.
Note: You can adjust the cooking time and temperature to suit your pizza type, but you cannot modify the preheating temperature or time.
WARNING: Do not cook in the lower basket without the stone or without a support that prevents grease, liquids and food pieces from falling onto the lower heating element. This could damage the machine.
Light touch icon
With the power on, press this button to turn on the light for 30 seconds.
Temperature/Time setting touch icon
Press this button to select temperature or time for adjustment.
- / + touch icon
In temperature or time setting mode, press this button to increase or decrease the time or temperature values as selected.
Start/Pause/Cancel touch icon
- After setting functional parameters, press the Start/Cancel touch icon to begin cooking.
- If you press the Start/Cancel touch icon during cooking without selecting any chamber, all operating chambers will enter pause state.
- If you press the Start/Cancel touch icon during cooking having selected a specific chamber, only that chamber will enter pause state. The remaining chambers will continue operating.
- If during cooking you press and hold the Start/Cancel touch icon, all cooking processes will stop, and the machine will return to standby state.
- If during cooking you select a chamber and press and hold the Start/Cancel touch icon, only that chamber will reset and enter standby state. The others will continue operating.
Finish Synchronisation touch icon (SYNC)
After setting functional parameters, press the Sync touch icon for both upper baskets to finish simultaneously. The Sync touch icon will flash and display.
SYNC function selection: If you select SYNC but only choose one chamber, the appliance will not operate when you press Start. The display will flash, reminding you to either select the function for the other basket or press SYNC again to cancel it.
- Different times: If the two chambers have different times, the appliance will start with the chamber that has the longer time. The display corresponding to the other basket will show "Hold". When times match, both baskets will work together and finish simultaneously.
- Time setting: If you change the time in one basket to be shorter or longer than the other, the SYNC function will stop, and the baskets will work independently.
- Temperature and time setting: During operation, the temperature and time +/- keys will be off. These touch icons will only illuminate when a basket side is selected to adjust that basket's temperature and time.
| Programme | Temperature (°C) | Time (min) | Temperature range (°C) | Time range | Preheating | Notes |
| STEAK | 200 | 8 | 170 - 200 | 1 - 30 | Yes, 5 min | Add food notice |
| CHICKEN WINGS | 200 | 25 | 100 - 200 | 1 - 60 | - | - |
| FISH | 190 | 14 | 150 - 200 | 1 - 60 | Yes, 5 min | Add food notice |
| VEGETABLES | 175 | 20 | 140 - 190 | 1 - 60 | - | - |
| FROZEN CHIPS | 200 | 25 | 160 - 200 | 1 - 60 | - | - |
| DESSERTS | 160 | 20 | 100 - 190 | 1 - 60 | - | - |
| DEHYDRATION | 55 | 6h | 40 - 100 | 1h - 24h | - | - |
| DIY | 200 | 20 | 40 - 200 | 1 - 60 | - | - |
| PIZZA (stone) | 230 | 12 | 120 - 230 | 1 - 60 | Yes, 10 min | Add food notice |
Cooking tips
- Smaller food items require shorter preparation time than larger ones.
- A larger quantity of ingredients only requires a slightly longer preparation time, and conversely, a smaller quantity only requires a slightly shorter preparation time.
- Turning smaller food items halfway through the cooking process optimises the final result and prevents uneven cooking.
- Add a little extra oil to fresh potatoes for a crispier result. Cook the food items in the air fryer immediately after adding oil.
- Never cook directly on the lower basket rack without proper support, as this may damage the lower heating element.
- Do not prepare extremely fatty ingredients such as sausages in the air fryer.
- Foods that can be prepared in a conventional oven can also be prepared in the air fryer. The optimal quantity for preparing chips is 500 grams.
- Use pre-made pastry to prepare quick and easy snacks. Pre-made pastry requires less preparation time than homemade dough.
- Place a baking tin or oven dish in the air fryer basket when baking a cake or quiche, or when cooking fragile or filled ingredients.
- You can also use the air fryer to reheat ingredients.
- It is normal to hear the fan running for some time after cooking has finished, as it is extracting internal heat from the machine.
- Leave the baskets partially open after cooking to prevent condensation inside the air fryer.
5. TROUBLESHOOTING
| Error code | Main cause | Solution |
| E1 | Open circuit in LEFT basket temperature sensor | Contact Cecotec's Official Technical Support Service. |
| E3 | Open circuit in RIGHT basket temperature sensor | |
| E5 | LOWER basket open circuit | |
| E2 | Short circuit in LEFT fryer basket | Contact Cecotec's Official Technical Support Service. |
| E4 | Short circuit in RIGHT fryer basket | |
| E6 | Short circuit in LOWER basket |
6. CLEANING AND MAINTENANCE
Clean the appliance after every use. The frying basket and the appliance interior have a non-stick coating. Do not use metal kitchen utensils or abrasive cleaning materials to clean them, as this could damage the non-stick coating.
- Remove the plug from the mains socket and allow the appliance to cool down.
- Remove the basket to allow the appliance to cool down more quickly.
- Clean the appliance's housing with a damp cloth.
- Clean the basket with hot water, a small amount of washing-up liquid and a non-abrasive sponge.
- You can use a degreasing liquid to remove any remaining dirt.
- Unplug the appliance and allow it to cool down.
- Clean the appliance interior with hot water and a non-abrasive sponge.
- Clean the heating element once cooled with a cleaning brush to remove any food residue.
- Ensure all parts are clean and dry.
- Do not wash the stone with soap and water as the stone is porous and chemicals may penetrate it.
Storage
- Unplug the appliance and let it cool down.
- Ensure all parts are clean and dry before storing the product.
7. DISPOSAL OF OLD ELECTRICAL AND ELECTRONIC APPLIANCES
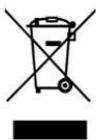
This symbol indicates that, according to the applicable regulations, the product and/or batteries must be disposed of separately from household waste. When this product reaches the end of its service life, you must remove the batteries/accumulators and take it to a collection point designated by local authorities. For detailed information on how to properly dispose of electrical and electronic equipment and/or the corresponding batteries, consumers should contact their
local authorities.
Compliance with the above guidelines will help to protect the environment.
ENGLISH
8. COPYRIGHT
The intellectual property rights over the texts in this manual belong to CECOTEC INNOVACIONES, S.L. All rights reserved. The content of this publication may not, either in part or in its entirety, be reproduced, stored in a retrieval system, transmitted or distributed by any means (electronic, mechanical, photocopying, recording or similar) without prior authorisation from CECOTEC INNOVACIONES, S.L.
9. DECLARATION OF CONFORMITY
CE Cecotec Innovaciones hereby declares that this air fryer, model EU01_109979 Cecofry FoodCourt 18000 4Pizza, complies with the Directive 2014/53/EU on radio equipment. The full text of the EU Declaration of Conformity can be found on the following
website:
www.cecotec.es
1.PIÈCES ET COMPOSANTS
Appareil.lmg. 1
Pizza Mode (onderste pizzamand)
5. PROBLEEMOPLOSSING


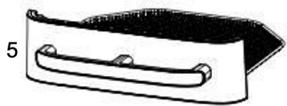

Fig./Img./Abb./Afb./Rys.1

Fig./Img./Abb./Afb./Rys. 2
www.cecotec.es
- SOMMAIRE
- ENGLISH
- INSTRUCTIONS DE SÉCURITÉ
- Control panel. Fig. 2
- Preset programmes
- Note:
- BEFORE USE
- Box content:
- INSTALLATION
- Using the air fryer
- OPERATION
- AirFryer Mode (Upper basket)
- Pizza Mode (Lower pizza basket)
- Light touch icon
- Temperature/Time setting touch icon
- - / + touch icon
- Start/Pause/Cancel touch icon
- Finish Synchronisation touch icon (SYNC)
- Cooking tips
- TROUBLESHOOTING
- CLEANING AND MAINTENANCE
- Storage
- DISPOSAL OF OLD ELECTRICAL AND ELECTRONIC APPLIANCES
- COPYRIGHT
- DECLARATION OF CONFORMITY
- 1.PIÈCES ET COMPOSANTS
- Appareil.lmg. 1
- Pizza Mode (onderste pizzamand)
- PROBLEEMOPLOSSING
Brand : CECOTEC
Model : Cecofry Foodcourt 18000 4pizza
Category : Deep fryer