MH-2556 - Brush cutter DOLMAR - Free user manual and instructions
Find the device manual for free MH-2556 DOLMAR in PDF.



User questions about MH-2556 DOLMAR
0 question about this device. Answer the ones you know or ask your own.
Ask a new question about this device
Download the instructions for your Brush cutter in PDF format for free! Find your manual MH-2556 - DOLMAR and take your electronic device back in hand. On this page are published all the documents necessary for the use of your device. MH-2556 by DOLMAR.
USER MANUAL MH-2556 DOLMAR
Read this instruction manual thoroughly before using the Pole Hedge Trimmer and follow the safety regulations carefully. Be sure to keep this instruction manual for future reference.
Important:
Thank you very much for choosing the DOLMAR Pole Hedge Trimmer. We are pleased to offer you a product that is the result of an extensive development program and many years of knowledge and experience. To safely obtain the best possible results from your DOLMAR Pole Hedge Trimmer, please read this manual thoroughly before using the machine, and follow all instructions given herein to assure proper operation of the DOLMAR Pole Hedge Trimmer.

natural_image
Icon of an open book inside a black circle (no text or symbols)| Table of Contents | Page |
| Symbols | 2 |
| Safety instructions | 3~6 |
| Specifications | 7 |
| Parts Breakdown | 8 |
| Connecting the trimmer unit to the pole | 9 |
| Attaching the handle | 9 |
| Using the shoulder strap | 9 |
| Fuel/refueling | 10 |
| Precautions before starting the engine | 11 |
| Starting the engine | 11 |
| Stopping the engine | 12 |
| Checking and adjusting the idling speed | 12 |
| Operating the Pole Hedge Trimmer | 13~14 |
| Maintenance | 14~16 |
| Storage | 17 |
| Maintenance schedule | 17 |
| Troubleshooting | 17 |
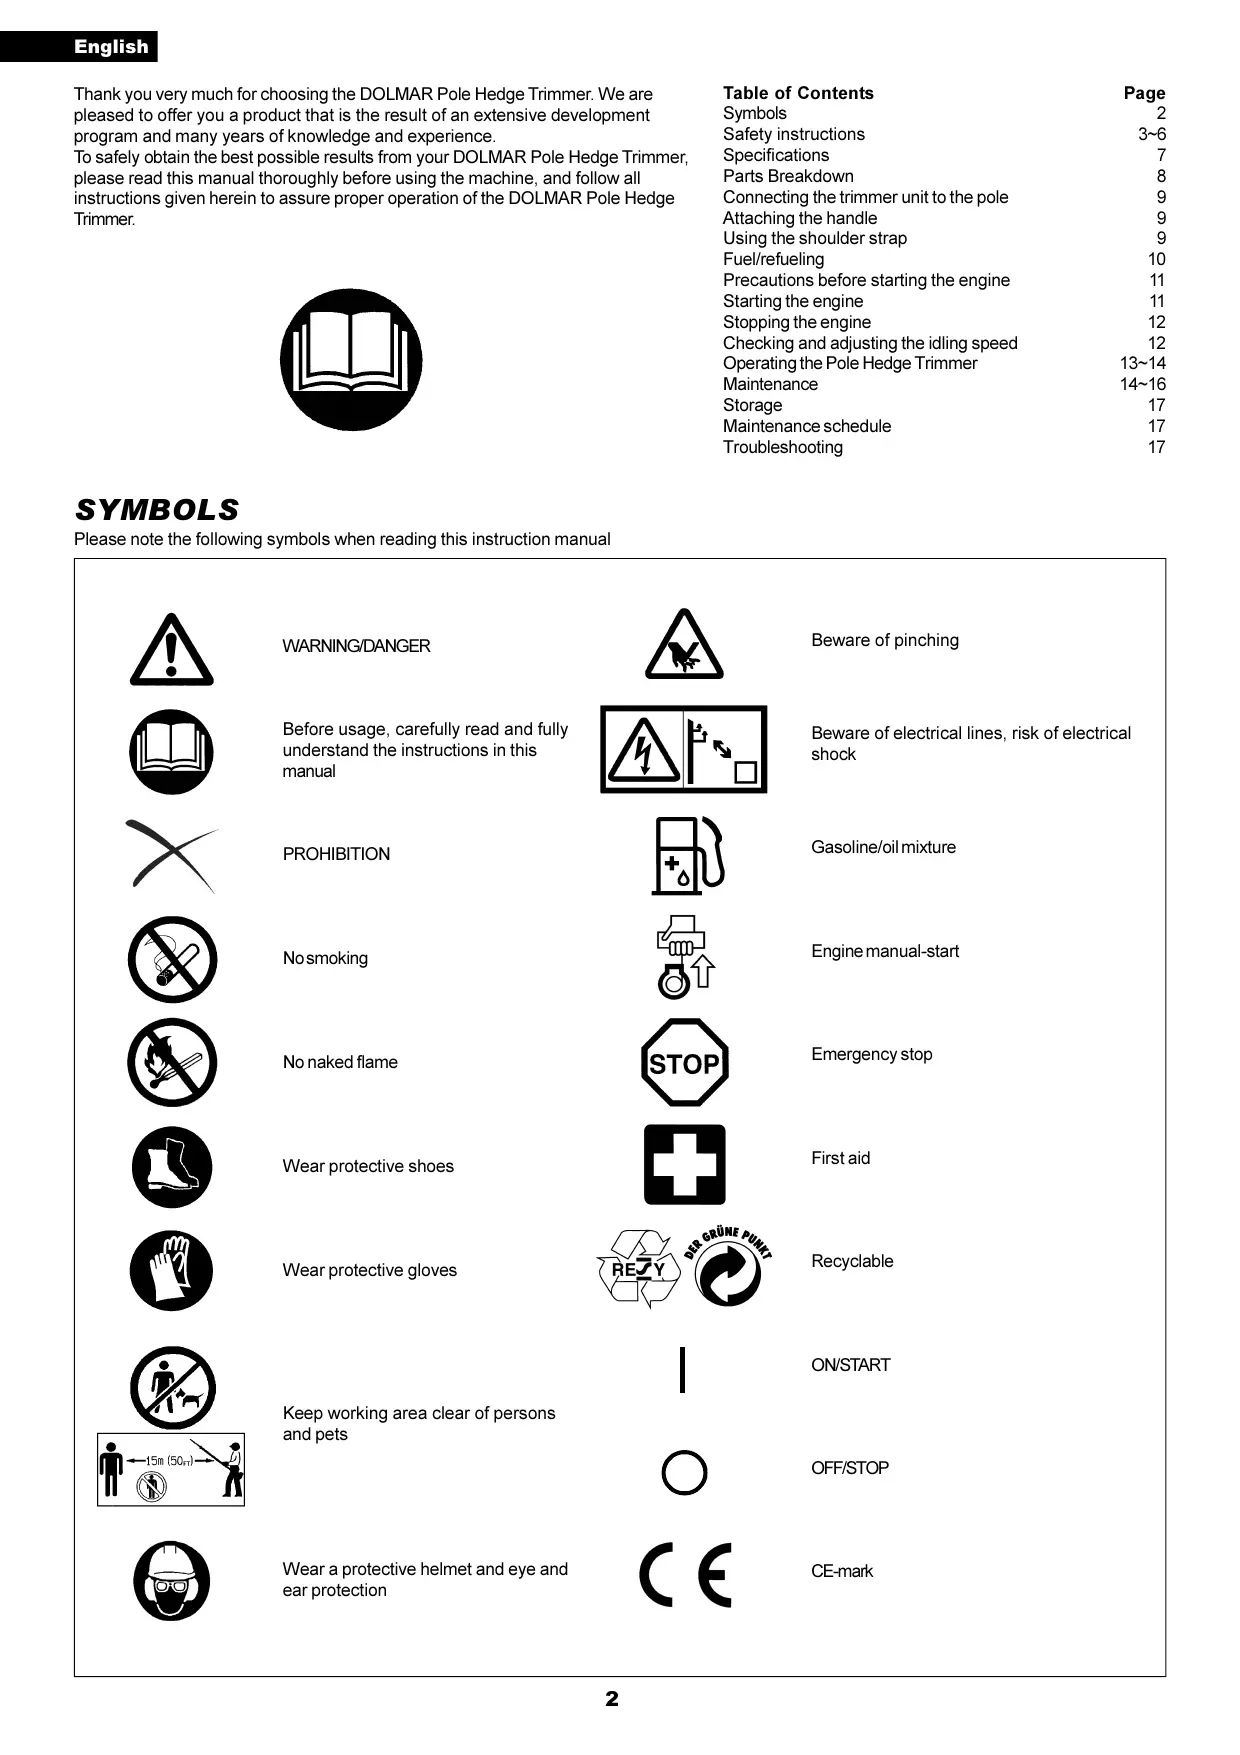
SYMBOLS
Please note the following symbols when reading this instruction manual

WARNING/DANGER

Before usage, carefully read and fully understand the instructions in this manual

PROHIBITION

No smoking




Beware of pinching
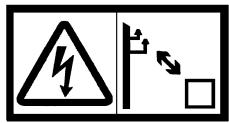
Beware of electrical lines, risk of electrical shock

Gasoline/oil mixture

Engine manual-start

Emergency stop

First aid

Recyclable

ON/START

OFF/STOP

CE-mark
SAFETY INSTRUCTIONS
General Instructions
- Before usage, carefully read this manual and thoroughly familiarize yourself with how to correctly handle the pole hedge trimmer. THIS EQUIPMENT CAN CAUSE SERIOUS INJURY IF USED IMPROPERLY!
- Always provide detailed instructions on how to correctly use the pole hedge trimmer when lending the equipment to another person. Make sure that the instruction manual is handed over together with the pole hedge trimmer.
- First-time users should ask their dealer for basic instructions on the correct handling of the pole hedge trimmer.
- Store this manual in a location where it is easily accessible for quick reference.
- Do not allow persons under the age of 18 to operate the pole hedge trimmer. Individuals over 16 years old, however, may use the pole hedge trimmer for training purposes if under the constant supervision of an adult familiar with the operation of the pole hedge trimmer.
- Always use the pole hedge trimmer with the utmost care and attention.
- Serious injury may result if the pole hedge trimmer is used in the following circumstances. Do not use the pole hedge trimmer:
- When feeling tired or ill.
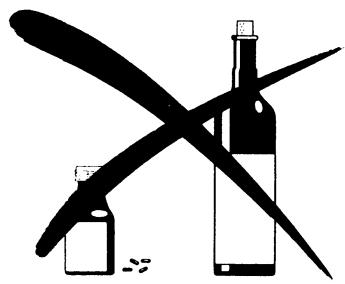
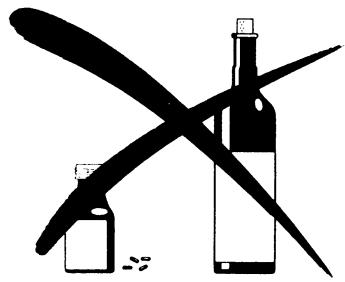
• After consumption of alcohol and/or medication. - At night or in poor lighting conditions.
- During pregnancy.
Intended use
- This pole hedge trimmer has been designed for the sole purpose of trimming hedges and bushes with a maximum branch diameter of 6 mm. Do not use the trimmer for any other purposes.
Personal protective equipment
- Clothes worn should be functional and tight-fitting without restricting movement. Do not wear clothing or jewelry that could get entangled in underbrush or in the machine.
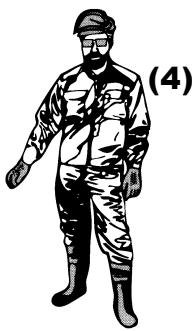
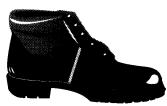
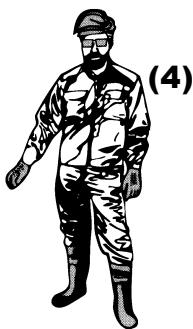
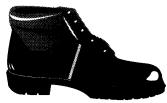
- For adequate protection against injuries to head, eyes, feet, hands, as well as hearing impairment, the following protective equipment and clothing must be used when working with the pole hedge trimmer.
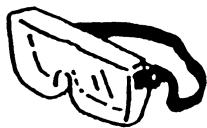
- To prevent injury to the head or the eyes, always wear a protective helmet (1) with goggles or a visor (2).
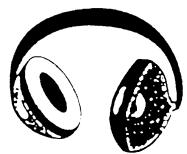
- To avoid hearing impairment, wear adequate ear defenders (3) at all times.
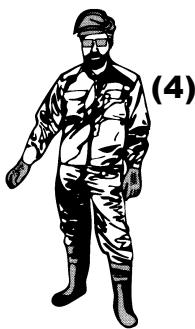
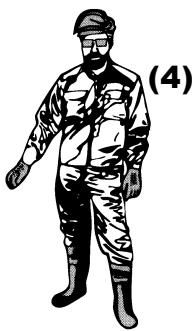
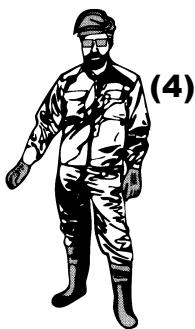
- Use of a well-fitting work overalls (4) is strongly recommended.
- Always wear rugged, leather working gloves (5) when operating the pole hedge trimmer.
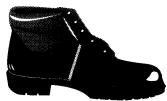
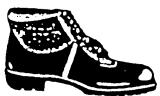
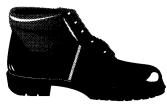
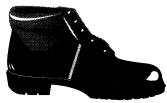
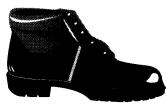
- When using the pole hedge trimmer, always wear sturdy shoes (6) with a non-slip sole. Special work shoes ensure good footing and protect against injury.

natural_image
Icon of an open book inside a black circle (no text or symbols)
natural_image
Abstract black-and-white graphic with stylized shapes and crossed lines (no text or symbols)(1)

natural_image
Illustration of a helmet with protective gear and a label (2) on the cup (no text or symbols beyond label)
natural_image
Illustration of a black and white headset with no text or symbols(3)
natural_image
Illustration of a person in military uniform with hat and boots, labeled (4), no text or symbols present.
(5)
(6)
Starting the Pole Hedge Trimmer
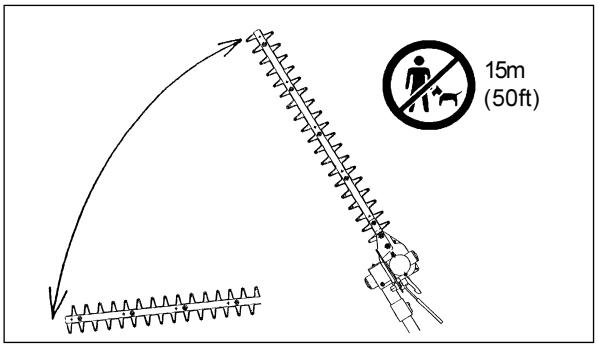
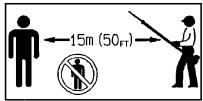
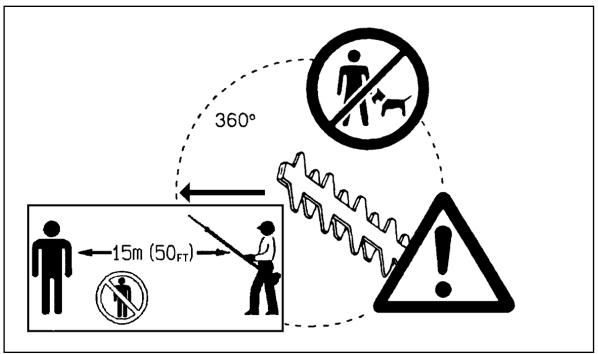
- At all times allow a 15-meter diameter safety zone around the working area. Make sure that all persons (in particular children) and/or animals remain outside this zone. In general, avoid using the hedge trimmer whenever people (in particular children) are nearby.
- Before starting the Pole Hedge Trimmer, always make sure that the machine is in safe operational condition.
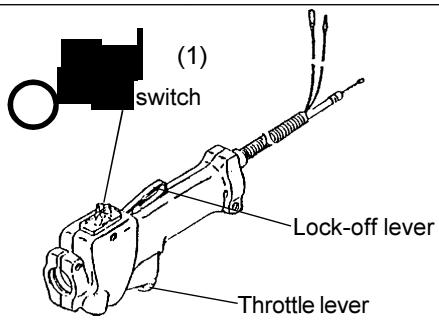
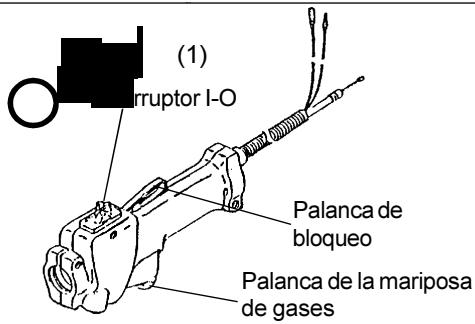
- Check the operation of the throttle lever safety mechanism. The lock-off lever should have a smooth and easy action. Make sure that the lock-off lever functions properly. Check that the handles are clean and dry and test the STOP switch to ensure that it is functioning properly.
Always start the pole hedge trimmer in accordance with the directions provided in this instruction manual.
Follow the instructions below to start the pole hedge trimmer
- Start the pole hedge trimmer only after the machine has been completely assembled and all accessory parts have been attached.
- Before starting the engine, make sure that cutter blades are not obstructed by any foreign objects such as stones, branches, etc.
- Stop the engine immediately if engine problems occur.
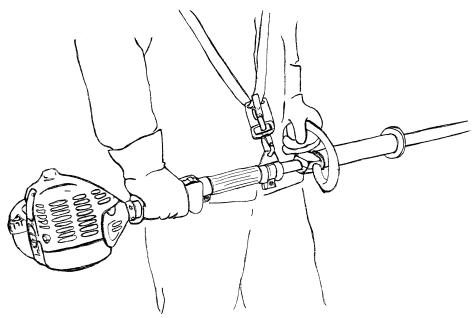
- When operating the pole hedge trimmer, always maintain a firm grip on both handles. Wrap your fingers tightly around each handle, cradling the handle between thumb and forefinger. To keep the pole hedge trimmer under control at all times, avoid changing your grip during operation. Make sure that the control handles are in good condition and free of moisture, mud, oil or grease.
Always ensure secure and well-balanced footing
- Only use the pole hedge trimmer outdoors.
- Always stop the engine immediately and discontinue operation if engine trouble occurs or if the machine starts making unusual noise.
- Exhaust fumes are poisonous. Never operate the machine in an enclosed room or tunnel without ventilation (risk of suffocation and gas poisoning). Note that carbon monoxide is an odorless gas. Always make sure that areas where the engine is operated are adequately ventilated.
- Stop the engine when resting, or when the pole hedge trimmer is left unattended. Place the machine in a safe location and make sure that no combustible material is nearby.
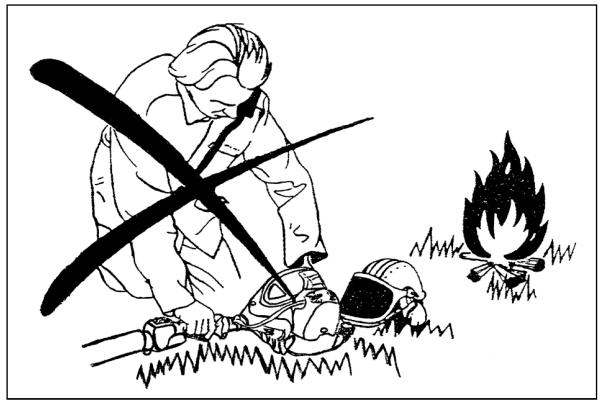
- Never place a hot hedge trimmer onto dry grass or combustible material.
- To reduce the risk of fire, keep the engine and muffler free of debris, leaves or excessive lubricant.
- Never operate the engine if the muffler is malfunctioning.
- Turn off the engine before transportation.
-
Always stop the engine in the following circumstances. When:
-
Resting
- Transporting the machine
- Cleaning the machine
- Refueling the machine
- Performing maintenance on the machine
- Fixing a problem with the machine
- When transporting the machine in a vehicle, always securely attach the pole hedge trimmer to avoid leakage of residual fuel.
- Always empty the fuel tank before transporting the pole hedge trimmer in a vehicle.
- When unloading the machine from a vehicle, take extra care not to drop the pole hedge trimmer to the ground, as this may seriously damage the fuel tank.
- Except in an emergency, never drop the pole hedge trimmer as this may seriously damage the machine.
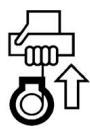
- When transporting the pole hedge trimmer, always lift the machine completely off of the ground. Never drag the engine across the ground as this may damage the fuel tank and possibly cause a fire.
- Always use the cutter cover provided to protect and secure the cutting section of the pole hedge trimmer during transportation and storage.
text_image
360° 15m (50 FT)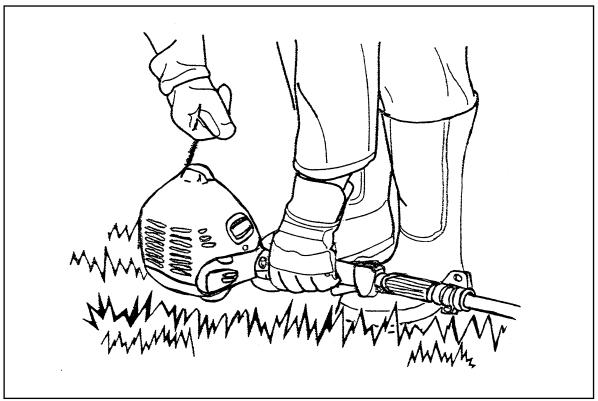
natural_image
Line drawing of a person using a handheld tool to lift a small cylindrical device on grass (no text or symbols)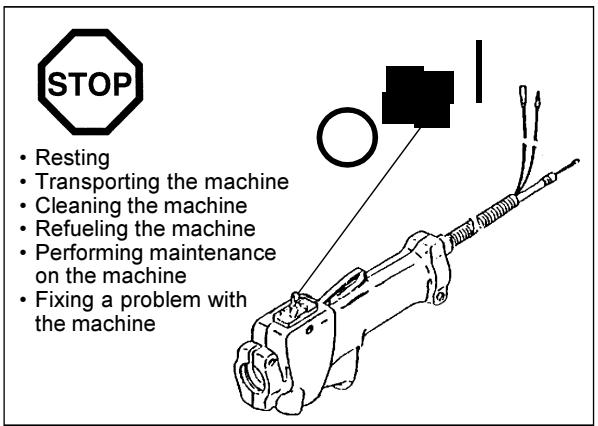
text_image
STOP • Resting • Transporting the machine • Cleaning the machine • Refueling the machine • Performing maintenance on the machine • Fixing a problem with the machine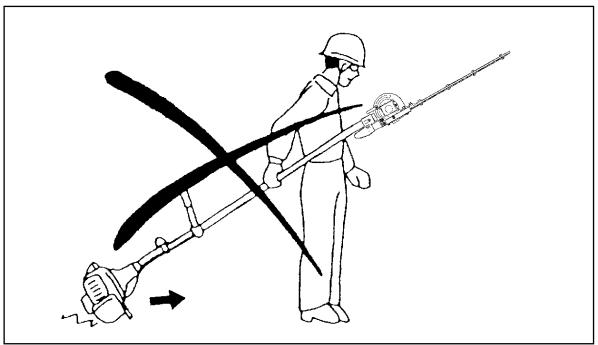
natural_image
Illustration of a person using a power tool to lift a motor, with an arrow indicating motion direction (no text or symbols)Refueling
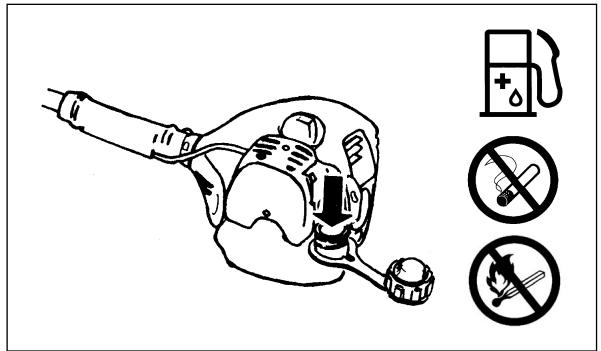
- Before refueling, stop the engine.
- Never refuel near naked flames
- Do not smoke when refueling.
- Always allow sufficient time for the engine to cool down before refueling.
- Take care not to let your skin come into contact with petroleum products. Do not inhale gasoline fumes and always wear protective gloves when refueling. Change and clean protective wear at regular intervals.
- Take extra care to avoid spilling gasoline and oil in order to avoid contamination of the ground (environmental protection). If gasoline or oil has been spilled onto the hedge trimmer, immediately wipe the surface of the hedge trimmer with a rag. To avoid spontaneous combustion, allow wet rags to dry sufficiently before discarding them into an appropriate, covered container.
- Make sure that no fuel comes in contact with your clothing. Change fuel-contaminated clothing immediately (fire hazard).
- Close the fuel tank and tighten the fuel tank cap securely. To restart the engine, transfer the pole hedge trimmer to a location at least 3 meters away from the place of refueling.
- Check the fuel tank cap at regular intervals to make sure that the cap is securely fastened.
- Never refuel the machine in an enclosed room. Fuel vapors accumulate at ground level (risk of explosion).
- Store fuel in appropriate containers only, and make sure that stored fuel is out of the reach of children.
- To prevent damage to fuel lines and engine parts, avoid using gasoline that contains ethanol or methanol (types of alcohol) when mixing gasoline with two-stroke engine oil.
text_image
Safety warning illustration showing a person using a fuel pump and three prohibition symbols: no smoking, no smoking, and no fire.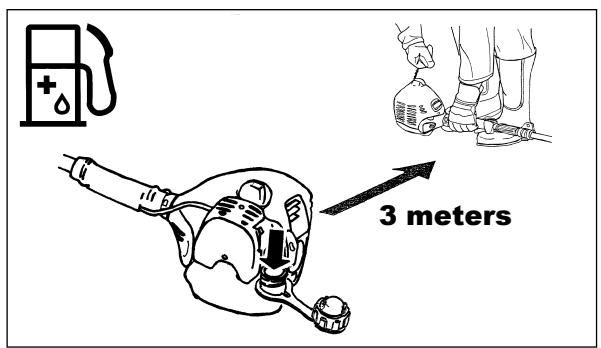
text_image
3 metersOperation
- During operation, hold the pole hedge trimmer with both hands at all times.
- Only use the pole hedge trimmer in good light and visibility conditions. Beware of slippery and wet areas (ice and snow) during the cold season (danger of slipping), and always ensure secure footing.
- Never use the pole hedge trimmer while standing on an unstable surface or a steep slope.
- Never use the pole hedge trimmer while standing on a ladder.
- Never climb a tree to use the pole hedge trimmer from the tree.
- To avoid stumbling or falling over objects, never walk backwards when working with the pole hedge trimmer.
- Always stop the engine before cleaning or servicing the machine. Also, refrain from replacing parts before the engine has been stopped.
- Do not operate the pole hedge trimmer if the cutting unit is damaged or worn.

text_image
Warning symbol image with exclamation mark inside a triangleMaintenance instructions
- Always do your utmost to keep pollution and noise emissions as low as possible when operating the pole hedge trimmer. Pay special attention to correct adjustment of the carburetor.
- Clean the hedge trimmer at regular intervals and periodically check whether all nuts and bolts are securely tightened.
- Never service or store the pole hedge trimmer in the vicinity of naked flames, sparks, etc.
- Empty the fuel tank before storage, and always store the pole hedge trimmer in a well-ventilated locked room. Make sure the pole hedge trimmer is out of children's reach at all times.
- To prevent further damage and/or personal injury, refrain from repairing a malfunctioning pole hedge trimmer if not qualified to do so. For repairs always contact your dealer or an authorized service agent.
natural_image
Illustration of a person in protective gear using a tool near a campfire (no text or symbols)Do not attempt to modify or remodel the pole hedge trimmer as this may affect operation safety.
Maintenance work that can be performed by the user is limited to the activities described in this instruction manual. Any other procedures are to be executed by an authorized service agent.
Use only genuine spare parts and accessories supplied by DOLMAR via authorized service centers.
Use of unauthorized accessories and tools may increase the risk of accident and injury. DOLMAR accepts no liability whatsoever for accidents or damage resulting from the use of unauthorized accessories and parts.
First aid
As a precaution for the occurrence of an accident, make sure that a fully stocked first aid kit is ready at hand.
Replace any items taken from the first aid kit as soon as possible.
When asking for help in the case of an emergency, give the following information:
- Place of accident
- What happened
• Number of injured people - Extent of injuries
- Your name
Packaging
The pole hedge trimmer is delivered in a protective cardboard box to prevent damage during shipping. Cardboard is a basic raw material that can be reused and recycled (waste paper recycling).

natural_image
Simple black-and-white cross symbol on black background (no text or numbers)

EU Conformity Declaration
The undersigned, Junzo Asada and Rainer Bergfeld, as authorized by DOLMAR GmbH, Jenfelder Str. 38, 22045 Hamburg, Germany declare that the DOLMAR Machines,
Type : MH-2556
manufactured by Robin conforms to the basic safety and health requirements of the applicable EU guidelines:
EU Machine guideline 98/37/EG
EU EMC guideline 89/336/EWG (modified by 91/263/EWG, 92/31/EWG and 93/68/EWG)
Noise Emission guideline 2000/14/EC
The most important standards applied to properly meet the requirements of the above EU guidelines were: EN 11806, EN 774, EN 11680, CISPR 12, EN50082-1, DIN VDE 0879 T1.
Technical Documentation:
Fuji Robin Industries Ltd.
35 OHOKA, NUMAZU - CITY, SHIZUOKA - PREF, 410-8535 JAPAN
Hiroshi Hirooka
General Manager, Engineering Department
Guaranteed Sound Power : 106 dB
Measured Sound Power : 103 dB
Hamburg, 01.11.01
For DOLMER GmbH
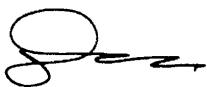
Junzo Asada
Managing Director

Rainer Bergfeld
Managing Director
| Model | MH-2556 | ||
| Loop handle and Grip handle | |||
| Dimensions (L x W x H) mm | 2410 x 335 x 220 | ||
| Mass kg | 6.4 | ||
| Volume (fuel tank) L | 0.65 | ||
| Cutting length mm | 535 | ||
| Engine displacement cm3 | 24.5 | ||
| Maximum engine performance | 0.75 kW at 7000 min-1 | ||
| Engine speed min-1At recommended max, spindle speed | 8800 | ||
| Fuel consumption kg/h | 0.50 | ||
| Specific fuel consumption g/kWh | 667 | ||
| Idling speed min-1 | 3000 | ||
| Clutch engagement speed min-1 | 4000 | ||
| Carburetor type(Diaphragm carburetor) | WALBRO WYL | ||
| Ignition system type | Solid state ignition | ||
| Spark plug type | NGK BMR7A | ||
| Electrode gap mm | 0.6-0.7 | ||
| Vibration per ISO7916 | Right handle (rear grip) | Idling m/s2 | 2.6 |
| Racing m/s2 | 8.1 | ||
| Left handle (handle) | Idling m/s2 | 7.8 | |
| Racing m/s2 | 12.7 | ||
| Left handle (front grip) | Idling m/s2 | 3.9 | |
| Racing m/s2 | 10.1 | ||
| Vibration per ISO11680 | Right handle (rear grip) | Idling m/s2 | 2.9 |
| Racing m/s2 | 8.7 | ||
| Left handle (handle) | Idling m/s2 | 9.3 | |
| Racing m/s2 | 11.9 | ||
| Left handle (front grip) | Idling m/s2 | 4.4 | |
| Racing m/s2 | 9.9 | ||
| Sound pressure level average | ISO7917 dB (A) | 93.3 | |
| ISO11680 dB (A) | 91.6 | ||
| Sound power level average | ISO10884 dB (A) | 102.4 | |
| ISO11680 dB (A) | 98.5 | ||
| Mixture ratio (Fuel: DOLMER 2-stroke oil) | 50:1 | ||
| Gear ratio | 1/4 | ||
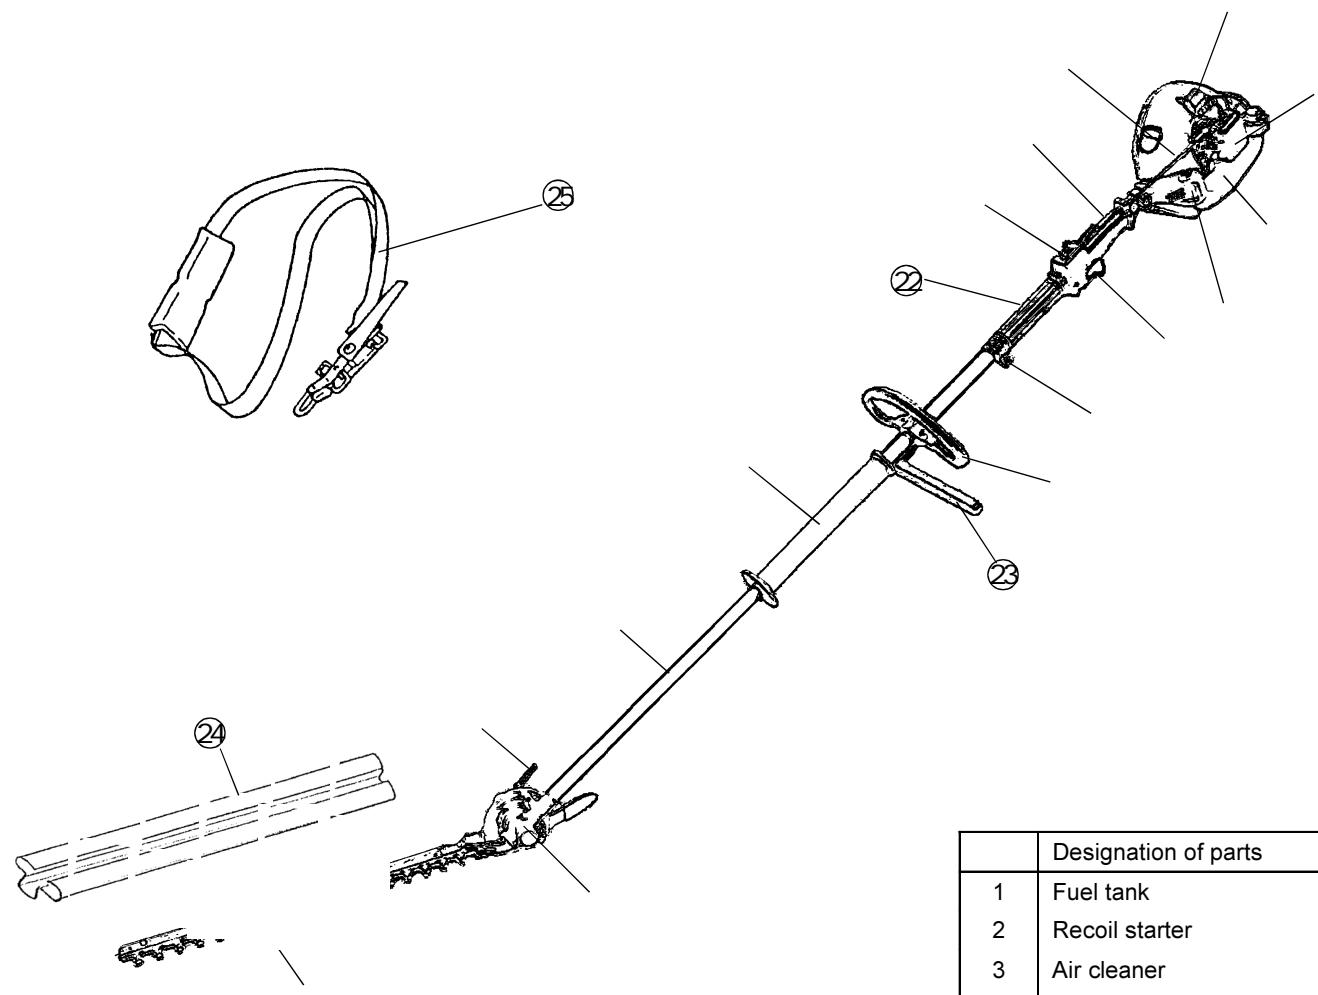
text_image
Designation of parts Fuel tank Recoil starter Air cleaner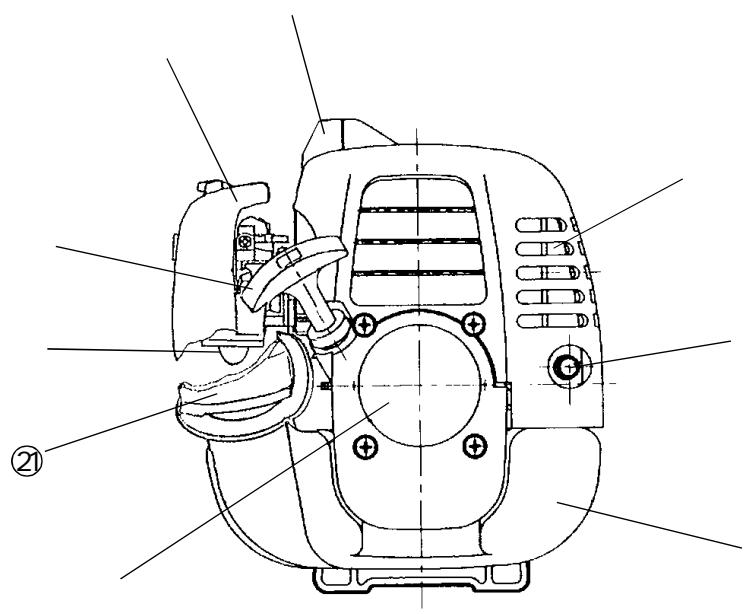
text_image
Technical diagram of a mechanical device with numbered annotations pointing to components.| Designation of parts | |
| 1 | Fuel tank |
| 2 | Recoil starter |
| 3 | Air cleaner |
| 4 | I-O switch (ON/OFF) |
| 5 | Spark plug |
| 6 | Muffler |
| 7 | Clutch case |
| 8 | Rear grip |
| 9 | Metal clasp for shoulder strap attachment |
| 10 | Handle |
| 11 | Throttle lever |
| 12 | Throttle cable |
| 13 | Shaft |
| 14 | Cutter blades |
| 15 | Front grip |
| 16 | Starter knob |
| 17 | Primer pump |
| 18 | Gear box |
| 19 | Exhaust pipe |
| 20 | Clamp lever |
| 21 | Fuel tank cap |
| 22 | Distance collar |
| 23 | Barrier |
| 24 | Blade cover |
| 25 | Shoulder strap |
CONNECTING THE TRIMMER UNIT TO THE POLE
Important:
Make sure that the engine is turned off, and remove the spark plug cap before assembling the pole hedge trimmer.
Wear protective gloves!
Secure blades with the blade cover provided when connecting the trimmer unit to the pole.
- Loosen the M5x10 screw and M5x25 bolt.
- Insert shaft into gear case
NOTE: Make sure that the shaft is completely inserted into the gear case (approx. 40mm/1.57").
If you are having trouble inserting the shaft, manually rotate the drive axle a little and try again.
- Confirm that the shaft is properly inserted and then tighten the M5x10 screw and the M5x25 bolt.
ATTACHING THE HANDLE
- Attach the protective barrier together with the handle so that the barrier juts out to the left as viewed from the operating position.
- Make sure not to set the handle too close to the control grip (use the distance collar provided for this purpose).

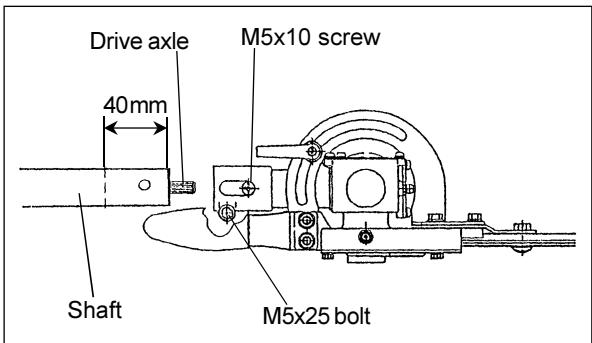
text_image
Drive axle 40mm M5x10 screw Shaft M5x25 bolt
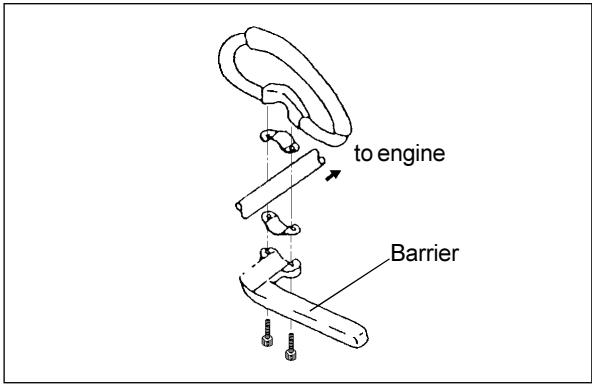
text_image
to engine BarrierHow to wear the shoulder strap
- Wear the shoulder strap over the left shoulder.
- Keep the pole hedge trimmer unit on the right hand side of the body.
- Attach the strap to the fitting provided on the pole hedge trimmer and adjust the length of the strap to attain a comfortable working position.
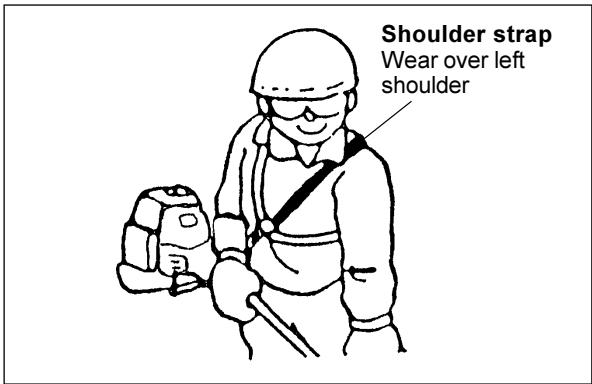
text_image
Shoulder strap Wear over left shoulder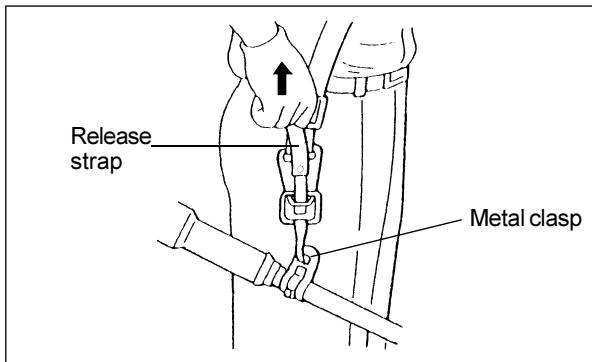
text_image
Release strap Metal claspEmergency separation
Forcefully pull the release strap in an upward direction to separate the pole hedge trimmer from the shoulder strap in the case of an emergency.
Be extremely careful to maintain control over the machine at this time. Do not allow the machine to be deflected towards you or any other person nearby.
FUEL|REFUELING
Gasoline/oil mixture
- The engine of the pole hedge trimmer is a highly efficient two-stroke engine that runs on a mixture of gasoline and two-stroke engine oil. The engine is designed to use regular unleaded gasoline with a min. octane value of 91 ROZ. If such gasoline is not obtainable, instead use gasoline with the highest octane value available. This will not cause any damage to the engine, but may result in poor engine performance. Similar results are to be expected when leaded gasoline is used. To obtain optimal engine performance, and for the sake of human health and the environment, where possible use unleaded fuel.
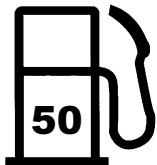
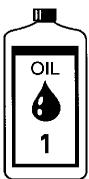
- Two-stroke engine oil (quality grade: TSC-3) must be added to the gasoline in order to lubricate the engine. The engine has been designed to use environment-friendly DOLMAR 2-stroke oil, which is to be mixed at a ratio of 50:1. This specially developed oil ensures prolonged engine service life and reliable engine performance with an absolute minimum of exhaust gas emissions. It is imperative to strictly observe the 50:1 mixture (Gasoline/DOLMAR 2-stroke oil), as reliable performance of the pole hedge trimmer cannot be guaranteed otherwise.
- Correct gasoline/oil mixture:
Mix 50 parts gasoline with 1 part DOLMAR 2-stroke engine oil (see also table on the right).
NOTE: When preparing the gasoline/oil mixture, first mix all of the amount of oil required with half the amount of gasoline required. Add the remaining gasoline and shake the mixture well before replenishing the tank. Do not add more oil then prescribed. If too much oil is added this will produce additional combustion residue, thus polluting the environment and clogging the muffler and the cylinder exhaust channel. In addition, overall fuel consumption will also increase and poorer engine performance is to be expected.
Handling of petroleum products
Always handle fuel with the utmost care and attention. Since fuel contains substances similar to solvents, refueling must be done outdoors or in well-ventilated areas. Do not inhale gasoline fumes and avoid any skin contact with gasoline or oil. Human skin will dry out if in contact with petroleum over an extended period of time. This may result in various skin diseases and allergic reactions.
Gasoline or oil coming into contact with the eyes can cause severe eye irritation. Should gasoline or oil come into contact with your eyes, immediately rinse your eyes with large amounts of clean water. Do not hesitate to see a doctor if irritation persists.
Refueling
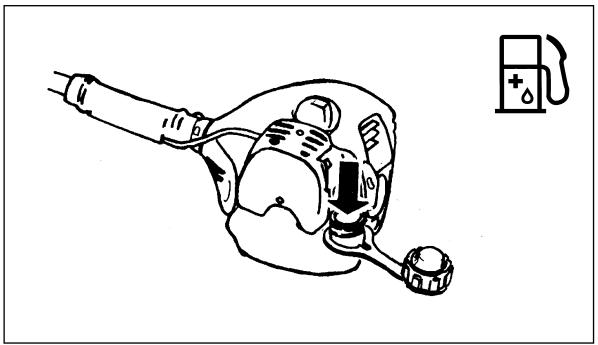
- Turn off the engine.
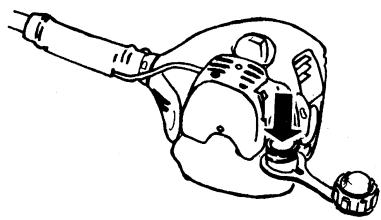
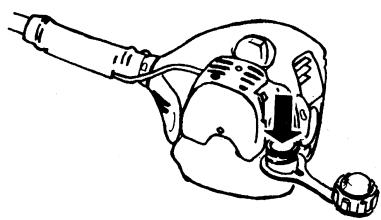
- Unscrew tank cap and pour the fuel mixture into the tank. Use a piece of clean gauze to filter the fuel.
- Replace and hand-tighten the fuel tank cap.
- Always wipe off the fuel tank cap to protect the fuel tank from contamination.
- Reconfirm whether the fuel tank cap is securely tightened.
- Always wipe off spilled fuel immediately to reduce the risk of fire.
Fuel storage
- Fuel deteriorates if stored over an extended period of time.
- Purchase only the amount of fuel to be used over a 4-week period.
- Use only approved petroleum-storage containers.

text_image
STOP
text_image
Warning symbol with exclamation mark inside triangleObserve the Safety Instructions on page 5
natural_image
Line drawing of a medical device with a pressure gauge and a gas pump symbol (no text or labels)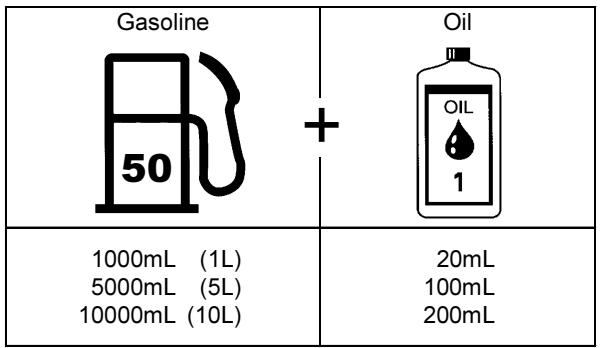
text_image
Gasoline 50 + Oil OIL 1 1000mL (1L) 5000mL (5L) 10000mL (10L) 20mL 100mL 200mL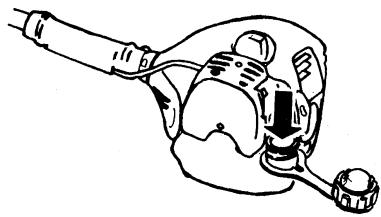
natural_image
Line drawing of a robotic hand gripping a small object, no text or symbols present


PRECAUTIONS BEFORE STARTING THE ENGINE
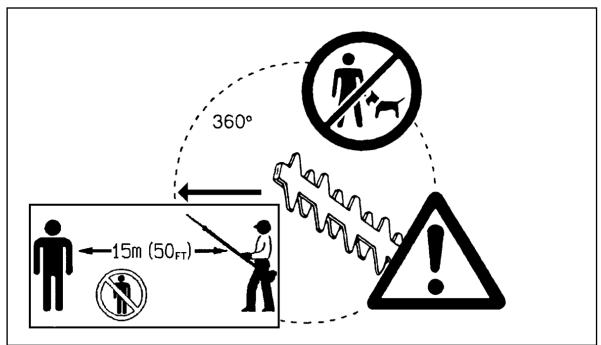
- At all times allow a 15-meter diameter safety zone around the working area. Make sure that all persons (in particular children) and/or animals remain outside this zone.
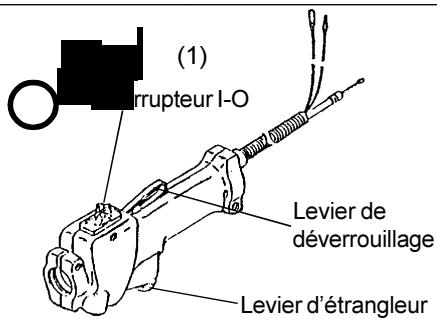
- Before using the pole hedge trimmer, make sure that the machine is in safe operational condition. Make sure that the cutter blades are not damaged, and check the throttle lever for easy action. Confirm that the cutter blades are not in motion when the engine is idling. If the machine is not operating normally, contact your dealer to have the machine adjusted. Make sure that the handles are clean and dry, and test whether the I-O switch is functioning properly. Start the engine only in accordance with the instructions given in this manual. Do not use any other methods to start the pole hedge trimmer (see, "Starting the Engine").
- Start the engine of the pole hedge trimmer only after having read and fully understood the instructions. Never attempt to start a pole hedge trimmer that has not been fully assembled. Serious injury may result otherwise.
- Before starting the engine, always make sure that the cutter blades are not obstructed by stones, branches or any other solid objects.
- Check the working area for wires, cord, glass or other foreign objects that could get caught in the cutter blades.
- Electrical shock: Be aware of all electrical lines in the vicinity. Check the entire work area for the presence of power lines and electrical fences before starting to work.
STARTING THE ENGINE
If the machine has just been refueled, move at least 3 meters away from the location where the pole hedge trimmer was refueled. Place the pole hedge trimmer on a reasonably clean spot on level ground, and make sure that the cutter blades are not in contact with the ground or any other solid objects.
Cold start (cold engine / engine was stopped for more than 5 minutes / after refueling)
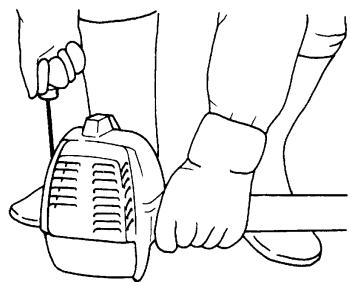
- Move the I-O switch to the "I" position (1).
- Push the primer pump (2) repeatedly (7 to 10 times) until fuel enters the bulb of pump.
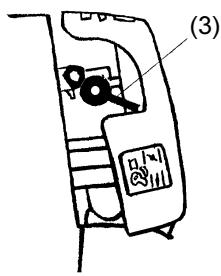
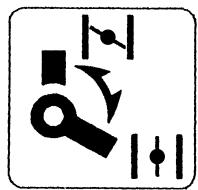
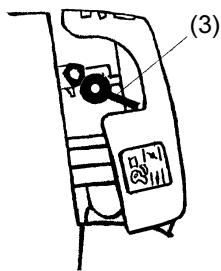
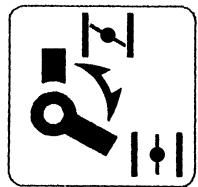
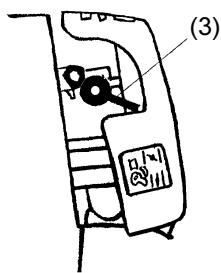
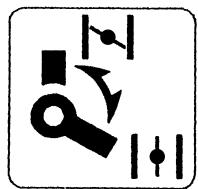
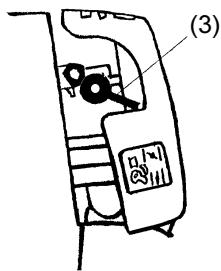
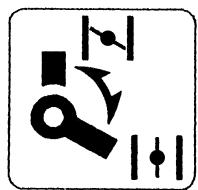
- Move the choke lever (3) into the "|→" (vertical) position.
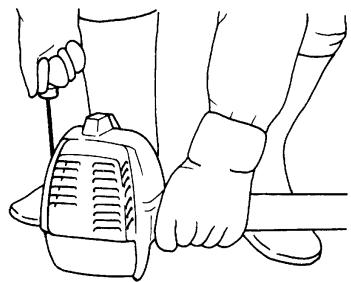
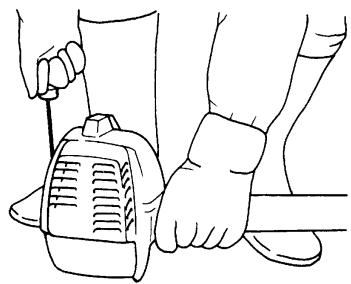
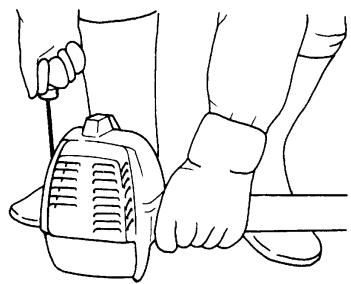
- With one hand hold the engine firmly on the ground (4).
- Pull the starter cord for approx. 10\~15 cm until resistance can be felt.
- Pull firmly (repeatedly if necessary) on the cord until the engine starts.
- Return choke lever to position "|♦|" after the engine has started. Note that the choke lever returns automatically when the throttle lever is operated. Squeeze the throttle lever together with the lock-off lever.
- Warm up the engine at a moderate speed for approx. 1\~2 minutes.
- After the engine is warm the engine runs evenly and transition from low speed to high speed is smooth and without interruption.
Note: Pulling the starter rope repeatedly with the choke in "☐" position results in excessive fuel intake, which can make it difficult for the engine to start. In the case of excessive fuel intake, remove the spark plug and pull the starter rope slowly to remove excess fuel. Dry the spark plug electrode and replace the spark plug.
Warm start (immediate restart after engine-stop)
Do not operate the choke (3) when restarting the engine immediately after stoppage. If the engine does not start, execute steps 1\~8 as described above (cold start).
Note: Do not release the starter knob immediately after pulling the starter rope, but guide the knob back to its original position.
text_image
360° 15m (50 FT)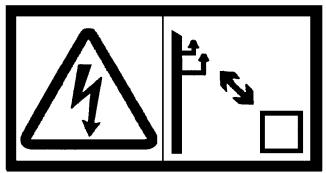
text_image
Safety warning sign showing lightning symbol and pole with directional arrows indicating electrical hazard


text_image
(1) switch Lock-off lever Throttle lever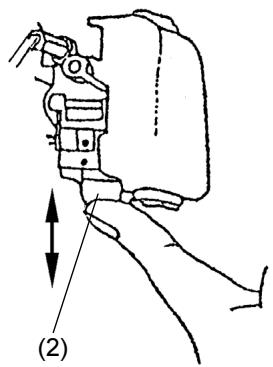
text_image
(2)
text_image
(3)
natural_image
Line drawing of two hands operating a portable device (no text or symbols)(4)
STOPPING THE ENGINE
- Release the throttle lever.
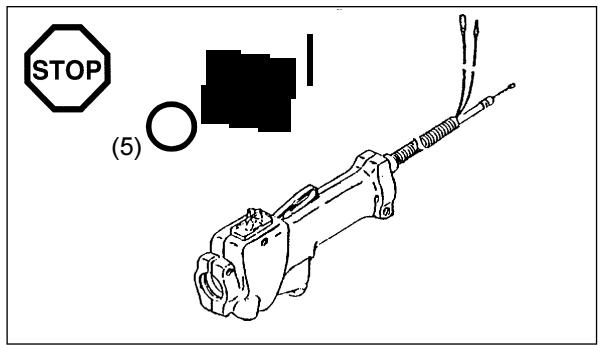
- Push the I-O switch to the "O" position (5) to stop the engine.



text_image
STOP (5)CHECKING AND ADJUSTING THE IDLING SPEED
The cutter blades of the pole hedge trimmer should not move when the throttle lever is released.
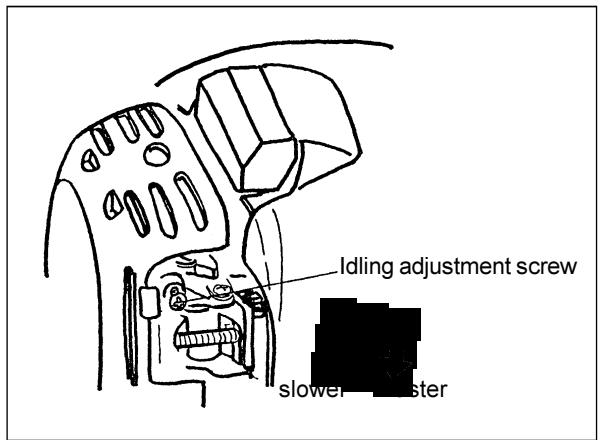
- The correct idling speed is 3000 min^-1 . If necessary, adjust the idling speed using the idling adjustment screw (reduce revs until the cutter blades do not move anymore).
- Turn screw clockwise: Idling speed increases
- Turn screw counter-clockwise: Idling speed decreases.
Allow an adequate difference between the idling rate and the rate at which the clutch engages (reduce idling speed further if necessary). Should the cutter blades still move in spite of accurate idling speed settings, consult your nearest authorized service agent.
- The clutch should engage at a minimum rate of 4000min^-1 .
- Check that the STOP switch, the lock-off lever and the throttle lever are all functioning properly.
text_image
Idling adjustment screw slower stater- When working with the pole hedge trimmer, firmly grasp the handles with both hands.
- Do not touch the cutter blade portion of the pole hedge trimmer during operation, or when the engine is running.
- Take extra care not to inhale exhaust gases when working with the pole hedge trimmer. Never operate the pole hedge trimmer in an enclosed room or an area with insufficient ventilation (risk of suffocation and gas poisoning). Note that carbon monoxide is an odorless gas that is, it cannot be detected by the sense of smell.
- Always wear adequate protective wear before starting to work with the pole hedge trimmer.
- Stop the engine immediately if the muffler is not functioning properly.
- Only use the pole hedge trimmer in good light and visibility conditions.
- Do not operate the pole hedge trimmer in darkness or fog. Beware of slippery and wet areas (ice and snow) during the cold season (danger of slipping), and always ensure secure footing.
- Never use the pole hedge trimmer while standing on an unstable surface or a steep slope.
- Never use the pole hedge trimmer while standing on a ladder.
- Never climb a tree to use the pole hedge trimmer from the tree.
- Continuously check the working area for wires, cord, glass or other foreign objects that could get caught in the cutter blades.
- Confirm that the cutter blades are in rapid motion before starting to cut.
- Always grip the pole hedge trimmer with both hands and maintain a firm grip when working with the machine.
- To assure optimal control over the pole hedge trimmer, always completely wrap your hands around the handles (use your thumb for counter pressure) and apply a firm grip on the handles.
- Note that the cutter blades will remain in motion for up to two seconds after the throttle lever has been released.
- Do not cut with the pole hedge trimmer at low engine speed.
- The speed of the cutter blades cannot be adjusted properly with the throttle lever when the engine is running at low speed.
- To trim the top surface of a hedge, first align the cutting tool at an angle of 15^ 30^ in the cutting direction and keep the pole hedge trimmer in a horizontal position. Then start trimming the hedge using a swinging movement, much like drawing circle segments with the hedge trimmer shaft.
- To trim the sides of a hedge, align the blades parallel to the surface to be cut and start trimming with semi-circular upward (down-up) movements.
- Pay attention when trimming a hedge that has grown along a fence. Be especially careful not to allow the cutter blades from coming into contact with solid matter such as a metal fence. Cutting into solid matter such as metal, stone, concrete or thick wood may damage the blades and/or cause overall breakdown of the machine.
- Do not use the pole hedge trimmer over an extended period of time. As a general rule, for every 50 minutes of operation take a 10-20 minutes rest.
- If the cutter blades come into contact with stones or other solid objects, stop the engine immediately and check the blades for damage. Replace the blades if damaged.
- If the pole hedge cutter develops a problem during operation (strange noises, vibration, etc.), immediately stop the engine. Do not use the machine again until the problem has been recognized and solved.
- Always do your utmost to keep pollution and noise emissions as low as possible when operating the pole hedge trimmer. Pay special attention to correct carburetor adjustment and accurate gasoline/oil mixture.
- If thick branches get jammed in the cutter blades, immediately stop the engine, lay the equipment on the ground and remove the obstruction. Check the blades for damage before using the machine again.




natural_image
Line drawing of a person using a tool to lift a motor (no text or symbols present)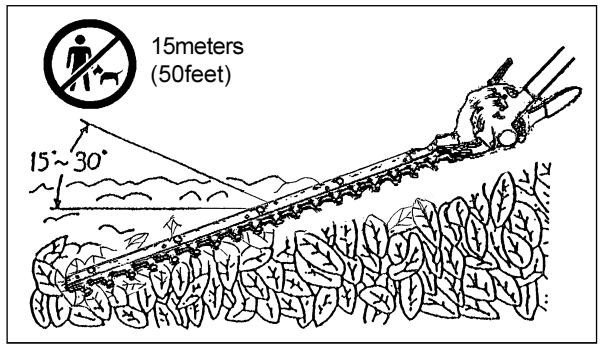
text_image
15meters (50feet) 15°~30°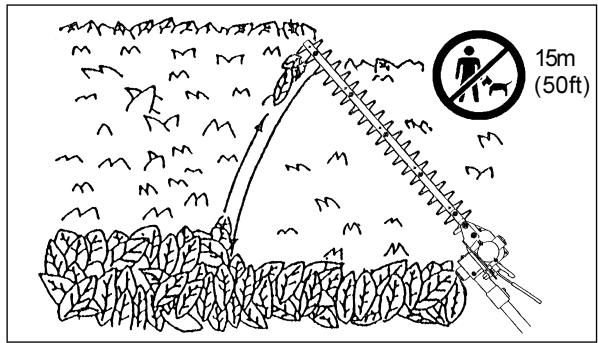
text_image
15m (50ft)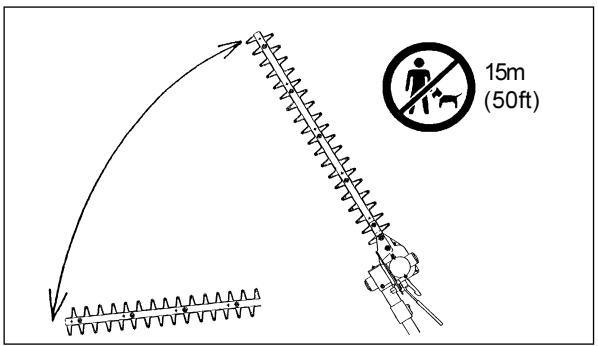
text_image
15m (50ft)Adjustment of cutting angle
- Stop the pole hedge trimmer engine and lay the machine on the ground.
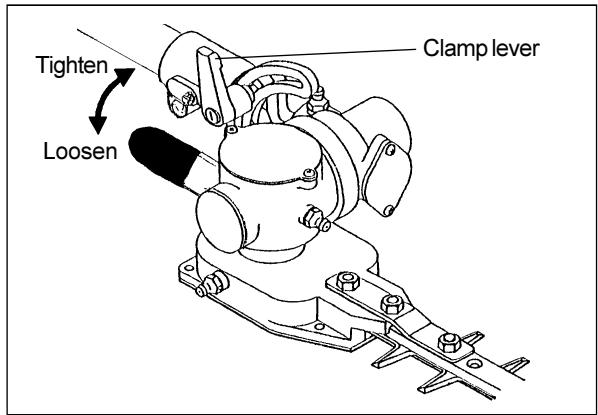
- To adjust the angle of the cutter unit, loosen the clamp lever located at the top of the cutter unit by turning it counter-clockwise.
- Adjust the angle of the cutter unit and turn the clamp lever clockwise to secure.
- The cutter unit can be adjusted anywhere between 45^ and 90^ .
Note:
- Do not adjust the cutter unit while the pole hedge trimmer is in an upright position.
- Move the I-O switch to the "O" position and lay the pole hedge trimmer flat on the ground to adjust the cutting angle.
- Always secure the blades with the blade cover provided before adjusting cutting angle.



text_image
Tighten Loosen Clamp leverMAINTENANCE
- Before performing any maintenance work on the pole hedge cutter (blade cleaning, etc.), always stop the engine and wait until the engine has cooled down. As an additional safety precaution, also remove the spark plug cap.
- Do not try to straighten or weld a bent or broken cutting blade. Always replace damaged blades.
- Stop the engine at regular intervals to check the cutter blades for possible damage (perform a tapping-resonance test to detect hard-to-see hairline cracks). Always make sure that the teeth of the blades are sharp.
- Clean the pole hedge trimmer at regular intervals. During cleaning also check that all screws, nuts and bolts are well tightened.
- To reduce the risk of fire, never service or store the pole hedge trimmer in the vicinity of open fires.
- Always wear rugged protective gloves when handling the cutter blades.
- Contact your dealer for replacement cutter blades.



Sharpening the blade
If the cutting blades have become blunt and cutting performance is poor, have the blades sharpened by an authorized service agent.
Extended use of the pole hedge trimmer will gradually wear down the blades. Readjust the blades if cutting performance deteriorates noticeably. For adjustment of the blades follow the instructions below.
- Release nut
- Tighten screw lightly until resistance is felt. Then turn the screw in the opposite direction for a quarter or half turn.
- Hold screw in place with a screwdriver and tighten nut .
- After adjustment lubricate the blades with a thin film of light oil.
- Start the engine and pull the throttle lever several times to set the blades in motion. Continue for approx. one minute.
- Stop the engine and wait until the blades come to a standstill. Cautiously touch the blades with your bare hand. Adjustment is correct if the blades are warm, but not too hot to touch. If the blades are too hot to be touched, release screw for another quarter to half a turn and repeat steps 5\~6 to confirm proper adjustment.
NOTE: Always stop the engine and remove the spark plug cap before adjusting the blades!
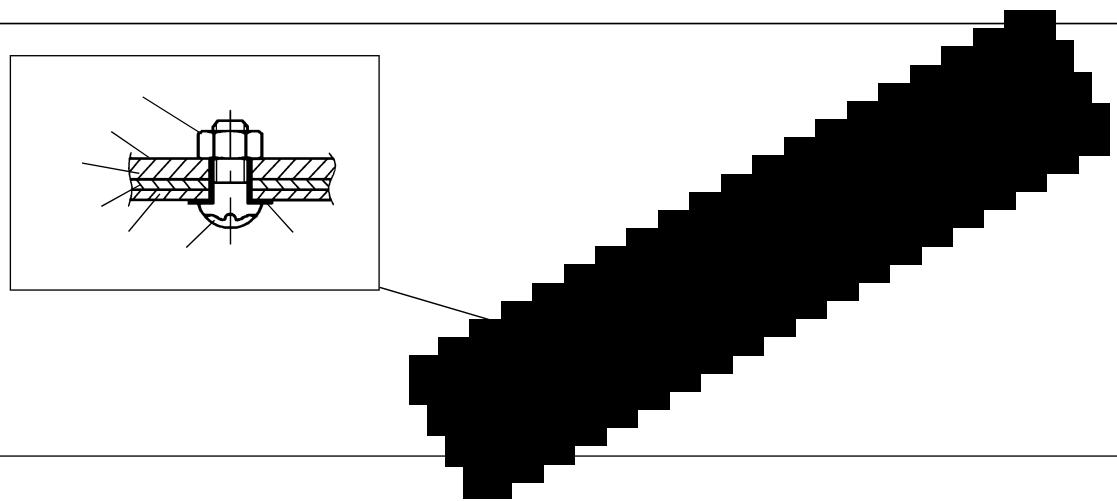
The blades have grooves around the truss screws . Always keep these grooves clean so that they can be inspected for possible damage.
Hexagonal U-nut
Truss screw
Flat washer
Blunt extension
Blade guide
Upper blade
Lower blade
natural_image
Pure mechanical assembly diagram showing a bolted joint and a stepped shaft, without any text or symbolsCleaning the air cleaner - Every 8 hours (daily)
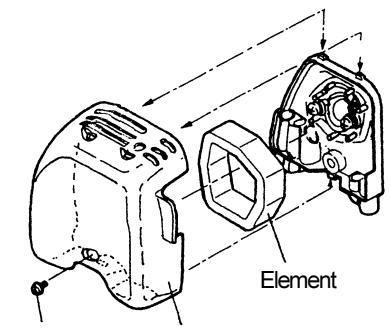
- Remove the air cleaner cover.
- Remove the sponge element. Wash the sponge element in lukewarm water and allow to dry completely.
- Replace the cleaned and dried sponge element and then replace the air cleaner cover.
Note: Clean the air cleaner on a daily basis. A clogged air cleaner may make it difficult or impossible to start and/or accelerate the engine.
text_image
ElementScrew
Air cleaner cover
Checking the spark plug - Every 8 hours (daily)
- Only use the universal wrench provided to remove and replace the spark plug.
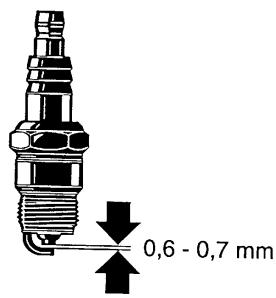
- The spark plug gap should be 0.6\~0.7 mm. Adjust the spark plug gap if it is too wide or too narrow. Clean or replace the spark plug if contaminated and/or clogged with carbon residue. Always replace with the same type of spark plug.
text_image
0,6 - 0,7 mmAdding grease and lubricant
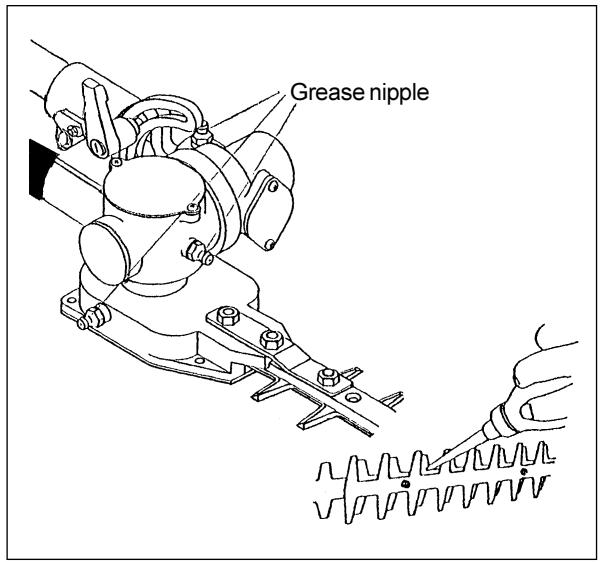
- The gearbox of the pole hedge trimmer should be greased every 20 working hours. Add approx. 10cc of lubricant (Shell Alvania No. 3 or equivalent) to the gearbox via the grease nipples. (Some grease will emerge from the head of the gearbox (located at the base of the blade) when the pole hedge trimmer is set in motion the first time after greasing. Use this as a rough indicator for the amount of grease to supply.)
Note: Observe greasing intervals and the amount of grease to be supplied. Mechanical parts of the pole hedge trimmer may be damaged if grease is not supplied at the prescribed intervals or if an insufficient amount of grease is added.
text_image
Grease nippleFuel tank filter
- The inside of the fuel tank is equipped with a filter that cleans the fuel before it enters the carburetor.
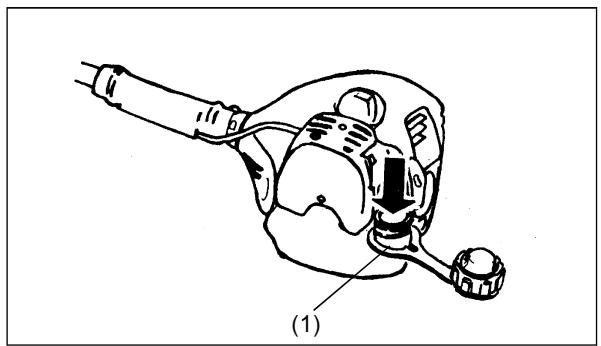
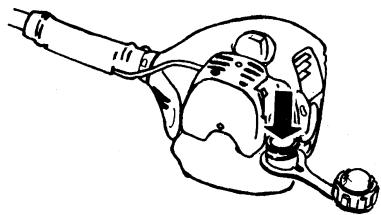
- Visually check the filter at regular intervals. To do so, use a piece of wire formed into a hook and draw the filter out of the tank (1). Replace the filter if it is hardened, clogged up, or excessively contaminated.
- Inadequate fuel supply as a result of a deteriorated fuel filter may result in poor engine performance. In order to ensure that the required amount of fuel enters the carburetor, replace the fuel filter whenever in doubt of its condition.
natural_image
Line drawing of a robotic arm with labeled parts (1), no text or symbols presentCleaning the muffler outlet
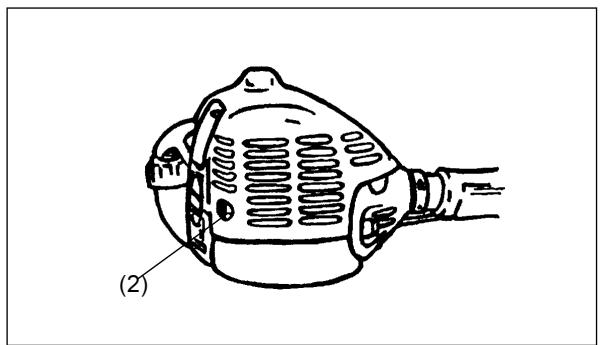
- Check the condition of the muffler outlet (2) at regular intervals.
- Use a suitable tool to remove excessive carbon residue that accumulates around the muffler outlet. Take special care to prevent removed carbon residue from entering engine parts.
Cleaning the spark arrester
- The spark arrester should be cleaned every 50 working hours.
- Have the spark arrester cleaned at your dealership or by an authorized service agent.
For all maintenance work not mentioned in this instruction manual, please contact your dealership or an authorized service agent.
natural_image
Line drawing of a mechanical component with labeled parts (2), showing internal structure without any text or symbols.Daily inspection and maintenance
To ensure a long service life of your pole hedge trimmer, perform the following inspections and maintenance on a daily basis.
- Always check for loose or missing parts before starting operation. Pay special attention to the cutting unit and make sure that the cutter blade lock screws are well tightened.
- Check for clogging of the cooling air passages and the cooling fins of the cylinder before starting operation. Clean if necessary.
- Each day after using the pole hedge trimmer perform the following.
- Clean the outside of the pole hedge trimmer; check for damage and loose parts.
- Clean the air filter. Clean the filter several times a day if working in extremely dusty conditions.
- Check the cutter blades for damage. Make sure that the blades are securely mounted.
STORAGE
If the pole hedge trimmer is to be stored for an extended period of time, proceed as follows:
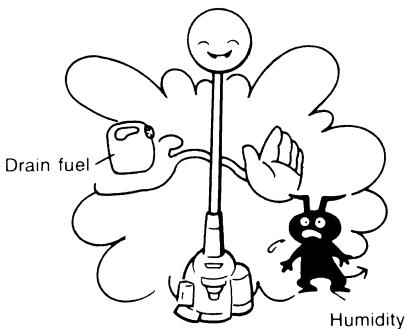
- Drain all fuel from the tank and carburetor.
- Remove the spark plug and add a few drops of two-stroke oil through the spark plug hole. Gently pull out the starter rope to ensure that the oil is evenly distributed inside the engine. Replace and tighten the spark plug.
- Clean the entire pole hedge trimmer and apply a thin layer of oil to the metallic surfaces of the machine. Secure and protect the blades with the blade cover provided. Store the pole hedge trimmer in location that is free of humidity.
text_image
Drain fuel HumidityMAINTENANCE SCHEDULE
| General | EngineScrews, nuts, bolts | Check general condition and safetyVisually check for damageConfirm that screws, nuts and bolts are secure |
| After refueling | Throttle leverLock-off leverSTOP switch | Check functioningCheck functioningCheck functioning |
| Daily | Air filterCooling air ductCutting toolIdling | CleanCleanCheck for damage, confirm sharpConfirm that the cutter blades are not in motion |
| Every 20 hours | Gearbox | Add grease |
| Weekly | Spark plugMuffler | Check, replace if necessaryCheck, clean outlet if necessary |
| Quarter annually | Fuel filterFuel tank | Clean or replace, if necessaryClean inside |
| Before extended storage | Fuel tankCarburetor | Drain tankKeep engine running until fuel runs out |
TROUBLESHOOTING
| Problem | System | Observation | Cause |
| Engine does not start or difficulty starting | Ignition | Ignition spark is present | Problem with fuel supply or compression system, mechanical defect |
| No ignition spark | STOP switch in OFF-position, broken wire, defective spark plug or connector, defective ignition module | ||
| Fuel supply | Fuel available | Wrong choke setting, defective carburetor, fuel filter contaminated, broken or bent fuel hose | |
| Compression | Inside engine | Defective cylinder gasket, damaged crankshaft seals, defective piston and/or cylinder rings | |
| Outside engine | Loose spark plug | ||
| Mechanical | Starter not functional | Defective starter spring, mechanical defect inside engine | |
| Warm start problems | Fuel available Ignition functioning | Carburetor contaminated (have carburetor cleaned) | |
| Engine starts but stalls immediately | Fuel supply | Fuel available | Incorrect idling adjustment, carburetor or fuel filter contaminated |
| Defective fuel tank vent, broken fuel hose, defective STOP switch (loose contact, etc.) | |||
| Poor performance | Several systems may be affected simultaneously | Engine idling | Contaminated air filter, carburetor contaminated, clogged muffler, clogged cylinder exhaust duct |
natural_image
Icon of an open book inside a black circle (no text or symbols)text_image
15m (50ft)natural_image
Icon of an open book inside a black circle (no text or symbols)
natural_image
Abstract black-and-white graphic of a stylized pen and bottle crossed over a glass (no text or symbols)(1)

natural_image
Illustration of a helmet with a headlamp and label (2), no text or symbols present.
natural_image
Illustration of a pair of black headphones with no text or symbols(3)
natural_image
Illustration of a person in military-style uniform with hat and gloves, labeled (4), no text or symbols present.
(5)
(6)
text_image
360° 15m (50ft)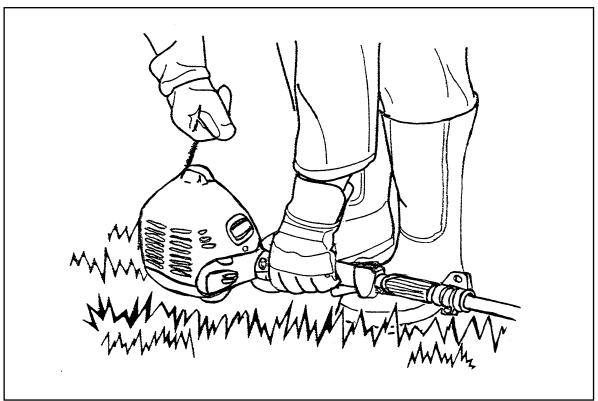
natural_image
Line drawing of a person using a tool to lift a small water bottle on grass (no text or symbols)
natural_image
Illustration of a person using a long-handled tool to lift a propeller, with an arrow indicating motion (no text or symbols)Ravitaillement
text_image
Safety warning illustration showing a person using a fuel pump and three prohibition symbols: no smoking, no smoking, and no fire.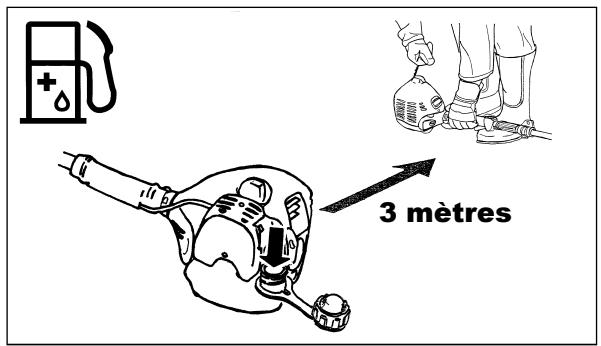
text_image
3 mètresFonctionnement
text_image
Warning symbol image with exclamation mark inside a triangle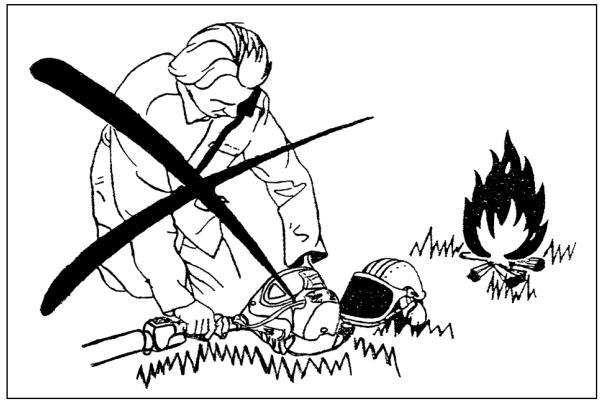
natural_image
Illustration of a person in protective gear using a tool to cut a fire with smoke nearby (no text or symbols)natural_image
Simple white cross symbol on black background, no text or numbers present

Déclaration «EU» de conformité
text_image
Technical diagram of a sewing machine with labeled parts and numbered annotationstext_image
Warning symbol with exclamation mark inside trianglenatural_image
Line drawing of a robotic arm with articulated joints and a handle (no text or symbols)
Carburant
1000mL (1L)
5000mL (5L)
10000mL (10L)
Huile
20mL
100mL
200mL
natural_image
Line drawing of a robotic arm joint (no text or symbols)


PRÉCAUTIONS AVANT LE DÉMARRAGE DU MOTEUR
text_image
360° 15m (50 FT)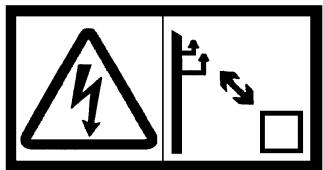
text_image
Safety warning sign showing lightning bolt symbol and pole with right-angle arrow indicating right turn


natural_image
Line drawing of two hands operating a portable air conditioner (no text or symbols)(4)
natural_image
Line drawing of a person using a tool to lift a curved object, no text or symbols present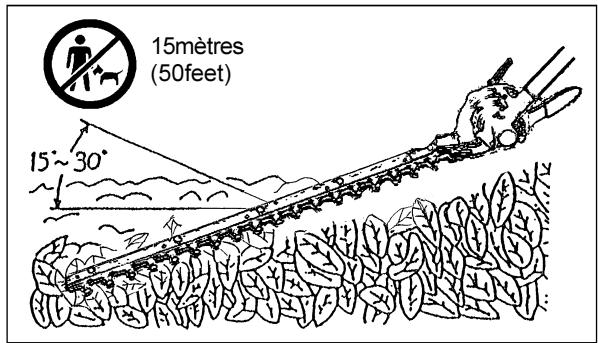
text_image
15mètres (50feet) 15°~30°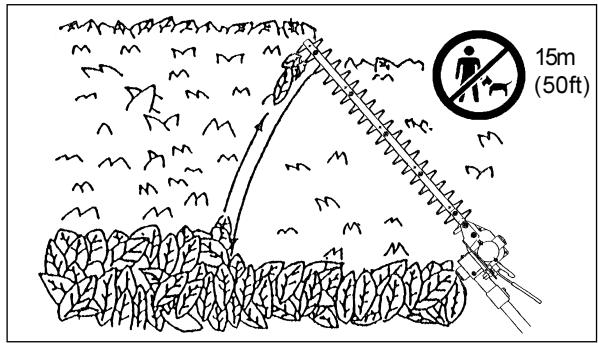
text_image
15m (50ft)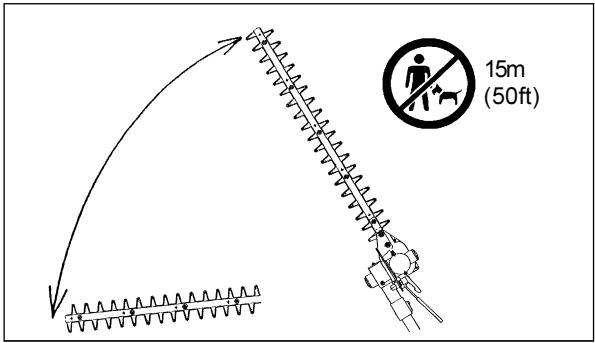
text_image
15m (50ft)natural_image
Pure mechanical assembly diagram showing a bolted joint and a stepped shaft, without any text or symbolsnatural_image
Line drawing of a robotic arm with labeled parts (1), no text or symbols presentnatural_image
Line drawing of a mechanical component with labeled parts (2), showing internal structure without any text or symbols.natural_image
Symbolic icon of an open book inside a black circle (no text or symbols)natural_image
Icon of an open book inside a black circle (no text or symbols)
text_image
Warning symbol with exclamation mark inside triangle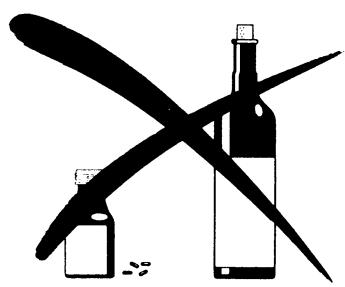
natural_image
Abstract black-and-white graphic with stylized shapes and no text or symbols(1)

natural_image
Simple line drawing of a helmet with a label (2) and no text or symbols on the helmet itself
natural_image
Illustration of a black and white headset with no text or symbols(3)
natural_image
Illustration of a person in military-style uniform with hat and boots, labeled (4), no text or symbols present.
(5)
(6)
text_image
360° 15m (50ft)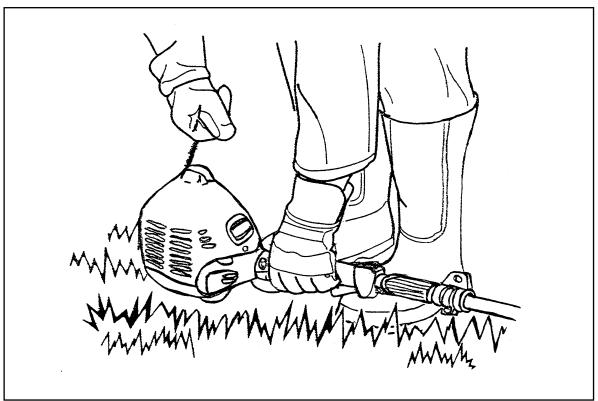
natural_image
Line drawing of a person using a tool to lift a small water bottle on grass (no text or symbols)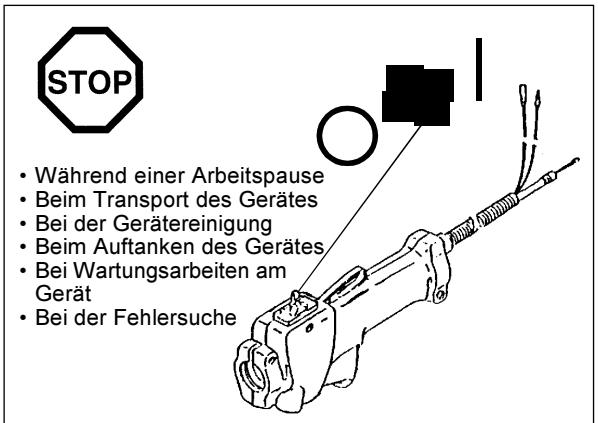
natural_image
Illustration of a person using a long-handled tool to lift a vehicle, with an arrow indicating motion (no text or symbols)Auftanken
text_image
Safety warning illustration showing electric shock hazard with fuel pump, no smoking, and fire extinguisher symbols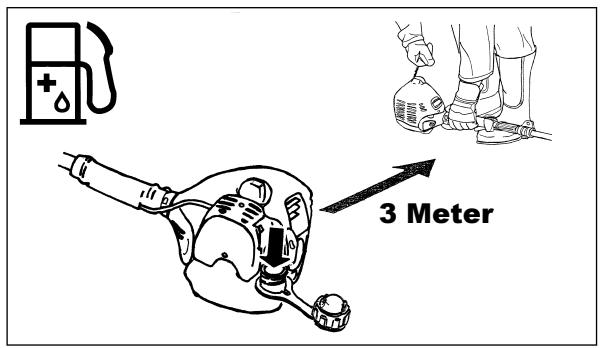
text_image
3 Meter
text_image
Warning symbol image with exclamation mark inside a triangle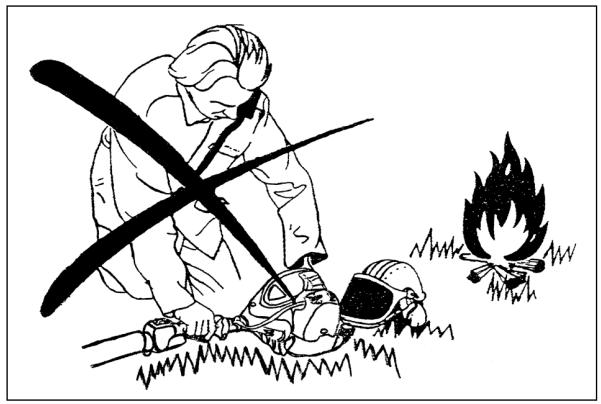
natural_image
Illustration of a person in protective gear using a tool to cut a fire with a campfire nearby (no text or symbols)natural_image
Simple white cross symbol on black background, no text or symbols present

text_image
Technical diagram of a mechanical device with labeled parts, showing internal components and alignment indicators.text_image
Warning symbol with exclamation mark inside trianglenatural_image
Line drawing of a medical device with a pressure gauge and a gas pump symbol (no text or labels)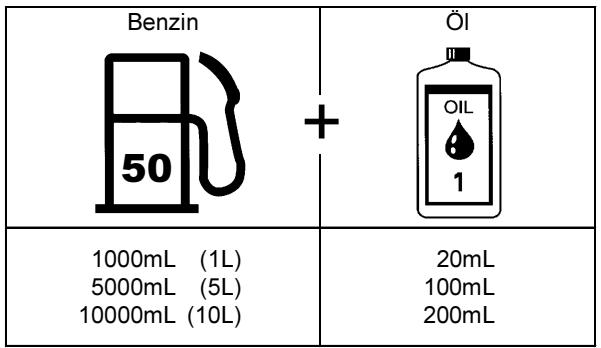
text_image
Benzin 50 + Öl OIL 1 1000mL (1L) 5000mL (5L) 10000mL (10L) 20mL 100mL 200mL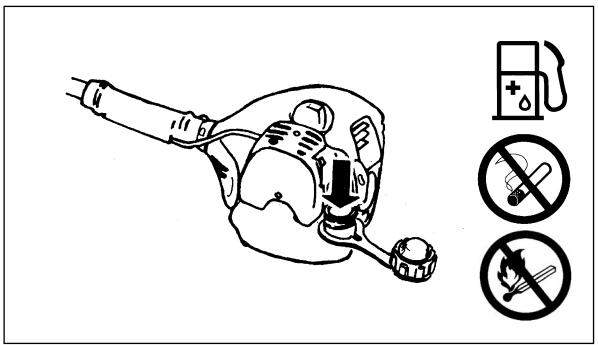
text_image
Safety warning illustration showing a person using a fuel pump and three prohibition symbols for no smoking.VORSICHTSMAßNAHMEN VOR ANLASSEN DES MOTORS
text_image
360° 15m (50 FT)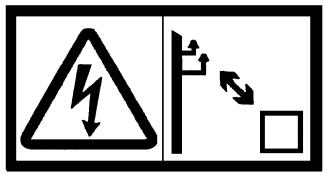
text_image
Safety warning sign showing lightning bolt symbol and pole with directional arrows indicating electrical hazard


text_image
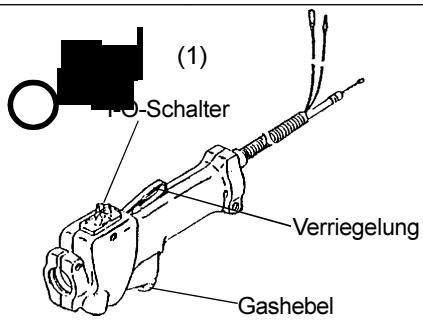
(1) Po-Schalter Verriegelung Gashebel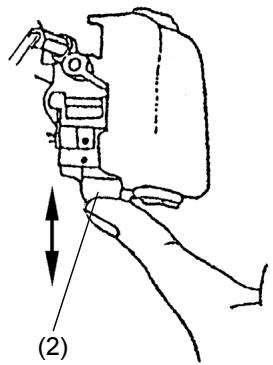
text_image
(2)
text_image
(3)

natural_image
Line drawing of two hands operating a portable air conditioner (no text or symbols)(4)
MOTOR ABSTELLEN
natural_image
Line drawing of a person using a tool to lift a sword, no text or symbols present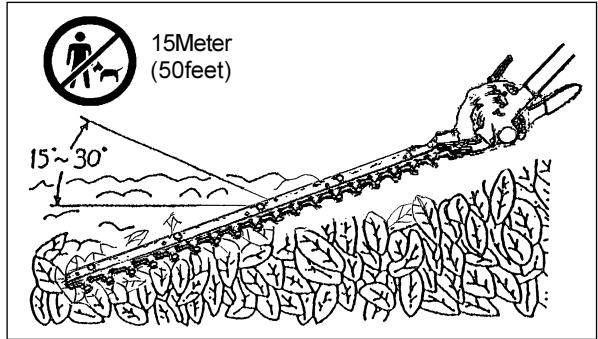
text_image
15Meter (50feet) 15~30°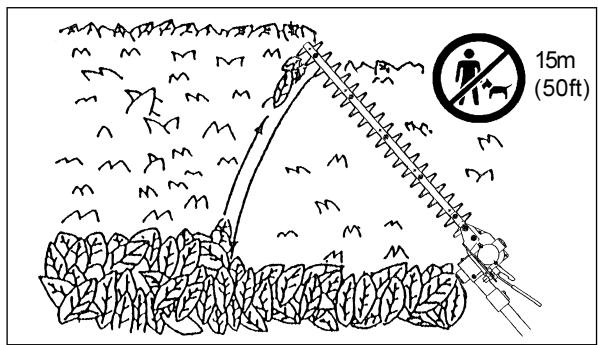
text_image
15m (50ft)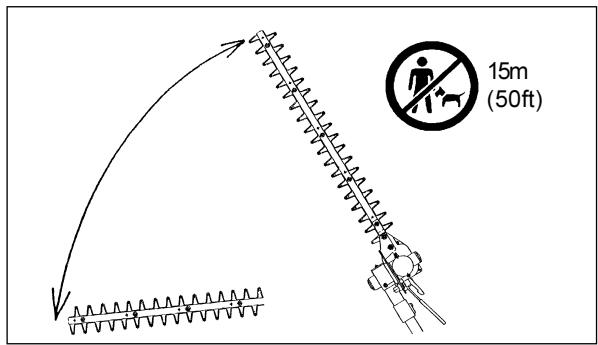
text_image
15m (50ft)natural_image
Pure mechanical assembly diagram showing a bolted joint with an inset close-up of the component (no text or symbols)natural_image
Line drawing of a robotic arm with labeled parts (1), no text or symbols presentnatural_image
Line drawing of a mechanical component with labeled parts (2), showing internal structure without any text or symbols.natural_image
Icon of an open book inside a black circle (no text or symbols)natural_image
Symbolic icon of an open book inside a black circle (no text or symbols)
text_image
Warning symbol with exclamation mark inside triangle, commonly used for safety alerts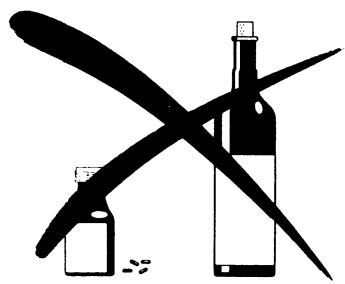
natural_image
Abstract black-and-white illustration of a crossed arrow and two bottles (no text or symbols)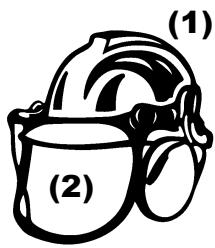
natural_image
Illustration of a helmet with two labeled parts (1) and (2), no text or symbols present.
natural_image
Illustration of a black and white headset with earbuds (no text or symbols)(3)
natural_image
Illustration of a person in military-style uniform with hat and boots, labeled (4), no text or symbols present.
(5)
(6)
text_image
360° 15m (50 FT)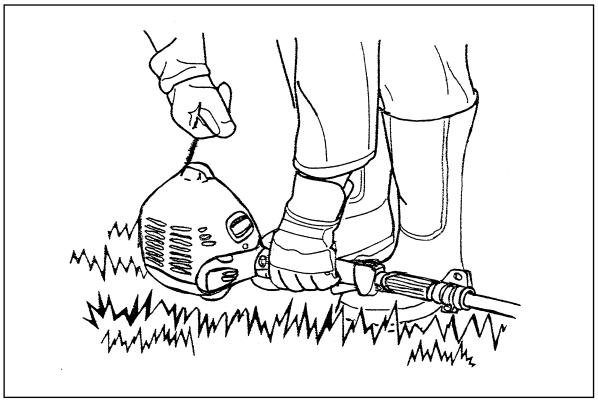
natural_image
Line drawing of a person using a tool to lift a small container on grass (no text or symbols)natural_image
Illustration of a person using a long-handled tool to lift a vehicle, with an arrow indicating motion (no text or symbols)text_image
Safety warning illustration showing a person using a fuel pump and three prohibition symbols: no smoking, no smoking, and no fire.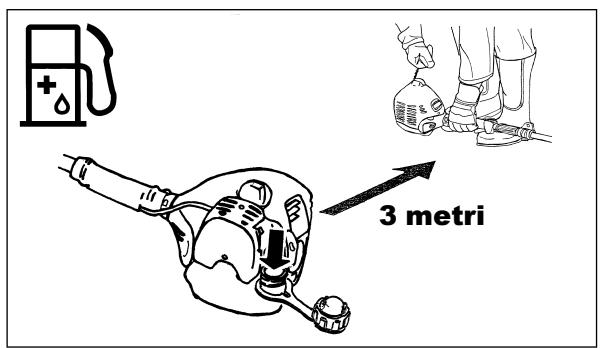
text_image
3 metriDurante il lavoro
text_image
Warning symbol image with exclamation mark inside a triangle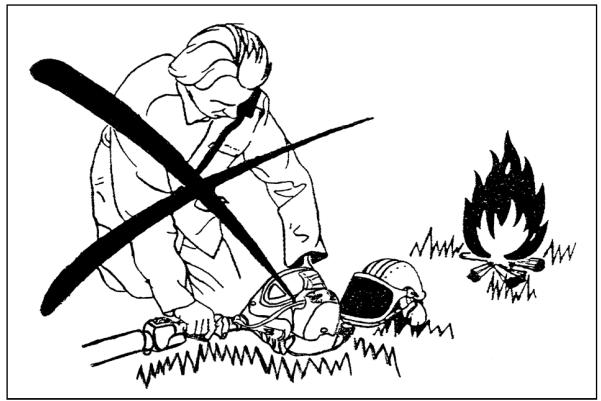
natural_image
Illustration of a person in protective gear using a tool near a campfire (no text or symbols)natural_image
Simple black-and-white cross symbol on black background (no text or numbers)

Normative UE EMC 89/336/EWG, modificate da quelle 91/263/EWG, 92/31/EWG and 93/68/EWG
text_image
Technical diagram of a sewing machine with numbered annotations indicating parts of the body and internal structure.text_image
Warning symbol with exclamation mark inside trianglenatural_image
Line drawing of a medical device with a pressure gauge and a gas pump symbol (no text or labels)natural_image
Line drawing of a robotic arm with articulated joints and a handle (no text or symbols)


text_image
360° 15m (50 FT)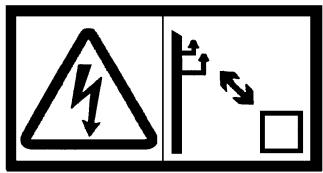
text_image
Safety warning sign showing lightning bolt symbol and pole with right-angle arrows indicating current direction



natural_image
Line drawing of two hands operating a portable air conditioner (no text or symbols)(4)
natural_image
Line drawing of a person using a tool to grip a mechanical component (no text or symbols)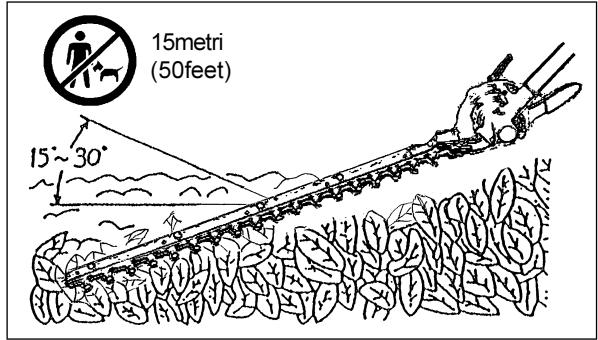
text_image
15metri (50feet) 15°~30°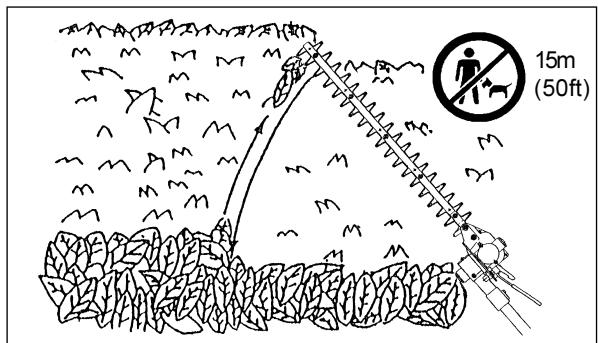
text_image
15m (50ft)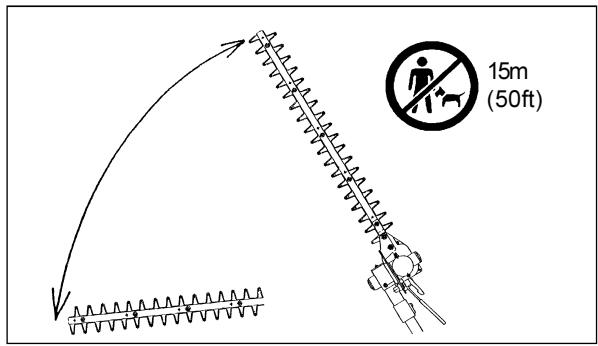
text_image
15m (50ft)natural_image
Technical drawing of a mechanical assembly with cross-hatched sections and no visible text or symbolsnatural_image
Abstract black pixelated diagonal line on white background (no text or symbols)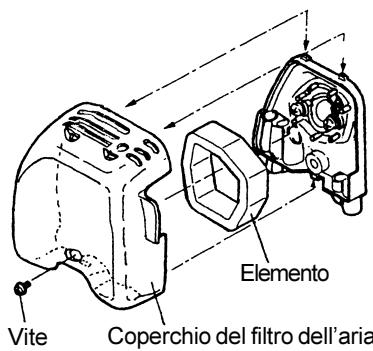
natural_image
Line drawing of a robotic arm with labeled parts (1), no text or symbols presentnatural_image
Line drawing of a mechanical component with labeled parts (2), showing internal structure without any text or symbols.natural_image
Icon of an open book inside a black circle (no text or symbols)natural_image
Icon of an open book inside a black circle (no text or symbols)
text_image
Warning symbol with exclamation mark inside triangle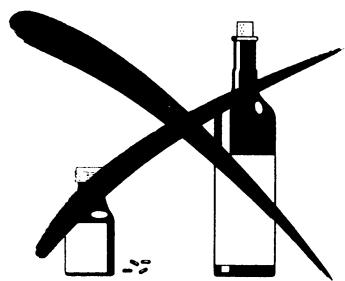
natural_image
Black and white illustration of a wine bottle crossed out by a curved line, with no visible text or symbols.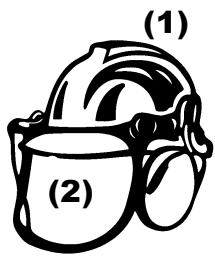
natural_image
Illustration of a helmet with two labeled parts (1) and (2), no text or symbols present.
natural_image
Illustration of a black and white headset with no text or symbols(3)
natural_image
Illustration of a person in military-style uniform with a beanie, standing with one hand extended (no text or symbols)
(5)
(6)
text_image
360° 15m (50FT)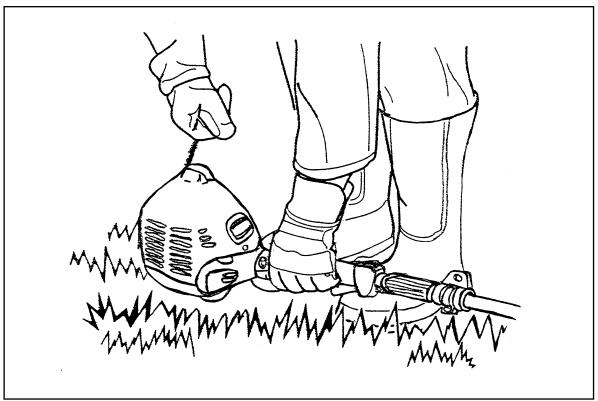
natural_image
Line drawing of two hands operating a portable device on grass, no text or symbols present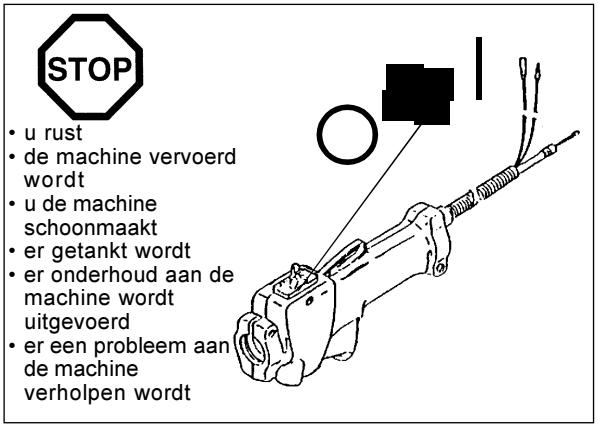
natural_image
Illustration of a person using a long-handled tool to lift a curved blade, with an arrow indicating motion (no text or symbols)Tanken
text_image
Safety warning illustration showing a medical device with no smoking and three prohibition symbols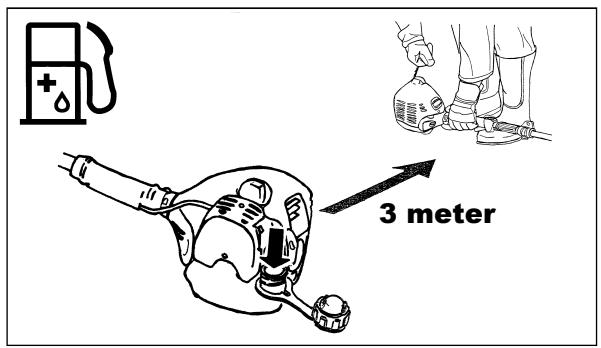
text_image
3 meterBediening
text_image
Warning symbol image with exclamation mark inside a triangle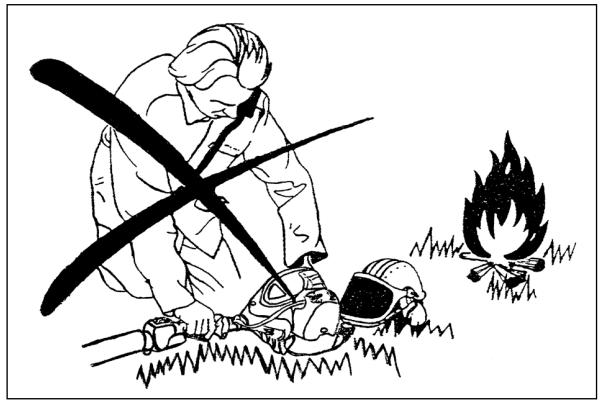
natural_image
Illustration of a person in protective gear using a tool to cut a fire with smoke nearby (no text or symbols)natural_image
Simple black-and-white cross symbol on black background (no text or numbers)

text_image
Technical diagram of a mechanical device with numbered annotations indicating parts of the body and internal structure.text_image
Warning symbol with exclamation mark inside trianglenatural_image
Line drawing of a medical device with a pressure gauge and a gas pump symbol (no text or labels)Benzine | + | Olie |
| 1000mL (1L)5000mL (5L)10000mL (10L) | 20mL100mL200mL |
natural_image
Line drawing of a robotic arm with articulated joints and grippers (no text or symbols)


VOORZORGEN BIJ HET STARTEN VAN DE MOTOR
text_image
360° 15m (50 FT)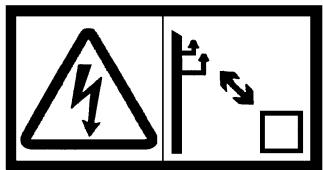
text_image
Safety warning sign showing lightning bolt symbol and pole with right-angle arrow indicating right turn



text_image
(1) Schakelaar Vergrendeling Gashendel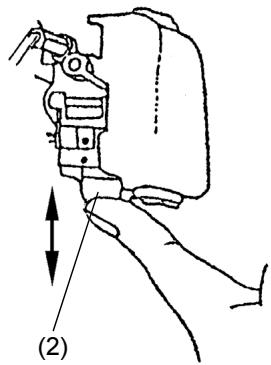
text_image
(2)
text_image
(3)

natural_image
Line drawing of two hands operating a portable air conditioner (no text or symbols)(4)
STOPPEN VAN DE MOTOR



natural_image
Line drawing of a person using a tool to grip a mechanical component (no text or symbols)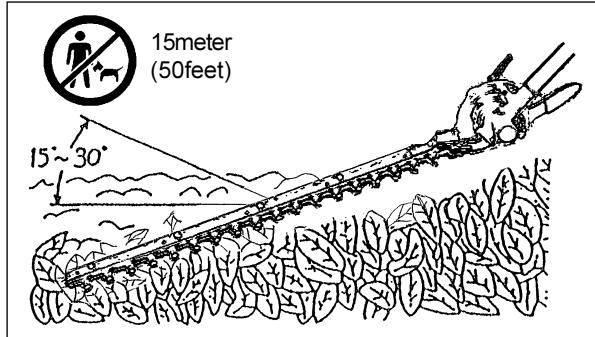
text_image
15meter (50feet) 15°~30°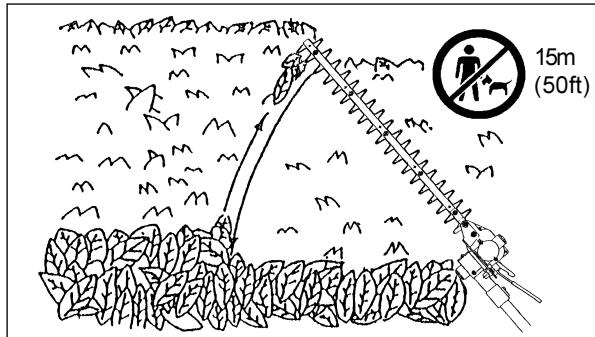
text_image
15m (50ft)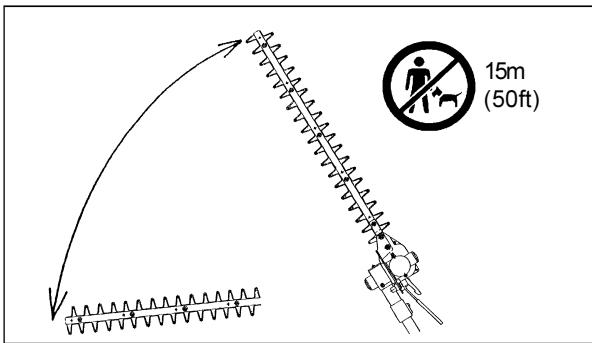
text_image
15m (50ft)natural_image
Technical cross-sectional diagram of a mechanical assembly (no text or labels)natural_image
Line drawing of a robotic arm with labeled parts (1), no text or symbols presentnatural_image
Line drawing of a mechanical component with labeled parts (2), showing internal structure without any text or symbols.natural_image
Symbolic icon of an open book inside a black circle (no text or symbols)text_image
15m (50 FT)natural_image
Icon of an open book inside a black circle (no text or symbols)
text_image
Warning symbol with exclamation mark inside triangle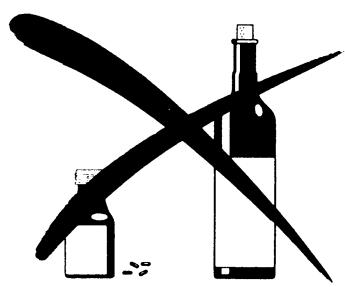
natural_image
Abstract black-and-white graphic with stylized shapes and no text or symbols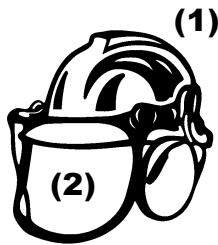
natural_image
Illustration of a helmet with two labeled parts (1) and (2), no text or symbols present.
natural_image
Illustration of a black and white headset with no text or symbols(3)
natural_image
Illustration of a person in military-style uniform with hat and gloves, labeled (4), no text or symbols present.
(5)
(6)
text_image
360° 15m (50FT)
natural_image
Line drawing of a person using a handheld tool to lift a small cylindrical device on grass (no text or symbols)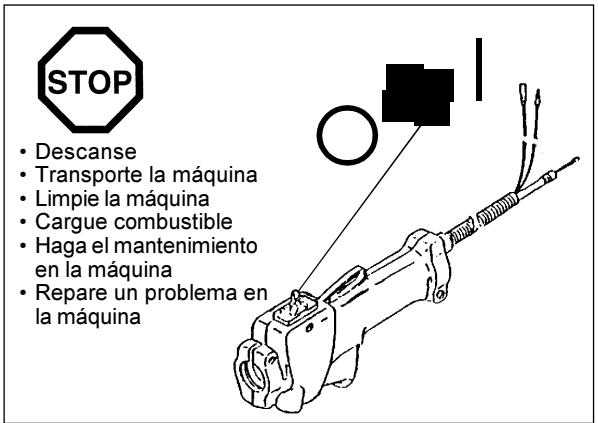
natural_image
Illustration of a person using a long-handled tool to lift a vehicle, with an arrow indicating motion (no text or symbols)Carga de combustible
text_image
Safety warning illustration showing a person using a fuel pump and three prohibition symbols: no smoking, no smoking, and no fire.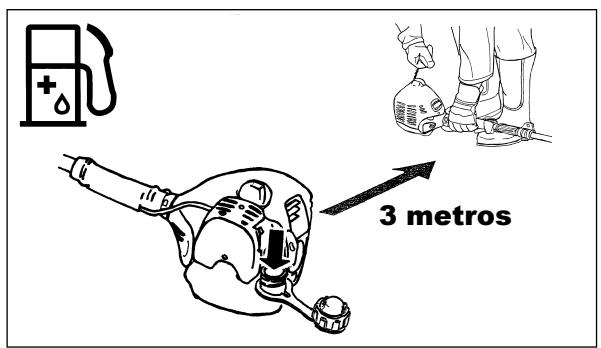
text_image
3 metros
text_image
Warning symbol image with exclamation mark inside a triangle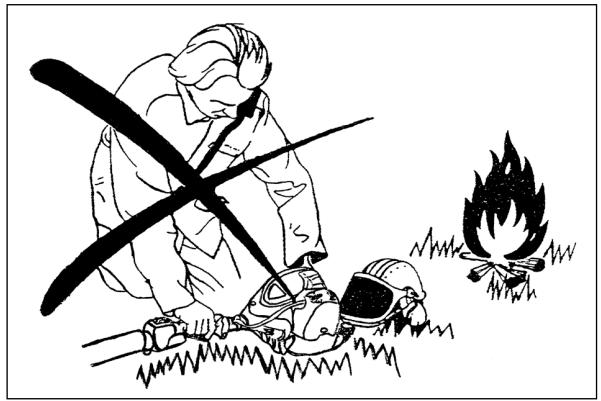
natural_image
Illustration of a person in protective gear with a cross symbol, next to a campfire and smoke (no text or symbols)natural_image
Simple black-and-white cross symbol on black background (no text or numbers)

text_image
Technical diagram of a mechanical device with labeled parts, including a numbered annotation (②) pointing to a component.text_image
Warning symbol with exclamation mark inside trianglenatural_image
Line drawing of a robotic arm with articulated joints and a handle (no text or symbols)
Gasolina | + | Aceite |
| 1000mL (1L)5000mL (5L)10000mL (10L) | 20mL100mL200mL |
natural_image
Line drawing of a robotic arm with articulated joints and grippers (no text or symbols)


Carga de combustible
text_image
360° 15m (50FT)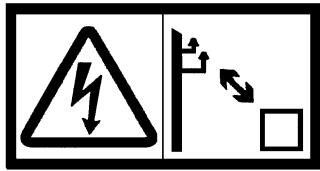
text_image
Safety warning sign showing lightning bolt symbol and pole with directional arrows indicating shock hazard


text_image
(1) ruptor I-O Palanca de bloqueo Palanca de la mariposa de gases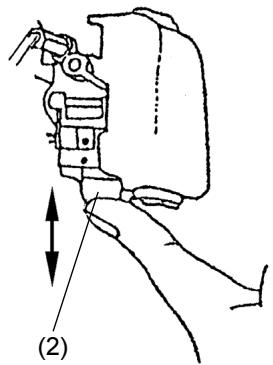
text_image
(2)
text_image
(3)

natural_image
Line drawing of a person using a handheld device to interact with another person (no text or symbols present)natural_image
Four black-and-white warning symbols: triangular warning triangle, hand gesture, helmet with safety gear, and boot (no text or numbers)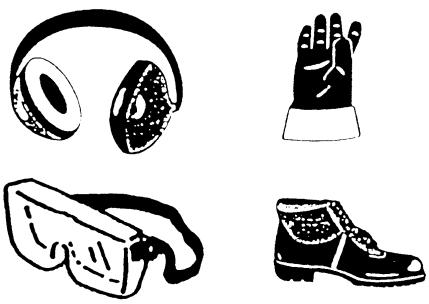
natural_image
Illustration of four different winter sports equipment: headboard, gloves, sneaker, and boot (no text or symbols)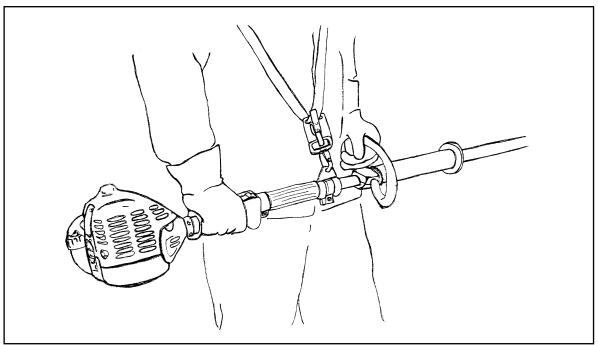
natural_image
Line drawing of a person using a sprocket to lift a rope, no text or symbols present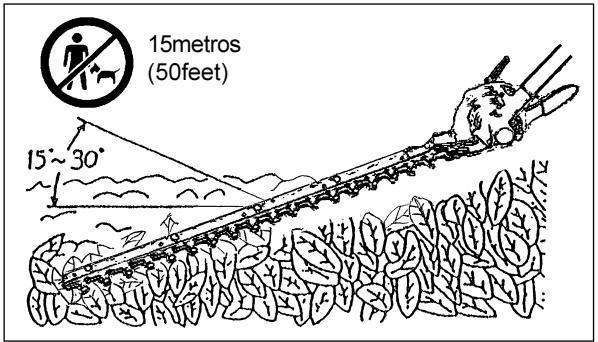
text_image
15metres (50feet) 15°~30°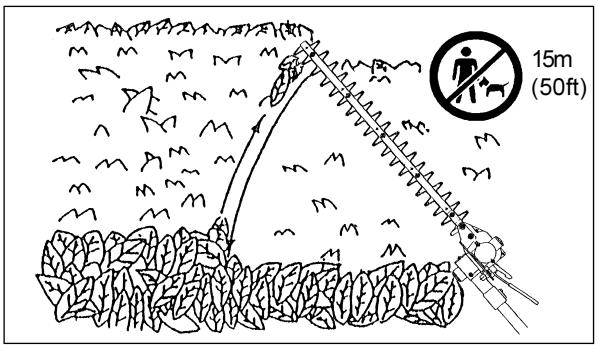
text_image
15m (50ft)