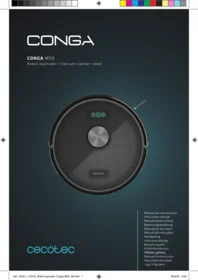
Conga M50 X Treme - Robot vacuum CECOTEC - Free user manual and instructions
Find the device manual for free Conga M50 X Treme CECOTEC in PDF.


| Product type | Robotic vacuum cleaner |
| Brand | Cecotec |
| Model | Conga M50 X Treme |
| Dimensions (diameter x height) | 33 cm x 8 cm |
| Weight | 2.8 kg |
| Battery type | Rechargeable lithium-ion |
| Battery capacity | 2500 mAh |
| Runtime | Up to 120 minutes |
| Charging time | Approximately 4 to 5 hours |
| Suction power | 2000 Pa |
| Dustbin capacity | 500 ml |
| Filtration system | HEPA filter |
| Main functions | Automatic cleaning, scheduling, drop detection, suction, brushing |
| Noise level | Approximately 55 dB |
| Power supply | AC adapter 100-240V, 50/60Hz |
| Maintenance and cleaning | Empty the dustbin, clean the brushes, replace the filter every 3 months |
| Safety | Anti-fall sensors, overload protection |
| Spare parts and repairability | Brushes, filters, dustbin, battery available on the Cecotec website |
| General information | 2-year warranty, use on hard floors and carpets |
Frequently Asked Questions - Conga M50 X Treme CECOTEC
User questions about Conga M50 X Treme CECOTEC
0 question about this device. Answer the ones you know or ask your own.
Ask a new question about this device
Download the instructions for your Robot vacuum in PDF format for free! Find your manual Conga M50 X Treme - CECOTEC and take your electronic device back in hand. On this page are published all the documents necessary for the use of your device. Conga M50 X Treme by CECOTEC.
USER MANUAL Conga M50 X Treme CECOTEC
cecòtec
- Parts and components 19
- Before use 20
- Operation 20
- Wi-Fi connectivity and mobile App 24
- Cleaning and maintenance 24
- Troubleshooting 26
- Copyright 29
- Simplified EU Declaration of Conformity 30
SOMMAIRE
EU01_114516_Conga M50
EN • The coding in this manual is generic and applies to all code variants of the appliance.
https://cecotec.es/es/information/declaration-of-conformity
ENGLISH
1. PARTS AND COMPONENTS
Fig. 1
- Back Home button
- Laser sensor
- START/PAUSE button:
- Short press: Start or pause cleaning
- Long press: Power on/off
- IR sensor
- Bumper
- Spot Cleaning button
- Charging base
- DC connector
- Charging contacts
Fig. 2
- Fall-detection sensors
- Omnidirectional wheel
- Charging contacts
- Fall-detection sensors
- Side brush
- Main brush release button
- Main brush
- Drive wheels
Fig. 3
- Mixed tank
- Mop holder
- Mop pad
- Water inlet
- High-efficiency filter
- Sponge filter
- Pre-filter
Note:
The graphics in this manual are schematic representations and may not exactly match the product.
CONGA M50
ENGLISH
2. BEFORE USE
- This robot vacuum cleaner comes in packaging designed to protect it during transport. Take the robot vacuum cleaner out of its box. You can keep the original box and other packaging materials in a safe place to prevent damage to the robot vacuum cleaner if you need to transport it in the future. If you wish to dispose of the original packaging, make sure all items are recycled properly.
- Check that all parts and components are included and in good condition. If any of them are missing or damaged, please contact Cecotec's Official Technical Support Service immediately.
Box content
Fig. 4
- Robot vacuum cleaner
- Charging base
- Power adapter
- Mixed tank, mop holder and mop pad
- Side brush
- Self-cleaning brush
- Mixed brush
- Instruction manual
Do not remove the product's serial number in order to keep proper traceability if technical assistance is required.
3. OPERATION
Cautions:
- Check and prepare the area to be cleaned to ensure safe operation. Arrange furniture and remove obstacles that may hinder cleaning.
- Remove or cover low-lying objects on the floor that may interfere with the robot's operation, such as bathroom scales or stand fan bases. Fig. 5.
- For carpets with fringe or tassels, fold the edge underneath the carpet to prevent entanglement with the robot.
- When the robot is cleaning near open stairs or drops, place a protective barrier to ensure safety and proper operation. Fig. 6.
- Remove any objects from the cleaning area that could become entangled in the robot, such as power cables, cords, etc. Additionally, if a step is too high, the robot may get stuck. Fig. 7
ENGLISH
Useful tips:
- For the first use, follow the robot throughout its complete cleaning cycle. This will help you identify and resolve any initial minor issues and ensure uninterrupted cleaning. While following it, be careful not to stand directly in front of the robot.
3.1. Preparation
Before using the product:
Remove the protective strip. Fig. 8
Remove the protective film. Fig. 9
Install the side brush. Fig. 10
3.2. Charging the robot
- Place the charging base on the floor against a wall.
- Make sure there are no stairs, drops or objects within 1 metre to the left and right of the base, and 2 metres in front of it. Fig. 11
- Connect the base to the mains power supply.
- Avoid direct sunlight exposure.
- Place the robot on the charging base, ensuring the charging contacts on both the robot and base connect properly. The robot will beep and start charging. During charging, the START/PAUSE button will flash white. Once fully charged, the white light will remain steady.
- When using it for the first time, fully charge the robot.
- Charging time is approximately 4-5 hours.
Important notices:
- During daily use, make sure that the robot returns to the charging base and the base remains connected to the power supply.
- Regularly clean the charging contacts on the base to ensure efficient charging.
- If the robot will not be used for an extended period, charge it completely, turn it off, and store it in a dry, well-ventilated place.
- If the battery becomes excessively discharged or is not used for a long time, the product may not recharge. In this case, contact Cecotec's Official Technical Support Service. Do not attempt to disassemble or repair the robot yourself.
3.3. Installing the mixed tank
- Open the water tank lid and fill it with water. Fig. 12
- Close the water tank lid. Make sure the lid is properly closed with no raised edges. Fig. 13
- Install the mop holder and mop pad. Fig. 14
- Insert the mixed tank and dust container. Fig. 15
CONGA M50


ENGLISH
Useful tips:
- To extend the water tank's service life, it is recommended to use purified or softened water.
- Do not use the mopping function on carpets.
- After mopping, empty the water tank and remove the mop holder.
- When the mop holder is installed, the robot will operate in simultaneous vacuuming and mopping mode. The suction power will automatically be set to 'quiet' mode and cannot be manually adjusted.
- When the mop holder is not installed, the robot will operate only in vacuuming mode, without mopping.
- It is normal for a small amount of water to remain in the tank due to factory testing.
3.4. Robot operation
1. Starting cleaning
- Press and hold the START/PAUSE button for 3 seconds to switch on the robot.
- Before the first cleaning session, make sure the robot is on the charging base and fully charged.
- Briefly press the START/PAUSE button to start cleaning. The robot will create a map of the environment during its first cleaning session.
2. Start / Pause
- Press the START/PAUSE button during operation to pause the robot.
3. Wake Up
- The indicator light will turn off if the robot remains paused for more than 4 hours. Press and hold the START/PAUSE button to activate it again.
4. Spot Cleaning
- Press the Spot Cleaning button and the robot will clean a 1.5 m x 1.5 m square area centred on its current position.
5. Recharge (Return to base)
- Press the Back Home button and the robot will return to the charging base.
3.5. App operation and features
1. Map management
- Before using the robot, it is recommended to activate the "Map Saving Mode" in the App for an enhanced experience.
- Map creation: By selecting the "Complete Cleaning" mode, the robot will start cleaning
22
CONGA M50
ENGLISH
from the charging base and return upon completion. During this process, it will create a map of the different areas of your home based on the house layout. You can save this map in the App. Up to 4 different maps can be saved.
- Map editing: You can split, merge or rename different areas (partitions) of the map.
2. Complete Cleaning Fig. 16
- The robot will create a map based on its spatial scanning. It will divide each room into square areas, cleaning first the edges of each area and then the interior in a zigzag pattern until all zones are completed.
3. Room Cleaning Fig. 17
- The robot will clean the rooms selected in the App.
Tips:
- "Map Saving Mode" must be activated in the App and a map must be saved before using "Room Cleaning".
- "Room Cleaning" is for customising the cleaning area, not for isolating hazardous zones. Remove any obstacles around the selected rooms.
4. Zone Cleaning Fig. 18
- The robot will clean the zones drawn in the App.
Tips:
- "Zone Cleaning" is for customising the cleaning area, not for isolating hazardous zones. Remove any obstacles within the drawn zones.
5. Pin & Go Fig. 19
- Specify a point on the map and the robot will automatically navigate to it.
6. Recharge and Resume Fig. 20
- When the battery is low during cleaning, the robot will automatically return to the charging base to recharge. Once recharged, it will resume cleaning from where it left off.
Tips:
- The robot will not resume cleaning if the "Do Not Disturb" mode is activated.
- If the robot is manually recharged or relocated, it will not resume cleaning.
7. Restricted Areas Fig. 21
- Create "No-Go Zones", "No-Mop Zones" and "Virtual Walls" on the map to prevent the robot from accessing certain areas or rooms. By default, the "No-Mop Zones" will only be activated when the mop holder is installed.
CONGA M50


ENGLISH
Tips:
- Restricted areas can be created on a saved map or during map creation.
- Restricted areas are for customising the cleaning area, not for isolating hazardous zones.
- If the robot is moved or significant changes occur in the house layout, the map may become invalid and restricted areas may be lost.
8. Scheduled Cleaning Fig. 22
- Set cleaning schedules in the App. The robot will clean at the programmed times and return to the charging base upon completion.
Tips:
- The robot will not start the scheduled cleaning if the battery level is low.
4. WI-FI CONNECTIVITY AND MOBILE APP
Scan the following QR code to access the App download option and an instruction manual explaining how to pair your product:

5. CLEANING AND MAINTENANCE
5.1. Mixed tank
- Press and hold the release button and remove the mixed water and dust tank. Fig. 23
- Remove the mop holder and mop pad. Fig. 24
- Wash and dry the mop pad. Fig. 25
- Open the dust container and remove the pre-filter, filter and sponge filter. Fig. 26
- Clean dust from the pre-filter using the cleaning brush. Gently tap the filter to remove dust. Fig. 27
- Wash the dust container and sponge filter with water. The filter cannot be washed. If it accidentally gets wet, air dry before reuse. Fig. 28
- Empty any remaining water from the water tank. Air dry the water tank, dust container and sponge filter in a shaded area. Fig. 29
5.2. Main brush, side brushes, drive wheels and universal wheel
- Pull the release tabs to unlock the main brush cover, as shown in Fig. 30.
- Lift the main brush to remove it. Fig. 31
- Clean the main brush with the cleaning brush. Fig. 32
- Clean the side brush with the cleaning brush. Fig. 33
24
CONGA M50
ENGLISH
Cleaning the drive wheels
- Use the cleaning brush to remove hair and dirt from the drive wheels. Fig. 34
- If a drive wheel becomes jammed, rotate its gear in the opposite direction so dirt falls through the opening. Fig. 35
Cleaning the universal wheel
Use the cleaning brush to remove hair and dirt from the universal wheel. Fig. 36
5.3. Charging contacts
Clean the robot's charging contacts. Fig. 37
Clean the charging base contacts. Fig. 38
5.4. Fall-detection sensors and bumper
Clean the fall-detection sensors. Fig. 39
Clean the infrared sensor (IR sensor). Fig. 40
Useful tips:
The charging contacts and fall-detection sensors contain sensitive electronic components.
Use a dry cloth to clean them, never a damp cloth, to prevent water damage.
CONGA M50
ENGLISH
6. TROUBLESHOOTING
If the following conditions occur during use, the user can check and resolve them without assistance:
| No. | Problem | Possible cause | Possible solution |
| 1 | The robot does not connect to the App. | The router name and/or password are incorrect. | Configure the router network and make sure the router name and password are correct. |
| The network signal is out of the robot's range. | Make sure the robot is within the router's network signal range. | ||
| The robot is not in configuration mode. | Make sure the robot is connected to the power supply and turned on. Press the Back Home button and the Spot Cleaning button at the same time for 3 seconds. | ||
| You have not selected 2.4GHz or 2.4/5GHz networks. | The robot is not compatible with 5G networks. Please select a 2.4GHz or 2.4/5GHz network. | ||
| You have downloaded the wrong App. | Scan the QR code or download the Cecotec App. | ||
| 2 | The map has been lost. | It is possible to lose the map if the robot is moved manually. | Try to recover it by moving the robot to the charging base. Find the saved map in the App's map storage and press "use map" to recover it. If the problem persists, restart the mapping. |
| 3 | It is not possible to create maps in the App. | The robot does not start operating from the charging base. | The robot must start cleaning from the charging base. |
| The robot has been moved during operation. | Do not move the robot during operation. | ||
| The cleaning session is not complete. | Allow the robot to return to the charging base after cleaning. |
ENGLISH
| 4 | The robot does not return to the charging base. | The charging base is incorrectly positioned. | Position the charging base correctly, following the instructions in the "Charging the robot" section. |
| The charging base is unplugged or has been moved. | Make sure the charging base is turned on and do not move it during cleaning. | ||
| The robot does not start operating from the charging base. | It is recommended that the robot starts cleaning from the charging base. | ||
| The path to the charging base is blocked. For example, the door to the room where the charging base is located is closed. | Keep the charging route clear. | ||
| 5 | The robot returns to the charging base before finishing cleaning. | The room is too large and the robot needs to return to the base to recharge. | Activate Continuous Cleaning. Follow the App instructions for more details. |
| There are areas that the robot cannot access due to furniture or obstacles. | Clear the area to be cleaned, arranging furniture and small objects properly. | ||
| 6 | The robot does not charge. | The charging base is not connected to the power supply. | Make sure that the charging base is connected to the power supply and the indicator light is on. |
| The robot's charging contacts are not in contact with those of the charging base. | Make sure that the robot's charging contacts connect with the base contacts and that the START/ PAUSE button is flashing. Check if the charging contacts on both the robot and base are dirty. Clean these parts as described in the "Charging contacts" section. | ||
| The battery temperature is too high or too low. | It is recommended to charge and use the robot at a temperature between 0 °C and 40 °C. | ||
| Extended periods of inactivity can lead to excessive battery discharge. | It is recommended to use the product regularly. If you do not use it for a long time and have issues charging it, contact Cecotec's Official Technical Support Service. |
CONGA M50
ENGLISH
| 7 | Unusual noise during cleaning. | The side brush and main brush are entangled. The dust container and filter are clogged. | Regular cleaning of the side brush, main brush, dust container, filter, etc. is recommended. |
| The robot is in full power mode. | Switch to standard mode. | ||
| 8 | The robot gets stuck during cleaning and stops. | The robot has become entangled with an object on the floor (power cables, curtains, carpet tassels, etc.). | The robot will try several ways to free itself. If unsuccessful, you must remove the obstacles manually and restart the robot. |
| The robot may be stuck under furniture. | Place a physical barrier, or set a Virtual Wall in the App. | ||
| 9 | The following issues may occur while the robot is cleaning: disordered cleaning path, cleaning path deviation, repetitive cleaning or lack of cleaning in small areas. (If there is a large area that has not been cleaned, the robot will automatically clean the missing area later). | The presence of cables, slippers and other objects on the floor hinders the robot's normal operation. | Please pick up objects scattered on the floor, such as cables and slippers, before cleaning. If any area is left uncleaned, the robot will clean the missed area automatically, please do not interfere (e.g. by moving the robot or blocking its path). |
| When climbing steps, thresholds and door frames, the robot's drive wheel slips on the floor, which can affect the robot's perception of the whole house layout. | It is recommended to close the door and clean the area separately. After cleaning, it will return to the starting point. You can use it with complete peace of mind. | ||
| Operation on recently waxed and polished floors or smooth tiles results in less traction between the drive wheels and the floor. | It is recommended to wait for the floor wax to dry before using it. | ||
| Home layout prevents the robot to access some areas. | We recommend tidying up the home to ensure that the robot can access and clean properly. | ||
| The distance sensor is dirty or covered. | Clean the distance sensor or remove objects covering it. |
ENGLISH
| 10 | There is a dust leakage during operation. | The dust container outlet is blocked. | Remove the mixed tank and clean the dust container opening. |
| 11 | During use, the robot's water tank slips out of place. | The tank is not installed correctly. | Make sure that the robot's tank fits into place when installing it. |
| 12 | The drive wheels are blocked. | The drive wheels are obstructed by foreign objects. | Rotate and press the drive wheels to check if there are any foreign objects wrapped or stuck. If you find anything, clean it up as soon as possible. If the problem persists, contact Cecotec's Official Technical Support Service. |
| 13 | The robot does not start automatic cleaning at the scheduled time. | The Scheduled Cleaning function is cancelled. | Reset the schedule. |
| The robot has run out of battery. | Charge the robot. | ||
| The Do Not Disturb mode is activated. | In Do Not Disturb mode, the robot does not perform the scheduled cleaning. | ||
| 14 | The robot does not perform Continuous Cleaning. | The Do Not Disturb mode is activated. | In Do Not Disturb mode, the robot does not perform Continuous Cleaning. |
| In the last cleaning session, the robot did not return to the charging base automatically. | Continuous Cleaning is not performed when the robot is manually placed or moved to charging base. |
If you are unable to solve these problems by following the above instructions, please contact after-sales service.
7. COPYRIGHT
The intellectual property rights over the texts in this manual belong to CECOTEC INNOVACIONES, S.L. All rights reserved. The contents of this publication may not, in whole or in part, be reproduced, stored in a retrieval system, transmitted, or distributed by any means (electronic, mechanical, photocopying, recording or similar) without the prior authorization of CECOTEC INNOVACIONES, S.L.
CONGA M50
ENGLISH
8. SIMPLIFIED EU DECLARATION OF CONFORMITY

Cecotec Innovations hereby declares that the robot vacuum cleaner, model EU01_114516 - Conga M50, is in conformity with the Radio Equipment Directive 2014/53/EU.
The full text of the EU Declaration of Conformity can be found on the following website:
https://cecotec.es/es/information/declaration-of-conformity
FRANÇAIS
1. PIÈCES ET COMPOSANTS
Img. 1
https://cecotec.es/es/information/declaration-of-conformity
CONGA M50
ITALIANO
1. PARTI E COMPONENTI
Fig. 1
4. CONNESSIONE WI-FI E APP
https://storececotec.it/it/information/declaration-of-conformity
PORTUGUÊS
1. PEÇAS E COMPONENTES
Fig. 1
https://cecotec.pt/pt/information/declaration-of-conformity
CONGA M50
83
NEDERLANDS
1. ONDERDELEN EN COMPONENTEN
Afbeelding 1
6. PROBLEEMOPLOSSING
https://cecotec.es/es/information/declaration-of-conformity
POLSKI
1. CZĘŚCI I KOMPONENTY
Rys. 1
https://cecotec.es/es/information/declaration-of-conformity
CONGA M50
ČEŠTINA
1. DÍLY A KOMPONENTY
Obr. 1
https://cecotec.es/es/information/declaration-of-conformity
CONGA M50
121
TÜRKÇE
1. PARÇALAR VE BILEŞENLER
Şekil 1
https://cecotec.es/es/information/declaration-of-conformity
ΕΛΛΗΝΙΚΑ
1. MEPH KAI E≡APTHMATA
Eik. 1
https://cecotec.es/es/information/declaration-of-conformity
CONGA M50
CATALÀ
1. PECES I COMPONENTS
Fig. 1
https://cecotec.es/ca/information/declaration-of-conformity
MAGYAR
https://cecotec.es/es/information/declaration-of-conformity
CONGA M50
173
ي برع
https://cecotec.es/es/information/declaration-of-conformity


- SOMMAIRE
- ENGLISH
- PARTS AND COMPONENTS
- Fig. 1
- Fig. 2
- Fig. 3
- Note:
- BEFORE USE
- Box content
- OPERATION
- Cautions:
- Useful tips:
- Preparation
- Charging the robot
- Important notices:
- Installing the mixed tank
- Robot operation
- Starting cleaning
- Start / Pause
- Wake Up
- Spot Cleaning
- Recharge (Return to base)
- App operation and features
- Map management
- Complete Cleaning Fig. 16
- Room Cleaning Fig. 17
- Tips:
- Zone Cleaning Fig. 18
- Pin & Go Fig. 19
- Recharge and Resume Fig. 20
- Restricted Areas Fig. 21
- Scheduled Cleaning Fig. 22
- WI-FI CONNECTIVITY AND MOBILE APP
- CLEANING AND MAINTENANCE
- Mixed tank
- Main brush, side brushes, drive wheels and universal wheel
- Cleaning the drive wheels
- Cleaning the universal wheel
- Charging contacts
- Fall-detection sensors and bumper
- TROUBLESHOOTING
- COPYRIGHT
- SIMPLIFIED EU DECLARATION OF CONFORMITY
- FRANÇAIS
- PIÈCES ET COMPOSANTS
- Img. 1
- ITALIANO
- PARTI E COMPONENTI
- CONNESSIONE WI-FI E APP
- PORTUGUÊS
- PEÇAS E COMPONENTES
- NEDERLANDS
- ONDERDELEN EN COMPONENTEN
- Afbeelding 1
- PROBLEEMOPLOSSING
- POLSKI
- CZĘŚCI I KOMPONENTY
- Rys. 1
- ČEŠTINA
- DÍLY A KOMPONENTY
- Obr. 1
- TÜRKÇE
- PARÇALAR VE BILEŞENLER
- Şekil 1
- ΕΛΛΗΝΙΚΑ
- MEPH KAI E≡APTHMATA
- Eik. 1
- CATALÀ
- PECES I COMPONENTS
- MAGYAR
Brand : CECOTEC
Model : Conga M50 X Treme
Category : Robot vacuum