DJ025BB - Radio LEXIBOOK - Free user manual and instructions
Find the device manual for free DJ025BB LEXIBOOK in PDF.
| Product type | Barbie digital camera with flash |
| Brand | LEXIBOOK |
| Model | DJ025BB |
| Power supply | 3 AAA 1.5V batteries (not included) |
| Resolution | High (≈48 photos) / Low (≈186 photos) |
| Flash | Automatic, manually on/off |
| Screen | LCD |
| Viewfinder | Optical |
| Internal memory | Built-in (no memory card) |
| Connectivity | USB (cable included) |
| Functions | Photo capture, playback mode, slideshow, delete, webcam mode |
| Interchangeable covers | 2 covers included |
| Included software | Print Creations, Barbie's Creative Photo Lab |
| Care and cleaning | Clean with a slightly damp cloth; avoid moisture and heat |
| Warranty | 2 years |
| Reference | DJ025BB |
| Manufacturer | LEXIBOOK S.A., 2 avenue de Scandinavie, 91953 Courtaboeuf Cedex France |
Frequently Asked Questions - DJ025BB LEXIBOOK
User questions about DJ025BB LEXIBOOK
0 question about this device. Answer the ones you know or ask your own.
Ask a new question about this device
Download the instructions for your Radio in PDF format for free! Find your manual DJ025BB - LEXIBOOK and take your electronic device back in hand. On this page are published all the documents necessary for the use of your device. DJ025BB by LEXIBOOK.
USER MANUAL DJ025BB LEXIBOOK
Barbie Digital Camera with flash INSTRUCTION MANUAL
DJ025BB
A
B
C
D
PRÉSENTATION DE VOTRE APPAREIL PHOTO
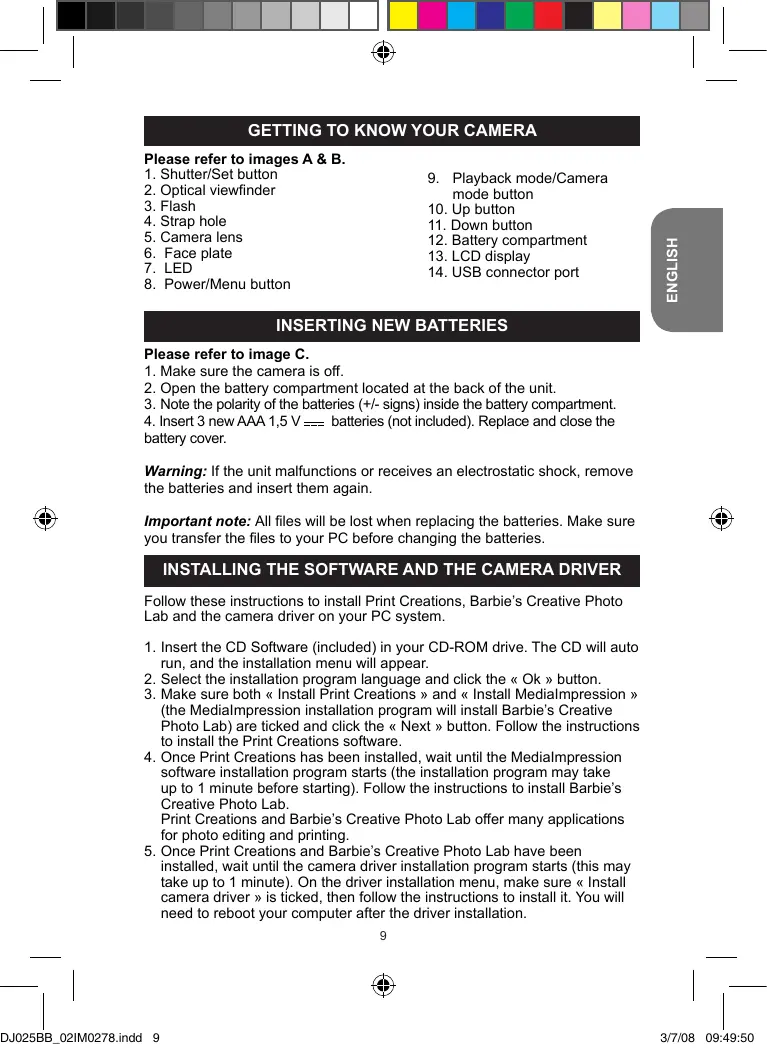
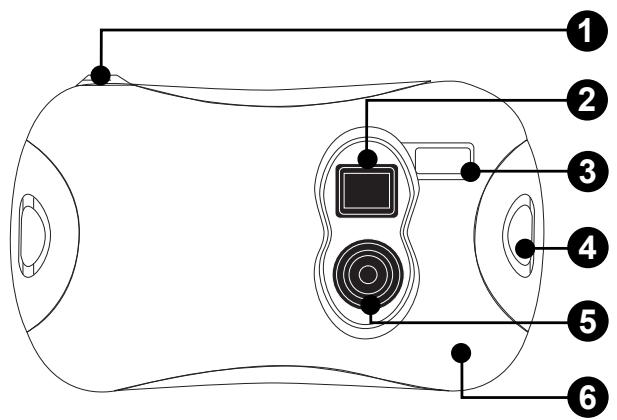
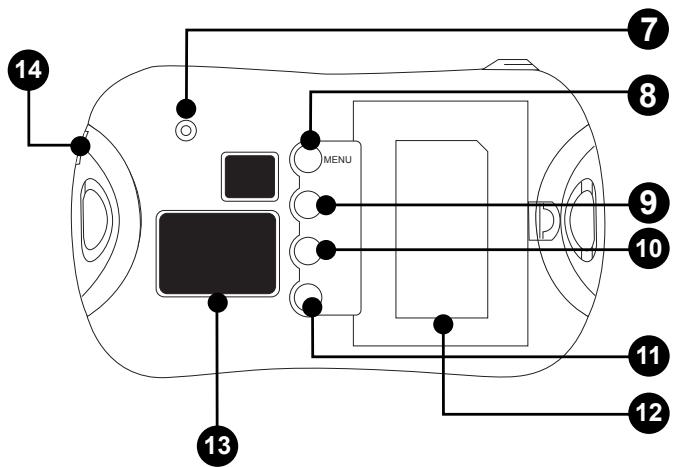
Please refer to images A & B.
1.Shutter/Set button
2. Optical viewfinder
3. Flash
4. Strap hole
5. Camera lens
6. Face plate
7. LED
8. Power/Menu button
9.Playback mode/Camera mode button
- Up button
- Down button
- Battery compartment
- LCD display
- USB connector port
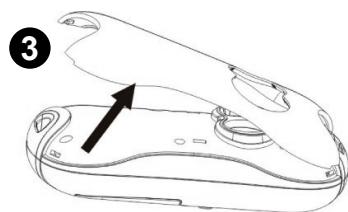
INSERTING NEW BATTERIES
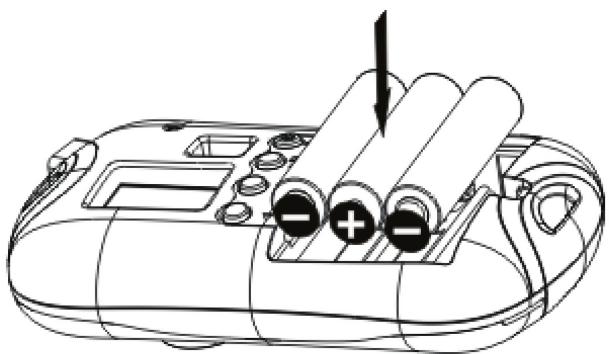
Please refer to image C.
- Make sure the camera is off.
- Open the battery compartment located at the back of the unit.
- Note the polarity of the batteries (+/- signs) inside the battery compartment.
- Insert 3 new AAA 1,5 V --- batteries (not included). Replace and close the battery cover.
Warning: If the unit malfunctions or receives an electrostatic shock, remove the batteries and insert them again.
Important note: All files will be lost when replacing the batteries. Make sure you transfer the files to your PC before changing the batteries.
INSTALLING THE SOFTWARE AND THE CAMERA DRIVER
Follow these instructions to install Print Creations, Barbie's Creative Photo Lab and the camera driver on your PC system.
- Insert the CD Software (included) in your CD-ROM drive. The CD will auto run, and the installation menu will appear.
- Select the installation program language and click the « Ok » button.
- Make sure both « Install Print Creations » and « Install Medialmpression » (the Medialmpression installation program will install Barbie's Creative Photo Lab) are ticked and click the « Next » button. Follow the instructions to install the Print Creations software.
- Once Print Creations has been installed, wait until the MedialImpression software installation program starts (the installation program may take up to 1 minute before starting). Follow the instructions to install Barbie's Creative Photo Lab.
Print Creations and Barbie's Creative Photo Lab offer many applications for photo editing and printing.
- Once Print Creations and Barbie's Creative Photo Lab have been installed, wait until the camera driver installation program starts (this may take up to 1 minute). On the driver installation menu, make sure « Install camera driver » is ticked, then follow the instructions to install it. You will need to reboot your computer after the driver installation.
Note:
- If the CD does not auto run, click Start Run, type in "D:\setup.exe" in the Run dialog text box (where D:\ is your CD-ROM drive) and press Enter.
- Please wait between the installations processes of the software and the camera driver (the installation program may take up to 1 minute before starting).
- You must install the driver before downloading pictures from the camera.
- Make sure the camera is not connected to your PC before installing the driver and the software.
TURING THE CAMERA ON AND OFF
Press the Power button (8) for about 3 seconds to turn the camera on. The camera will sound a beep to confirm that it is ready for use. Press and hold Power button (8) for about 3 seconds again to turn it off.
Note: The camera will auto power off after 60 seconds of inactivity.
SELECTING THE PHOTO RESOLUTION
There are 2 resolution modes:

High resolution: the camera can store about 48 pictures in this mode.
Low resolution: the camera can store about 186 pictures in this mode.
- Press the Menu button (8) three times to see what kind of resolution setting is selected on your camera.
- Press the Shutter button (1) once within 3 seconds to change the resolution.
- Repeat steps 1 and 2 to modify the resolution again.
FLASH FUNCTION
Switch on the camera.
A Auto Flash
- Press the Menu button (8) until the ^ icon appears on the lower left corner of the LCD screen. Press the Shutter button (1) within 3 seconds to confirm and activate the auto flash.
Flash on
- Press the Menu button (8) until the ^ icon appears on the lower left corner of the LCD screen. Press the Shutter button (1) within 3 seconds to confirm and switch on the flash.
Flash off
- Press the Menu button (8) until the icon appears on the lower left corner of the LCD screen. Press the Shutter button (1) within 3 seconds to confirm and switch off the flash.
TAKING PHOTOS
Switch on the unit. In Camera mode, press the Shutter button (1) to take a photo. The camera will beep once to confirm that a picture is taken. The number of pictures you can still take in memory is shown on the LCD screen.
Note: When the camera's memory is full, if you try to take a photo the LCD screen will display "00" and the camera will beep two times.
PLAYBACK MODE
- Switch on the camera. Press the playback button (9) to enter playback mode.
- The camera will automatically show the photos currently stored in memory in a slide show format. Press the up button (10) or the down button (11) to exit the slide show.
Note: the camera will launch the slide show only if there are 2 photos, or more, stored in your camera's memory.
- Press the up button (10) or the down button (11) to browse manually through your photos.
DELETING FILES
- Switch on the camera.
- In Camera mode:
Delete the last picture taken
Press the Menu button (8) two times; the icon will appear on the LCD display. Press the Shutter button (1) within 3 seconds to delete the last picture taken.
Deleting all files
Press the Menu button (8) one time; the icon will appear on the LCD display. Press the Shutter button (1), the number of pictures you can still take in memory will flash on the LCD. Press the Shutter button (1) again within 3 seconds to delete all the pictures stored in the camera.
- In playback mode:
Delete the last picture taken
Press the up button (10) or the down button (11) to exit the slide show. Press the Shutter button (1); you will hear a continuous « beep » sound. Press the Shutter button (1) again to delete the last picture taken.
- Connect the camera to your computer via the USB cable provided. You will hear a small beep sound and the LCD screen will turn on when the camera is connected to your PC.
- Double-click on the Barbie's Creative Photo Lab icon that appears on your desktop to launch the Barbie's Creative Photo Lab program.
- Click on the "Acquire" button on the Main Menu.
- Select the "913D camera" driver from the list of devices and follow the instructions to download your photos.
PC GAM MODE
Connected to your PC, your camera can be used as a webcam.
Webcam mode
- Connect the camera to your computer via the USB cable.
- In "My Computer", double click on a new drive called "913D Camera". You will be in webcam mode.
Instant messaging (chat)
You can use your camera as a webcam with your instant messaging client (Yahoo Messenger, MSN Messenger, Skype...).
Ex: Using Yahoo Messenger
- Connect the camera to your computer via the USB cable.
- Start Yahoo messenger.
- Select the « Tools » listing on the top of the toolbar. Go to the drop down menu and select the listing for « Start my Webcam »
- You will see a window appearing with your image. Now people who have your Yahoo login name will be able to see you.
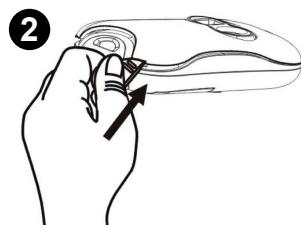
INTERCHANGEABLE COVERS
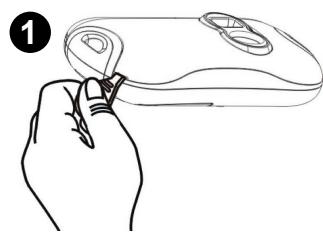
Please refer to image D.
Your digital camera comes with 2 interchangeable covers. To remove and insert a cover, use a sharp instrument to unsnap the cover on each corner of the camera. Snap in a new cover.
MAINTENANCE
Only use a soft, slightly damp cloth to clean the unit. Do not use detergent. Do not expose the unit to direct sunlight or any other heat source. Do not immerse the unit in water. Do not dismantle or drop the unit. Do not try to twist or bend the unit.
WARRANTY
NOTE: Please keep this instruction manual, it contains important information. This product is covered by our two-year warranty. To make use of the warranty or the after-sales service, please contact your retailer and supply proof of purchase. Our warranty covers material or installation-related defects attributable to the manufacturer, with the exception of wear caused by failure to respect the instructions for use or any unauthorised work on the equipment (such as dismantling, exposure to heat or damp, etc).
Reference: DJ025BB
LEXIBOOK UK Ltd,
Unit 10 Petersfield Industrial Estate,
Bedford Road, Petersfield, Hampshire,
GU32 3QA, United Kingdom
Helpline: 0808 100 3015,
http://www.lexibook.com
©2008 Mattel, Inc.
©2008 Lexibook®
Environmental Protection
Unwanted electrical appliances can be recycled and should not be discarded along with regular household waste! Please actively support the conservation of resources and help protect the environment by returning this appliance to a collection centre (if available).
Designed in Europe - Made in China
CONOCE TU CÁMARA
Lexibook Ibérica S.L.