
SBS-WS-300 - Weather Station STEINBERG - Free user manual and instructions
Find the device manual for free SBS-WS-300 STEINBERG in PDF.


| Product Type | Weather Station |
| Brand | Steinberg |
| Model | SBS-WS-300 |
| Dimensions (outdoor unit) | Approx. 200 x 150 x 80 mm |
| Dimensions (indoor unit) | Approx. 160 x 100 x 30 mm |
| Weight (outdoor unit) | Approx. 500 g |
| Weight (indoor unit) | Approx. 200 g |
| Power supply | AA batteries (x3) for outdoor unit, 5V power adapter for indoor unit |
| Main functions | Indoor/outdoor temperature, humidity, atmospheric pressure, weather forecast, moon phase, time/date, alarm |
| Outdoor sensor | Wireless sensor, range up to 100 m |
| Radio frequency | 868 MHz |
| Display | Color LCD display, backlit |
| Care and cleaning | Clean with a soft, dry cloth. Do not use solvents. |
| Safety | Do not expose to excessive moisture. Use only recommended batteries. |
| Spare parts and repairability | Spare parts available through customer service. Repairs must be done by a professional. |
| General information | 106-page manual available for download. |
Frequently Asked Questions - SBS-WS-300 STEINBERG
User questions about SBS-WS-300 STEINBERG
0 question about this device. Answer the ones you know or ask your own.
Ask a new question about this device
Download the instructions for your Weather Station in PDF format for free! Find your manual SBS-WS-300 - STEINBERG and take your electronic device back in hand. On this page are published all the documents necessary for the use of your device. SBS-WS-300 by STEINBERG.
USER MANUAL SBS-WS-300 STEINBERG
1. Time
Met Office - Self Registration


Weather Underground: Forecast - an iOS and Android app for weather forecasts: https://itunes.apple.com/us/app/weather-underground-forecast/id48615480@https://play.google.com/store/apps/details?id-com_wunderground.android.weather&hl-en


22.07.2019


USER MANUAL TECHNICAL DATA
| Product name | WiFi Weather Station | |
| Model SBS-WS-300 | ||
| Temperature | Measurement range (outdoor) [°C] | -40+60 |
| Measurement range (indoor) [°C] | 0+50 | |
| Measurement accuracy [°C] | ±1 | |
| Humidity | Measurement range [%] | 10-99 |
| Measurement resolution [%] | 1 | |
| Measurement accuracy [%] | ±5 | |
| Rainfall | Measurement range [mm] | 0-6000 |
| Measurement resolution [mm] | 0.254 (if the volume of rain <1000mm)1 (if the volume of rain >1000mm); | |
| Measurement accuracy [%] | ±10 | |
| Wind speed | Measurement range [m/s] | 0-50 |
| Atmospheric pressure | Measurement range [hPa] | 700-1100 |
| Measurement accuracy [hPa] | ±5 | |
| Alarm duration [s] 120 | ||
| Data transmission range [m] 100 | ||
| Transmission frequency [mHz] 866 | ||
| IP protection class | Receiver IPX0 | |
| Transmitter IP44 | ||
| Battery type | Receiver 3xAAA | |
| Transmitter 2xAA | ||
| Dimensions [mm] | Receiver 19sx140x20 | |
| Transmitter 340x295x145 | ||
- GENERAL DESCRIPTION The user manual is designed to assist in the safe and trouble-free use of the device. The product is designed and manufactured in accordance with strict technical guidelines, using state-of-the-art technologies and components. Additionally, it is produced in compliance with the most stringent quality standards.
DO NOT USE THE DEVICE UNLESS YOU HAVE THOROUGHLY READ AND UNDERSTOOD THIS USER MANUAL.
To increase the product life of the device and to ensure trouble-free operation, use it in accordance with this user manual and regularly perform maintenance tasks. The technical data and specifications in this user manual are up to date. The manufacturer reserves the right to make changes associated with quality improvement. The device is designed to reduce noise emission risks to a minimum, taking into account technological progress and noise reduction opportunities.
LEGEND
| CE | The product satisfies the relevant safety standards. |
| Read instructions before use. | |
| The product must be recycled. | |
| WARNING! or CAUTION! or REMEMBER! Applicable to the given situation (general warning sign). | |
| ATTENTION! Rotating parts, entanglement hazard! |

PLEASE NOTE! Drawings in this manual are for illustration purposes only and in some details may differ from the actual machine.
The original operation manual is in German. Other language versions are translations from German.
2. USAGE SAFETY
ATTENTION! Read all safety warnings and all instructions. Failure to follow the warnings and instructions may result in an electric shock, fire and/or serious injury or even death.
The terms "device" or "product" are used in the warnings and instructions to refer to WIFI WEATHER STATION. Do not use in very humid environments or in the direct vicinity of water tanks.
2.1 SAFETY IN THE WORKPLACE
a) Only the manufacturer's service point may repair the device. Do not attempt any repairs independently!
b) Regularly inspect the condition of the safety labels. If the labels are illegible, they must be replaced.
c) Please keep this manual available for future reference. If this device is passed on to a third party, the manual must be passed on with it.
d) Keep packaging elements and small assembly parts in a place not available to children.
e) Keep the device away from children and animals.
REMEMBER: When using the device, protect children and other bystanders.
2.2 PERSONAL SAFETY
a) Do not use the device when tired, ill or under the influence of alcohol, narcotics or medication which can significantly impair the ability to operate the device.
b) The device can be handled only by physically fit persons who are capable of handling it, properly trained, familiar with this manual and trained within the scope of occupational health and safety.
c) Do not wear loose clothing or jewellery. Keep hair, clothes and gloves away from moving parts. Loose clothing, jewellery or long hair may get caught in moving parts.
d) Remove all adjusting tools or spanners before turning the device on. A tool or spanner left in the revolving part of the device may cause injury.
e) The device is not a toy. Children must be supervised to ensure that they do not play with the device.
2.3 SAFE DEVICE USE
a) Do not overload the device. Use the appropriate tools for the given task. A correctly-selected device will perform the task for which it was designed better and in a safer manner.
b) When not in use, store in a safe place, away from children and people not familiar with the device who have not read the user manual. The device may pose a hazard in the hands of inexperienced users.
c) Keep the device in perfect technical condition. Before each use, check for general damage and especially for cracked parts or elements, and for any other conditions that may impact the safe operation of the device. If damage is discovered, hand over the device for repair before use.
d) Keep the device out of the reach of children.
e) Device repair or maintenance should be carried out by qualified persons, only using original spare parts. This will ensure safe use.
f) Clean the device regularly to prevent stubborn grime from accumulating.
g) The device is not a toy. Cleaning and maintenance may not be carried out by children without supervision by an adult person.
h) Keep the device away from sources of fire and heat.
i) Do not overload the device.
j) Keep batteries out of reach of children when not in use.
k) Before use, make sure that the wind turbine and the rotor are not blocked in any way, which would disturb the measurement results.
l) The external transmitter should be mounted in the open air in a place where it can be exposed to weather conditions. Mounting close to canopies, walls, or trees may result in disturbing the measurement results.
- USE GUIDELINES
The device is intended for meteorological measurements, including temperatures, rainfall, air humidity, wind speed, etc.
The user is liable for any damage resulting from unintended use of the device.
3.1. DEVICE DESCRIPTION
ATTENTION! This product's view can be found on the last pages of the operating instructions (pp. 207).
3.1.1. TRANSMITTER
- Wind direction indicator
- Wind speed meter
- Light sensor
- Humidity / temperature meter
- Precipitation level meter
- Level
- Solar panel
- Pin 'U'
9 Battery compartment
- [RESET] button
- LED diode
22.07.2019
3.1.2. RECEIVER
- Time panel
- Lunar phase panel
- Barometric pressure panel
- Weather forecast panel
- Insulation panel
- Light panel
7 Wind speed panel
- Wind direction panel
- MAX/MIN
- Rainfall panel
- Outdoor temperature panel
- Outdoor humidity panel
- RF icon
- Indoor humidity panel
- Indoor temperature panel
- Date
- WiFi icon
- DST - Automatic time change from daylight to standard time
3.1.3. FUNCTION BUTTONS PANEL
A SET - Press this button to display the MAC address. Hold this button to enter the setting mode.
B. TEMP - Press this button to display wind chill, heat index, and dew point temperature.
C. RAIN - Press this button to display the rain indicator (day / week / month / total). To reset the rain display, hold the button for 2 seconds.
D. WIND - Press this button to display wind / gust direction.
E. PRESSURE - Press this button to display the average absolute pressure value of 12/24/48/72 hours. Press and hold the button for 2 seconds to display absolute and relative pressure.
F. ALARM - Press this button to display the alarm temperature / humidity / air flow speed / wind in the day / wind value.
G. MAX / MIN - Press this button to display the maximum and minimum temperature / humidity / water flow rate / water flow day / wind / insulation / light / absolute pressure value.
H. LIGHT / SNOOZE - Press this button to adjust the brightness of the LCD backlight.
WARNING!
- After turning the power on, press the WIND button and PRESSURE button to reset the device. The device's default settings will be restored.
- To bypass radio reception, press the TEMP button after turning the device on.
- To increase or decrease the numbers, hold the WIND/+ button or the PRESSURE/- button for 2 seconds.
- The setting procedure can be stopped at any time by pressing the LIGHT / SNOOZE button or after a 30-second timeout.
3.2 PREPARING FOR USE
ASSEMBLING THE APPLIANCE
CAUTION: Before installing the weather station in a target place, configure the set and, afterwards, check if the device is working properly.
Inserting batteries
- Remove the battery compartment cover.
- Insert the batteries into the compartment observing the polarity.
- Replace the battery compartment cover. NOTE: If you need to replace the batteries with new ones, proceed in the same way as above. NOTE: If no LEDs are on, make sure that the batteries are inserted correctly or resetting has been conducted properly.
3.2.1 CONFIGURING THE SET
A. Transmitter
- After installing the batteries, the transmitter will start for a short time and this will be indicated by the LED light. Then the LED will turn off and the transmitter will go into normal operation mode.
- A transmitter will start searching for a radio time signal. If a signal reception is correct, a diode will flash and, afterwards, light for several seconds.
- When operating in a standard mode, a diode will light for a moment every 48 sec.
B. Receiver
- After the batteries are installed, the receiver will start.
- A receiver will start searching for a transmitter signal. The icon of a radio signal reception will appear on a display.
- When the receiver detects a transmitter signal, it will switch to a standard operation mode.
- When no radio signal is detected, the device restart searching every 6 hours.
- If the signal is lost or the measurement results are not displayed:
a) press and hold the [RESET] button on the transmitter;
b) take out the batteries and wait about 2 minutes before putting them back into the battery compartment of the receiver.
TRANSMITTER INSTALLATION
A. Mounting bracket

- Unpack the transmitter components and check their condition.
- Attach a metal flat bar to the bottom of the transmitter.
- Insert the "U" pins into the holes of the flat bar and secure them with the nuts.
B. Wind speed meter (anemometer)

- Mount the measuring cups on the shaft. Secure by tightening the bolt.
NOTE: pay attention that the anemometer cups can move freely. Too tight mount can interfere with measurement results.
C. Wind direction indicator (anemoscope)

- Mount the weathercock on the shaft by sliding it all the way to the opposite side of the anemometer and secure it by tightening the bolt.
NOTE: Make sure that the weathercock can move freely.
D. Outdoor installation

- Place the transmitter in its final location using the mounting bracket (post diameter 1-2 inches not included in the set).
- When installing the transmitter in a target location, take into account the north direction and install the transmitter according to the direction marked on the transmitter surface.
- Level the transmitter using a level placed on its surface. Caution: Poor levelling of the transmitter may disturb measurement results.
RECEIVER INSTALLATION
- It is recommended to install the receiver on a flat vertical surface to ensure proper transmitter signal reception. Caution: Distance from the transmitter, the presence of barriers (e.g., walls), and electromagnetic or radio waves may reduce signal strength.
3.3. DEVICE USE
Press the SET button for 2 seconds to enter the model; the basic settings can be made as follows:
3.3.1. SOUND SIGNAL
- To select the audio signal settings, hold the SET button for 2 seconds.
- The digits of the sound section will start flashing, press the WIND / - or PRESSURE / + button to select ON or OFF option.
3.3.2 MAX/MIN
- Press the SET button twice to select the MAX / MIN section.
The numbers of the ON / OFF section will flash, press WIND / - or PRESSURE / + to select ON or OFF option.
3.3.3. DATE AND TIME PARAMETERS

- Time
• Press the SET button 3 times to select the 12/24 hour format section (default setting: 24 hours).
• Press the SET button 4 times to select the hour section.
• Press the SET button 5 times to select the minute section.
- Date
- Press the SET button 6 times to select DD-MM or MM-DD format (default setting: DD-MM).
• Press the SET button 7 times to select the year. • Press the SET button 8 times to select the month.
• Press the SET button 9 times to select the day.
- Wireless signal indicator - The strength of the wireless signal shows the quality of the signal reception. Signal strength is determined by the number of bars - the more, the better signal strength.
WARNING! Press WIND / + or PRESSURE / - to set the value.
WARNING! If the user wants to change the minutes, the seconds will automatically reset to 0.
WARNING! Wi-Fi firmware version 1.4.4 and higher support the Global Time function: Synchronization, time zone, DST and date will be automatically updated when connected to the Internet.
3.3.4. PRESSURE

- Press the SET button 10 times to select the ABS pressure unit. The value and hPa digits will start flashing, press WIND / + or PRESSURE / - to select the unit (hPa, inHg, mmHg).
- Press the SET button 11 times to select the REL pressure unit. The value and hPa digits will start flashing, press WIND / + or PRESSURE / - to select the unit (hPa, inHg, mmHg).
- To switch from the absolute to relative pressure, press and hold the PRESSURE button for 2 seconds.
- To view pressure history, press the PRESSURE button to display 12, 24, 48 and 72 hours of average pressure.
3.3.5. LIGHT

- Press the SET button 12 times to select the lighting unit (lux, fc, W/m²); default unit W/m².
3.3.6. TEMPERATURE
- Press the SET button 13 times to select the outdoor / outlet temperature unit.
- The digits next to the degree icon will start flashing. Press the WIND / + or PRESSURE / - button to select the unit. Default unit: ||
- In normal mode, press TEMP. to display wind chill, heat index, and dew point temperature.
- To register a new transmitter, hold the TEMP button for 5 seconds.
WARNING! Every 60 seconds the device will measure indoor temperature, humidity, and pressure. If the temperature drops below the minimum value or exceeds the maximum value, the device will display the message:
3.3.7. WIND

- Press the SET button 14 times to select the wind speed unit (km/h, mph, knots, m/s, bft). Default unit: km/h.
In normal mode, press WIND / to view wind and gust direction.

- Press the SET button 15 times to select the rain unit (inches or mm). Default unit: mm.
- In the normal mode, press the RAIN button to view rainfall during the day, week, month and total rainfall.
- Hold the RAIN button for 2 seconds to reset the current rainfall on the display.
4 Day: defined by a calendar day, i.e. 0:00-24:00 with the current date.
5 Week defined by a calendar week, i.e. Sunday - Saturday.
6 Month: defined by a calendar month, i.e. from the first to the last day of the month.
7 Total rainfall: the total amount of rainfall since the station was started.
WARNING! Resetting the week rainfall will automatically reset the daily rainfall.
WARNING! Resetting the week rainfall will automatically reset the daily rainfall.
WARNING! Resetting month rainfall will automatically reset the week and daily rainfall.
3.3.9. LUNAR PHASE

- Press the SET button 16 times to select the northern or southern hemisphere.
3.3.10.ALARM MODE
- Display of the alarm value
- Press the ALARM button to display the high alarm.
- Press the ALARM button again to display the low alarm.
WARNING! Press the RAIN button to select the display speed or daily rain alarm data.
WARNING! Press the WIND / - button to select wind or wind alarm data display.
WARNING! Press the ALARM button a third time or press the LIGHT / SNOOZE button to return to the normal mode.
- Alarm mode settings
- Press and hold the ALARM button for 2 seconds to set the correct alarm mode:
» Press the WIND / + or PRESSURE / - button to arm / disarm the alarm and adjust the alarm values.
» Press the SET button to confirm and go to the next item.
» Press the ALARM button to turn the alarm on or off. WARNING! When an alarm is activated, the current trigger source icon for the time, high value icon, and low value icon will flash to indicate that the alarm has been activated. WARNING! Press the ALARM button a third time or press the LIGHT / SNOOZE button to return to the normal mode.
- Order of setting alarms
• Time alarm settings
• High indoor temperature settings
- Low indoor temperature setting
- High indoor humidity setting - Low indoor humidity settings
• High outdoor temperature settings
- Low outdoor temperature settings
• High outdoor humidity settings
- Low outdoor humidity settings
- Setting for strong wind
- High gust intensity - Setting the large an
- Height setting on a rainy day
2.1.1. January 1, 2017
3.3.11. MAX/MIN mode
- Press the MAX / MIN button to display the maximum values
- Press the TEMP button to display the maximum value
of wind coolness, heat indicator and dew point.
- Press the RAIN button to display the maximum value of rain quantity, day, week and month.
- Press the WIND / + button to display the
values of wind and gust.
- Press the PRESSURE / - button for 2 seconds to display the maximum values of the absolute and relative pressure.
- Press the MAX / MIN button again to display the minimum values.
- Press the TEMP button to display the minimum value for the cooling and dew point.
- Press the PRESSURE / - button for 2 seconds to display the absolute and relative pressure minimum values.
WARNING! Press the MAX / MIN button for 2 seconds to reset the maximum and minimum values.
WARNING! Press the MAX / MIN button a third time or press the LIGHT / SNOOZE button to return to the normal mode.
3.3.12. CALIBRATION
- Hold TEMP and MAX / MIN button simultaneously for 5 seconds to enter calibration mode.
- Press the WIND / + and PRESSURE / - buttons to
- Press the SET button to confirm and move to the
next item.
WARNING! To exit the settings, press the LIGHT / SNOOZE button.
- Calibration order
- Calibrated indoor temperature offset (range 1/5°C, default: 0 degrees)
- Calibrated indoor humidity offset (range +/- 10%) - Calibrated outdoor temperature offset (range +/- 5°C, default; 0 degrees)
- Calibrated outdoor humidity offset (range +/- 10%)
- Calibrated absolute pressure offset (range +/- 50 hPa)
• Calibrated wind direction offset (adjustable by degree)
• Wind speed ratio adjustment, 100% by default (range from 50% to 150%)
- Rain ratio adjustment, 100% by default (range from 50% to 150%)
3.3.13. RESTORING DEFAULT SETTINGS
To restore the default settings of the device, follow these steps.
- Disconnect power from the console by removing the
- Turn the power on by connecting to the AC power.
- Wait until all segments appear on the screen.
- Press and hold the WIND / + and PRESSURE / - buttons simultaneously for about 5 seconds until the starting-up sequence is completed.
- Replace the batteries.
3.3.14. REGISTRATION OF A NEW TRANSMITTER Press and hold the LIGHT / SNOOZE button for 5 seconds and then press and hold the console button. The wireless sensor will be registered again.
3.3.15. BACKLIGHT
- With AC adapter
- The backlight can be switched on continuously only when the AC adapter is permanently connected. When the AC adapter is disconnected, the backlight may be turned on temporarily.
- Press the LIGHT / SNOOZE button to adjust the brightness between values: High, Low, Off.
- Without AC adapter
• To reduce power consumption, the display console will automatically enter standby mode and data will not be sent during this time.
• To exit standby mode, hold LIGHT / SNOOZE or insert the power plug.
3.3.16. WEATHER FORECAST
The device has 6 colored forecast icons that use changing atmospheric pressure to predict weather conditions for the next 6 hours.
Sunny Partly sunny
Cloudy Rainy Storm (display will flash for maximally 30 minutes)


Snowy
WARNING! The snow icon will appear in the place of the rain icon when the outdoor temperature is lower than 0°C (32°F).
3.3.17. INDOOR PARAMETERS

- Indoor air temperature
Indoor air humidity
3.3.16. OUTDOOR PARAMETERS

- Outdoor air temperature
- Outdoor air humidity
The device displays 5 insulation levels:
- LOW - Low
- MODERATE - Moderate
- HIGH - High
- VERY HIGH - Very high
- EXTREME - Extremely high
3.3.20. NAP
After the time alarm is activated, the alarm will be activated and the alarm icon will flash for 120s.
- Press the LIGHT / SNOOZE button to mute the alarm for 10 minutes. After this time the alarm will be restarted.
- To stop the alarm, press any button except for LIGHT / SNOOZE
3.3.21. MAC address
• After connecting to the external power supply and connecting it to the network press the SET button to display the MAC address.
• After obtaining the MAC address, register the device on Ecowitt's website or on another website.
3.4. CLEANING AND MAINTENANCE
a) Wait for the rotating elements to stop.
b) Use only non-corrosive cleaners to clean the surface. c) Store the unit in a dry, cool place, free from moisture and direct exposure to sunlight.
d) The device must be regularly inspected to check its technical efficiency and spot any damage.
c) Use a soft, damp cloth for cleaning.
f) When replacing batteries, use an anti-corosive agent
g) In a snowy environment, spray the top of the weather station with anti-icing agent.
3.4.1 CLEANING THE PRECIPITATION METER

- Turn the funnel counterclockwise.
- Lift the funnel.
- Clean the rain meter with a soft, damp cloth. If insects need to be removed, it is recommended to use an insecticide before cleaning.
- Insert the funnel in its original position and tighten it clockwise.
SAFE REMOVAL OF BATTERIES AND RECHARGEABLE BATTERIES
1.5V AAA batteries are installed in the devices. Remove used batteries from the device using the same procedure by which you installed them. Recycle batteries with the appropriate organisation or company.
- NOTE: WIFI firmware version 1.4.4 and above support Global Time synchronization. Time zone, DST and date will be automatically updated from the internet when the base station is connected to the internet.
4.1. LIVE ONLINE PUBLISHING Your console is capable of sending your sensor data to select internet-based weather services. The supported services are shown in the table below:
Hosting Service Website Description
| EcowittWeather | https://www.ecowitt.net | Ecowitt is a new weather server that can host multiple sensors that other servers don't support. |
| WeatherUnderground | https://www.wunderground.com | Weather Underground is a free weather hosting service that allows you to send and view your weather station data real-time, view graphs and gauges, import text data for more detailed analysis and use iPhone, iPad and Android applications available at Wunderground.com. Weather Underground is a subsidiary of The Weather Channel and IBM. |
| WeatherCloud | https://weathercloud.net | Weathercloud is a real-time weather social network formed by observers from around the world. |
| Weather Observation Website (WOW) | http://www.metoffice.gov.uk/ | WOW is a UK based weather observation website. WOW allows anyone to submit their own weather data, anywhere in the world. |
| Customized Website | Supports uploading to your customised website, if the website has the same protocol as Wunderground or Ecorwitt |
4.2. CONNECTING THE WEATHER STATION CONSOLE TO WIFI
To send weather data to these services you must connect your console to the internet via WiFi. The console can only operate using WiFi when the external power adapter is connected and plugged in. Note: If you are testing the setup of the outdoor sensor package indoor, you may want to consider connecting to WiFi but not yet configuring any of the weather services. The reason is that indoor temperatures and humidity recorded by the outdoor sensors will be reported to the weather service(s) and they will reflect indoor conditions, and not outdoor conditions. Therefore, they will be incorrect. Furthermore, the odometer may be tripped during handling, causing rain to register when it may not actually have been raining. The configuration of the WiFi connection of the weather station should be done after the sensors are installed outdoors.
4.2.1. DOWNLOAD MOBILE APPLICATION
WiFi configuration is done using your mobile device, either iOS or Android. Start by downloading the "WS View" application from the Apple App Store or Google Play store, as appropriate for your device.
4.2.2 CONNECT THE CONSOLE TO WIFI 4.2.2.1 ANDROID USER: Activate the application you have downloaded on your mobile device. The following instructions will generally show screens for the Android application side by side.
Configure Device 1) Select your device from the device list, then press Next.
2) Follow the instructions, tick the box to confirm "completed operation", press Next.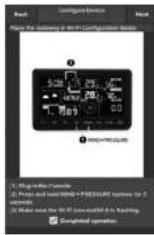
3) Start searching for your device. If the device is in your WiFi list, it will jump to the view as in Figure 4. The device has the name "EasyWeather WIFI" followed by four characters.
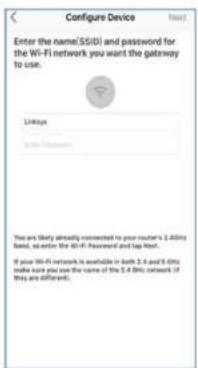
4) Press Scan and select your SSID from the list, then enter your WiFi password and press Next. If you own a dual band router (2.4 GHz and 5.0 GHz), make sure you connect to the 2.4 GHz band, otherwise it will fail to connect the weather station to WiFi.
5) Connect your phone to the weather station "Easy/Weather-WIFI" and your router. After successful configuration, the "Upload Setting" screen will appear automatically.
Upload Setting
Your console is capable of sending your sensor data to selected internet-based weather services: ecowitt.net, Wunderground.com, weathercloud.net, www.metoffice.gov.uk and your customised website. Users need to register at the selected website to get the station ID (or MAC address) and password.
A. UPLOAD YOUR WEATHER DATA TO THE ECOWITT WEBSITE
We recommend using the Ecowitt Weather server to monitor and record your sensors data. The Ecowitt Weather server supports uploading all the sensor's data. For other weather services, only server-supported data will be uploaded.
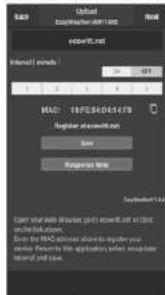
On the ecowitt.net uploading page, enable the ON button (displayed blue) and set the uploading interval time. Press Save. Copy the MAC address (will be used to add the device on the server later). Press "Register at Ecowitt.net" to open web browser in order to activate the "Register with Ecowitt.net" option. If you successfully added the device and sent the data, but the data is not displayed, click "Response Time" to reset and check the status of the response.

2) Finish the registration on the Ecowitt page. If you have an account and password, press "Return to Login" to login to the website

3) Click the upper left menu button and select "Devices". Press "Aid Device" and input all the information needed. Click Save. If you tick "Open data", your weather data can be viewed by other people. NOTE: When selecting the device address on map, please wait till the map is displayed. Note: Please set the correct time zone to get the correct time. The time will be automatically updated according to internet time during WiFi connection. Once registered, select the dashboard to view your data, as shown below:
Ecowitt.net has a responsive design and is mobile friendly. Simply open your mobile devices web browser, browse to ecowitt.net, and bookmark your dashboard for quick access. B. UPLOAD YOUR WEATHER DATA TO WUNDERGROUND.

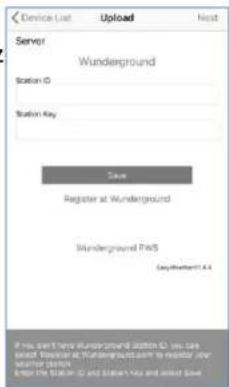
1) On the Wunderground.com uploading page, input Station ID & Station Key, then press Save. Your station ID will be added to the WU StationID. Then press Next. Jump to the screen for Upload your weather data to Weathercloud.net. If you don't have Wunderground Station ID and Key, press "Register at Wunderground.com" to activate the "Register with Wunderground" option.

2) Register at Wunderground.com. Enter your valid email address and password to register and create your weather underground account. You will be presented with a form to fill out.

3) Complete and submit the form. If you can't find your weather station model number from the drop-down menu, please select "others".
4) Once registered successfully, you'll receive a new Station ID, password / key and an email about the information of Station ID and Station password / key. Go back to the Wunderground.com uploading page, input Station ID & Station Key, and press Save. Your station ID will be added to the WU Station ID. C. UPLOAD YOUR WEATHER DATA TO WEATHERCLOUD.NET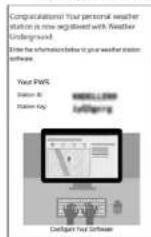

1) Upload your weather data to Weathercloud.net. Input Weathercloud ID & Weathercloud Key, press Save. Then press Next Jump to the screen for Upload your weather data to Weather Observation Website (WOW). If you don't have Weathercloud ID and Key, press "Register at Weathercloud.net" to open your web browser in order to activate the "Register with Weathercloud.net" option.

2) Register at Weathercloud.net. Visit weathercloud.net and enter Username, Email and Password to sign up. Respond to the validation email from Weathercloud (it may take a few minutes).

3) You will be prompted to add a device. Select 'Create device' and enter your station's information. After registering your station, take note of the "Weathercloud ID" and "Key" presented to you. Enter these values in the mobile application. D. UPLOAD YOUR WEATHER DATA TO WEATHER OBSERVATION WEBSITE (WOW)

1) Upload your weather data to WOW. Input Weathercloud ID & Weathercloud Key, press Save. Then press Finish. Jump to the Device List home screen. If you don't have a WOW ID and Key, press "Register at WeatherObservationWeb site" to open your web browser in order to activate the "Register with WOW" option.

Register for Weather Observations Website

2) Register at WeatherObservationWebsite. Create a new account. You will be presented with a form to fill out.

3) The actual form is longer, but all questions should be self-explanatory. Complete and submit the form. You will shortly receive an email with instructions on how to login. Now wait for the email and click the link included to confirm your email address.
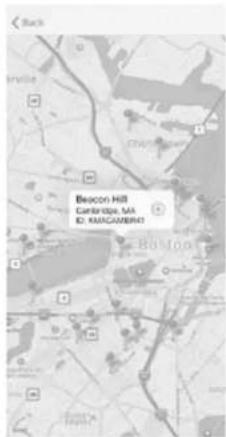
Follow the instructions on the screen and log in to the site. Once you are logged in, you will need to create a new WOW site. 'Sites' are the means by which WOW organizes weather data you contribute. Basically, WOW builds a personal web site for your weather station. To allow data uploading, you will need two items associated with the web site. Site ID: This is an arbitrary number that is used to distinguish your site from another. This number appears (in brackets) next to or underneath the name of your site on the site information page; for example:
6a571450-df53-e611-9401-0003ff5987fd Authentication Key: This is a 6-digit number that is used to ensure data is coming from you and not another user. Begin setting up a new site by clicking "Enter a Site".

Make sure you are (still) logged in to the WOW site. Login as necessary. Now click on "My Sites" in the navigation bar at the top. If you have only 1 site, you will now be shown its page. If you have multiple sites, you will have to choose the correct one first. On this page, you will find the site ID just below the map:


You will also need to establish a unique 6-digit PIN code that you should keep secret. This is the 'Authentication Key.' Setup this number by clicking 'Edit Site' and fill it with a 6-digit number of your choice:
Authentication Key
123456
You will need both "Site ID" and "Authentication Key" to setup the upload configuration for WOW in the Weather Server. In your mobile application, navigate to the "Device List" page and tap the device you want to configure WOW for. You will then be shown the "wunderground.com" configuration. Please ignore and tap "Next" to see the "Weathercloud" configuration. Please press "Next" one more time and you will now be on the WOW configuration screen. On this screen you will fill out "Station ID" with the WOW "Site ID" value, and "Station Key" with the WOW "Authentication Key" you created. Press "Save" to finalize the configuration.
E. UPLOAD YOUR WEATHER DATA TO CUSTOMISED WEBSITE

22.07.2019
If you want to upload data to your customised website, select the Enable button (display blue) and select the protocol type. The website should have the same protocol with Wunderground or Ecowitt. Input all the information needed. Press Save.
4.2.2. IOS USER
Activate the application you have downloaded on your mobile device. The main screen will indicate your station is offline (because it is not yet connected to WiFi).

Configure Device
Note: If you own a dual band router (2.4 GHz and 5.0 GHz), make sure you connect to the 2.4 GHz band, otherwise it will fail to connect the weather station to WiFi.

1) Tap on the settings icon and select "Configure a New Device".
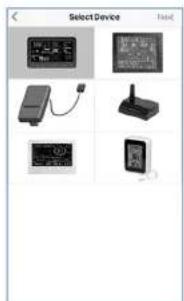
2) Select the device you have from the device list, then press Next.
3) Operate as per the information, tick the box to confirm "completed operation", press Next.

4) Press Sync and select your WiFi network from the WLAN list, then enter your WiFi password and press Next.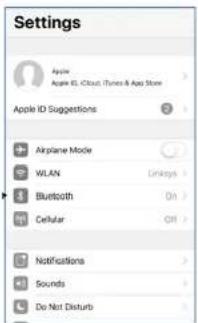

Select desired WiFi network and return to WS View App.
![Gateway Wi-Fi. Connect to gateway Wi-Fi network: [ ] Navigate to your device's home screen. [ ] Activate "Settings". [ ] Choose "Wi-Fi". [ ] Select "EasyWeather-WiFi" from the list. [ ] Start and Connect to help add. [ ] Return to this application. Currently connected to: Linkages.](/content/2026/06/1386885/images/e3456a1cc14785db2d6ffd59cd4e55e47abc9f479c87a5290b5ebeb8a8dca7c5.jpg)
5) Press button 'Select WiFi' to go to WiFi Setting.

6) Select WiFi device. The device named "EasyWeather-WIFxxxxl" and return to the WS View App.
7) Connection success, it will jump to "Upload Setting" screen automatically.

8) It may happen that getting back to the WiFi network which you selected on step 4) is not possible. The window "Please connect your mobile WiFi to xxx (WiFi Network name) and return to WS View App" will pop up. Press OK to continue.
Upload Setting
Your console is capable of sending your sensor data to selected internet-based weather services: Wunderground.com, Weathercloud.net and www.metoffice.gov.uk. Users need to register at the selected website to get the station ID and password.
ENEN Mobile application - Device List (Android)

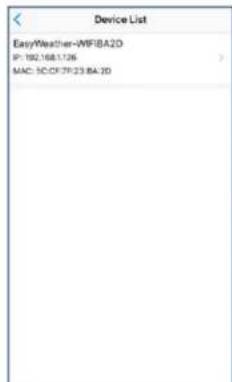
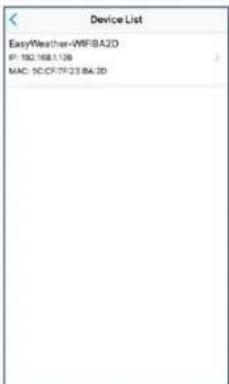
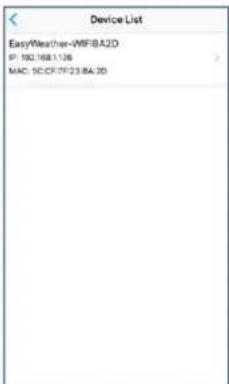
4.3. MOBILE APPLICATION - DEVICE LIST You can see your console through the 'Device List' menu option: Tapping on your console's entry in the device list will bring you to the page where you can change WU registration information. If you want to stop your console upload data to Wunderground, delete your Station ID and select "Save".

Mobile application - Device List (iOS)


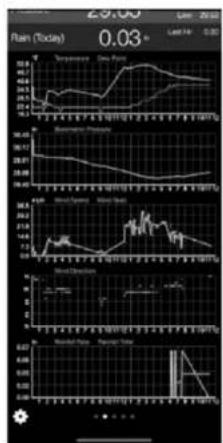
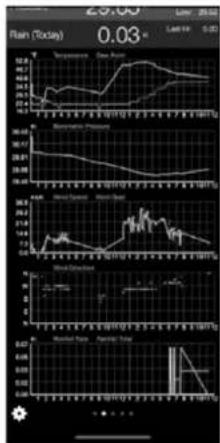
4.4. MOBILE APPLICATION - CHECK WU WEATHER DATA AND GRAPH In the mobile application tap Menu and choose WU Dashboard and you will be presented with a page listing current conditions for that station. If you have added multiple WU IDs, tap on the WU Station ID to switch to view data from other IDs. 22.07.2019

![04/20/77 05/28/2019 12:38 Temperature 25°C Daily Peak 18°C Humidity 65% Pressure 1073.88MPa Wind Direction kWV Wind Speed km/h Wind Current km/h Solar Radiation 0.9kA/m³ [W] 0.0 Precipitation Rate 12.45mm Temperature/Day Point](/content/2026/06/1386885/images/f85c868f973ff8bd4f77252f4f00b0b44965e05de9e1bae8af587935f260fdcd.jpg)

Mobile application - WU Dashboard (iOS)

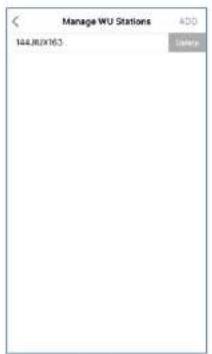
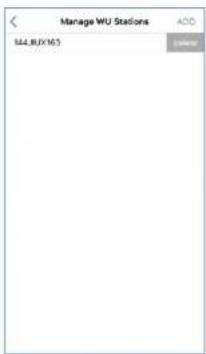
4.5. MOBILE APPLICATION - REMOVE OR ADD WU ID If you have previously registered your console for use with Wunderground.com and wish to remove this device's data display from the app, select the "Manage WU Station" menu option after tapping on the settings icon, select "Delete" your console from the list and confirm. The Station ID will be deleted from the WU Station ID list and will not have the data information on the app. But the data will be uploaded to Wunderground.com as usual. If you want to add a new weather station to view its data on the app, and this device is registered in Wunderground.com, select "Add WU Station ID" and input the WU station ID of this new device.
Mobile application – Remove or Add WU ID (Android)

Mobile application – Remove or Add WU ID (iOS)

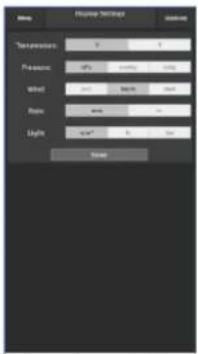
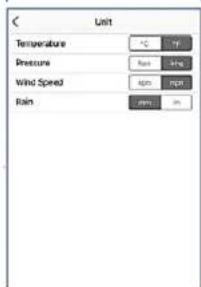
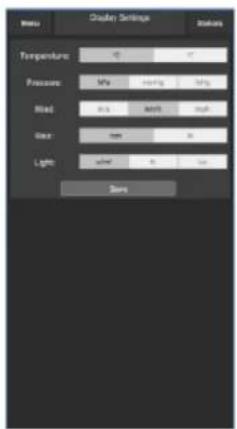
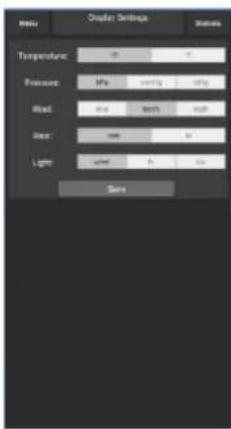
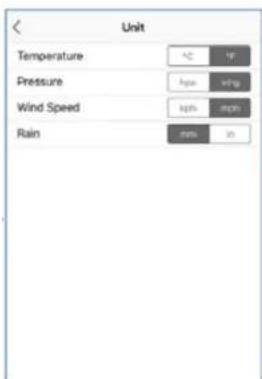
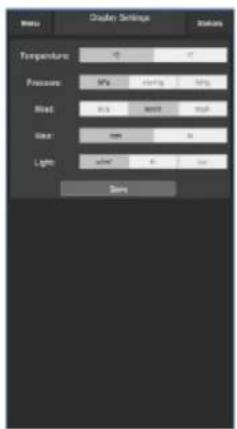
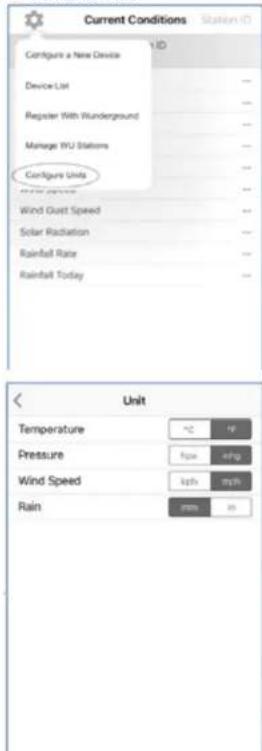
4.6. MOBILE APPLICATION - SET UNITS You may want to change the units in which sensor values are reported. To do so, click on the "Configure Units" menu after tapping on the settings icon. Next, tap on the sensor type you wish to change the reporting units for and set the units as desired.
Mobile application - Change units (Android)


4.7. REGISTERING WEATHERUNDERGROUND.COM THROUGH THE PC OR MAC If you have not already done setup for wunderground.com during the WiFi setup, you can do so later. Perform the following steps: 1) Visit Wunderground.com and click Join as the right top arrow indicates and select the Sign up for free option:

2) Click More and select Add Weather Station to register your station:

3) Click "Verify Location" and fill out the form. After submitting the form, you will see the following:
Step 3: Add Your WU Info to Your Weather Station Software
Congratulations. Your station is now registered with Wunderground! You are almost done. Now go to your weather station software and add the following:
KCALOSAN764
Yao Sudan
YaoTawood
v8cn612c
(2) Note: Your station ID will have the form: KSSCCCC###, where K is for USA station (I for international), SS is your state, CCCC is your city and ### is the station number in that city. In the example above, KCALOSAN764 is in the USA (K), State of California (CA), City of Los Angeles (LOSAN) and #764.
Viewing your Data on Wunderground.com
You can also observe your weather station's data by using the wunderground.com web site. Use the below URL, where your station ID replaces the text "STATIONID":
http://www.wunderground.com/personal-weather-station/dashboard?ID=STATIONID
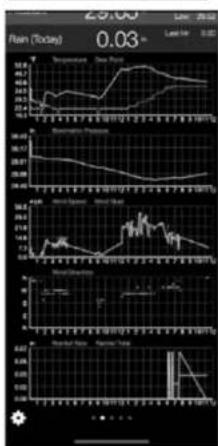
You will see a page like below, where you can see both today's data and historical data:

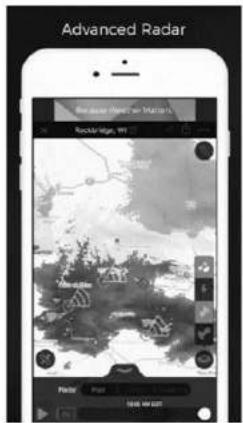
There are also some very useful mobile apps. The URLs provided here go to the Web version of the application pages. You can also find them directly from the iOS or Google Play stores: WunderStation: iPad application for viewing your station's data and graphs. https://itunes.apple.com/us/app/wunderstation-weather-from-your-neighborhood/id906099986

WU Storm: iPad and iPhone application for viewing radar images, animated wind, cloud coverage and detailed forecast, and PWS station data
https://itunes.apple.com/us/app/wu-storm/id955957721
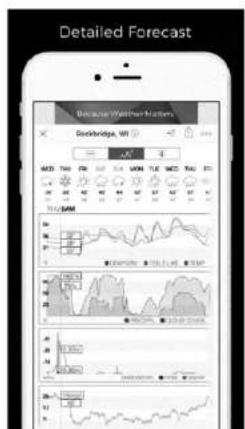
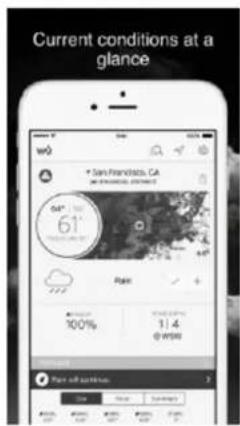
Weather Underground: Forecast: iOS and Android application for forecasts
https://itunes.apple.com/us/app/weather-underground-forecast/id486154808
https://play.google.com/store/apps/details?id=com.wunderground.android.weather&hl=en
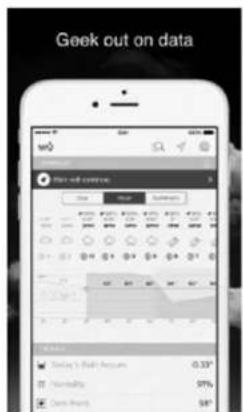

PWS Weather Station Monitor. View weather conditions in your neighbourhood, or even right in your own backyard. Connects to wunderground.com https://itunes.apple.com/us/app/pws-weather-station-monitor/id713705929
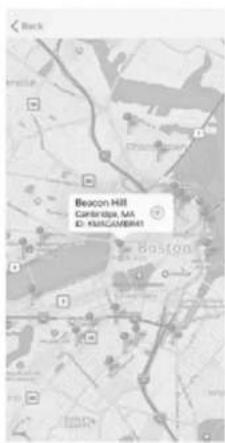


Your new site has been created and saved.


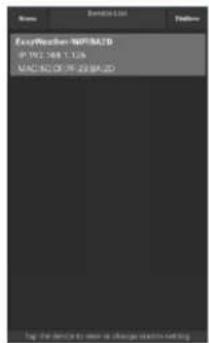





Configure the device
5) By clicking the "Select WiFi" button, you will access the WiFi settings.


22.07.2019


22.07.2019


4.7. REGISTRATION ON WEATHERUNDERGROUND.COM USING PC OR MAC.
Personal Weather Station Network Copyright: Satellite Data, August 2018
Step 1: Register your Station
- 106 (1) 24-38, 604 COUNTY FROM MY BROWN WITH THE WAVE

http://www.wunderground.com/personal-weather-station/dashboard?ID-STATIONID
https://itunes.apple.com/us/app/wunderstation-weather-from-your-neighborhood/id906099986

https://itunes.apple.com/us/app/wu-storm/id955957721


https://itunes.apple.com/us/app/weather-underground-forecast/id486154808https://play.google.com/store/apps/details?id=com.wunderground.android.weather&hl=en
22.07.2019


PWS Weather Station Monitor - displays weather conditions in your area and even directly in your garden. Connects to wunderground.com https://itunes.apple.com/us/app/pws-weather-station-monitor/id713705929


MANUEL D'UTILISATION
DÉTAILS TECHNIQUES


Application mobile - Bureau WU (iOS)

4.5. MOBILE APPLICATION - DELETE OR ADD A WU IDENTIFIER

22.07.2019

ERFR

4.7. REGISTRATION ON WEATHERUNDERGROUND.COM USING A COMPUTER (PC OR MAC).
Personal Weather Station Network Description: Netatma Weather Station, Register with WU, Step 2: Register Your Station
Step 3: Add Your WU Info to Your Weather Station Software. Congratulations. Your station is now registered with Wunderground! You are about to send data. There go to your weather station software and enter the following: KCALOSAN764
http://www.Wunderground.com/personal-weather-station/dashboard?ID=STATIONID
https://itunes.apple.com/us/app/wu-storm/id955957721

FRFR
Weather Underground: Forecast application iOS and Android for weather forecasts: https://itunes.apple.com/us/app/weather-underground-forecast/id486154808 https://play.google.com/store/apps/details?id=com.wunderground.android.weather&hl=en


22.07.2019
INSTRUCTIONS FOR USE TECHNICAL DATA

22.07.2019


22.07.2019


ITIT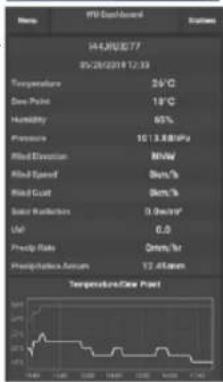


22.07.2019

Personal Weather Station Network Overview: Right Guide Register with VPA Step 1. Register Your Station 1. The following table provides the original document: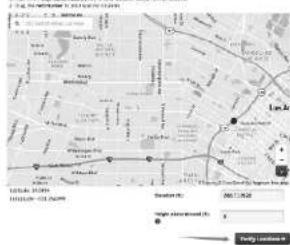
https://itunes.apple.com/us/app/wunderstation-weather-from-your-neighborhood/id906099986

https://itunes.apple.com/us/app/wu-storm/id955957721


22.07.2019






22.07.2019
ESES

4.7. REGISTRATION ON WEATHERUNDERGROUND.COM USING A COMPUTER OR MAC
Personal Weather Station Network - 10.000 Step 1: Register Your Station
http://www.wunderground.com/personal-weather-station/dashboard?ID-STATIONID
https://itunes.apple.com/us/app/wunderstation-weather-from-your-neighborhood/id906099986

https://itunes.apple.com/us/app/wu-storm/id955957721
ESES

Weather Underground: Forecast - iOS and Android app that provides forecasts: https://itunes.apple.com/us/app/weather-underground-forecast/id486154808https://play.google.com/store/apps/details?id=com.wunderground.android.weather&hl=en

22.07.2019


USER MANUAL TECHNICAL DATA
- MATHA'S TOSHU, 20. FATHA, SHTANES
SAFE DISPOSAL OF ACCUMULATORS AND BATTERIES
22.07.2019




Personal Weather Station Network
Decline: Styling Trim. Regains with W3 Step 1: Register Your Station
http://www.wunderground.com/personal-weather-station/dashboard?ID-STATIONID
https://itunes.apple.com/us/app/wunderstation-weather-from-your-neighborhood/id906099986

https://itunes.apple.com/us/app/wu-storm/id955957721

22.07.2019
Weather Underground: Forecast - iOS and Android app for forecasts: https://itunes.apple.com/us/app/weather-underground-forecast/id486154806https://play.google.com/store/apps/details?id-com-vunderground.android.weather&hl-en



USER MANUAL
TECHNICAL DATA
EXPLANATION OF SYMBOLS
SAFE DISPOSAL OF ACCUMULATORS AND BATTERIES
Configure the device


Mobile app - device list (iOS)



Mobile app - WU panel (iOS)
22.07.2019


22.07.2019
Personal Weather Station Network
Deadline: Dying Quian. Regisars will 102 Step 1: Register Your Station
http://www.wunderground.com/personal-weather-station/dashboard?ID=STATIONID
https://itunes.apple.com/us/app/wunderstation-weather-from-your-neighborhood/id906099986

22.07.2019
https://itunes.apple.com/us/app/weather-underground-forecast/id486154806https://play.google.com/store/apps/details?id-com-wunderground.android.weather&hl-en-monitor/id713705929


PRODUCT DRAWINGS | PRODUCT'S VIEW | RYSUNKI PRODUKTU | NÄKRESY PRODUKTU SCHÉMAS DU PRODUIT LE ILLUSTRAZIONI DI PRODOTTO | LAS ILLUSTRACIONES DE PRODUCTO | A TERMÉK ÄBRÄI

NAMEPLATE TRANSLATIONS
steinberg SYSTEMS
① Wifi Weather Station ② SBS-VWS-300
③ Power: 5V DC | 230V-/50Hz
4 Frequency: 868.3 MHz
⑤ Production Year:
① Product Name: Wifi Weather Station
② Model: SBS-WS-300
3 Power: 2 x 1.5V AA Batteries
4 Frequency: 868.3 MHz

| 1 | 2 | 3 | 4 | 5 | 6 | |
| DF | Produktname | Modell | Leistung | Frequenz | Produktionsjahr | Hersteller |
| EN | Product Name | Model | Power | Frequency | Production year | Manufacturer |
| PL | Nazwa produktu | Model | Moc | Częstotliwość | Rok produkcji | Producent |
| CZ | Název výrobku | Model | Jmenovitý výkon | Frekvence | Rok výroby | Výroboce |
| FR | Nom du produit | Modèle | Puissance | Fréquence | Année de production | Fabricant |
| IT | Nome del prodotto | Modello | Potenza | Frequenza | Anna di produzione | Produktare |
| ES | Nombre del producto | Modelo | Potencia | Frecuencia | Año de producción | Fabricante |

DE | EN | PL | FR | IT | ES | CZ

EU Declaration of Conformity
Responsible entity (name, address): EXPONDO POLSKA SP. Z O.O. SP. K., ul. Nowy Kisielin – Innowacyjna 7, 66-002 Zielona Góra, Poland, EU
With full responsibility, I declare that the product
Name | name | nazwa | dénomination | nome | nombre | mèno: WIFI WETTERSTATION | WIFI WEATHER STATION | WIFI STACJA METEROLOGICZNA | STATION MÉTÉO CONNECTÉE | STAZIONE METEO WIFI | ESTACIÓN METEROLOGÍGICA WIFI | WIFLMETEROLOGICKÁ STANICE
Model: SBS-WS-300
Serial number:
00000000000-99999999999
meets the following essential requirements
• RED 2014/53/EU,
• RoHS 2011/65/EU
In addition, this product complies with the requirements of the following harmonized standards:
• EN 301 489 1 V2.1.1:2017,
• EN 301 489-3 V2.1.1:2017,
For the disposal of the device, please consider and act according to the national and local rules and regulations.
CONTACT
expondo Polska sp. z o.o. sp. k.


Brand : STEINBERG
Model : SBS-WS-300
Category : Weather Station