
SPMR1 A1 - Walkie-talkie SILVERCREST - Free user manual and instructions
Find the device manual for free SPMR1 A1 SILVERCREST in PDF.


| Product Type | Two-way radio (Talkie-Walkie) |
| Brand & Model | SilverCrest SPMR1 A1 |
| Frequency Band | PMR446 (446.00625 – 446.09375 MHz) |
| Number of Channels | 8 |
| Privacy Codes | 38 CTCSS tones |
| Maximum Range | Up to 5 km (in open area) |
| Transmit Power | 0.5 W (ERP) |
| Power Supply | 3x AAA batteries or rechargeable Ni-MH batteries (not included) |
| Charging | Via micro-USB (not included) or optional charging cradle |
| Battery Life | Approx. 12 hours (typical use) |
| VOX Function | Hands-free voice activation |
| Scan Function | Scans channels for activity |
| Keypad Lock | Prevents accidental settings change |
| Roger Beep | End-of-transmission tone |
| Monitor Function | Temporarily open squelch |
| Dimensions (approx.) | 160 x 50 x 30 mm |
| Weight (without batteries) | Approx. 90 g |
| Operating Temperature | -10°C to +50°C |
| Ingress Protection | Not waterproof; keep dry |
| Maintenance | Clean with a soft, dry cloth; avoid solvents |
| Safety Warnings | Do not use in explosive atmospheres; keep out of reach of children |
| Spare Parts / Repairability | Batteries and charger available; device not repairable by user |
| General Information | License-free in EU; intended for recreational use |
Frequently Asked Questions - SPMR1 A1 SILVERCREST
User questions about SPMR1 A1 SILVERCREST
0 question about this device. Answer the ones you know or ask your own.
Ask a new question about this device
Download the instructions for your Walkie-talkie in PDF format for free! Find your manual SPMR1 A1 - SILVERCREST and take your electronic device back in hand. On this page are published all the documents necessary for the use of your device. SPMR1 A1 by SILVERCREST.
USER MANUAL SPMR1 A1 SILVERCREST
PMR 2-WAY RADIO SET SPMR1 A1
GB
PMR 2-WAY RADIO SET
Operation and Safety Notes
LT
PMR RADIJO RYŠIO STOTELIŲ KOMPLEKTAS
GB Operation and Safety Notes Page 5

Warnings and symbols used.... Page 6
Introduction Page 7
Intended use...... Page 7
Trademark notices.... Page 7
Scope of delivery ...... Page 7
Safety notes...... Page 8
Description of parts.... Page 12
Technical data Page 13
Before use Page 15
Operation...... Page 15
Setting up your product ...... Page 15
Getting started...... Page 17
Advance settings Page 19
Storage when not in use.... Page 23
Cleaning Page 23
Troubleshooting...... Page 23
Disposal...... Page 24
Simplified EU declaration of conformity.... Page 25
Warranty and service Page 25
Warranty...... Page 25
Warranty claim procedure ...... Page 26
Service Page 26
| Warnings and symbols usedThese instructions for use contain the following symbols and warnings: | |
 | DANGER! This symbol with the signal word “DANGER” indicates a hazard with a high level of risk which, if not avoided, will result in serious injury or death. |
 | WARNING! This symbol with the signal word “WARNING” indicates a hazard with a medium level of risk which, if not avoided, will result in serious injury or death. |
 | CAUTION! This symbol with the signal word “CAUTION” indicates a hazard with a low level of risk which, if not avoided, could result in minor or moderate injury. |
 | ATTENTION! This symbol with the signal word “ATTENTION” indicates a possible property damage. |
 | NOTE: This symbol with the signal word “NOTE” provides additional useful information. |
 | Direct current / voltage |
 | Alternating current / voltage |
 | This action sign indicates to wear suitable protective gloves! Follow the instructions to avoid hands striking or being struck by objects or being in contact with thermal or chemical materials! |
 | WARNING! EXPLOSION HAZARD! A warning with this symbol and word “WARNING! EXPLOSION HAZARD” indicates the potential threat of explosion. Failure to observe this warning may result in serious or fatal injuries and potential property damage. Follow the instructions in this warning to prevent serious injuries, a danger to life or property damage! |
 | Protection class IIThe power adaptor has a double insulation. |
PMR 2-WAY RADIO SET
●Introduction
We congratulate you on the purchase of your new product. You have chosen a high quality product. The instructions for use are part of the product. They contain important information concerning safety, use and disposal. Before using the product, please familiarise yourself with all of the safety information and instructions for use. Only use the product as described and for the specified applications. If you pass the product on to anyone else, please ensure that you also pass on all the documentation with it.
●Intended use
This PMR 2-WAY RADIO SET (hereinafter referred to as "product") is an information technology device. This product is not intended for use in companies or for other commercial uses (e.g. office productivity applications). Use this product only in the home for private purposes Any other use is considered improper. Any claims resulting from improper use or due to unauthorised modification of the product will be considered unwarranted. Any such use is at your own risk.
●Trademark notices
- iUSB Registered trademark of USB Implementers Forum, Inc.
The SilverCrest trademark and trade name is the property of their respective owners.
■ Any other names and products are trademarks or registered trademarks of their respective owners.
- Scope of delivery
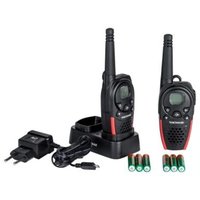
2 x Handheld radio transceivers
1 x Charger cradle
1 x Power adaptor
6 x AA Ni-MH rechargeable batteries
2 x Belt clips
1 x User manual
Before using the product, please familiarize yourself with all of the safety instructions and instructions for use! When passing this product on to others, please also include all the documents!
The product must be checked before each use, a defective or damaged device must not be used.
WARNING! DANGER TO LIFE AND RISK OF ACCIDENT FOR INFANTS AND CHILDREN!
DANGER! RISK OF SUFFOCATION! Never leave children unsupervised with the packaging material. The packaging material poses a suffocation hazard. Children frequently underestimate the dangers. The packaging material is not a toy.
This product may be used by children age 8 years and up, as well as by persons with reduced physical, sensory or mental capacities or lacking experience and/or knowledge, so long as they are supervised or instructed in the safe use of the product and understand the associated risks. Do not allow children to play with the product. Cleaning and user maintenance should not be performed by children without supervision. The product is not a toy.
⚠️ DANGER! Some of the provided parts can be swallowed. If a part is swallowed, seek immediate medical attention.
WARNING! Radio interference
■ Switch the product off on aeroplanes, in hospitals, service rooms, or near medical electronic systems. The wireless signals transmitted could impact the functionality of sensitive electronics.
- Keep the product at least 20 cm from pacemakers or implantable cardioverter defibrillators, as the electromagnetic radiation may impair the functionality of pacemakers.
The radio waves transmitted could cause interference in hearing aids.
Do not place or use the product near flammable gasses or potentially explosives areas (e.g. paint shops) with the wireless components on, as the radio waves emitted can cause explosions and fire.
The range of the radio waves varies by environmental conditions. In the event of wireless data transmission, unauthorised third parties receiving the data cannot be excluded.
■ The product must not be used in a blasting area or in the vicinity of detonators.

DANGER! Keep batteries/rechargeable batteries out of reach of children. If accidentally swallowed seek immediate medical attention.
■ Swallowing may lead to burns, perforation of soft tissue, and death. Severe burns can occur within 2 hours of ingestion.

WARNING! EXPLOSION HAZARD!

Never recharge non-rechargeable batteries. Do not short-circuit batteries/rechargeable batteries or open them. Overheating, fire or bursting can be the result. Never throw batteries/rechargeable batteries into fire or water. Do not exert mechanical loads to batteries.
If batteries/rechargeable batteries are used, the radio must never be placed in the charging cradle.
Risk of batteries/rechargeable batteries leakage
Avoid extreme environmental conditions and temperatures, which could affect batteries/rechargeable batteries, e.g. radiators / direct sunlight.
In the event of a leakage of batteries/rechargeable batteries, immediately remove them from the product to prevent damage.
Avoid contact of leaked chemicals with skin, eyes and mucous membranes. In the event of contact with battery acid, thoroughly flush the affected area with plenty of clean water and seek immediate medical attention.
WEAR PROTECTIVE GLOVES!

Leaked or damaged batteries/rechargeable batteries can cause burns on contact with the skin. Wear suitable protective gloves at all times if such an event occurs.
Batteries/ rechargeable batteries
- All batteries/rechargeable batteries must always be replaced at the same time.
- Insert batteries/rechargeable batteries according to polarity marks (and (-) on the battery/rechargeable battery and the product.
- Clean the contacts on the battery/rechargeable and in the battery/rechargeable battery compartment before inserting!
■ Remove exhausted batteries/rechargeable batteries from the product immediately.
■ Only use the specified type of battery/rechargeable battery!
■ Replacement of a battery with an incorrect type that can defeat a safeguard, (use of lithium batteries/ rechargeable batteries must be prohibited).
■ Remove the battery/rechargeable battery when the product is not to be used for a long time.
■ Improper use may cause explosions and danger to life.
- Do not dispose of batteries/rechargeable batteries into fire or a hot oven, or mechanically crush or cut batteries/rechargeable batteries. There is a risk of an explosion.
■ Leaving a battery in an extremely high temperature surrounding environment that can result in an explosion or the leakage of flammable liquid or gas.
A battery subjected to extremely low air pressure that may result in an explosion or the leakage of flammable liquid or gas.
ATTENTION! RISK OF PROPERTY DAMAGE
- Check the product before every use! Discontinue use if any damage to the product is detected!
■ Sudden temperature changes may cause condensation inside the product. In this case, allow the product to acclimate for some time before using it again to prevent short circuits! - Do not operate the product near heat sources, e.g. radiators or other devices emitting heat!
- Do not throw the product into fire and do not expose to high temperatures.
■ Never open the product!! It has no internal parts requiring maintenance.
This product complies with IPX4 protection against splash water, but must not be immersed in water or other liquids. Do not place the product near containers with water or other liquids.
ATTENTION! Ensure that:
No direct heat sources (e.g. heating) can affect the product.
The product is not used in the immediate vicinity of magnetic fields (e.g. speakers).
- No fire sources (e.g. burning candles) are placed on or near the product.
No objects are inserted into the interior of the product.
The product is never subjected to excessive shocks and vibrations.
■ Position the product on a stable, flat surface and do not place any heavy objects on top of the components.
- Do not open the power adaptor casing under any circumstances. Do not insert any objects into the inside of the casing.
■ Only use the product with the supplied power adaptor.
The power adapter is also only for use with the charger cradle of the handheld radio transceiver.
Before connecting the power adaptor to the power supply, check the voltage and current rating corresponds with the power supply details shown on the power adaptor rating label.
■ The socket must always be easily accessible.
- To avoid damaging the cord, do not squeeze, bend or chafe it on sharp edges. Keep the cord away from hot surfaces and open flames as well.
- Lay out cords in such a way that no unintentional pulling or tripping over is possible.
- Keep the power adaptor and its cord out of reach of children.
■ Disconnect the power adaptor from the power supply when not in use and before cleaning.
During cleaning or operation, do not immerse the electrical parts of the product and the power adaptor in water or other liquids.
The power adaptor always uses a small amount of power even when the handheld transceivers are not being charged. The plug must be removed from the power adaptor for a complete disconnection form the mains power supply.
If smoke or unusual sounds are observed, immediately unplug the power adaptor from the power supply. Have the product and the power adaptor checked by a specialist before using it again.
■ Never touch the power adaptor with wet hands.
■ Power adaptor and product shall not be covered.
The OWIM GmbH & Co KG is not responsible for interference with radios or televisions due to unauthorised modification of the product.
The user of the product is fully responsible for correcting interference caused by such unauthorised modification of the product, as well as replacement of such products.
It is necessary to repair the product if they have been damaged in a way, for example, if the housing is damaged, if liquid or objects have penetrated the product or if the product has been exposed to rain or moisture.
Repair work is also required if the product is not working properly on has been dropped. If smoke is produced, or there are any unusual sounds or smells, turn the product off immediately and remove the batteries. In such cases, the product should not be used until they have been inspected by authorised service personnel. Only have the product repaired by qualified personnel. Never open the housing of the product.
- Observe the regulations and laws in the country of use. In some countries it is forbidden to use your PMR while driving a vehicle, in which case stop your vehicle beside the road before using it.
- Radio must never be operated with a damaged antenna. Even if the insulation of the antenna is damaged, the operation of the radio must be stopped.
The device meets RF exposure guidelines when used against the face at a distance of at least 25 mm or when positioned at least 0 mm away from the body. When a carry case, belt clip or other form of device holder is used for body-worn operation, it should not contain metal and should provide at least the above stated separation distance from the body.
■ Always keep as much distance from the antenna as possible. The antenna shall not be touched during use. - Do not look directly into the beam of the LED light. The luminaire is not intended for household use.
■ Use the belt clip if you want to carry the handeld transceiver with you.
●Description of parts
Please refer to the fold out pages.
Handheld transceiver
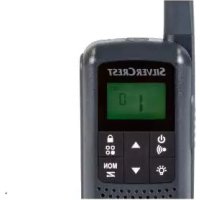
1 Display
2 Antenna
3 2.5mm connection for headset (with rubber cover)
4 LED lamp
5 Up button
6 Menu button
7 MON Monitor/ Channel Scan button
8 Down button
9 USB charging socket (with rubber cover)
10 Microphone
11 Speaker
12 Lamp ON/ OFF Button
13 Call button/ Power ON/OFF
14 PTT button
15 Belt clamp
16 Battery compartment cover lock
17 Charging contacts
Charger cradle
18 Micro-USB socket
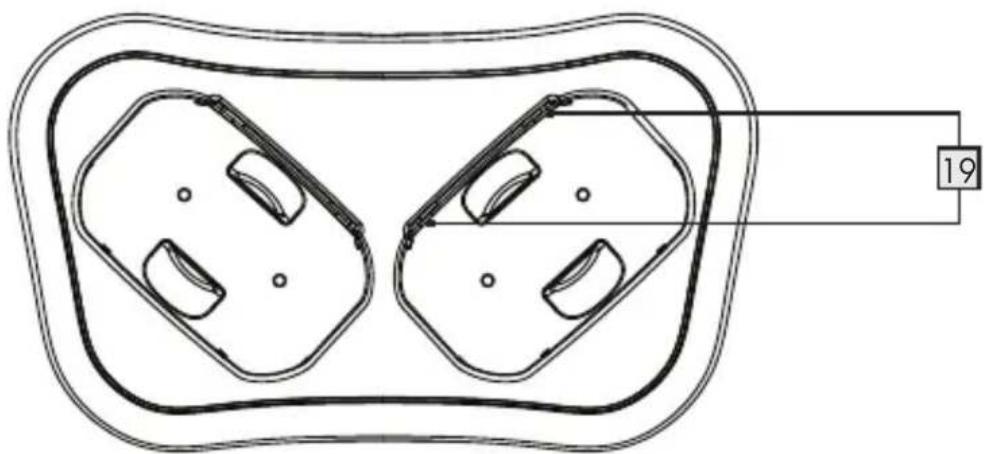
19 Charging contacts
Display panel items
20 Dual channel icon
21 Scan icon
22 VOX icon
23 Battery level indicator
24 Reception icon (RX)
25 Transmission icon (TX)
26 Sub Channel indication (CTCSS/ DCS)
27 Button lock icon
28 Speaker volume
29 Transmission Channel
Other items
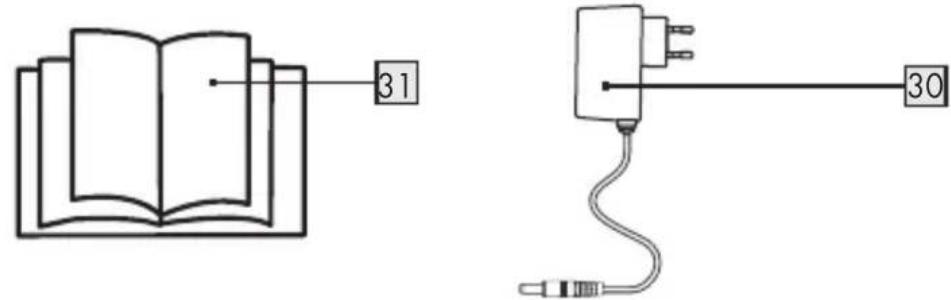
30 Power adaptor
31 User manual
●Technical data
Channels: 16
Subcode: CTCSS 38/DCS 83
Frequency: 446.00625 - 446.19375 Mhz
Band: 446 PMR
Highest Reported SAR
VOX (100% duty cycle)
In-front of Face: 0.290 W/kg
Body-Worn: 0.733 W/kg
Push-to-Talk (50% duty cycle)
In-Front-of Face: 0.145 W/kg
Body-Worn: 0.366 W/kg
Power output: <27 dBm
Range: Up to 10 km (Open field) *
Transmission power: ≤500 mW ERP
Modulation type: FM-F3E
Channel separation: 12.5 kHz
Conventional/3x AA sized batteries or rechargeable batteries: 3x rechargeable AA sized NiMH batteries
Operating temperature 0 - 40 °C range:
Storage humidity: 10 to 70 % RH
Dimension (L x W x H): Handheld radio 175 x 54 x 33 mm Charging cradle: 50 x 140 x 82 mm
Weight (without batteries/rechargeable batteries): Handheld radio: 122.6 g Charging cradle: 91.3 g Power adapter: 49.4 g
IP standard: IPX4
USB Power Adaptor
Manufacturer: Shenzhen Tianyin Electronics Co., Ltd
Model identifier: EU version: TPA-97H050055VW01 UK version: TPA-97H050055BW01
Input voltage: 100-240 V\~
Input AC frequency: 50/60 Hz
Input current: 0.15 A
Output voltage: 5.0 V
Output current: 0.55 A
Output power: 2.75 W
Average active efficiency: ≥72.2%
No-load power consumption: <0.10 W
Protection class: II / ☐
* i NOTE: The communication range is calculated based on optimum conditions, with no obstructions. Actual range will vary depending on terrain and conditions. The specification and design may be changed without notification.
●Before use
i NOTE:
■ Before use, verify the package contents are complete and undamaged!
- All parts have to be unpacked and the packaging material has to be removed completely.
■ Remove the protective film from the displays of both transceivers.
Operation
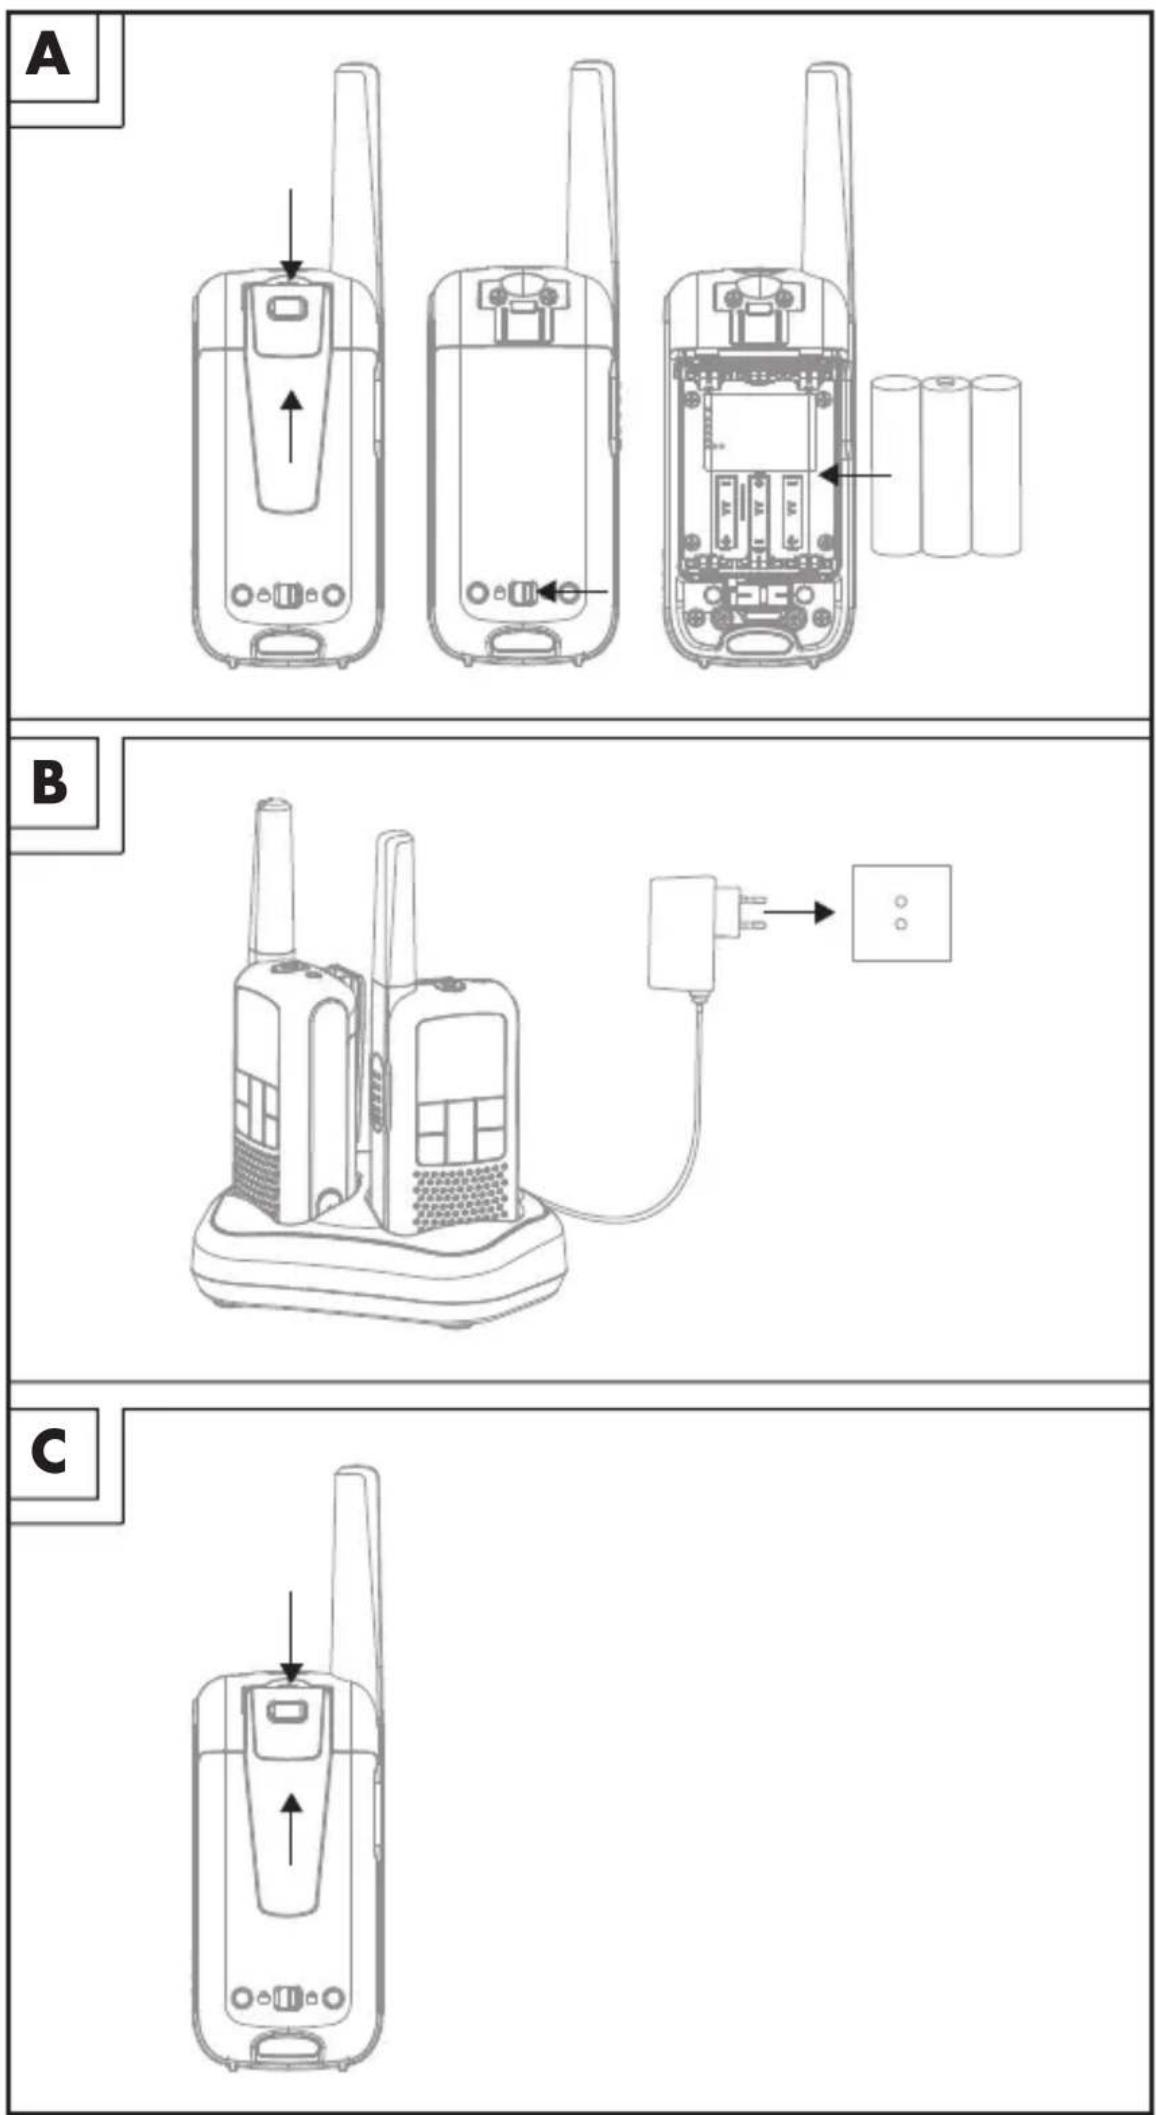
- Setting up your product Installing/removing the belt clip (see fig. C)
Installing the belt clamp
Insert the belt clamp 15 into the slot located at the back of the handheld transceiver. The belt clamp 15 must audibly click into place.
Removing the belt clamp
To remove the belt clamp 15 from the handheld transceiver, release the belt clamp lock. Once it is unlocked, slide the belt clamp out of the slot.
Inserting/ Replacing the batteries (see fig. A)
Step 1: Remove the belt clamp 15.
Step 2: Unlock the battery compartment cover lock 16.
Step 3: Insert 3 AA sized batteries/rechargeable batteries into the battery compartment with the correct polarity ensuring that the positive + and negative - of the batteries/rechargeable batteries and the battery terminals inside the battery compartment are aligned.
Step 4: Close the battery compartment cover lock 16 and lock it.
Step 5: Replace the belt clamp 15.
Charging the rechargeable batteries (see fig. B)
This product can use either alkaline or Ni-MH rechargeable batteries. If you choose to use rechargeable batteries on your handheld radio transceiver set, please follow the information detailed in this section.
Setting up the charging cradle:
Step 1: Make sure to place the charging cradle on a flat, stable surface.
Step 2: Plug the power adapter's USB cable into the Micro-USB socket of the charging cradle.
Step 3: Plug the power adaptor 30 into a nearby wall socket that can be easily accessible.
Step 4: Place the handheld transceivers onto the charging cradle.
You can see the charging status from the Battery level indicator 23 to check the battery charging status. Total charging time is approx. 17 hours.
You can also charge the handheld transceivers directly without using the charging cradle by plugging the Micro-USB plug of the power adaptor into the USB charging socket 9. Open the rubber cover of the USB charging socket 9 before you insert the Micro-USB plug to the USB charging socket 9.
The Battery level indicator 23 in the upper right corner of the display scrolls while charging

Connecting the headset
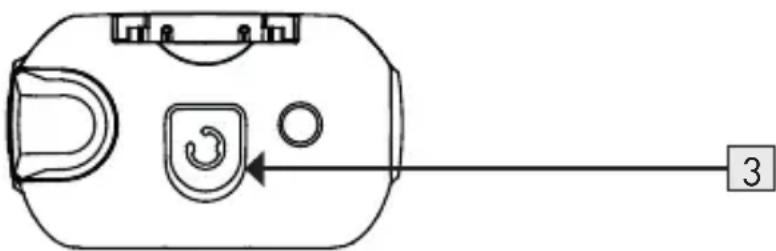
On the top of handheld transceiver there is a 2.5mm connection for a headset 3.
Open the rubber cover and then plug you headphones (not included) into this socket.
●Getting started
NOTE: The handheld transceivers work as a pair and need to communicate with each other using the same communication channel and also the same CTCSS (Continuous Tone-Coded Squelch System), or DCS code (Digital Code Squelch). Also, they will need to be within a 10 km range in an open field to work, as buildings, forests and areas of high ground can reduce the range. On a free channel, others who have a PMR or receiver can follow your conversation.
Power ON the handheld transceiver
To power ON the handheld transceiver press and hold the button 13 for at least 3 seconds. Then an acoustic signal can be heard and the current set channel will be shown in the display 1. At this moment, the handheld transceiver will be in receiver mode.
Power OFF the handheld transceiver
To power OFF the handheld transceiver press and hold the button 13 for at least 3 seconds. Then an acoustic signal can be heard and the display 1 will turn off.
Adjusting the volume
Press the Up button 5 to increase the audio volume. The speaker volume range will be indicated between 0 to 7L, (highest volume being 7L, and the lowest volume being 0L).
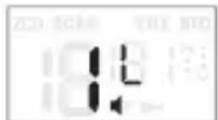
The set volume is shown flashing on the display for approx. 8 seconds and is then automatically saved. If the user sets the volume to "0" and "x" will also appear next to the loudspeaker symbol.
LED flash light ON/OFF
You can turn on the LED flash light at anytime by pressing the flash light ON/OFF Button 12.
NOTE: All settings are automatically saved after approx. 8 seconds and the handheld transceiver will then return to standby mode.
Setting up a different channel (Total 16 PMR radio channels)
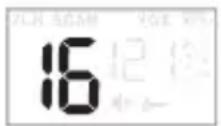
Both of the PMR radio handheld transceivers need to be set to the same channel for communication.
Step 1: Press the Menu button 6 once and the Transmission Channel 29 indicator will start flashing.
Step 2: Press the Up button 5 or the Down button 8 to select the desired channel for both handheld transceivers.
Step 3: Press the PTT button 14 to confirm.
NOTE: When using the handheld transceivers, all devices that are set to the same channel can participate in the conversation.
Transmission

NOTE: All PMR radio handheld transceivers within the range and set to the same channel, the receive symbol appears and the message will be played.
Step 1: Press and hold the PTT button 14. The above transmission icon will appear in the display 1.
Step 2: Hold the handheld transceiver at about 3 to 5 cm from your mouth and speak into the microphone 10.
Step 3: Release the PTT button 14 once you have completed your message.
Battery status indicator

When the product is switched ON, the Battery level indicator 23 will show on the top right corner of the display 1.

Rechargeable batteries fully charged.

Rechargeable batteries 2/3 charged.

Rechargeable batteries 1/3 charged.

Rechargeable batteries empty.
When the batteries drop to 1/3 charged, a double beep tone is emitted every 10 minutes, at this time start to charge the rechargeable batteries.
●Advance settings
CTCSS (Continuous Tone-Coded Squelch System)/
DCS (Digital Code Squelch)
In order to avoid receiving other signals from nearby, you can apply for CTCSS or DCS technology by following the information detailed in this section.
The CTCSS or DCS three-digit code is basically a tone frequency that the handheld transceivers will use for transmission. Two handheld transceivers that have been set to the same channel and the same CTCSS or DCS code can listen to each other. No other transceiver will be heard on the same channel, unless it is using the same CTCSS or DCS code.
This product supports a total of 38 analogue CTCSS (1 to 38) and 83 digital DCS (39 to 121) codes. Any receiver tuned to the same channel and using the same CTCSS or DCS code can listen to your message.
Setting up the sub-channel CTCSS/ DCS code
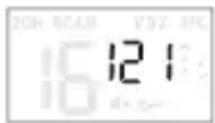
Setting up a sub channel allows you to not be disturbed by other handheld transceivers transmitting on the same channel or get any interference from other sources using the same frequency.
Step 1: Press the Menu button 6 twice and the sub channel indication 26 starts flashing.
Step 2: Use the Up button 5 or the Down button 8 to set the desired sub-channel (1 - 121) or disable this function by selecting "0".
Step 3: Press the PTT button 14 to confirm which channel you prefer.
Disable the CTCSS/ DCS code
To disable the CTCSS or DCS code, select the code "0". "0" will appear in the menu.
NOTE: Handheld transceivers with a sub channel "0" can receive all signals on that channel, also when you have set a sub channel on your handheld transceiver.
Channel monitoring
You can use this function to disable the noise reduction, allowing you to also listen to weak transmitters on the current channel.
Step 1: Press and hold the Monitor/ Channel Scan button 7 for 3 seconds to disable the noise reduction and to monitor the channel.
Step 2: Release the button 7 to turn the noise reduction on again.
Voice-controlled send function (VOX)
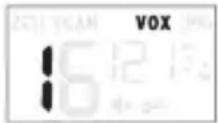
The handheld transceiver will start transmitting as soon as it detects your voice something like using the hands-free function of your mobile phone. This allows you to send a message without pressing the PTT button 14. Using this function is not recommended when you are located in a noisy or windy environment.
Step 1: Press the Menu button 6 4 times. The VOX icon 22 will illuminate in the display and the current VOX setting will flash on the display 1.
Step 2: Press the Up button 5 to set the sensitivity of the VOX function. The higher the set value the more sensitive the VOX function will become. You can set a value from "1" to "3".
Step 3: To deactivate the VOX set the value to "0".
Step 4: Press the PTT button 14 to confirm the setting.
NOTE: It would be preferably to use this function in combination with a headset. Keep in mind that it can take over a second after you have started talking before the handheld transceiver starts transmitting.
Channel scan
Use this function to scan all active channels (1-16) in the loop.
Step 1: Briefly press the button 7 to start scanning
Step 2: Briefly press the Up button 5 or Down button 8 to continue scanning if you are only receiving noise on certain channel.
Step 3: If the reception of the same channel keeps during the scan, you may remove this channel from the scan by pressing and holding Up button 5 or Down button 8 for 2 seconds. Then the scan will resume but the selected channel will be skipped.
⚠️ ATTENTION! You cannot remove a channel to which the walkie-talkie was set when the scan was started.
The next time you initiate a channel scan, all channels will be scanned again.
Searching for an active channel

Step 1: Briefly press the button 7 to start scanning.
Step 2: Briefly press the Up button 5 or the Down button 8 to continue scanning if you're only receiving noise on a certain channel.
Step 3: When the reception of the same channel keeps failing during the scan, you may remove this channel from the scan by pressing and holding the Up button 5 or the Down button 8 for 2 seconds. The scan will resume, but the selected channel will be skipped.
⚠️ ATTENTION! You cannot remove a channel to which the handheld transceiver was set when the scan was started. The next time you initiate a channel scan, all channels will be scanned again.
Step 4: Press the button 7 again to end the scan.
Dual channel scan
Use this 2 channel scan to consecutively listen to the channel to which the handheld transceiver is currently set and a 2nd channel.
Step 1: Press the Menu button 6 5 times and the "2CH" icon 20 will appear on the display 1.
Step 2: Use the Up button 5 or the Down button 8 to select the 2nd channel ('OF' means Off).
Step 3: Press the PTT button 14 to confirm.
Step 4: Repeat these instructions and select the option 'OF' in step 2 to disable this function.
The two monitored channels are shown alternately in the display. If the second monitored channel is displayed "2CH" also appears in the display.
Call alert (CA) tones
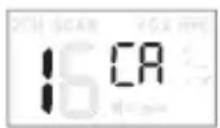
The call tone is an audible signal that alerts other stations that you want to transmit a message. This product has 20 different call tones.
Selecting the call tone:
Step 1: Press the Menu button 6 3 times. The indication "CA" will appear on the display 1 and the number of the current call tone will flash and the call tone can be heard.
Step 2: Press the Up button 5 or the Down button 8 to set a different call tone.
Step 3: Press the PTT button 14 to confirm the selected call alert tones.
i NOTE: "0" = Tone OFF
Roger Beep ON/OFF
If this function is enabled, a signal tone will sound at the receiving end as soon as you stop transmitting. The receiving person now knows when he or she can talk back.
Step 1: Make sure that the handheld transceiver is switched OFF.
Step 2: Press and hold the Up button 5 and depress the button 13 for 3 seconds to switch ON the handheld transceiver.
Step 3: If the Roger beep was enabled, it will now be disabled, and vice versa.
Button sound ON/OFF
Key tones are the tones that sound upon pressing a button. You may switch these tones on or off as follows:
Step 1: Make sure that the handheld transceiver is switched OFF.
Step 2: Press and hold the Down button 8 and depress the button 13 for 3 seconds to switch on the handheld transceiver.
Step 3: If the key tones were enabled, they'll now be disabled, and vice versa. The key tones are also deactivated if the user sets the volume to "0".
KEYPAD button LOCK:
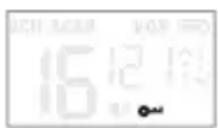
When the keylock is enabled, the Up button 5, Down button 8, Menu button 6 and button 7 are locked.
Step 1: Press and hold the Menu button 6 until after approx. 3 seconds the Button lock icon 27 appears on display 1.
Step 2: Press and hold the Menu button 6 again for 2 seconds to unlock these buttons.
Display backlight
Each time you press a function button (except the PTT button 14, button 13 or button 12) the background lighting of the display will illuminate. This lighting will automatically switch OFF in 5 seconds after pressing the last button.
The "call function" and the "send" function can still be used normally.
●Storage when not in use
- Batteries/rechargeable batteries must be removed before storage.
■ Store the product in a dry indoor location protected from direct sunlight, preferably in its original packaging.
●Cleaning
■ Switch the product off before cleaning!
No acid, chafing or solvent cleaning agents should be used or the product can be damaged.
■ Only clean the outside of the product using a soft, dry cloth!
At persistent soiling, a mild cleaning agent can be used.
●Troubleshooting
Problem Solution
The device cannot be switched on.
Option 1: Replace the product with new batteries/recargeable batteries.
Option 2: Check that the batteries/recargeable batteries have been inserted into the battery compartment with the correct polarity orientation.
Option 3: Charge the rechargeable batteries of product inside battery compartment.
Option 4: Make sure press and hold the ON/OFF button 13 for at least 3 seconds.
Not charging Option 1: Install new batteries/recargeable batteries.
Option 2: Check that the batteries/recargeable batteries have been inserted into the battery compartment with the correct polarity orientation.
Option 3: Check if power adaptor correctly plug into socket.
Option 4: Check if power adaptor cable correctly plug into charge cradle or loose plug into USB socket.
Poor reception or interference
Option 1: Weak signal, move away from those electromagnetic sources.
Option 2: Running out of batteries, replace with new batteries or full charge your product again.
Option 3: Try to switch different channel to see if quality can be improved.
●Disposal
Packaging:
The packaging is made of environmentally friendly materials, which may be disposed of through your local recycling facilities.
Product:
Contact your municipality for information on how to dispose of your worn-out product.
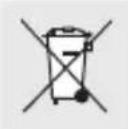
The adjacent symbol of a crossed out dustbin on wheels indicates this product is subject to Directive 2012/19/EU. This directive states at the end of the life this product must not be disposed of through regular household refuse but must be returned to special collection sites, recycling depots or waste management companies.
This disposal is free of charge to you.
Protect the environment and dispose of properly.
The product is recyclable, subject to extended manufacturer responsibility, and collected separately.
Batteries:
Think about the environment and your personal health. Dispose empty batteries in separate collecting boxes. These can be found in many public buildings or in shops where batteries are sold.
Improper disposal of batteries can harm the environment!
Never dispose of batteries in your household waste. They may contain toxic heavy metals and are subject to hazardous waste regulations. The chemical symbols of the heavy metals are:
Cd = cadmium, Hg = mercury, Pb = lead. Therefore dispose of used batteries through your local collection site.
●Simplified EU declaration of conformity
Hereby, OWIM GmbH & Co. KG, Stiftsbergstraße 1, 74167 Neckarsulm, GERMANY, declares that the product [PMR 2-WAY RADIO SET, HG06837], is in compliance with Directives 2014/53/EU, 2011/65/EU and also fullfills Ecological Design Directive 2009/125/EC.
The full text of the EU declaration of conformity is available at the following internet address: www.owim.com
●Warranty and service
Warranty
The product has been manufactured to strict quality guidelines and meticulously examined before delivery. In the event of product defects you have legal rights against the retailer of this product. Your legal rights are not limited in any way by our warranty detailed below.
The warranty for this product is 3 years from the date of purchase. Should this product show any fault in materials or manufacture within 3 years from the date of purchase, we will repair or replace it - at our choice - free of charge to you.
The warranty period begins on the date of purchase. Please keep the original sales receipt in a safe location. This document is required as your proof of purchase. This warranty becomes void if the product has been damaged, or used or maintained improperly.
The warranty applies to defects in material or manufacture. This warranty does not cover product parts subject to normal wear, thus possibly considered consumables (e.g. batteries) or for damage to fragile parts, e.g. switches, rechargeable batteries or glass parts.
●Warranty claim procedure
To ensure quick processing of your case, please observe the following instructions:
Please have the till receipt and the item number (e.g. IAN 123456_7890) available as proof of purchase.
You will find the item number on the rating plate, an engraving, on the front page of the instructions for use (bottom left), or as a sticker on the rear or bottom of the product.
If functional or other defects occur, please contact the service department listed either by telephone or by e-mail.
You can return a defective product to us free of charge to the service address that will be provided to you. Ensure that you enclose the proof of purchase (till receipt) and information about what the defect is and when it occurred.
Service
GB Service Great Britain
Tel.: 08000569216
E-Mail: owim@lidl.co.uk
CE
E-posti aadress: owim@lidl.ee
CE
BRĪDINĀJUMS! EKSPLOZIJAS RISKS!

⚠️ WARNUNG! EXPLOSIONSGEFAHR!

TRAGEN SIE SCHUTZHANDSCHUHE!

Subcode: CTCSS 38/DCS 83
Frequenz: 446.00625 - 446.19375 Mhz
Band: 446 PMR
CTCSS (Continuous Tone-Coded Squelch System)/DCS (Digital Code Squelch)


- PMR 2-WAY RADIO SET SPMR1 A1
- PMR 2-WAY RADIO SET
- ●INTRODUCTION
- ●INTENDED USE
- ●TRADEMARK NOTICES
- SCOPE OF DELIVERY
- WARNING! DANGER TO LIFE AND RISK OF ACCIDENT FOR INFANTS AND CHILDREN
- DANGER! KEEP BATTERIES/RECHARGEABLE BATTERIES OUT OF REACH OF CHILDREN. IF ACCIDENTALLY SWALLOWED SEEK IMMEDIATE MEDICAL ATTENTION
- WARNING! EXPLOSION HAZARD
- RISK OF BATTERIES/RECHARGEABLE BATTERIES LEAKAGE
- WEAR PROTECTIVE GLOVES
- BATTERIES/ RECHARGEABLE BATTERIES
- ATTENTION! RISK OF PROPERTY DAMAGE
- ATTENTION! ENSURE THAT
- ●DESCRIPTION OF PARTS
- HANDHELD TRANSCEIVER
- CHARGER CRADLE
- DISPLAY PANEL ITEMS
- OTHER ITEMS
- ●TECHNICAL DATA
- USB POWER ADAPTOR
- ●BEFORE USE
- I NOTE
- OPERATION
- SETTING UP YOUR PRODUCT INSTALLING/REMOVING THE BELT CLIP (SEE FIG. C)
- INSTALLING THE BELT CLAMP
- REMOVING THE BELT CLAMP
- INSERTING/ REPLACING THE BATTERIES (SEE FIG. A)
- CHARGING THE RECHARGEABLE BATTERIES (SEE FIG. B)
- SETTING UP THE CHARGING CRADLE
- CONNECTING THE HEADSET
- ●GETTING STARTED
- POWER ON THE HANDHELD TRANSCEIVER
- POWER OFF THE HANDHELD TRANSCEIVER
- ADJUSTING THE VOLUME
- LED FLASH LIGHT ON/OFF
- SETTING UP A DIFFERENT CHANNEL (TOTAL 16 PMR RADIO CHANNELS)
- TRANSMISSION
- BATTERY STATUS INDICATOR
- ●ADVANCE SETTINGS
- CTCSS (CONTINUOUS TONE-CODED SQUELCH SYSTEM)
- DCS (DIGITAL CODE SQUELCH)
- SETTING UP THE SUB-CHANNEL CTCSS/ DCS CODE
- DISABLE THE CTCSS/ DCS CODE
- CHANNEL MONITORING
- VOICE-CONTROLLED SEND FUNCTION (VOX)
- CHANNEL SCAN
- SEARCHING FOR AN ACTIVE CHANNEL
- DUAL CHANNEL SCAN
- CALL ALERT (CA) TONES
- SELECTING THE CALL TONE
- ROGER BEEP ON/OFF
- BUTTON SOUND ON/OFF
- KEYPAD BUTTON LOCK
- DISPLAY BACKLIGHT
- ●STORAGE WHEN NOT IN USE
- ●CLEANING
- ●TROUBLESHOOTING
- PROBLEM SOLUTION
- ●DISPOSAL
- PACKAGING
- PRODUCT
- THIS DISPOSAL IS FREE OF CHARGE TO YOU
- BATTERIES
- IMPROPER DISPOSAL OF BATTERIES CAN HARM THE ENVIRONMENT
- ●SIMPLIFIED EU DECLARATION OF CONFORMITY
- ●WARRANTY AND SERVICE
- WARRANTY
- ●WARRANTY CLAIM PROCEDURE
- SERVICE
- GB SERVICE GREAT BRITAIN
- CE
- BRĪDINĀJUMS! EKSPLOZIJAS RISKS
- ⚠️ WARNUNG! EXPLOSIONSGEFAHR
- TRAGEN SIE SCHUTZHANDSCHUHE
- CTCSS (CONTINUOUS TONE-CODED SQUELCH SYSTEM)/DCS (DIGITAL CODE SQUELCH)
Brand : SILVERCREST
Model : SPMR1 A1
Category : Walkie-talkie