
SPMR 8000 A1 - Walkie-talkie SILVERCREST - Free user manual and instructions
Find the device manual for free SPMR 8000 A1 SILVERCREST in PDF.


| Product Type | Two-way radio / Talkie-walkie |
| Brand | SilverCrest |
| Model | SPMR 8000 A1 |
| Frequency Band | 446 MHz (PMR446) |
| Number of Channels | 8 |
| Sub-channels (CTCSS) | 38 |
| Maximum Range | Up to 8 km (line of sight) |
| Power Supply | 3 x AAA alkaline batteries (not included) or rechargeable battery pack |
| Battery Life | Approx. 24 hours (standby) / 10 hours (continuous use) |
| Power Output | 0.5 W (max. allowed for PMR446) |
| VOX Function | Yes, adjustable sensitivity |
| Scan Function | Yes, for active channels |
| Display | Backlit LCD with channel, sub-channel, battery indicator |
| Keypad Lock | Yes |
| Roger Beep | Yes, selectable |
| Dimensions (H x W x D) | Approx. 120 x 55 x 30 mm |
| Weight (without batteries) | Approx. 85 g |
| Operating Temperature | -10°C to +50°C |
| Housing Material | ABS plastic |
| Care and Cleaning | Wipe with a soft, dry cloth; do not use solvents |
| Safety | Keep away from water and moisture; do not operate near explosive atmospheres |
| Spare Parts | Replacement batteries (AAA or rechargeable pack); available from SilverCrest service |
| Repair | Repairs only by authorized service center; no user-serviceable parts inside |
| General Information | Manual available for download in PDF from the manufacturer's website |
Frequently Asked Questions - SPMR 8000 A1 SILVERCREST
User questions about SPMR 8000 A1 SILVERCREST
0 question about this device. Answer the ones you know or ask your own.
Ask a new question about this device
Download the instructions for your Walkie-talkie in PDF format for free! Find your manual SPMR 8000 A1 - SILVERCREST and take your electronic device back in hand. On this page are published all the documents necessary for the use of your device. SPMR 8000 A1 by SILVERCREST.
USER MANUAL SPMR 8000 A1 SILVERCREST
Last Information Update
06/2012 Ident No: SPWR EC00 A1 002012-1
DE AT
PMR Twintalker 2-Way Radio Set
Her manual and service information
IAN 78727
IAN 78727
DE AT ME

Deutsch....2
Nederlands 32
English....62
Inhalt
Einleitung 5
CTCSS (Continuous Tone Coded Squelch System) /DCS (Digital Coded Squelch)....20
natural_image
Line drawing of a walkie-talkie connected to an electrical plug (no text or symbols)(Abbildung ähnlich)

CTCSS (Continuous Tone Coded Squelch System) /DCS (Digital Coded Squelch)
natural_image
Symbol of a trash bin crossed with no text or numbers, representing waste sorting or disposal (no text present)CTCSS-codes (Continuous Tone Coded Squelch System)/DCS-codes (Digital Coded Squelch)......50
De CTCSS-code instellen 51
De DCS-code instellen....51
natural_image
Line drawing of a two-wireless air conditioner unit connected to a plug (no text or symbols)
CTCSS-codes (Continuous Tone Coded Squelch System)/DCS-codes (Digital Coded Squelch)
natural_image
Symbol of a trash bin crossed with no text or numbers, representing waste sorting or disposal (no text present)Technical specifications 67
Safety instructions....69
General safety instructions....69
Operating environment/environmental conditions 70
Cables....70
Conventional and rechargeable batteries....71
Caution - danger of explosion....71
Caution - risk of burns....72
Caution - risk of injury....72
Risks associated with high noise levels 72
Copyright....72
Overview 73
Handheld transceiver....73
Display items....74
Charger cradle 74
Before you start 75
Inserting the rechargeable/conventional batteries....75
Charging the batteries 75
Preparing the charging cradle....75
Charging the batteries....76
Installing/removing the belt clip....77
Installing the belt clip....77
Removing the belt clip 77
Connecting the earphones....77
Getting started 78
Powering the handheld transceivers on/off 78
Powering the handheld transceiver on....78
Powering the handheld transceiver off....78
Adjusting the volume....78
Setting a different channel....79
Reception 79
Transmission....79
Battery status indicator....80
Advanced operation....80
CTCSS (Continuous Tone Coded Squelch System)/DCS (Digital Coded Squelch) code 80
Setting the CTCSS code....81
Setting the DCS code 81
Disabling the CTCSS/DCS code....81
Channel monitoring....81
Voice-controlled send function (VOX) 82
Channel scan....82
Searching for an active channel....82
Searching for a CTCSS code 83
Searching for a DCS code....83
Dual scan....84
Call tones 84
Selecting the call tone 84
Sending the call tone....84
Setting the roger beep on/off 85
Setting the button sound on/off....85
Button lock 85
Chronometer 86
Display backlight 86
Troubleshooting 87
Maintenance/cleaning 88
Maintenance....88
Cleaning....88
Environmental regulations and disposal information 89
Declaration of conformity 89
Warranty and service information 90
Introduction
Thank you for choosing a SilverCrest product.
Your SilverCrest SPMR 8000 A1 consists of two portable handheld radio transceivers with a maximum range of 8 km. Using this PMR set is free of charge, so there is no need to pay any licence fees, etc. You can choose from eight channels for communicating between the two stations. The handheld transceivers are protected against light rain.
You can use your PMR set anywhere you need to communicate with other people. For instance, you can keep in touch with your children while they are playing in the garden. Once you have found an interference-free channel, communication will be limited only by obstacles and the maximum range.
Intended use
This handheld radio transceiver set is a consumer electronics device. The SilverCrest SPMR 8000 A1 handheld radio transceiver set has been designed for communicating with other people. The handheld radio transceiver set may be used only for private purposes, and not for industrial or commercial purposes. It may not be used in tropical climates. Only cables and external devices that comply with safety standards and the electromagnetic compatibility and shielding quality of this device may be used.
This handheld radio transceiver set fulfils all relevant norms and standards associated with CE Conformity. Any modifications to the handheld radio transceiver set may mean that these norms cease to be met. The manufacturer is not liable for any damage or interference resulting therefrom. Only use the accessories recommended by the manufacturer. Any use other than that mentioned above does not correspond to the intended use.
Observe the regulations and laws in the country of use.

Power your PMR off when on an aircraft and the cabin attendants instruct you to do so. You must follow the airline flight and cabin crew instructions when using the product.

Power the product off wherever you encounter any signs indicating you must do so. Hospitals and medical facilities may use devices that are sensitive to RF fields.

In some countries it is forbidden to use your PMR while driving a vehicle, in which case stop your vehicle beside the road before using it.

Do not touch the antenna while transmitting, as this may result in decreased range.
Package contents
Take all supplied devices and accessories out of the packaging and inspect them for any damaged or missing items:
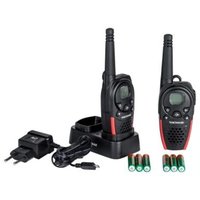
• 2 SPMR 8000 A1 handheld radio transceivers
- 2 belt clips
- 1 charger cradle
- 1 power adapter
- 8 rechargeable AAA-sized Ni-MH batteries
• 2 earphones with microphone and PTT button
- User manual with safety information
If you find any items missing or damaged, phone our Hotline. You will find the phone number in the last chapter, "Warranty and Service Information".

Remove the protective film from the displays (1) of both transceivers. To do this, place your fingernail below the tongue in the upper-left corner of the protective film, lift it up and remove the film.
Technical specifications
| Brand | SilverCrest |
| Model name SPMR 8000 A1 | |
| Channels | 8 |
| Subcode CTCSS 38/DCS 83 | |
| Frequency 446.00625 - 446.09375 MHz | |
| Range Up to 8 km (in open field) | |
| Conventional/rechargeable batteries | Per handheld transceiver:4 x AAA-sized batteries or 4 x rechargeable AAA-sized NiMH batteries |
| Transmission power ≤ 500 mW ERP | |
| Modulation type FM - F3E | |
| Channel separation 12.5 kHz | |
| Power adapter for dual charging cradle | Manufacturer: O RealInput: 230-240V AC/50 HzOutput: 9 V/300 mAPower: max. 3 W |
| Earphones | Type: PMR HS01Impedance: 32 ΩMaximum power: 10 mWBroadband characteristic voltage: 450 mV |
| Dimensions | Handheld transceiver: 55 x 103 x 36 mmCharger cradle: 114 x 80 x 43 mm |
| Weight (without batteries/rechargeable batteries) | Handheld transceiver: 90 gCharger cradle: 76 gBelt clip: 3 gHeadphones: 14,5 gPower adapter: 71 g |
| Environment | Operation:0 °C to 30 °C, max. 85% relative humidityStorage:-20 °C to 55 °C, max. 90% relative humidity |
| IP standard IPX2 protection against water drops |
SilverCrest SPMR 8000 A1
| Frequency chart | CTCSS code | ||||||||
| Channel | Frequency (MHz) | Code | Frequency (Hz) | Code | Freq. (Hz) Code | Freq. (Hz) | Code | Freq. (Hz) | |
| 1 | 446.00625 | 0 | Disabled | 10 | 94.8 | 20 | 31.8 30 | ||
| 2 | 446.01875 | 1 | 67.0 | 11 | 97.4 | 21 | |||
| 3 | 446.03125 | 2 | 71.9 | 12 | 100.0 | 22 | |||
| 4 | 446.04375 | 3 | 74.4 | 13 | 103.5 | 23 | |||
| 5 | 446.05625 | 4 | 77.0 | 14 | 107.2 | 24 | |||
| 6 | 446.06875 | 5 | 79.7 | 15 | 110.9 | 25 | |||
| 7 | 446.08125 | 6 | 82.5 | 16 | 114.8 | 26 | |||
| 8 | 446.09375 | 7 | 85.4 | 17 | 118.8 | 27 | |||
| 8 | 88.5 | 18 | 123.0 | 28 | 173.8 | 38 | |||
| 9 | 91.5 | 19 | 127.3 | 29 | 179.9 | ||||
| DCS codes | |||||||||
| No. | DCS code | No. | DCS code | No. | DCS code | No. | DCS code | No. | DCS code |
| 1 | 23 | 18 | 125 | 35 | 245 | 52 | 412 | 69 | 624 |
| 2 | 25 | 19 | 131 | 36 | 251 | 53 | 413 | 70 | 627 |
| 3 | 26 | 20 | 132 | 37 | 261 | 54 | 423 | 71 | 631 |
| 4 | 31 | 21 | 134 | 38 | 263 | 55 | 431 | 72 | 632 |
| 5 | 32 | 22 | 143 | 39 | 265 | 56 | 432 | 73 | 654 |
| 6 | 43 | 23 | 152 | 40 | 271 | 57 | 445 | 74 | 662 |
| 7 | 47 | 24 | 155 | 41 | 306 | 58 | 464 | 75 | 664 |
| 8 | 51 | 25 | 156 | 42 | 311 | 59 | 465 | 76 | 703 |
| 9 | 54 | 26 | 162 | 43 | 315 | 60 | 466 | 77 | 712 |
| 10 | 65 | 27 | 165 | 44 | 331 | 61 | 503 | 78 | 723 |
| 11 | 71 | 28 | 172 | 45 | 343 | 62 | 506 | 79 | 731 |
| 12 | 72 | 29 | 174 | 46 | 346 | 63 | 516 | 80 | 732 |
| 13 | 73 | 30 | 205 | 47 | 351 | 64 | 532 | 81 | 734 |
| 14 | 74 | 31 | 223 | 48 | 364 | 65 | 546 | 82 | 743 |
| 15 | 114 | 32 | 226 | 49 | 365 | 66 | 565 | 83 | 754 |
| 16 | 115 | 33 | 243 | 50 | 371 | 67 | 606 | ||
| 17 | 116 | 34 | 244 | 51 | 411 | 68 | 612 | ||
Safety instructions
Before using this device for the first time, read the following User Manual and heed all warnings, even if you are familiar with handling electronic devices. Keep these operating instructions in a safe place for future reference. If you sell the device or give it away, pass on the operating instructions at the same time.

This icon denotes important information for the safe operation of the product and the user's safety.

This icon denotes further information on the topic.

This icon warns you about possible damage to the user's hearing.

General safety instructions
- Electrical devices should not be operated by children or people with mental or physical disabilities. Do not allow these people to use electrical devices when not under supervision. They may fail to understand that they can be dangerous.
- Small parts can represent choking hazards. Note too that there is a risk of suffocation if airways are blocked by the packaging film.
- If you notice smoke or unusual noises or smells, disconnect all cables immediately. If this occurs the handheld radio transceiver set should no longer be used and should be inspected by authorised service personnel. Never inhale smoke from a possible device fire. If you do inadvertently inhale smoke, seek medical attention. Smoke inhalation can be damaging to your health.

Operating environment/environmental conditions
- Position the handheld radio transceiver set on a stable, flat surface and do not place any heavy objects on the components.
- Keep the handheld radio transceiver set away from moisture. Do not place any receptacles containing liquids (beverages, vases, etc.) next to or on the components. Avoid vibrations, heat and direct sunlight so that the handheld radio transceiver set is not damaged.
- The handheld radio transceiver set is not designed for use in environments with high temperatures or humidity (e.g. bathrooms) or above-average levels of dust. Operating temperature and operating humidity: 0 °C to 30 °C, max. 85% relative humidity.
- If the handheld radio transceiver set is exposed to wide temperature fluctuations, condensation can form and create moisture, which can in turn cause a short circuit. If this occurs, use the handheld radio transceiver set only after it has reached the ambient temperature.
- Make sure that no fire hazards (e.g. burning candles) are placed on or near the handheld radio transceiver set.

Cables
Unplug all cables by holding the plugs and never pull on the cables themselves. Never place pieces of furniture or other heavy objects on the cables and take care that they do not become damaged, especially at the plugs and sockets. Never tie knots in the cable and do not tie it to other cables. All cables should be positioned so that nobody can trip over them or be obstructed by them.
A damaged power cord can cause fire or an electric shock. Inspect the power cord from time to time. Never use adapter plugs or extension cables that do not comply with the current safety regulations in your country, and do not modify the power adapter or power cable yourself.

Conventional and rechargeable batteries
- Insert the batteries/rechargeable batteries with the correct polarity. Refer to the diagram inside the battery compartment.
- Do not attempt to recharge the batteries and do not throw batteries into a fire.
- Use only batteries/rechargeable batteries of the same type.
- Remove the batteries/rechargeable batteries when the device is not going to be used for a long time.

Caution – danger of explosion
- Never replace any batteries/rechargeable batteries in an explosion-sensitive environment. While inserting or removing the batteries (or rechargeable batteries), a spark may be produced causing an explosion.
- Power your PMR off when in a potentially explosive environment. Sparks in such an environment may cause explosion or fire. In addition, injury or even death may occur.
- Explosion-sensitive areas are normally (but not always) labelled. These include fuel storage areas such as below deck on a boat, fuel line or tank areas, environments where the air contains inflammable substances (e.g. cereals, metal dust or powder) and any areas where you should normally switch off your car engine.
- Do not throw any batteries or rechargeable batteries into a fire, as they may explode.

Caution – risk of burns
- Never touch the antenna if you find that the antenna insulation is damaged. When the antenna comes in contact with the skin, minor burns may occur while transmitting.
- Batteries and rechargeable batteries may cause material damage and burns if any conductors such as jewellery, keys or chains touch the battery terminals. The conductive material may close an electrical circuit causing a short circuit and become very hot. Handle any batteries and rechargeable batteries carefully, especially when storing them in a pocket, purse or other receptacle containing metal objects.

Caution – risk of injury
- Do not place the product within the action radius of your vehicle's airbag. Airbags inflate very quickly. If a PMR is placed within the airbag deployment radius, the PMR may be hurled across the vehicle and cause injury to the occupants.
- Keep the radio transceivers at least 15 cm (6 inches) away from any pacemakers.
- Power your PMR off if you observe any interference caused to medical equipment.
Risks associated with high noise levels

Caution when using earphones. Listening at a high volume can damage your hearing.
Copyright
All the contents of this user manual are protected by copyright and provided to the reader for information only.
Copying data and information without the prior explicit written consent of the author is strictly forbidden. This also applies to any commercial use of the contents and information.
All texts and diagrams are up to date as of the date of printing. Subject to change without notice.
Overview
These operating instructions have a fold-out cover. On the inside of the cover the various components are shown with numbers indicated. The meanings of the numbers are as follows:
Handheld transceiver
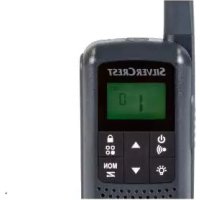
1 Display
2 Earphones connector (with rubber cover)
3 Antenna
4 Call button
5 Menu button
- To open the menu settings
6 Down button ▼
- To reduce the speaker volume
- To select the previous menu item
7 Charging contacts
8 Microphone
9 Up button ▲
- To increase the speaker volume
- To select the next menu item
10 On/Off button
11 PTT button
Display items
12 CTCSS indicator
13 DCS indicator
14 CTCSS/DCS code/chronometer seconds/menu item value
15 Chronometer 1/100 second
16 VOX icon
17 DCM icon
18 Channel/menu item indication
19 Speaker volume
20 Button lock icon
21 Battery level indicator
22 Reception icon (RX)
23 Transmission icon (TX)
24 Scan icon
Charger cradle
25 Power adapter socket
26 Battery level indicator
27 Charging contacts
Before you start
Inserting the rechargeable/conventional batteries

(The figure is representational)
- If necessary, remove the belt clip (see the chapter "Removing the Belt Clip").
- Carefully use your fingernail to push the battery compartment cover clip [C] upwards and lift the cover to remove it.
- Insert two AAA-sized batteries/rechargeable batteries into the battery compartment by respecting the correct polarity. Note the + and - icons on the batteries and inside the battery compartment.
- Close the battery compartment. First insert the battery compartment cover on the top into the corresponding notch on the radio transceiver housing and then swivel the cover downwards until it clicks into place.
- Replace the belt clip (see "Installing the belt clip").
Charging the batteries
If you use rechargeable batteries to power your SilverCrest SPMR 8000 A1 handheld radio transceiver set, read this chapter carefully.
Preparing the charging cradle
- Place the charging cradle on a stable, flat surface.
- Plug the power adapter plug into the power receptacle [25] of the charging cradle.
- Plug the power adapter into a wall outlet.

WARNING
Make sure that the wall outlet is nearby and easily accessible so that you can unplug the power adapter quickly in case of an emergency. Otherwise a short circuit or fire can occur.

The charging cradle's power adapter consumes power even if there is no handheld radio transceiver placed onto it. It is therefore recommended that you unplug the power adapter from the wall outlet to completely separate it from the mains and avoid any unnecessary power consumption.
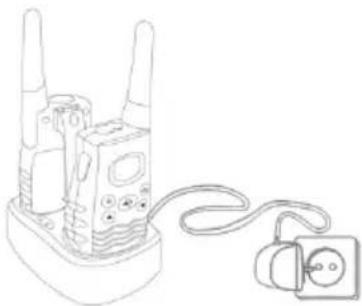
Charging the batteries

Charge the battery packs of both handheld radio transceivers completely before using them for the first time. Charging takes approx. 8 to 10 hours.
Place the handheld transceivers onto the charging cradle as shown.
The charging indicator [26] located on top of the charging cradle illuminates when a transceiver has been inserted properly and its battery is being charged. Charging takes approx. 8 to 10 hours. The charging indicator [26] is still illuminated when the batteries are fully charged.
natural_image
Line drawing of a two-wireless air conditioner unit connected to a plug (no text or symbols)(The figure is representational)

Do not press the PTT button [11] while the handheld transceivers are inserted into the charging cradle.
Installing/removing the belt clip
Installing the belt clip
Insert the belt clip into the guide located at the handheld transceiver back panel. The belt clip must click into place.
Removing the belt clip
To remove the belt clip from the handheld transceiver, pull the latch on the belt clip [A] while sliding the belt clip out of the guide in the direction of the antenna [B].

(The figure is representational)
Connecting the earphones
You can use your PMR sets with the supplied earphones. The earphones receptacle [2] is located behind a protective cover.

WARNING
Before connecting the earphones, you must reduce the sound volume (see page 78) otherwise you risk damaging your hearing due to the high earphones level.
- To connect the earphones, open the rubber cover that protects the earphones receptacle [2].
- Insert the 2.5 mm jack-type earphones plug into the earphones receptacle [2].
- Fasten the earphones cable to a piece of clothing by using the clip attached to the cable and then insert the earpiece into your ear.
The PTT button on the earphones works in exactly the same way as the PTT button [11] of your PMR. When using the PTT button of the earphones you must speak into the microphone located on the earphones cable.

Do not connect any other headphones or earphones, otherwise you risk seriously damaging your PMR.

When using the earphones, the IPX2 protection against vertically falling drops of water with tilted enclosure is not guaranteed.
Getting started
In order to be able to communicate using two PMR units, they must be set to the same channel and the same CTCSS or DCS code. Furthermore, they must be located within range (max. 8 km in open field).
RF communications take place on a free (unscrambled) channel, i.e. other people who have a PMR or receiver for the set channel will be able to listen to your messages. You can choose from eight different channels.

This User Manual's display illustrations show only the information relevant to the functions or settings being described.
Powering the handheld transceivers on/off
Powering the handheld transceiver on

Press and hold the On/Off button ⏻[10] for at least three seconds. An acoustic signal can be heard and the currently set channel will appear on the display [1].
The handheld transceiver will be in receive mode as long as it is powered on and not transmitting (idle mode).
Powering the handheld transceiver off
Press and hold the On/Off button ⏻ [10] for at least three seconds. An acoustic signal can be heard and the display [1] will turn blank.
Adjusting the volume

- Press the Up ▲ button [9] to raise the audio volume. The speaker volume will be indicated by the number of bars [19] (one bar = low volume, four bars = high volume).
- Press the Down ▼ button [6] to reduce the audio volume.
Setting a different channel
When setting a different channel, this needs to be done on both PMR sets for you to be able to communicate with the remote station.
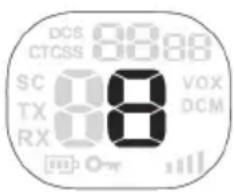
- Press the Menu ➕ button [5] once. The current channel number will flash on the display.
- Press the Up ▲ [9] or Down ▼ [6] button to set a different channel.
- Press the PTT button [11] to confirm the setting.

If no button is pressed for five seconds while changing a setting, the handheld transceiver will return to idle mode and use the previously adjusted setting.
Reception
The handheld transceiver will be in receive mode as long as it is powered on and not transmitting (idle mode).
Transmission
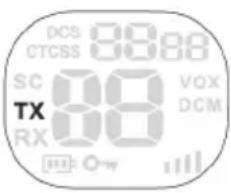
- Keep the PTT button [11] pressed. The TX icon will appear on the display [1].
- Speak into the microphone [8]. Hold the handheld transceiver vertically and approx. 10 cm (4 inches) from your mouth.
- Release the PTT button [11] when you are done with your message.
Battery status indicator
When the transceiver is powered on, the number of bars on the battery status indicator [21] will appear on the display [1] to show the level of the rechargeable or inserted batteries.


Rechargeable batteries/batteries fully charged
Rechargeable batteries/batteries two-thirds charged
Rechargeable batteries/batteries one-third charged
Rechargeable batteries/batteries empty
When the rechargeable or inserted batteries are exhausted, an acoustic signal will be heard, in which case replace the batteries or recharge them if using rechargeable batteries.
Advanced operation
The Menu button [5] allows you to customise your PMR. For more information about the functions, see the following pages.

If no button is pressed for five seconds while changing a setting, the handheld transceiver will return to idle mode and use the previously adjusted setting.
CTCSS (Continuous Tone Coded Squelch System)/DCS (Digital Coded Squelch) code
If many handheld transceivers are being used in your vicinity, it is likely that other people will be using the same channel. To avoid receiving the signals of other parties, CTCSS or DCS codes can be used.
The three-digit CTCSS or DCS code is a tone frequency that the PMR will transmit. Two stations that have been set to the same channel and the same CTCSS or DCS code can listen to each other. No other stations will be heard on the same channel, unless these stations use the same CTCSS or DCS code. Your SilverCrest SPMR 8000 A1 supports 38 analogue CTCSS (1 to 38) and 83 digital DCS (1 to 83) codes.

Any receiver tuned to the same channel and using the same CTCSS or DCS code can listen to your conversation.
Using a CTCSS or DCS code does not prevent your conversations from being intercepted by other parties: any radio transceiver or receiver tuned into the same channel that is not using a CTCSS or CDCSS code will be able to listen to all transmissions on this channel.
Setting the CTCSS code

- Press the Menu ➕ button [5] twice. The indication "CTCSS" and the current CTCSS code will flash on the display.
- Press the Up ▲ [9] or Down ▼ [6] button to set a different CTCSS code.
- Press the PTT button [11] to confirm the setting.
Setting the DCS code
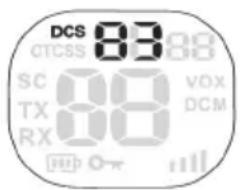
- Press the Menu ➕ button [5] three times. The indication "DCS" and the current DCS code will flash on the display.
- Press the Up ▲ [9] or Down ▼ [6] button to set a different DCS code.
- Press the PTT button [11] to confirm the setting.
Disabling the CTCSS/DCS code
To disable the CTCSS or DCS code, select the code "00". "OF" will appear on the menu.
Channel monitoring
You can use this function to search the current channel for any weak signals.
- Press and hold the Menu ➕ button [5] and the Down ▼ button [6] simultaneously to enable channel monitoring.
- Press the Menu ➕ button [5] to stop channel monitoring.

During channel monitoring you can listen to any communications over the current channel, independently of the set CTCSS or DCS code.
Voice-controlled send function (VOX)
This function is similar to the hands-free feature of your mobile phone. The PMR will start transmitting as soon as it detects your voice (or any other noise). This allows you to send a message without pressing the PTT button [11]. Using this function is not recommended when you are located in a noisy or windy environment.

- Press the Menu ➕ button [5] four times. The indication "VOX" and the current VOX setting will flash on the display.
- Press the Up ▲ button [9] to enable the VOX function or to raise the VOX sensitivity.
- Press the Down ▼ button [6] to reduce the VOX sensitivity or to disable the VOX function ("OF").
- Press the PTT button [11] to confirm the setting.
Channel scan
Channel scan will search all available channels (1 to 8) for any active stations in a loop.
If an active channel is found, you can search for the CTCSS or DCS code that a station is using on the channel.
Searching for an active channel

- Press the Menu ➕ button [5] five times. The indication "SC" and the current channel number will flash on the display.
- Press the Up ▲ [9] or Down ▼ [6] button to launch the channel search.
The scan will stop automatically once an active channel has been found. Then you can listen to the transmissions. Once the transmission on the active channel is terminated, the channel search continues.

Pressing the PTT button [11] while listening to a found channel, the handheld transceiver will use that channel and return to idle mode.
Searching for a CTCSS code
If an active channel is found, press the PTT button [11] to use the found channel. Next you can search for the CTCSS or DCS code being used.

- Press the Menu ➤ button [5] six times. The indications "SC" and "CTCSS 00" will flash on the display. The current channel number will also be displayed.
- Press the Up ▲ [9] or Down ▼ [6] button to scan the selected channel.
Once a transmission is detected on the selected channel, its CTCSS code (if any) is detected and displayed.

Pressing the PTT button [11] will cause the handheld transceiver to use that code and return to idle mode.
Searching for a DCS code

- Press the Menu ➤ button [5] seven times. The indications "SC" and "DCS 00" will flash on the display. The current channel number will also be displayed.
- Press the Up ▲ [9] or Down ▼ [6] button to scan the selected channel.
Once a transmission is detected on the selected channel, its DCS code (if any) is detected and displayed.

Pressing the PTT button [11] will cause the handheld transceiver to use that code and return to idle mode.
Dual scan
Your PMR will normally receive one channel only (with or without CTCSS or DCS code). The dual scan function allows the monitoring of a second channel with CTCSS or DCS code.
While dual scan is enabled, your PMR will toggle between the two channels.

- Press the Menu ➕ button [5] eleven times. The indication "DCM OF" will flash on the display.
- Press the Up ▲ [9] or Down ▼ [6] button to switch to a different channel.
- Press the Menu ➕ button [5] to confirm the selected channel and continue to CTCSS selection. Press the Menu ➕ button [5] again to go to DCS selection.
- Press the Up ▲ [9] or Down ▼ [6] button to set a different CTCSS or DCS code.
- Press the PTT button [11] to confirm the setting and return to idle mode.

To disable this function, select "OF" when choosing the DCM channel.
Call tones
The call tone is an audible signal that alerts other stations that you want to transmit a message. The SilverCrest SPMR 8000 A1 supports 15 call tones.
Selecting the call tone

- Press the Menu ➕ button [5] eight times. The indication "CA" will appear on the display, the number of the current call tone will flash and the call tone can be heard.
- Press the Up ▲ [9] or Down ▼ [6] button to set a different call tone.
Sending the call tone
Briefly press the Call button [4] to send the call tone over the current channel.
Setting the roger beep on/off
If you release the PTT button [11] after transmitting your message, the unit will send a roger beep to indicate the end of the transmission. If necessary, you can disable this roger beep.
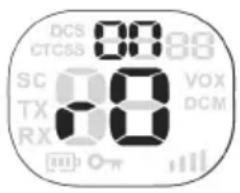
- Press the Menu ➤ button [5] nine times. The indication "rO" will be shown and the current status will flash on the display.
- Press the Up ▲ button [9] to enable (ON) or the Down ▼ button [6] to disable (OF) the roger beep.
- Press the PTT button [11] to confirm the setting and return to idle mode.
Setting the button sound on/off
An acoustic signal can normally be heard each time you press a button. This feature does not apply to the On/Off button ⏻ [10] or the PTT button [11]. If necessary, you can disable the button sound.

- Press the Menu ➤ button [5] ten times. The indication "tO" will be shown and the current status will flash on the display.
- Press the Up ▲ button [9] to enable (ON) or the Down ▼ button [6] to disable (OF) the button sound.
- Press the PTT button [11] to confirm the setting and return to idle mode.
Button lock
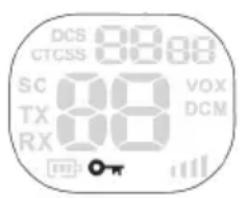
- Press and hold the Menu ➕ button [5] for three seconds to activate the button lock. The button lock icon is displayed on the screen.
- To disable the button lock, press and hold the Menu ➕ button [5] again for three seconds. The button lock icon will go off.

The following buttons will still work while the button lock is enabled: PTT button [11], Call button •» [4] and On/Off button §10.
Chronometer
The SilverCrest SPMR 8000 A1 includes a chronometer function for time measurement. The chronometer can count to 59'59''99.
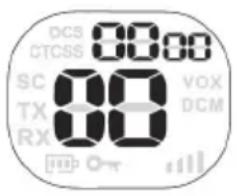
- Press and hold the Call • button [4] for three seconds to activate the chronometer. The chronometer appears on the display.
- Press the Up ▲ button [9] to start time measurement.
- Press the Up ▲ button [9] to stop time measurement.
- Press the Down ▼ button [6] to reset time measurement.
- Press and hold the Call • button [4] for three seconds to exit the chronometer.

The chronometer is not available while channel monitoring is enabled.
Display backlight
The PMR display [1] has a backlight to facilitate operating the device in darkness. The backlight will switch on automatically when pressing any button except the PTT button [11] and the Call ⏻ button [4]. The On/Off ⏻ button [10] activates the backlight only when powering the unit on.
The backlight will switch off automatically after six seconds.
Troubleshooting
You can solve most common problems yourself using the table below. If the problem persists after checking the suggested solutions, contact our Service Hotline. You will find the phone number in the last chapter, "Warranty and Service Information". Do not attempt to repair the product yourself.
| Problem Solution | |
| Unable to power the PMR on | Press and hold the On/Off button [10] for at least three seconds.Charge the batteries of your PMR or insert new batteries. |
| No transmission | Set both radio transceivers to the same channel and if applicable the same CTCSS or DCS code.Press and hold the PTT button [11] fully down while speaking.If there is interference in the transmission, switch to a different channel. |
| Short range, communications interference | The range depends on the environment. Steel constructions, concrete buildings or use of the unit in a vehicle may reduce the range. If possible, try moving to a place where you have free sight to the receiving station. |
| Reception interference | Move away from any electromagnetic sources (high-voltage power lines, machines with electric motors, etc.).The sending and receiving units are placed too close together. Keep at least 1.5 m between the two units.Try to see if the communication quality is better on a different channel. |
Maintenance/cleaning
Maintenance
- Repairs are required when the PMR set has been damaged in any way, such as when liquid has entered the product, the product has been exposed to rain or moisture, the product does not work normally or the product has been dropped.
- If you notice smoke or unusual noises or smells, unplug the charger cradle immediately or remove the rechargeable battery or conventional batteries from the radio transceivers. In these cases the product should not be used further and should be inspected by authorised service personnel.
- All servicing work must be carried out by qualified specialist personnel.
- Never open the housing of the handheld transceiver, as you may damage it.
- Do not attempt to repair the product yourself.

If the power cord is damaged you run the risk of an electric shock.
Cleaning
- Disconnect the PMR set from the mains before cleaning it.
- Use a soft, lint-free cloth for cleaning.
- Do not use any cleaners, detergents or solvents, as these may enter the housing and cause permanent damage to the product.
- For more stubborn dirt, use a slightly damp cloth.
- Clean the battery terminals from time to time with a dry, lint-free cloth.
- If a handheld transceiver gets wet, power it off immediately and remove the rechargeable or conventional batteries. Dry the battery compartment with a soft cloth. Leave the battery compartment open until the humidity has completely evaporated. Do not use the product until it is completely dry.
Environmental regulations and disposal information

natural_image
Symbol of a trash bin with crossed lines indicating no waste or discharge, and a solid black rectangle below (no text or labels)If the product is labelled with a crossed-out waste bin, it is subject to European Directive 2002/96/EC. All electrical and electronic devices must be disposed of separately from household waste at official disposal centres. Proper disposal of old devices prevents damage to the environment or your health. For further information about proper disposal, contact your local council, recycling centre or the shop where you bought the device.
Respect the environment. Old batteries/rechargeable batteries do not go in the domestic waste. They must be handed in at a collection point for waste batteries. Note that batteries/rechargeable batteries must be disposed of fully discharged at appropriate collection points for old batteries. If disposing of batteries which are not fully discharged, take precautions to prevent short circuits.
Dispose of all packaging in an environmentally-friendly manner. Boxes can be recycled with waste paper collections or handed in at public collection points. Foil and plastics included in the original packaging can be disposed of via your local waste disposal company in an environmentally-friendly way.
Declaration of conformity

This device has been tested for compliance with the relevant requirements of RTT&E Directive 1999/5/EC. The Declaration of Conformity can also be found at the end of this User Manual. The CE sign can be found in the battery compartment of the handheld radio transceivers and on the bottom of the charger cradle. The product also fulfils Ecological Design Directive 2009/125/EC with implementing order 278/2009 and the RoHS Directive 2011/65/EU.
Warranty and service information
Warranty of Targa GmbH
Dear Customer,
This device is sold with three years warranty from the date of purchase. In the event of product defects, you have legal rights towards the seller. These statutory rights are not restricted by our warranty as described below.
Warranty conditions
The warranty period commences upon the date of purchase. Please keep the original receipt in a safe place as it is required as proof of purchase. If any material or manufacturing faults occur within three years of purchase of this product, we will repair or replace the product free of charge as we deem appropriate.
Warranty period and legal warranty rights
The warranty period is not extended in the event of a warranty claim. This also applies to replaced and repaired parts. Any damage or defects discovered upon purchase must be reported immediately when the product has been unpacked. Any repairs required after the warranty period will be subject to charge.
Scope of warranty
The device was carefully manufactured in compliance with stringent quality guidelines and subjected to thorough testing before it left the works. The warranty applies to material and manufacturing faults. This warranty does not cover product components which are subject to normal wear and which can therefore be regarded as wearing parts, or damage to fragile components such as switches, rechargeable batteries or components made of glass. This warranty is void if the product is damaged, incorrectly used or serviced. To ensure correct use of the product, always comply fully with all instructions contained in the user manual. The warnings and recommendations in the user manual regarding correct and incorrect use and handling of the product must always be observed and complied with. The product is solely designed for private use and is not suitable for commercial applications. The warranty is rendered void in the event of incorrect handling and misuse, if it is subjected to force, and also if any person other than our authorised service technicians interfere with the device. No new warranty period commences if the product is repaired or replaced.
Submitting warranty claims
To ensure speedy handling of your complaint, please note the following:
Before using your product for the first time, please read the enclosed documentation or online help carefully. Should any problems arise which cannot be solved in this way, please call our hotline.
- Always have your receipt, the product article number as well as the serial number (if available) to hand as proof of purchase.
- If it is not possible to solve the problem on the phone, our hotline support staff will initiate further servicing procedures depending on the fault.

Service

Phone: 0207 - 36 50 744
E-Mail: service.GB@targa-online.com

Phone: 01 - 242 15 83
E-Mail: service.IE@targa-online.com

Phone: 800 - 62 175
E-Mail: service.MT@targa-online.com

Phone: 800 - 92 496
E-Mail: service.CY@targa-online.com
IAN: 78727

Manufacturer
Please note that the following address is not a service address. First contact the service point stated above.
TARGA
GmbH
Postfach 22 44
D-59482 Soest
www.targa.de
CE
EU Declaration of Conformity
Address:
Targa GmbH
Lange Wende 41
59494 Soest, Germany
Product:
Walkie Talkie
Model:
SilverCrest SPMR 8000 A1
Identification number:
IAN 78727
The product complies with the requirements of the following European directives:
2004/108/EC
Electromagnetic Compatibility
2006/95/EC
Low Voltage
1999/5/EC
R&TTE (Class 1)
2009/125/EC
Energy Related Products
2011/65/EU
Restriction of the use of certain hazardous substances in electrical and electronic equipment
Compliance was proved by the application of the following standards:
EMC:
EN 301 489-1 V1.8.1
EN 301 489-5 V1.3.1
Safety:
EN 60950-1:2006
RF:
EN 300 296-2 V1.2.1
ErP:
Regulation 278/2009
RoHS:
EN 62321: 2009
Year of CE marking:
2012

Soest, 30th of july 2012
Matthias Klauke, Managing Director


- Inhalt
- CTCSS (Continuous Tone Coded Squelch System) /DCS (Digital Coded Squelch)
- CTCSS-codes (Continuous Tone Coded Squelch System)/DCS-codes (Digital Coded Squelch)
- Getting started 78
- Advanced operation....80
- Troubleshooting 87
- Maintenance/cleaning 88
- Environmental regulations and disposal information 89
- Declaration of conformity 89
- Warranty and service information 90
- Introduction
- Intended use
- Package contents
- Safety instructions
- General safety instructions
- Operating environment/environmental conditions
- Cables
- Conventional and rechargeable batteries
- Caution – danger of explosion
- Caution – risk of burns
- Caution – risk of injury
- Risks associated with high noise levels
- Copyright
- Overview
- Handheld transceiver
- Display items
- Charger cradle
- Before you start
- Inserting the rechargeable/conventional batteries
- Charging the batteries
- Preparing the charging cradle
- WARNING
- Installing/removing the belt clip
- Installing the belt clip
- Removing the belt clip
- Connecting the earphones
- Getting started
- Powering the handheld transceivers on/off
- Powering the handheld transceiver on
- Powering the handheld transceiver off
- Adjusting the volume
- Setting a different channel
- Reception
- Transmission
- Battery status indicator
- Advanced operation
- CTCSS (Continuous Tone Coded Squelch System)/DCS (Digital Coded Squelch) code
- Setting the CTCSS code
- Setting the DCS code
- Disabling the CTCSS/DCS code
- Channel monitoring
- Voice-controlled send function (VOX)
- Channel scan
- Searching for an active channel
- Searching for a CTCSS code
- Searching for a DCS code
- Dual scan
- Call tones
- Selecting the call tone
- Sending the call tone
- Setting the roger beep on/off
- Setting the button sound on/off
- Button lock
- Chronometer
- Display backlight
- Troubleshooting
- Maintenance/cleaning
- Maintenance
- Cleaning
- Environmental regulations and disposal information
- Declaration of conformity
- Warranty and service information
- Warranty of Targa GmbH
- Warranty conditions
- Warranty period and legal warranty rights
- Scope of warranty
- Submitting warranty claims
- Service
- Manufacturer
- CE
- EU Declaration of Conformity
Brand : SILVERCREST
Model : SPMR 8000 A1
Category : Walkie-talkie