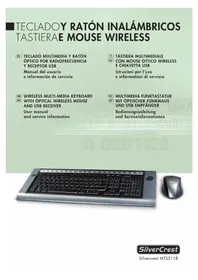
MTS 2118 - Keyboard SILVERCREST - Free user manual and instructions
Find the device manual for free MTS 2118 SILVERCREST in PDF.


| Product Type | Keyboard |
| Brand | SilverCrest |
| Model | MTS 2118 |
| Connectivity | Wired USB |
| Layout | QWERTY (US/International) |
| Dimensions (approx.) | 450 x 150 x 20 mm |
| Weight (approx.) | 500 g |
| Power Supply | USB bus-powered |
| Cable Length | 1.5 m |
| Key Count | 104 keys (standard) |
| Multimedia Keys | Yes (volume, media control) |
| Compatible Operating Systems | Windows, macOS, Linux |
| Maintenance | Clean with a soft, dry cloth; avoid liquids |
| Safety Precautions | Do not expose to moisture or extreme temperatures |
| Spare Parts & Repairability | Not user-serviceable; contact support for issues |
| General Information | Designed for everyday typing and computer use |
Frequently Asked Questions - MTS 2118 SILVERCREST
User questions about MTS 2118 SILVERCREST
0 question about this device. Answer the ones you know or ask your own.
Ask a new question about this device
Download the instructions for your Keyboard in PDF format for free! Find your manual MTS 2118 - SILVERCREST and take your electronic device back in hand. On this page are published all the documents necessary for the use of your device. MTS 2118 by SILVERCREST.
USER MANUAL MTS 2118 SILVERCREST
MT WITH OPTICAL WIRELESS MOUSE AND USB RECEIVER
User manual and service information
DE MULTIMEDIA FUNKTASTATUR
AT MIT OPTISCHER FUNKMAUS UND USB EMPFÄNGER
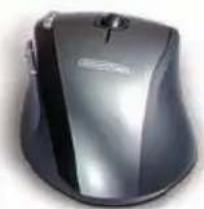
1 Tastiera wireless
2 Maus ottico wireless
3 Chiavetta USB mini
4 2 batterie del tipo AAA, 1,5V (Micro) per la radiotastiera (senza figura)
5 2 batterie del tipo AA, 1,5V (Mignon) per il radiomaus (senza figura)
6 CD-Rom con Software (senza figura)
7 Istruzioni per l'uso (senza figura)
Wireless Multi-Media Keyboard and Mouse Set
MTS 2118
Package Contents
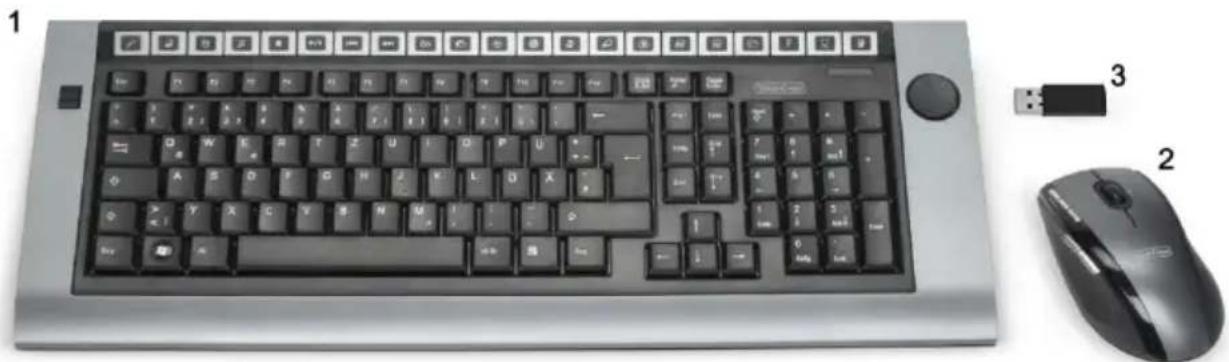
1 Wireless keyboard
2 Wireless optical mouse
3 Miniature USB receiver
4 2 batteries type AAA, 1,5V (Micro) for the wireless keyboard (not illustrated)
5 2 batteries type AA, 1,5V (Mignon) for the wireless mouse (not illustrated)
6 Software CD-ROM (not illustrated)
7 Operating manual (not illustrated)
System Requirements
- Intel® Pentium® III / AMD Athlon™ or higher
- 1 free USB port
- Microsoft® Windows® 2000 Professional, Windows® XP or Windows Vista™
- CD-ROM drive or DVD drive for installing the software
Overview
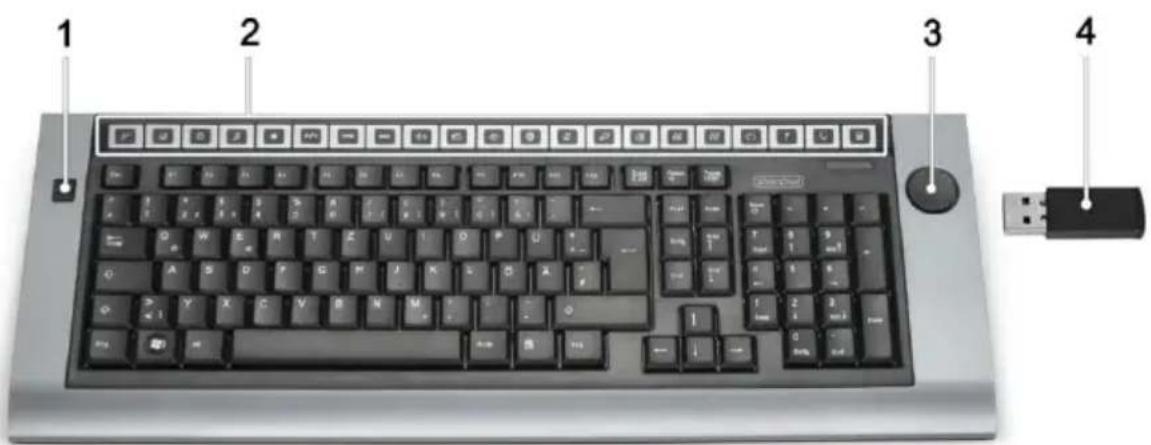
1 Scroll wheel
2 Special keys (hotkeys)
3 Volume control
4 Miniature USB receiver
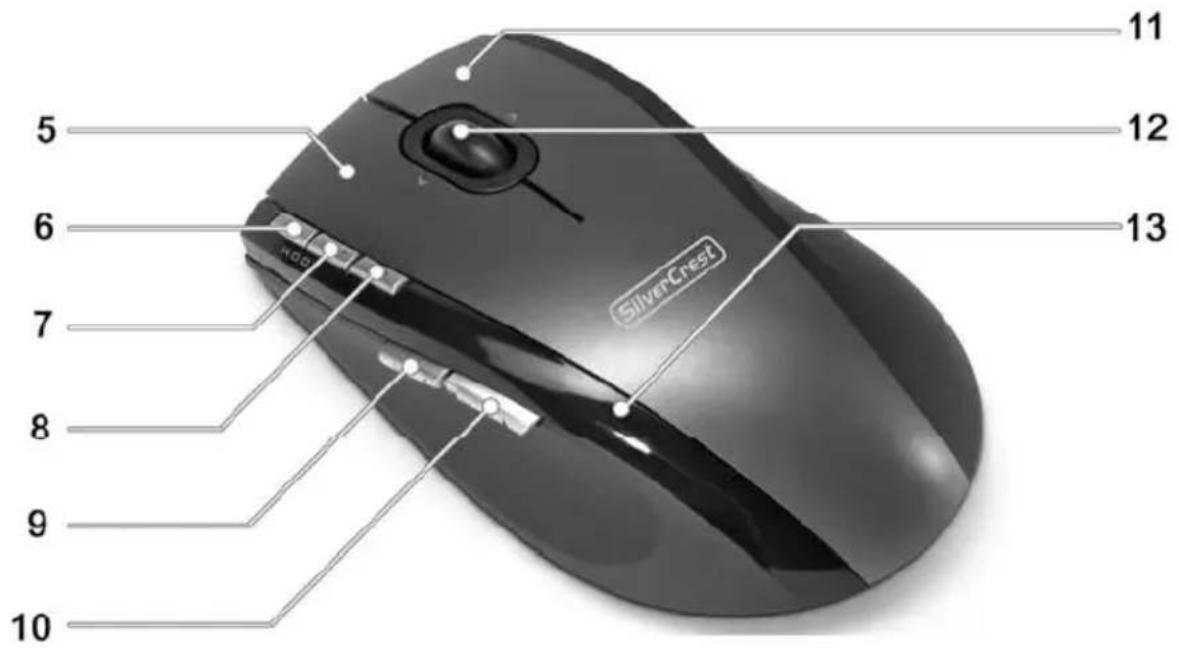
5 Left mouse button
6 Zoom - (standard)
Play / Pause (media operation)
7 Zoom + (standard)
Start Media Player (media operation)
8 Toggle 500/1000 cpi (press briefly)
Toggle standard/media operation (pressed continually for 3 seconds)
9 Back (standard)
Previous title (media operation)
10 Forward (standard)
Next title (media operation)
11 Right mouse button
12 Tilt wheel (4-way scrolling wheel)
13 Battery power control lamp
Contents
Package Contents 41
System Requirements 41
Overview 42
Contents 44
Important Safety Information 45
Operating Environment.... 5
Maintenance and Care 45
Children.... 46
Intended Use.... 46
Batteries.... 46
R/F Interface 47
Compliance 48
Appliance Disposal 48
Introduction 48
Hardware Installation 49
Inserting the Batteries.... 49
Connecting the Miniature USB Receiver 50
Software Installation 51
Task Bar Symbols.... 53
Configuration 53
Toggling between Operating Modes.... 53
Configuration of the Optical Mouse 54
Configuration of the Keyboard 55
Office Lock....58
Attachment 59
Troubleshooting 59
Technical Data....59
Warranty Information 60
Important Safety Information
Before putting the appliance into operation for the first time, please thoroughly read the following instructions and heed all safety warnings, even if you are quite used to handling electronic devices. Keep this manual in a safe place for future reference. If you sell or pass on the appliance, you should absolutely ensure to hand over these instructions as well.
Operating Environment
Position the device on a firm, even surface and do not place any objects on top of it. The appliance is not designed for operation in spaces subject to high humidity or temperatures (e.g. bathrooms) or in excessively dusty locations. Operating temperature and air humidity: 5°C to 45°C, max. relative air humidity 90%.
Please ensure that:
- the appliance is not exposed to direct sources of heat (e.g. heating elements);
- the appliance is not exposed to direct sunlight or artificial light;
- any contact with splashes and/or drips of water and other liquids is avoided and the device is not operated near water; in particular, the appliance may never be submerged (do not place water-filled objects such as vases or open drinks containers on top of or near the appliance);
- the appliance is not placed in the direct vicinity of magnetic fields (e.g. loudspeakers);
- no sources of open flame (e. g. lighted candles) are placed on top of or near the appliance;
- the appliance is not penetrated by alien objects;
- the appliance is not exposed to strong temperature fluctuations;
- the appliance is not subjected to excessive shaking or vibration.
Maintenance and Care
Maintenance activities are required if the appliance has been damaged, liquids or objects have penetrated the casing, the appliance has been exposed to rain or moisture, the appliance is not working properly or if it has been dropped. If you notice any smoke developing, unusual noises or scents, please switch off the appliance immediately. In such cases the appliance may not be operated until a professional specialist has checked it. Any repairs are only to be performed by qualified professional technicians.
Never open the casing of the appliance or of any accessories. Only clean the appliance with a clean and dry cloth, never using any aggressive liquids.
Children
Electrical appliances are not suitable as children's toys. Never permit children the unsupervised use of any electrical appliances. Children are not always able to fully appreciate the potential dangers. If swallowed, batteries and small parts (e.g. miniature USB receiver) can potentially be life-threatening. Keep batteries out of the reach of small children. If a battery has been swallowed, medical help needs to be consulted immediately. Please also keep the plastic wrapping away from children to avoid suffocation risks.
Intended Use
This keyboard and mouse set consists of a wireless keyboard, a wireless mouse and a radio receiver and is an information technology appliance. The appliance may not be used outside of closed rooms or in regions with a tropical climate. Only use connecting cables and/or peripheral devices whose technical safety, electromagnetic compatibility and shielding properties correspond to the appliance in question. This appliance meets all the relevant norms and standards in connection with CE-conformity. Compliance with these standards is no longer guaranteed if the appliance is modified without the manufacturer's authorization. Only use the accessories specified by the manufacturer.
If you are not using the appliance within the Federal Republic of Germany you are bound by the state regulations and/or legislation applicable in the country of operation.
Batteries
Please always insert the batteries with the poles pointing in the proper direction. Never attempt to recharge the batteries and under no circumstances try to incinerate them. Do not use different batteries (e.g. old and new, alkaline and carbon, etc.) simultaneously. Remove batteries if appliance is not being used for any longer periods of time. Inappropriate battery use may result in explosion and leakage risks. Please take care to protect the environment. Used batteries do not belong in the domestic waste and need to be handed in at a collection point for used batteries instead.
R/F Interface
Please switch off the appliance in airplanes, hospitals, operating theatres and in the vicinity of medical electronic system. The radio waves transmitted could impair the functionality of sensitive appliances.
Observe a minimum distance of 20 cm between the appliance and any pacemaker as the radio waves could impair the function of the pacemaker.
The transmitted radio waves may create interference noises in hearing aids.
Do not allow the appliance to be introduced in the vicinity of inflammable gases or in environments subject to a risk of explosion (e.g. paint shops) as long as the radio component is switched on, because the transmitted radio waves could trigger an explosion or fire.
The coverage/range of the radio waves varies depending on the surrounding and environmental conditions.
In any data exchange via wireless connections, unauthorized third parties are also able to receive the data. Targa GmbH is not liable for any radio or television interference caused by unauthorized modifications of this appliance. Targa furthermore accepts no liability for the replacement or exchange of connection cables and appliances not specified by Targa GmbH. The user is solely responsible for the elimination of interferences caused by such an unauthorized modification, as well as for the replacement or exchange of the appliances concerned.
Compliance

This mouse and keyboard set has been tested and approved for compliance with the essential requirements and other relevant regulations contained in the EU EMC directive 2004/108/EG as well as the directive for low-voltage appliances 2006/95/EG and the R&TTE directive 99/5/EC.
Appliance Disposal
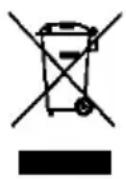
All appliances labelled with this symbol are subject to the European directive 2002/96/EC. All electrical and electronic appliances need to be disposed off separately via the facilities provided for this purpose by the authorities and may not be included in the domestic waste. The proper disposal of old appliances helps protect the environment and prevent risks for your personal health. Further information on the proper disposal of this appliance, once it is no longer needed, is available from your municipal authority, the waste disposal services, or the shop where you bought the product.
Introduction
Thank you very much for buying the multi-media keyboard and mouse set MTS2118. The components are equipped with SmartLink radio technology and hence do not require any manual synchronization. Several special keys and buttons on both appliances help you adapt the operation of the mouse and keyboard to your personal wishes. The mouse features a tilt wheel (4-way scroll wheel) enabling you to scroll horizontally as well as vertically.
Hardware Installation
Inserting the Batteries
Please start by inserting the batteries in the mouse and keyboard as shown in the illustrations below. Please ensure that the + and - poles of the batteries point in the right direction when you insert them. Now switch on the wireless mouse using the On/Off switch at the underside (15). The wireless mouse features a control lamp (13) on the top. This control lamp lights up in red if the battery power is low. Please replace the batteries in this case with new 1,5V AA batteries (Mignon).
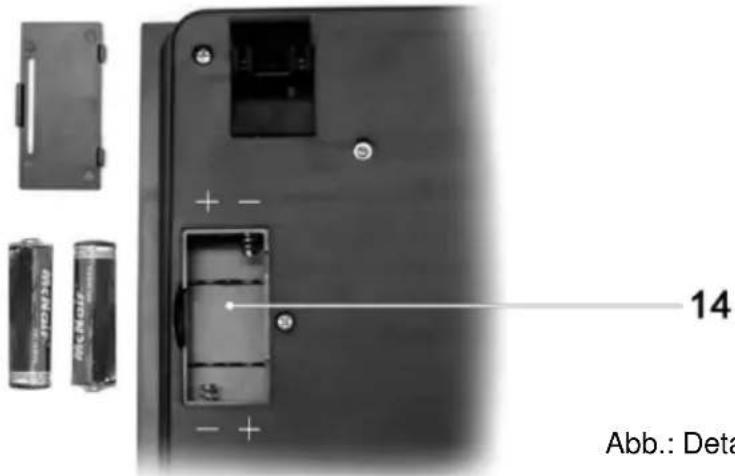
Abb.: Detail view of keyboard underside
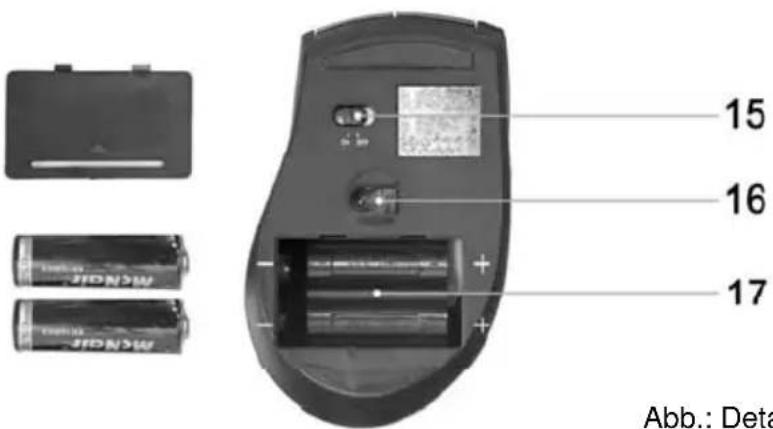
Abb.: Detail view of mouse underside
14 Keyboard battery compartment
15 On/Off switch for mouse
16 Optical sensor
17 Mouse battery compartment
Connecting the Miniature USB Receiver
Connect the miniature USB receiver (4) to a free USB port of your running computer.
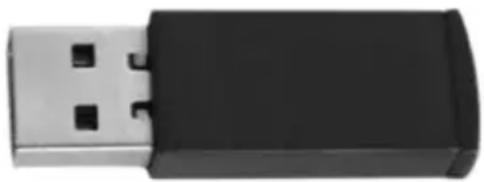
Abb.: Miniature USB Receiver
The operating system will automatically recognize the new hardware and install the required drivers. Depending on the operating system installed, the following screen messages may appear:
Windows ® 2000/XP
When the receiver is connected for the first time, the operating system Windows ® 2000/XP displays the message „New hardware detected“. Wait until the message „The new hardware has been installed and is now ready for use“ is displayed before using your mouse and keyboard.
Windows Vista TM
When the receiver is connected for the first time, the operating system Windows Vista™ displays the message „Installation of appliance driver software“. Wait until the message „The appliances are ready for use now“ appears. The mouse and keyboard are now operational and ready to be used.
If your previous mouse and keyboard are still connected to the computer, please shut down the computer, disconnect the appliances in question and then restart the computer.
Software Installation
If you would like to use all of the functions of your mouse and keyboard set you need to install the software included. Insert the included CD-ROM in the CD-ROM drive of your computer. The installation process should start automatically, failing that, start the CD-ROM file "setup.exe" manually by double-clicking it.
Only with the operating system Windows Vista™ will the installation initially be stopped by the user account control function with the message: „An unidentified program is attempting to access the computer”. Click on „OK“ to continue with the installation.
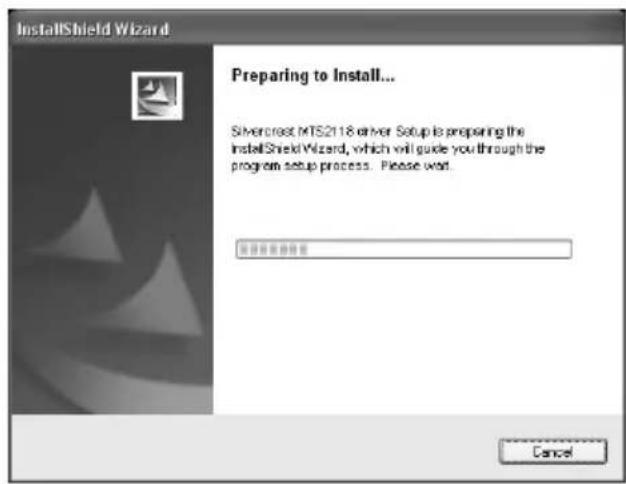
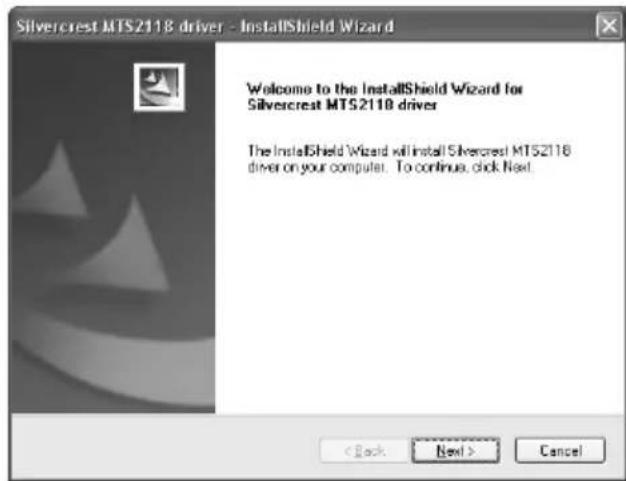
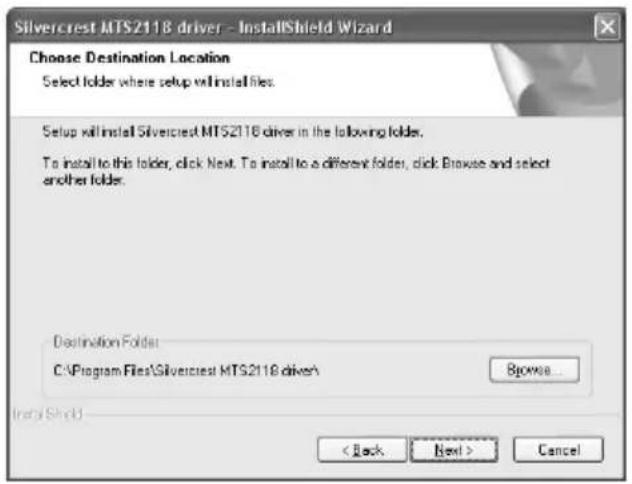
The following installation illustrations correspond to the operating system Windows ® XP. The windows displayed in the operating systems Windows Vista ™ and Windows ® 2000 are slightly different, but their content is the same.
The installation is being prepared.
Click on Next to start the installation.
Here you can select the target file for the installation via the Browse button or use the suggested file. Click on Next to proceed with the installation.
The software data are being copied. Please wait.
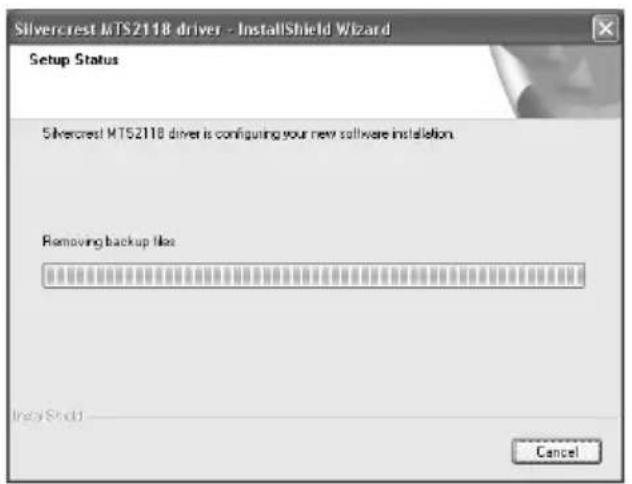
The installation is complete, please click on Finish.
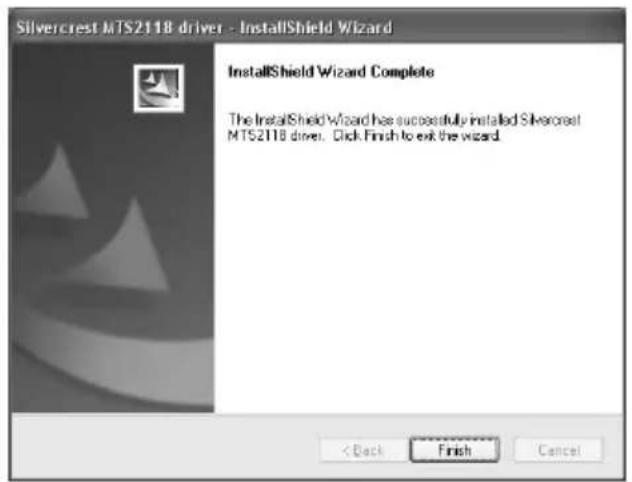
Only the operating system Windows Vista™ requires a restart. Select "Yes, restart the computer now" first and then click the Finish button.
Windows Vista™ will subsequently execute a restart. As soon as the restart of your computer is concluded, your keyboard and optical mouse are ready for configuration using the software.
Task Bar Symbols

A double click on this symbol opens the configuration menu for the optical mouse (see page 54 – “Configuration of the Optical Mouse” for a description).

A double click on this symbol opens the configuration menu for the keyboard (see page 55 – “Configuration of the Keyboard” for a description).

This symbol shows you that the keyboard's „Num Lock“ function has been activated. Press the “Num Lock” key to deactivate the function again.

This symbol shows you that the keyboard's „Caps Lock“ function has been activated. Press the “Caps Lock” key to deactivate the function again.

This symbol shows you that the keyboard's „Scroll“ function has been activated. Press the “Scroll” key to deactivate the function again.

This symbol shows you that the keyboard's „Office Lock“ function has been activated. Press the “Office Lock” key to deactivate the function again (for a description of the Offcie Lock function, see page 58 - Office Lock).
Configuration
Toggling between Operating Modes
The CPI button (9) puts you in a position to toggle between the optical scan resolutions of 500 cpi und 1000 cpi. The scanning is more precise at 1000 cpi and the mouse cursor will move faster given the same movements.
If you would like to toggle between standard operation and media operation on the mouse, press the CPI button (9) and keep it pressed for a minimum of 3 seconds until the power control lamp (12) briefly lights up. Please see the list on page 43 for information on the functions available in the media operation mode.
Configuration of the Optical Mouse
Double click on this symbol ⚙in the task bar (bottom right of the screen, next to the system clock) in order to open the configuration menu for the mouse.
Here you can specify functions for selected mouse buttons. Simply click on the selection switch next to the corresponding mouse button and select a function from the menu by clicking on it with the left mouse button.
You can restore the mouse to its original state by clicking the „Restore to default“ button.
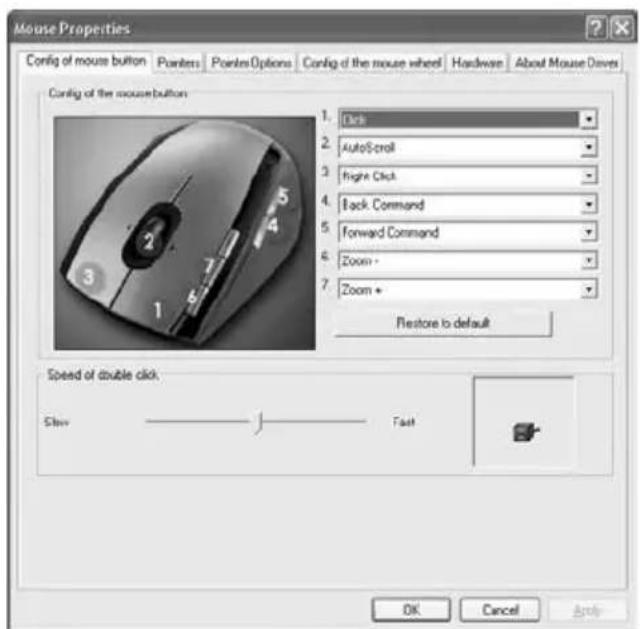
If you would like to apply your changes, please click on the „Apply“ button (the window will remain open) or the „OK“ button (the window will close).
The slide switch puts you in a position to adjust the speed of double clicks. If you move the slide to the left and then activate the function via the „Apply“ button, the mouse will react to a slow double-clicking speed. If you move the switch to the right you will need to execute double clicks at a correspondingly faster speed.
You can test the speed setting for double clicks by double-clicking on the symbol next to the slide switch.
Click on the „Config of the mouse wheel“ tab in the configuration menu in order to perform the following mouse tilt wheel settings.
Vertical Scrolling
The vertical scrolling function determines the speed at which the scroll wheel moves the lines on the screen up or down. Use the option "For pages" in order to scroll through a document page by page.
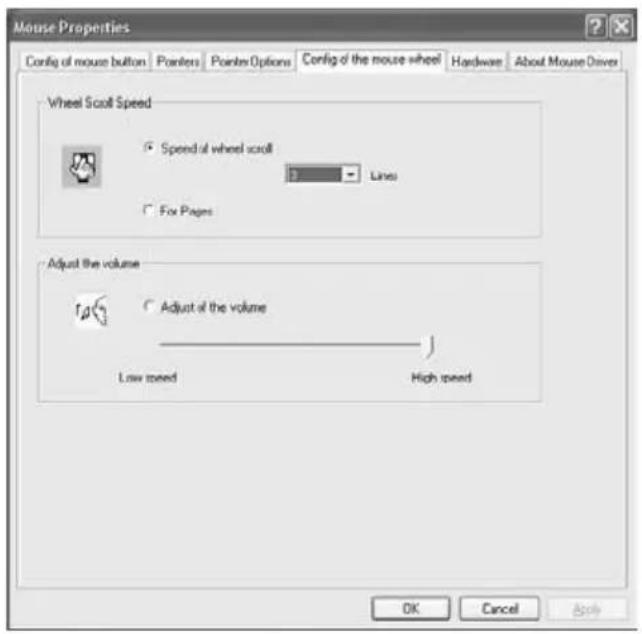
Audio Volume Adjustment
Select the option „Adjust the volume“ to adjust the system volume using the tilt wheel of the mouse. The slide switch puts you in a position to define the rate of volume change per notch.
Tip for users of Microsoft ® Windows Vista TM :
You can also adjust the horizontal scrolling of the tilt wheel in the system control of the operating system in the submenu „Mouse“. The configuration menu of the mouse driver needs to be closed in order to access the system control menu.
Configuration of the Keyboard
The wireless keyboard of the keyboard and mouse set features 21 shortcut keys (hotkeys), a scroll wheel and a volume control. Following software installation, the special keys offer the following standard functions. 18 hotkeys can furthermore be freely programmed according to your requirements.
Hotkey Description

Log off the logged on user

Initiate sleep modus *

Switch computer on/off *
(Many mainboards feature a BIOS setting such as, for example, „Boot on USB“, „Power on by USB“, or a
corresponding setting). Activate this function in order to be able to switch the computer on and off via the keyboard. Please also consult the documentation of your computer or main board before activating the BIOS setting.

Starts the standard media player (e.g. Microsoft® Media Player)

Stop replay

Play / Pause

Previous title

Next title

Sound on/off

Standard internet browser (e.g. Internet Explorer)

Standard email programme (e.g. Microsoft® Outlook)

Internet-browser favourites

Update display

Search

Stop webpage download in internet-browser

Start Microsoft ® Word (needs to be installed)

Start Microsoft ® Excel (needs to be installed)

Toggle between active applications

Office Lock *

Open desktop

Start pocket calculator
* not freely programmable
Double-click on this symbol 📄 in the task bar to configure the programmable hotkeys (bottom right of your screen, next to the system clock). The following menu opens:
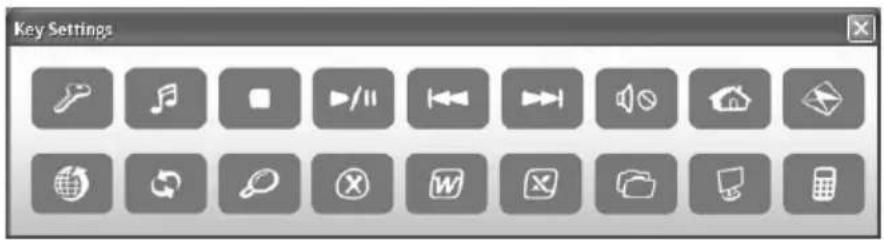
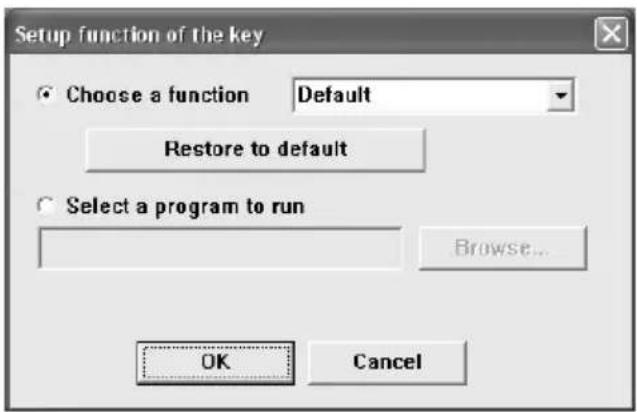
Now left-click on the symbol corresponding to the hotkey which is to be changed. This opens the following menu:
Use the top option „Choose a function“ to select one of the default programmes. Once this function is activated by clicking „OK“, the menu will close and you can start the selected programme easily via the corresponding hotkey.
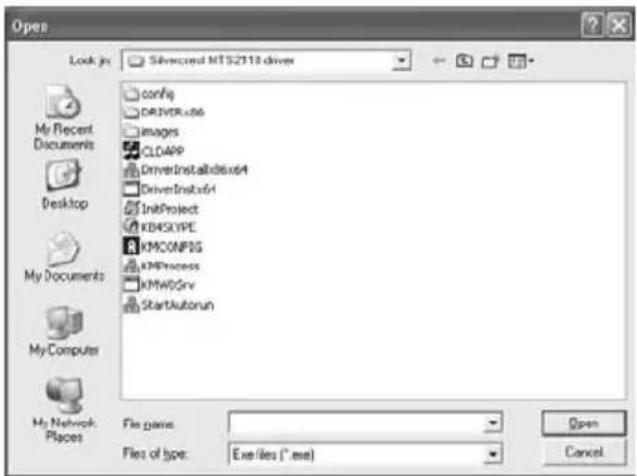
Selecting the second option „Select a program to run“ and then left-clicking on the „Browse“ button will open this menu (see illustration on right). Here you can select any executable file on your computer’s hard disk which is to be started via the corresponding hotkey.
Office Lock
Press the hotkey F on the keyboard to activate Office Lock and press the same key again to deactivate it. The symbol F appears in the task bar as long as the function is activated.
Office Lock configures the function keys F1 to F12 with fixed functions in Microsoft® Office. To be able to use these functions, a version of Microsoft® Office needs to be installed on your computer. The following list shows all the special functions available to make working with the Office software particularly easy:
F 1 Help
Open help
F 2 New
Create new document
F 3 Open
Open existing document
F 4 Save
Save document
F 5 Replace
Open the „Search/Replace“ dialogue
F 6 Spelling
Start the spell checker
F 7 Undo
Undo last command
F 8 Restore
Restore last undone command
F 9 Answer (only Microsoft Outlook)
Answer email
F 10 Answer all (only Microsoft Outlook)
Answer all parties
F 11 Forward (only Microsoft ® Outlook)
Forward email
F 12 Send (only Microsoft ® Outlook/Outlook Express)
Send email
Attachment
Troubleshooting
If the keyboard or mouse do not respond to input after the installation, please check the following:
☑ Check that the batteries have been inserted properly (with the poles pointing in the right direction).
☑ Check that the receiver is connected to the computer properly (see page 50 - Connecting the Miniature USB Receiver).
☑ Try another USB port.
☑ Check the battery power (insert new batteries, if required).
☑ Please note that you need to use a mat (e.g. mouse pad) if you intend to use the mouse on a glass surface or glossy surface.
Technical Data
- 2.4 GHz radio frequency
- SmartLink technology (dispenses with the need to connect the receiver and mouse/keyboard manually)
Keyboard
- 21 special keys (hotkeys), 18 of which are programmable
- Volume control
- Scroll wheel
- Range up to 5m
Mouse
- Optical sensor with selectable resolution of 500 cpi and 1000 cpi
- 8 buttons, 7 of which are programmable
- Tilt wheel (4-way scroll wheel)
- Range up to 5m
Warranty Information
36 month warranty from date of purchase

United Kingdom
3
Important warranty information
SilverCrest
Dear Customer,
Thank you for purchasing a SILVERCREST product.
Please carefully read through the enclosed documentation or online help before putting your SILVERCREST product into service. If you have a problem, which can't be solved in this way, please contact our hotline.
If the problem cannot be solved over the phone, you will be given a reference number (RMA), which you should enclose together with a copy of the proof of purchase. After you have packaged the unit safe for transport and in plain packaging, please send it for warranty processing, with the RMA noted on the outside of the package, to the address given to you by our hotline employee. After receiving the unit we will correct the manufacturing and material defect free of charge.
Up-to-date information and answers to the most frequently asked questions are available on the internet from:
www.silvercrest.cc
This guarantee is valid in the UK.
Your statutory guarantees from the seller are in addition to this warranty and are not limited by it.

MONTH WARRANTY
Hotline number: 0207-3650744
(Please have your serial number to hand!)
Manufacturer: TARGA GmbH, Postfach 2244, D-59482 Soest
www.silvercrest.cc


- WIRELESS MULTI-MEDIA KEYBOARD AND MOUSE SET
- MTS 2118
- PACKAGE CONTENTS
- SYSTEM REQUIREMENTS
- OVERVIEW
- CONTENTS
- PACKAGE CONTENTS 41
- SYSTEM REQUIREMENTS 41
- IMPORTANT SAFETY INFORMATION 45
- HARDWARE INSTALLATION 49
- SOFTWARE INSTALLATION 51
- WARRANTY INFORMATION 60
- IMPORTANT SAFETY INFORMATION
- OPERATING ENVIRONMENT
- PLEASE ENSURE THAT
- MAINTENANCE AND CARE
- CHILDREN
- INTENDED USE
- BATTERIES
- R/F INTERFACE
- COMPLIANCE
- APPLIANCE DISPOSAL
- INTRODUCTION
- HARDWARE INSTALLATION
- INSERTING THE BATTERIES
- CONNECTING THE MINIATURE USB RECEIVER
- WINDOWS ® 2000/XP
- WINDOWS VISTA TM
- SOFTWARE INSTALLATION
- TASK BAR SYMBOLS
- CONFIGURATION
- TOGGLING BETWEEN OPERATING MODES
- CONFIGURATION OF THE OPTICAL MOUSE
- VERTICAL SCROLLING
- AUDIO VOLUME ADJUSTMENT
- CONFIGURATION OF THE KEYBOARD
- HOTKEY DESCRIPTION
- OFFICE LOCK
- ATTACHMENT
- TROUBLESHOOTING
- TECHNICAL DATA
- KEYBOARD
- MOUSE
- WARRANTY INFORMATION
- 36 MONTH WARRANTY FROM DATE OF PURCHASE
- IMPORTANT WARRANTY INFORMATION
Brand : SILVERCREST
Model : MTS 2118
Category : Keyboard