HPI-7S - Digital piano ROLAND - Free user manual and instructions
Find the device manual for free HPI-7S ROLAND in PDF.


User questions about HPI-7S ROLAND
0 question about this device. Answer the ones you know or ask your own.
Ask a new question about this device
Download the instructions for your Digital piano in PDF format for free! Find your manual HPI-7S - ROLAND and take your electronic device back in hand. On this page are published all the documents necessary for the use of your device. HPI-7S by ROLAND.
USER MANUAL HPI-7S ROLAND
The lightning flash with arrowhead symbol, within an equilateral triangle, is intended to alert the user to the presence of uninsulated "dangerous voltage" within the product's enclosure that may be of sufficient magnitude to constitute a risk of electric shock to persons.

The exclamation point within an equilateral triangle is intended to alert the user to the presence of important operating and maintenance (servicing) instructions in the literature accompanying the product.
INSTRUCTIONS PERTAINING TO A RISK OF FIRE, ELECTRIC SHOCK, OR INJURY TO PERSONS.
IMPORTANT SAFETY INSTRUCTIONS SAVE THESE INSTRUCTIONS
WARNING - When using electric products, basic precautions should always be followed, including the following:
- Read these instructions.
- Keep these instructions.
- Heed all warnings.
- Follow all instructions.
- Do not use this apparatus near water.
- Clean only with a dry cloth.
- Do not block any of the ventilation openings. Install in accordance with the manufacturers instructions.
- Do not install near any heat sources such as radiators, heat registers, stoves, or other apparatus (including amplifiers) that produce heat.
-
Do not defeat the safety purpose of the polarized or grounding-type plug. A polarized plug has two blades with one wider than the other. A grounding type plug has two blades and a third grounding prong. The wide blade or the third prong are provided for your safety. If the provided plug does not fit into your outlet, consult an electrician for replacement of the obsolete outlet.
-
Protect the power cord from being walked on or pinched particularly at plugs, convenience receptacles, and the point where they exit from the apparatus.
- Only use attachments/accessories specified by the manufacturer.
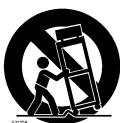
- Use only with the cart, stand, tripod, bracket, or table specified by the manufacturer, or sold with the apparatus. When a cart is used, use caution when moving the cart/apparatus combination to avoid injury from tip-over.
- Unplug this apparatus during lightning storms or when unused for long periods of time.
- Refer all servicing to qualified service personnel. Servicing is required when the apparatus has been damaged in any way, such as power-supply cord or plug is damaged, liquid has been spilled or objects have fallen into the apparatus, the apparatus has been exposed to rain or moisture, does not operate normally, or has been dropped.
For the U.K.
IMPORTANT: THE WIRES IN THIS MAINS LEAD ARE COLOURED IN ACCORDANCE WITH THE FOLLOWING CODE.
BLUE: NEUTRAL
BROWN: LIVE
As the colours of the wires in the mains lead of this apparatus may not correspond with the coloured markings identifying the terminals in your plug, proceed as follows:
The wire which is coloured BLUE must be connected to the terminal which is marked with the letter N or coloured BLACK.
The wire which is coloured BROWN must be connected to the terminal which is marked with the letter L or coloured RED.
Under no circumstances must either of the above wires be connected to the earth terminal of a three pin plug.
HPi-7s
Roland Digital Piano
Before using this unit, carefully read the sections entitled: "IMPORTANT SAFETY INSTRUCTIONS" (p. 2), "USING THE UNIT SAFELY" (p. 6), and "Important Notes" (p. 9). These sections provide important information concerning the proper operation of the unit. Additionally, in order to feel assured that you have gained a good grasp of every feature provided by your new unit, owner's manual should be read in its entirety. The manual should be saved and kept on hand as a convenient reference.

Easy Operation with the Cursor Button p. 25
Most tasks are carried out by pressing the button for the function you want
to use, then using the cursor button and the [X] and
[] buttons, [-][+] button at the panel center.
This allows you to enjoy a wide variety of performances
with simple operations.


To Learn What Kinds of Songs are Included
p. 41
The HPi-7S features 183 internal songs in a wide range of musical genres, from piano practice songs to pops.

Listen to Phrases with a Variety of Instrument Sounds p. 51
You can listen to phrases (brief performances) using a variety of sounds to learn which tones are suited to each kind of performance.

Listen to Music Files p. 44, p.47
You can enjoy listening to music CD and SMF music files.

Read Notations as You Perform
p. 26
You can show notations in the display and follow the notes as you play. You can turn the pages in the
notation with the pedals, and display lyrics and fingering number as well.
You can display the notation not just for the internal songs, but also for songs you record yourself.
Try checking out the notations as you perform.

138 Sonate No.15 4/4 H:1 One Note Options

Playing

Change the Keyboard Touch p. 53
You can change the sense of heft in the keys (the touch), making it lighter or heavier to match the player's finger strength.

Use the Pedals p. 29
Enjoy authentic piano performances using the pedals.

Perform in Singer's Ranges p. 68
When accompanying vocal performances, you can transpose the keyboard to match the vocalist's register, simply and easily with the score (the actual keys played) unchanged. You can also change songs in difficult keys to simpler key signatures.

Perform with a Variety of Sounds p. 51
Not only can you perform using piano sounds, you can also select other sounds suited to the material you are playing.

Layer Two Sounds as You Play p. 56
You can perform with two different sounds, for example piano and strings, layered together. Layering lets you give the sound greater substance.

Play Different Sounds in the Left and Right Hands p. 57
You can split the keyboard into two sections and perform using two different tones with the left and right hands.
Provides Support for Your Lessons at Home!
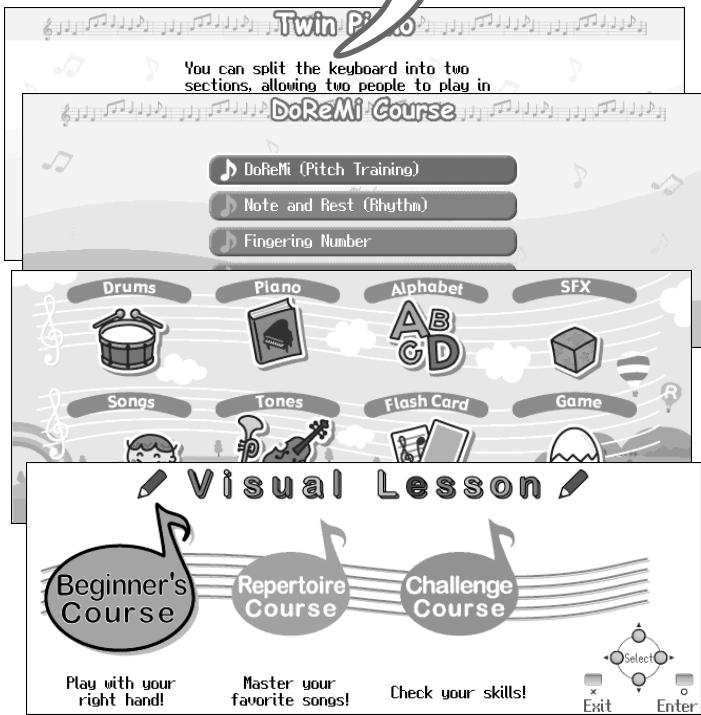
To Learn the Sounds and Instruments Through Games and Activities → Wonderland p. 30
To Grasp the Fundamentals of Notations and the Keyboard DoReMi Course p. 32
To Master One Song Suited to Your Level of Ability Visual Lesson p. 37
To Split the Keyboard Into Two Sections For Two-Person Performances Twin Piano p. 34
Convenient Functions Functions

Output Your Own Performances as Notations p. 104
You can save the notations as image data to external memory (optional) and use your own computer and printer to print out these notations.

Prevent Settings from being Changed During Performances p. 98
You can prevent your settings from being changed as you play, even when buttons are pressed accidentally.

Restore the Settings Programmed at the Time of Purchase p. 98
You can restore the HPi-7S's settings after changing them, returning the settings to their original state at the time the instrument was purchased.


Perform Using the Metronome p. 63
The HPi-7S includes a metronome function. You can adjust the metronome volume level and change the tones used for the metronome sound.

Practice at Different Tempos p. 62
When practicing songs written with rapid tempos, you can practice at reduced tempos that are easier to handle.

Practice Just the Left or Right Hand p. 59
You can practice each hand's part individually, for example, following the song's right-hand part with your own right hand, or playing the left-hand part in time with the song's right-hand part.

cord Your Own Performances p. 70
You can record the performances you play. You can then play back the recordings afterwards to check how you've done.

cord Along with Songs p. 73
You can record while a song is played, allowing you to record your own performances along with songs.

ave Your Recorded Performances to the i-7S p. 80
After recording your own performance, you can then save it within the HPi-7S's internal memory. This is convenient, as the saved performances are not deleted even when the HPi-7S's power is turned off. You can also easily select performances that have been saved in the piano.
USING THE UNIT SAFELY
INSTRUCTIONS FOR THE PREVENTION OF FIRE, ELECTRIC SHOCK, OR INJURY TO PERSONS
About WARNING and CAUTION Notices
| WARNING | Used for instructions intended to alert the user to the risk of death or severe injury should the unit be used improperly. |
| CAUTION | Used for instructions intended to alert the user to the risk of injury or material damage should the unit be used improperly. * Material damage refers to damage or other adverse effects caused with respect to the home and all its furnishings, as well to domestic animals or pets. |
About the Symbols
| ▲ | The ▲ symbol alerts the user to important instructions or warnings. The specific meaning of the symbol is determined by the design contained within the triangle. In the case of the symbol at left, it is used for general cautions, warnings, or alerts to danger. |
| ◎ | The ⊙ symbol alerts the user to items that must never be carried out (are forbidden). The specific thing that must not be done is indicated by the design contained within the circle. In the case of the symbol at left, it means that the unit must never be disassembled. |
| ◆ | The ● symbol alerts the user to things that must be carried out. The specific thing that must be done is indicated by the design contained within the circle. In the case of the symbol at left, it means that the power-cord plug must be unplugged from the outlet. |
ALWAYS OBSERVE THE FOLLOWING
WARNING
Do not disassemble or modify
Do not disassemble or modify this device.

Do not repair or replace parts
Never attempt to repair this device or replace parts. If repair or part replacement should become necessary, you must contact your dealer or a Roland service center.

Do not use or store in the following types of locations
- Locations of extremely high temperature (such as in direct sunlight, near heating equipment, or on a device that generates heat)
- Near moisture (such as in a bathroom, near a sink, or on a wet floor) or in locations of high humidity
- Locations exposed to rain
- Locations of excessive dust
- Locations subject to heavy vibration

Do not place in an unstable location
Do not place this device on an unstable stand or a tilted surface. You must place it in a stable and level location.

Connect the power cord to an outlet of the correct voltage
You must connect the power cord to an AC outlet of the correct voltage as marked on the device.

WARNING
Use only the included power cord
You must use only the power cord included with the device. Do not use the included power cord with any other device.

Do not bend the power cord or place heavy objects on it
Do not bend the power cord excessively, or place heavy objects on the power cord. Doing so will damage the power cord, and may cause short circuits or faulty connections, possibly resulting in fire or electrical shock.

Do not share an outlet with an unreasonable number of other devices
Do not connect excessive numbers of electrical devices to a single power outlet. In particular, when using a power strip, exceeding the rated capacity (watts/amps) of the power strip may cause heat to be generated, possibly melting the cable.

Avoid extended use at high volume
This device, either by itself or used in conjunction with headphones, amps, and/or speakers, is capable of producing volume levels that can cause permanent hearing damage. If you experience impaired hearing or ringing in your ears, immediately stop using the device and consult a medical specialist.

Do not insert foreign objects
Never allow foreign objects (flammable objects, coins, wires, etc.) to enter this device. This can cause short circuits or other malfunctions.


WARNING
Turn off the power if an abnormality or malfunction occurs
If any of the following should occur, immediately turn off the power, disconnect the power cord from the AC outlet, and contact your dealer or a service center to have the device serviced.
- The power cord is damaged
- The device produces smoke or an unusual smell
- A foreign object enters the device, or liquid spills into the device
- The device becomes wet (by rain, etc.)
- An abnormality or malfunction occurs in the device

Do not allow children to use without supervision
In households with children, take particular care against tampering. If children are to use this device, they must be supervised or guided by an adult.

Do not drop or subject to strong impact
Do not drop this device or subject it to strong impact.

Do not use overseas
If you wish to use this device overseas, please contact your dealer or a service center.

Do not use a CD-ROM in an audio CD player or DVD player
If you attempt to play back a CD-ROM in a conventional audio CD player or DVD player, the resulting high volume may damage your hearing or your speakers.

Do not place containers of water on the device
Do not place containers of water (such as a flower vase) or drinks on the device. Nor should you place containers of insecticide, perfume, alcoholic liquids, nail polish, or spray cans on the device. Liquids that spill into the device may cause it to malfunction, and may cause short circuits or faulty operation.

Place in a well ventilated location
When using this device, ensure that it is placed in a well ventilated location.

Grasp the plug when connecting or disconnecting the power cord
When connecting or disconnecting the power cord to/from an AC outlet or the device itself, you must grasp the plug, not the cord.

Periodically wipe the dust off the power cord plug
From time to time, you should unplug the power cord from the AC outlet and use a dry cloth to wipe the dust off of it. You should also unplug the power cord from the AC outlet if you will not be using the device for an extended period of time. Dust or dirt that accumulates between the power cord plug and the AC outlet can cause a short circuit, possibly resulting in fire.

Manage cables for safety
Ensure that the connected cables are organized and managed in a safe manner. In particular, place the cables out of reach of children.

Do not stand or place heavy objects on this device
Do not stand on this device, or place heavy objects on it.

Do not connect or disconnect the power cord with wet hands
Do not connect or disconnect the power cord to the device or AC outlet while holding the power cord plug with wet hands.

Cautions when moving this device
When moving this device, please check the following cautions. Then, make sure that at least three persons work together in lifting and carrying the device, all the while making sure to keep it level. When doing so, be careful not to pinch your hands or drop the device on your feet.

- Check whether the knob bolts fastening the device to its stand have become loose. If they are loose, tighten them firmly.
- Disconnect the power cord.
- Disconnect external devices.
- Raise the adjuster of the stand(p. 29).
- Close the lid.
- Remove the music stand.
CAUTION
Unplug the power cord from the AC outlet before cleaning
Before you clean the device, turn off the power and unplug the power cord from the AC outlet (p. 17).

If there is a possibility of lightning strike, disconnect the power cord from the AC outlet
If there is a possibility of lightning strike, immediately turn off the power and disconnect the power cord from the AC outlet.

Cautions when opening/closing the lid
Be careful when opening/closing the lid so you do not get your fingers pinched (p. 17). Adult supervision is recommended whenever small children use the unit.

Keep small items out of the reach of children
To prevent small items such as the following from being swallowed accidentally, keep them out of the reach of children.

- Included items
- Screws for assembling the stand
- Wing nut for headphone hook
-
Removed parts
Music rest attachment screws
Volume knob -
GS (G) is a registered trademark of Roland Corporation.
- XG lite (XGite) is a registered trademark of Yamaha Corporation.
- This product uses certain software of the "Independent JPEG Group."
- All product names mentioned in this document are trademarks or registered trademarks of their respective owners.
In addition to the "USING THE UNIT SAFELY" listed on page 6-8, please observe the following cautions.
Power Supply
- Do not connect this device to the same electrical outlet as an inverter-controlled device such as a refrigerator, microwave oven, or air conditioner, or a device that contains an electric motor. Depending on how the other device is used, power supply noise could cause this device to malfunction or produce noise. If it is not practical to use a separate electrical outlet, please connect this device via a power supply noise filter.
- Before you make connections, you must switch off the power on all devices to prevent malfunction and/or speaker damage.
- When you turn off the power, the screen and indicators of this device will go dark, but this does not mean that the main power supply is completely disconnected. If you need to completely shut off the power supply, turn off the power switch of this device and then unplug it from the AC outlet. Connect this device to an AC outlet that is as close and accessible as possible.
Location
- If this device is placed near devices that contain large transformers, such as power amps, hum may be induced in this device. If this occurs, move this device farther away or change its orientation.
- If this device is operated near a television or radio, color distortion may be seen in the television screen or noise may be heard from the radio. If this occurs, move this device farther away.
- Keep your cell phone powered off or at a sufficient distance from this device. If a cell phone is nearby, noise may be heard when a call is received or initiated, or during conversation.
- Do not leave this device in direct sunlight, near devices that produce heat, or in a closed-up automobile. Do not allow illumination devices operated in close proximity (such as a piano light) or powerful spotlights to shine on the same location on this device for an extended time. This can cause deformation or color change.
- If you move this device between locations of radically different temperature or humidity, water droplets (condensation) may form inside the device. Using the device in this condition will cause malfunctions, so please allow several hours for the condensation to disappear before you use the device.
- Do not allow items made of rubber or vinyl to remain on top of this device for an extended time. This can cause deformation or color change.
- Do not leave objects on top of the keyboard. This can cause malfunctions such as failure to sound.
- Do not affix adhesive labels to this device. The exterior finish may be damaged when you remove the labels.
Care
- For everyday care, wipe with a soft dry cloth, or remove stubborn dirt using a tightly wrung-out cloth. If this device contains wooden components, wipe the entire area following the direction of the grain. The finish may be damaged if you continue strongly rubbing a single location.
- If water droplets should adhere to this device, immediately wipe them off using a soft dry cloth.
- Do not use solvents such as benzene, thinner, or alcohol, since these can cause deformation or color change.
- The pedals of this device are made of brass. Brass has a natural tendency to oxidize and become tarnished. If this occurs, use a commercially available metal polish.
Servicing
- If you return this device for servicing, the contents of memory may be lost. Please store important contents on USB memory, or make a note of the contents. We take utmost care to preserve the contents of memory when performing service, but there may be cases when the stored content cannot be recovered because the memory section has malfunctioned. Please be aware that we cannot accept responsibility for the recovery of lost memory content or for any consequences of such loss.
Other Cautions
- Stored content may be lost due to a malfunction of the device or because of inadvertent operation. You should back up important content on USB memory as a safeguard against such loss.
- We cannot accept responsibility for the recovery of any content lost from internal memory or USB memory, or for the consequences of such loss.
- Do not apply excessive force to the buttons, knobs, or input/output jacks, since this may cause malfunctions.
- Never strike or apply strong pressure to the display.
- When connecting or disconnecting cables, grasp the plug (not the cable) to prevent short circuits or broken connections.
- This device may produce a certain amount of heat, but this is not a malfunction.
- Please enjoy your music in ways that do not inconvenience other people nearby, and pay particular attention to the volume at nighttime. Using headphones will allow you to enjoy music without having to be concerned about others.
- When transporting or shipping this device, package it in an appropriate amount of cushioning material. Scratches, damage, or malfunctions may occur if you transport it without appropriate packaging.
-
If using the music rest, do not apply excessive force to it.
-
Some connection cables contain a resistor. Do not connect such cables to this device. Doing so may make the volume extremely low or inaudible. Please use connection cables not containing a resistor.
- Before opening or closing the keyboard lid, always make sure that no pets or other small animals are located on top of the instrument (in particular, they should be kept away from the keyboard and its lid). Otherwise, due to the structural design of this instrument, small pets or other animals could end up getting trapped inside it. If such a situation is encountered, you must immediately switch off the power and disconnect the power cord from the outlet. You should then consult with the retailer from whom the instrument was purchased, or contact the nearest Roland Service Center.
Floppy Disk Handling (Using Optional Floppy Disk Drive)
-
Floppy disks contain a plastic disk with a thin coating of magnetic storage medium. Microscopic precision is required to enable storage of large amounts of data on such a small surface area. To preserve their integrity, please observe the following when handling floppy disks:
-
Never touch the magnetic medium inside the disk.
- Do not use or store floppy disks in dirty or dusty areas.
- Do not subject floppy disks to temperature extremes (e.g., direct sunlight in an enclosed vehicle).
Recommended temperature range: 10–50 degrees C (50–122 degrees F). -
Do not expose floppy disks to strong magnetic fields, such as those generated by loudspeakers.
-
Floppy disks have a "write protect" tab which can protect the disk from accidental erasure. It is recommended that the tab be kept in the PROTECT position, and moved to the WRITE position only when you wish to write new data onto the disk.
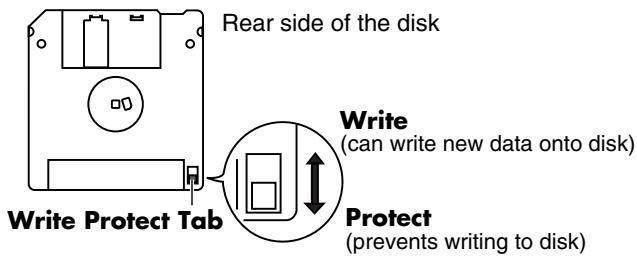
- The identification label should be firmly affixed to the disk. Should the label come loose while the disk is in the drive, it may be difficult to remove the disk.
- Store all disks in a safe place to avoid damaging them, and to protect them from dust, dirt, and other hazards. By using a dirty or dust-ridden disk, you risk damaging the disk, as well as causing the disk drive to malfunction.
USB Memory Handling
-
When connecting USB memory, firmly insert it all the way in.
-
Do not touch the pins of the USB memory connector, or allow them to become dirty.
-
USB memory is made using high-precision electronic components, so please observe the following points when handling it.
-
To prevent damage from static electrical charges, discharge any static electricity that might be present in your body before handling USB memory.
- Do not touch the terminals with your fingers or any metal object.
- Do not bend or drop USB memory, or subject it to strong impact.
- Do not leave USB memory in direct sunlight or in locations such as a closed-up automobile. (Storage temperature: 0–50 degrees C)
- Do not allow USB memory to become wet.
-
Do not disassemble or modify USB memory.
-
When connecting USB memory, position it horizontally with the external memory connector and insert it without using excessive force. The external memory connector may be damaged if you use excessive force when inserting USB memory.
- Do not insert anything other than USB memory (e.g., wire, coins, other types of device) into the external memory connector. Doing so will damage the external memory connector.
- Do not apply excessive force to the connected USB memory.
- If you will not be using USB memory for an extended period of time, close the USB memory cover.
Handling the CDs (CD-ROMs)
-
When handling the discs, please observe the following.
-
Do not touch the encoded surface of the disc.
- Do not use in dusty areas.
-
Do not leave the disc in direct sunlight or an enclosed vehicle.
-
Avoid touching or scratching the shiny underside (encoded surface) of the disc. Damaged or dirty CD-ROM discs may not be read properly. Keep your discs clean using a commercially available CD cleaner.
- Keep the disc in the case.
- Do not keep the disc in the CD drive for a long time.
- Do not put a sticker on the label of the disc.
- Wipe the disc with a soft and dry cloth radially from inside to outside. Do not wipe along circumference.
- Do not use benzine, record cleaner spray or solvents of any kind.
- Do not bend the disc. Bending discs may prevent proper reading and writing of data, and may further result in malfunction.
Thank you, and congratulations on your choice of the Roland Digital Piano HPi-7S.
In order to enjoy reliable performance of your new keyboard for many years to come, please take the time to read through this manual in its entirety.
How To Use This Manual
Please start out by reading "Before You Begin Playing" in the Owner's Manual (this volume). This explains how to connect the HPi-7S's power cord and how to turn on the HPi-7S's power.
This Owner's Manual describes procedures covering everything from mastering the basic operations used for the HPi-7S's performance functions to more advanced procedures, which allow you to create songs on the HPi-7S.
Conventions Used in This Manual
This manual uses the following conventions in the interest of simpler, more concise instructions.
- Button names are enclosed in square brackets "[ ]", as in [Reverb] button.
- For easier readability, some screens and colors used here may differ in part from actual screens and colors.
- On screen text is enclosed in angled brackets < > , as in
. - An asterisk (*) or a at the beginning of a paragraph indicates a note or precaution. These should not be ignored.
(p. **) refers to pages within the manual.
USING THE UNIT SAFELY 6
Important Notes. 9
Introduction 11
How To Use This Manual 11
Conventions Used in This Manual 11
Before You Begin Playing 16
Setting Up for Performing 16
Attaching the Music Rest. 16
Using the Music Holders 16
Connecting the Pedal Cord. 16
Connecting the Speaker Cable. 16
Connecting the Power Cord 17
Opening and Closing the Lid 17
Turning the Power On/Off 18
Adjusting the Volume of the Sound 18
Connecting Headphones 18
Using the Headphone Hook 19
Connecting a Microphone 19
Adjusting the Contrast of the Screen 20
Using USB Memory/Floppy Disk 20
Connecting USB Memory 20
Installing the Floppy Disk Drive 20
Using CD. 21
Connecting a CD Drive 21
Panel Descriptions. 22
Basic Operation and the Main Screen 25
Basic Operation 25
Basic Screen 26
Notation Screen 26
List Screen 28
Detailed Settings Screen 28
Messages 28
About the Pedals 29
Try Out the HPi-7S's Lesson Functions! 30
Playing in a Wonderland of Sound 30
Learning the Basics of Reading Music (DoReMi Course) 32
DoReMi (Pitch Training) 33
Note and Rest (Rhythm) 33
Fingering Number 33
Thumb Under 33
Splitting the Keyboard Into Two Sections for Four-Hand Performances (Twin Piano) 34
Taking a Lesson While Playing a Two-Person Game (Twin Piano Game) 35
Changing the Way in Which the Sound is Heard (Twin Piano Mode) 36
Playing Songs Using the Lesson Functions (Visual Lesson) 37
Practicing with Internal Songs and Songs on USB Memory 40
Listening to the Songs 41
Listening to the Internal Songs. 41
Playing Songs Consecutively (All Song Play) 43
Listening to Music Files or a Song that was Saved on USB Memory 44
Registering the Songs You Like (Favorites) 45
Removing Songs from Favorites 46
Playing a Music CD or Audio File 47
Adjusting the Volume of an Audio File or Music CD 49
Reducing the Playback Volume of Sounds in the Center (Center Cancel) 49
Adding Variety to Your Performances 50
Playing the Keyboard Like a Piano (One Touch Piano) 50
Performing with a Variety of Tones 51
Playing Percussion Instruments or Sound Effects 52
Adjusting the Keyboard Touch (Key Touch) 53
Applying Effects to the Sound 54
Adding Reverberation to the Sound (Reverb) 54
Adding Richness to the Sound (Chorus) 54
Adjusting the Brightness of the Sound (Brilliance) 55
Adding Liveliness to the Sound (Dynamics Sound Control) 55
Playing Two Sounds Layered Together (Dual) 56
Playing Different Sounds in the Right and Left Hand (Split) 57
Practicing 59
Playing Along with Songs 59
Lowering the Volume of a Part You're Learning (Melody Guide) 60
Changing the Volume Balance of the Accompaniment and Keyboard (Balance) 61
Adjusting the Tempo 62
Playing Back at a Fixed Tempo (Tempo Mute) 62
Using the Metronome 63
Adding a Count to Assist Your Timing 64
Assigning Markers to a Song for Repeated Practice 66
Assigning a Marker in the Middle of a Measure (Resolution) 67
Changing the Key of the Keyboard or Song Playback (Transpose) 68
Recording Your Performance 69
Recording a New Song 70
Saving Recorded Performances to the Favorites 72
Recording Along with a Song 73
Re-recording 75
Erasing a Recorded Song 76
Erasing the Performance on Specific Tracks 76
Recording Songs Starting with Pickups 76
Multitrack Recording on Five Tracks 77
Saving the Performance 78
Using External Memory 78
Connecting an USB Memory 78
Rotating the External Memory Connector Holder 78
79
Saving Songs 80
83
Copying Songs on USB Memory to Favorites 84
Copying Songs Saved in Favorites to USB memory 85
Convenient Functions 86
Functions that Can be Selected Using the [Function] Button 86
Making the Settings 86
Adjusting the volume balance between accompaniment and keyboard (Volume Balance) 86
Adjusting the Piano Sounds (Piano Designer) 86
Opening/Closing the Piano Lid (Lid) 86
Changing How Rapidly Sounds Are Expressed According to
the Force Used to Play the Keys (Hammer Response) 86
Setting the Tuning Curve (Stretch Tuning) 87
Adjusting Resonance when the Damper Pedal is Depressed (Damper Resonance) 87
Adjusting the Resonant Sounds when the Keys are Pressed (String Resonance) 87
Playing Sounds When the Keys Are Released (Key Off Resonance) 87
Adjusting the Keyboard Touch (Key Touch) 87
Making Fine Adjustments to the Keyboard Touch Sensitivity (Key Touch Offset) 87
Changing the Velocity When the Key Touch is Set to "Fixed" (Fix Velocity) 87
Listening to a Piano Designer demo 87
Setting the Reference Pitch and Temperament (Tuning) 88
Tuning to Other Instruments' Pitches (Master Tuning) 88
Changing the Tuning (Temperament) 88
Setting the Tonic (Key) 88
Adjusting the Depth of the Effects (Effect) 89
Changing the Brightness of the Sound/Making the Sound Expressive (Adjusting the sound) ....89
Giving the Sound More Spatial Depth (3D Sound Control) 89
Adjusting the Depth of the Sound (Depth) 89
Changing How Grand Space is Applied (3D Mode) 90
Adjusting the Volume of an Audio File (Audio Volume) 90
Adjusting the depth of mic echo (Mic Echo) 90
Adjusting the tonal character (Equalizer) 90
Changing the equalizer type 90
Changing the Equalizer Settings (Equalizer) 90
Changing the Pedal Functions (Pedal) 91
Changing the Language Displayed in the Screen (Language) 92
Selecting Images to be Shown on the Displays (User Image Display) 92
To Delete a Saved Image 92
Playing the Demos 93
Setting the Demo (Auto Demo) 93
Changing the Parts Assigned to the Track Buttons During SMF Playback (Track Assign) 93
Recording and Playing Back Performances of Specific Instruments (16 Track) 94
Changing the Tone Settings When Playing Back Songs (Play Mode) 96
Displaying theLyrics (Lyrics) 96
Switching VIMA TUNES Recommended Tones (Recommended Tone) 96
Adjusting the Volume (Master Gain) 96
Formatting the User Memory (Initialize User Memory) 97
Remembering the Settings Even when the Power is Turned Off (Memory Backup) 97
Restoring the Original Default Settings (Factory Reset) 98
Using the V-LINK Function 98
Disabling the Buttons (Panel Lock) 98
Changing the Notation Screen Settings 99
Editing Songs (Song Edit) 100
Undoing Edits (Undo) 100
Copying Measures (Copy) 101
Correcting Timing Discrepancies (Quantize) 101
Deleting Measures (Delete) 102
Inserting Blank Measures (Insert) 102
Transposing Individual Parts (Transpose) 102
Making Measures Blank (Erase) 103
Exchanging Parts (Part Exchange) 103
Correcting Notes One by One (Note Edit) 103
Modifying the Tone Changes in a Song (PC Edit) 104
Saving the Notation Data in BMP Format 104
Connecting to Other Devices. 106
Connecting to Audio Equipment 106
Connecting Speakers to the HPi-7S and Outputting Sounds 106
Playing Sounds from Audio Equipment Through the HPi-7S 106
Connecting to MIDI Devices 107
Playing the HPi-7S with a MIDI Sequencer/Recording
the HPi-7S's Performance Data to a MIDI Sequencer 107
Producing Sounds from a MIDI Sound Module by Playing the HPi-7S 107
Making MIDI-Related Settings 108
Selecting the Transmit Channel (Transmit Channel) 108
Disconnecting the Internal Sound Generator and Keyboard (Local Control) 108
Sending Recorded Performance Data to a MIDI Device (Composer Out) 109
Sending Tone Change Messages
(Program Change/Bank Select MSB/Bank Select LSB) 109
Connecting a Computer 109
Making the Settings for the USB Driver 110
Connecting an External Display or Television 111
Connecting an External Display 111
Connecting a Television 111
Changing the Settings for Showing Images with the External Display and the Television
(External Display) 112
Changing the content shown in the external display (Display Content) 112
Display Method 112
Setting the Duration for Displaying Images (Slide Show Interval) 112
Appendices
Troubleshooting 113
Error Message 116
Tone List 117
Drum/SFX Set List 119
Internal Song List 123
Songs for Visual Lesson 124
Beginner's Course 124
Repertoire Course 124
Challenge Course 124
Music Files That the HPi-7S Can Use 125
The HPi-7S Allows You To Use the Following Music Files 125
About the HPi-7S Sound Generator 125
MIDI Implementation Chart 126
Main Specifications 127
Index 129
Setting Up for Performing
■ Attaching the Music Rest
The music rest of the HPi-7S contains a liquid crystal display screen.
Use the following procedure, and handle the music rest with care.
- Secure the music rest in place by turning the included screws (at two points).
When attaching the music rest, support it firmly with one hand to make sure that you don't drop it. Be careful, so you don't get your fingers pinched.
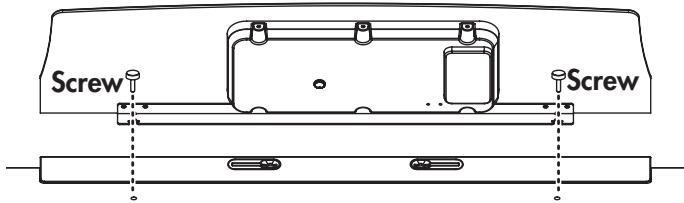
View from Rear
- Connect the LCD cord of the music rest to the LCD Out connector on the rear panel of the HPi-7S.
NOTE
The power must be off when connecting the cable of the music rest.
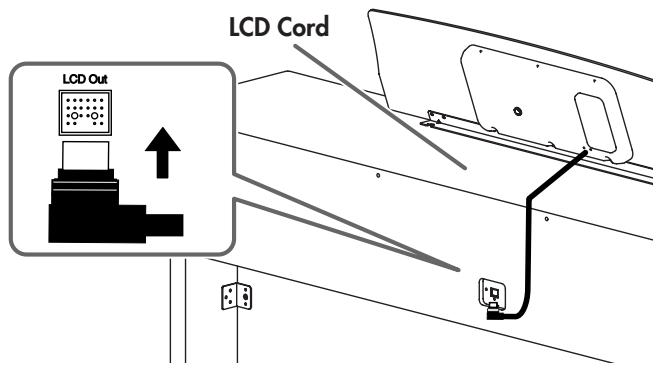
NOTE Do not apply excessive force to the installed music rest.
NOTE Be sure to use the supplied screws for attaching the music rest.
NOTE Before moving the piano, be sure to remove the music rest to prevent accidents.
NOTE Be careful not to lose the screws used to fasten the music rest, or allow small children to accidentally swallow them.
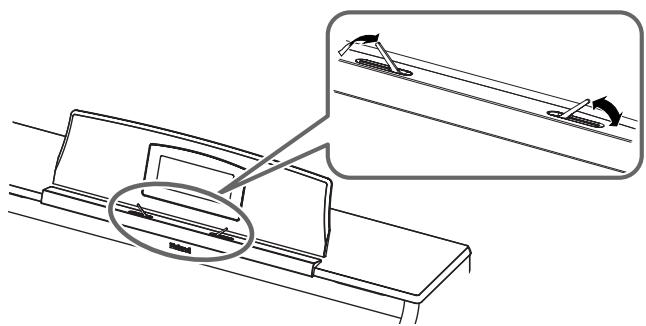
Using the Music Holders
You can use the holders to hold pages in place.
When not using the holders, leave them folded down.
Connecting the Pedal Cord
- Insert the end of the pedal cord extending from the piano stand to the Pedal connector located at the lower part of the HPi-7S's rear panel.

Connecting the Speaker Cable
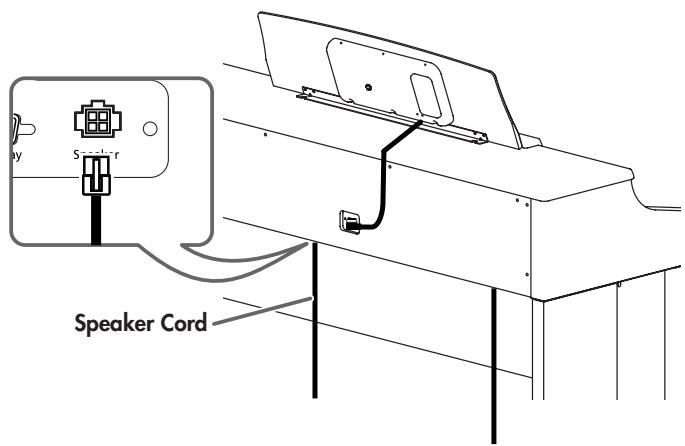
- Plug the speaker cable extending from the stand into the SPEAKER connector located at the rear of the HPi-7S's bottom panel.
- Pay attention to the shape of the speaker cable's connector, and insert it until you hear it click securely into place.
Connecting the Power Cord
- Make sure that the [Power] switch located at the left side of the front panel is off (in the upward position).
Power

Upward position

Lower position
- Turn the [Volume] knob all the way toward the left to minimize the volume.
- Connect the included power cord to the AC inlet located at the rear of the bottom panel.
- Plug the other end of the power cord into an AC outlet.
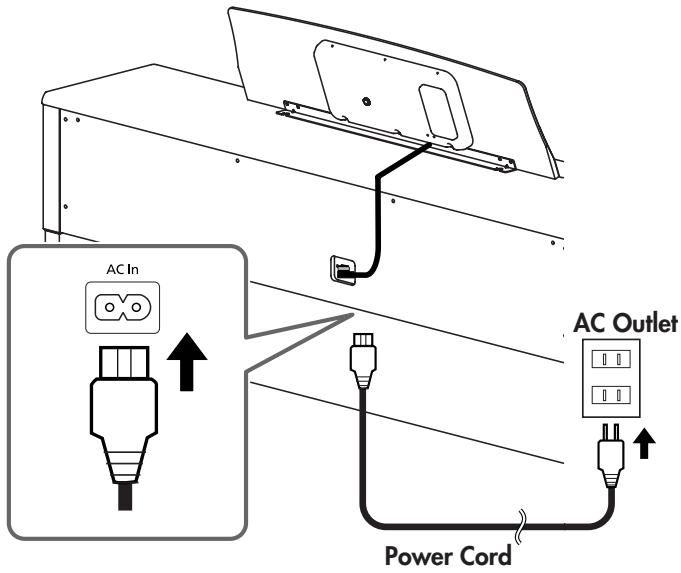
NOTE Use only the included power cord.
Opening and Closing the Lid
Opening the Lid
- Use both hands to lift the lid lightly, and slide it away from yourself.
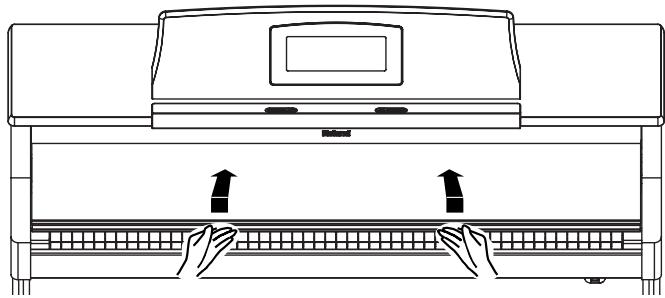
Closing the Lid
- Pull the lid gently toward yourself, and lower it softly after it has been fully extended.

Be careful not to get your fingers pinched when opening or closing the lid. If small children will be using the HPi-7S, adult supervision should be provided.

To prevent accidents, the lid must be closed when transporting the piano.
Turning the Power On/Off

Once the connections have been completed (p. 17), turn on power to your various devices in the order specified. By turning on devices in the wrong order, you risk causing malfunction and/or damage to speakers and other devices.
Turning On the Power
- Turn the [Volume] knob all the way toward the left to minimize the volume.
- Press the [Power] switch.
After the power comes on, the opening animation appears in the screen within the music rest, followed by the Notation screen.
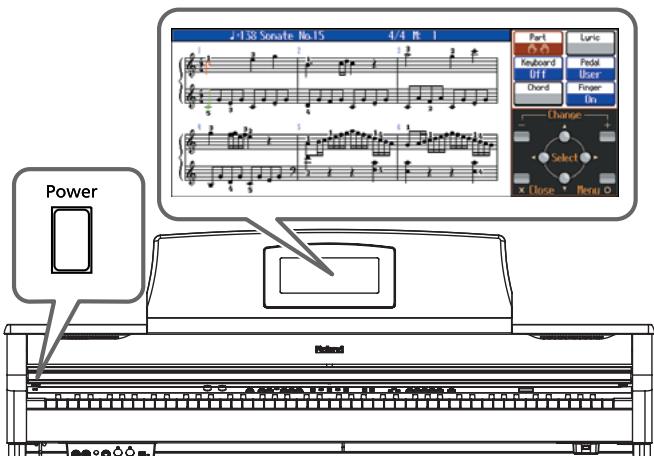
- Use the [Volume] knob to adjust the volume (refer to the next section).

This unit is equipped with a protection circuit. A brief interval (a few seconds) after power up is required before the unit will operate normally.
Turning Off the Power
- Turn the [Volume] knob all the way down.
- Press the [Power] switch.
The screen display goes blank, and the power is turned off.

If you need to turn off the power completely, first turn off the [Power] switch, then unplug the power cord from the power outlet. Refer to "Power Supply" (p. 9).
Adjusting the Volume of the Sound
- Turn the [Volume] knob to adjust the overall volume.
Adjust the volume level as you play the keyboard and listen to the sound.
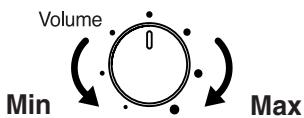

You can also adjust the headphone volume with the [Volume] knob.
Connecting Headphones
The HPi-7S has two jacks for plugging in headphones. This allows two people to listen through headphones simultaneously, making it very useful for lessons and when performing piano pieces for four hands. Additionally, this allows you to play without having to worry about bothering others around you, even at night.
If connecting only one pair of headphones, they can be connected to either one of the headphone jacks.
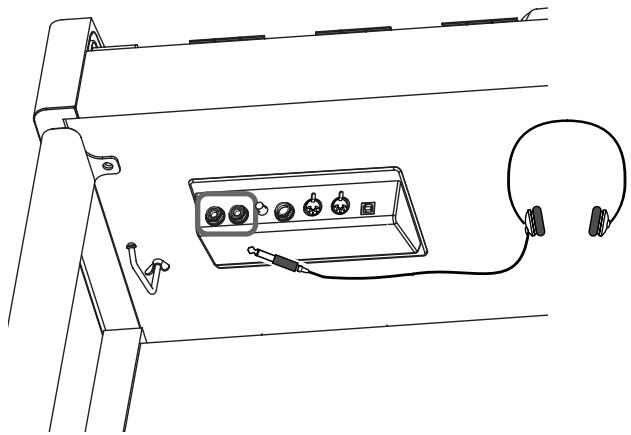
- Connect the headphones to the Phones (headphones) jack on the left underside of the HPi-7S.
When you connect headphones, no sound will be output from the speakers of the HPi-7S.
The headphone volume is adjusted by the [Volume] knob (p. 18) of the HPi-7S.
Some Notes on Using Headphones
- To avoid damaging or severing the headphone cord, be sure to handle the headphones by holding the phones themselves, and grasping the plug and not the cord when pulling the headphone plug.
- To prevent possible auditory damage, loss of hearing, or damage to the headphones, the headphones should not be used at an excessively high volume. Listen at appropriate levels.
- The headphones may be damaged if the volume is too high when they are plugged in. Connect the headphones only after turning the volume down completely.
- Please use stereo headphones.
Using the Headphone Hook
Whenever you are not using the headphones, you can hang them on the headphone hook at the lower left of the HPi-7S.
Attaching the Headphone Hook
- Press and twist the headphone hook included with the HPi-7S into the hole in the bottom left of the HPi-7S (refer to the figure below).
- Turn the headphone hook wing nut to secure the headphone hook.
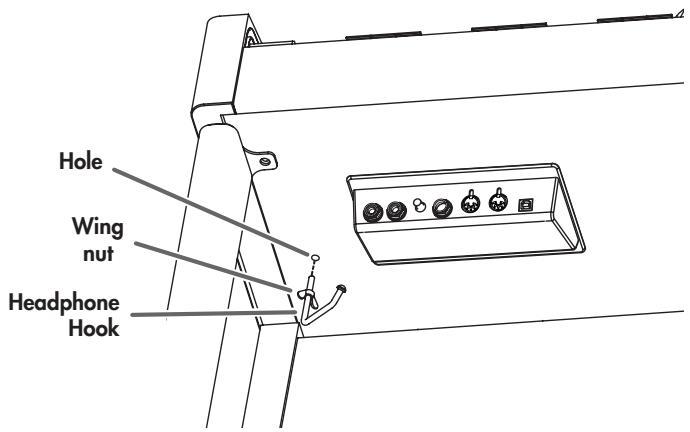
Some Notes on Using Headphone Hook
Do not hang anything other than headphones on the headphone hook. Doing so may damage the instrument or the hook.
Connecting a Microphone
You can connect a microphone into the Mic jack, and enjoy karaoke with the HPi-7S.
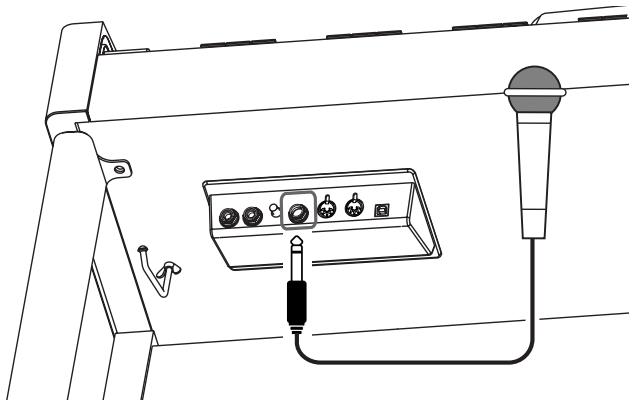
- Connect a microphone (sold separately) to the Mic jack located in the jack panel on the lower left of the HPi-7S.
- Rotate the Mic Volume knob on the left side of the Mic jack to adjust the volume level for the microphone.
- Adjust the mic echo (p. 90).
Some Notes on Using a Microphone
- Be careful of high volume levels when using mikes late at night or early in the morning.
- When connecting a microphone to the HPi-7S, be sure to lower the volume. If the volume control is too high when the microphone is plugged in, noise may be produced by the speakers.
-
Howling could be produced depending on the location of microphones relative to speakers. This can be remedied by:
-
Changing the orientation of the microphone.
- Relocating microphone at a greater distance from speakers.
- Lowering volume levels.
Adjusting the Contrast of the Screen
You can adjust the brightness of the HPi-7S's display.
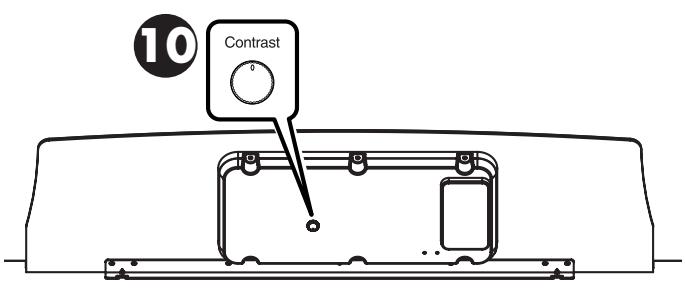
1. To adjust the contrast of the screen, turn the [Contrast] knob located at the back of the music rest.
![ROLAND HPI-7S - To adjust the contrast of the screen, turn the [Contrast] knob located at the back of the music rest. - 1](/content/2025/01/130843/images/d12d6dc08aa1228633bdcefc25ccbe0e69654422f0e0da186ab63e4cadfdf20b.jpg)
Some Notes on Using the LCD Screen
- Never remove the liquid crystal display cover at the back of the music rest. By removing it you risk electrical shock and/or malfunction.
- You may see vertical lines in the screen, but this is due to the structure of a liquid crystal display, and does not indicate a malfunction. By using the [Contrast] knob to adjust the contrast of the screen, you can minimize these lines.
- The contrast of the screen may be affected by the temperature.
Using USB Memory/Floppy Disk
A song you've recorded on the HPi-7S can be saved by copying it to separately sold USB memory (p. 84). You can also copy songs to a floppy disk using a separately sold floppy disk drive.
You can also play back SMF music files or audio files (p. 44) saved on USB memory or a floppy disk.
NOTE
Use USB memory and floppy disk drive available from Roland. Proper operation cannot be guaranteed if other USB device is used.
Connecting USB Memory
1. Connect the USB memory to the External Memory connector.
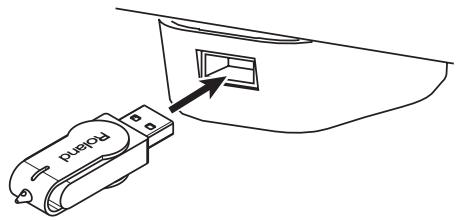
Carefully insert the USB memory all the way in—until it is firmly in place.
MEMO
If you're using new USB memory or floppy Disk, you'll need to initialize (format) it on the HPi-7S. For details, refer to " Formatting Media (Format)" (p. 79).
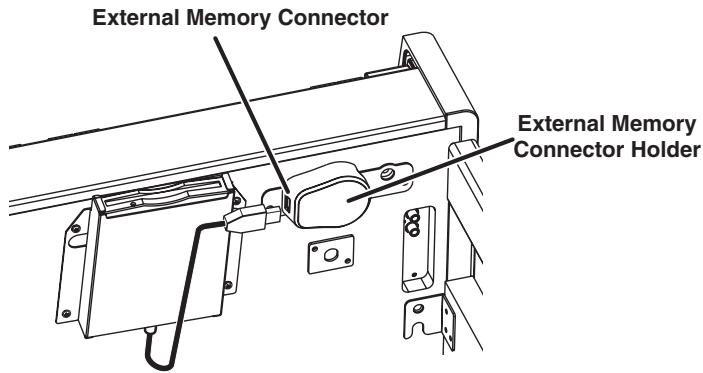
■ Installing the Floppy Disk Drive
Attach the floppy disk drive as shown the figure, using the mounting holes on the HPi-7S's bottom panel.
MEMO
For details of the attachment, refer to the owner's manual of the floppy disk drive.
Using CD
You can play back audio CDs and CD-ROMs containing saved SMF music files.

You can also play songs on VIMA CD-ROMs (VIMA TUNES) sold by Roland.
Precautions Concerning Use of the CD
- You cannot play back CD-R/RW discs to which audio tracks have been added or CDs containing both audio tracks and data (CD Extra).
- The HPi-7S is capable of playing back only commercial CDs that conform the official standards-those that carry the "COMPACT DISC DIGITAL AUDIO" logo.
- The usability and sound quality of audio discs that incorporate copyright protection technology and other non-standard CDs cannot be guaranteed.
- For more detailed information on audio discs featuring copyright protection technology and other non-standard CDs, please consult the disc vendor.
- You cannot save songs to CDs, and you cannot delete songs recorded to CDs. Furthermore, you cannot format CDs.
Connecting a CD Drive

CD drives that draw their power from the USB connector cannot be used.
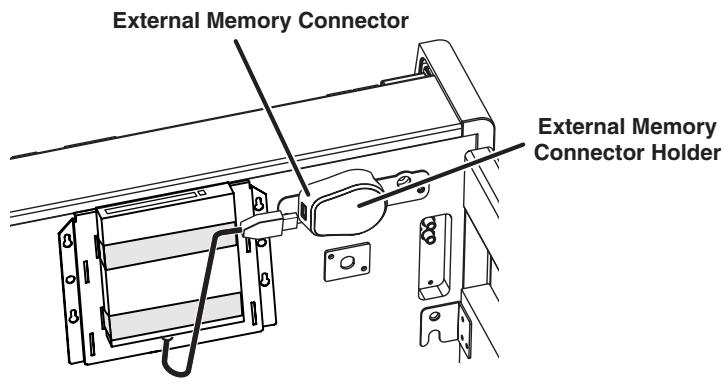
- Turn off the power to the HPi-7S and the CD drive to be connected.
- Connect the USB cable included with the CD drive to the External Memory connector on the HPi-7S.
- Turn on the power to the connected CD drive.
- Turn on the power to the HPi-7S.

For information on how to perform the following CD-drive operations, refer to the owner's manual for the drive.
- Switching the power on and off
- Inserting and ejecting a CD

A list of the CD drives that have been tested and found to be compatible is available on the Roland website.
http://www.roland.com/
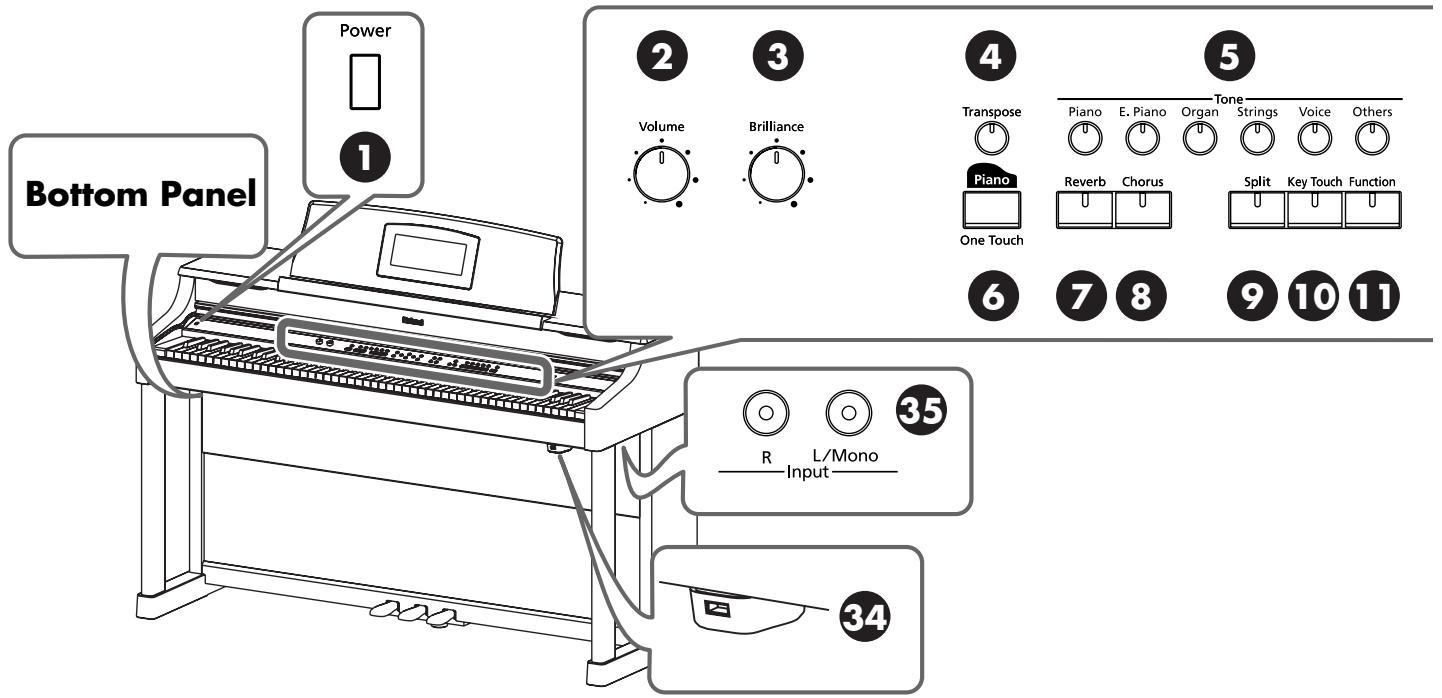
Front Panel
Front Panel
- [Power] switch
Pressed to switch the power on and off (p. 18).
- [Volume] knob
Adjusts the overall volume of the HPi-7S (p. 18).
If headphones are connected, this adjusts the headphone volume (p. 18).
- [Brilliance] knob
Adjusts the brightness of the sound (p. 55).
- [Transpose] button
Transposes the pitch of the keyboard or the song being played (p. 68).
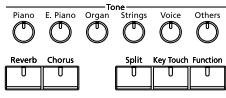
- Tone buttons (Piano, E. Piano, Organ, Strings, Voice, Others)
Select the type of sound (the tone group) that will be played from the keyboard (p. 51).
- One Touch [ Piano ] button
Makes the optimal settings for a piano performance (p. 50).
- [Reverb] button
Adds reverberation to the sound (p. 54).
- [Chorus] button
Adds spaciousness to the sound (p. 54).
- [Split] button
Lets you play different sounds in the left and right-hand areas of the keyboard (p. 57).
10.[Key Touch] button
Adjusts the touch of the keyboard (p. 53).
11.[Function] button
Selects various performance-related functions
(p. 86-p. 105, p. 108-p. 110).
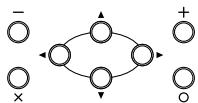
12.[-][+] buttons
Used to select the value that you want to set (p. 25).
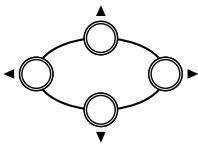
- Cursor buttons
Used to select the item that you want to set (p. 25).
Also used to select values in some screens.
14.[×][O]buttons
Press the [O] button to confirm the selections you've made using the cursor buttons (11) (p. 25).
The [X] cancels the operation, or displays the notation screen.
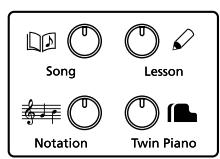
15.[ (Song)] button
Use this button to select internal songs or songs from USB memory (p. 41-p. 48, p. 59, p. 70-p. 77).
16.[ (Lesson)] button
You can enjoy practices using the "DoReMi Course," "Visual Lesson," and other lesson functions (p. 32–p. 40).
Selects various performance-related functions.
17.[ (Notation)] button
Displays the notation in the screen (p. 26, p. 26, p. 99).
18.[Twin Piano] button
Divides the keyboard into two separate sections, allowing two people to perform in the same registers (p. 34).
19.[A (Metronome)] button
Sounds the internal metronome (p. 63).
20.Tempo [Slow] [Fast] buttons
Adjust the tempo (p. 62).
Simultaneously pressing the [Slow] and [Fast] buttons will restore the basic tempo.










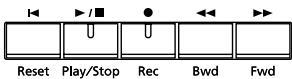



Bottom Panel (Front Side Left)



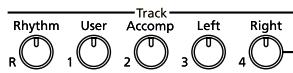
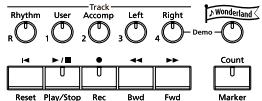
21 Track buttons
(R/Rhythm, 1/User, 2/Accomp, 3/Left, 4/Right)
Used to play back or record each track of a song
(p. 59, p. 73 - p. 77).
22.[Reset] button
Resets the song playback-start location to the beginning of the song.
23.[▶/■ (Play/Stop)] button
This starts and stops playback and recording of songs.
24.[ (Rec)] button
This lets you record your own performance into the HPi-7S (p. 69-p. 77).
25.[Bwd] button
Rewinds the song.
26.[▶▶ (Fwd)] button
Fast-forwards the song.
27.[Wonderland] button
Here you can enjoy the "Drums," "SFX," and "Game," and learn about instruments while having fun (p. 30).
28.[Count/Marker] button
This is used for setting the count (p. 64).
This allow you to add and move markers in the notation as well as repeat playback of song segments simply and easily (p. 66).
HPi-7S's Bottom Panel (Front Side Left)
29.Phones jacks
A set of headphones can be connected here (p. 18).
30.Mic Volume knob
Adjusts the volume level for the microphone (p. 19).
31.Mic jack
Used for connecting a microphone (p. 19).
32.MIDI Out/In connector
An external MIDI device can be connected here to receive performance data (p. 107).
33.USB connector
Used for connecting a computer to the HPi-7S using a USB cable (p. 109).
HPi-7S's Bottom Panel (Front Side Right)
34.External memory connector
Here you can connect USB memory, a floppy disk drive, or a CD drive, and play back stored songs (p. 44).
You can also use USB memory to save a song you've recorded on the HPi-7S (p. 80).
By rotating the base you can neatly store the USB memory or USB cable.
- Use USB memory available from Roland. Proper operation cannot be guaranteed if other USB Memory products are used.
- CD drives that draw their power from the USB connector cannot be used.
35.Input jacks
Here you can connect a portable audio player or another electronic musical instrument, and listen to the connected device through the HPi-7S's speakers (p. 106).
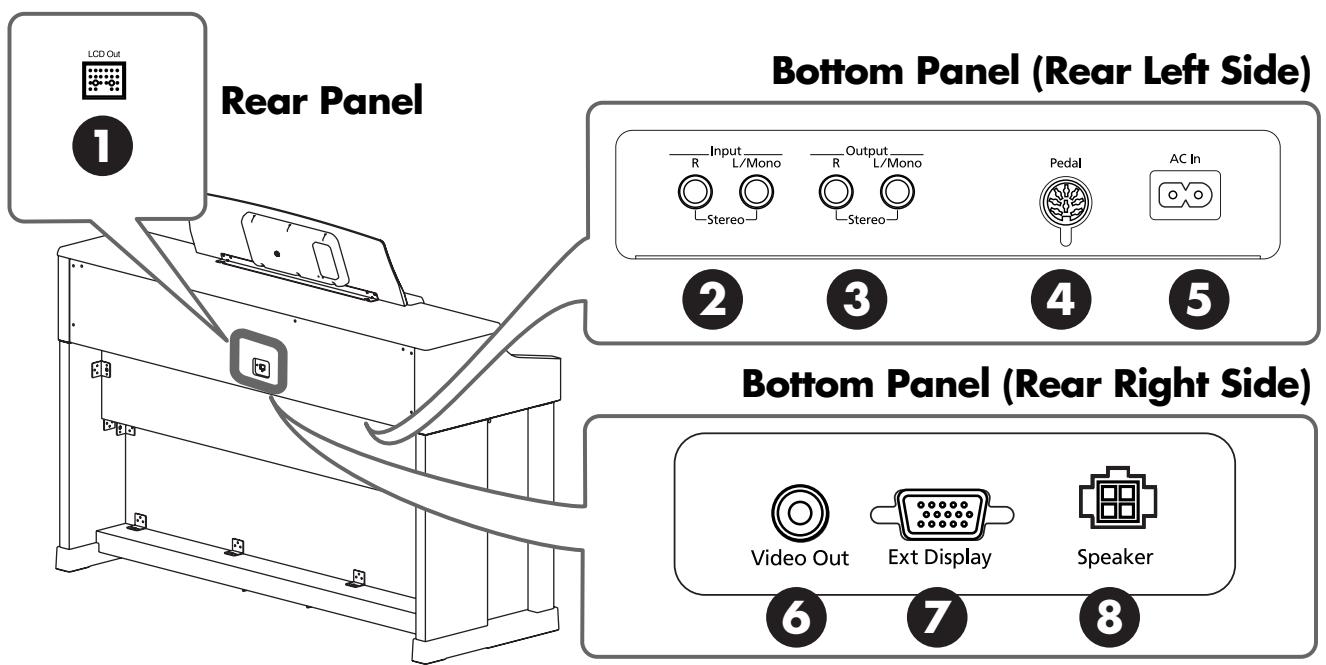
Rear Panel
1. LCD Out connector
Connect the LCD cord of the music rest to this connector (p. 16).
HPi-7S's Bottom Panel (Rear Left Side)
2. Input jacks
These jacks can be connected to another sound generating device or an audio device, so that the sound of that device will be output from the HPi-7S's speakers (p. 106).
3. Output jacks
These jacks can be connected to your audio system to enjoy more powerful sound. They can also be connected to a tape recorder or similar device in order to record your performance on a cassette tape (p. 106).
4. Pedal jack
Connect the pedal cord of the stand to this jack (p. 16).
5. AC Inlet
Connect the included power cord to this inlet (p. 17).
HPi-7S's Bottom Panel (Rear Right Side)
6. Video Out jack
Connect a television here (p. 111). This allows you to display the lyrics, notations and slide show on the connected television set.
7. Ext Display connector
Connect a external display here (p. 111). You can display the lyrics, notations and slide show on the external display.
8. Speaker connector
Here is where you connect the speaker cable from the dedicated stand(p. 16).
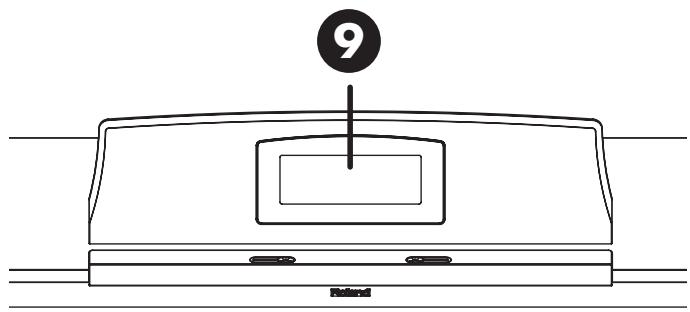
Music Rest
9. Display
This displays notations for the internal songs and performances recorded to the HPi-7S, in addition to a variety of settings.
- The explanations in this manual include illustrations that depict what should typically be shown by the display. Note, however, that your unit may incorporate a newer, enhanced version of the system (e.g., includes newer sounds), so what you actually see in the display may not always match what appears in the manual.
10.[Contrast] knob
This knob adjusts the contrast of the screen (p. 20).
Basic Operation
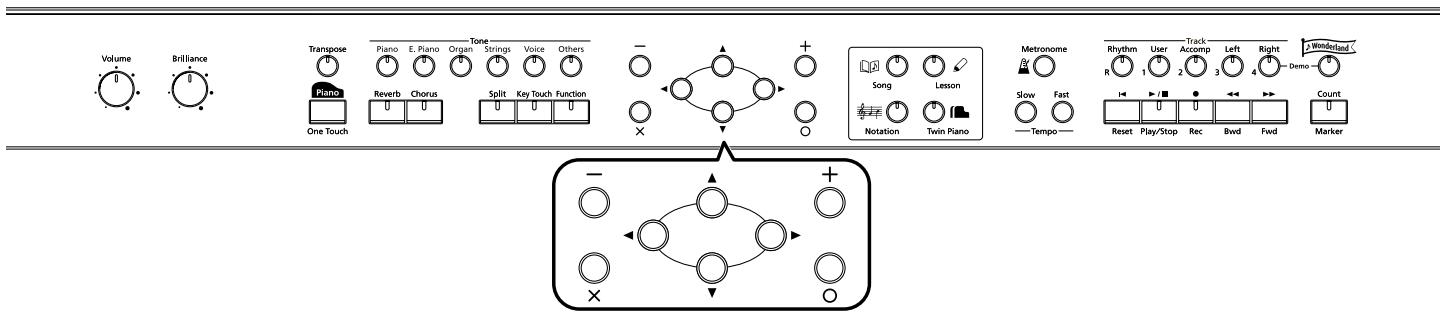
The HPi-7S is operated mainly by pressing the button for the function you want to use, then using the cursor buttons and [O][X][-][+] buttons in the center of the front panel while viewing the screen.
| Button | How It Is Used |
| cursor buttons | Use the up, down, left, and right cursor buttons to select parameters. In screens consisting of two or more pages, pressing the cursor left and right button switches the screen displayed. |
| In the Settings screen, pressing the cursor up and down button changes the settings. | |
| [○] button | Finalizes the selected parameter. |
| The assigned function in that screen is used. Examples: <Audition>, <Enter>, etc. | |
| Opens the advanced settings screen. Examples: <Notation Menu>, <Maker>, etc. | |
| [X] button | Closes the screen that is currently open. |
| Displays the Notation screen. | |
| [-] [+] button | Change the selected value. |
Correspondence Between Screens and Buttons
The functions of the cursor buttons, the [O] button, and the [X] button may be indicated in the screen.
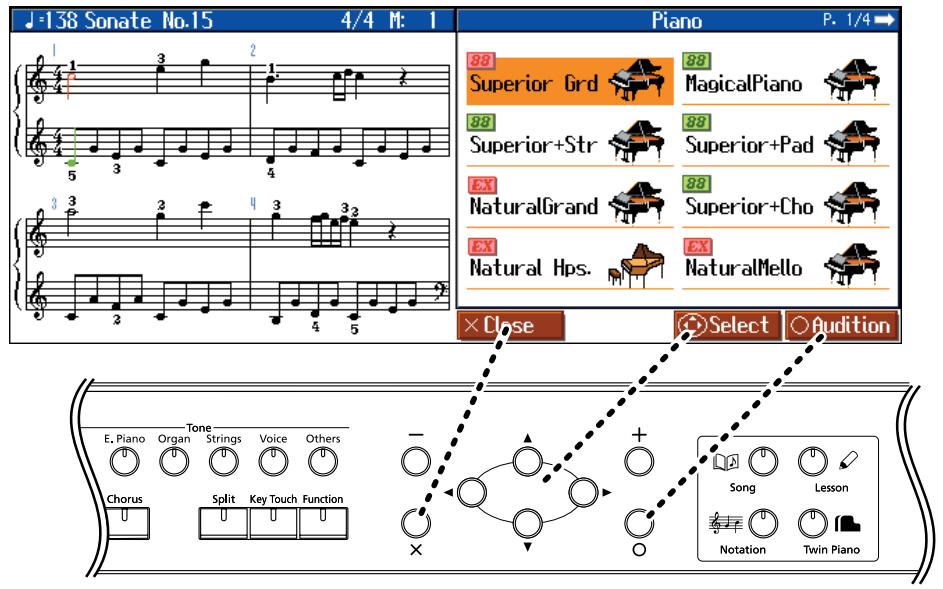
Basic Screen
■ Notation Screen
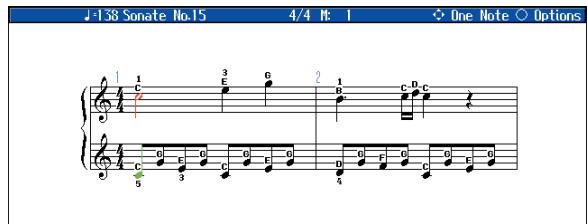
The Notation screen, like the one shown to the right, is displayed when you turn on the power to the HPi-7S.
You can display notations not only for the internal songs, but also for SMF music files and performances recorded with the HPi-7S as well. The Notation screen has five pages. The screens are switched in the following manner each time the [ (Notation)] button is pressed.
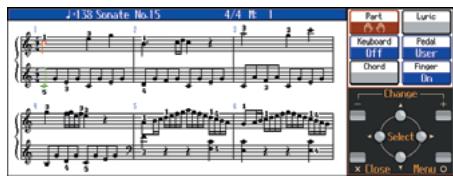

If you press the [O] button while the Notation screen is displayed, the display switches to the
"Notation+Settings" screen. Pressing the [O] button once more while the "Notation+Settings" screen is displayed opens the "Notation Menu" screen.
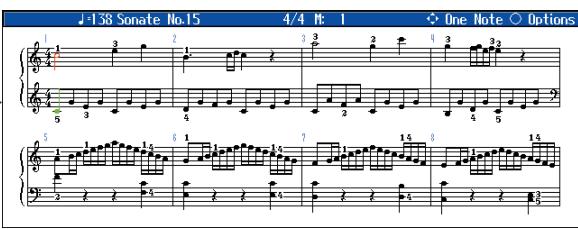
Notation

Notation Press
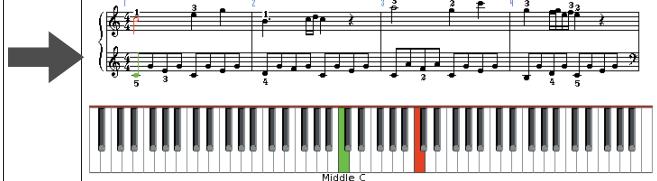

Notation
Press
Notation (Enlarged)
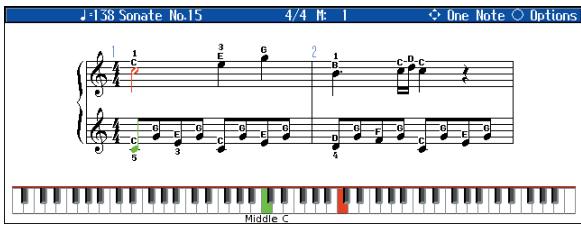
Notation (Enlarged) + Keyboard
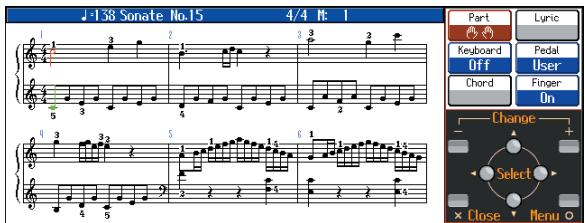
Notation + Settings
You can change the following settings in the "Notation+Settings" screen.
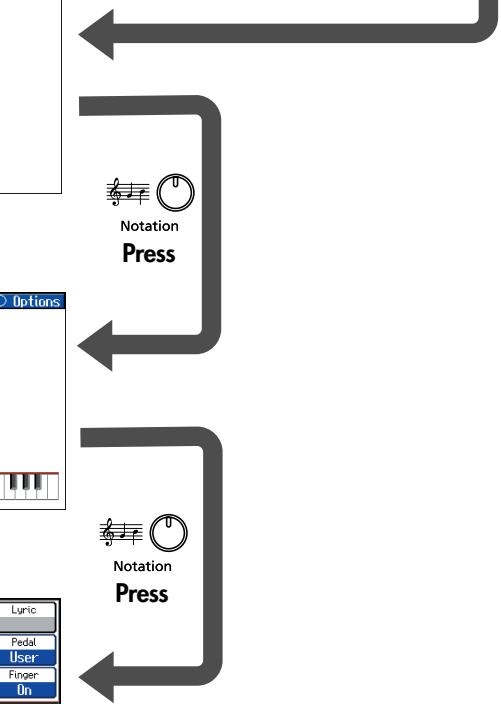

- If you have selected a part that contains no performance data, the notation will not show any notes. To change the part that is displayed, refer to "Changing the Notation Screen Settings" (p. 99).
- The fingering numbers shown in the screen indicate one possible fingering.
Some Notes on the Notation Screen
- When you begin song playback, the notation screen will show . While this symbol is displayed, performance data is being loaded from USB memory or internal memory. Thirty seconds or longer may be required to load the data. Please wait.
- The displayed notation is generated from the music files, and priority is given to making the display easy to read rather than reproducing a complicated or difficult performance accurately. For this reason, you may notice differences when compared with commercially available sheet music. In particular, this is not suitable for display of sophisticated or complex songs that require detailed notations.
- In the notation screen, lyrics or notes may fall outside the display range of the screen, and fail to be shown.
- A notation cannot be displayed for a song from a music CD or audio file.
- If you display the notation or change the displayed part during song playback, the song may sometimes play back from the beginning.
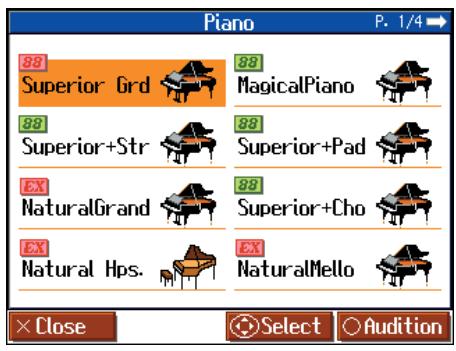
■ List Screen
This type of list screen will appear when you select songs, or tones. In this screen, use the cursor buttons to select the desired item.
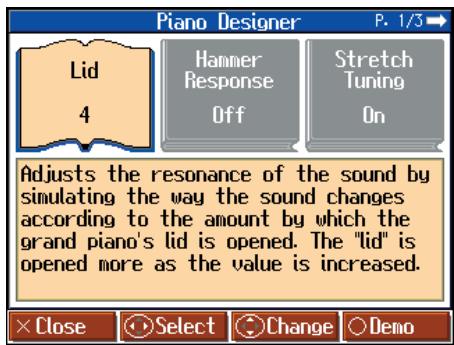
Detailed Settings Screen
Detailed settings for functions are made in a screen similar to this. In this screen, you can then change the value with the cursor buttons. An explanation of the selected item is shown below the item. For some items, an explanation of the values will also be displayed.
When you press the [X] button, and you'll then be returned to the screen that was displayed prior to the current screen.
When P. * / * appears at the upper right of the screen, it indicates that there are other items on the previous or next page.
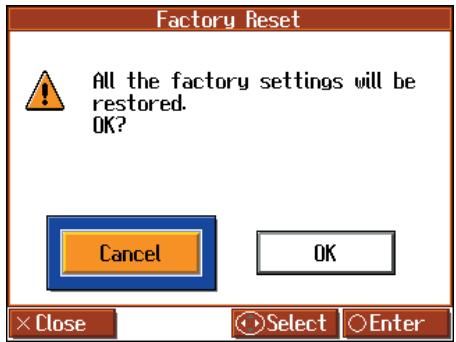
■ Messages
Various messages will sometimes be displayed during operation. These messages ask you to confirm an operation, inform you of the results of an operation, or indicate an error when an operation could not be performed.
For details on error messages that begin with "Error," refer to p. 116.
When a message like that to the right appears, select an answer with the cursor buttons, then press the [O] button to enter your selection. Pressing the [X] button closes the screen that is currently open.
About the Pedals
The pedals have the following functions, and are used mainly for piano performance.
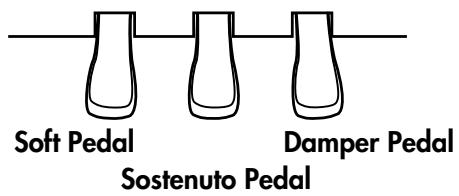
Damper Pedal (right pedal)
Use this pedal to sustain the sound.
While this pedal is pressed, notes will be sustained even after you take your fingers off the keys.
The length of sustain will change subtly depending on how deeply you press the pedal.
On an acoustic piano, holding down the damper pedal will allow the remaining strings to resonate in sympathy with the sounds that you played from the keyboard, adding a rich resonance.
The HPi-7S simulates this damper resonance.

You can adjust the amount of damper resonance that occurs when you press the damper pedal. Refer to "Adjusting Resonance when the Damper Pedal is Depressed (Damper Resonance)" (p. 87).
Sostenuto Pedal (center pedal)
This pedal sustains only the sounds of the keys that were already played when you pressed the pedal.
Soft Pedal (left pedal)
This pedal is used to make the sound softer.
When you hold down this pedal and play the keyboard, the sound will have a softer tone. This is the same function as the left pedal of an acoustic piano.
The softness of the tone can be varied subtly by the depth to which you press the pedal.

The Sostenuto pedal and Soft pedal can be given functions other than these. Refer to "Notation Screen" (p. 26) and "Changing the Pedal Functions (Pedal)" (p. 91).
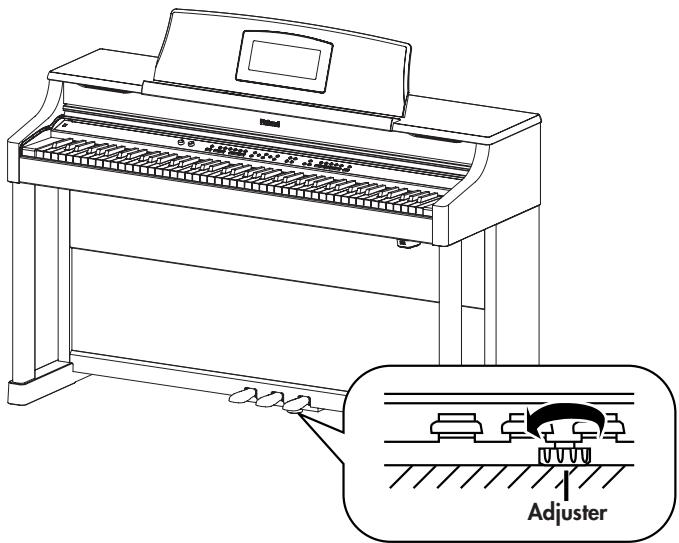
About the Adjuster
If you feel that the pedal is unstable (for example if you've moved the HPi-7S to a different location), you can adjust the adjuster located on the bottom of the pedals as follows.
- Rotate the adjustor to lower it so that it is in firm contact with the floor. If there is a gap between the pedals and the floor, the pedals may be damaged. In particular when placing the instrument on carpet, adjust this so that the pedals firmly contact the floor.
Playing in a Wonderland of Sound
"Wonderland" allows children to experience a variety of sounds and internal songs with easy operation and enjoyable animation.
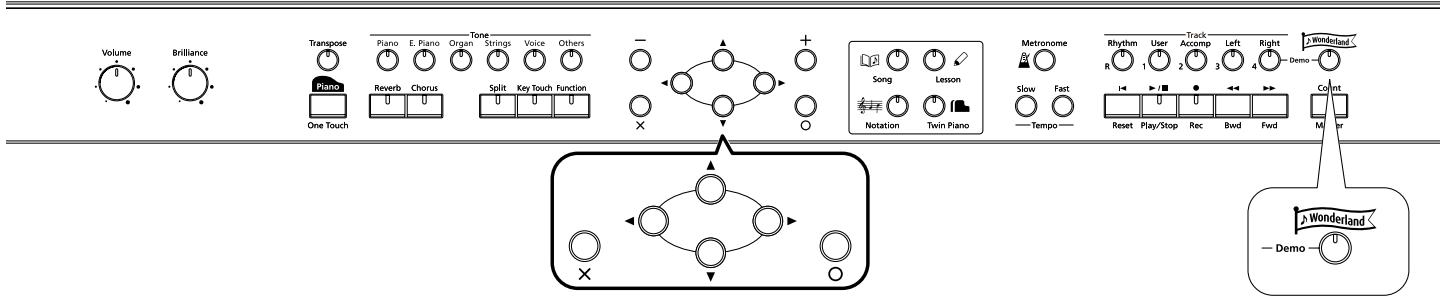
1. Press the [Wonderland] button.
After the opening screen is displayed, the "Wonderland" screen, like the one below, appears in the display.
![ROLAND HPI-7S - Press the [Wonderland] button. - 1](/content/2025/01/130843/images/ceee7c8fd5741c1c09f8f9f97f91bf0abd76bcbf300a9dc56083f5069cae9b90.jpg)
2. Press the cursor buttons to select the item you want to play, then press the [O] button.
You can do the following in Wonderland.
| Item | How It Is Used |
| Drums | Select a picture of a percussion instrument to hear the sound of that instrument. Play the keyboard to play the selected percussion instrument. |
| Piano | Learn how the piano is constructed. |
| Alphabet | Use the keyboard to become familiar with the alphabet. |
| SFX | Listen to a wide variety of sound effects. |
| Songs | Listen to the internal songs. |
| Tones | Select a picture of an instrument to hear the sound of that instrument. Play the keyboard to play the selected instrument. |
| Flash Card | In this game, you play the notes shown on the cards. |
| Game | In this game, you try to the tone name, chords, and rhythms that you hear. |
- Try playing as you view the screen.
- When you have finished with Wonderland, press the [Wonderland] button.
Learning the Basics of Reading Music (DoReMi Course)
In the "DoReMi Course," even those unable to read music can study the basics of reading music and the keyboard through games and music.


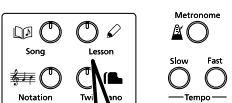
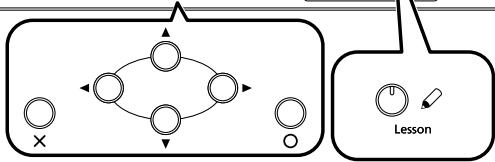
- Press the [ Lesson] button.
The Menu screen appears.
- Press the cursor buttons to select
, then press the [O] button.
The "DoReMi Course" screen appears.
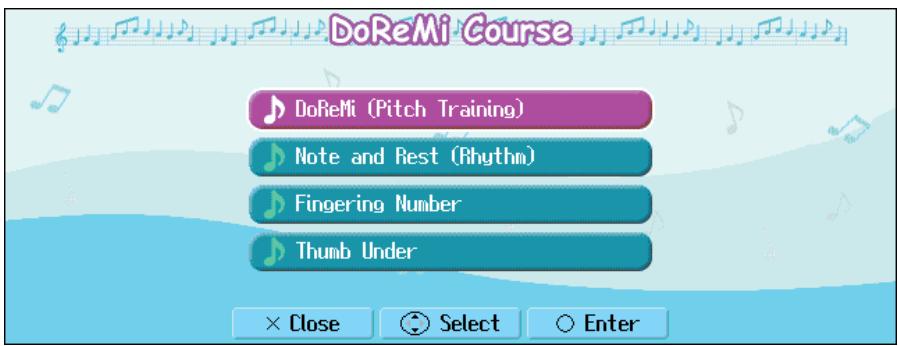
- Press the cursor up and down button to select the item you want to practice, then press the [O] button.
You can do the following in DoReMi Course.
| Item | Contents |
| DoReMi(Pitch Training) | Learn the key and note positions and the note names. |
| Note and Rest (Rhythm) | Learn the note and rest lengths. |
| Fingering Number | While playing, learn the fingering numbers. |
| Thumb Under | Familiarize yourself with the thumb-under technique for smooth fingering in performances. |
- Now try learning how to read the notation, using the buttons as you view the screen.
- When you have finished with DoReMi Course, press the [ × ] button in the "DoReMi Course" screen.
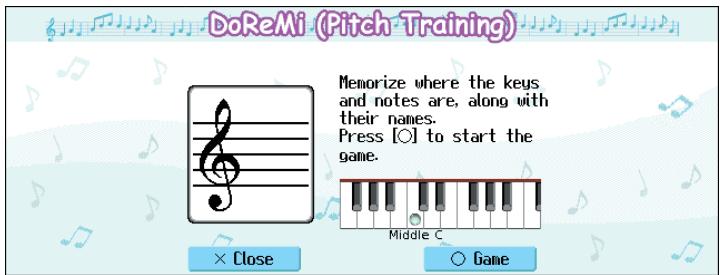
DoReMi (Pitch Training)
Remember the key and note positions and the note names.
Press the [O] button to start the game.
In this game, questions will appear in the left side of the screen. Answer the questions by playing the keys.
Pressing the [O] button in the game screen prompts a description of the key and note positions and the note names.
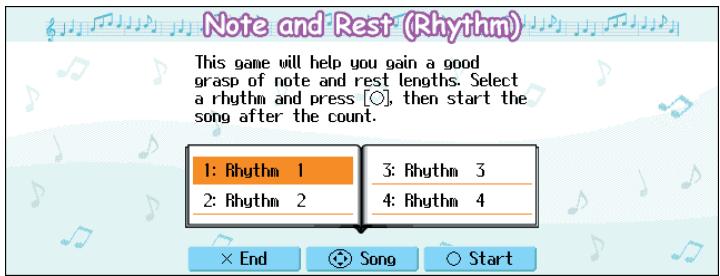
Note and Rest (Rhythm)
Remember the note and rest lengths.
Press the [ ] button to start the practice.
Play the song while paying attention to the note and rest lengths.
Selecting
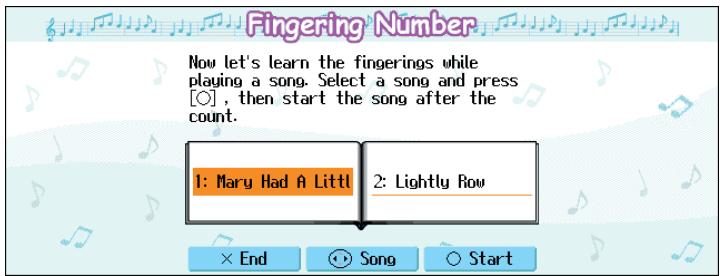
Fingering Number
Memorize the fingerings as you play the song.
Press the [ ] button to start the practice.
Play the song according to the fingering given.
After finishing the practice, you can press the cursor buttons to check the notes and fingerings in the notation, one note at a time.
Selecting
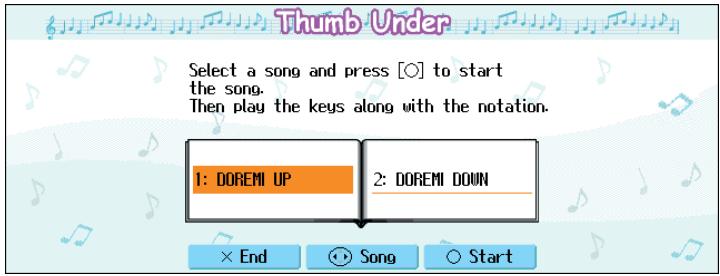
Thumb Under
To perform with smooth finger movements,
familiarize yourself with the thumb-under technique.
Press the [0] button to start the practice.
Play the song while paying attention to the fingering and how you are crossing over your hands.
After finishing the practice, you can press the cursor buttons to check the finger movements slowly, one note at a time.
Selecting
Splitting the Keyboard Into Two Sections for Four-Hand Performances (Twin Piano)
You can divide the keyboard into two separate sections, allowing two people to perform in the same registers.
By dividing the keyboard into two sections, you can use the instrument as though it were two pianos.
Even when playing in tandem, its easy to see whether or not the two players' performances are matching.
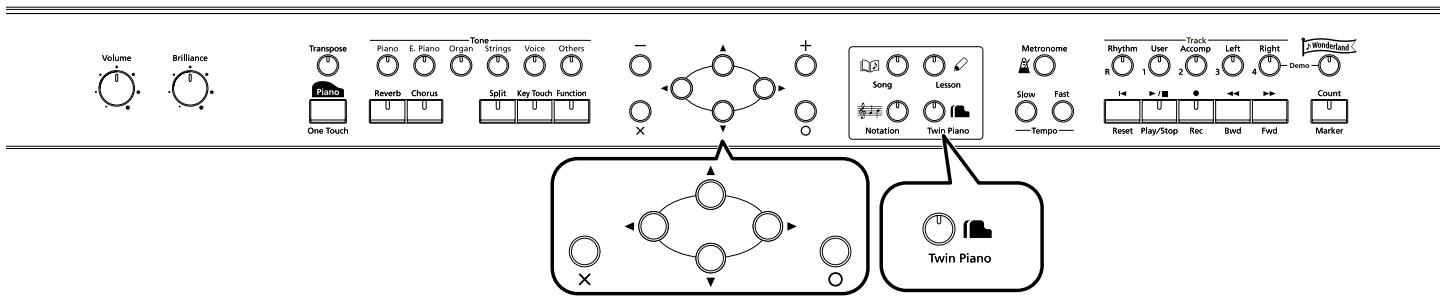
Press the [ (Twin Piano)] button.
The Twin Piano function switches on.
![ROLAND HPI-7S - Press the [ (Twin Piano)] button. - 1](/content/2025/01/130843/images/05f7f3cb7a135d32f2b2bae47dbc8aad70319200b0f65e70d470f69c11e7d70e.jpg)
The following occurs with Twin Piano set to ON.
- The keyboard is divided into two sections which can be played with "Middle C" placed at the center of each section.
- The right pedal now functions as the damper pedal for the right keyboard section, and the left pedal functions as the damper pedal for the left keyboard section.
- The same tone (Superior Grd) is sounded by both sections.
- If the Split function or the Dual function was on when you turned Twin Piano on, the Split function and the Dual function will be turned off.
- 3D Sound Control, Damper Resonance and Chorus will be off.
2. Try performing with two people, one person playing on the left side of the keyboard and one on the right.

After you've turned on the Twin Piano function, you can press the tone buttons to switch sounds.

You can record performances played using the Twin Piano function.
"Recording a New Song" (p. 70)
Cancelling Twin Piano Function
Use the following procedures to cancel Twin Piano function.
Method 1: Press the [ (Twin Piano)] button.
Method 2: Press the One Touch [ Piano ] button. p. 50
Method 3: Cancel the "Split" function. p. 58
Method 4: Change the "Pedal" function. p. 26
Taking a Lesson While Playing a Two-Person Game (Twin Piano Game)
The HPi-7S features an ear training game that makes use of the Twin Piano function. You can enjoy games such as listening to notes played in the left part of the keyboard and playing the same notes in the right side, or displaying notes played in the left part of the keyboard on the screen and playing the same note in the right side, all while getting real ear training practice.
Press the [O] button in the "Twin Piano" screen.
The "Twin Piano Game" screen appears.
![ROLAND HPI-7S - Press the [O] button in the "Twin Piano" screen. - 1](/content/2025/01/130843/images/934e37aa093a51a1715665491212421a9964981873e611c5ae9a844966c641fc.jpg)
2. Press the cursor left or right button to select or , then press the [O] button.
| Game | Lesson Format |
| Listen to Sounds | After listening to the note for a key played by the player using the left section of the keyboard, the player on the right plays the note he or she thinks is the same. * Several seconds after the player on the left poses the question, the note played appears in the notation to provide a hint. |
| Read Notations | The player using the left section of the keyboard plays a note to pose a question. That note is indicated in the notation. The player on the right looks at the screen and then plays the note he or she thinks is the same. * The player on the left should continue holding down the key for several seconds after presenting the question. |
3. One person presses a key in the left part of the keyboard to present a question.
4. The other person responds by pressing a key in the right part of the keyboard.

When
Changing the Way in Which the Sound is Heard (Twin Piano Mode)
You can choose one of two ways in which the sound will be produced.
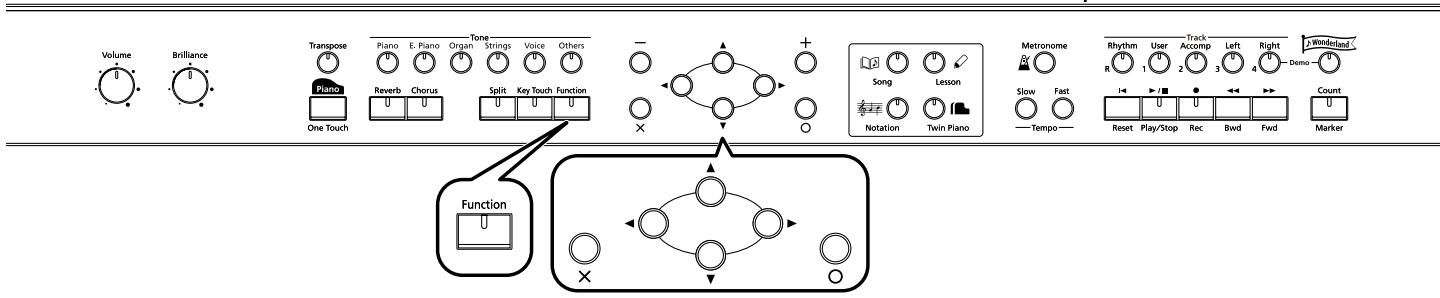
- Press the [Function] button.
- Press the cursor buttons to select
, then press the [O] button. - Press the cursor up or down button to change the Twin Piano Mode setting.
| Setting | Explanation |
| 1 | Notes played in the keyboard's right zone will be heard more loudly from the right speaker than from the left speaker. Conversely, notes played in the keyboard's left zone will be heard more loudly from the left speaker than from the right speaker. |
| 2 | Notes played in the keyboard's right zone will be heard only from the right speaker. Notes played in the keyboard's left zone will be heard only from the left speaker. |
NOTE
If you set Twin Piano mode to "2," reverb will no longer be applied when you turn on Twin Piano mode.
NOTE
For some sounds, the sound may not be split even if you set Twin Piano mode to "2."
MEMO
You can use the Memory Backup function to store this setting in internal memory (p. 97).
Playing Songs Using the Lesson Functions (Visual Lesson)
You can enjoy your practices with the HPi-7S's Lesson function (Visual Lesson).
Play along with the accompaniment, and your score appears in the display showing how well you played. In addition, in the Check screen you can see the results shown as notation, allowing you to confirm just what you played.
You can select the course and practice songs to match your current abilities. You can also supplement your stock of practice songs with additional music files.




At this point, pressing [O] advances you to the next screen, and pressing [X] returns the previous screen to the display.
Starting the Visual Lesson Function
When you want to perform with the tone changed, select the tone before starting Visual Lesson.
1. Press the [Lesson] button.
The Menu screen appears.
2. Press the cursor buttons to select <Visual Lesson> , then press the [0] button.
The "Visual Lesson" screen appears.
![ROLAND HPI-7S - Press the cursor buttons to select <Visual Lesson> , then press the [0] button. - 1](/content/2025/01/130843/images/5c2ba7033567218a50d297e3e4c87ef31a602dc978aceda3008ec2c40fa0c6c1.jpg)
Selecting the Course
3. Press the cursor left or right button to select the course you want to practice, then press the [O] button.
![ROLAND HPI-7S - Press the cursor left or right button to select the course you want to practice, then press the [O] button. - 1](/content/2025/01/130843/images/7bc419786c78862f05ffffc46d79afdb12ebaec6f9f9e660bda5544b0feea588.jpg)
When changing tones, refer to "Performing with a Variety of Tones" (p. 51).
Selecting the Song
4. Press the cursor buttons to select the song you want to practice.
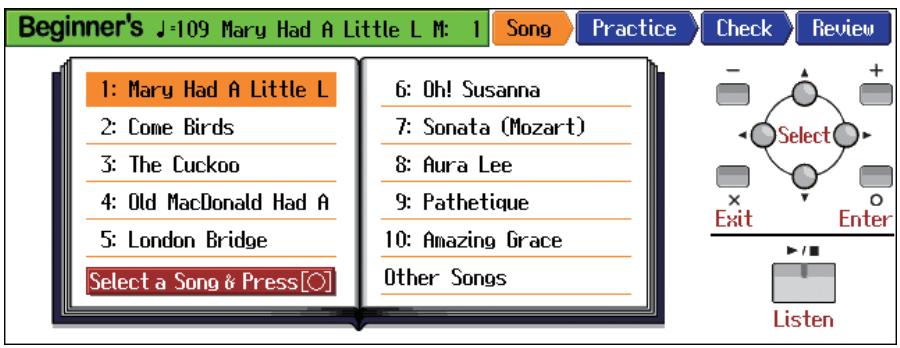
You can audition the sound by pressing the [▶/■ (Play/Stop)] button.
You can adjust the tempo by pressing the Tempo [Slow] [Fast] buttons.
You can also play the metronome sound by pressing the [A (Metronome)] button.
5. Press the [O] button.
A screen like the one below appears when you select the
![ROLAND HPI-7S - Press the [O] button. - 1](/content/2025/01/130843/images/3b1de2449ee2ae366f0407d52d11eaa12be04869d390922b4b650cf7d1224fbc.jpg)
Set the tempo and the part you want to practice, then press the [O] button.
Playing along with the Song
6. After reading the message in the screen, press the [0] button once more.
The song accompaniment begins.
7. Play along with the accompaniment.
When you have finished playing, your score appears in the display.
MEMO
If you stop playing before the end of the song, the song playback stops, and the screen showing the graded result appears.
Checking the Performance
8. Press the [O] button.
The results of your performance is shown in the musical notation in the Check screen, like that below.
![ROLAND HPI-7S - Press the [O] button. - 1](/content/2025/01/130843/images/060d2726f521ae7c3d8cf27a7166f92723df50ec56b43f03ed1e0f51448f7933.jpg)
| Button | How it is Used |
| cursor buttons | You can switch the performance to be checked by pressing the cursor up or down button. Pressing the cursor down button when “Ref.” (reference) is selected switches the performance to “You” (the results of your performance). Pressing the cursor up button when “You” (the results of your performance) is selected switches the performance to “Ref.” (reference). |
| You can check each note in the performance, one note at a time, by pressing the cursor left or right button. | |
| [←] (Bwd)] button | The notation is switched, going back one measure in the notation each time the button is pressed. |
| [▶] (Fwd)] button | The notation is switched, advancing one measure in the notation each time the button is pressed. |
| [▶/■ (Play/Stop)] button | You can use this to play back the performance selected with the cursor buttons (“Ref.” [reference] or “You” [the results of your performance]). |
Displaying the Menus
9. Press the [O] button.
The following screen appears.
![ROLAND HPI-7S - Press the [O] button. - 1](/content/2025/01/130843/images/47906151289376c7df9654242b0368e9bbad450ffa79fcccd5685cf6931f9e89.jpg)
10. Press the cursor buttons to select the menu, then press the [O] button.
If you want to practice the same song again, select "Try Again."
If you want to practice another song, select "Select Song."
If you want to practice with another course, select "Select Course."
If you are finished with Visual Lesson, select "Exit."
■ Practicing with Internal Songs and Songs on USB Memory
Not only can you practice the songs prepared for use in Visual Lesson, you can also practice other HPi-7S internal songs and songs saved on USB memory.
When practicing songs saved on USB memory, be sure to have the USB memory connected to the HPi-7S's External Memory connector first.
1. Select "Other Songs" in the "practice song selection" screen, then press the [O] button.
![ROLAND HPI-7S - Select "Other Songs" in the "practice song selection" screen, then press the [O] button. - 1](/content/2025/01/130843/images/d9954294ed1ec861e7cc10b9f985a8990af2f7d06da565108ee2819f78708346.jpg)
The "song selection" screen appears.
2. Press the cursor buttons to select the song, then press the [O] button.
3. If you have selected the course, set the tempo and the part you want to practice, then press the [O] button.
4. Play along with the accompaniment.
When you have finished playing, your score appears in the display.
Press the [O] button to display the results of your performance in the notation.
MEMO
When the "Repertoire course" is selected,
NOTE
You can't use Visual Lesson with a music CD or audio file.
NOTE
Depending on the data size of the song, it may not play all the way to the end when using Visual Lesson. In such cases, you'll need to reduce the data size of the song by using the functions described in "Editing Songs" (p. 100). One solution would be to extract the portion that you want to practice.
NOTE
If you want to use a song on USB memory with Visual Lesson, use parts 3 and 4 to record the parts you'll be practicing, and use part 2 and parts 5-16 to record the accompaniment.
You can listen to the internal songs, commercially available music files, songs you have recorded yourself, and songs saved on USB memory (optional; sold separately).
Listening to the Internal Songs
The HPi-7S features a variety of internal songs. The internal songs are categorized into "Practice," "Masterpieces," "Popular," and "Kids" genres.
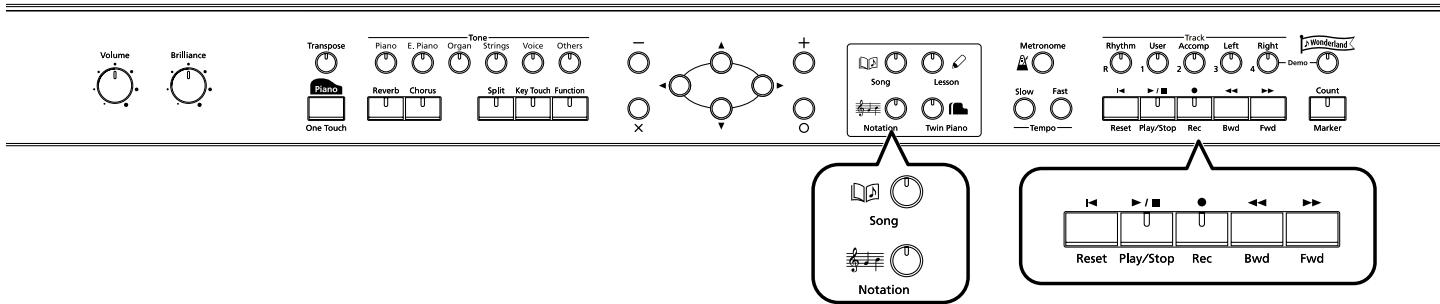
You can listen to songs from floppy disk by using a separately sold floppy disk drive. By using a commercially-available CD drive, you can listen to SMF data or VIMA CD-ROMs (VIMA TUNES) on a CD-ROM, or listen to music CDs.
Selecting the Song
1. Press the [ (Song)] button.
The "song selection" screen appears.
![ROLAND HPI-7S - Press the [ (Song)] button. - 1](/content/2025/01/130843/images/4123f49fff8dda4fb473eeedc0c9194552345934c3f09379bfa97bc4f170dc4f.jpg)
2. Press the cursor left or right button to select the song genre.
3. Press the cursor up or down button to select the song you want to listen to from the song list.
Playing Back
4. Press the [▶/■ (Play/Stop)] button.
The [ / (Play/Stop)] button's indicator will light.
The song will begin playing.
NOTE
The "External Memory", "Disk", "CD" or "Music CD" genres can be selected only when USB memory, a floppy disk drive or CD drive is connected to the External Memory connector. In this case, "Disk" is indicated when a floppy disk drive is connected; "External Memory" is indicated when USB memory is connected; "Music CD" or "CD" is indicated when CD drive is connected.
In addition, the "Favorites" genre can be selected only when you have a song or songs in the "Favorites."
MEMO
While the notation shows the symbol, the song data is being loaded.
MEMO
When the "song selection" screen is displayed, you can start and stop playback of songs by pressing the [O] button.
Stopping Playback
5. Press the [▶/■ (Play/Stop)] button.
The [ / (Play/Stop)] button's indicator goes off, and playback of the song stops.
Playback will stop automatically when it reaches the end of the song.
Press the [Reset] button to return to the beginning of the song.
You can check the notes of all the internal songs in the Notation screen. They also have orchestral accompaniments, so you can play along with the accompaniment, or adjust the tempo to the desired speed for easier practice.
"Playing Along with Songs" (p. 59)
"Adjusting the Tempo" (p. 62)
You can save songs currently being practiced and other songs you like simply and easily by registering them to the "Favorites." You can also play back SMF music files saved on external memory (USB memory, floppy disks; separately available) connected to the External Memory connector.
"Registering the Songs You Like (Favorites)" (p. 45)
"Internal Song List" (p. 123)
"Listening to Music Files or a Song that was Saved on USB Memory" (p. 44)
If a screen like the following is displayed
If you select a different song after already having recorded, edited (p. 100), or changed the settings (p. 94) for a song, the following message appears.
If you want to erase the song, use the cursor buttons to select <OK> , then press the [O] button. If you do not want to delete the song, select <Cancel> , then save the song to USB memory or to the "Favorites."
"Saving Songs" (p. 80)
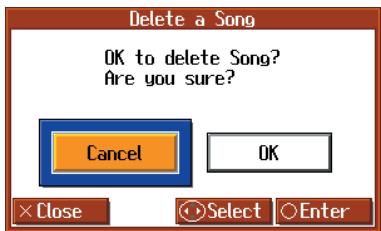
Playing Songs Consecutively (All Song Play)
You can play back the internal songs and songs in USB memory continuously.
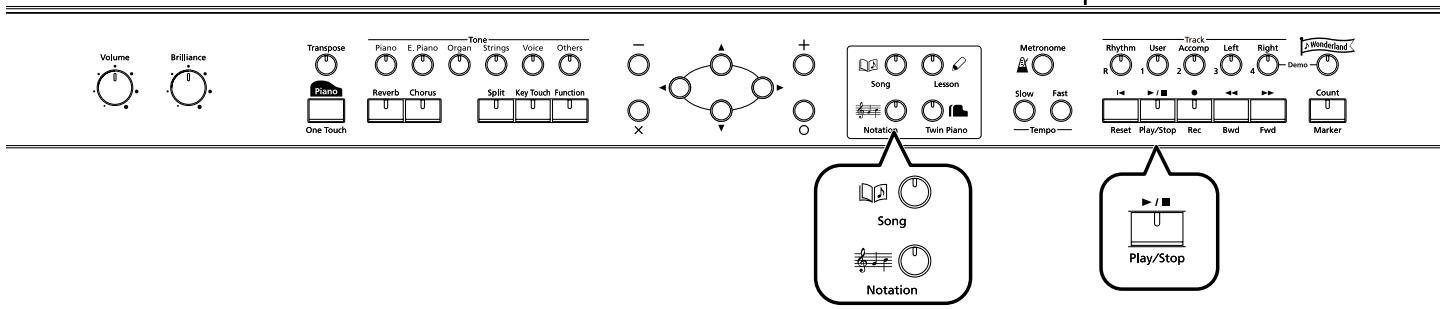
- Hold down the [D (Song)] button and press the [▶/■ (Play/Stop)] button.
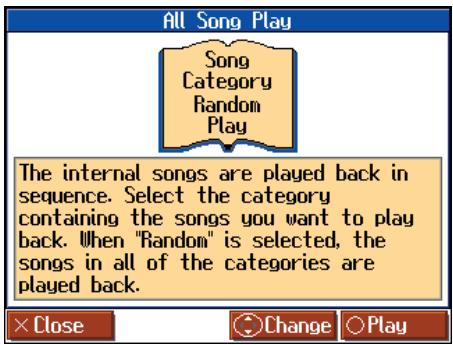
- Press the cursor up or down button to change the setting.
| Setting | Explanation |
| Random Play | Songs in all genres are played back in random order. |
| Practice | All internal songs in the selected genre are played back. |
| Masterpieces | |
| Popular | |
| Kids Song | |
| Favorites | All songs registered in the "Favorites" are played back. |
| External Memory | Songs stored to the USB memory, floppy disk or CD connected to the External Memory connector are played back. |
- Press the [O] button.
All songs in the selected genre are played back continuously.
When all selected songs have been played, playback will return to the first song and resume.
If no operations are performed for dozens of seconds,
Stopping Playback
- Press the [▶/■ (Play/Stop)] button.
Playback will stop.

If you want to play back songs stored to optional external memory (USB memory, floppy disks or CD), select

When playing back all songs on external memory, you cannot play back songs contained inside folders. If any songs that you want to play are inside any folders, move those songs outside their folders.
Listening to Music Files or a Song that was Saved on USB Memory
This procedure is used to play back commercially available music files and songs saved on optional USB memory and floppy disks connected to the External Memory connector. You can also play the keyboard along with the song playback.
- Connect the optional USB memory or floppy disks drive to the External Memory connector.
If playing back commercially available music files or songs saved on a floppy disk, insert the floppy disk in the floppy disk drive.
Selecting the Song
- Press the [ (Song)] button.
- Press the cursor left or right button to select
, , or as the genre.
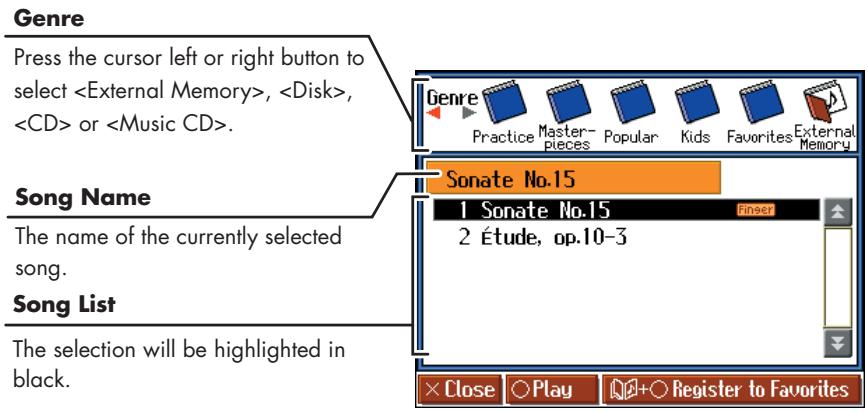
- Press the cursor up or down button to select the song you want to play back.
Playing Back
- Press the [▶/■ (Play/Stop)] button.
The song will begin playing.
Stopping Playback
- Press the [ / (Play/Stop)] button once more.
When Selecting Songs in Folders
- In the "song selection" screen, press the cursor buttons to select the folder containing the song you want to play back.
- Press the [/ (Play/Stop)] or [○] button.
After a moment, a list of songs in the folder is displayed.
- Press the cursor buttons to select the song you want to play back.

For more on connecting USB memory or floppy disk drives, refer to "Connecting USB Memory" (p. 20) and "Installing the Floppy Disk Drive" (p. 20).

The measure number in the screen will be highlighted while the music file is being loaded. Please wait.

For more on how to use the notation screen, refer to p. 26.

To Leave a Folder
-
Press the cursor buttons to select l (Up).
-
Press the [▶/■ (Play/Stop)] or [O] button.
Registering the Songs You Like (Favorites)
You can register songs you are currently practicing or enjoy playing to "Favorites," allowing you to select these songs easily.


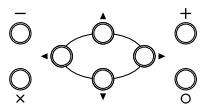
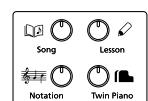
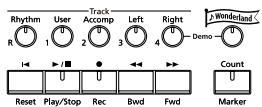
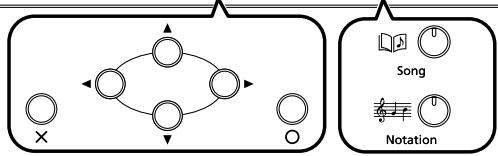
What are the "Favorites?"
This is the area of memory where you can save copies of performances recorded with the HPi-7S, songs stored in the USB memory connected to the HPi-7S's External Memory connector, and other songs. By registering songs to the "Favorites," you can then select the registered songs easily by selecting "Favorites" as the genre in the "song selection" screen.
Since songs registered to the "Favorites" are not deleted when you turn off the HPi-7S's power, you will find it convenient to register the songs you often listen to here in the "Favorites."
1. Press the [ (Song)] button.
The "song selection" screen appears.
![ROLAND HPI-7S - Press the [ (Song)] button. - 1](/content/2025/01/130843/images/1eb10fd960a0bfd7ed8d7775263f7f02195c7a70715e032b35b6f50e5348c2ec.jpg)
2. Press the cursor left or right button to select the song genre.
3. Press the cursor up or down button to select the song you want to register.
4. Hold down the [ (Song)] button and press the [O] button.
A screen like the one shown below appears.
![ROLAND HPI-7S - Hold down the [ (Song)] button and press the [O] button. - 1](/content/2025/01/130843/images/10857849ec69b1f8a9bf3524a6148c1d1d0c7438574c3a7992d4197aa0c4171b.jpg)
NOTE
You cannot register audio files to the Favorites.
NOTE
When you have selected a song registered to the "Favorites" genre, holding down the [D (Song)] button and pressing the [O] button displays the "song deletion" screen.
If you do not want to delete the song, use the cursor buttons to select <Cancel> and then press the [O] button.
5. Press the cursor right button to select <OK> , then press the [0] button.
The selected song is registered to "Favorites."
Now you can select the registered song by selecting "Favorites" for the genre in the "Song Selection" screen.
■ Removing Songs from Favorites
1. Press the [ (Song)] button.
The "song selection" screen appears.
2. In the "song selection" screen, press the cursor left or right button to select .
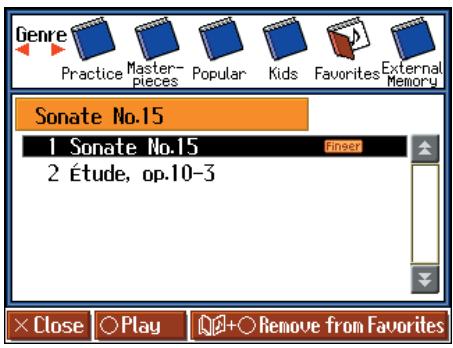
3. Press the cursor up or down button to select the song you want to remove from "Favorites."
4. Hold down the [ (Song)] button and press the [O] button.
A screen like the one shown below appears.
![ROLAND HPI-7S - Hold down the [ (Song)] button and press the [O] button. - 1](/content/2025/01/130843/images/83677ccaae8cc70a1fa2ef994b478ac0b5dae238824fc9931ee3300c96c91450.jpg)
5. Press the cursor right button to select <OK> , then press the [0] button.
The selected song is removed from the "Favorites."
NOTE
Never turn off the power while the display indicates
"Executing....
NOTE
You can register up to a maximum of 200 songs in the "Favorites." However, if there is insufficient memory remaining, the message "Error: 11" (p. 116) will appear even with fewer than 200 songs, and you will not be able to continue registering more songs.
NOTE
You cannot select "Favorites" as the song genre without any songs being registered to the "Favorites."
NOTE
Never turn off the power while the display indicates
"Executing....
Playing a Music CD or Audio File
You can connect a commercially available CD drive and play back a music CD. You can also play back audio files from USB memory.


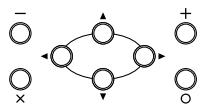
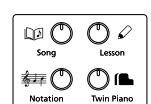
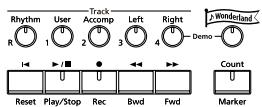
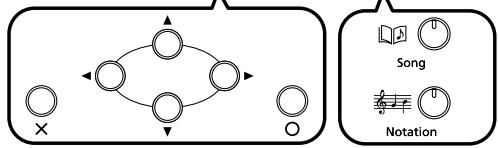
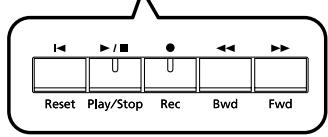
1. Connect your separately purchased USB memory or commercially available CD drive to the external memory connector.
If you want to play back a music CD, insert the CD in your CD drive.
Selecting the Song
- Press the [ (Song)] button.
- Use the cursor left or right button to select either
or as the Genre.
Genre
Press the cursor left or right button to select
Song Name
The name of the currently selected song.
The selection will be highlighted in black.
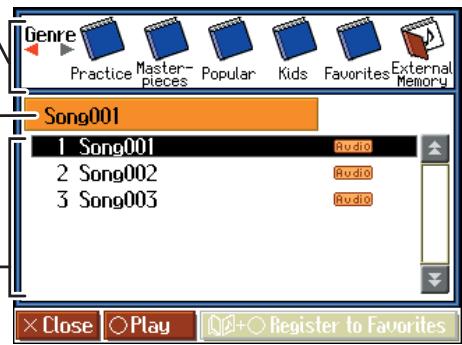
Song List
4. Press the cursor up or down button to select the song you want to play back.
When Selecting Songs in Folders
- In the "song selection" screen, press the cursor buttons to select the folder containing the song you want to play back.
- Press the [ / (Play/Stop)] or [ ] button.
After a moment, a list of songs in the folder is displayed.
- Press the cursor buttons to select the song you want to play back.

For more on connecting USB memory, refer to "Connecting USB Memory" (p. 20).

To Leave a Folder
-
Press the cursor buttons to select (Up).
-
Press the [ / (Play/ Stop)] or [O] button.
Playing Back
- Press the [▶/■ (Play/Stop)] button.
The song will begin playing.
Stopping Playback
- Press the [ / (Play/Stop)] button once more.
About Audio Files
Audio files of the following format can be played
- File extension is ".wav"
16-bit linear
44.1 kHz sampling rate
The following functions cannot be used for audio file playback.
3D Sound Control (p. 89)
Reverb (p. 54)
- Tempo change (p. 62)
- Save to internal memory (p. 80)
Recording (p. 69)
- Play back (mute) individual parts (p. 95)
NOTE
This instrument is incapable of displaying the notation for the songs on a music CD.
NOTE
You cannot register audio files to the Favorites.
Adjusting the Volume of an Audio File or Music CD
You can adjust the playback volume of an audio file or music CD.
- Press the [Function] button.
The "Functions" screen appears.
- Press the cursor buttons to select
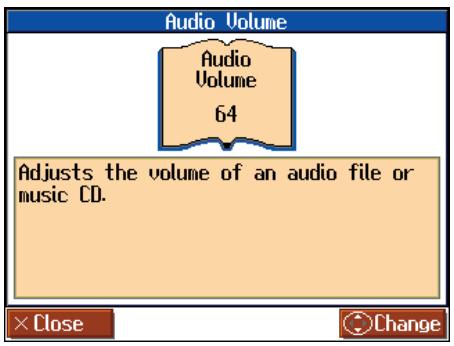
- Use the cursor buttons to adjust the volume of the audio file or Music CD.
| Setting |
| 0-127 |
- Reducing the Playback Volume of Sounds in the Center (Center Cancel)
When playing a music CD or audio file, you can reduce the playback volume of sounds that are located in the center (such as vocals or melody instruments).
- Play back the audio file or music CD (p. 47).
- Press the track [4/Right] button so its indication is turned off.
The volume of the melody or vocal will be reduced.
Turning off the center cancel function
- Press the track [4/Right] button so it's lit.
NOTE
For some songs, the sounds in the center may not be entirely eliminated.
NOTE
You may find that using Center Cancel reduces the tone quality of some songs.
NOTE
The Center Cancel setting will be cancelled when you select another song.
NOTE
If you use Center Cancel when 3D Sound Control (p.89) is on, 3D Sound Control will be turned off.
Playing the Keyboard Like a Piano (One Touch Piano)
You can create the optimal settings for a piano performance with the press of a single button.


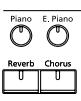

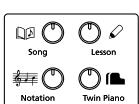
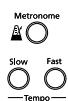
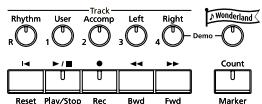
1. Press the One Touch [ Piano ] button.
The Tone [Piano] button's indicator will light.
A screen stating that the optimal settings for piano performances have been selected is displayed for several seconds, followed by a "Notation screen" like the following.
![ROLAND HPI-7S - Press the One Touch [ Piano ] button. - 1](/content/2025/01/130843/images/6275713c250b9c114b6c2262ed2fdf65ac157333da2f31e57a68aa5bb7fcfb7a.jpg)
![ROLAND HPI-7S - Press the One Touch [ Piano ] button. - 2](/content/2025/01/130843/images/986000c21323df5e5ef977c110257bdb5d4e05da41a5c42d305a83e08e35727e.jpg)
When you press the One Touch [Plano] button, the HPi-7S will switch to the following settings, regardless of the current panel settings.
- If the keyboard has been split into upper and lower sections (Split Performance p. 57), the keyboard returns to a single section. When the sounds are layered (Dual Performance p. 56), the layered sound is cancelled, and sounds are played using the piano tone.
- Pedal functions are as follows: the left pedal functions as the soft pedal, the center pedal functions as a sostenuto pedal, and the right pedal functions as a damper pedal. If any other functions are assigned to the left and center pedals, these functions are cancelled.
- The "Superior Grd" sound is automatically selected.
- Reverb depth is set to "4."
- The chorus function is turned off.
![ROLAND HPI-7S - Press the One Touch [ Piano ] button. - 3](/content/2025/01/130843/images/7034e64fef2356011b0329b21b68526bd8b988a3965ecf39d7955828e21104cb.jpg)
The notation for the currently selected song is displayed in the screen.
![ROLAND HPI-7S - Press the One Touch [ Piano ] button. - 4](/content/2025/01/130843/images/7639e96612b8e56424a659bde653592bc2fe84b38664fab7bba5b711632c9e6a.jpg)
When the one touch piano screen is displayed, you can press the [O] button to access the Piano Designer screen (p. p. 86).
![ROLAND HPI-7S - Press the One Touch [ Piano ] button. - 5](/content/2025/01/130843/images/68029784494c97f610d952c55661f2da381aad9276cb9684c2a34b870228327c.jpg)
Since this instrument faithfully reproduces real acoustic piano action and response, keys played in the top one-and-one-half-octave range continue to resonate, regardless of the damper pedal action, and the tone in this range is audibly different. The Transpose setting (p. 68) can also be used to change the range that is unaffected by the damper pedal.
Performing with a Variety of Tones
The HPi-7S contains 610 and more different tones.
The tones are organized into six tone groups, which are assigned to the Tone buttons.

Tone Group: Piano, E. Piano, Organ, Strings, Voice, Others
1. Press any one of the Tone buttons to select a tone group.
When you press a Tone button, the button's indicator will light. The "tone selection" screen appears.
2. Press the cursor buttons to select the tone to perform with.
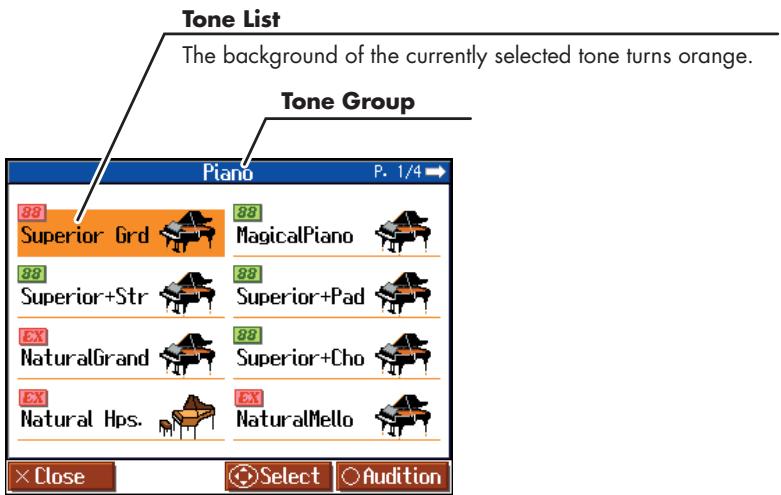
The "tone selection" screen consists of multiple pages. When you press the cursor buttons to switch tones, the screen switches automatically.
The next time you press this Tone button, the tone you finalized here will be heard.
"Tone List" (p. 117)
Tones indicated by "EX" is called an "EX Tone." These tones are especially recommended.
Sounds for which " 88" is indicated are 88-key multi-sampled piano sounds.
Sounds for which a red 88 indication is shown will additionally produce a key-off sound. What "Key Off Sound" does is recreate the tonal changes produced when the fingers are released from the keys.
When the "tone selection" screen is displayed, you can listen to a phrase that uses the selected tone by pressing the [O] button. The phrase is played to the end and then stops automatically. Pressing the [O] button while the phrase is still playing stops the phrase.
Playing Percussion Instruments or Sound Effects
You can use the keyboard to play percussion sounds or effects like sirens and animal sounds.

- Press the Tone [Others] button.
- Use the cursor buttons to select a rhythm set such as
or (SFX set).
Drum set names are indicated by initial "DR."
Each note of the keyboard will play a different sound.
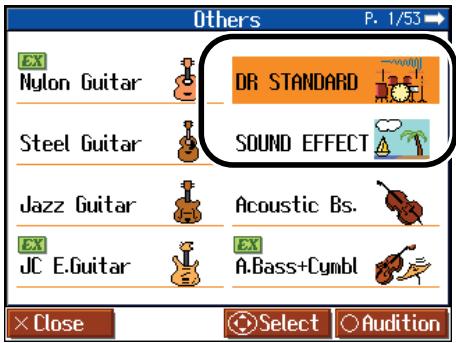

The combination of sounds assigned to the keyboard varies according to the drum set. For the sounds that are assigned to each key of a drum set or sound effect set, refer to "Drum/SFX Set List" (p. 119).
Adjusting the Keyboard Touch (Key Touch)
You can adjust the touch (playing feel) of the keyboard.
You can adjust the keyboard touch as appropriate for the playing strength of the person who is performing.


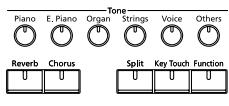
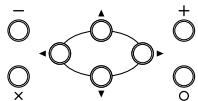
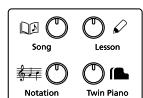
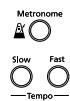
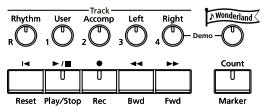
1. Press the [Key Touch] button.
Each time you press the [Key Touch] button, the button's indicator changes color while the touch is switched.
![ROLAND HPI-7S - Press the [Key Touch] button. - 1](/content/2025/01/130843/images/c7ae96112e8e0af81c6851f68b46c4ac6ec11400daec9c9e671a16e263a1a9a8.jpg)
| Indicator | Setting | Explanation |
| Lit (Orange) | Fixed | Sounds at a fixed volume, regardless of your keyboard playing strength. |
| Lit (Green) | Super Light | This setting produces the lightest keyboard touch. |
| Lit (Green) | Light | Fortissimo (ff) can be produced by playing less strongly than usual, making the keyboard feel lighter. This setting makes it easier for children, whose hands have less strength. |
| Off | Medium | This allows you to play using the most natural touch. This setting is closest to the response of an acoustic piano. |
| Lit (Red) | Heavy | Fortissimo (ff) cannot be produced unless you play more strongly than usual, making the keyboard feel heavier. This setting allows you to add more expression when playing dynamically. |
| Lit (Red) | Super Heavy | This setting produces the heaviest keyboard touch. |
![ROLAND HPI-7S - Press the [Key Touch] button. - 2](/content/2025/01/130843/images/0d4c541a711bf6ddd75b7e90f1c775e291ec6ee16ad9a9e0ef2f96858feffd7a.jpg)
While the "Key Touch" screen is being displayed, you can also change the key touch by pressing the cursor up or down button.
![ROLAND HPI-7S - Press the [Key Touch] button. - 3](/content/2025/01/130843/images/9a3b0afefa65773e01a5764f6ae1557990f7df32b8fde35d51003c38f4a94047.jpg)
You can specify the loudness at which each note will sound when the Fixed keyboard touch is selected. Refer to "Changing" the Velocity When the Key Touch is Set to "Off"(p. 87).
![ROLAND HPI-7S - Press the [Key Touch] button. - 4](/content/2025/01/130843/images/8b2ebd32c87f5c3e0a9da8d8e92f7ba625f9ba9b1ae0d62b0ce4c13073ffb300.jpg)
You can adjust the keyboard touch sensitivity in the Piano Designer screen (p. 86). You can make even finer adjustments to the keyboard touch. Please refer to "Making Fine Adjustments to the Keyboard Touch Sensitivity" (p. p. 87).
Applying Effects to the Sound
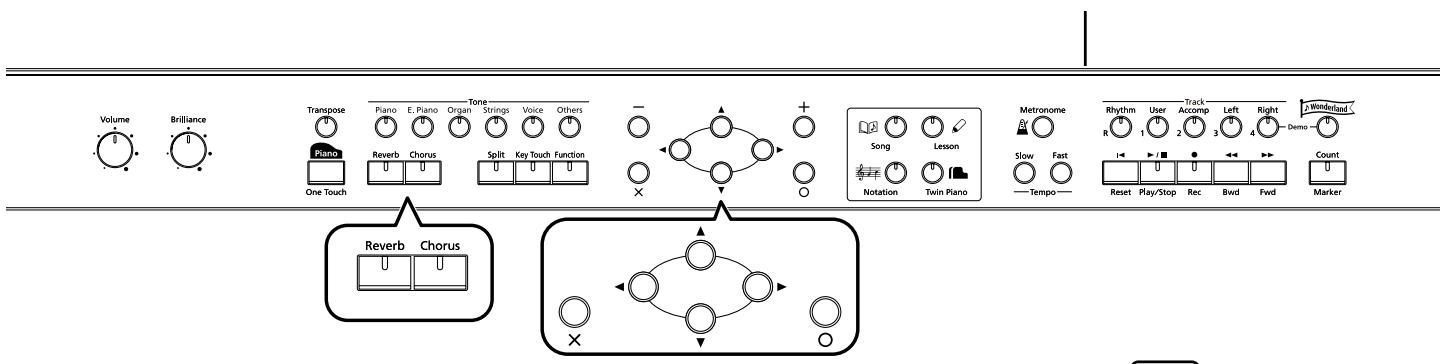
Adding Reverberation to the Sound (Reverb)
By applying the reverb effect you can produce a pleasant reverberation, making it sound as though you were performing in a concert hall.
1. Press the [Reverb] button.
The button's indicator will light, and a reverb effect will be applied to the sound. To cancel the reverb effect, press the [Reverb] button, getting its indicator to go dark.
![ROLAND HPI-7S - Press the [Reverb] button. - 1](/content/2025/01/130843/images/6ac47444710e81bdf85b6a38cc8a2d9d7de895381634489f9d5adad7ba7b42d4.jpg)
The depth of the reverb effect can be adjusted. Refer to "Adjusting the Depth of the Effects (Effect)" (p. 89).
Adding Richness to the Sound (Chorus)
By applying the chorus effect you can make the sound richer and more spacious. You can turn the chorus effect on and off for each tone individually.
1. Press the [Chorus] button.
The button's indicator will light, and a chorus effect will be applied to the sound. To cancel the chorus effect, press the [Chorus] button, getting its indicator to go dark.
![ROLAND HPI-7S - Press the [Chorus] button. - 1](/content/2025/01/130843/images/216b8b0d6331d1259aec93fc72f539c0b6a9ff54674098f6b386846a6676f8e2.jpg)
The depth of the chorus effect can be adjusted. Refer to "Adjusting the Depth of the Effects (Effect)" (p. 89).
NOTE
It is not possible to memorize the reverb effect setting for each tone.
MEMO
You can change the amount of reverb applied by holding down the [Reverb] button and pressing the cursor up or down button.
MEMO
The chorus setting can be memorized for each tone. Turning off the power restores the original settings. You can also use the Memory Backup function to save the chorus settings even when the power is turned off.
MEMO
You can change the amount of chorus applied by holding down the [Chorus] button and pressing the cursor up or down button.
Adjusting the Brightness of the Sound (Brilliance)
You can adjust the brightness of the sound.
1. Turn the [Brilliance] knob to adjust the brightness of the sound.
Turning the knob toward the right will make the sound brighter, and turning it toward the left will make the sound more mellow.
Adding Liveliness to the Sound (Dynamics Sound Control)
You can add liveliness to the sound to give it superb clarity and distinctness.
1. Press the [Function] button.
The Functions screen appears.
2. Press the cursor buttons to select , then press the [O] button.
![ROLAND HPI-7S - Press the cursor buttons to select , then press the [O] button. - 1](/content/2025/01/130843/images/e62ed6b79f5300abcf88496a4abe650e8b7d690f542916a8012fbfffb496f933.jpg)
3. Press the cursor up or down button to change the dynamics setting.
| Setting | Explanation |
| Off | The Dynamics sound control function is switched off. |
| Sharp | Creates a sound with boosted bass and treble. |
| Clear | Creates a clear distinct sound in lower frequency. |
| Power | Creates a sound with boosted bass. |
4. Press the [ × ] button to close the "Tone Control" screen.
![ROLAND HPI-7S - Press the [ × ] button to close the "Tone Control" screen. - 1](/content/2025/01/130843/images/02e118b84af1c6378834993cfb49fb7b60abc9cc01d8dbc4a0a2f037bf188594.jpg)
You can use the Memory Backup function to store this setting in internal memory (p. 97).
NOTE
For some sounds, this may cause distortion.
NOTE
Dynamics does not affect the sound from the Input jack or the sound of external devices connected to the MIDI Out connector.
NOTE
If you use Dynamics Sound Control when 3D Sound Control (p. 89) is on, 3D Sound Control will be turned off.
Playing Two Sounds Layered Together (Dual)
Simultaneously playing two sounds when one key is pressed is called "Dual Performance."
1. Simultaneously press two of the Tone buttons.
Both of the button indicators will light. Of the two buttons, the sound of the left button will be "Tone 1," and the sound of the right button will be "Tone 2."
Tone 1
Displays the tone name for the left Tone button that is selected.
Displays the tone name for the right Tone button that is selected.
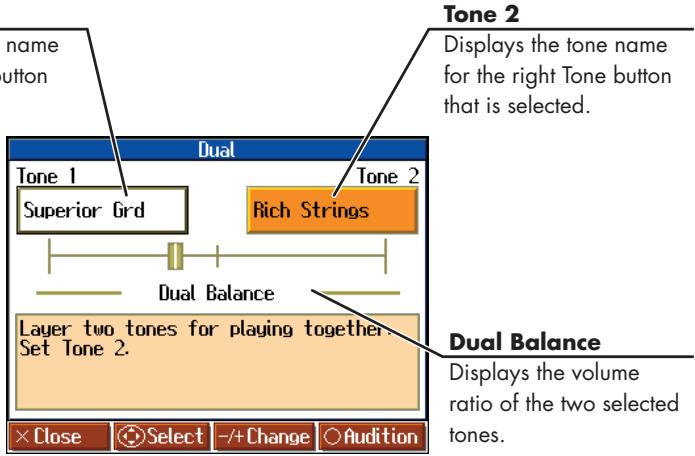
Tone 2
Changing the Tone
- Press the cursor buttons to select "Tone 1" or "Tone 2."
- Press the [-] [+] button to select the tone.
When the tone names of "Tone 1" or "Tone 2" are highlighted, you can press the cursor buttons to select tones within the same tone group.
Adjusting the Volume Balance (Dual Balance)
You can change the volume balance between the two layered sounds in Dual performance.
- Press the cursor buttons to select "Dual Balance."
- Press the [-] [+] button to adjust the dual balance.
The volume balance changes.
Cancelling Dual Performance
- Press any tone button.
Now you'll hear only the sound of the button you pressed.
NOTE
You can't use Dual Performance if the Twin Piano function is on.
Playing Different Sounds in the Right and Left Hand (Split)
Dividing the keyboard into right-hand and left-hand areas, then playing different sounds in each is called "Split Performance." The boundary key is called the "Split Point."
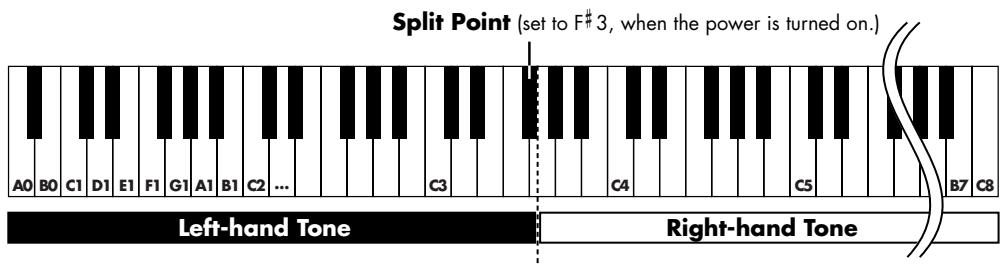
The split point key is included in the left-hand keyboard area.
1. Press the [Split] button.
Split performance is enabled. The tone selected before the performance is set as the "Right-hand Tone", the "Left-hand Tone" is selected automatically.
The following screen appears.
Left-hand Tone
Displays the name of the tone selected for the left-hand keyboard area.
![ROLAND HPI-7S - Press the [Split] button. - 1](/content/2025/01/130843/images/02563c86df40533d86edd34fe2edd0819ccf828f0db0ad075b2b06eb16cc32f2.jpg)
Right-hand Tone
Displays the name of the tone selected for the right-hand keyboard area.
Split Point
Displays the key between the right-hand and left-hand keyboard areas.
Changing Tones
- Press the cursor buttons to select
or . - Press the [-] [+] button to select the tone.
When the tone names of
Changing the Split Point
- Press the cursor buttons to select the keyboard layout (split point).
- Press the [-] [+] or down button.
The Split Point is changed.
You can change the split point within the range of B1 through B6.
NOTE
You can't use Split performance if the Twin Piano function is on.
MEMO
When switching tone groups, if
You can use the cursor buttons to select tones within the selected tone group.
After changing the tone,
pressing the [X] button returns
the "Split" screen to the
display.
MEMO
This is set to "F#3" when the power is turned on.
Cancelling the Split Performance
Use the following procedure to cancel the split.
1. Press the [Split] button, getting its indicator to go dark
Enabling Split Performance When Dual Performance is Already Enabled
By enabling Split Performance while the HPi-7S is already in Dual Performance mode, you can then split the keyboard into left and right sections, while also having two tones play in the right side.
1. Simultaneously press two tone buttons to switch to Dual Performance.
2. Press the [Split] button.
Split is now enabled.
In addition, Dual performance is enabled in the right-hand side of the keyboard.
Left-hand Tone
Tone 2
![ROLAND HPI-7S - Press the [Split] button. - 1](/content/2025/01/130843/images/e933cc3f4edcb54a6e41303ac3c2d6af59935fa1e437b6816a2c774b42c9de89.jpg)
This shows the relative balance in volume between the two tones selected for the right-hand side.
Tone 1
Displays the name of Tone 1 of the Dual performance in the right-hand area.
Displays the name of Tone 2 of the Dual performance in the right-hand area.
To Switch From Split to Dual Performance
- Set the HPi-7S to Split Performance (p. 57).
- After pressing the cursor buttons to select the right-hand tone, press two tone buttons.
Split Performance is enabled. In addition, Dual Performance is enabled in the right-hand part.
Playing Along with Songs
You can play along with a music data stored internally in the HPi-7S, on USB memory or on CD-ROM.
You can mute the sound of the part you want to play, and play that part yourself. This makes it easy to practice hands separately. For example, you can follow along with your right hand while you listen to that same right-hand part be played, or you can practice the right-hand part while the left-hand part plays.
You can check the notes in internal songs and songs stored to USB memory in the Notation screen.

A music file for piano lessons may be assigned to the five Track buttons as shown below.
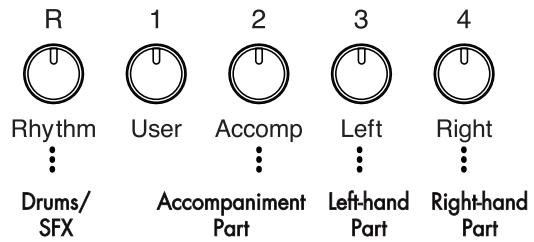
By using these Track buttons, you can mute the sound of specific parts. This is referred to as "mute."
Preparing to Play
1. Select the song you want to play.
"Listening to the Internal Songs" (p. 41)
"Listening to Music Files or a Song that was Saved on USB Memory" (p. 44)
2. Press the track button for the performance part you want to practice; the button's indicator goes off.
The indicators of the buttons you pressed will go dark, and the selected track will not be heard.
To cancel muting, press the same track button once again to make the indicator light.
3. Press the [T (Notation)] button.
The Notation screen appears. While the screen shows the symbol, the song data is being loaded.
Playing back
4. Press the [▶/■ (Play/Stop)] button.
The button's indicator will light.
The song will begin playing. Go ahead and play along with the song.
MEMO
For more on music files, refer to "Music Files That the HPi-7S Can Use" (p. 125).
MEMO
If a single Track button includes more than one instrument and you want to mute just one of those instruments, take a look at "Preventing a Part from Playing (Mute)" (p. 95).
MEMO
When a single Part is not played, it is called "Minus One." Using Minus One, you can mute out a particular instrument and play the part yourself.
MEMO
When playing back SMF music files for Roland Piano Digital series instruments, and the [3/ Left] button and [4/Right] button do not correctly control the left/right-hand performances, please change the "Track Assign" settings. Please refer to "Changing the Parts Assigned to the Track Buttons During SMF Playback (Track Assign)" (p. 93).
MEMO
You can press the Tempo [Slow] [Fast] buttons to adjust the tempo to your liking.
Stopping the song
5. Press the [ / (Play/Stop)] button.
The indicator for the [ / (Play/Stop)] button goes out, and playback of the song stops.
Playback will stop automatically when it reaches the end of the song.
Press the [Reset] button to return to the beginning of the song.
If a screen like the following is displayed
If you select a different song after already having recorded, edited (p. 100), or changed the settings (p. 95) for a song, the following message appears. If you want to erase the song, select <OK> . If you do not want to delete the song, select <Cancel> , then save the song to USB Memory or to the "Favorites."
"Saving Songs" (p. 80)
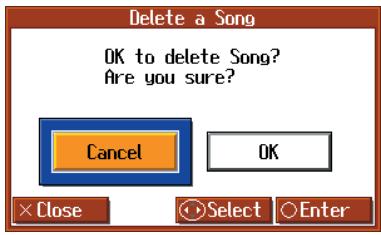
Lowering the Volume of a Part You're Learning (Melody Guide)
When playing back an internal song or SMF music file, you can have the part you intend to perform be played at a reduced volume.
Until you've learned a part you want to play, you can have that part be played at a reduced volume while you practice it. Once you've learned the part, you can press the track button to mute it completely, and play it yourself.
1. Hold down the track button until the Mute Volume screen appears.
2. Press the [-] [+] buttons to adjust the volume of the part.
The volume of the part can be adjusted within the 0-80 range.
NOTE
The Melody Guide function does not work for a music CD or audio file.
NOTE
When you turn off the power, the part volume will return to "0."
Changing the Volume Balance of the Accompaniment and Keyboard (Balance)
You can change the volume balance between the sounds from the song being played and the sounds from keyboard.
- Press the [Function] button.
The Functions screen appears.
- Press the cursor buttons to select <Balance> , then press the [0] button.
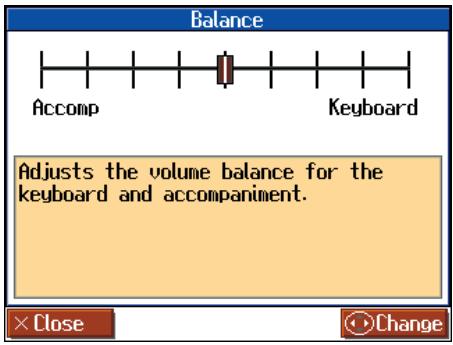
- Press the cursor left or right button to adjust the volume balance between accompaniment and keyboard.
| Setting | Explanation |
| Pressing the cursor right button sets the <Keyboard> side | The volume of the song and accompaniment sounds decreases. |
| Pressing the cursor left button sets the <Accomp> side | The volume of the keyboard sounds decreases. |
Adjusting the Tempo
This changes the song tempo.
If songs seem difficult to play at their original speed, you may find it helpful to first practice with the tempo slowed down. Then, after becoming more familiar with the song, you can practice it at a gradually faster tempo.
Changing the tempo has no effect on the pitch of the notes. Additionally you can change the tempo even when the song is in progress.

Press the Tempo [Slow] [Fast] buttons to adjust the tempo.
The tempo can be adjusted in a range of = 10 - 500 .
Playing Back at a Fixed Tempo (Tempo Mute)
The tempo in some songs may change, speeding up or slowing down, when the song is in progress.
If a song has tempo changes, it helps to practice the song first at a steady tempo.
Overriding tempo changes is called "Tempo Mute."
1. Press the [ (Metronome)] button.
The "Metronome" screen appears.
2. Press the [O] button.
Tempo mute is enabled.
When tempo mute is in effect, the tempo display appears in reverse video.
![ROLAND HPI-7S - Press the [O] button. - 1](/content/2025/01/130843/images/0828946f3a03effba5fd39000f70465fb3d8bf481b8a92878f72af8e2c743723.jpg)
When you play back the song, it will play at a constant tempo.
To cancel Tempo Mute, press the [ (Metronome)] button again to display the "Metronome" screen, then press the [O] button.
Tempo Mute will also be cancelled when you select a different song.
NOTE
You cannot change the tempos for Audio files and Music CDs.
MEMO
You can also enable Tempo Mute by holding down
[ \text{[▶/■ (Play/Stop)] button and pressing either the Tempo [Slow] or [Fast] button.} ]
MEMO
You can also cancel TempoMute when the function isenabled by holding down
[ \text{[▶/■ (Play/Stop)] button and pressing either the Tempo [Slow] or [Fast] button.} ]
Using the Metronome
The HPi-7S contains a versatile metronome function.
While a song is playing, the metronome will sound at the corresponding tempo and time signature (Beat).

1. Press the [ (Metronome)] button.
The button's indicator will blink according to the time signature (Beat), and the metronome will sound.
To stop the metronome, press the [A (Metronome)] button, getting its indicator to go dark.
![ROLAND HPI-7S - Press the [ (Metronome)] button. - 1](/content/2025/01/130843/images/0ef1d801acb0460c642330f29e9b27186b6a98a7ac1753530e25037338122b82.jpg)
2. Press the cursor left or right button to select the setting you want to make.
| Item | Setting |
| Volume | Choosing sets the volume to the lowest level, and choosing sets it to the highest level. ChoosingOFFto silence the metronome sound. |
| Beat | 2/2, 0/4 (Only weak beats will be sounded), 2/4, 3/4, 4/4, 5/4, 6/4, 7/4, 3/8, 6/8, 9/8, 12/8* It is not possible to change the "Beat" setting while a song is playing. |
MEMO
You can set Tempo Mute by pressing the [O] button when the "Metronome" screen is displayed (p. 62).
| Item | Setting |
| Sound | Click, Electronic, ichi, ni, Voice (Japanese) ("1","2","3" in Japanese), One, two, Voice (English) ("1","2","3" in English), Animal, Wood Block, Triangle & Castanets, Hand Claps |
| Pattern | Normal, ( dotted half note), (half note), ( dotted quarter note), (quarter note), ( dotted eighth note), (eighth note), ( sixteenth note), +Double. Double (note added to back beat of the first beat), +Tripl. Triple (added notes sound the first beat as a triplet), +Shufl. Shuffle (notes added to create a shuffle) |
| Beat LED | On (The [ Metronome]) button's indicator flashes in time with the beat.), Off (Dark) |
3. Press the cursor up or down button to change the value.
Adding a Count to Assist Your Timing
"Count-in" means to sound a count before song playback begins.
"Countdown" means to sound a count after the end of the song introduction (before you begin playing the keyboard). If you will be playing along with a song, sounding a count will make it easier to match the timing of your performance to the song.



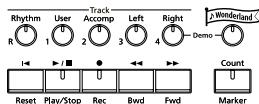
1. Press the [Count/Marker] button.
The "Count" screen appears. The "Count" screen has two pages.
![ROLAND HPI-7S - Press the [Count/Marker] button. - 1](/content/2025/01/130843/images/ea3e57d0a7ba5b842fa0d9cc008e12efb5f52fb891de2ab74f334626944541eb.jpg)
![ROLAND HPI-7S - Press the [Count/Marker] button. - 2](/content/2025/01/130843/images/01c7a51274c69b8a3d1c20f48f16082e2379b8925fd8bdb3ed6e423ed7d3257e.jpg)
2. Press the cursor left or right button to select the setting you want to make.
| Item | Setting | |
| Count Mode | Specifies what type of count will be added. | Count In (add a count before the performance), Countdown (add a count only before you begin playing), Count In/ down (add both a count-in and a countdown) |
| Countdown Sound | Specifies the count-down sound. | Voice (Japanese), Voice (English) |
| Countdown Track | Specifies the track or part that will determine the beginning of the performance when adding a countdown. | Left & Right Track (Right-hand and left-hand parts of a piano song), Left Track (Left-hand part of a piano song), Right Track (Right-hand part of a piano song), Part 1-16 |
| Count In Sound | Specifies the count-in sound. | Stick, Click, Electronic, Voice (Japanese), Voice (English), Wood Block, Triangle & Castanets, Hand Clap, Animal |
| Count In Measure | Specifies the length (number of measures) of the count-in. | 1, 2 |
| Count In Repeat | When <Repeat> is turned on in the “Marker” screen (p. 66), this specifies whether the count-in will sound each time the range between the markers is repeated, or only the first time. | First time, Each time |
3. Press the cursor up or down button to change the value.
Assigning Markers to a Song for Repeated Practice
You can add markers within a song so that you can move to a marked measure, or play back repeatedly between two markers.
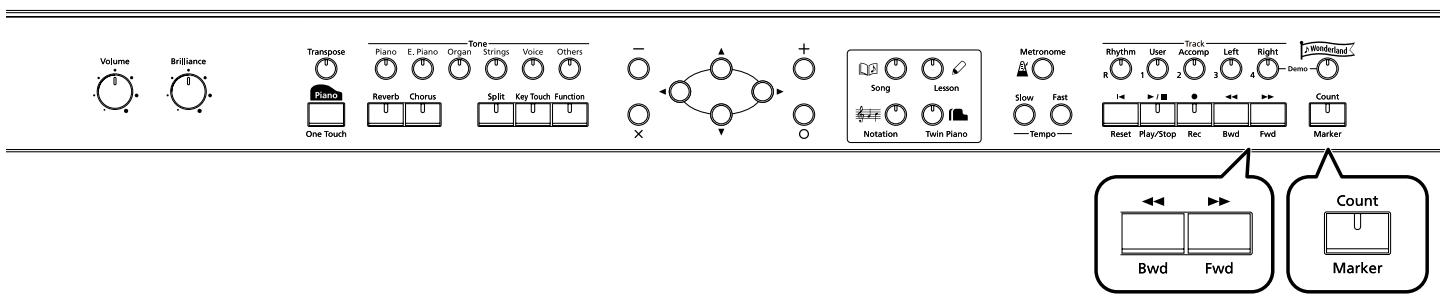
Before you begin, select the song in which you want to assign markers (p. 41, p. 44).
Accessing the Marker Screen
- Press the [Count/Marker] button to display the "Count" screen.
- Press the [O] button.
The "Marker" screen appears.
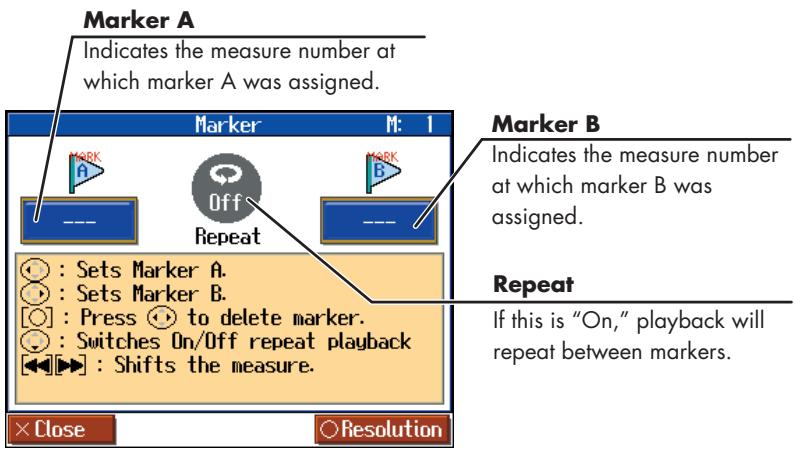
Moving to the Location at which You Want to Assign a Marker
- Use the [ (Bwd)] [Fwd] buttons to move to the measure at which you want to assign a marker.
Assigning a Marker
- Press the cursor left or right button to add a marker.
Press the cursor left button to set Marker A; press the cursor right button to set Marker B. The screen will indicate the number of the measure at which the marker was assigned.
NOTE
You cannot place markers in audio files and in Music CDs.
NOTE
It is not possible to assign marker B at the same location or earlier than marker A.
MEMO
Markers can also be assigned in units of beats rather than measures. Refer to "Assigning a Marker in the Middle of a Measure (Resolution)" (p. 67).
Moving an Assigned Marker
After adding markers to a song, you can then move to the location where Marker A is set by holding down the cursor left button and pressing either the
[ \langle \triangleleft \langle \text{Bwd} \rangle \text{or} [\triangleright \triangleright (\text{Fwd})] \text{button.} ]
To adjust the location of marker B, hold down the cursor right button and press the
[←(Bwd)] or [▶(Fwd) button.
Moving to the Location of an Assigned Marker
After assigning a marker in the song, press either cursor left or right button to move (jump) to the location of the marker.
Playing Repeatedly between Markers
After assigning both markers A and B, press the cursor down button to turn
When you press the [▶/■ (Play/Stop)] button, playback will repeat between the markers.
Deleting a Marker You've Assigned
Hold down the [O] button, and press the cursor left button to delete marker A, or press the cursor right button to delete marker B.
■Assigning a Marker in the Middle of a Measure (Resolution)
A marker can be assigned in the middle (at the beginning of a beat) of a measure.
Press the [Count/Marker] button to display the "Count" screen, then press the [O] button.
2. Press the [O] button once more to access the "Resolution" screen.
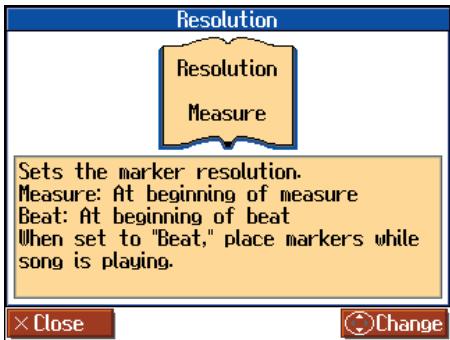
- Press the cursor up or down button to change the setting.
| Setting | |
| Measure | Markers will be assigned to the beginning of a measure. |
| Beat | Markers will be assigned to the beginning of a beat. |
If you use Repeat Playback without assigning marker A or B The entire selected song will be played back repeatedly.
If you use Repeat Playback when only marker A is assigned
The song will play back repeatedly from marker A to the end of the song.
If you use Repeat Playback when only marker B is assigned
The song will play back repeated from the beginning of the song to marker B.
MEMO
If
press the [ (Notation)] button to display the Notation screen and play back
repeatedly. Anything you want to do that involves markers, including moving to a particular marker, is accomplished within the "Marker" screen.
Changing the Key of the Keyboard or Song Playback (Transpose)
By using the "Transpose" function, you can transpose your performance without changing the notes you play. For example, if a song is in a difficult key with numerous sharps (#) or flats (b), you can use this function to play it in an easier key.
You can also use this function to play back a song in a different key.
When accompanying a vocalist, you can easily transpose the key to a range that is comfortable for the singer, while still playing the notes as written (i.e., with the same fingering positions).
1. Press the [Transpose] button.
The "Transpose" screen appears.
![ROLAND HPI-7S - Press the [Transpose] button. - 1](/content/2025/01/130843/images/c7b1962bb322facd8129163354335470ee43c2425356f801826d743f51c56b7b.jpg)
The available transposition range varies with the type of song data used.
| Item | Setting | ||
| Keyboard | Transpose the keys played by the keyboard. | -6-0-5 | |
| Song | Transpose the song playback. | SMF Music Files | -24-0-24 |
| Music CDs/ Audio Files | -6-0-5 | ||
2. Press the [O] button to switch the link on or off.
When set to Link <On> , the values for the keyboard and the song data are the same. When set to Link <Off> , the values for the keyboard and the song data can be set separately. To cancel the transposition, set Transpose to "0."
The transposition setting returns to "0," when you choose another song.
For example, if you want the E pitch to sound when you press the C key, set the "Keyboard" transpose setting to "4."
![ROLAND HPI-7S - Press the [O] button to switch the link on or off. - 1](/content/2025/01/130843/images/4108c58f055af6dab2d63aa92728ad7ba585192b43a36c8834d1407ec95875f5.jpg)
NOTE
If you've selected a song from a music CD or an audio file, using Transpose function may affect the tonal character.
MEMO
The Transpose icon appears in the Notation screen while the Transpose function is on.
NOTE
If you've selected a sing from a music CD on an audio files and used Transpose when 3D
Sound Control (p. 89) is on, 3D Sound Control will be turned off.
The HPi-7S lets you record your own performances.
A recorded performance can be played back to hear your own playing, or to add additional parts.
The following types of recording can be done using the HPi-7S.
| Recording just your own keyboard performance | →“Recording a New Song” (p. 70) |
| Record along with an internal song or song saved on USB Memory | →“Recording Along with a Song” (p. 73) |
| Re-recording | →“Re-recording” (p. 75) |
| Recording to the Track Buttons | →“Multitrack Recording on Five Tracks” (p. 77) |
| Multitrack recording on 16 tracks | →“Recording and Playing Back Performances of Specific Instruments (16 Track)” (p. 94) |
Memo
Songs you record are discarded if you select another song, or turn off the power of the HPi-7S. Save important performances to the "Favorites" or to USB Memory (optional), floppy disks (optional). Refer to "Saving Songs" (p. 80).
If a screen like the following is displayed
If you record a new song after already having recorded, edited (p. 100), or changed the settings (p. 95) for a song, the following message appears.
If you want to erase the song, use the cursor buttons to select <OK> , then press the [O] button. If you do not want to delete the song, use the cursor buttons to select <Cancel> and press the [O] button, then save the song to USB Memory or to the "Favorites."
"Saving Songs" (p. 80)
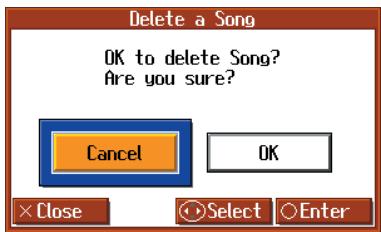
Recording a New Song
Here's how to record just your own keyboard performance without using an internal song.
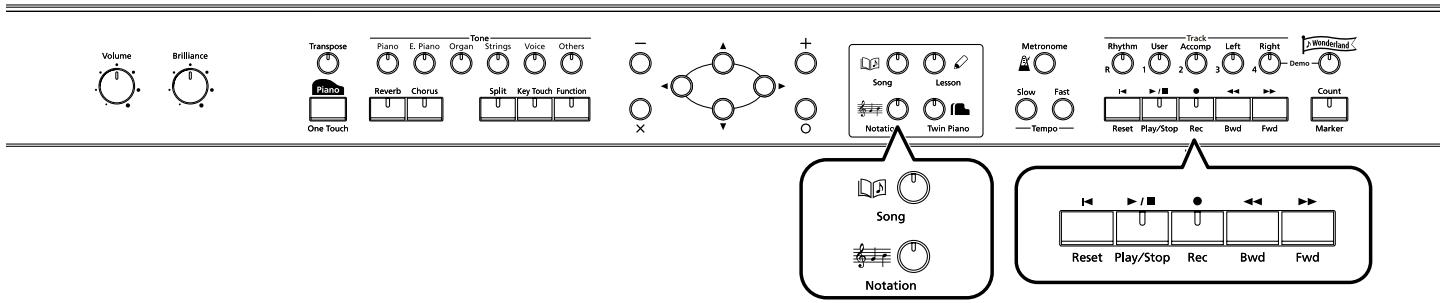
Making the Recording Settings (Choosing "New Song")
1. Press the [ (Song)] button.
![ROLAND HPI-7S - Press the [ (Song)] button. - 1](/content/2025/01/130843/images/c7e7a814366b29a5701b48d86f543587455c90334b80932162cb92857ef22ce8.jpg)
2. Press the cursor up button one or more times to return to the first song, then press the cursor up button once more to select .
If there is a song that has already been recorded, or if you edit the song or change the settings, then when you press the cursor up or down button, the message "OK to delete Song?" appears (p. 69). When you delete the song, the "New Song" is displayed.
The notation will appear when you press the [ 23 (Notation)] button.
- You can change the tone used in recording.
"Performing with a Variety of Tones" (p. 51)
- You can change the tempo and set the beat for the song.
"Adjusting the Tempo" (p. 62)
Changing the beat for the song (p. 63)
- You can record while the metronome sound.
In this case, the metronome sound is not recorded.
"Using the Metronome" (p. 63)
3. Press the [ (Rec)] button.
The indicators of all Track buttons will blink, and the HPi-7S enters recording-standby mode.
To cancel recording, press the [ (Rec)] button once more and watch the indicator goes out.
Starting the Recording
4. Press the [▶/■ (Play/Stop)] button.
The count is played, and then recording begins.
Note that recording will also begin as soon as you play anything on the keyboard, even if you do not press the [▶/■ (Play/Stop)] button.
In this case, no count will be heard.
Once recording begins, the [ / (Play/Stop)] button and the [ (Rec)] button indicators will light.
Go ahead and perform on the keyboard.
Stopping the Recording
5. Press the [▶/■ (Play/Stop)] button.
Recording will stop, and the [ / ] (Play/Stop)] button and the [] (Rec)] button indicators will go out.
Playing Back the Recorded Performance
6. Press the [1 (Reset)] button, and then press the [▶/■ (Play/Stop)] button.
You can listen the recorded performance.
To stop the playback, press the [▶/■ (Play/Stop)] button once again.
Track Button Assignments for the Recorded Performance
When you record only a keyboard performance, the performance will be assigned to the track buttons as follows.
| Normal performance (playing a single sound from the entire keyboard) | The performance is recorded to the [1/User] button. |
| Dual performance → p. 56 | The performance is recorded to the [1/User] button. |
| Split performance → p. 57 | The left-hand performance is recorded to the [3/Left] button, and the right-hand performance to the [4/Right] button. |
| Dual performance and Split performance → p. 58 | The left-hand performance is recorded to the [3/Left] button, and the right-hand dual performance to the [4/Right] button. |
| Twin Piano performance → p. 34 | The performance on the left side is recorded to the [3/Left] button, and the performance on the right side is recorded to the [4/Right] button. |
| Drum set or sound effect performance → p. 52 | The performance is recorded to the [R/Rhythm] button. |
MEMO
When pressing the [ (Rec)] button to display "Exit/New Song/Add On," press the cursor buttons to select < New Song> and then press the [O] button. This bypasses Steps 1 and 2.
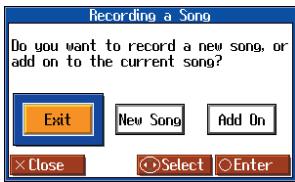
NOTE
Be aware that if you select
NOTE
Recordings of performances are deleted when you turn off the power to the HPi-7S. If you do not want a recorded performance to be deleted, save the performance to external memory (USB Memory or Floppy disk) or to the "Favorites"(p. 72, p. 80).
MEMO
If you have not saved the performance you recorded, you won't be able to play back another song. You'll have to erase (p. 76) or save (p. 72, p. 80) the performance before playing back another song.
Saving Recorded Performances to the Favorites
You can save the performances you have recorded to the "Favorites."
If you turn off the power of the HPi-7S after recording a song without saving the recording first, the recorded song is deleted. Songs saved to the "Favorites" are not deleted even when the power is turned off, so be sure that any song that you don't want to lose is saved to the "Favorites."
- Record the performance (p. 70, p. 73, p. 77).
- Press the [ (Song)] button to open the "song selection" screen.
- Hold down the [ (Song)] button and press the [O] button.
The following screen appears.
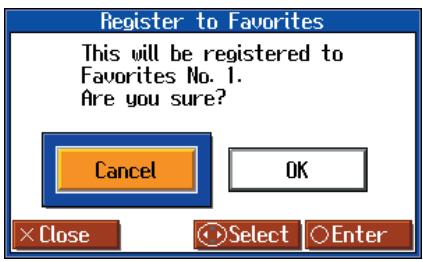
- Press the cursor right button to select <OK> , then press the [0] button.
A screen like the one shown below appears.
You can change the name of the recorded song in this screen.
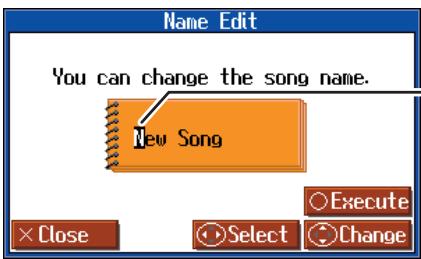
Character to be changed
The selected character is shown with a black background.
Characters that can be input:
ABCDEFGHIJKLMNOPQRSTUVWXYZ
[ \text{[} ]^{\backprime} \text{.} \text{} \text{} \text{} \text{} \text{} \text{} \text{} \text{} \text{} \text{} \text{} \text{} \text{} \text{} \text{} \text{} \text{} \text{} \text{} \text{} \text{ } \text{} \text{} \text{} \text{} \text{} \text{} \text{} \text{} \text{} \text{} \text{} \text{} \text{} \text{} \text{} \text{} \text{} \text{} \text{} \text{ } ]
Space !"# % &'(('*+,-./0123456789;:<=>? @
If you do not want to change the song name, go to Step 6.
- Press the cursor left or right button to select the character you want to change, then press the cursor up or down button to change the character.
- After changing the name, press the [O] button.
The song, with the name changed, is saved to the "Favorites."
NOTE
When you have selected a song registered to the "Favorites" genre, holding down the [ (Song)] button and pressing the [O] button displays the "song deletion" screen.
If you do not want to delete the song, use the cursor buttons to select <Cancel> and then press the [O] button.
MEMO
You can save recorded songs to USB Memory (p. 80). In addition, you can copy songs saved in the "Favorites" to USB Memory (p. 84).
Recording Along with a Song
Try recording along with internal songs and songs on USB Memory.

Here, record your right-hand performance along with the song accompaniment.
Settings for Performances
1. Press the [ (Song)] button to select the song you want to play.
"Listening to the Internal Songs" (p. 41)
"Listening to Music Files or a Song that was Saved on USB Memory" (p. 44)
2. Press the [ (Notation)] button to display the notation screen.
You can change the tone used in performances and change the tempo at which songs are played back. You can also play the metronome sound while recording.
Settings for Recording
3. Press the [ (Rec)] button.
A screen like the one shown below appears.
![ROLAND HPI-7S - Press the [ (Rec)] button. - 1](/content/2025/01/130843/images/e35aab6a1d41b137c4f7bcf2e77a300be375748f6e6d75e36a034ba17354c057.jpg)
4. Press the cursor left or right button to select , then press the [O] button.
With this setting, you can record while listening to the selected song.
![ROLAND HPI-7S - Press the cursor left or right button to select , then press the [O] button. - 1](/content/2025/01/130843/images/cafe70d772e1337ec292f56e9d26459b1020e17c395ad2c8867bb8a0f92f984d.jpg)
![ROLAND HPI-7S - Press the cursor left or right button to select , then press the [O] button. - 2](/content/2025/01/130843/images/2100dbae24bcd09702fc16c8951aed4251c2c52c7371aae3bdc5d34cae722741.jpg)
If you select a track button and then record, the sound of the selected track button will not be heard during recording.
![ROLAND HPI-7S - Press the cursor left or right button to select , then press the [O] button. - 3](/content/2025/01/130843/images/7c87cf17c58963356e1f602be85b09999785b1ab43b88bb9477899e0f8df7993.jpg)
You can't record along with an audio file or Music CD.
![ROLAND HPI-7S - Press the cursor left or right button to select , then press the [O] button. - 4](/content/2025/01/130843/images/47e89435ad0b15bdaf3727825ffed4c28a838062c4177b101720851478a3f1d4.jpg)
While the measure number is highlighted, the notation screen is being generated. When the highlighted number returns to normal, please try the operation again.
![ROLAND HPI-7S - Press the cursor left or right button to select , then press the [O] button. - 5](/content/2025/01/130843/images/d68520f5b39b90e6134ca4e313d723322649c5a844a0191df59359529d54f8a6.jpg)
The song tempo is stored within the song you selected. You can change the song tempo (p. 62).
![ROLAND HPI-7S - Press the cursor left or right button to select , then press the [O] button. - 6](/content/2025/01/130843/images/0129e22c406c5e22fa7c07c44949b473e096c5f276baa5489d63a05b7cb57f53.jpg)
Performing with a Variety of Tones p. 51
Using the Metronome p. 63
Selecting the Track to Record
5. Press the track button for the track that you want to record (i.e., the track that you want to play yourself).
The indicator of the button you pressed will blink, and the HPi-7S enters recording-standby mode.
Since in this example we will record the right-hand part performance, press the [4/Right] button to make the button's indicator blink.
To cancel recording, press the [ (Rec)] button once more and watch the indicator goes out.
Starting the Recording
6. Press the [▶/■ (Play/Stop)] button.
The count is played, and then recording begins.
When recording starts, the [ / ] (Play/Stop)] and [] (Rec)] buttons' indicators light.
Stopping the Recording
7. Press the [▶/■ (Play/Stop)] button.
Recording stops, and the indicators for the [ / ] (Play/Stop)] and [] (Rec)] buttons go out.
Listening to the Recorded Performance
8. Press the [I< (Reset)] button, then press the [▶/■ (Play/Stop)] button.
The recorded performance is played back.
When you press the [ / (Play/Stop)] button, recording stops.
![ROLAND HPI-7S - Press the [I< (Reset)] button, then press the [▶/■ (Play/Stop)] button. - 1](/content/2025/01/130843/images/0a2166dcf1aa1ef3cea2089e1f03fdbedd03214f88de01d6dc16e2eb3fc7c73c.jpg)
Only drum sets or SFX set are recorded to the [R/Rhythm] button.
Re-recording
When you want to re-record, specify the track button whose performance you want to re-record, then record again. When you select a previously recorded track button and re-record, the performance from the location at which you begin recording up to the location at which you stop recording will be replaced by the newly re-recorded performance.
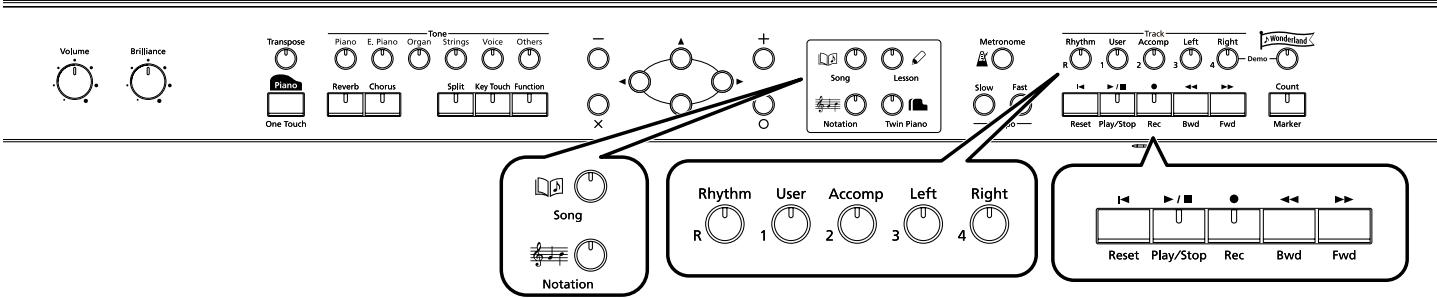
- Use the [ (Bwd)] or [ (Fwd)] button to move to the measure that you want to re-record.
- Press the [● (Rec)] button.
A screen like the one shown below appears.
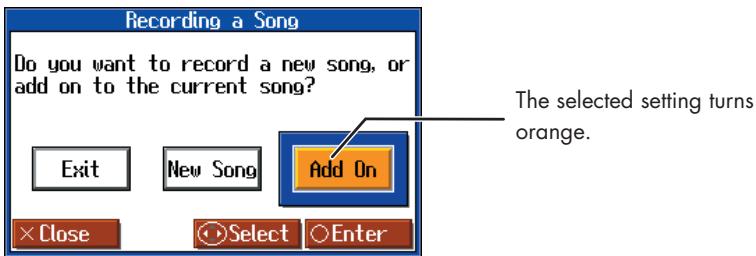
- Press the cursor left or right button to select
, then press the [O] button
This sets the HPi-7S so you can record while listening to the song already recorded.
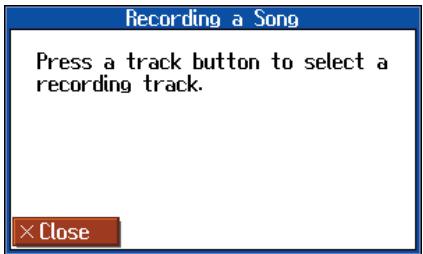
- Press the track button for the track that you want to re-record.
The indicators of the button you pressed and of the [▶/■ (Play/Stop)] button will blink, and the HPi-7S enters recording-standby mode.
- Press the [ / (Play/Stop)] button to start recording.
The count is played, and then recording begins.
When recording begins, the [▶/■ (Play/Stop)] button and [● (Rec)] button indicators will light.
Go ahead and perform on the keyboard.
- Press the [ / (Play/Stop)] button to stop recording.
The [ / (Play/Stop)] button and the [ (Rec)] button indicators will go out.
MEMO
When you want to record over again after deleting all of the previous recording, refer to "Erasing a Recorded Song" (p. 76).
MEMO
When deleting the performance for a specific track button, refer to "Erasing the Performance on Specific Tracks" (p. 76).
NOTE
The song tempo is stored within the song you selected.
Erasing a Recorded Song
A recorded song can be erased in the following two ways:
Method 1: After recording a song, press the [ (Song)] button and select another song in the "song selection" screen.
Method 2: Hold down the [ (Song)] button and press the [ (Rec)] button.
When either of these operations are performed, a display like the following will appear.
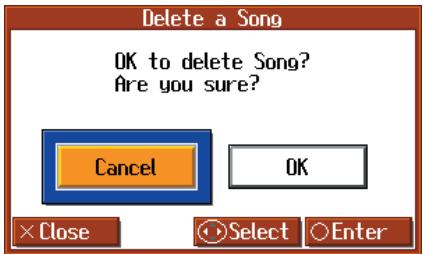
If you select <OK> , the song will be deleted. If you do not want to erase the song, save it on USB Memory or "Favorites" (p. 72, p. 80).
Erasing the Performance on Specific Tracks
You can select and erase performances on specific tracks.
1. Hold down the Track button for the track containing the performance you want to erase, then press the [● (Rec)] button.
The Track button's indicator goes out, and the recorded performance is erased.
Recording Songs Starting with Pickups
You can record songs that start with pickup beats (songs that start on a beat other than the measure's first beat).
1. Carry out Steps 1-3 on p. 70 to prepare for recording.
If the [ (Rec)] button's indicator is not lit, press the [ (Rec)] button so the indicator is lit.
The HPi-7S is put in recording standby.
2. Press the [ (Bwd)] button one time.
The measure number in the upper right of the notation screen changes to "PU," and the HPi-7S is set to record a song starting with a pickup.
![ROLAND HPI-7S - Press the [ (Bwd)] button one time. - 1](/content/2025/01/130843/images/4efb9d6237c9d0634ce5840017b6fa50cb0cd8986f03c6661185df550b32bd4e.jpg)
Press the [ / (Play/Stop)] button, then record the performance.
The count is played, and then recording begins.
Multitrack Recording on Five Tracks
Multitrack recording is a method by which you can record additional tracks while listening to the previously recorded tracks.
The HPi-7S provides five tracks, so you can record different sounds on each track to create an ensemble song.
You can also record on 16 tracks (p. 94).
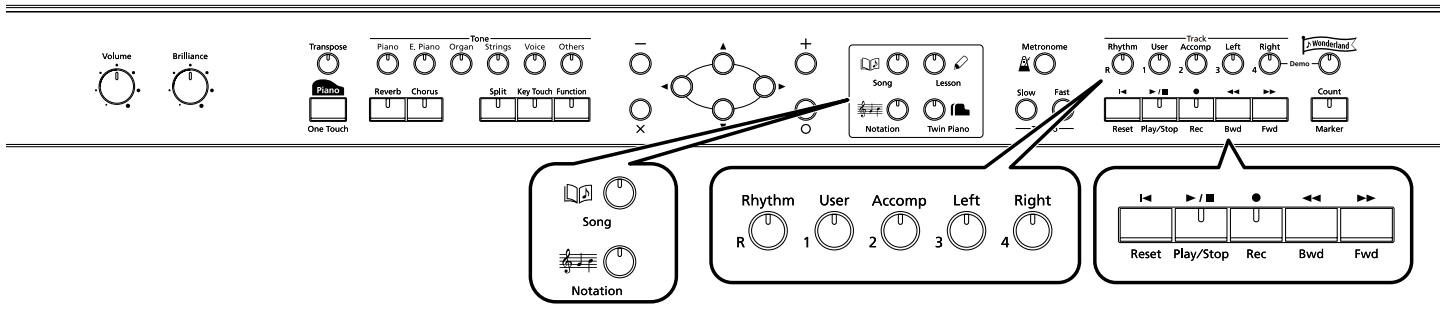
Recording the First Track
- Record your performance as described in "Recording a New Song" (p. 70).
Recording the Second and Subsequent Tracks
- Select and record additional tracks one at a time as described in "Re-recording" (p. 75).
For the second and subsequent recordings, you can listen to the previously recorded performances while you record.
- Record additional tracks as desired to complete the song.
The Five Track Buttons and 16 Parts
Many songs in commercially available SMF music files consist of 16 parts. The 16 parts are divided among the five track buttons.
The track buttons and the 16 parts correspond as follows.
| Track button | Part |
| [R/Rhythm] | 10, 11 |
| [1/User] | 1 |
| [2/Accomp] | 2, 5-9, 12-16 |
| [3/Left] | 3 |
| [4/Right] | 4 |

The song tempo will be remembered as the tempo at which you recorded the first track.
NOTE
Only drum set or SFX set sounds can be recorded in the [R/Rhythm] button.
Using External Memory
If you install USB Memory or a floppy disk drive (optional; sold separately), you'll be able to save songs you've recorded and listen to commercially available music files.
Connecting an USB Memory
1. Connect the USB Memory to the External Memory connector.
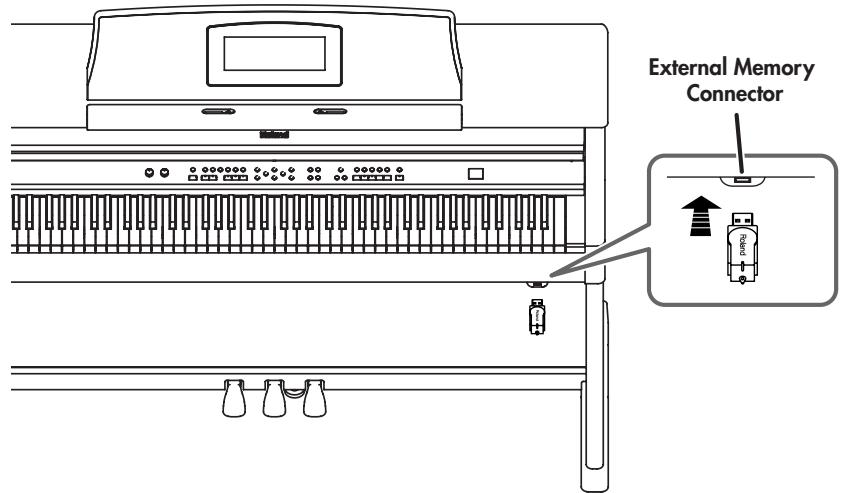
Rotating the External Memory Connector Holder
The External Memory connector holder rotates 90 degrees left and right.
Rotating the External Memory connector holder allows you to avoid damaging the connected USB Memory if something happens to bump against it.
1. Grasp the External Memory connector holder and turn it 90 degrees to the left or right.
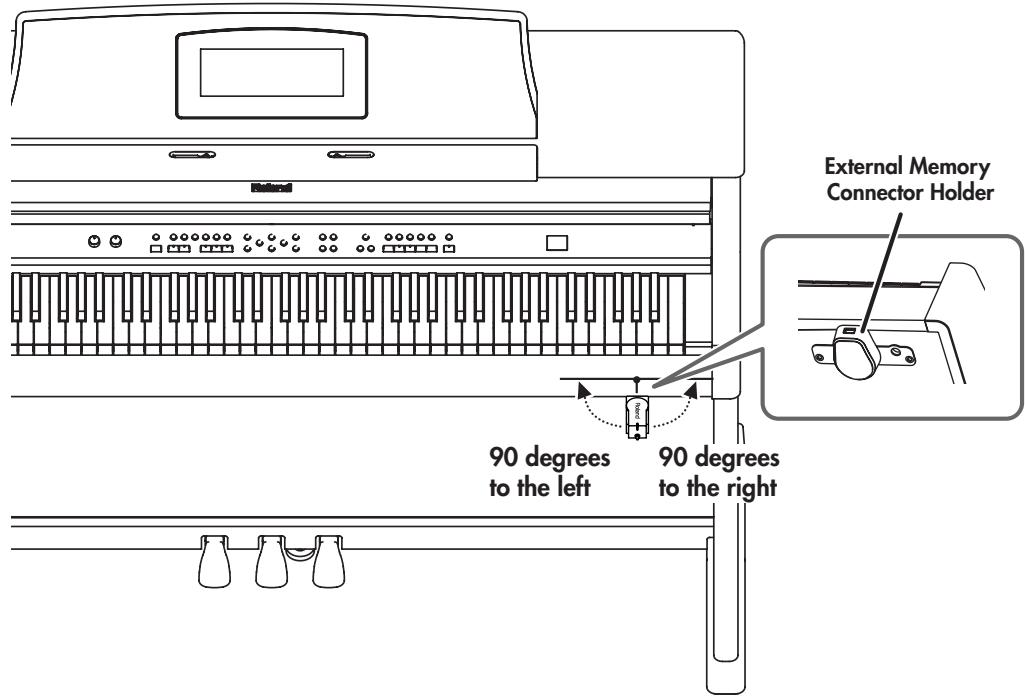

If connecting an optional floppy disk drive, substitute "floppy disk" wherever the term "USB memory" appears here.

If connecting an optional floppy disk drive, refer to "Installing the Floppy Disk Drive" (p. 20).

Use USB memory and floppy disk drive available from Roland. Proper functioning cannot be guaranteed if other USB memory products are used.

Be sure to grasp the External Memory connector holder itself when rotating it. Never rotate the External Memory connector holder by holding the connected USB memory.

Take care not to allow your fingers to become pinched when rotating the External Memory connector holder.
Formatting Media (Format)
The process of preparing USB Memory or floppy disks so that they can be used with the HPI-7S is called "initialization" (formatting).
In certain cases, particularly with floppy disks, the media is formatted for a specific type of device. If the media format does not match the HPi-7S's, you will not be able to use that media with the HPi-7S.
- Connect the USB Memory to the External Memory connector.
- Press the [Function] button.
The Functions screen appears.
- Press the cursor buttons to select
, then press the [O] button.
The "File" screen appears.
- Press the cursor right button to select
, then press the [O] button.

- Press the cursor right button to select <OK> , then press the [0] button.
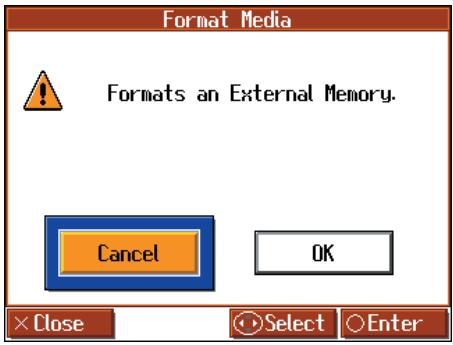
Initialization of the external memory begins.
When initialization is completed, you're returned to the "File" screen.
MEMO
If connecting an optional floppy disk drive, substitute "floppy disk" wherever the term "USB memory" appears here.
NOTE
When an external memory is initialized, all of the data saved on the external memory is erased. If you're formatting a used external memory for reuse, be sure to check first to make sure the external memory doesn't contain any data you don't want to lose.
NOTE
You cannot select
MEMO
When initializing floppy disks, check to make sure that the disk's write protect tab is slid to the "write" position (p. 10).
NOTE
Do not remove the storage media until the initialization is completed.
NOTE
If "Error" appears on screen, take a look at "Error Message" (p. 116).
Saving Songs
A recorded performance is discarded when you switch off the power or choose another song. You can store recorded song data to optional USB Memory and to the "Favorites." Be sure to save important songs to USB Memory or "Favorites."
What are "Favorites?"
You can register songs you are currently practicing or particularly like to "Favorites," allowing you to select these songs easily.
You can register songs recorded with the HPi-7S and songs saved to USB memory to the "Favorites." When you register a song on an USB memory to "Favorites," you can then play back the song without connecting the USB memory to the external memory connector.
If a recorded performance is saved to "Favorites," the performance won't be erased when the power is turned off.
Preparations for Saving a Song
When saving to USB Memory, connect the USB memory to the external memory connector.
- Press the [Function] button.
The Functions screen appears.
- Press the cursor buttons to select
, then press the [O] button. - Press the cursor left button to select <Save> , then press the [0] button.
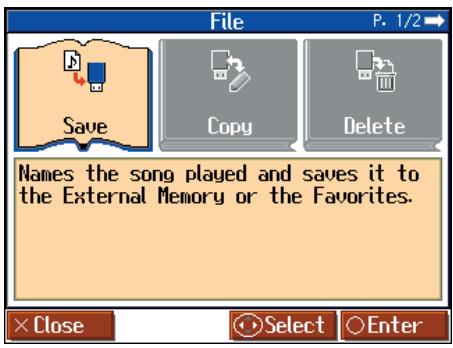
MEMO
If connecting an optional floppy disk drive, substitute "floppy disk" wherever the term "USB memory" appears here.
MEMO
When using a new storage media, first initialize (format) the external memory on the HPI7S. Take a look at " Formatting Media (Format)" (p. 79).
NOTE
Some commercially available music files cannot be saved because they are copy protected.
NOTE
You can't save a music CD or audio file to the "Favorites."
MEMO
When saving to floppy disks, first check to make sure that the floppy disk's protect tab is set to the "Write" position (p. 10).
MEMO
If not handled with care, a floppy disk and an USB memory can be damaged, or the data on it become corrupted, making playback impossible. We recommend saving your songs on two different media.
MEMO
When you want to clear all of the content saved to the "Favorites" and restore the settings to the original factory condition on the HPi-7S, refer to " Formatting the User Memory (Initialize User Memory)" (p. 97).
Determining the Save Destination
4. Press the cursor up or down button to change the setting of the Save Destination.
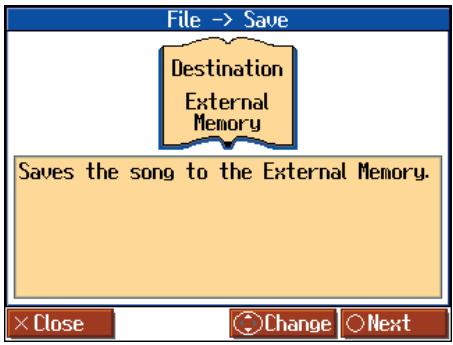
| Setting | Explanation |
| External Memory | The recorded song is saved to the external memory (USB memory, floppy disk, etc.). |
| Favorites | The recorded song is saved to the "Favorites." |
5. Press the [O] button.
Determining the Name of the Song to be Saved
6. Press the cursor left or right button to select the character you want to change, then press the cursor up or down button to change the character.
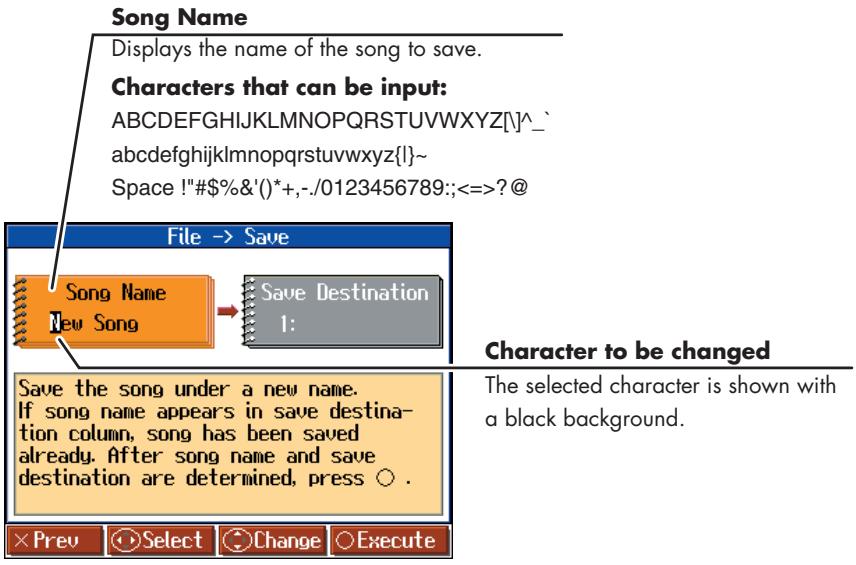
NOTE
You cannot select
Selecting the Save Number
7. Press the cursor right button one or more times to select .
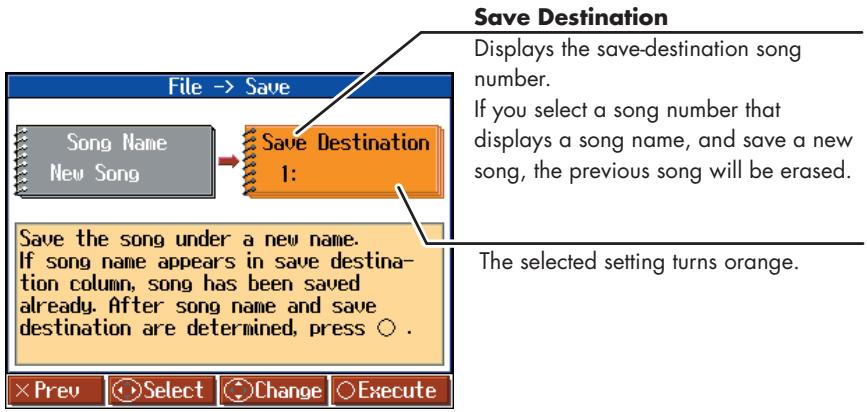
8. Press the cursor up or down button to select the save-destination number.
If a song name is displayed with a number, a song is already saved to that number. If you select a number with a previously saved song and then proceed to save a new song, the previously saved song will be erased. If you do not want to lose a saved song, select a number with no song name indicated in the save-destination column.
Saving the Song
9. Press the [O] button.
Saving begins. The time required for saving ranges from several seconds to half a minute or more. Don't take the USB memory out of the external memory connector until the saving process is finished.
Press [X] button several times; the "File" screen returns to the display.
NOTE
Never turn off the power while the saving operation is in progress. Doing so will damage the HPi-7S's internal memory or USB memory, making it unusable.
MEMO
It's a good idea to get into the habit of moving the write-protect tab (p. 10) on the floppy disk to the "Protect" position when you've finished saving your data. Keeping the tab at "Protect" prevents operations that could erase your songs by mistake.
Deleting Saved Songs
This deletes songs that have been saved on USB memory, or to "Favorites."
To delete a song on an USB memory, first connect the USB memory to the external memory connector.
- Press the [Function] button.
The Functions screen appears.
- Press the cursor buttons to select
, then press the [O] button. - Press the cursor left or right button to select
, then press the [O] button. - Press the cursor up or down button to select the location in which the song you want to delete is saved.
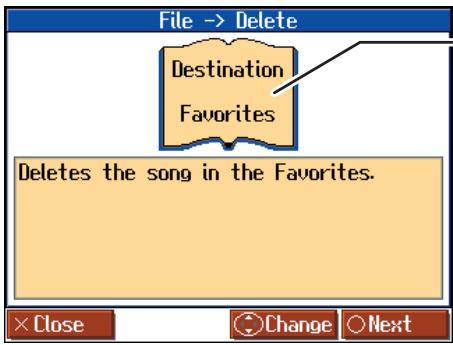
Distination
The location where the song you want to delete is stored is displayed.
- Press the [O] button.
- Press the cursor up or down button to select the song to be deleted.
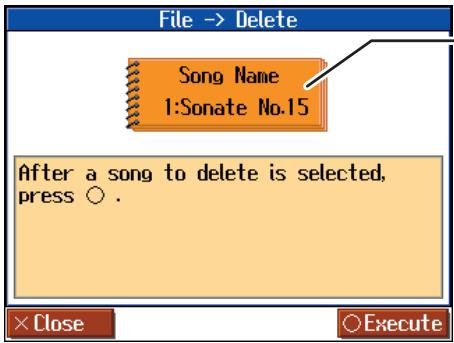
Song Name
Displays the name of the song that will be deleted.
- Press the [O] button.
The selected song is deleted.
Press [X] button several times; the "File" screen returns to the display.
NOTE
You cannot select
NOTE
You cannot select
NOTE
Never turn off the power while the operation is in progress. Doing so will damage the HPi-7S's internal memory or USB memory, making it unusable.
Copying Songs on USB Memory to Favorites
You can take songs saved on USB memory and copy them to "Favorites."
You can also copy songs in "Favorites" to USB memory.
- Connect the USB memory with the song to be copied to the External Memory connector.
- Press the [Function] button.
The Functions screen appears.
- Press the cursor buttons to select <File> , then press the [0] button.
- Press the cursor left or right button to select <Copy> , then press the [0] button.
- Press the cursor up or down button to select the copy type (copy source and destination).
If copying songs from USB memory to the "Favorites," select
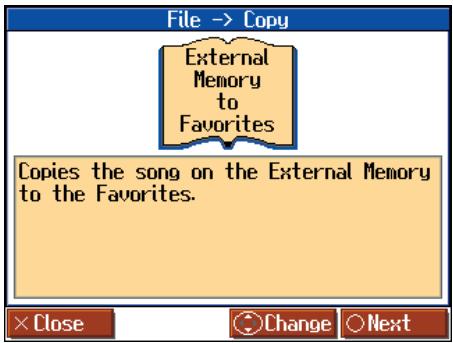
- Press the [O] button.
Selecting the Song You Want to Copy
- Press the cursor up or down button to select the song you want to copy.
When "All" is selected, all of the songs on the USB memory are copied to "Favorites."
NOTE
You can't copy an audio file or music CD to "Favorites."
NOTE
You cannot select
MEMO
If there's a floppy disk in the floppy disk drive, you'll also be able to select "Disk to External Memory." Press [O] and then proceed as directed in the screen.
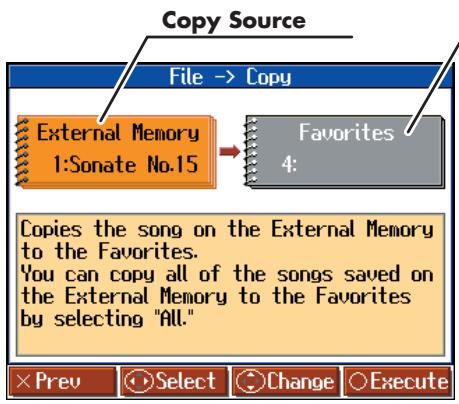
Copy Destination Displays the copy-destination song number. If you select a song number that displays a song name, and copy a new song, the previous song will be erased.
Selecting the Copy Destination
- Press the cursor left or right button to select Copy Destination.
- Press the cursor up or down button to select the copy-destination number.
If a number is displayed with a song name, a song is already saved to that number. If you select a number with previously saved song data and proceed to copy to that location, the previously saved song will be erased. If you don't want to erase a previously saved song, choose a number with no song name appears in the destination column.
- Press the [O] button.
The song is copied.
■ Copying Songs Saved in Favorites to USB memory
Songs that have been saved to "Favorites" can be copied onto USB memory. In this case, select
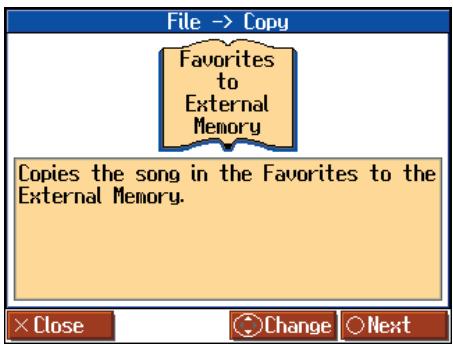
The rest of the procedure is identical to that used for copying songs from USB memory to "Favorites."
NOTE
When copying songs in USB memory, songs within folders are not copied when <All> is selected. If a song you want to copy is in a folder, first move the song outside of the folder to copy it.
NOTE
Never turn off the power while the operation is in progress. Doing so will damage the HPi-7S's internal memory or USB memory, making it unusable.
NOTE
Some song data cannot be copy because they are copy protected.
Functions that Can be Selected Using the [Function] Button
Here's how you can easily make changes such as tuning the HPi-7S or changing the function of the pedals.
Making the Settings
- Press the [Function] button.
The Functions screen appears.
- Press the cursor buttons to select the setting you want to make.
Pressing the cursor left or right button switches the selected setting horizontally; pressing the cursor up or down button switches the selected setting vertically.
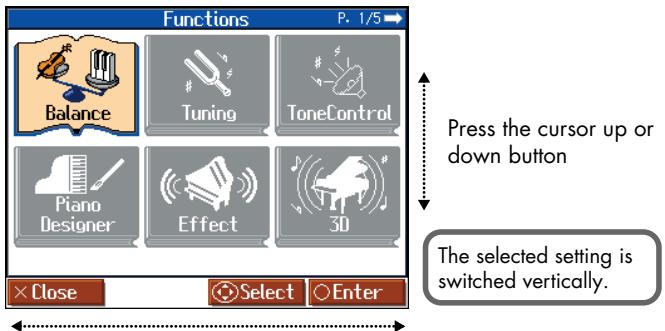
Press the cursor left or right button
The selected setting is switched horizontally. If there are any pages before or after the current page, pressing the cursor button one or more times will switch the display to such pages.
- Press the [0] button.
The screen for the selected function appears. - Press the cursor up or down button to change the setting.
- When you have finished making the settings, press the [ × ] button one or more times to return to the Notation screen.
Tone and Performance Settings
Adjusting the Volume Balance between accompaniment and keyboard (Volume Balance)
You can adjust the volume balance between the song and the sounds you play from the keyboard.
Refer to "Changing the Volume Balance of the Accompaniment and Keyboard (Balance)" (p. 61) for the procedure.
Adjusting the Piano Sounds (Piano Designer)
The HPi-7S is capable of reproducing a variety of the acoustic piano's distinctive characteristics. You can also adjust these to suit your own taste and style.
Refer to "Making the Settings" (previous section) for the procedure.
NOTE This setting is valid when some piano sounds are selected.
Opening/Closing the Piano Lid (Lid)
This simulates the actual changes in sound that occur when the lid of a grand piano is set at different heights.
| Setting | Explanation |
| 0-6 | As the value decreases, the lid seems to close more, producing a softer sound. Increasing the value opens the lid more, producing a brighter sound. |
Changing How Rapidly Sounds Are Expressed According to the Force Used to Play the Keys (Hammer Response)
You can adjust the timing with which sounds are produced according to the force used to play the keys.
When a key is pressed on an acoustic piano, it causes a hammer to move and strike the strings, producing sound. The hammers move more slowly when the keys are played gently, meaning that sounds are produced just slightly later than when you play the keyboard with greater force. If the Hammer Response function is turned on, the time between the moment you press a key until the sound is heard will change depending on the strength with which you play. As you play more softly, this time will become longer.
| Setting | Explanation |
| Off, 1–10 | The higher the value, the more slowly the hammers move when the keys are played gently. When set to Off, sounds are played immediately when the keys are pressed, regardless of the force used to play them. |
Setting the Tuning Curve (Stretch Tuning)
Pianos are generally tuned so that the low range is flatter and the high range is sharper than equal tempered pitches. This method of tuning is unique to the piano, and is known as "Stretched Tuning."
| Setting | Explanation |
| On | This tuning curve expands the low range and high range. It is suitable for piano solos. |
| Off | This is the standard tuning curve. This is the right choice when using Dual performance (p. 56), or when playing in ensemble with other instruments. |
Adjusting Resonance when the Damper Pedal is Depressed (Damper Resonance)
You can adjust this resonance (Damper Resonance) when the damper pedal is depressed.
On an acoustic piano, holding down the damper pedal will allow the remaining strings to resonate in sympathy with the sounds that you played from the keyboard, adding a rich resonance. The resonance is called "Damper Resonance."
| Setting | Explanation |
| Off, 1–10 | Increasing the value will increase the amount of effect. When set to Off, no Damper Resonance is applied. |
Adjusting the Resonant Sounds when the Keys are Pressed (String Resonance)
When the keys are pressed on an acoustic piano, the strings for keys that are already pressed also vibrate sympathetically. The function used to reproduce this resonance is called "String Resonance."
| Setting | Explanation |
| Off, 1–10 | Increasing the value will increase the amount of effect. When set to Off, no String Resonance is applied. |
Playing Sounds When the Keys Are Released (Key Off Resonance)
This adjusts sympathetic vibrations such as an acoustic piano's key-off sound (the subtle sound that occurs when you release a note).
| Setting | Explanation |
| Off, 1–10 | Increasing the value will increase the amount of effect. When set to Off, no Key Off Resonance is applied. |
Adjusting the Keyboard Touch (Key Touch)
You can adjust the touch (playing feel) of the keyboard.
| Setting | Explanation |
| Fixed, Super Light, Light, Medium, Heavy, Super Heavy | You can adjust the sensitivity with which the keyboard responds to your playing. If you turn the keyboard's touch sensitivity “Fixed,” all notes will sound at a fixed loudness regardless of how strongly you play the keyboard. |
Making Fine Adjustments to the Keyboard Touch Sensitivity (Key Touch Offset)
You can make fine adjustments to the touch sensitivity of the keyboard. You can adjust the keyboard touch in even greater detail than specified by the Key Touch setting (see preceding section)
| Setting | Explanation |
| -10-0-9 | Increasing this value will make the keyboard feel heavier. |
Changing the Velocity When the Key Touch is Set to "Fixed" (Fix Velocity)
This sets the velocity the sound will have when the keyboard touch (p. p. 53, p. 87) is set to "Fixed."
If you turn the keyboard's touch sensitivity "Fixed," all notes will sound at a fixed loudness regardless of how strongly you play the keyboard. The setting described below specifies the loudness in this case.
| Setting | Explanation |
| 1-127 | Increasing this value will increase the volume of your keyboard playing. |
■ Listening to a Piano Designer demo
You can hear a demonstration of the various differences in sound created by the Piano Designer function (p. 86). When the Piano
Designer screen is shown, press the [O] button to access the Piano Designer Demo screen. To hear the demo, proceed as directed by the screen. You can also select the piano designer demo from "Select a Demo" screen (p. 93).
When you have finished with Piano Designer Demo, press the [X] button in the "Piano Designer Demo" screen.
Setting the Reference Pitch and Temperament (Tuning)
Tuning to Other Instruments' Pitches (Master Tuning)
In situations such as when playing ensemble with other instruments, you can tune the HPi-7S's standard pitch to the pitch of another instrument. For a cleaner ensemble sound while performing with one or more other instruments, ensure that each instrument's standard pitch is in tune with that of the other instruments. The standard pitch generally refers to the pitch of the note that's played when you finger the middle A key.
Setting
415.3 Hz-440.0 Hz-466.2 Hz
Changing the Tuning (Temperament)
You can play classical styles such as Baroque using historic temperaments (tuning methods).
Today, compositions are generally created with equal temperament in mind and are played using equal temperament. However in past ages of classical music, a variety of temperaments were used. By playing in the temperament that was in use when a composition was created, you can experience the sonorities of chords originally intended for that song.
| Setting | Explanation |
| Equal | This temperament divides the octave into 12 equal parts. All intervals will be slightly out of tune by the same amount. |
| Just (Maj) | This temperament makes the 5th and 3rd intervals pure. It is unsuitable for playing melodies and modulation is not possible, but it produces beautifully harmonious chords. |
| Just (min) | Just intonation differs between major and minor keys. The same results as major can be obtained in a minor key. |
| Arabic | This tuning is suitable for the music of Arabia. |
| Kirnberger | This temperament is a modification of meantone temperament and just intonation, allowing more freedom of modulation. It allows you to play in all keys (third method). |
| Pythagorean | This temperament is based on the theories of the Greek philosopher Pythagoras, and has pure fourths and fifths. Chords containing a third will sound impure, but melodies will sound good. |
| Meantone | This temperament is a partial compromise of just intonation in order to allow modulation. |
| Setting | Explanation |
| Werkmeister | This temperament is a combination of meantone and Pythagorean temperaments. It allows you to play in all keys. (First method, number three.) |
When performing in ensemble with other instruments, be aware that depending on the key, there may be some shifting of the pitch. Tune the HPi-7S to the fundamental pitch of the other instruments.
Setting the Tonic (Key)
When playing with tuning other than equal temperament, you need to specify the tonic note for tuning the song to be performed (that is, the note that corresponds to C for a major key or to A for a minor key). If you choose an equal temperament, there's no need to select a tonic note.
Setting
C,C#,D,Eb,E,F,F#,G,Ab,A,Bb,B
Adjusting the Depth of the Effects (Effect)
You can adjust the depth of the reverb (p. 54) and chorus (p. 54).
Refer to "Making the Settings" (p. 86) for instructions.
Reverb
| Setting | Explanation |
| 1–10 | Increasing the value will increase the amount of reverb effect. |

This setting is valid when the [Reverb] button is turned on to apply an effect to the sound.

Holding down the [Reverb] button, press the cursor up or down button to adjust the depth of reverb effect.

You cannot make separate reverber effect depth settings for each individual tone. The effect will be applied with the same depth to all tones.

This will not change the reverb depth for the song that is playing back.
Chorus
You can set the amount of chorus applied for each tone individually.
- Select the tone for which you want to adjust the chorus.
- Press the [Function] button.
- Press the cursor buttons to select <Effect> , then press the [O] button.
- Press the cursor right button to select
. - Press the cursor up or down button to change the setting.
| Setting | Explanation |
| 1–10 | The amount of chorus effect applied increases as the value is raised. |

As long as the power to the HPi-7S is turned on, you can store the chorus settings to each tone individually. In addition, you can use the Memory Backup function (p. 97) to keep the stored settings even when the power is turned off.
Changing the Brightness of the Sound/Making the Sound Expressive (Adjusting the sound)
You can adjust the brightness of the sound, or make it more expressive.
"Adjusting the Brightness of the Sound (Brilliance)" (p. 55)
"Adding Liveliness to the Sound (Dynamics Sound Control)" (p. 55)
Giving the Sound More Spatial Depth (3D Sound Control)
You can use the internal speakers to add a three-dimensional spaciousness to the sound of the accompaniment.
Adjusting the Depth of the Sound (Depth)
The HPi-7S provides a "3D Sound Control" function, which creates the sense of spatial depth that you experience when playing a grand piano. This function adds the natural resonance and spaciousness that are characteristic of an acoustic piano.
Refer to "Making the Settings" (p. 86) for instructions.
You can adjust the spatial depth over four levels.
| Setting | Explanation |
| Off,1-4 | Increasing the value will increase the spatial depth of the sound. When set to Off, no 3D Sound Control effect is applied. |

You can use the Memory Backup function to store this setting in internal memory (p. 97).

You can change the way in which the 3D Sound Control function is applied (p. 90).

3D Sound Control does not affect the sound from the Input jack or the sound of external devices connected to the MIDI Out connector.

When you turn Twin Piano on or Dynamic Sound Control on, 3D Sound Control will be turned off.

If you use the Transpose function (p. 68) or the Center Cancel function (p. 49) when a music CD song or an audio file is selected, 3D Sound Control will be turned off.
Changing How Grand Space is Applied (3D Mode)
This specifies how 3D Sound Control will be applied.
Refer to "Making the Settings" (p. 86) for instructions.
| Setting | Explanation |
| Auto | When the headphones are connected, the depth effect is optimized for headphones, and when no headphones are connected, the optimal depth for speakers is applied. |
| Speaker | The optimal depth for speakers is used, regardless of whether or not headphones are connected. 3D sound control is also applied to the sound output from the Output connectors, making this convenient when you want to play through speakers connected to the Output connectors. |
| Headphones | The optimal depth for headphones is used, regardless of whether or not headphones are connected. |
Adjusting the Volume of an Audio File (Audio Volume)
You can adjust the volume at which an audio file or music CD will play.
"Adjusting the Volume of an Audio File or Music CD" (p. 49)
Adjusting the Depth of Mic Echo (Mic Echo)
When using a mic, you can apply an effect similar to a karaoke echo to the sound of the mic.
Refer to "Making the Settings" (p. 86) for instructions.
| Setting | Explanation |
| Off, 1–10 | Increasing this value will apply the echo more strongly. |
Adjusting the tonal character (Equalizer)
Changing the Equalizer Type
You can switch the equalizer settings to change the tonal character. The HPi7-S provides four equalizer settings.
| Setting | Explanation |
| Off | The equalizer function will be off. |
| 1 | Boosts the high frequencies, making the sound brighter and more brilliant. |
| 2 | Reduces the high frequencies, making the sound more mellow. |
| 3 | Boosts the mid and low frequencies, giving the sound more power. |
| 4 | A setting suitable for piano solos. |
Changing the Equalizer Settings (Equalizer)
You can use the equalizer to modify the tonal character of the sound by boosting or reducing just the low-frequency or high-frequency range of the sound.
- Choose an equalizer setting from 1 through 4.
- Press the [O] button.
- Press the cursor buttons to select the setting you want to make.
- Press the [-] [+] button to change the setting.
| Indication | Value | Description |
| Low Gain | -12–+12 dB | Adjusts the level of the low-frequency range. |
| Low Freq | 100–1.0k (Hz) | Frequency point in the low-frequency range. Generally, this changes the level at and below this frequency. |
| Low Mid Gain | -12–+12 dB | Adjusts the level of the low-frequency range to midrange. |
| Low Mid Freq | 16–16.0k (Hz) | Frequency point in the low-frequency range to midrange. This changes the level of the specified bandwidth centered on this frequency. |
| Low Mid Q | 0.5, 1.0, 2.0, 4.0, 8.0 | Changes the bandwidth of the low-frequency range to midrange. The bandwidth affected by the controls narrows as the value increases. |
| High Mid Gain | -12–+12 dB | Adjusts the level of the mid-to high-frequency range. |
| High Mid Freq | 16–16.0k (Hz) | Frequency point in the mid-to high-frequency range to midrange. This changes the level of the specified bandwidth centered on this frequency. |
| High Mid Q | 0.5, 1.0, 2.0, 4.0, 8.0 | Changes the bandwidth of the mid-to high-frequency range. The bandwidth affected by the controls narrows as the value increases. |
| High Gain | -12–+12 dB | Adjusts the level of the high-frequency range. |
| High Freq | 1.25k–16.0k (Hz) | Frequency point in the high-frequency range. Generally, this changes the level at and over this frequency. |
NOTE
Sounds may become distorted as the Gain level increases.
Changing the Pedal Functions (Pedal)
You can change the function of the left pedal and center pedal.
Refer to "Making the Settings" (p. 86) for instructions.
Left Pedal, Center Pedal
| Setting | Explanation |
| Upper Soft (only left pedal) | When you hold down the pedal and play the keyboard, the sound will have a softer tone. |
| Upper Sostenuto (only center pedal) | Only the notes that were played while the pedal was held down will be sustained. |
| Tap Tempo | The tempo of the song, or metronome will be set by the interval at which you press the pedal. When the pedal to which this function is assigned is pressed several times at the desired rate, the tempo will be set accordingly. |
| Lower Damper | When using Split performance (p. 57), the same effect as the damper pedal will be applied to the left-hand keyboard area. |
| Replay | Pressing the pedal during playback of a song stops the playback. When the pedal is released, playback resumes from the beginning of the measure that was playing when the pedal was pressed. When the pedal is pressed in rapid succession, the playback will resume backs up the same number of measures as the number of times the pedal is pressed. |
| Page Bwd | Pressing the pedal turns the notation appearing on the display to the preceding page while the playback of a song is stopped. |
| Page Fwd | Pressing the pedal turns the notation appearing on the display to the next page while the playback of a song is stopped. |
| Play/Stop | Performs the same function as the [▶/■ (Play/Stop)] button. |
Screen Display Settings
Changing the Language Displayed in the Screen (Language)
You can change the language that is displayed in the screen.
Refer to "Making the Settings" (p. 86) for instructions.
Setting
English, Japanese, Germany, French, Spanish

Germany, French, and Spanish are displayed for some functions. Other screens will be displayed in English.
Selecting Images to be Shown on the Displays (User Image Display)
You can have image data from computers and other devices shown on the onboard display, when the HPi-7S is turned on.
Displaying images saved on floppy disks on the HPi-7S's screen requires a floppy disk drive (optional; sold separately).
- Prepare the desired image data with your computer.
- Save the images you want to display to USB memory (optional) or a floppy disk (optional).
- Connect the USB memory containing the image to the HPI-7S's External Memory connector.
When using a floppy disk, insert the floppy disk in the floppy disk drive connected to the External Memory connector.
- In Step 2 on p. 86, select
and press the [O] button.
The "User Image Display" screen appears.
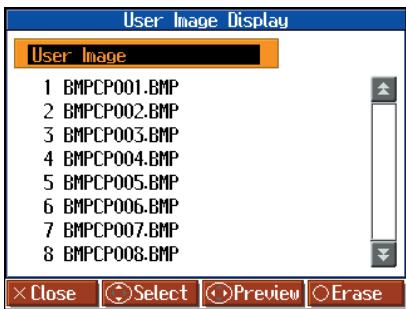
By selecting the image you want to display and pressing the cursor left or right button, you can display the selected image in the screen to confirm the image.
- Press the cursor up or down button to select the image you want to display from the list, then press the [O] button.
Recommended Image Data
| Size | 640 x 240 pixels |
| Format | BMP format, JPEG format |
| Name | 1-8 characters in length (lowercase is ok).A filename extension of“.bmp” or“.jpg” must be added after the name.Use of the following alphanumeric characters is recommended for naming image files.A B C D E F G H I J K L M N O P Q R S T U V W X Y Z a b c d e f g h i j k l m n o p q r s t u w x y z0 1 2 3 4 5 6 7 8 9 |
When You Want to Display Images Residing in Folders
- Bring up the "User Image Display" screen.
- Press the cursor up or down button to select the folder containing the desired image.
- Press the [O] button.
The name of the image file in the folder is displayed.
- Press the cursor up or down button to select the image you want to display from the list, then press the [O] button.
To Leave a Folder
- Press the cursor up or down button to select (Up).
- Press the [ ] button.
To Delete a Saved Image
- Press the cursor up button one or more times to select "User Image."
- Press the [O] button.
The following message appears.
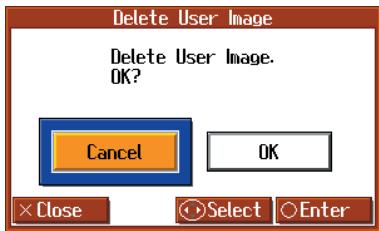
- Press the cursor right button to select <OK> , then press the [O] button.
The saved images are deleted.
Playing the Demos
You can play demo that give you an idea of the HPi-7S's various functions.
1. Hold down the Track [4/Right] button and press the [Wanderland] button.
The Select a Demo screen appears.
2. Use the cursor buttons to select "Auto Demo."
3. Press the [O] button.
The HPi-7S's functions appear in sequence in the display.
Press a button or a key on the keyboard to stop the demo.
![ROLAND HPI-7S - Press the [O] button. - 1](/content/2025/01/130843/images/1652e894f3af015ec206e61b5f0fc80892b2e0c7f2e428e31e398ab8b6942dee.jpg)
You can set the HPi-7S so that the demo with all of the songs starts playing automatically if the instrument is not played or adjusted for several minutes.
"Setting the Demo (Auto Demo)" (p. 93)
![ROLAND HPI-7S - Press the [O] button. - 2](/content/2025/01/130843/images/cea1d3d581bce2c50e6d3ebd02d071192587100dc16d14c2d18f697a814f9811.jpg)
By selecting "Piano Designer" in the demo screen, you can listen to a Piano Designer demo.
"Listening to a Piano Designer demo" (p. 87)
Setting the Demo (Auto Demo)
Sets whether or not Auto Demo is started when no action is taken for a set length of time.
Refer to "Making the Settings" (p. 86) for instructions.
| Item | Explanation | Setting |
| Auto Start | Sets whether or not Auto Demo is started when no action is taken for a set length of time. | On, Off |
| Mode | Selects the image to be displayed in the screen when Auto Demo starts. Select <Demo> to display the demo introducing the HPi-7S's functions. Select <User Image> to display the image saved with "User Image Display" (p. 92). | Demo, User Image |
| BGM | Selects whether or not BGM (background music) is played when Auto Demo starts. When <On> is selected, all of the songs are played in random order. | On, Off |

If you select
Recording and Playback Setting
Changing the Parts Assigned to the Track Buttons During SMF Playback (Track Assign)
Ordinarily, when playing back SMF music files for Roland Piano Digital instruments (p. 125), the left-hand part is assigned to the Track [3/Left] button, and the right-hand part is assigned to the Track [4/Right] button. However, right-hand and left-hand part assignments in certain SMF music files may differ.
If these are set to "Auto," and as a result you are unable to use the track buttons to control the left- and right-hand parts properly, change the setting to "2/1 Part" or "3/4 Part."
Refer to "Making the Settings" (p. 86) for instructions.
| Setting | Explanation |
| Auto | The part assigned to each track will be determined automatically, depending on the song file. |
| 2/1 Part | Part 1 will be assigned to the right-hand track, part 2 to the left-hand track, and part 3 to the user track. |
| 3/4 Part | Part 4 will be assigned to the right-hand track, part 3 to the left-hand track, and part 1 to the user track. |

The Track Assign function does not affect internal songs or song data that is other than SMF format.

After changing this setting, try selecting the song once again.
Recording and Playing Back Performances of Specific Instruments (16 Track)
The HPi-7S lets you record 16 separate parts. Multitrack recording is a method of recording whereby you listen to what has previously been recorded while recording new parts on top of that material.
By recording a different tone to each part, you can create song data for performances that feature up to 16 different tones layered together.
The function used for recording the 16 individual parts one at a time is called the "16-track sequencer."
16-Track Sequencer
You can record performances for up to 16 parts, overlaying them part by part, to create a single song.
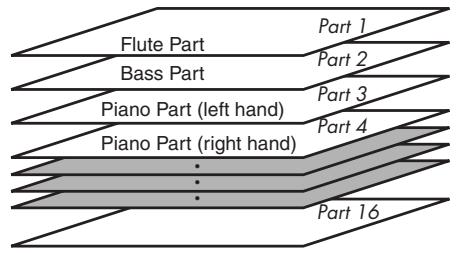
16-Track Sequencer and the Track Buttons
In addition to the "16-Track Sequencer" function, the "Track Buttons" (p. 59) are another of the unit's playing/recording functions.
These "track buttons" group the 16-track sequencer's 16 parts with five buttons. Using the 16-track sequencer to work with performances recorded with the track buttons allows you to record even more sounds and edit with precision.
The track buttons correspond to the 16-track sequencer's parts as shown below.
| Track button | 16-track Sequencer's Part |
| [R/Rhythm] | 10, 11 |
| [1/User] | 1 |
| [2/Accomp] | 2, 5-9, 12-16 |
| [3/Left] | 3 |
| [4/Right] | 4 |
Each of the 16-track sequencer's parts is used for recording a single tone, so you cannot use it to record tones that combine two tones simultaneously, as in Dual (p. 56) and Split (p. 57) performances.
You can also change the tones in each part, select specific parts for playback (solo), and prevent specified parts from playing (mute). Playback with only a single part muted is called "Minus One."
You can even set solo and muting during playback.
Part 11 of Roland SMF music file that is available for purchase is included with the track button [2/Accomp], but the correspondence of other parts to the track buttons is the same.
NOTE
Some commercially available SMF music files may contain data that cannot be edited.
Basic Procedure
First, have the song that you want to edit selected.
- Press the [Function] button.
The Functions screen appears.
- Press the cursor buttons to select the <16 Track>, then press the [0] button.
A screen like the one shown below appears.
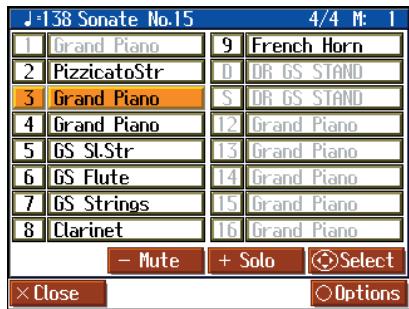
The characters for parts with no recorded data are grayed out.
- Press the cursor buttons to select the part you want to edit.
- Make the part settings (p. 95), mute settings (p. 95), and tone settings (p. 95).
- Record the performance (p. 95).
- When you have finished the settings and recording, press the [ × ] button.
If the Following Message Appears
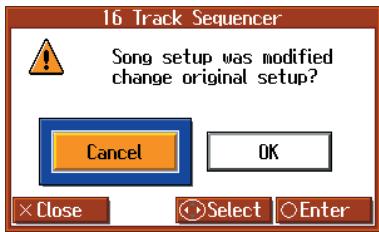
Press the cursor right button to select <OK> , then press the [O] button
MEMO
If you select <Cancel> , the "16-track Sequencer" screen closes without any changes being made to the part settings.
Preventing a Part from Playing (Mute)
- Press the cursor buttons to select the part you want to mute.
- Press the [-] [+] button or ,cursor left button left and right to select Solo or Mute.
| Button Function | Explanation |
| Pressing the [+] button | Only the sounds in the selected part is played (Solo). Part other than those selected have an “M” appearing with the numbers. |
| Pressing the [-] button | The sounds of the selected parts are not played (they are muted). The number of the muted part is displayed as “M.” |
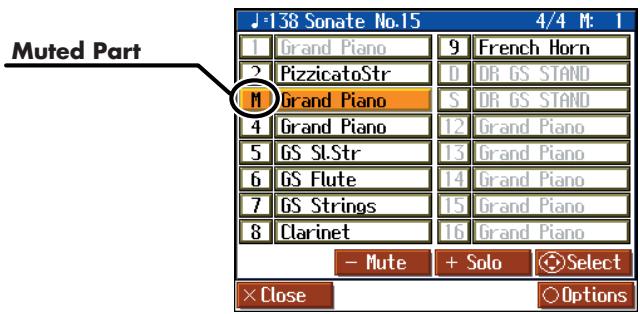
Press the [- ] [+] button once more to cancel the solo or mute.
Changing Tones
- Press the Tone button to select the Tone group.
- Press the cursor buttons to select the tone.
Making Part Settings
This makes more detailed settings for the parts.
- Press the cursor buttons to select the part you want to edit, then press the [O] button.
A screen like the one shown below appears.
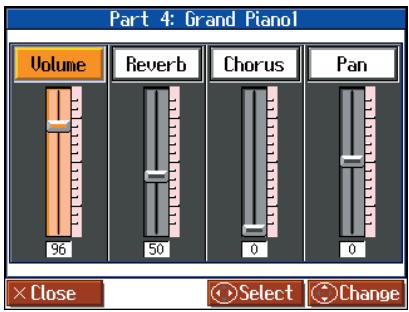
- Press the cursor left or right button to select the item, then press the cursor up or down button to change the setting.
| Item | Explanation |
| Volume | Changes the volume level. |
| Reverb | Changes the amount of reverb effect applied to the sound. |
| Chorus | Changes the amount of chorus effect applied to the sound. |
| Pan (Panpot) | Shifts the direction from which the sound is heard between left and right. Press the cursor up button to shift the sound to the right, or press the cursor down button to shift it to the left. |
What's Panpot?
Panpot is the control that determines the placement of the sound in the stereo sound field between left and right speakers. By altering the Panpot setting, you can change the perceived location of the sound between the left and right speakers.
Recording
- Press the cursor buttons to select the part you want to record.
- Use the [ (Bwd)] or [ (Fwd)] button to move to the measure you want to record.
- Set the recording tempo (p. 62) and metronome (p. 63).
- Press the [ (Rec)] button.
The HPi-7S goes into record standby.
- Press the [▶/■ (Play/Stop)] button to start recording.
The count is played, and then recording begins.
- Press the [▶/■ (Play/Stop)] button to stop recording.
Changing the Tone Settings When Playing Back Songs (Play Mode)
With the normal setting, GS tones (sounds that are compatible with other GS instruments) will normally be used to play back song data. By changing this setting, you can play back song using HPi-7S-specific tones for certain portions of the data.
Refer to "Making the Settings" (p. 86) for instructions.
| Setting | Explanation |
| GS | Playback uses GS-compatible tones for performances that sound like other GS instruments. |
| HPi | Playback uses HPi-7S tones for greater expressiveness. However, differences may appear when playing back using devices other than the HPi-7S. |

After changing this setting, try selecting the song once again.
Displaying theLyrics (Lyrics)
Some commercially available music files for use in karaoke, as well as some of the internal songs include lyrics data. You can have the lyrics screen be displayed automatically when playing back these kinds of song data.
Refer to "Making the Settings" (p. 86) for instructions.
| Setting | Explanation |
| Off | The lyrics screen is not displayed, even when playing back song data containing lyrics data. The notation and lyrics are displayed in the Notation screen. |
| On | The lyrics screen is displayed automatically when song data containing lyrics data is played back. You can confirm lyrics in the lyrics screen when, for example, the lyrics cannot be displayed in full within the Notation screen. |
Switching VIMA TUNES Recommended Tones (Recommended Tone)
You can connect a commercially available USB CD drive to the HPI-7S, and play back separately sold CD-ROMs created for the VIMA (VIMA TUNES).
Songs on VIMA CD-ROM (VIMA TUNES) are programmed with "recommended tones" suitable for each song.
When you select a song from a VIMA CD-ROM (VIMA TUNES), recommended tones will be assigned to the HPi-7S's [Strings], [Voice] and [Others] tone buttons, and these three tone buttons will blink.
When you press a flashing Tone button, the recommended tone is then selected, enabling you to perform the selected song using a tone matched to that song as it plays back.
You can set the HPi-7S so that the recommended tones are automatically assigned or not assigned.
Refer to "Making the Settings" (p. 86) for instructions.
| Setting | Explanation |
| On | When you select a song from a VIMA CD-ROM (VIMA TUNES), the recommended tones will automatically be assigned to the HPi-7S's [Strings], [Voice] and [Others] tone buttons. |
| Off | When you select a song from a VIMA CD-ROM (VIMA TUNES), the recommended tones are not used, and only the HPi-7S's internal tones can be selected. |
This is set to "On" at the factory.
Adjusting the Volume (Master Gain)
If you are playing the HPi-7S through a connected external system, there may be cases in which the volume from your external system is too low even when the HPi-7S's volume is turned to the maximum setting. In such cases, you can adjust the master gain setting as follows.
Adjusting the master gain will also affect the volume of the internal speakers and headphones.
Refer to "Making the Settings" (p. 86) for instructions.
Setting
-12-0-12 dB

The sound may distort if you increase the volume excessively.
Other Settings
Formatting the User Memory (Initialize User Memory)
The HPi-7S features an internal storage area where you can save recorded performances and User image. This space is called the "User Memory."
The following content is stored to the user memory.
Songs registered to the "Favorites"
- Image files set with the "User Image Display"
To delete all of the content held in the user memory and restore the original settings, carry out the following procedure.
- In step 2 on p. 86, select "Initialize User Memory" and press the [O] button, and a message will be displayed.
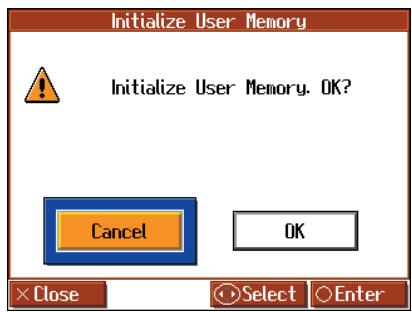
- Press the cursor right button to select <OK> , then press the [O] button; the initialization is executed.

Never turn off the power while the display indicates "Executing...." Doing so will damage the HPi-7S's internal memory, making it unusable.

Carrying out this operation does not initialize any settings other than the user memory settings. To restore settings other than those for the user memory to the original default settings, carry out Factory Reset (p. 98).
Remembering the Settings Even when the Power is Turned Off (Memory Backup)
Normally, the settings of the various variations will revert to their default values when the power is turned off. However, you can specify that the various settings will be remembered even when the power is turned off.
This function is called "Memory Backup."
- In step 2 on p. 86, select "Memory Backup" and press the [O] button, and a message will be displayed.
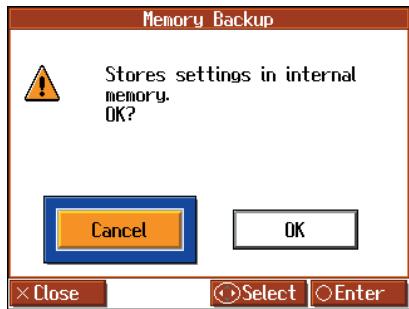
- Press the cursor right button to select <OK> , then press the [O] button; the Memory Backup is executed.

Never turn off the power while the display indicates "Executing...." Doing so will damage the HPi-7S's internal memory, making it unusable.
| Stored Contents | |
| Piano Designer | Lid, Hammer Response, Stretched Tuning, Damper resonance, String Resonance, Key Off Resonance, Key Touch, Key Touch, Key Touch Offset, Key Touch Fix Velocity |
| Tuning | Master Tunig, Temperament, Key |
| Transpose | Link on/off |
| Effects | Reverb on/off, Reverb depth for each sound Chorus on/off, Chorus depth for each sound |
| Equalizer | EQ Number (off, 1, 2, 3, 4), Various settings |
| Adjusting the Sound | Dynamics Sound Control |
| 3D | Depth, Mode |
| Metronome | Metronome Sound |
| Count | Count-in sound, Count-down sound, Count-in measures |
| External display settings | Display Content, Display Method |
| Other | Language, Track Assign, Play Mode, Lyrics, Twin Piano Mode, Dual Balance, Split Point |
→ The settings for the following parameters are saved even without Memory Backup.
Auto Demo (p. 93), USB Driver (p. 110)
Restoring the Original Default Settings (Factory Reset)
The memory backup settings can be restored to the original default condition. This operation is referred to as "Factory Reset."

When you execute "Factory Reset," all settings you've stored up to that point will be cleared, and reset to their factory-set condition.
- In step 2 on p. 86, select "Factory Reset" and press the [O] button, and a message will be displayed.
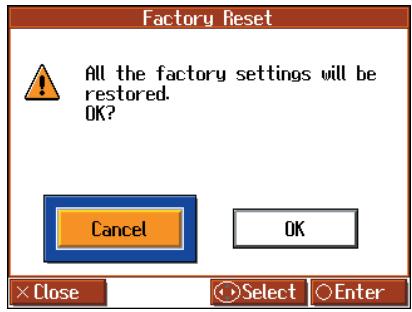
- Press the cursor right button to select <OK> , then press the [O] button; the Factory Reset is executed.
Once the Factory Reset has been completed, switch the power off, then on again.

Never turn off the power while the display indicates "Executing...." Doing so will damage the HPi-7S's internal memory, making it unusable.

Executing this operation will not erase the songs from "Favorites" or USB memory. If you want to erase all songs from the HPi-7S's internal memory, refer to " Formatting the User Memory (Initialize User Memory)" (p. 97).
Using the V-LINK Function
Connecting the HPi-7S to a V-LINK compatible image device allows you to control the images with the HPi-7S.
V-LINK ( V-LINK ) is a function that allows music and images to be performed together. By using MIDI to connect two or more V-LINK compatible devices, you can easily enjoy performing a wide range of visual effects that are linked to the expressive elements of a music performance.
Refer to "Making the Settings" (p. 86) for instructions.

To prevent malfunction and/or damage to speakers or other devices, always turn down the volume, and turn off the power on all devices before making any connections.
| Setting | Explanation |
| On | Switches to Image Control mode. You can control images using the twelve keys at the left end of the keyboard. |
| Off | Cancels Image Control mode. |
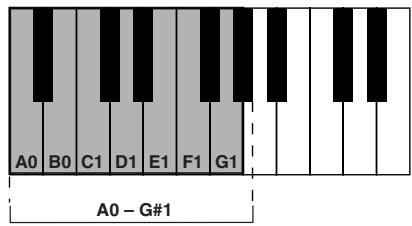

While V-LINK is switched on, no sound is produced when you press any of the twelve keys at the left end of the keyboard. In addition, an icon indicating that V-LINK is on appears in the Notation screen.
Disabling the Buttons (Panel Lock)
The "Panel Lock" function locks the HPi-7S in a state where all buttons will be disabled. In addition, the indicators for all of the HPi-7S's buttons go out, and nothing is displayed in the screen within the music rest. This prevents the settings from being inadvertently modified even if children press the buttons accidentally.
- Press the One Touch [Piano] button and [Count/Marker] button simultaneously.

Pressing buttons during playback or recording of a song stops the playback or recording.
Canceling the Panel Lock function
- Once again, press the One Touch [ Piano ] button and [Count/Marker] button simultaneously.

Panel Lock will be cancelled when you turn off the power.
Changing the Notation Screen Settings
You can change the parts shown in the notation screen, and how the notation is displayed.
1. Press the [ (Notation)] button one or more times to display a screen like the following.
![ROLAND HPI-7S - Press the [ (Notation)] button one or more times to display a screen like the following. - 1](/content/2025/01/130843/images/74324d870523639e2149d9aef7039ac4e9fa492765b39f4e82eb89c9675f3585.jpg)
You can set the HPi-7S so that while the Notation screen is being displayed, a screen like that above continues to appear even if you press the [O] button.
2. Press the [O] button; the is displayed.
![ROLAND HPI-7S - Press the [O] button; the is displayed. - 1](/content/2025/01/130843/images/4e4f28bfbca1792b58ac73b1efdb82cc4df96ece6df164658d6d108c1486f8d9.jpg)
3. Press the cursor buttons to select , then press the [O] button.
A screen like the one below appears.
![ROLAND HPI-7S - Press the cursor buttons to select , then press the [O] button. - 1](/content/2025/01/130843/images/3a677dcfc1da4988ef858ecd90f6463a1269d1c5c85ef8809a7911cf8c3eb128.jpg)
The Notation Options screen has four pages. Switch among the pages in the screen by pressing the cursor left or right button.
| Item | Setting | |
| Pitches Specify how note names are displayed when the notation screen is expanded. | Off | Not displayed. |
| C, D, E | The note name (C, D, E) will be displayed. | |
| Do, Re, Mi (Fixed) | The pitch names (fixed Do) are displayed. | |
| Do, Re, Mi (Movable) | The syllable names (movable Do) are displayed. | |
| Item | Setting | |
| Clef L, Clef R Specify whether the notation will be displayed as a G- clef or F-clef. | Auto | The display will be switched automatically. |
| G Clef | Select a G-clef notation. | |
| F Clef | Select a F-clef notation. | |
| Item | Setting |
| User Select the part that will be displayed when you select Web (User) for “Part” in the notation screen. | User Track, Part 1-16 |
| Item | Setting |
| Left Select the part that will be displayed when you select (Left) for “Part” in the notation screen. | Left Track, Part 1-16 |
| Item | Setting |
| Right Select the part that will be displayed when you select (Right) (Right) for “Part” in the notation screen. | Right Track, Part 1-16 |
| Item | Setting | |
| Key Display the notation in the specified key. | Auto | The key will be set automatically according to the song file. |
| # x 6-0- b x 5 | The notation will be displayed in the specified key. | |
| Item | Setting |
| Resolution | |
| Sets the minimum note value displayed in the screen. | 16th Note, 32nd Note |
| Item | Setting |
| Bouncing Ball Sets whether or not the animation of the ball bouncing in time with the tempo is to be displayed when song data is played back. | On, Off |
| Item | Setting |
| Color Notation | |
| Sets whether or not the note currently being played appears in color in the notation when song data is played back. | On, Off |
| When set to <On>, notes in the right-hand part appear in red, while the notes in the left-hand part are displayed in green. |
Editing Songs (Song Edit)
There are many ways you can edit performances recorded using the HPI-7S Track button (p. 59) or 16-track sequencer (p. 94).
Basic Operation of the Editing Functions
1. Press the [ (Notation)] button one or more times to display a screen like the following.
![ROLAND HPI-7S - Press the [ (Notation)] button one or more times to display a screen like the following. - 1](/content/2025/01/130843/images/b227a48cbdb7dccf58a95b35403b32c8576f7e57790ecda96b76e283a3ed1385.jpg)
You can set the HPi-7S so that while the Notation screen is being displayed, a screen like that above continues to appear even if you press the [O] button.
2. Press the [O] button; the is displayed.
![ROLAND HPI-7S - Press the [O] button; the is displayed. - 1](/content/2025/01/130843/images/4fc42b92ad81b7072421832036b1ab9909d566cd831989341f3aa9f8283fd0f8.jpg)
3. Press the cursor buttons to select <Song Edit> , then press the [0] button.
![ROLAND HPI-7S - Press the cursor buttons to select <Song Edit> , then press the [0] button. - 1](/content/2025/01/130843/images/4cc8b75b90cf55535801e8eb39322d7010c532e29e6abcdeed0634c22f1baa89.jpg)
4. Press the cursor buttons to select the function, then edit it.
The "Song Edit" screen has four pages. Press the cursor left or right button one or more times to switch the screens. For more detailed information, refer to the corresponding page for each function.
Editing Functions
| Function | Explanation | Page |
| Undo | Undoes editing operations that have been performed. | p. 100 |
| Copy | Copies measures. | p. 101 |
| Quantize | Corrects Timing Discrepancies. | p. 101 |
| Delete | Deletes measures. | p. 102 |
| Insert | Inserts a blank measure. | p. 102 |
| Transpose | Transposes parts individually. | p. 102 |
| Erase | Erases data in measures, creating blank measures. | p. 103 |
| Part Exchange | Exchanges the sounds in parts. | p. 103 |
| Note Edit | Allows corrections to be made note by note. | p. 103 |
| PC Edit | Allows editing of the Tones changes that occur during a song. | p. 104 |
"PC" stands for "Program Change," which is a command that tells an instrument to change the sound it's using. With songs that rely on the use of a variety of sounds, a "PC" needs to be located at every point within the song where the Tone is to be changed.
* Some edits can't be undone, not even by choosing "Undo." We recommend saving songs to USB memory or to "Favorite" before editing. For more on how to save songs, refer to "Saving Songs" (p. 80).
→ You can press the [▶/■ (Play/Stop)] button in the "Song Edit" screen to play back the edited song. However, you cannot play back the song while editing in the various edit screens.
Undoing Edits (Undo)
You can cancel an editing operation that you've just carried out. This is handy when you want to undo an edit and restore data to the way it was before.
- There are some edits that can't be restored.
Editing functions that can be undone appear on screen.
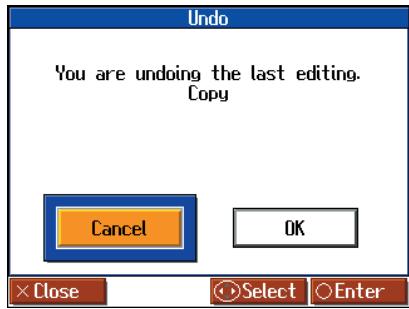
Selecting
- Copying Measures (Copy)
You can copy a portion of a performance to a different bar in the same Part or to a measure in another Part. This is handy when you're composing a song that repeats a similar phrase.
Ex. To copy measures 5-7 to measure 8.
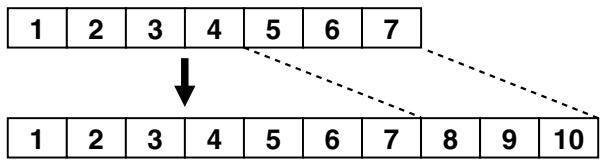
Refer to "Basic Operation of the Editing Functions" (p. 100) for instructions.
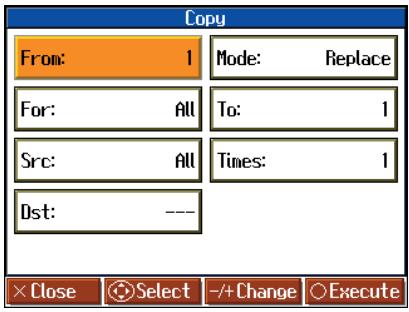
| Item | Explanation | |
| From | Measure number of the first measure of the segment to be copied | |
| For | Number of measures to be copied When <All> is selected, all of the measures are copied. | |
| Src | Copy-source Track button or part number Choosing <All> copies all Parts. If you choose a Track button, you can only copy to the selected Track button. You cannot copy to the other Track buttons. When <All> or a track button is selected, “- - -” appears in the “Dst” field. | |
| Dst | Copy-destination part number | |
| Mode | Data can be copied in the following three ways: | |
| Replace | If there is a performance recorded at the copy destination, this previous recording is erased, and the copied data is written in its place. | |
| Mix | If there is a performance recorded at the copy destination, the copied data is layered over the previous recording. If the Tones used for the copy source and copy destination are different, the copy-destination Tone is used. | |
| Insert | If there is a performance recorded at the copy destination, the copied portion is inserted without erasing the previous recording. The song is lengthened by the number of inserted measures. | |
| Item | Explanation |
| To | Copy-destination measure number When <End> is selected, the data is copied to the end of the song. |
| Times | Number of times the data is to be copied |
Correcting Timing Discrepancies (Quantize)
You can correct for timing discrepancies in a recorded performance by automatically aligning the music with the timing you specify. This is called "Quantize."
As an example, let's say that the timing of some quarter-notes in a performance is a little off. In this case, you can quantize the performance with quarter-note timing, thus making the timing accurate.
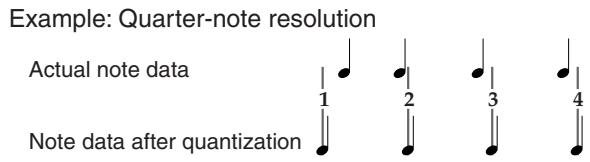
Example: Sixteenth-note resolution
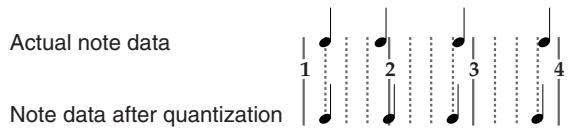
Refer to "Basic Operation of the Editing Functions" (p. 100) for instructions.
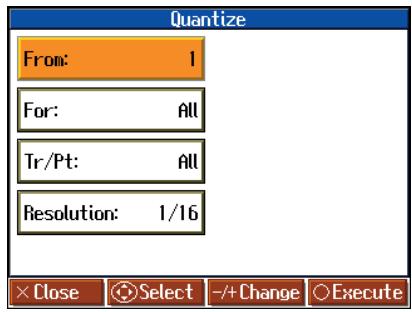
| Item | Explanation |
| From | Measure number of the first measure of the segment to be quantized |
| For | Number of measures to be quantized When <All> is selected, all of the measures are quantized. |
| Tr/Pt | Track button or part number to be quantized Choosing <All> quantizes the same passage in all Parts. |
| Resolution | Quantization timing Select one of the following values 1/2 (half note), 1/4 (quarter note), 1/6 (quarter-note triplet), 1/8 (eighth note), 1/12 (eighth-note triplet), 1/16 (sixteenth note), 1/24 (sixteenth-note triplet), 1/32 (thirty-second note) |
- Deleting Measures (Delete)
You can delete a part of a performance measure by measure. When a portion of a performance is deleted, the rest of the performance is shifted up to fill the gap. Erasing measures in a specified passage is called "Delete."
Ex. To delete measures (bars) 5-8
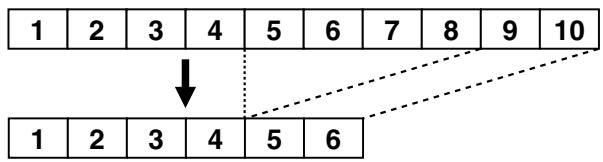
Refer to "Basic Operation of the Editing Functions" (p. 100) for instructions.
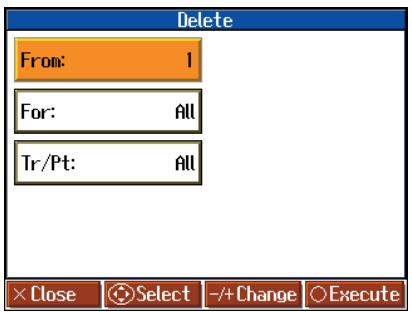
| Item | Explanation |
| From | Measure number of the first measure of the segment to be deleted |
| For | Number of measures to be deleted When <All> is selected, all of the measures are deleted. |
| Tr/Pt | Track button or part number to be deleted When <All> is selected, the same portion of all parts is deleted. |
Inserting Blank Measures (Insert)
You can add a blank measure at a location you specify. This addition of a blank measure is called "Insert."
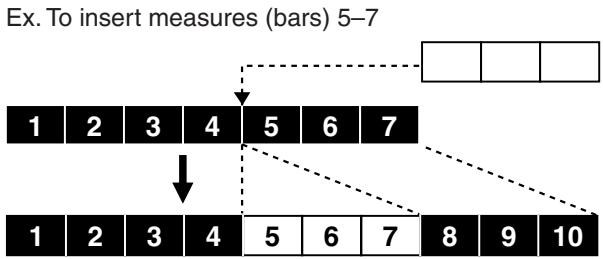
Refer to "Basic Operation of the Editing Functions" (p. 100) for instructions.
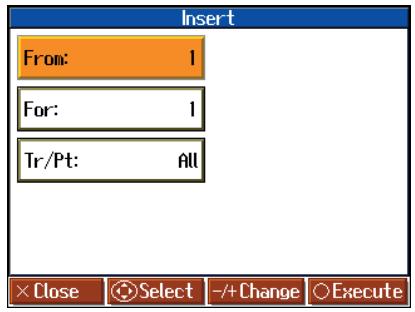
| Item | Explanation |
| From | Measure number of the first measure of the segment to be inserted |
| For | Number of measures to be inserted |
| Tr/Pt | Track button or part number where data will be inserted When <All> is selected, blank measures are inserted at the same place in all parts. |
Transposing Individual Parts (Transpose)
You can transpose specified parts and tracks individually.
Refer to "Basic Operation of the Editing Functions" (p. 100) for instructions.
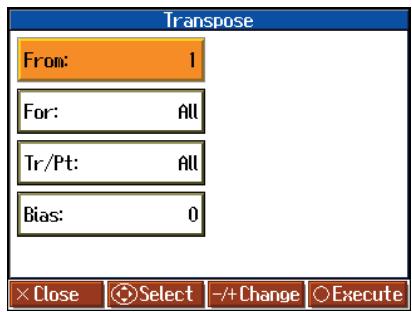
| Item | Explanation |
| From | Measure number of the first measure of the segment to be transposed |
| For | Number of measures to be transposed When <All> is selected, all of the measures are transposed. |
| Tr/Pt | Track button or part number to be transposed When <All> is selected, the same portion of all parts is transposed. |
| Bias | The range of transposition You can select the range to transpose the data, from -24 (two octaves down) to +24 (two octaves up), adjustable in semitones. |

You cannot transpose performances of the drum sets and sound effect sets (such as the Rhythm Track).
Making Measures Blank (Erase)
You can delete the performance data in a specified block of measures, turning them into blank measures without reducing the length of the song. This process is called "Erase."
Ex. To erase measures (bars) 5-8
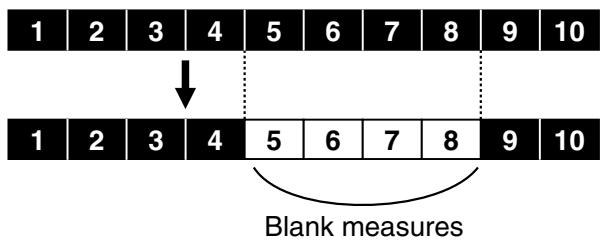
Refer to "Basic Operation of the Editing Functions" (p. 100) for instructions.
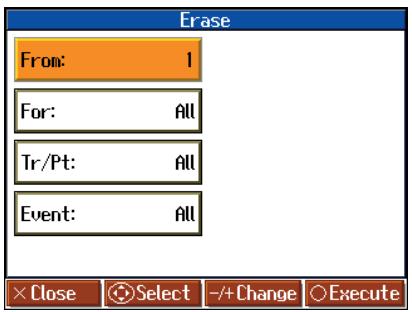
| Item | Explanation | |
| From | Measure number of the first measure of the segment to be erased | |
| For | Number of measures to be erased When <All> is selected, all of the measures are erased. | |
| Tr/Pt | Track button or part number to be erased When <All> is selected, the same portion of all parts is erased. | |
| Event | Select from the following types of performance data to erase: | |
| All | All performance data, including notes, tempos, Tones switches (Program Change), volume changes, etc., are erased. | |
| Tempo | Tempo data is erased. Erasing the tempo data for all measures results in a single, constant tempo. | |
| Prog. Change | Erases the data for switching Tones (p. 109). | |
| Note | Erases only notes. | |
| Except Note | Erases all of the performance data except for the notes. | |
| Expression | Erases Expression (volume change) information. | |
| Lyrics | Only the lyrics are removed. | |
Exchanging Parts (Part Exchange)
You can exchange the notes recorded for a particular part with the notes recorded for another part. This process of exchanging parts is called "Part Exchange."
Refer to "Basic Operation of the Editing Functions" (p. 100) for instructions.
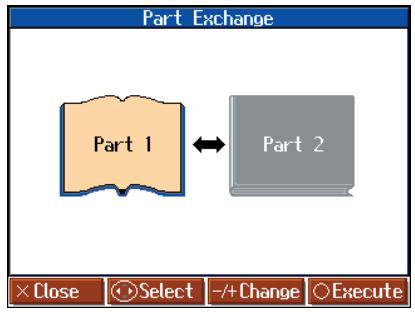
Correcting Notes One by One (Note Edit)
You can make corrections in a recorded performance one note at a time. This process of making changes in individual notes is called "Note Edit."
You can make these corrections by using note editing:
- Deleting misplacedd notes
- Changing the pitch of a single note
- Changing the force used in playing a single key (velocity)
- Change the fingering numbers.
Refer to "Basic Operation of the Editing Functions" (p. 100) for instructions.
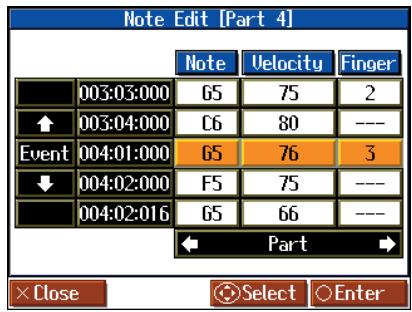
The note-location display uses "Measure: Beat: Tick" as the format. A tick is a unit of time that's shorter than a beat.
Use the cursor buttons to select the part with the note to be edited. The Part number appears at the top of the screen.
Use the [ (Bwd)] button and the [ (Fwd)] button or use cursor up or down button to find the note to be corrected.
Once the note you want to edit is displayed in the center of the screen, press the [O] button to display the settings screen.
In the settings screen, press the cursor left or right button to select the "Note (pitch)," "Velocity (note strength)," and "Finger (fingering number)" settings for the note.
Use the cursor buttons to correct the note, velocity, or fingering number. If you want to delete the note, press the [O] button.
Modifying the Tone Changes in a Song (PC Edit)
In some songs, the instrument sound changes during the course of the song (that is, the Tone changes in the middle of a Part). In such songs, an instruction to switch the Tone is inserted at the place where you want the sound to change. This instruction is called a "Program Change" (PC), and actions such as deleting program changes, or changing the selected Tone by them are called "PC Edit."
- It is not possible to insert a program change into a measure or beat that does not contain a program change.
Refer to "Basic Operation of the Editing Functions" (p. 100) for instructions.
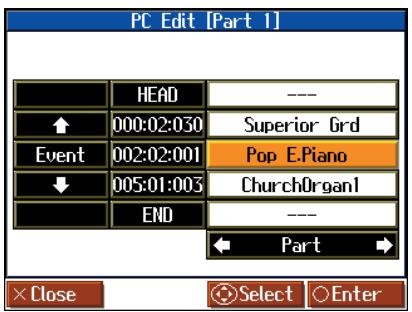
The PC-location display uses "Measure: Beat: Tick" as the format.
A tick is a unit of time that's shorter than a beat.
Use the cursor buttons to select the part with the program change to be edited. The Part number appears at the top of the screen.
Use the [ (Bwd)] button and the [ (Fwd)] button or use cursor up or down button to find the program change to be edited.
Once the Program Change you want to edit is displayed in the center of the screen, press the [O] button to display the settings screen.
In the settings screen, press a tone button to select a tone group, then select a tone with the cursor buttons.
When selecting Part 10 or 11, select the drum set or effect sound.
If you want to delete the Program Change, press the [O] button.
Saving the Notation Data in BMP Format
You can take notations that are displayed on the HPi-7S and save them to USB memory (sold separately). You can also use saved image data to your computer.
- You cannot save copyrighted song data.
- Other than for your own personal enjoyment, use of the notations that are output without the permission of the copyright holder is prohibited by law.
- For more on indicating note names when outputting notations as BMP files, refer to "Changing the Notation Screen Settings" (p. 99).
1. Connect the USB memory to the External Memory connector.
2. Select the song you want to save (p. 41, p. 44).
When making notation data from a song you have performed, first record the song ahead of time (p. 69).
3. Press the [ (Notation)] button one or more times to display a screen like the following.
![ROLAND HPI-7S - Press the [ (Notation)] button one or more times to display a screen like the following. - 1](/content/2025/01/130843/images/e6a9d8a6db1eeaf85007544de183ddd083639b0fd01bac32498ddc792d5f7c7b.jpg)
4. Press the [O] button; the "Notation Menu" screen is displayed.
5. Press the cursor buttons to select <BMP Export> , then press the [0] button.
A message screen appears.
6. After reading the message, press the [O] button.
The following screen appears when you select a copyrighted song. When this screen appears, press the [O] button at this point to return to Step 2 and select a different song.
![ROLAND HPI-7S - After reading the message, press the [O] button. - 1](/content/2025/01/130843/images/6df9b30fe4e1cf3cc8ccfdc20fbb30531b252002ae6a34d28ec733ddddbd6bb4.jpg)
A screen like the one shown below appears.
![ROLAND HPI-7S - After reading the message, press the [O] button. - 2](/content/2025/01/130843/images/3b49971022ae0f92dbd4451d44b64c05bb6449e434b80f6c873cf2685022473f.jpg)
- Press the cursor left or right button to select the item, then press the cursor up or down button to set the range to be saved.
| Item | Setting | Explanation |
| Start Measure | Song Top- | Selects the measure from which output starts. |
| End Measure | -Song End | Selects the measure from which output ends. |
| Direction | Portrait, Landscape | Selects the orientation for output of the notation. |
- Press the [O] button.
The notation is saved to the USB memory as image data in BMP ( bitmap) format.
![ROLAND HPI-7S - After reading the message, press the [O] button. - 3](/content/2025/01/130843/images/1d62c8b2107686e4f592d893e8549f9a5a7a43e4440a0c0c1f5f3e9be7c285cf.jpg)
Do not remove the USB memory while "save" is in progress.
Connecting to Audio Equipment
You can connect audio devices to play the sound of the HPi-7S through the speakers of your audio system, or to record your performance on a tape recorder or other recording device.
Use phone plug audio cables (sold separately) to make connections.
- Connecting Speakers to the HPi-7S and Outputting Sounds
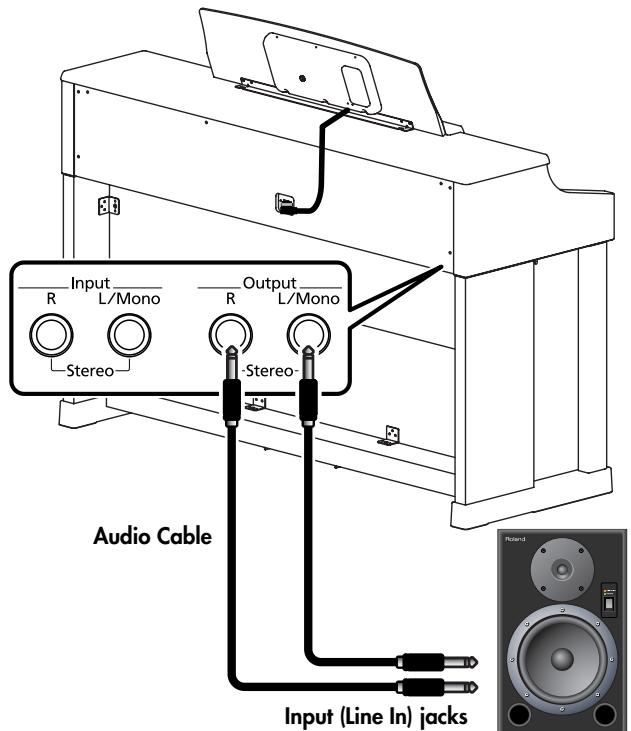
Speaker etc.
- Turn the volume all the way down on the HPi-7S and on the speaker you're about to connect.
- Turn off the power to the HPi-7S and the speaker.
- Use audio cables (sold separately) to make the connection.
- Switch on the HPi-7S.
- Switch on the connected speaker.
- Adjust the volume level on the HPi-7S and the connected speaker.
When you play the HPi-7S's keyboard, the sound is played from the connected speakers.
Turning Off the Power
- Turn the volume all the way down on the HPi-7S and on the speaker you're about to connect.
- Turn off the connected speaker.
-
Turn off the HPi-7S.
-
When connection cables with resistors are used, the volume level of equipment connected to the input jacks may be low. If this happens, use connection cables that do not contain resistors.
- To prevent malfunction and/or damage to speakers or other devices, always turn down the volume, and turn off the power on all devices before making any connections.
Playing Sounds from Audio Equipment Through the HPi-7S
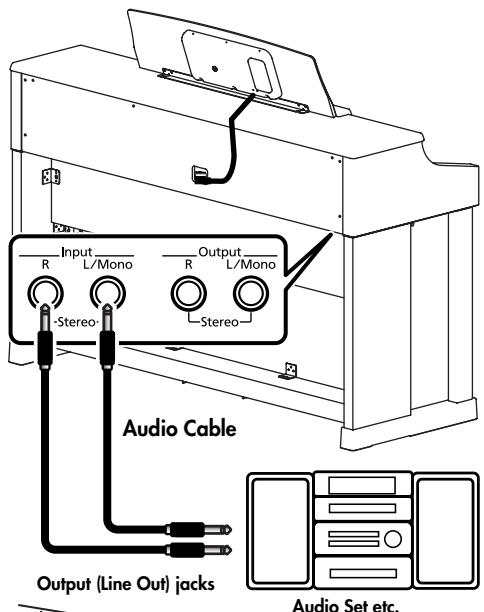
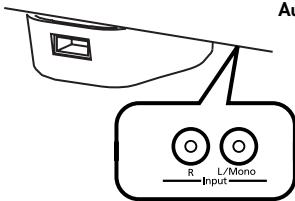
RCA pin-type Input jacks are located to the lower right of the front. They provide a convenient way to connect portable audio devices.
- Turn the volume all the way down on the HPi-7S and on the audio device you're about to connect.
- Turn off the power to the HPi-7S and the audio device.
- Use audio cables (sold separately) to make the connection.
- Switch on the audio device.
- Switch on the HPi-7S.
- Adjust the volume level on the audio device. The sounds from the connected audio device are played by the HPi-7S.
Turning Off the Power
- Turn the volume all the way down on the HPi-7S and on the audio device you're about to connect.
- Turn off the HPi-7S.
- Turn off the audio device.
Connecting to MIDI Devices
By connecting an external MIDI device and exchanging performance data, you can control one device from the other. For instance, you can output sound from the other instrument or switch Tones on the other instrument.
What's MIDI?
MIDI, short for "Musical Instrument Digital Interface," was developed as a universal standard for the exchange of performance data between electronic instruments and computers. The HPi-7S is equipped with MIDI connectors to let it exchange performance data with external devices. These connectors can be used to connect the HPi-7S to an external device for even greater versatility.
■ Playing the HPi-7S with a MIDI Sequencer/ Recording the HPi-7S's Performance Data to a MIDI Sequencer
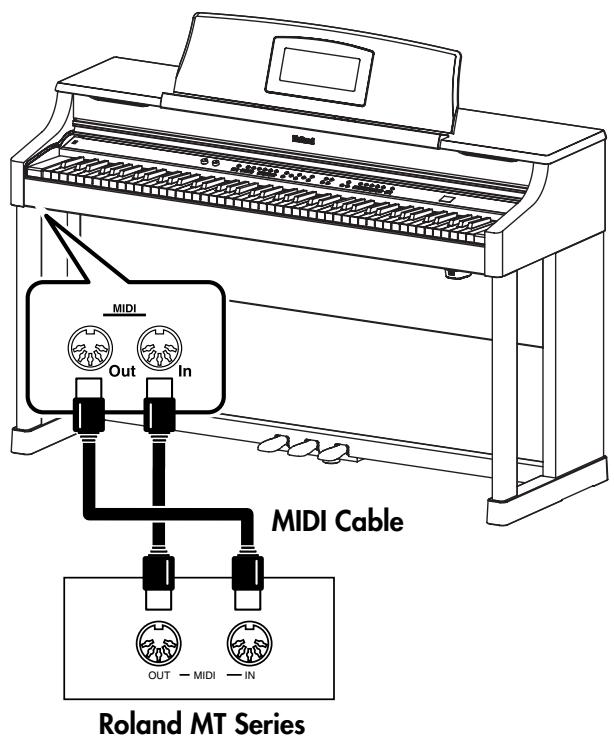
NOTE
When the HPi-7S is connected to a MIDI sequencer, set it to "Local Off." Refer to "Disconnecting the Internal Sound Generator and Keyboard (Local Control)" (p. 108).
Producing Sounds from a MIDI Sound Module by Playing the HPi-7S
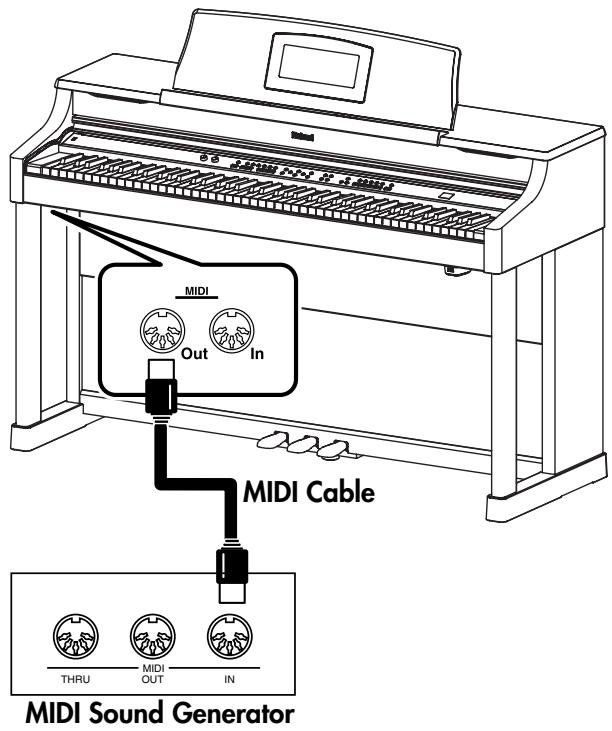
Making the Connection
- Turn the volume all the way down on the HPi-7S and on the MIDI device you're about to connect.
- Switch off the power to the HPi-7S and the MIDI device you're about to connect.
- Use a MIDI cables (sold separately) to connect the MIDI connectors to each other (see illustration).
- Switch on the power to the HPi-7S and the connected MIDI device.
- Adjust the volume level on the HPi-7S and the connected MIDI device.
- You should also set the MIDI settings as needed.
For details on the MIDL-related settings, refer to p. 108.
Making MIDI-Related Settings
Here's how you can set the transmit channel and other MIDI-related settings.
- Press the [Function] button.
- Press the cursor buttons to select <MIDI> , then press the [O] button.
The "MIDI" screen has two pages.
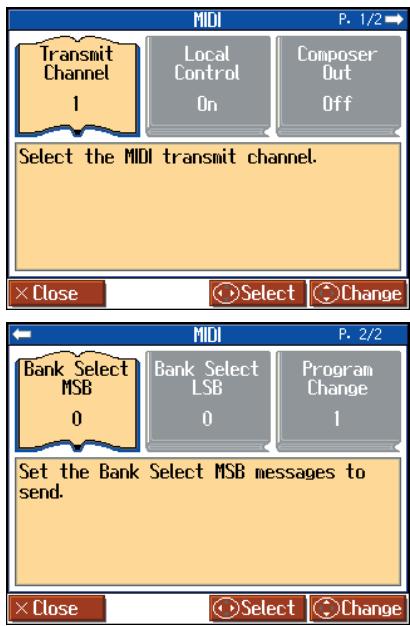
- Press the cursor buttons to select the setting you want to make.
| Item | Explanation |
| Transmit Channel | Chooses the MIDI send channel. |
| Local Control | Switches Local Control on or off. |
| Composer Out | Specifies whether a recorded performance will be transmitted to a MIDI device. |
| Bank Select MSB | Chooses Bank Select MSB messages. |
| Bank Select LSB | Chooses Bank Select LSB messages. |
| Program Change | Chooses Program Change messages (Program Numbers). |
- Press the cursor up or down button, or [-] [+] button to change the setting.
- Press the [ × ] button.
Press the [X] button one or more times to return to the Notation screen.
Selecting the Transmit Channel (Transmit Channel)
This parameter sets the MIDI channel for transmissions from the HPi-7S. MIDI uses what are called "MIDI channels," numbered 1-16.
Connecting to MIDI devices and setting the HPi-7S to the MIDI channel for each device allows you to output sounds and switch tones. When the HPi-7S is set to Dual performance (p. 56), data is transmitted only of the channel set here.
The HPi-7S receives all channels 1-16.
| Item | Explanation | Setting |
| Transmit Channel | Chooses the MIDI send channel. | 1–16 |
- Disconnecting the Internal Sound Generator and Keyboard (Local Control)
When you have a MIDI sequencer connected, set this parameter to Local Off. Since the Thru function of your sequencer will normally be turned on, notes played on the keyboard or played back by the recorder will be transmitted to the sound generator by the two routes (1) and (2) shown in the illustration, causing notes to be sounded in duplicate or to be cut off unnaturally. To prevent this, the setting called "Local Off" is used to disconnect the route in (1).
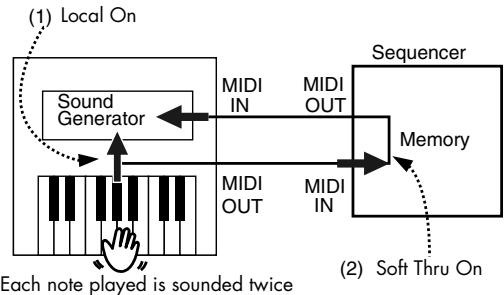
Local On: The keyboard and recorder are connected to the internal sound generator.
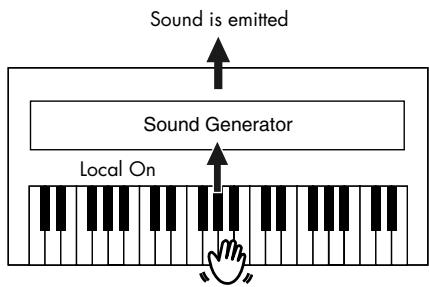
Local Off: The keyboard and recorder are not connected to the internal sound generator. No sound will be produced by the keyboard when it is played.
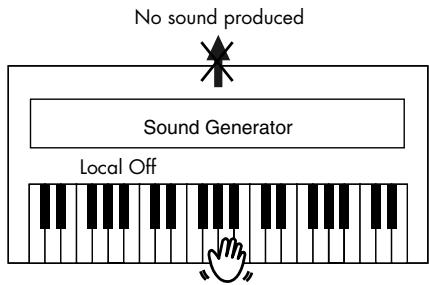
When a Roland MT series instrument is connected, it is not necessary to make the Local Off setting. The MT transmits a Local Off message when the power is turned on. If you turn on the power in the order of the HPi-7S MT series, Local Off will be set automatically.
| Item | Explanation | Setting |
| Local Control | Switches Local Control on or off. | On, Off |
Sending Recorded Performance Data to a MIDI Device (Composer Out)
WhenComposer Out is active, you can send performance data recorded with the HPi-7S to a connected MIDI device or computer.
When you turn on the power, this is set to "Off" (data is not sent).
If you want a performance recorded on the HPi-7S to be transmitted to an external MIDI device or computer, turn the "Composer Out" setting "On." If this is "Off," performance data will not be transmitted.
| Item | Explanation | Setting |
| Composer Out | Specify whether a recorded performance will be transmitted to a MIDI device. | On, Off |
Sending Tone Change Messages (Program Change/Bank Select MSB/Bank Select LSB)
A Program Change is a message that means "change to the Tone of the specified number." The device that receives this changes to the Tone of the corresponding number.
When you choose a Program Change message (Program Number), the Program Number will be transmitted to the MIDI device connected to the HPi-7S. The MIDI device that receives the Program Number changes the tone to the corresponding Program Number.
Normally, the Tone is selected from the 128 Tones available. Some MIDI devices, however, have more than 128 Tones. With such devices, the Tone is selected through a combination of Program
Change messages and Bank Select messages. There are two parts of a Bank Select message: the MSB (Controller 0, with a value of 0-127) and the LSB (Controller 32, with a value of 0-127).

Some MIDI devices cannot use bank select messages. Alternatively, some devices may use bank select messages, but ignore the LSB message.
| Item | Explanation | Setting |
| Bank Select MSB | Transmit the bank select MSB. | 0 (00h)–127 (7Fh) |
| Bank Select LSB | Transmit the bank select LSB. | 0 (00h)–127 (7Fh) |
| Program Change | Transmit the program number. | 1 (00h)–128 (7Fh) |
Connecting a Computer
The following become possible once you connect a USB cable (available separately) between the USB connector located to the lower left of the HPi-7S and the USB connector of your computer.
- You can use the HPi-7S to play sounds from SMF music files played back with MIDI software.
- By exchanging MIDI data with sequencer software, you can save songs recorded with the HPi-7S to your computer, and enjoy a variety of musical control and editing features.
Connect the HPi-7S to your computer as shown below.
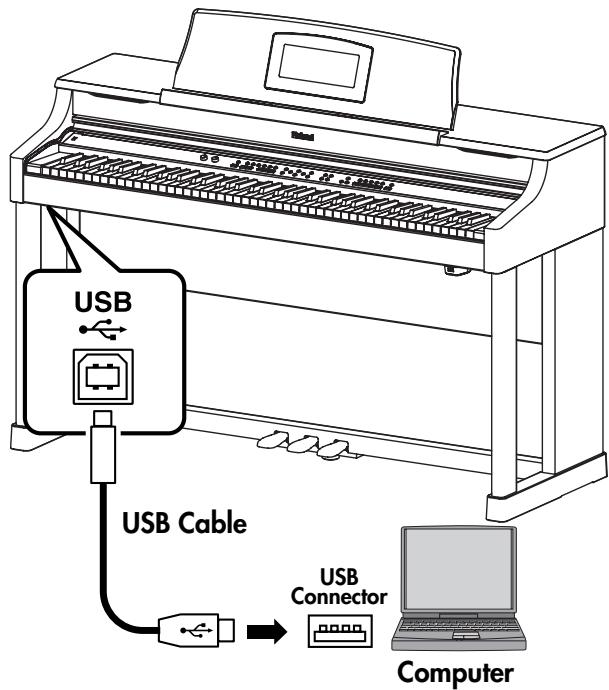
- Refer to the Roland website for system requirements. Roland website: http://www.roland.com/
If connection to your computer is unsuccessful…
Normally, you don't need to install a driver in order to connect the HPi-7S to your computer. However, if some problem occurs, or if the performance is poor, using the Roland original driver may solve the problem. For details on downloading and installing the Roland original driver, refer to the Roland website.
Roland website: http://www.roland.com/
Specify the USB driver you want to use, and then install the driver. For details, refer to "Making the Settings for the USB Driver." (p. 110)
Caution
- To prevent malfunction and/or damage to speakers or other devices, always turn down the volume, and turn off the power on all devices before making any connections.
- Only MIDI data can be transmitted using USB.
- USB cables are not included. Consult your Roland dealer if you need to purchase.
- Turn on the power to the HPi-7S before starting up MIDI applications on the computer. Do not turn the HPi-7S on or off while any MIDI application is running.
Making the Settings for the USB Driver
Normally, you don't need to install a driver in order to connect the HPi-7S to your computer. However, if some problem occurs, or if the performance is poor, using the Roland original driver may solve the problem.
Specify the USB driver you want to use, and then install the driver.
- Press the [Function] button.
The Functions screen appears.
- Press the cursor buttons to select
, then press the [O] button.
The "USB Driver" screen appears.
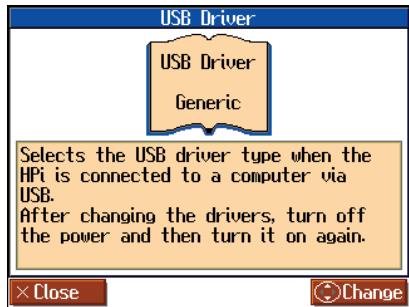
- Press the cursor up or down button to select the USB driver.
| Item | Explanation |
| Generic | Choose this if you want to use the standard USB driver that was included with your computer. Normally, you should use this mode. |
| Original | Choose this if you want to use a USB driver downloaded from the Roland website. |
- Turn the HPi-7S's volume to the minimum level, switch off the power, then turn it back on again.
Connecting an External Display or Television
You can connect a computer monitor or other external display or a television to the HPi-7S, enabling you to display the Panel, Slide show or Notations on a larger screen.
Connecting an External Display
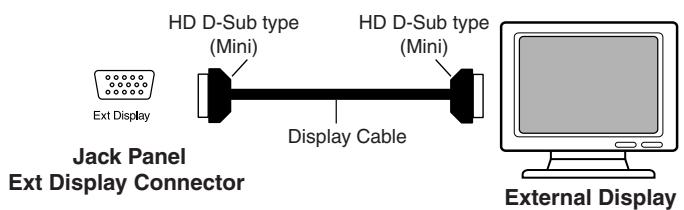
Displays That Can Be Connected to This Instrument

In general, a great many of the VGA monitors and multiscan monitors that are available on the market are compatible with this instrument. However, before you connect any monitor, make sure it meets the following specifications:
| Resolution | 640 x 480 pixels |
| Horizontal scan frequency | 31.5 kHz |
| Vertical scan frequency | 60 Hz |
| Connector | 3-row, 15-pin D-Sub type |
| Signal | Analog |

Confirm that the display to be used is compatible with the frequencies mentioned above. Using a display that is not compatible with the above frequencies may result in incorrect image output when images move, and in certain cases may even damage the display.
Making the Connections

To prevent malfunction and/or damage to speakers or other devices, always turn down the volume, and turn off the power on all devices before making any connections.
- Turn off the power to the HPi-7S and the display to be connected.
- Connect your display to the HPi-7S.
Use display cable (sold separately) to connect the display to the Ext Display connector on the HPi-7S.
Do not connect external devices to both the external display connector and the Video Out connector at the same time.
Doing so may cause the display to appear strange, or may cause malfunction.
- Switch on the HPi-7S (p. 18).
- This sets the display format (p. 112).
- Switch on the connected display.

For more on handling the external display, refer to your display's owner's manual.
Connecting a Television
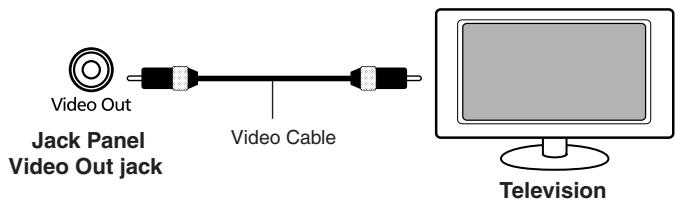
Making the Connections

To prevent malfunction and/or damage to speakers or other devices, always turn down the volume, and turn off the power on all devices before making any connections.
- Turn off the power to the HPi-7S and the television to be connected.
- Connect your display to the HPi-7S.
Use a video cable (sold separately) to connect the HPi-7S's Video Out jack with the television's video input jack.
- Turn on the power to the HPi-7S (p. 18).
- This sets the display format (p. 112).
- Turn on the power to the television.
Image-related settings
Changing the Settings for Showing Images with the External Display and the Television (External Display)
This selects the content shown on the external display or the television connected to the HPi-7S.
Refer to "Making the Settings" (p. 86) for instructions.
Display Content
Your television or external display can show an image that's different from what's shown on the instrument's display.
| Setting | Explanation |
| Panel | Screens are shown the same way they appear in the HPi-7's display. |
| Notation | You'll be able to view the notation on a screen that's larger than the built-in display. |
| Slide Show | The image is displayed in the slide show. |
Display Method
Specify the display method as appropriate for the device you've connected.
| Setting | Explanation |
| VGA | Choose this if you’ve connected an external display. |
| NTSC | Choose this if you’ve connected a television. |
| PAL |
Setting the Duration for Displaying Images (Slide Show Interval)
You can specify the interval at which images will change when you play back a slide show.
| Setting |
| 2-60 |
Displaying Favorite Images on an External Display or Television (Slide Show)
With the HPi-7S, you can display desired image data saved to USB memory on a connected external display or television screen.
You can also use VIMA CD-ROMs (VIMA TUNES) sold by Roland. This allows you to display slide shows contained on CD-ROMs on a display or television at the same time that songs are played back.
Preparing the Images to be Displayed
Prepare the desired image data on your computer and save the data to the USB memory.
- Prepare the desired image data with your computer.
| Image Data That Can Be Displayed | |
| Size | 640 x 480 pixels (recommendation) |
| Format | BMP format, JPEG format |
| Extension | “.bmp”,“.jpg” |
- Connect the USB memory to your computer, then create a folder named "_.PICTURE" in the USB memory.
- Place the images you want to display in the "PICTURE" folder.

You can have images be displayed in the order you prefer by changing the file names. By adding a number from 001 through 999 to the six- to eight-character file name, you can have the files be displayed according to their numerical order.

The folder named "PICTURE" is not shown in the Song Select screen.

Some images may not be displayed in the slide show if 500 or more files, including images, are contained in a single folder.
Running Slide Shows Through a Connected External Display or Television
- Make sure the power to the HPi-7S is turned off, then connect the external display or television (p. 111).
- Turn on the power to the HPi-7S and the external display (or television).
- Make the settings for the display or television format (p. 112).
- Connect the USB memory containing the saved images you want to display to the Ext Memory port.
- Change the content show (Display Content) in the external display, make the settings for the slide show to appear in the external display or television(p. 112).
The slide show appears in the external display or television screen.
If you think there's a problem, read this first.
| Case | Cause/Remedy |
| The power doesn’t come on | Is the power cord connected and plugged in correctly? (p. 17) |
| The button doesn’t work | Is Panel Lock activated? (p. 98)Hold down the One Touch [ Piano ] button and press the [Count/Marker] button to turn off the Panel Lock function. |
| Nothing appears on screen | The HPi-7S uses a liquid-crystal screen, so text may not be displayed when the ambient temperature is below freezing. |
| Is the music rest (screen) connection cable connected correctly? (p. 16) | |
| Is Panel Lock activated? (p. 98)While Panel Lock is on, the screen display and the indicators for all buttons are turned off. | |
| Vertical lines appear in the screen/Color is “washed out” at the edges of the screen | These occur due to the nature of a liquid crystal display, and do not indicate a malfunction. They can be minimized by adjusting the brightness of the screen (p. 20). |
| Depressing a pedal has no effect, or the pedal effect doesn’t stop | Is the pedal connected correctly?Make sure the pedal cord extending from the stand is securely connected to the pedal jack on the bottom of the unit (p. 16). |
| Has a different function been assigned to the pedal?See “Changing the Pedal Functions (Pedal)”(p. 91). | |
| Normal pedal operation is automatically enabled when the One Touch [ Piano ] button is pressed (p. 50). | |
| Is the HPi-7S set to Twin Piano?The pedal functions are changed automatically when the Twin Piano function is on (p. 34). | |
| The pedal rattles | Adjust the adjuster underneath the pedal so that the pedal presses firmly against the floor surface (p. 29). |
| The volume level of the instrument connected to Input jacks is too low | Could you be using a connection cable that contains a resistor?If you use a connecting cable that contains a built-in resistor, the volume of the device connected to the Input connector may be very low. In such cases, please use a connecting cable that does not contain a resistor (such as one from the Roland PCS series). |
| Unable to read from/write to USB memory | Are you using (optional) Roland memory?Reliable performance cannot be guaranteed if you use non-Roland memory products. |
| Case | Cause/Remedy |
| Low hum coming from external device | Do you have different external devices plugged into different power outlets?When connecting external devices, always draw power from the same outlet. |
| Performance begins suddenly | The HPi-7S can be set so that the demo begins playing automatically after the instrument has remained idle for five to ten minutes.Switch this setting (Auto Start) to “Off.”Refer to “Setting the Demo (Auto Demo)” (p. 93). |
| Can’t select a tone | Press the [×] button several times to return to the notation screen (p. 26), and then select a tone. |
| No sound is heard | |
| No sound is heard | Is the volume level of the HPi-7S (p. 18) or connected device turned all the way down? |
| Are headphones plugged in?Has a plug remained connected to the Phones jack? (p. 18)When headphones or plugs are connected, the keyboard’s speaker stops playing. | |
| Could the “Balance” setting be set all the way toward “Accomp” or “Keyboard”? (p. 61) | |
| Has Local Control been set to “Off”?When Local Control is set to Off, no sound is produced by playing the keyboard. Set Local Control to On(p. 108). | |
| No sound from left-hand section of keyboard | Is V-LINK switched on? (p. 98)When V-LINK is switched on, the twelve keys at the left end of the keyboard are used to control images, and no sounds are played with these keys. |
| No sound is heard (when a MIDI instrument is connected) | Have all devices been switched on? (p. 107) |
| Are the MIDI cables connected correctly? (p. 107) | |
| Does the MIDI channel match the connected instrument? (p. 108) | |
| No sound is heard when the keyboard is played | Has Local Control been set to “Off”?When Local Control is set to Off, no sound is produced by playing the keyboard, Set Local Control to On (p. 108). |
| Not all played notes are sounded | The maximum number of notes that the HPi-7S can play simultaneously is 128. Frequent use of the damper pedal when playing along with a song may result in performance data with too many notes, causing some notes to drop out. |
| The sound is strange | |
| Sounds are heard twice (doubled) when the keyboard is played | Is the HPi-7S in Dual performance? (p. 56) |
| When the HPi-7S is connected to an external sequencer, set the Local Control to off (p. 108). Alternatively, the sequencer could be set so its Soft Thru feature is Off. | |
| The tuning or pitch of the keyboard or song is off | Have you set Transpose? (p. 68) |
| Are the settings for the "Temperament" (p. 88) and "Stretch Tuning" (p. 87) correct? | |
| Is the setting for the "Master Tuning" correct? (p. 88) | |
| The wrong instrument is selected when you press the [String], [Voice], or [Others] button | Tone buttons [String] [Voice] [Others] also operate as buttons that select "Recommended Tones." With the factory settings, connecting a commercially-available CD-ROM drive to the external memory connector and selecting a song from a CD-ROM produced for the VIMA (VIMA TUNES) will automatically cause sounds appropriate for that song to be assigned to the [String], [Voice], or [Others] Tone buttons, so that you can select "recommended" tones by pressing one of these buttons. You can also make settings so that "recommended" tones are not automatically assigned (p. 96). |
| Volume of keyboard is too low | Could the "Balance" setting be set all the way toward "Accomp"? (p. 61) |
| The Tone has changed | When a performance made along with a Music Files tune has been recorded, recording the performance to button [1/User] may make the Tones for buttons [3/Left] and [4/Right] change as well. |
| Reverberation still audible even with Reverb turned off | Since the HPi-7S's piano sounds faithfully reproduce the sense of spaciousness and reverberation of an actual acoustic piano's sound, a certain amount of reverberation is still perceptible, even with the reverb effect deactivated. |
| In the upper range, the sound changes abruptly beyond a certain key | On an acoustic piano, notes in the upper one and a half octaves of the keyboard continue to sound until they decay naturally, regardless of the damper pedal. There is a difference in the timbre as well. Roland pianos faithfully simulate such characteristics of the acoustic piano. On the HPi-7S, the range that is unaffected by the damper pedal will change depending on the Key Transpose setting. |
| A High-pitched whine is produced | When listening through headphones: Some of the more flamboyant and effervescent piano tones feature an ample high-end component, which may make the sound appear to have metallic reverberation added. Since this reverberation becomes particularly audible when supplemented by heavy reverb, you may be able to diminish the problem by reducing the amount of reverb applied to the sound. When listening through speakers: Here, a different cause (such as resonance produced by the HPi-7S) would be suspect. Consult your Roland dealer or nearest Roland Service Center. |
| Case | Cause/Remedy |
| The bass range sounds odd, or there is a vibrating resonance | When listening through speakers: Playing at loud volumes may cause instruments near the HPi-7S to resonate. Resonation can also occur with fluorescent light tubes, glass doors, and other objects. In particular, this problem occurs more easily when the bass component is increased, and when the sound is played at higher volumes. Use the following measures to suppress such resonance. •Place speakers so they are 10–15 cm from walls and other surfaces. •Reduce the volume. •Move the speakers away from any resonating objects. |
| When listening through headphones: Here, a different cause would be suspect. Consult your Roland dealer or nearest Roland Service Center. |
| Song doesn't play back correctly | |
| Song doesn't play back | Does the screen indicate message, like “OK to delete Song?” (p. 42) The internal songs cannot be played back while recorded performance data remains in the HPi-7S's memory. Try playing back the song after deleting the performance data. |
| Only the sound of a particular instrument in a song does not play | Is the indicator for the Track button extinguished? (p. 59, p. 73, p. 94) If the button indicator is out, the music on that track is not heard. Press the track button so the indicator is illuminated. Or cancel the mute in the “16-track Sequencer” screen. |
| Pressing the [I-(Reset)] button doesn't return to the beginning of the song | Some music files may contain settings that stop playing back at a point partway through the song. Press the [I-(Reset)] button several times more to return to the beginning of the tune. |
| Has a Marker placed in the song? (p. 66) | |
| The [I-(Bwd)] and [I-(Fwd)] buttons don't work | The [I-(Bwd)] and [I-(Fwd)] buttons are ignored while music files is being read in. Wait until processing finishes. |
| If you attempt to play back performance data that contains more data than the entire capacity of the HPi-7S's memory, you may find that operations other than playback (such as rewind or fast forward) become unavailable. | |
| There is a slight delay before playback of a song on USB memory starts | There are two types of SMF music files: format 0 and format 1. If the song uses SMF format 1 data, there will be a slight delay until playback starts. Refer to the booklet that came with the music files you're using to determine the format type. |
| Lyrics are not indicated properly in the display | With some music files, the lyrics cannot be displayed correctly. |
| In the notation screen, some lyrics or notes could extend beyond the edges of the screen, and not be displayed. | |
| Case | Cause/Remedy |
| Notation is not indicated properly in the display | If you select a part that does not contain performance data, notes will not be displayed in the notation. Change the part that is displayed (p. 99). |
| The notation screen feature is particularly unsuitable for the display of difficult, complex musical works that demand accurate notation. Refer to “Some Notes on the Notation Screen” (p. 27). | |
| In the notation screen, some lyrics or notes could extend beyond the edges of the screen, and not be displayed. | |
| Movement of notation or keyboard display not smooth | There may be times when a complex variety of information is being displayed or when a large amount of data is displayed at one time. Change the notation display settings as described below. • Set “Bouncing Ball” to “Off” (p. 99) • Set “Color Notation” to “Off” (p. 99) • Set “Keyboard” to “Off” (p. 26) |
| Song becomes unstable | In certain cases, such as when playing the songs on USB memory, the song may lag when excessive amounts of performance data are used. |
| Demo song not playing | Could <BGM>, an “Auto Demo” setting, be switched off (p. 93)? |
| Can’t play back a song saved in USB memory | The song name will not be shown if the song information in the file is empty or consists only of spaces. |
| Is the filename extension “MID”? Files with other file name extensions cannot be handled as song data. | |
| Titles of songs on USB memory or floppy disks not being displayed | Has the song name data (Sequence/Track Name Meta Event) been entered in the file? Song titles are not displayed if the song name data is blank or consists exclusively of spaces. |
| Is the file name no more than eight single-byte characters? | |
| Is “MID” used as the extension? The song cannot be treated as song data if a different extension is used. | |
| Volume of accompaniment or internal song is too low | Could the “Balance” setting be set all the way toward “Keyboard”? (p. 61) |
| Case | Cause/Remedy |
| Can’t record | |
| Can’t record | Has one of the track buttons for recording been selected? (p. 73, p. 75, p. 77) |
| It is not possible to record while the notation is being generated. Once the unit has finished generating the notation (i.e., when the measure number in the screen is no longer highlighted), try the operation once again. | |
| Tempo of recorded song or metronome is off | If you select an internal song in which the tempo changes during the song, and then record, the tempo will change in the same way for the performances that are recorded on the other tracks. The tempo of the metronome will also change in the same way. |
| If you record additional material without erasing the previously recorded song, the song will be recorded at the first-recorded tempo. Please erase the previously recorded song before you re-record (p. 76). | |
| The recorded performance has disappeared | Any performance that has been recorded is deleted when the power to the HPi-7S is turned off or a song is selected. A performance cannot be restored once it's been deleted. Be sure to save it on an USB memory or “Favorites” (HPi-7S Memory) before you turn off the power (p. 80). |
| About the audio file | |
| Can’t play back an audio file | Is the audio file in a format supported by the HPi-7S? Audio files of the following format can be played back. •File extension “WAV” •16-bit linear •“44.1 kHz” sampling rate |
| Can’t record along with an audio file | The HPi-7S can’t record using audio files or copy them into “Favorites”. |
| Can’t copy an audio file into “Favorites” | |
| Indication | Meaning |
| Error: 1 | You can only read the music file. It can not be saved. |
| Error: 2 | An error occurred during writing. The storage media's protect tab may be in the “Protect” (writing prohibited) position, or the storage media may not yet be initialized. |
| Error: 10 | No storage media is inserted. Insert the storage media and try again. |
| Error: 11 | There is not sufficient free memory in the save destination. Either insert other storage media or delete unneeded files and try again. |
| Error: 14 | An error occurred during writing. The storage media may be corrupted. Insert other storage media and try again. Alternatively, you can initialize the storage media. |
| Error: 15 | The file is unreadable. The data format is not compatible with the HPi-7S. |
| Error: 16 | Data was not called up in time for playback of the song. After waiting several seconds, you may be able to play back the song by pressing the [▶/■ (Play/Stop)] button again. |
| Error: 17 | The selected image data cannot be displayed. Prepare image data that can be used with the HPi-7S (p. 92). |
| Error: 18 | This audio format is not supported. Please use 44.1 kHz 16-bit linear WAV format audio files. |
| Error: 30 | The internal memory capacity of the HPi-7S is full. |
| Error: 40 | The HPi-7S cannot deal with the excessive MIDI data sent from the external MIDI device. Reduce the amount of MIDI data sent to the HPi-7S. |
| Error: 41 | A MIDI cable has been disconnected. Connect it properly and securely. |
| Error: 43 | A MIDI transmission error has occurred. Check the MIDI cable and connected MIDI device. |
| Error: 51 | There may be a problem with the system. Repeat the procedure from the beginning. If it is not solved after you have tried several times, contact the Roland service center. |
| Error: 65 | The External Memory connector was subjected to excessive current. Make sure that there is no problem with the external media, then turn the power off, then on again. |
- External Media: USB memory and floppy disk etc.
Press [X] button, and you can cancel the error message.
[Piano]
Superior Grd
Superior+Str
NaturalGrand
Natural Hps.
Magical Piano
Superior+Pad
Superior+Cho
NaturalMello
Natural Gnd2
Mellow Piano2
Detuned Piano
Honky-tonk
Piano Str2
Piano Choir
NaturalC.Hps
Harpsichord2
Ballad Piano
PianoStrings
Rock Piano
Bright Piano
Air Grand
Bell Piano
UprightPiano
Honky-tonk 2
Grand Piano1
MellowPiano1
Grand Piano2
Mono Piano
Piano
Piano 2
Piano 3
[E.Piano]
Pop E.Piano
Vintage EP
E.Piano 1
E.Piano 2
Morning Lite
Vibraphone
Marimba
Mallet Isle
70's E.Piano
Tremolo EP
60's EP2
Clav
Jazzy Vib+Gt
Celesta
Vibe Tr.
Marimba Tr.
Stage EP
E.Piano 3
St.FM EP
E. Grand
Music Box
Glockenspiel
Xylophone
Soft E.Piano
Hard EP2
60's E.Piano
Mild E.Grand
Mild E.Piano
Hard E.Piano
Hard FM EP
FM+SA EP
MIDI Piano1
MIDI Piano2
EG+E.Piano 1
EG+E.Piano 2
Vibra Bells
Hard Clav.
Soft Clav.
Reso Clav.
Phase Clav.
Analog Clav.
Pop Celesta
Pop Vibe.
Soft Marimba
Balafon
Steel Drums
Tubular-bell
Santur
Kalimba
[Organ]
ChurchOrgan1
ChurchOrgan3
Nason flt 8'
Theater Org.
Rotary Organ
Mellow Bars
Jazz Organ1
German Acco.
Full Organ 1
Lower Organ1
Rock Organ1
ChurchOrgan2
Organ Flute
Trem.Flute
Bandoneon
Harmonica
Pipe Organ 1
Pipe Organ 2
Jazz Organ2
Jazz Organ3
Jazz Organ4
Organ Bass
Full Organ 2
Full Organ 3
Full Organ 4
Lower Organ2
Rotary Org.S
Rotary Org.F
Rock Organ2
Pop Organ
Metalic Org.
VS Organ
Digi Church
Accordion
BrightAccord
Organ 1
Organ 2
[Strings]
Rich Strings
Mellow Str
Bright Str
St. Harp
ChamberWinds
Flute
EX Trumpet
Blow Sax
Strings
Velo Strings
Violin
Cello
Power Brass
Soprano Sax
Oboe
Clarinet
Orchestra
Orchestra 2
Harp Strings
Warm Strings
Slow Strings
Oct Strings
PizzicatoSt
Timpani
OrchestraHit
Warm JP Str
Bell Strings
Choir Str
Slow Violin
Contrabass
Strings 2
SlowStrings2
Legato Sti
DecayStrings
Decay Str2
SynStrings1
Syn Strings2
OB Strings
Euro Hit
6th Hit
Bass Hit
TromboneSoft
Trombone 2
GS Tuba
Trumpet
MutedTrumpet
Fr.Horn Solo
French Horn
Alto Sax
Grow Sax
Tenor Sax
GS Bari Sax
AltoSax + Tp
BrassSection
Brass
Brass 2
Bright Brass
Brass ff
St. Brass ff
Synth Brass1
Synth Brass2
Synth Brass3
Soft Brass
Oct SynBrass
Bassoon
English Horn
Piccolo
Pan Flute
GS Pan Flute
Recorder
Blow Pipe
Bottle Blow
Shakuhachi
Ocarina
[Voice]
Aerial Choir
JazzScat
Rich Choi
Boys Choir
Glasswaves
Holy Voices
Glittery Pad
HollowReleas
Dat Accent
Bap Accent
Dat & Bap
Thum Voice
Fantasia
Soft Pad
Org Bells
Harpvox
Pop Voice
Voice Oohs
Doos Voice
SynVox
Mellow Choir
Choir Oohs
Choir Aahs
Decay Choi
Fantasia 2
New Age Pad
Warm Pad
P5 Poly
Poly King
Heaven II
Warm SquPad
JP8 Sqr Pad
Sweep Pad 2
Decay Pad
Crystal
Clear Bells
Soft Crystal
Digi Bells
Nylon Harp
Nylon + EP
Brightness
Syn.Square
CC Solo
Dual Sqr&Saw
SquareWave2
FM Lead 1
LM Square
JP8 Square
Mg Lead
Waspy Synth
P5 Saw Lead
Natural Lead
Rhythmic Saw
JP8 Pulse
LM PureLead
Cheese Saw
Reso Saw
2600 SubOsc
RAVE Vox
FM Lead 2
Fat & Perky
Big Panner
Ai-yai-a
Echo Pan 2
Falling Down
RandomEnding
[Others]
NylonGuitar
SteelGuitar
JazzGuitar
JC E.Guitar
DR STANDARD
SOUND EFFECT
Acoustic Bs.
A.Bass+Cymbol
Nylon+Steel
12strGuitar
Overdrive Gt
Rock Rhythm
Hawaiian Gt.
DR POP
DR ROCK
DR JAZZBRUSH
Fretless Bs
Fingered Bs.
Picked Bs.
Slap Bass
Nylon Gto
Ukulele
Steel Vox
Mellow Gt.
Open Hard
Muted Gt.
Muted Gt.2
Muted Dis.Gt
DistortionGt
Feedback Gt2
Rock Rhythm2
PowerGuitar
Power Gt.2
5th Dist
Dazed Guitar
Acid Guitar
Banjo
Koto
Shamisen
Wood Bass
W.Bass+Ride
Mute PickBs.
Mr.Smooth
Synth Bass 1
Synth Bass 2
SynthBass101
Jungle Bass
Modular Bass
WireStr Bass
ResoSH Bass
SH101 Bass
DR ROOM
DR POWER
DR ELECTRO
DR TR-808
DR DANCE
DR JAZZ
DR BRUSH
DR ORCHESTRA
DR GS STAND
DR GS ROOM
DR GS BRUSH
Piano 1
Piano 1w
Piano 1d
Piano 2
Piano 2w
Piano 3
Piano 3w
GS Honkytonk
Honky-tonk 2
GS E.Piano1
GS E.Piano2
60's E.Piano
E.Piano 1v
E.Piano 2v
Detuned EP 1
Detuned EP 2
GS Harpsi.
Coupled Hps.
Harpsi.w
Harpsi.o
Soft Clav.
Celesta
GS Glocken
GS Music Box
Vibraphone
Vibe.w
GS Marimba
Marimba
Xylophone
Tubular-bell
Church Bell
Carillon
GS Santur
Organ 1
Organ 2
Pop Organ 1
Detuned Or.1
Detuned Or.2
GS ChurchOr1
GS ChurchOr2
Church Org.3
Full Organ 4
Jazz Organ1
Rock Organ2
Reed Organ
Accordion Fr
Accordion It
GS Harmonica
Bandoneon
GS Nylon Gt.
NylonGuitar
Nylon Gt.o
Ukulele
Steel-str.Gt
12-str.Gt
GS Mandolin
JazzGuitar
GS Hawaiian
Clean Gt
Chorus Gt.
Muted Gt.
Funk Gt.
Funk Gt.2
Overdrive Gt
GS Dist.Gt
Feedback Gt.
Gt.Harmonics
Gt. Feedback
GS Ac.Bass
GS Fing.Bass
GS Picked Bs
Fretless Bs.
Slap Bass
Slap Bass 2
SynthBass101
Synth Bass 1
Synth Bass 2
Synth Bass 3
Synth Bass 4
Rubber Bass
GS Violin
Slow Violin
Viola
GS Cello
Contrabass
GS Trem.Str
PizzicatoStr
GS Harp
Timpani
GS Strings
Orchestra
GS SL.Str
Syn Strings I
SynStrings2
SynStrings3
Choir Aahs
Choir
Pop Voice
SynVox
OrchestraHit
GS Trumpet
GS Trombone
Trombone 2
GS Tuba
MutedTrumpet
French Horn
Fr.Horn 2
Brass 1
Brass 2
Synth Brass1
Synth Brass2
Synth Brass3
Synth Brass4
AnalogBrass1
AnalogBrass2
GS Sop.Sax
Alto Sax
Tenor Sax
GS Bari Sax
GS Oboe
GS Eng.Horn
Bassoon
Clarinet
Piccolo
GS Flute
Recorder
GS Pan Flute
GS BottleBlw
Shakuhachi
Whistle
Ocarina
Square Wave
Square
Sine Wave
Saw Wave
Saw
Doctor Solo
Syn.Calliope
Chiffer Lead
Charang
Solo Vox
5th Saw Wave
Bass & Lead
Fantasia
Warm Pad
Polysynth
Space Voice
Bowed Glass
Metal Pad
Halo Pad
Sweep Pad
Ice Rain
Soundtrack
Crystal
Syn Mallet
Atmosphere
Brightness
Goblin
Echo Drops
Echo Bell
Echo Pan
Star Theme
Sitar
Sitar 2
Banjo
GS Shamisen
Koto
Taisho Koto
Kalimba
Bagpipe
Fiddle
Shanai
Tinkle Bell
Agogc
Steel Drums
Woodblock
Castanets
Taiko
Concert BD
Melo. Tom 1
Melo. Tom 2
Synth Drum
808 Tom
Elec Perc
Reverse Cym.
Gt.FretNoise
Gt.Cut Noise
String Slap
Breath Noise
Fl.Key Click
Seashore
Rain
Thunder
Wind
Stream
Bubble
Bird
Dog
Horse-Gallop
Bird 2
Telephone 1
Telephone 2
DoorCreaking
Door
Scratch
Windchime
Helicopter
Car-Engine
Car-Stop
Car-Pass
Car-Crash
Siren
Train
Jetplane
Starship
Burst Noise
Applause
Laughing
Screaming
Punch
Heart Beat
Footsteps
Gun Shot
Machine Gun
Lasergun
Explosion
Piano 1*
Piano 2*
Piano 3*
Honky-tonk*
E.Piano 1*
E.Piano 2*
Harpsichord*
Clav.*
Celesta*
Glocken*
Music Box*
Vibraphone*
Marimba*
Xylophone*
Tubularbell*
Santur
Organ 1*
Organ 2*
Pop Organ 1*
Rock Organ2*
ChurchOrg.1*
Reed Organ*
AccordionFr*
Harmonic
Bandoneon*
Nylon-strGt*
Steel-strGt*
Jazz Guitar*
Clean Gt.*
Muted Gt.*
Funk Gt.*
OverdriveGt*
Dist.Guitar*
Gt.Harmo*
Acoustic Bs*
Fingered Bs*
Picked Bs.
Fretless Bs*
Slap Bass 1*
Slap Bass 2*
Synth Bass1*
Synth Bass2*
Rubber Bass*
Violin*
Viola*
Cello*
Contrabass*
Tremolo Str*
Pizzicato*
Harp
Timpani*
Strings*
SlowStrings*
Syn.Str 1*
Syn.Str 2*
Choir Aahs*
Pop Voice*
SynVox
Orche.Hit*
Trumpet*
Trombone*
Tuba*
M. Trumpet*
FrenchHorns*
Brass 1*
SynthBrass1*
SynthBrass2*
A.Brass 1*
Soprano Sax*
Alto Sax*
Tenor Sax*
BaritoneSax*
Oboe*
EnglishHorn*
Bassoon*
Clarinet*
Piccolo*
Flute*
Recorder*
Pan Flute*
Bottle Blow*
Shakuhachi*
Whistle*
Ocaring*
Square Wave*
Saw Wave*
Doctor Solo
SynCalliope*
ChifferLead*
Charang*
Solo Vox*
5th SawWave*
Bass & Lead*
Fantasia*
Warm Pad*
Polysynth*
Space Voice*
Bowed Glass
Metal Pad*
Halo Pad*
Sweep Pad*
Ice Rain*
Soundtrack*
Crystal*
Syn Mallet*
Atmosphere*
Brightness*
Goblin*
Echo Drops*
Star Theme*
Sitar*
Banjo*
Shamisen*
Koto*
Kalimba*
Bagpipe*
Fiddle*
Shanai
Tinkle Bell*
Agogo
Steel Drums*
Woodblock*
Taiko*
Melo.Tom 1*
Synth Drum*
ReverseCym.*
Fret Noise*
BreathNoise*
Seashore*
Bird*
Telephone 1*
Helicopter*
Applause*
Gun Shot*
- ----: No sound.
- [EXC]: will not sound simultaneously with other percussion instruments of the same number.
DR STANDARD
| 21 | ----- | |
| 22 | ----- | |
| 23 | ----- | |
| 24 | Bar Chime | |
| 25 | Snare Roll | |
| 26 | Finger Snap | |
| 27 | High Q | |
| 28 | Slap | |
| 29 | Scratch Push | [EXC7] |
| 30 | Scratch Pull | [EXC7] |
| 31 | Sticks | |
| 32 | Square Click | |
| 33 | Metronome Click | |
| 34 | Metronome Bell | |
| 35 | Std Kick 2' | |
| 36 | Kick 1 | |
| 37 | Side Stick | |
| 38 | Std Snr 1 | |
| 39 | Hand Clap | |
| 40 | Std Snr 2 | |
| 41 | Low Tom 2 | |
| 42 | Closed Hi-hat 1' | [EXC1] |
| 43 | Low Tom 1 | |
| 44 | Pedal Hi-hat 1' | [EXC1] |
| 45 | Mid Tom 2 | |
| 46 | Open Hi-hat 1' | [EXC1] |
| 47 | Mid Tom 1 | |
| 48 | High Tom 2 | |
| 49 | Crash Cymbal 1 | |
| 50 | High Tom 1 | |
| 51 | Ride Cymbal 1 | |
| 52 | Chinese Cymbal | |
| 53 | Ride Bell | |
| 54 | Tambourine | |
| 55 | Splash Cymbal | |
| 56 | Cowbell | |
| 57 | Crash Cymbal 2 | |
| 58 | Vibra-slap | |
| 59 | Ride Cymbal 2 | |
| 60 | High Bongo | |
| 61 | Low Bongo | |
| 62 | Mute High Conga | |
| 63 | Open High Conga | |
| 64 | Low Conga | |
| 65 | High Timbale | |
| 66 | Low Timbale | |
| 67 | High Agogo | |
| 68 | Low Agogo | |
| 69 | Cabasa | |
| 70 | Maracas | |
| 71 | Short Hi Whistle | [EXC2] |
| 72 | Long Low Whistle | [EXC2] |
| 73 | Short Guiro | [EXC3] |
| 74 | Long Guiro | [EXC3] |
| 75 | Claves | |
| 76 | High Wood Block | |
| 77 | Low Wood Block | |
| 78 | Mute Cuica | [EXC4] |
| 79 | Open Cuica | [EXC4] |
| 80 | Mute Triangle | [EXC5] |
| 81 | Open Triangle | [EXC5] |
| 82 | Shaker | |
| 83 | Jingle Bell | |
| 84 | Bell Tree | |
| 85 | Castanets | |
| 86 | Mute Surdo | [EXC6] |
| 87 | Open Surdo | [EXC6] |
| 88 | ----- |
SOUND EFFECT
| 21 | ---- |
| 22 | ---- |
| 23 | ---- |
| 24 | ---- |
| 25 | ---- |
| 26 | ---- |
| 27 | ---- |
| 28 | ---- |
| 29 | ---- |
| 30 | ---- |
| 31 | ---- |
| 32 | ---- |
| 33 | ---- |
| 34 | ---- |
| 35 | ---- |
| C2 | ---- |
| 36 | ---- |
| 37 | ---- |
| 38 | ---- |
| 39 | High Q |
| 40 | Slap |
| 41 | Scratch Push [EXC7] |
| 42 | Scratch Pull [EXC7] |
| 43 | Sticks |
| 44 | Square Click |
| 45 | Metronome Click |
| 46 | Metronome Bell |
| 47 | Guitar sliding Finger |
| C3 | ---- |
| 48 | Guitar cutting noise (up) |
| 49 | Guitar cutting noise (down) |
| 50 | String slap of double bass |
| 51 | Fl.Key Click |
| 52 | Laughing |
| 53 | Screaming |
| 54 | Punch |
| 55 | Heart Beat |
| 56 | Footsteps1 |
| 57 | Footsteps2 |
| 58 | Applause |
| 59 | Door Creaking |
| C4 | ---- |
| 60 | Door |
| 61 | Scratch |
| 62 | Wind Chimes |
| 63 | Car-Engine |
| 64 | Car-Stop |
| 65 | Car-Pass |
| 66 | Car-Crash |
| 67 | Siren |
| 68 | Train |
| 69 | Jetplane |
| 70 | Helicopter |
| 71 | Starship |
| C5 | ---- |
| 72 | Gun Shot |
| 73 | Machine Gun |
| 74 | Lasergun |
| 75 | Explosion |
| 76 | Dog |
| 77 | Horse-Gallop |
| 78 | Birds |
| 79 | Rain |
| 80 | Thunder |
| 81 | Wind |
| 82 | Seashore |
| 83 | Stream |
| C6 | ---- |
| 84 | Bubble |
| 85 | Cat |
| 86 | Bird |
| 87 | BabyLaughing |
| 88 | Booeree |
| 89 | Glass & Glam |
| 90 | Ice Ring |
| 91 | Crack Bottle |
| 92 | Pour Bottle |
| 93 | Car Horn |
| 94 | R.Crossing |
| 95 | SL 1 |
| C7 | ---- |
| 96 | SL 2 |
| 97 | Seal |
| 98 | Fancy Animal |
| 99 | Elephant |
| 100 | Bike |
| 101 | ----- |
| 102 | Applause |
| 103 | ----- |
| 104 | ----- |
| 105 | ----- |
DR POP
| 21 | R&B Snare | R&B Snare |
| 23 | Rock Snare | Pop Snare m |
| 24 | Rock Snare | Pop Snare m |
| 25 | Pop Snare Ghost | Pop Snare Ghost |
| 26 | Pop Snare m | Pop Snare m |
| 27 | Finger Snap | Finger Snap |
| 28 | 707 Claps | 707 Claps |
| 29 | Hand Clap [EXC7] | Hand Clap [EXC7] |
| 30 | Hand Clap2 [EXC7] | Hand Clap2 [EXC7] |
| 31 | Hand Clap | Hand Clap |
| 32 | Pop Pedal HH [EXC1] | Pop Pedal HH [EXC1] |
| 33 | Gospel Hand Clap | Gospel Hand Clap |
| 34 | Snare Roll | Snare Roll |
| 35 | Pop Kick | Rock Kick |
| 36 | Pop Kick | Rock Kick |
| 37 | Pop Side Stick | Rock Side Stick |
| 38 | Pop Sanre s | Rock Sanre s |
| 39 | Pop Sande Ghost | Rock Sande Ghost |
| 40 | Pop Sande s | Rock Sande s |
| 41 | Pop Low Tom f | Rock Low Tom f |
| 42 | Pop CHH 1 [EXC1] | Rock CHH 1 [EXC1] |
| 43 | Pop Low Tom | Rock Low Tom |
| 44 | Pop CHH 2 [EXC1] | Rock CHH 2 [EXC1] |
| 45 | Pop Mid Tom f | Rock Mid Tom f |
| 46 | Pop OHH [EXC1] | Rock OHH [EXC1] |
| 47 | Pop Mid Tom | Rock Mid Tom |
| 48 | Pop High Tom f | Rock High Tom f |
| 49 | Pop Crash Cymbal 1 | Rock Crash Cymbal |
| 50 | Pop High Tom | Rock High Tom |
| 51 | Pop Ride Cymbal 1 | Rock Ride Cymbal 1 |
| 52 | Pop Chinees Cymbal | Pop Chinees Cymbal |
| 53 | Pop Ride Bell | Pop Ride Bell |
| 54 | Tambourine 2 | Tambourine 2 |
| 55 | Splash Cymbal | Splash Cymbal |
| 56 | Cha Cha Cowbell | Cha Cha Cowbell |
| 57 | Pop Crash Cymbal 2 | Chinees Cymbal |
| 58 | Vibra-slap 2 | Vibra-slap 2 |
| 59 | Pop Ride Cymbal 2 | Pop Ride Cymbal 3 |
| 60 | High Bongo 2 | High Bongo 2 |
| 61 | Low Bongo 2 | Low Bongo 2 |
| 62 | Mute Conga | Mute Conga |
| 63 | High Conga 2 | High Conga 2 |
| 64 | Low Conga 2 | Low Conga 2 |
| 65 | High Timbale 2 | High Timbale 2 |
| 66 | Low Timbale 2 | Low Timbale 2 |
| 67 | High Agogo | High Agogo |
| 68 | Low Agogo | Low Agogo |
| 69 | Shaker 3 | Shaker 3 |
| 70 | Shaker 4 | Shaker 4 |
| 71 | Short Hi Whistle [EXC2] | Short Hi Whistle [EXC2] |
| 72 | Long Low Whistle [EXC2] | Long Low Whistle [EXC2] |
| 73 | Short Guiro [EXC3] | Short Guiro [EXC3] |
| 74 | Long Guiro [EXC3] | Long Guiro [EXC3] |
| 75 | Claves | Claves |
| 76 | High Wood Block | High Wood Block |
| 77 | Low Wood Block | Low Wood Block |
| 78 | Mute Cuica [EXC4] | Mute Cuica [EXC4] |
| 79 | Open Cuica [EXC4] | Open Cuica [EXC4] |
| 80 | Mute Triangle [EXC5] | Mute Triangle [EXC5] |
| 81 | Open Triangle [EXC5] | Open Triangle [EXC5] |
| 82 | Shaker | Shaker |
| 83 | Jingle Bell | Jingle Bell |
| 84 | Bell Tree | Bell Tree |
| 85 | Castanets | Castanets |
| 86 | Mute Surdo [EXC6] | Mute Surdo [EXC6] |
| 87 | Open Surdo [EXC6] | Open Surdo [EXC6] |
| 88 | Cana | Cana |
| 89 | Falamenco Hi-Timbale | Falamenco Hi-Timbale |
| 90 | Falamenco Lo-Timbale | Falamenco Lo-Timbale |
| 91 | Falamenco Tmbi Flam | Falamenco Tmbi Flam |
| 92 | Shekere 1 | Shekere 1 |
| 93 | Shekere 2 | Shekere 2 |
| 94 | Low Bongo Mute | Low Bongo Mute |
| 95 | High Bongo Mute | High Bongo Mute |
| 96 | ----- | ----- |
| 97 | ----- | ----- |
| 98 | ----- | ----- |
| 99 | ----- | ----- |
| 100 | Falamenco HC | Falamenco HC |
| 101 | Falamenco HC | Falamenco HC |
| 102 | Bongo Cowbell | Bongo Cowbell |
| 103 | ----- | ----- |
| 104 | Bongo Cowbell | Bongo Cowbell |
| 105 | ----- | ----- |
- ----: No sound.
- [EXC]: will not sound simultaneously with other percussion instruments of the same number.
| DR JAZZBRUSH | DR ROOM | DR POWER | DR ELECTORONIC | |||||
| 21 | R&B Snare | Pop Snare m | 22 | ----- | ----- | ----- | ----- | |
| 23 | Pop Snare m | Pop Snare m | 23 | ----- | ----- | ----- | ----- | |
| 24 | Pop Snare m | Pop Snare Ghost | 24 | Bar Chime | Bar Chime | Bar Chime | Bar Chime | |
| 26 | Pop Snare m | Pop Snare Ghost | 25 | Snare Roll | Snare Roll | Snare Roll | Snare Roll | |
| 27 | Finger Snap | Hand Clap | 26 | Finger Snap | Finger Snap | Finger Snap | Finger Snap | |
| 28 | 707 Claps | Hand Clap | 27 | High Q | High Q | High Q | High Q | |
| 29 | Hand Clap | Hand Clap2 | 28 | Slap | Slap | Slap | Slap | |
| 30 | Hand Clap | Hand Clap | 29 | Scratch Push | Scratch Push | Scratch Push | Scratch Push | |
| 31 | Hand Clap | Pop Pedal HH | 30 | Scratch Pull | Scratch Pull | Scratch Pull | Scratch Pull | |
| 32 | Gospel Hand Clap | Gospel Hand Clap | 31 | Sticks | Sticks | Sticks | Sticks | |
| 33 | Snare Roll | Snare Roll | 32 | Square Click | Square Click | Square Click | Square Click | |
| 34 | Pop Kick | Pop Kick | 33 | Metronome Click | Metronome Click | Metronome Click | Metronome Click | |
| 35 | Jazz Sanre | Jazz Sanre | 34 | Metronome Bell | Metronome Bell | Metronome Bell | Metronome Bell | |
| C2 | Jazz Sanre Swing | Jazz Sanre Swing | 35 | Kick1 | Kick1 | Kick1 | Kick1 | |
| 36 | Jazz Low Tom f | Jazz Low Tom f | 36 | Room Kick | MONDO Kick | Elec BD | ||
| 37 | Jazz High Tom f | Jazz High Tom f | 37 | Side Stick | Side Stick | Side Stick | ||
| 38 | Jazz High Tom f | Jazz High Tom f | 38 | Room Snr 1 | Gated SD | Elec SD | ||
| 39 | Jazz High Tom f | Jazz High Tom f | 39 | Hand Clap | Hand Clap | Hand Clap | ||
| 40 | Jazz Mid Tom f | Jazz Mid Tom f | 40 | Std Snr 1 | Snare Drum 2 | Gated SD | ||
| 41 | Open OH | Open OH | 41 | Room Low Tom 2' | Room Low Tom 2' | Elec Low Tom 2 | ||
| 42 | Jazz High Tom f | Jazz High Tom f | 42 | Closed Hi-hat 1' | Closed Hi-hat 1' | Closed Hi-hat 1 | ||
| 43 | Jazz High Tom f | Jazz High Tom f | 43 | Room Low Tom 1' | Room Low Tom 1' | Elec Low Tom 1 | ||
| 44 | Jazz High Tom f | Jazz High Tom f | 44 | Pedal Hi-hat 1' | Pedal Hi-hat 1' | Pedal Hi-hat 1 | ||
| 45 | Jazz High Tom f | Jazz High Tom f | 45 | Room Mid Tom 2' | Room Mid Tom 2' | Elec Mid Tom 2 | ||
| 46 | Tambourine 2 | Tambourine 2 | 46 | Open Hi-hat 1' | Open Hi-hat 1' | Open Hi-hat 1 | ||
| 47 | Splash Cymbal | Splash Cymbal | 47 | Room Mid Tom 1' | Room Mid Tom 1' | Elec Mid Tom 1 | ||
| 48 | Chaos Cowbell | Chaos Cowbell | 48 | Room Hi Tom 2' | Room Hi Tom 2' | Elec Hi Tom 2 | ||
| 49 | Jazz Crash Cymbal 2 | Jazz Crash Cymbal 2 | 49 | Crash Cymbal 1 | Crash Cymbal 1 | Crash Cymbal 1 | ||
| 50 | Vibra-slap 2 | Vibra-slap 2 | 50 | Room Hi Tom 1' | Room Hi Tom 1' | Elec Hi Tom 1 | ||
| 51 | Mute Conga | Mute Conga | 51 | Ride Cymbal 1 | Ride Cymbal 1 | Ride Cymbal 1 | ||
| 52 | High Bongo 2 | High Bongo 2 | 52 | Chinese Cymbal | Chinese Cymbal | Reverse Cymbal | ||
| 53 | Tambourine 2 | Tambourine 2 | 53 | Tambourine | Tambourine | Tambourine | ||
| 54 | Splash Cymbal | Splash Cymbal | 54 | Crash Cymbal 2 | Crash Cymbal 2 | Crash Cymbal 2 | ||
| 55 | Baba-slap 2 | Baba-slap 2 | 55 | Vibra-slap | Vibra-slap | Vibra-slap | ||
| 56 | Shaker 3 | Shaker 3 | 56 | Ride Cymbal 2 | Ride Cymbal 2 | Ride Cymbal 2 | ||
| 70 | Shaker 4 | Shaker 4 | 60 | High Bongo | High Bongo | High Bongo | ||
| 71 | Short Hi Whistle [EXC2] | Short Hi Whistle [EXC2] | 61 | Low Bongo | Low Bongo | Low Bongo | ||
| 72 | Long Low Whistle [EXC2] | Long Low Whistle [EXC2] | 62 | Mute High Conga | Mute High Conga | Mute High Conga | ||
| 73 | Short Guiroo [EXC3] | Short Guiroo [EXC3] | 63 | Open High Conga | Open High Conga | Open High Conga | ||
| 74 | Long Guiroo [EXC3] | Long Guiroo [EXC3] | 64 | Low Conga | Low Conga | Low Conga | ||
| 75 | Claves | Claves | 65 | High Timbale | High Timbale | High Timbale | ||
| 76 | High Wood Block | High Wood Block | 66 | Low Timbale | Low Timbale | Low Timbale | ||
| 77 | Mute Cuica | Mute Cuica | 67 | High Agogo | High Agogo | High Agogo | ||
| 78 | Open Cuica | Open Cuica | 68 | Low Agogo | Low Agogo | Low Agogo | ||
| 79 | Mute Triangle | Mute Triangle | 69 | Cabasa | Cabasa | Cabasa | ||
| 80 | Open Triangle | Open Triangle | 70 | Maracas | Maracas | Maracas | ||
| 81 | Shaker | Shaker | 71 | Short Hi Whistle [EXC2] | Short Hi Whistle [EXC2] | Short Hi Whistle [EXC2] | ||
| 82 | Shaker 4 | Shaker 4 | 72 | Long Low Whistle [EXC2] | Long Low Whistle [EXC2] | Long Low Whistle [EXC2] | ||
| 83 | Shaker 4 | Shaker 4 | 73 | Short Guiroo [EXC3] | Short Guiroo [EXC3] | Short Guiroo [EXC3] | ||
| 84 | Castanets | Castanets | 74 | Long Guiroo [EXC3] | Long Guiroo [EXC3] | Long Guiroo [EXC3] | ||
| 85 | Mute Surdo [EXC6] | Mute Surdo [EXC6] | 75 | Claves | Claves | Claves | ||
| 86 | Cana | Cana | 76 | High Wood Block | High Wood Block | High Wood Block | ||
| 87 | Falamenco Hi-Timbale | Falamenco Hi-Timbale | 77 | Low Wood Block | Low Wood Block | Low Wood Block | ||
| 88 | Falamenco Lo-Timbale | Falamenco Lo-Timbale | 78 | Mute Cuica | Mute Cuica | Mute Cuica | ||
| 89 | Falamenco Tmbl Flam | Falamenco Tmbl Flam | 79 | Open Cuica | Open Cuica | Open Cuica | ||
| 90 | Shekere 1 | Shekere 1 | 80 | Mute Triangle | Mute Triangle | Mute Triangle | ||
| 91 | Shekere 2 | Shekere 2 | 81 | Open Triangle | Open Triangle | Open Triangle | ||
| 92 | High Bongo Mute | High Bongo Mute | 82 | Shaker | Shaker | Shaker | ||
| 93 | Shaker 3 | Shaker 3 | 83 | Shaker 3 | Shaker 3 | Shaker | ||
| 94 | Shaker 4 | Shaker 4 | 84 | Bell Tree | Bell Tree | Bell Tree | ||
| 95 | Shaker 5 | Shaker 5 | 85 | Castanets | Castanets | Castanets | ||
| 96 | Shaker 6 | Shaker 6 | 86 | Mute Surdo [EXC6] | Mute Surdo [EXC6] | Mute Surdo [EXC6] | ||
| 97 | Shaker 7 | Shaker 7 | 87 | Open Surdo [EXC6] | Open Surdo [EXC6] | Open Surdo [EXC6] | ||
| 98 | Shaker 8 | Shaker 8 | 88 | Shaker 8 | Shaker 8 | Shaker | ||
* ----: No sound.
* [EXC]: will not sound simultaneously with other percussion instruments of the same number.
| DR TR-808 | DR DANCE | DR JAZZ DR GS STAND | DR BRUSH | |||||
| 21 | ----- | ----- | ----- | ----- | ||||
| 22 | ----- | ----- | ----- | ----- | ||||
| 23 | ----- | ----- | ----- | ----- | ||||
| 24 | Bar Chime | Bar Chime | Bar Chime | Bar Chime | ||||
| 25 | Snare Roll | Snare Roll | Snare Roll | Snare Roll | ||||
| 26 | Finger Snap | Finger Snap | Finger Snap | Finger Snap | ||||
| 27 | High Q | High Q | High Q | High Q | ||||
| 28 | Slap | Slap | Slap | Slap | ||||
| 29 | Scratch Push | [EXC7] | Scratch Push | [EXC7] | Scratch Push | [EXC7] | Scratch Push | [EXC7] |
| 30 | Scratch Pull | [EXC7] | Scratch Pull | [EXC7] | Scratch Pull | [EXC7] | Scratch Pull | [EXC7] |
| 31 | Sticks | Dance Snr 1 | Sticks | Sticks | ||||
| 32 | Square Click | Square Click | Square Click | Square Click | ||||
| 33 | Metronome Click | Metronome Click | Metronome Click | Metronome Click | ||||
| 34 | Metronome Bell | Metronome Bell | Metronome Bell | Metronome Bell | ||||
| 35 | Std Kick 2 | Kick 1 | Std Kick 2 | Kick 2 | ||||
| C2 | 808 Bass Drum 1 | 808 Bass Drum 2 | Std Kick 1 | Kick 1 | ||||
| 36 | 808 Rim Shot | 808 Rim Shot | Side Stick | Side Stick | ||||
| 37 | 808 Snare Drum | TR-909 Snr | Snare Drum 1 | Brush Tap | ||||
| 38 | Hand Clap | Hand Clap | Hand Clap | Brush Slap | ||||
| 39 | Snare Drum 2 | Dance Snr 2 | Snare Drum 2 | Brush Swirl | ||||
| 40 | 808 Low Tom 2 | 808 Low Tom 2 | Low Tom 2 | Brush Low Tom 2 | ||||
| 41 | 808 CHH | [EXC1] | 808 CHH [EXC1] | Closed Hi-hat 1 | [EXC1] | Closed Hi-hat 2 | [EXC1] | |
| 42 | 808 Low Tom 1 | 808 Low Tom 1 | Low Tom 1 | Brush Low Tom 1 | ||||
| 43 | 808 CHH | [EXC1] | 808 CHH [EXC1] | Pedal Hi-hat 1 | [EXC1] | Pedal Hi-hat 2 | [EXC1] | |
| 44 | 808 Mid Tom 2 | 808 Mid Tom 2 | Mid Tom 2 | Brush Mid Tom 2 | ||||
| 45 | 808 OHH [EXC1] | 808 OHH [EXC1] | Open Hi-hat 1 | [EXC1] | Open Hi-hat 2 | [EXC1] | ||
| 46 | 808 Mid Tom 1 | 808 Mid Tom 1 | Mid Tom 1 | Brush Mid Tom 1 | ||||
| C3 | 808 Hi Tom 2 | 808 Hi Tom 2 | High Tom 2 | Brush Hi Tom 2 | ||||
| 49 | 808 Cymbal | 808 Cymbal | Crash Cymbal 1 | Crash Cymbal 1 | ||||
| 50 | 808 Hi Tom 1 | 808 Hi Tom 1 | High Tom 1 | Brush Hi Tom 1 | ||||
| 51 | Ride Cymbal 1 | Ride Cymbal 1 | Ride Cymbal 1 | Ride Cymbal 1 | ||||
| 52 | Chinese Cymbal | Chinese Cymbal | Chinese Cymbal | Chinese Cymbal | ||||
| 53 | Ride Bell | Ride Bell | Ride Bell | Ride Bell | ||||
| 54 | Tambourine | Tambourine | Tambourine | Tambourine | ||||
| 55 | Splash Cymbal | Splash Cymbal | Splash Cymbal | Splash Cymbal | ||||
| 56 | 808 Cowbell | 808 Cowbell | Cowbell | Cowbell | ||||
| 57 | Crash Cymbal 2 | Crash Cymbal 2 | Crash Cymbal 2 | Crash Cymbal 2 | ||||
| 58 | Vibra-slap | Vibra-slap | Vibra-slap | Vibra-slap | ||||
| 59 | Ride Cymbal 2 | Ride Cymbal 2 | Ride Cymbal 2 | Ride Cymbal 2 | ||||
| C4 | High Bongo | High Bongo | High Bongo | High Bongo | ||||
| 60 | Low Bongo | Low Bongo | Low Bongo | Low Bongo | ||||
| 61 | 808 High Conga | 808 High Conga | Mute High Conga | Mute High Conga | ||||
| 62 | 808 Mid Conga | 808 Mid Conga | Open High Conga | Open High Conga | ||||
| 63 | 808 Low Conga | 808 Low Conga | Low Conga | Low Conga | ||||
| 64 | High Timbale | High Timbale | High Timbale | High Timbale | ||||
| 65 | Low Timbale | Low Timbale | Low Timbale | Low Timbale | ||||
| 66 | High Agogo | High Agogo | High Agogo | High Agogo | ||||
| 67 | Low Agogo | Low Agogo | Low Agogo | Low Agogo | ||||
| 68 | Cabasa | Cabasa | Cabasa | Cabasa | ||||
| 69 | 808 Maracas | 808 Maracas | Maracas | Maracas | ||||
| 70 | Short Hi Whistle | [EXC2] | Short Hi Whistle | [EXC2] | Short Hi Whistle | [EXC2] | Short Hi Whistle | [EXC2] |
| 71 | Long Low Whistle | [EXC2] | Long Low Whistle | [EXC2] | Long Low Whistle | [EXC2] | Long Low Whistle | [EXC2] |
| 72 | Short Guiroo | [EXC3] | Short Guiroo | [EXC3] | Short Guiroo | [EXC3] | Short Guiroo | [EXC3] |
| 73 | Long Guiroo | [EXC3] | Long Guiroo | [EXC3] | Long Guiroo | [EXC3] | Long Guiroo | [EXC3] |
| 74 | 808 Claves | 808 Claves | Claves | Claves | ||||
| 75 | High Wood Block | High Wood Block | High Wood Block | High Wood Block | ||||
| 76 | Low Wood Block | Low Wood Block | Low Wood Block | Low Wood Block | ||||
| 77 | Mute Cuica | [EXC4] | Mute Cuica | [EXC4] | Mute Cuica | [EXC4] | Mute Cuica | [EXC4] |
| 78 | Open Cuica | [EXC4] | Open Cuica | [EXC4] | Open Cuica | [EXC4] | Open Cuica | [EXC4] |
| 79 | Mute Triangle | [EXC5] | Mute Triangle | [EXC5] | Mute Triangle | [EXC5] | Mute Triangle | [EXC5] |
| 80 | Open Triangle | [EXC5] | Open Triangle | [EXC5] | Open Triangle | [EXC5] | Open Triangle | [EXC5] |
| 81 | Shaker | Shaker | Shaker | Shaker | ||||
| 82 | Jingle Bell | Jingle Bell | Jingle Bell | Jingle Bell | ||||
| C6 | Bell Tree | Bell Tree | Bell Tree | Bell Tree | ||||
| 84 | Castanets | Castanets | Castanets | Castanets | ||||
| 85 | Mute Surdo | [EXC6] | Mute Surdo | [EXC6] | Mute Surdo | [EXC6] | Mute Surdo | [EXC6] |
| 86 | Open Surdo | [EXC6] | Open Surdo | [EXC6] | Open Surdo | [EXC6] | Open Surdo | [EXC6] |
- ----: No sound.
- [EXC]: will not sound simultaneously with other percussion instruments of the same number.
| DR ORCHESTRA | DR GS ROOM | DR GS BRUSH | ||||
| 21 | ----- | ----- | ----- | |||
| 22 | ----- | ----- | ----- | |||
| 23 | ----- | ----- | ----- | |||
| 24 | Bar Chime | Bar Chime | Bar Chime | |||
| 25 | Snare Roll | Snare Roll | Snare Roll | |||
| 26 | Finger Snap | Finger Snap | Finger Snap | |||
| 27 | Close Hi-hat | [EXC1] | High Q | High Q | ||
| 28 | Pedal Hi-hat | [EXC1] | Slap | Slap | ||
| 29 | Open Hi-hat | [EXC1] | Scratch Push | [EXC7] | Scratch Push | [EXC7] |
| 30 | Ride Cymbal | Scratch Pull | [EXC7] | Scratch Pull | [EXC7] | |
| 31 | Sticks | Sticks | Sticks | |||
| 32 | Square Click | Square Click | Square Click | |||
| 33 | Metronome Click | Metronome Click | Metronome Click | |||
| 34 | Metronome Bell | Metronome Bell | Metronome Bell | |||
| 35 | Concert BD 2 | Std Kick 2 | Std Kick 2 | |||
| 36 | Concert BD 1 | Std Kick 1 | Std Kick 1 | |||
| 37 | Side Stick | Side Stick | Side Stick | |||
| 38 | Concert SD | Snare Drum 1 | Brush Tap | |||
| 39 | Castanets | Hand Clap | Brush Slap | |||
| 40 | Concert SD | Snare Drum 2 | Brush Swirl | |||
| 41 | Timpani F | Room Low Tom 2 | Low Tom 2 | |||
| 42 | Timpani F# | Closed Hi-hat 1 | [EXC1] | Closed Hi-hat 1 | [EXC1] | |
| 43 | Timpani G | Room Low Tom 1 | Low Tom 1 | |||
| 44 | Timpani G# | Pedal Hi-hat 1 | [EXC1] | Pedal Hi-hat 1 | [EXC1] | |
| 45 | Timpani A | Room Mid Tom 2 | Mid Tom 2 | |||
| 46 | Timpani A# | Open Hi-hat 1 | [EXC1] | Open Hi-hat 1 | [EXC1] | |
| 47 | Timpani B | Room Mid Tom 1 | Mid Tom 1 | |||
| C3 | Tippani c | Room Hi Tom 2 | High Tom 2 | |||
| 48 | Tippani c# | Crash Cymbal 1 | Crash Cymbal 1 | |||
| 50 | Tippani d | Room Hi Tom 1 | High Tom 1 | |||
| 51 | Tippani d# | Ride Cymbal 1 | Ride Cymbal 1 | |||
| 52 | Tippani e | Chinese Cymbal | Chinese Cymbal | |||
| 53 | Tippani f | Ride Bell | Ride Bell | |||
| 54 | Tambourine | Tambourine | Tambourine | |||
| 55 | Splash Cymbal | Splash Cymbal | Splash Cymbal | |||
| 56 | Cowbell | Cowbell | Cowbell | |||
| 57 | Concert Cymbal 2 | Crash Cymbal 2 | Crash Cymbal 2 | |||
| 58 | Vibra-slap | Vibra-slap | Vibra-slap | |||
| 59 | Concert Cymbal 1 | Ride Cymbal 2 | Ride Cymbal 2 | |||
| C4 | High Bongo | High Bongo | High Bongo | |||
| 60 | Low Bongo | Low Bongo | Low Bongo | |||
| 61 | Mute High Conga | Mute High Conga | Mute High Conga | |||
| 62 | Open High Conga | Open High Conga | Open High Conga | |||
| 63 | Low Conga | Low Conga | Low Conga | |||
| 64 | High Timbale | High Timbale | High Timbale | |||
| 65 | Low Timbale | Low Timbale | Low Timbale | |||
| 66 | High Agogo | High Agogo | High Agogo | |||
| 67 | Low Agogo | Low Agogo | Low Agogo | |||
| 68 | Cabasa | Cabasa | Cabasa | |||
| 69 | Maracas | Maracas | Maracas | |||
| 70 | Short Hi Whistle | [EXC2] | Short Hi Whistle | [EXC2] | Short Hi Whistle | [EXC2] |
| 71 | Long Low Whistle | Long Low Whistle | Long Low Whistle | |||
| 72 | Short Guiro | Short Guiro | Short Guiro | |||
| 73 | Long Guiro | Long Guiro | Long Guiro | |||
| 74 | Claves | Claves | Claves | |||
| 75 | High Wood Block | High Wood Block | High Wood Block | |||
| 76 | Low Wood Block | Low Wood Block | Low Wood Block | |||
| 77 | Mute Cuica | [EXC4] | Mute Cuica | [EXC4] | Mute Cuica | [EXC4] |
| 78 | Open Cuica | [EXC4] | Open Cuica | [EXC4] | Open Cuica | [EXC4] |
| 79 | Mute Triangle | [EXC5] | Mute Triangle | [EXC5] | Mute Triangle | [EXC5] |
| 80 | Open Triangle | [EXC5] | Open Triangle | [EXC5] | Open Triangle | [EXC5] |
| 81 | Shaker | Shaker | Shaker | |||
| 82 | Jingle Bell | Jingle Bell | Jingle Bell | |||
| 83 | Bell Tree | Bell Tree | Bell Tree | |||
| 84 | Castanets | Castanets | Castanets | |||
| 85 | Mute Surdo | [EXC6] | Mute Surdo | [EXC6] | Mute Surdo | [EXC6] |
| 86 | Open Surdo | [EXC6] | Open Surdo | [EXC6] | Open Surdo | [EXC6] |
| 87 | Applause | Applause | Applause | |||
- All rights reserved. Unauthorized use of this material for purposes other than private, personal enjoyment is a violation of applicable laws.
| Practice | |
| 1 | Openness |
| 2 | Arabesque |
| 3 | Pastoral |
| 4 | A Small Gathering |
| 5 | Innocence |
| 6 | Progress |
| 7 | The Clear Stream |
| 8 | Gracefulness |
| 9 | The Hunt |
| 10 | Tender Flower |
| 11 | The Young Shepherdess |
| 12 | Farewell |
| 13 | Consolation |
| 14 | Austrian Dance |
| 15 | Ballad |
| 16 | Sighing |
| 17 | The Chatterbox |
| 18 | Restlessness |
| 19 | Ave Maria |
| 20 | Tarantella |
| 21 | Angelic Harmony |
| 22 | Gondola Song |
| 23 | The Return |
| 24 | The Swallow |
| 25 | The Knight Errant |
| 26 | Invention 1 |
| 27 | Invention 2 |
| 28 | Invention 3 |
| 29 | Invention 4 |
| 30 | Invention 5 |
| 31 | Invention 6 |
| 32 | Invention 7 |
| 33 | Invention 8 |
| 34 | Invention 9 |
| 35 | Invention 10 |
| 36 | Invention 11 |
| 37 | Invention 12 |
| 38 | Invention 13 |
| 39 | Invention 14 |
| 40 | Invention 15 |
| 41 | Beyer 15 |
| 42 | Beyer 21 |
| 43 | Beyer 25 |
| 44 | Beyer 29 |
| 45 | Beyer 34 |
| 46 | Beyer 38 |
| 47 | Beyer 42 |
| 48 | Beyer 46 |
| 49 | Beyer 51 |
| 50 | Beyer 55 |
| 51 | Beyer 60 |
| 52 | Beyer 64 |
| 53 | Beyer 67 |
| 54 | Beyer 73 |
| 55 | Beyer 78 |
| 56 | Beyer 81 |
| 57 | Beyer 90 |
| 58 | Beyer 93 |
| 59 | Beyer 98 |
| 60 | Beyer 103 |
| 61 | Czerny 100-1 |
| 62 | Czerny 100-10 |
| 63 | Czerny 100-20 |
| 64 | Czerny 100-30 |
| 65 | Czerny 100-38 |
| 66 | Czerny 100-43 |
| 67 | Czerny 100-60 |
| 68 | Czerny 100-75 |
| 69 | Czerny 100-86 |
| 70 | Czerny 100-96 |
| Masterpieces | |
| 1 | Sonate No.15 |
| 2 | La Fille aux Cheveux de Lin |
| 3 | La Campanella |
| 4 | Scherzo No.2 |
| 5 | Étude, op.10-12 |
| 6 | Liebesträume 3 |
| 7 | Étude, op.10-3 |
| 8 | Je te veux |
| 9 | Valse, op.64-1 |
| 10 | Golliwog's Cakewalk |
| 11 | Fantaisie-Impromptu |
| 12 | Arabesque 1 |
| 13 | An der bereits, blauen Donau |
| 14 | Auf Flügeln des Gesanges |
| 15 | Mazurka No.5 |
| 16 | Gymnopédie 1 |
| 17 | Étude, op.25-1 |
| 18 | Clair de Lune |
| 19 | Étude, op.10-5 |
| 20 | Dr. Gradus ad Parnassum |
| 21 | Grande Valse Brillante |
| 22 | La prière d'une Vierge |
| 23 | Course en Troika |
| 24 | To The Spring |
| 25 | Valse, op.64-2 |
| 26 | Radetzky Marsch |
| 27 | Träumerei |
| 28 | Moments Musicaux 3 |
| 29 | Prélude, op.28-15 |
| 30 | Harmonious Blacksmith |
| 31 | Ungarische Tänze 5 |
| 32 | Türkischer Marsch (Beethoven) |
| 33 | Nocturne No.2 |
| 34 | Fruhlingslied |
| 35 | Präludium |
| 36 | Jägerlied |
| 37 | Menuet Antique |
| 38 | Für Elise |
| 39 | Türkischer Marsch (Mozart) |
| 40 | Ständchen |
| 41 | Humoreske |
| 42 | Blumenlied |
| 43 | Alpenglückchen |
| 44 | Menuett G dur (Beethoven) |
| 45 | Venezianisches Gondellied |
| 46 | Alpenabendröte |
| 47 | Farewell to the Piano |
| 48 | Brautchor |
| 49 | Battle of Waterloo |
| 50 | Wiener Marsch |
| 51 | Le Coucou |
| 52 | Menuett G dur (Bach) |
| 53 | Spinnerlied |
| 54 | Gavotte |
| 55 | Heidenröslein |
| 56 | Zigeuner Tanz |
| 57 | La Cinquantaine |
| 58 | Csikos Post |
| 59 | Dolly's Dreaming Awakening |
| 60 | La Violette |
| 61 | Fröhlicher Landmann |
| 62 | Sonatine op.36-1 (Clementi) |
| 63 | Sonatine op.20-1 (Kuhlau) |
| 64 | Sonatine No.5 (Beethoven) |
| Popular | |
| 1 | Salut D'amour |
| 2 | Canon (Pachelbel) |
| 3 | Ombra maifu |
| 4 | Les patineurs, Valse |
| 5 | Brindisi |
| 6 | Die Lorelei |
| 7 | Entertainer |
| 8 | Annie Laurie |
| 9 | O'sole Mio |
| 10 | Ave Maria |
| 11 | Greensleeves |
| 12 | Hallelujah! |
| 13 | Stagecoach |
| 14 | Little Brown Jug |
| 15 | Amazing Grace |
| 16 | Londonderry Air |
| 17 | When The Saints Go Marchin' In |
| 18 | Trio Grande * |
| 19 | Wedding Song * |
| 20 | L'éveil de l'amour * |
| 21 | Preludelight * |
| 22 | Blue Sky Rag * |
| 23 | Late Night Chopin * |
| 24 | Sun Daze * |
| 25 | Keepers Tale * |
| 26 | Secret Agent * |
| 27 | Kismet's Salsa * |
| 28 | Roll Over Ludwig * |
| 29 | A Prelude To... * |
| 30 | Count On The Blues * |
| 31 | One Down And Easy * |
| 32 | Bach's A Boppin' * |
| 33 | From Matthew's Passion * |
| 34 | Hungarian Rag * |
| 35 | Paganini Boogie * |
| 36 | Fly Flee * |
| Kids | |
| 1 | Old MacDonald Had A Farm |
| 2 | Twinkle Twinkle, Little Star |
| 3 | Frog Song |
| 4 | Mary Had A Little Lamb |
| 5 | London Bridge |
| 6 | Jingle Bells |
| 7 | Joy To The World |
| 8 | Silent Night, Holy Night |
| 9 | Puppy's March |
| 10 | Little Fox |
| 11 | Lightly Row |
| 12 | The Cuckoo |
| 13 | Grandfather's Clock |
- Song with a “*” symbol appended to their name may not allow output of their notations as image data in BMP ( bitmap) format.
Songs for Visual Lesson
Internal songs, Favorites, and songs from external memory can also be used with Visual Lesson.
Beginner's Course
Mary Had A Little Lamb
Come Birds
The Cuckoo
Old MacDonald Had A Farm
London Bridge
Oh! Susanna
Sonata (Mozart)
Aura Lee
Pathetique
Amazing Grace
■ Repertoire Course
Traumerei
Trepak
Canon (Pachelbel)
Railroad
Silent Night, Holy Night
Clair De Lune
La Primavera
Grandfather's Clock
What Are Music Files?
Music files contains musical information such as how long the key for a corresponding pitch is played, the force applied to the key played, and other such information. Performance data is transmitted to the HPi-7S from music files saved in USB memory and CD-ROM, and played back without change as songs. This is different than a audio CD, since the music file does not contain a recording of the sound itself. This makes it possible to change tempos and keys freely, allowing you to use it in many different ways.
Regarding Copyright
Use of the internal songs for any purpose other than private, personal enjoyment without the permission of the copyright holder is prohibited by law. Additionally, this data must not be copied, nor used in a secondary copyrighted work without the permission of the copyright holder.
Please be aware that if you create derivative works that are based on existing copyrighted material, such as commercially available SMF music files, such works may violate copyright law if used for any purpose other than personal enjoyment. Roland takes no responsibility for any copyright violation you may commit by creating such works.
The HPi-7S Allows You To Use the Following Music Files
VIMA TUNES VIMA TUNES
VIMA TUNES is a Roland specification for music files that contains image and lyric data, allowing you to enjoy songs with lyrics and images simultaneously. When data bearing the "VIMA TUNES" logo is played back on a device that bears the same logo, lyrics can be shown on the screen of a connected external display or television, letting you enjoy karaoke or watch a slide show.
SMF Music Files
SMFs (Standard MIDI Files) use a standard format for music file that was formulated so that files containing music file could be widely compatible, regardless of the manufacturer of the listening device. An enormous variety of music is available, whether it be for listening, for practicing musical instruments, for Karaoke, etc.
SMF with Lyrics SMF LYRICS
"SMF with Lyrics" refers to SMF (Standard MIDI File) that contains the lyrics. When Music Files carrying the "SMF with Lyrics" logo are played back on a compatible device (one bearing the same logo), the lyrics will appear in its display.
The HPi-7S come equipped with GM 2/GS sound generators.
About the HPi-7S Sound Generator
The HPi-7S come equipped with GM 2/GS sound generators.
General MlDI

The General MIDI is a set of recommendations which seeks to provide a way to go beyond the limitations of proprietary designs, and standardize the MIDI capabilities of sound generating devices. Sound generating devices and music files that meets the General MIDI standard bears the General MIDI logo. Music files bearing the General MIDI logo can be played back using any General MIDI sound generating unit to produce essentially the same musical performance.
General MIDI 2

The upwardly compatible General MIDI 2 recommendations pick up where the original General MIDI left off, offering enhanced expressive capabilities, and even greater compatibility. Issues that were not covered by the original General MIDI recommendations, such as how sounds are to be edited, and how effects should be handled, have now been precisely defined. Moreover, the available sounds have been expanded. General MIDI 2 compliant sound generators are capable of reliably playing back music files that carry either the General MIDI or General MIDI 2 logo.
In some cases, the conventional form of General MIDI, which does not include the new enhancements, is referred to as "General MIDI 1" as a way of distinguishing it from General MIDI 2.
GS Format

The GS Format is Roland's set of specifications for standardizing the performance of sound generating devices. In addition to including support for everything defined by the General MIDI, the highly compatible GS Format additionally offers an expanded number of sounds, provides for the editing of sounds, and spells out many details for a wide range of extra features, including effects such as reverb and chorus. Designed with the future in mind, the GS Format can readily include new sounds and support new hardware features when they arrive. Since it is upwardly compatible with the General MIDI, Roland's GS Format is capable of reliably playing back GM Scores equally as well as it performs GS music files (music files that have been created with the GS Format in mind). This product supports both the General MIDI 2 and the GS Format, and can be used to play back music data carrying either of these logos.
XG lite

XG is a tone generator format of YAMAHA Corporation, that defines the ways in which voices are expanded or edited and the structure and type of effects, in addition to the General MIDI 1 specification. XGlite is a simplified version of XG tone generation format. You can play back any XG music files using an XGlite tone generator. However, keep in mind that some music files may play back differently compared to the original files, due to the reduced set of control parameters and effects.
| Function... | Transmitted | Recognized | Remarks | |
| Basic Channel | Default Changed | 1 1-16 | 1-16 1-16 | |
| Mode | Default Messages Altered | Mode 3 x ***** | Mode 3 Mode 3, 4(M=1) | *2 |
| Note Number: | True Voice | 15-113 **** | 0-127 0-127 | |
| Velocity | Note ON Note OFF | O O | O O | |
| After Touch | Key's Ch's | x x | O *1 O *1 | |
| Pitch Bend | x | O | ||
| Control Change | 0, 32 1 5 6, 38 7 10 11 64 65 66 67 84 91 93 98, 99 100, 101 | O x x x x x x x x x x x x x x x x x x x x x x x x x x x x x x x x x x x x x x x x x x x x x x x x x x x x x x x x x x x x x x x x x x x x x x x x x x x x x x x x x x x x x x x x x x x x x x x x x x x x | O *1 O *1 O *1 O *1 O *1 O *1 O *1 O *1 O (Reverb) O (Chorus) O *1 O *1 | Bank select Modulation Portamento time Data entry Volume Panpot Expression Hold 1 Portamento Sostenuto Soft Portamento control Effect1 depth Effect3 depth NRPN LSB, MSB RPN LSB, MSB |
| Prog Change : True # | 0-127 ***** | O 0-127 | Program number 1-128 | |
| System Exclusive | O | O | ||
| System Common | x x x x x x | x x x x | ||
| System Real Time | O O | x x | ||
| Aux Message | : All sound off : Reset all controllers : Local Control : All Notes OFF : Active Sense : Reset | x x x x x x | O (120, 126, 127) O O O (123-125) O x | |
| Notes | *1 O x is selectable by Sys Ex. *2 Recognized as M=1 even if M≠1. | |||
Mode 1: OMNI ON, POLY
Mode 2: OMNI ON, MONO
O:Yes
Mode 3: OMNI OFF, POLY
Mode 4: OMNI OFF, MONO
X:No
| <Keyboard> | |
| Keyboard | 88 keys (PHA II ivory feel Keyboard with Escapement) |
| Touch Sensitivity | Touch: 100 levels/Fixed Touch (level adjustable) Hammer Response: Off/1 to 10 |
| Keyboard Mode | Whole Dual (volume balance adjustable) Split (split point adjustable) Manual Drums/SFX Twin Piano |
| <Sound Generator>88 keys stereo multi-sampling piano sound Conforms to GM2/GS/XG Lite | |
| Max. Polyphony | 128 voices |
| Tones | 612 tones (including 15 drum sets, 1 SFX set) |
| Temperament | 8 types: Equal, Just (Major), Just (Minor), Arabic, Kirnberger, Pythagorean, Meantone, Werkmeister Selectable tonic |
| Stretched Tuning | 2 types (On/Off) |
| Master Tuning | 415.3 Hz–466.2 Hz (adjustable in increments of 0.1 Hz) |
| Transpose | Key Transpose: -6 to +5 (in semitones) Playback Transpose: -24 to +24 (in semitones) Playback Transpose with Audio CD/Audio File: -6 to +5 (in semitones) |
| Effects | Reverb (10 levels) Chorus (10 levels) 3D (4 Levels) Dynamics Sound Control (3 types) Only for Piano Tones: Open/close lid (7 levels) Damper Resonance (10 levels) Key Off Resonance (10 levels) String Resonance (10 levels) |
| Equalizer | 4 band Digital Equalizer |
| <Composer> | |
| Metronome | Beat: 2/2, 0/4, 2/4, 3/4, 4/4, 5/4, 6/4, 7/4, 3/8, 6/8, 9/8, 12/8 |
| Volume: 11 levels | |
| Pattern: 11 patterns | |
| Sound: 8 types | |
| Tracks | 5 tracks/16 tracks |
| Song | 1 song |
| Note Storage | Approx. 30,000 notes |
| Tempo | Quarter note = 10–500 |
| Resolution | 120 ticks per quarter note |
| Recording Method | Realtime |
| Edit | Copy, Quantize, Delete, Insert, Erase, Transpose, Part Exchange, Note Edit, PC Edit |
| Control | Reset, Play/Stop, Rec, Bwd, Fwd, Track Select, All Song Play, Random Play, Count-in, Countdown, Marker Set, Repeat, Tempo Mute, Track Mute, Melody Guide, 16 part Mute, Volume Balance, Center Cancel (only for audio playback) |
| <Internal Memory> | |
| Songs | Max. 200 songs |
| Save Song | Standard MIDI Files (Format 0) |
| Others | User image display: 1 |
| <External Memory> | |
| External Storage | USB Memory (Sold Separately) USB CD Drive (Sold Commercially, Read Only) USB Floppy Disk Drive (Sold Separately) |
| Playable Data | Standard MIDI Files (Format 0/1), Roland Original Format (i-Format), Audio File (WAV 44.1kHz/16bit Linear Format) Audio CDs (CD-DA) |
| Save Format | Standard MIDI Files (Format 0) |
| <Others> | |
| Internal Songs | 183 songs |
| Rated Power Output | 60W x 2 |
| Speakers | 16 cm x 2 (with speaker box), 5 cmx2 |
| LCD | 640 x 240 dots graphic color LCD (with backlit) |
| Display | Notation/ User image (Built-in Display)/ Slide Show (External Display) |
| Languages | English/Japanese/German/French/Spanish |
| Notation | Grand staff/G clef staff/F clef staff, with note name/lyrics/chords/fingering |
| Control | Volume, Brilliance, LCD Contrast, Mic volume |
| Pedals | Damper (half-pedal recognition), Soft (half-pedal recognition, function assignable), Sostenuto (function assignable) |
| Other Functions | Piano Designer, One Touch Piano, Replay, Wonderland/Game, Visual Lesson, DoReMi Course, Twin Piano Game, V-LINK, Tone Demo, Auto Demo, Panel Lock, BMP Export, User Image Display, Mic Echo, Classic Position |
| Connectors | Ext Memory ConnectorUSB ConnectorOutput Jacks (L/Mono, R)Input Jacks (Front: L/Mono, R Rear: L/Mono, R) Phones Jack (Stereo) x 2MIDI Connectors (In, Out)AC InletExternal Display connector (15-pin D-Sub type)Video Out connectorMic Jack |
| Power Supply | AC 115 V, AC 117 V, AC 220 V, AC 230 V, AC 240 V (50/60 Hz) |
| Power Consumption | 120 W |
| Dimensions(Including piano stand) | 1409 (W) x 529 (D) x 892 (H) mm55-1/2 (W) x 20-7/8 (D) x 35-1/8 (H) inches |
| Dimensions(Including piano stand and music rest) | 1409 (W) x 529 (D) x 1098 (H) mm55-1/2 (W) x 20-7/8 (D) x 43-1/4 (H) inches |
| Weight(Including piano stand) | 80 kg / 176 lbs 6 oz |
| Accessories | Owner's ManualPower CordRoland 60 Classical Piano MasterpiecesHeadphones Hook |
| Options | USB MemoryFloppy Disk Drive |
- In the interest of product improvement, the specifications and/or appearance of this unit are subject to change without prior notice.
Numerics
16 Track 94
16-track Sequencer 94
3D Mode 90
3D Sound Control 89
A
AC Inlet 24
Adjuster 29
Adjusting the sound 89
All Song Play 43
Alphabet (Wonderland) 31
Audio Equipment 106
Audio File 47-49, 90
Audio Files 68
Audio Volume 90
Auto Demo 93
B
Bank Select LSB 109
Bank Select MSB 109
Basic Operation 25
Basic Screen 26
Beat 63
Beat Indicator 63-64
Bouncing Ball 99
Brightness Display 20
Brilliance 55
C
CD 21
CD Drive 21
Center Cancel 49
Center Pedal 29, 91
Chorus 54,89
Clef L 99
Clef R 99
Color Notation 99
Composer Out 109
Computer 109
Connecting Audio Equipment 106
Computer 109
External Display or Television 111
Headphone Hook 19
Headphones 18
Microphone 19
MIDI Devices 107
Pedal Cord 16
Power Cord 17
Speaker Cable 16
Contrast of the Screen 20
Copy 84-85
Copy (Copying Measures) 101
Count 64
Countdown 64
Count-in 64
Cursor Buttons 25
D
Damper Pedal 29
Damper Resonance 29,87
Delete (Deleting Measures) 102
Demo 93
Detailed Settings Screen 28
Direction 105
Display Brightness 20
Display Content 112
Display Method 112
DoReMi Course 32
Drum Set 52
Drum Set List 119
Drums (Wonderland) 31
Dual 56
Dual Balance 56
Dual Performance 56
DynamicsSoundControl 55
E
Effect 54,89
End Measure 105
Equalizer 90
Erase (Making Measures Blank) 103
Erasing Performance on Specific Tracks 76 Recorded Song 76
Error Message 116
EX Tone 51
External Display 112
External Memory . 79-81, 84-85, 92, 104-105, 113-115
External Memory Connector 23, 78
F
Factory Reset 98
Favorites 42-43, 45-46, 72, 80-81
Format 97
Saving 80
Fingering Number 27,32-33,103
Fix Velocity 87
Flash Card (Wonderland) 31
Floppy Disk 20
Floppy Disk Drive 20
Folders 44
Format 79
Front Panel 22
G
Game (Wonderland) 31
General MIDI 125
General MIDI 2 125
GS 125
GS Format 125
H
Hammer Response 86
Headphone Hook 19
Headphones 18
1
Initialization
Media 79
User Memory 97
Initialize User Memory 97
Insert (Inserting Blank Measures) 102
Internal Song 30,40-41,59,73,123
Internal Song List 123
K
Key 88
Key Off Resonance 87
Key Touch 53,87
Key Touch Offset 87
L
Language 92
LCD Out Connector 16,24
Left Pedal 29, 91
Left-hand Tone 57
Lesson Functions 30
Lid 86
Lid (Keyboard Lid) 17
List Screen 28
Local Control 108
Local Off 108
Local On 108
Lyric 96
M
Marker 66
Master Gain 96
Master Tuning 88
Melody Guide 60
Memory Backup 97
Messages 28
Metronome 63
Mic Echo 90
Mic Volume 23
MIDI 107
MIDI Channel (MIDI Transmit Channel) 108
MIDI-Related Settings 108
Music CD 47, 49
Music CDs 68
Music Files 125
Music Holder 16
Music Rest 16
Mute 59, 95
N
Notation Screen 26
Notation Settings 99
Note Edit 103
0
One-Touch Piano 50
Original Default Setting 98
P
Panel Lock 98
Panpot 95
Part 77, 94
Part Exchange 103
Part Settings 95
Pattern (Metronome) 64
PC Edit 104
Pedal 29, 91
Pedal Cord 16
Pedal Functions 91
Pedal Jack 16, 24
Percussion Sound 52
Performances
Dual Performance 56
One-Touch Piano 50
Performing with a Variety of Tones 51
Playing Percussion Instruments 52
Playing the Keyboard Like a Piano 50
Split Performance 57
Twin Piano Mode 34
Phones Jack 18, 23
Piano (Wonderland) 31
Piano Designer 86
Piano Designer demo 87
Pick up 76
Play Mode 96
Playing Back
All Song Play 43
Demo 93
Internal Song 41
Internal Song (Wonderland) 31
Music Files 44
Play Mode 96
Playing Back at a Fixed Tempo 62
Playing Repeatedly between Markers 67
Recorded Performance 71
Song Saved on USB Memory 44
Songs in Folders 44, 47
Power Cord 17
Power ON 18
[Power] switch 18, 22
Practice
Marker 66
Repeat 67
Visual Lesson 37
Program Change 109
Q
Quantize 101
R
Random Play 43
Rear Panel 24
Recommended Tone 96
Recording
16 Track Recording 94
Erasing a Recorded Song 76
Erasing the Performance on Specific Tracks 76
Recording a New Song 70
Recording Along with a Song 73
Recording Songs Starting with Pickup 76
Recording to the Track Buttons 77
Re-recording 75
Saving Recorded Performances 72
Sending Recorded Performance Data to a MIDI Device ... 109
The Five Track Buttons and 16 Tracks 77
Repeat 67
Replay 26,91
Resolution 67
Reverb 54,89
Right-hand Tone 57
s
Saving 72,80,104
Saving the Notation Data in BMP Format 104
Screen
Detailed Settings Screen 28
List Screen 28
Notation Screen 26
SFX (Wonderland) 31
SFX Set (Sound Effect Set) 52
Slide Show 112
Slide Show Interval 112
SMF Music Files 125
SMF with Lyrics 125
Soft Pedal 29
Solo 95
Song Edit 100
Songs (Wonderland) 31
Sostenuto Pedal 29
Sound (Metronome) 64
Sound Generator 125
Split 57
Split Performance 57
Split Point 57
Standard Pitch 88
Start Measure 105
Stretch Tuning 87
String Resonance 87
T
Tap Tempo 91
Temperament 88
Tempo 62
Tempo Mute 62
Tone 51
Tone Button 51
Tones (Wonderland) 31
Tonic 88
Track Assign 93
Track Button 59, 71, 94
Transmit Channel 108
Transpose 68
Transpose (Transposing Individual Parts) 102
Troubleshooting 113
Tuning 88
Tuning Curve 87
Twin Piano Game 35
Twin Piano Mode 34, 36
U
Undo 100
USB (MIDI) Connector 23, 109
USB Driver 110
USB Memory 20,40,43-44,59,73,78,116
User Image Display 92
User Memory 97
V
VIMA TUNES 125
Visual Lesson 37
V-LINK 98
Volume
Headphone Volume 18
Metronome Volume 63
Overall Volume 18
Part Volume 95
Volume (Metronome) 63
Volume Balance 61,86
Dual Performance 56
W
Wonderland 30
X
XG lite 125
Information
When you need repair service, call your nearest Roland Service Center or authorized Roland distributor in your country as shown below.
AFRICA
EGYPT
Al Fanny Trading Office 9, EBN Hagar Al Askalany Street, ARD E1 Golf, Heliopolis, Cairo 11341,EGYPT TEL: (022-418-5531
REUNION
Maison FO - YAM Marcel
25 Rue Jules Hermann,
Chaudron - BP79 97 491
St Clotilde Cedex,
REUNION ISLAND
TEL: (026) 218-429
SOUTH AFRICA
T.O.M.S. Sound & Music (Pty)Ltd. 2 ASTRON ROAD DEN JOHANNESBURGZA 2 SOUTH AFRICA
TEL: (011)417 3400
Paul Bothner(PTY)Ltd.
Royal Cape Park, Unit 24
Londonderry Road, Ottery 7800
Cape Town, SOUTH AFRICA
TEL: (021) 799 4900
ASIA
CHINA
Roland Shanghai Electronics Co., Ltd.
5F. No.1500 Pingliang Road
Shanghai 200090, CHINA
TEL: (021) 5580-0800
Roland Shanghai Electronics Co.,Ltd. (BEIJING OFFICE) 10F.No.183 Section Anhuaxil Chaoyang District Beijing
100011 CHINA
TEL: (01)
HONG KONG
Tom Lee Music Co., Ltd.
Service Division
22-32 Pun Shan Street, Tsuen Wan, New Territories, HONG KONG
TEL: 2415 0911
Parsons Music Library.
8th Floor, Railway Plaza, 39 Chatham Road South, T.S.T, Kowloon, HONG KONG
TEL: 2333 1863
INDIA
Rivera Digitec (India) Pvt. Ltd.
411, Nirman Kendra
Mahalaxmi Flats Compound
Off. Dr. Edwin Moses Road,
Mumbai-400011, INDIA
TEL: (022) 2493 9051
INDONESIA
PT Citra IntiRama
Jl. Cideng Timur No. 15J-15O
Jakarta Pusat
INDONESIA
TEL: (021) 6324170
KOREA
Cosmos Corporation
1461-9, Seocho-Dong, Seocho Ku, Seoul, KOREA
TEL: (02) 3486-8855
MALAYSIA
Roland Asia Pacific Sdn. Bhd. 45-1, Block C2, Jalan PJU 1/39, Dataran Prima, 47301 Petaling Jaya, Selangor, MALAYSIA TEL: (03) 7805-3263
VIET NAM
Suoi Nhac Company, Ltd 370 Cach Mang Thang Tam St. Dist.3, Ho Chi Minh City, VIET NAM Tel:9316540
PHILIPPINES
G.A. Yuapanco & Co. Inc. 339 Gil J. Puyat Avenue Makati, Metro Manila 1200 PHILIPPINES TEL: (02) 899 9801
SINGAPORE
SWEE LEE MUSIC COMPANY PTE. LTD. 150 Sims Drive, SINGAPORE 387381 TEL:6846-3676
TAIWAN
ROLAND TAIWAN
ENTERPRISE CO., LTD.
Room 5, 9fL No. 112 Chung
Shan N.Road Sec.2, Taipei,
TAIWAN, R.O.C.
TEL: (02) 2561 3339
THAILAND
Theera Music Co., Ltd. 100-108 Soi Verng Nakornkasem, New Road,Sumpantawongse, Bangkok 10100 THAILAND TEL: (02) 224-8821
AUSTRALIA/ NEW ZEALAND
AUSTRALIA/
NEW ZEALAND
Roland Corporation Australia Pty.,Ltd. 38 Campbell Avenue Dee Why West.NSW 2099 AUSTRALIA
For Australia
Tel: (02) 9882 8266
For New Zealand
Tel: (09) 3098 715
CENTRAL/LATIN AMERICA
ARGENTINA
Instrumentos Musicales S.A.
Av.Santa Fe 2055
(1123) Buenos Aires
ARGENTINA
TEL: (011) 4508-2700
BARBADOS
A&B Music Supplies LTD 12 Webster Industrial Park Wildley, St.Michael, Barbados TEL: (246)430-1100
BRAZIL
Roland Brasil Ltda.
Rua San Jose, 780 Sala B
Parque Industrial San Jose
Cota - São Paulo - SP, BRAZIL
TEL: (011) 4615666
CHILE
Comercial Fancy II S.A.
Rut.: 96,919,420-1
Nataniel Cox #739, 4th Floor
Santiago - Centro, CHILE
TEL: (02) 688-9540
COLOMBIA
Centro Musical Ltda.
Cra 43 B No 25 A 41 Bododega 9
Medellin, Colombia
TEL: (574)3812529
COASTAL
COSTA RICA
JUAN Bansbach Instrumentos Musicales
Ave.1. Calle 11, Apartado 10237, San Jose, COSTA RICA
TEL: 258-0211
CURACAO
Zeelandia Music Center Inc.
Orionweg 30
Curacao, Netherland Antilles
TEL: (305)5926866
DOMINICAN REPUBLIC
Instruments Fernando Giraldez
Calle Proyecto Central No.3
Ens.La Esperilla
Santo Domingo, Dominican Republic
TEL: (809) 683 0305
Roland Ireland
G2 Calmount Park, Calmunt Avenue, Dublin 12
Republic of IRELAND
TEL: (01) 4294444
ITALY
Roland Italy S. p. A.
MOCO INC.
No.41 Nike St., Dr.Shariyati Ave., Roberoye Cerahe Mirdamad
Tehran, IRAN
TEL: (021)-2285-4169
ISRAEL
Haillit P. Greenspoon & Sons Ltd.
8 Retzif Ha'alia Hashnia St.
Tel-Aviv-Yafu ISRAEL
TEL: (03) 6823666
JORDAN
MUSIC HOUSE CO. LTD.
FREDDY FOR MUSIC
P. O. Box 922846
Amman 11192 JORDAN
TEL: (06) 5692696
KUWAI
EASA HUSAIN AL-YOUSIFI & SONS CO.
Al-Yousifi Service Center
P.O.Box 126 (Safat) 13002
KUWAIT
TEL: 00965 802929
LEBANON
Chahine S.A.L.
George Zeidan St., Chahine
Bldg., Achrafieh, P.O.Box: 16-5857
Beirut, LEBANON
OMAN
TALENTZ CENTRE L.L.C. Malatan House No.1 Al Noor Street, Ruwi SULTANATE OF OMAN TEL:24783443
QATAR
Al Emadi Co. (Badie Studio & Stores) P.O.Box 62, Doha, QATAR TFI:4423-554
SAUDI ARABIA
aDawliah Universal Electronics APL Behind Pizza Inn Prince Turkey Street aDawliah Building,
PO BOX 2154, Alkhobar 31952 SAUDI ARABIA TEL: (03) 8643601
SYRIA
Technical Light & Sound Center
Rawda, Abdul Qader Jazairi St. Bldg. No. 21, P.O.BOX 13520, Damascus, SYRIA
TEL: (011) 223-5384
TURKEY
ZUHAL DIS TICARET A.S.
Galip Dede Bud. No.37
Beyoglu - Istanbul / TURKEY
TEL: (0212) 249 85 10
U.A.E.
Zak Electronics & Musical Instruments Co. L.L.C.
Zabeel Road, Al Sherooq Bldg., No. 14, Ground Floor, Dubai, U.A.E.
TEL: (04) 3360715
NORTH AMERICA
CANADA
Roland Canada Ltd. (Head Office) 5480 Parkwood Way Richmond B.C.,V6V CANADA TEL: (604)2706626
Roland Canada Ltd. (Toronto Office) 170 Admiral Boulevard Mississauga On L5T 2N6 CANADA TEL: (905) 362 9707
U.S.A.
Roland Corporation U.S. 5100 S. Eastern Avenue Los Angeles, CA 90040-2938, U.S.A.
TEL: (323) 890 3700
For EU Countries


This symbol indicates that in EU countries, this product must be collected separately from household waste, as defined in each region. Products bearing this symbol must not be discarded together with household waste.

This equipment has been tested and found to comply with the limits for a Class B digital device, pursuant to Part 15 of the FCC Rules. These limits are designed to provide reasonable protection against harmful interference in a residential installation. This equipment generates, uses, and can radiate radio frequency energy and, if not installed and used in accordance with the instructions, may cause harmful interference to radio communications. However, there is no guarantee that interference will not occur in a particular installation. If this equipment does cause harmful interference to radio or television reception, which can be determined by turning the equipment off and on, the user is encouraged to try to correct the interference by one or more of the following measures:
- Reorient or relocate the receiving antenna.
- Increase the separation between the equipment and receiver.
- Connect the equipment into an outlet on a circuit different from that to which the receiver is connected.
- Consult the dealer or an experienced radio/TV technician for help.
This device complies with Part 15 of the FCC Rules. Operation is subject to the following two conditions:
(1) This device may not cause harmful interference, and
(2) This device must accept any interference received, including interference that may cause undesired operation.
Unauthorized changes or modification to this system can void the users authority to operate this equipment. This equipment requires shielded interface cables in order to meet FCC class B Limit.
For Canada
NOTICE
This Class B digital apparatus meets all requirements of the Canadian Interference-Caising Equipment Regulations.
AVIS
DECLARATION OF CONFORMITY Compliance Information Statement
Model Name: HPi-7S
Type of Equipment : Digital Piano
Responsible Party : Roland Corporation U.S.
Address: 5100 S. Eastern Avenue Los Angeles, CA 90040-2938, U. S. A.
Telephone: (323) 890 3700
Roland