FP-2 - Digital piano ROLAND - Free user manual and instructions
Find the device manual for free FP-2 ROLAND in PDF.


User questions about FP-2 ROLAND
0 question about this device. Answer the ones you know or ask your own.
Ask a new question about this device
Download the instructions for your Digital piano in PDF format for free! Find your manual FP-2 - ROLAND and take your electronic device back in hand. On this page are published all the documents necessary for the use of your device. FP-2 by ROLAND.
USER MANUAL FP-2 ROLAND
Thank you, and congratulations on your choice of the Roland Digital Piano FP-2.
Main Features
Stylish, Light, Compact Design
The refined design fits in anywhere; and since it is so lightweight and compact, it's easy to take the instrument with you wherever you go.
Authentic Piano Performances
Features high-quality concert grand piano sounds and a Hammer Action keyboard that gives a more realistic piano touch by providing a heavier feel in the low end and a lighter feel in the upper notes.
In addition, the FP-2 is equipped with three pedal jacks and comes with a half-damper pedal capable of adjusting the depth of the resonance, combining to allow you to enjoy truly authentic piano performances.
Wide Variety of Tones For Use in Many Musical Genres and High-quality Effects
The FP-2 offers not just piano sounds, but over 50 different onboard sounds that can be used in a wide variety of musical styles.
You can also play Drum Sets with the instrument.
Additionally, the high-quality effects allow you to add more richness and expression to the sound.
"Session Partner" Lets You Enjoy Playing with a Session-Like Feel
Enjoy true session-like feel while performing along with a “rhythm” section built upon realistic-sounding “rhythms.”
You can specify the “rhythm” chord progression with your left hand, and create original chord progressions as well.
Experience a Variety of Performances with Dual and Split Functions
Layer two of the FP-2's many internal tones, play with different tones assigned to the left and right sections of the keyboard, and enjoy many other possibilities in working with Performances.
Easy Recording Functions
You can easily record your own performances using simple button operations.
Includes USB Connector
Connect your computer to the FP-2's USB connector and exchange MIDI data.
High-quality Speaker Provided
Enjoy listening to powerful, moving performances thanks to the high-quality speaker.
"Sound Control" and "Equalizer" for Enriched Sound
These functions allow you to correct discrepancies in the tone and adjust the tonal quality to create a fuller sound.
Before using this unit, carefully read the sections entitled: “USING THE UNIT SAFELY” and “IMPORTANT NOTES” (p. 2; p. 4). These sections provide important information concerning the proper operation of the unit. Additionally, in order to feel assured that you have gained a good grasp of every feature provided by your new unit, Owner’s manual should be read in its entirety. The manual should be saved and kept on hand as a convenient reference.
IMPORTANT: THE WIRES IN THIS MAINS LEAD ARE COLOURED IN ACCORDANCE WITH THE FOLLOWING CODE.
BLUE: NEUTRAL
BROWN: LIVE
As the colours of the wires in the mains lead of this apparatus may not correspond with the coloured markings identifying the terminals in your plug, proceed as follows:
The wire which is coloured BLUE must be connected to the terminal which is marked with the letter N or coloured BLACK.
The wire which is coloured BROWN must be connected to the terminal which is marked with the letter L or coloured RED.
Under no circumstances must either of the above wires be connected to the earth terminal of a three pin plug.
USING THE UNIT SAFELY
INSTRUCTIONS FOR THE PREVENTION OF FIRE, ELECTRIC SHOCK, OR INJURY TO PERSONS
About ⚠️ WARNING and ⚠️ CAUTION Notices
| ⚠ WARNING | Used for instructions intended to alert the user to the risk of death or severe injury should the unit be used improperly. |
| ⚠ CAUTION | Used for instructions intended to alert the user to the risk of injury or material damage should the unit be used improperly.* Material damage refers to damage or other adverse effects caused with respect to the home and all its furnishings, as well to domestic animals or pets. |
About the Symbols
| The △ symbol alerts the user to important instructions or warnings. The specific meaning of the symbol is determined by the design contained within the triangle. In the case of the symbol at left, it is used for general cautions, warnings, or alerts to danger. | |
| The ⊙ symbol alerts the user to items that must never be carried out (are forbidden). The specific thing that must not be done is indicated by the design contained within the circle. In the case of the symbol at left, it means that the unit must never be disassembled. | |
| The ● symbol alerts the user to things that must be carried out. The specific thing that must be done is indicated by the design contained within the circle. In the case of the symbol at left, it means that the power-cord plug must be unplugged from the outlet. |
ALWAYS OBSERVE THE FOLLOWING
WARNING
- Before using this unit, make sure to read the instructions below, and the Owner's Manual.

- Do not open (or modify in any way) the unit or its AC adaptor.

- Do not attempt to repair the unit, or replace parts within it (except when this manual provides specific instructions directing you to do so). Refer all servicing to your retailer, the nearest Roland Service Center, or an authorized Roland distributor, as listed on the “Information” page.

- Never use or store the unit in places that are:


- Subject to temperature extremes (e.g., direct sunlight in an enclosed vehicle, near a heating duct, on top of heat-generating equipment); or are
- Damp (e.g., baths, washrooms, on wet floors); or are
- Humid; or are
- Exposed to rain; or are
- Dusty; or are
- Subject to high levels of vibration.
- This unit should be used only with a rack or stand that is recommended by Roland (p. 9).

WARNING
- When using the unit with a rack or stand recommended by Roland, the rack or stand must be carefully placed so it is level and sure to remain stable. If not using a rack or stand, you still need to make sure that any location you choose for placing the unit provides a level surface that will properly support the unit, and keep it from wobbling.

- Be sure to use only the AC adaptor supplied with the unit. Also, make sure the line voltage at the installation matches the input voltage specified on the AC adaptor's body. Other AC adaptors may use a different polarity, or be designed for a different voltage, so their use could result in damage, malfunction, or electric shock.

- Use only the attached power-supply cord. Also, the supplied power cord must not be used with any other device.

- Do not excessively twist or bend the power cord, nor place heavy objects on it. Doing so can damage the cord, producing severed elements and short circuits. Damaged cords are fire and shock hazards!

WARNING
- This unit, either alone or in combination with an amplifier and headphones or speakers, may be capable of producing sound levels that could cause permanent hearing loss. Do not operate for a long period of time at a high volume level, or at a level that is uncomfortable. If you experience any hearing loss or ringing in the ears, you should immediately stop using the unit, and consult an audiologist.

- Do not allow any objects (e.g., flammable material, coins, pins); or liquids of any kind (water, soft drinks, etc.) to penetrate the unit.


- Immediately turn the power off, remove the AC adaptor from the outlet, and request servicing by your retailer, the nearest Roland Service Center, or an authorized Roland distributor, as listed on the "Information" page when:

- The AC adaptor, the power-supply cord, or the plug has been damaged; or
- If smoke or unusual odor occurs
- Objects have fallen into, or liquid has been spilled onto the unit; or
- The unit has been exposed to rain (or otherwise has become wet); or
- The unit does not appear to operate normally or exhibits a marked change in performance.
- In households with small children, an adult should provide supervision until the child is capable of following all the rules essential for the safe operation of the unit.

- Protect the unit from strong impact. (Do not drop it!)

- Do not force the unit's power-supply cord to share an outlet with an unreasonable number of other devices. Be especially careful when using extension cords—the total power used by all devices you have connected to the extension cord's outlet must never exceed the power rating (watts/amperes) for the extension cord. Excessive loads can cause the insulation on the cord to heat up and eventually melt through.

- Before using the unit in a foreign country, consult with your retailer, the nearest Roland Service Center, or an authorized Roland distributor, as listed on the “Information” page.

- DO NOT play a CD-ROM disc on a conventional audio CD player. The resulting sound may be of a level that could cause permanent hearing loss. Damage to speakers or other system components may result.

CAUTION
- The unit and the AC adaptor should be located so their location or position does not interfere with their proper ventilation.

- This (FP-2) for use only with Roland stand FPS-11A. Use with other stands is capable of resulting in instability causing possible injury.

- Always grasp only the plug on the AC adaptor cord when plugging into, or unplugging from, an outlet or this unit.

- At regular intervals, you should unplug the AC adaptor and clean it by using a dry cloth to wipe all dust and other accumulations away from its prongs. Also, disconnect the power plug from the power outlet whenever the unit is to remain unused for an extended period of time. Any accumulation of dust between the power plug and the power outlet can result in poor insulation and lead to fire.

- Try to prevent cords and cables from becoming entangled. Also, all cords and cables should be placed so they are out of the reach of children.

- Never climb on top of, nor place heavy objects on the unit.

- Never handle the AC adaptor or its plugs with wet hands when plugging into, or unplugging from, an outlet or this unit.

- If you need to move the instrument, take note of the precautions listed below. At least two persons are required to safely lift and move the unit. It should be handled carefully, all the while keeping it level. Make sure to have a firm grip, to protect yourself from injury and the instrument from damage.

- Check to make sure the screws securing the unit to the stand have not become loose. Fasten them again securely whenever you notice any loosening.
- Disconnect the power cord.
- Disconnect all cords coming from external devices.
- Remove the music stand.
- Before cleaning the unit, turn off the power and unplug the AC adaptor from the outlet (p. 8).

- Whenever you suspect the possibility of lightning in your area, disconnect the AC adaptor from the outlet.

- Should you remove screws for the stand or the music stand, make sure to put them in a safe place out of children's reach, so there is no chance of them being swallowed accidentally.

In addition to the items listed under “USING THE UNIT SAFELY” on page 2 and 3, please read and observe the following:
Power Supply
- Do not connect this unit to same electrical outlet that is being used by an electrical appliance that is controlled by an inverter (such as a refrigerator, washing machine, microwave oven, or air conditioner), or that contains a motor. Depending on the way in which the electrical appliance is used, power supply noise may cause this unit to malfunction or may produce audible noise. If it is not practical to use a separate electrical outlet, connect a power supply noise filter between this unit and the electrical outlet.
- The AC adaptor will begin to generate heat after long hours of consecutive use. This is normal, and is not a cause for concern.
- Before connecting this unit to other devices, turn off the power to all units. This will help prevent malfunctions and/or damage to speakers or other devices.
Placement
- Using the unit near power amplifiers (or other equipment containing large power transformers) may induce hum. To alleviate the problem, change the orientation of this unit; or move it farther away from the source of interference.
- This device may interfere with radio and television reception. Do not use this device in the vicinity of such receivers.
- Noise may be produced if wireless communications devices, such as cell phones, are operated in the vicinity of this unit. Such noise could occur when receiving or initiating a call, or while conversing. Should you experience such problems, you should relocate such wireless devices so they are at a greater distance from this unit, or switch them off.
- Do not expose the unit to direct sunlight, place it near devices that radiate heat, leave it inside an enclosed vehicle, or otherwise subject it to temperature extremes. Excessive heat can deform or discolor the unit.
- When moved from one location to another where the temperature and/or humidity is very different, water droplets (condensation) may form inside the unit. Damage or malfunction may result if you attempt to use the unit in this condition. Therefore, before using the unit, you must allow it to stand for several hours, until the condensation has completely evaporated.
- Do not allow objects to remain on top of the keyboard. This can be the cause of malfunction, such as keys ceasing to produce sound.
Maintenance
- For everyday cleaning wipe the unit with a soft, dry cloth or one that has been slightly dampened with water. To remove stubborn dirt, use a cloth impregnated with a mild, non-abrasive detergent. Afterwards, be sure to wipe the unit thoroughly with a soft, dry cloth. - Never use benzine, thinners, alcohol or solvents of any kind, to avoid the possibility of discoloration and/or deformation.
Additional Precautions
- Unfortunately, it may be impossible to restore the contents of data that was stored in another MIDI device (e.g., a sequencer) once it has been lost. Roland Corporation assumes no liability concerning such loss of data.
- Use a reasonable amount of care when using the unit's buttons, sliders, or other controls; and when using its jacks and connectors. Rough handling can lead to malfunctions.
- When connecting / disconnecting all cables, grasp the connector itself—never pull on the cable. This way you will avoid causing shorts, or damage to the cable's internal elements.
- To avoid disturbing your neighbors, try to keep the unit's volume at reasonable levels. You may prefer to use headphones, so you do not need to be concerned about those around you (especially when it is late at night).
- When you need to transport the unit, package it in the box (including padding) that it came in, if possible. Otherwise, you will need to use equivalent packaging materials.
- Do not apply undue force to the music stand while it is in use.
- Use only the specified expression pedal (EV-5; sold separately). By connecting any other expression pedals, you risk causing malfunction and/or damage to the unit.
- Use a cable from Roland to make the connection. If using some other make of connection cable, please note the following precautions.
- Some connection cables contain resistors. Do not use cables that incorporate resistors for connecting to this unit. The use of such cables can cause the sound level to be extremely low, or impossible to hear. For information on cable specifications, contact the manufacturer of the cable.
Handling CD-ROMs
- Avoid touching or scratching the shiny underside (encoded surface) of the disc. Damaged or dirty CD-ROM discs may not be read properly. Keep your discs clean using a commercially available CD cleaner.
Contents
USING THE UNIT SAFELY 2
IMPORTANT NOTES......4
Panel Descriptions......6
Before You Play 8
Making Connections....8
Installing the Music Stand....9
Using the stand....9
Connecting Pedals....9
Turning the Power On and Off 10
Adjusting the Sound's Volume and Brilliance...... 10
Connecting Headphones....10
Chapter 1 Playing the Keyboard ...... 11
Listening to Demo Songs....11
Listening to Internal Songs 12
Playing Back All Songs Continuously (All Song Play)....12
Listening to Each Part Separately 13
Performing with a Variety of Sounds.... 14
Performing With Two Layered Tones (Dual Play).... 15 Changing the Tone variations.... 15
Performing With Different Tones in the Left and Right
Sides of the Keyboard (Split Play) 16
Changing Tone Group and Tone Variation. 17
Changing the Keyboard's Split Point.... 18
Changing the Volume Balance for Dual Play and Split Play....18
Changing the Keyboard's Touch ....19 Changing the Velocity When the Key Touch Is Set to "Fixed"....20
Adding Reverberation to Sounds (The Reverb Effect) ... 21 Changing the Depth of Reverb Effect .... 21
Adding a Variety Effects to the Sound....22 Changing the Depth of Effect....22 Adding a Spinning Sound to Organ Tones (Rotary Effect)....23
Transposing the Key of the Keyboard (Key Transpose)....24
Using the Metronome....25 Changing the Tempo....25 Changing the Volume....25
Boosting the Low-Frequency Range (Sound Control) .... 26
Changing the Tonal Quality (Equalizer)....26
Chapter 2 Playing Along with Rhythms ...... 27
What is Session Partner? 27
Performing Along With Session Partner....28 Changing the Volume....28 Selecting Parts....29
Selecting a Rhythm....29
Changing a Rhythm's Tempo....30
Selecting a Rhythm's Chord Progression 30
Performing With the Chord Progression Specified in the Left Hand (Chord Progression off)....31
Recording the Chord Progression (Chord Progression)....32
Storing Settings (Setup) 33
Selecting Stored Settings 33
Chapter 3 Recording a Performance ..... 34
Recording a Performance 34
Recording a Performance Using Session Partner ..... 35
Recording Selected Track buttons 36
Erasing Recorded Performances .... 37
Chapter 4 Other Functions....38
How to Make Settings....38
Changing How the Pedal Effects Are Applied 39
Changing How the Pedals Work 39
Changing the Effect Type....40
Setting the Part to Which Effects Are Added....41
Changing the Pitch of the Lower Tone in Octave Steps (Octave Shift)....41
Tuning to Other Instruments' Pitches (Master Tuning). 41
Adjusting the Tuning (Temperament) 42
Changing the Beat of Metronome 42
Setting the Intro and Ending On or Off....43
Fixing a Set Chord Progression....43
Setting the Root Note of the Chord Progression...... 43
Setting the Chord Display On or Off 43
Changing the Equalizer Settings....44
Connecting to Audio Equipment 44
About the FP-2 Sound Generator....45
Connecting to the USB Connector 45
Connecting MIDI Devices 46
Using the V-LINK function....49
Making the Settings for the USB Driver....50
Restoring the Settings to the Factory Condition (Factory Reset) 50
Disabling Everything Except Piano Play (Panel Lock) ... 50
Appendices 51
Troubleshooting......51
Error Messages/Other Messages......53
Tone List 54
Rhythm Set List....56
Rhythm List....59
Chord Progression Pattern List ......60
Chord Fingering List......62
Internal Song List......66
Settings Stored in the Setup ......68
Easy Operation List......69
Main Specifications....72
Index....73
Front Panel
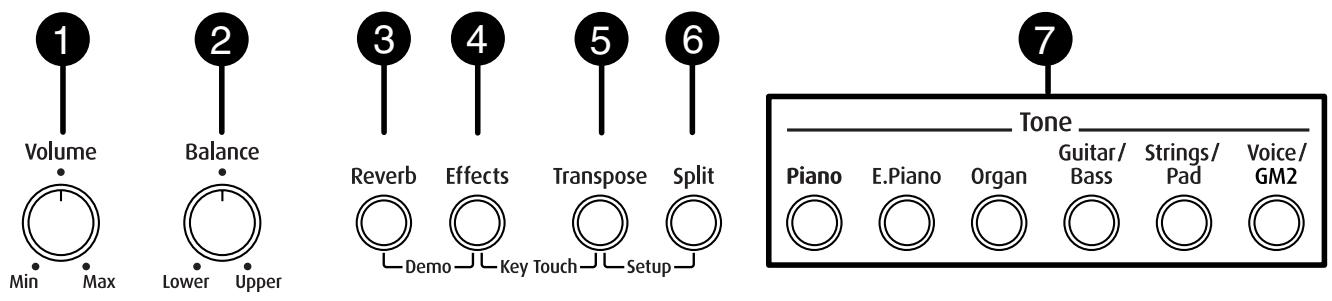
1 [Volume] Knob
Adjusts the overall volume level (p. 10).
2 [Balance] Knob
Adjusts the volume balance of the Upper and Lower Tones in Dual Play and Split Play (p. 18).
3 [Reverb] Button
You can use this to add the characteristic reverberation of a concert hall to what you play (p. 21).
In addition, you can hold down this button while pressing [Effects] button to listen demo song (p. 11).
4 [Effects] Button
Use this to add a variety of different effects to the sound (p. 22).
By holding down this button and pressing the [Transpose] button, you can change the keyboard's touch sensitivity (p. 19).
5 [Transpose] Button
Transposes the pitch of the keyboard (p. 24).
In addition, you can hold down this button while pressing [Split] button to store the selected functions and states of the buttons, and call up the stored settings (p. 33).
6 [Split] Button
Allows you to play different tones in the left and right sides of the keyboard (p. 16).
7 Tone Buttons
They are used to choose the kinds of sounds (Tone Groups) played by the keyboard (p. 14).
8 Display
Displays information such as the song number, Rhythm number, tempo, beat, and parameter settings values.
9 [Display] Button
Press this to change the Internal Song or tempo or Rhythm (p. 12, p. 25, p. 29).
Each time you press this button, the tempo, the Rhythm number, and the Song number will be displayed alternately. In addition, you can hold down this button while pressing [-] button to make various different settings (p. 38 to p. 49).
10 [-] [+] Buttons
These two buttons are used to modify the values of a variety of settings.
Pressing both the [-] and [+] buttons simultaneously returns the setting of a particular item or function to its original value.
11 [ (Metronome)] Button
Turns the internal metronome on and off (p. 25).
12 [Start/Stop] Button
Switches the Session Partner start or stop (p. 28).
13 [Part] Button
Switches the performance parts in Session Partner (p. 29).
14 [Chord Progression] Button
This turns the Session Partner chord progression on and off. When turned off, chords are specified in the left side of the keyboard (p. 31).
15 [Play/Stop] Button
Starts and stops playback of internal songs and recorded performances (p. 12).
Used for starting recording of performances (p. 34).
16 [Rec] Button
Puts the unit in the state whereby it is ready for recording performances (p. 34).
17 [Sound Control] Button
This produces a sound with greater brilliance (p. 26).
18 [Equalizer] Button
Switches the equalizer on or off (p. 26).
![ROLAND FP-2 - [Equalizer] Button - 1](/content/2025/01/130701/images/fedafb3e42558fe2f6c02e81e942d3f4e50c4b9325ac57076e9f43669c96f510.jpg)
text_image
8 9 10 11 12 13 14 15 16 17 18 Display - + X Session Partner_ Start/ Stop Part Chord Progression Play/ Stop Rec Sound Control Equalizer Function R 1 2 TrackRear Panel
![ROLAND FP-2 - [Equalizer] Button - 2](/content/2025/01/130701/images/22eae07228d4754e8c46c41aaa4f214c9648fba0e7ff0b164f84ea85c9c9b4cd.jpg)
text_image
USB (MIDI) 1 2 3 4 5 6 7 8 9 10 Phones DAMPER Sostenuto Soft (FC 1) (FC 2) Line In R L (Mono) Stereo Line Out R L (Mono) Stereo Speaker off On Power DC In1 USB(MIDI) Connector
Use this for connecting a computer to the FP-2 using a USB cable (p. 45).
2 MIDI Connectors
Used for connecting external MIDI devices and for sending and receiving MIDI messages (p. 46).
3 Pedal Jacks
Accepts connection of the supplied pedal (DP Series), or other suitable pedals (p. 9).
4 Line In Jacks
Provide input of the audio signals. Used for connecting audio equipment and other such devices (p. 44).
5 Line Out Jacks
Provide output of the audio signals. Also used for connecting audio equipment and other such devices (p. 44).
These allow you to play sounds from the FP-2 through other audio devices.
6 [Speaker] Switch
This switch turns the internal speaker on/off (p. 44).
7 [Power] Switch
This switch turns the unit on/off (p. 10).
8 DC In Jack
Connect the supplied AC adaptor here (p. 8).
9 Cord Hook
Use this to fix in place the cord from the supplied AC adaptor (p. 8).
10 Phones Jacks
A set of headphones can be connected to this jack (p. 10).
Making Connections
- Before you begin making connections, confirm the following.
Is the volume level of the FP-2 turned all the way down?
Is the power to the FP-2 turned off?
- Connect the supplied Power Cord to the supplied AC adaptor.

text_image
AC adaptor Power cord Power outlet- Connect the supplied AC adaptor to the FP-2, and then plug its other end into a power outlet.
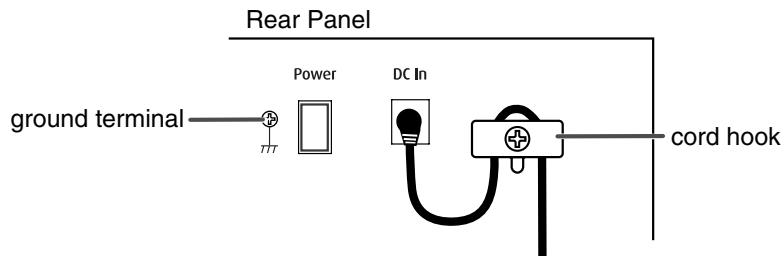
- Loop the AC adaptor cord around the cord hook to fasten it in place.
text_image
Rear Panel ground terminal Power DC In cord hookTo prevent the inadvertent disruption of power to your unit (should the plug be pulled out accidentally), and to avoid applying undue stress to the AC adaptor jack, anchor the power cord using the cord hook, as shown in the illustration.
Depending on the circumstances of a particular setup, you may experience a discomforting sensation, or perceive that the surface feels gritty to the touch when you touch this device. This is due to an infinitesimal electrical charge, which is absolutely harmless. However, if you are concerned about this, connect the ground terminal (see figure) with an external ground. When the unit is grounded, a slight hum may occur, depending on the particulars of your installation. If you are unsure of the connection method, contact the nearest Roland Service Center, or an authorized Roland distributor, as listed on the “Information” page.
Unsuitable places for connection
• Water pipes (may result in shock or electrocution)
• Gas pipes (may result in fire or explosion)
- Telephone-line ground or lightning rod (may be dangerous in the event of lightning)
Installing the Music Stand

natural_image
Technical line drawing of a mechanical assembly with mounting holes and a flat plate (no text or symbols)- Using the supplied screws, attach the music stand to the back of the FP-2 as illustrated.
Be sure to use the supplied screws for attaching the music stand.
Turn the screws clockwise until they're held in place—but don't tighten them yet.
- Put the music stand between the screws and the FP-2's body.
- While supporting the music stand with one hand, secure it in place by turning the screws.
When attaching the music stand, support it firmly with one hand to make sure that you don't drop it. Be careful, so you don't get your fingers pinched.
To remove the music stand, support it with one hand while loosening the screws.
After removing the music stand, don't forget to retighten the screws.
* Do not apply excessive force to the installed music stand.
Using the stand
When using the stand (FPS-11A), be sure to affix the spacers that are provided with the stand, as shown in the figure.
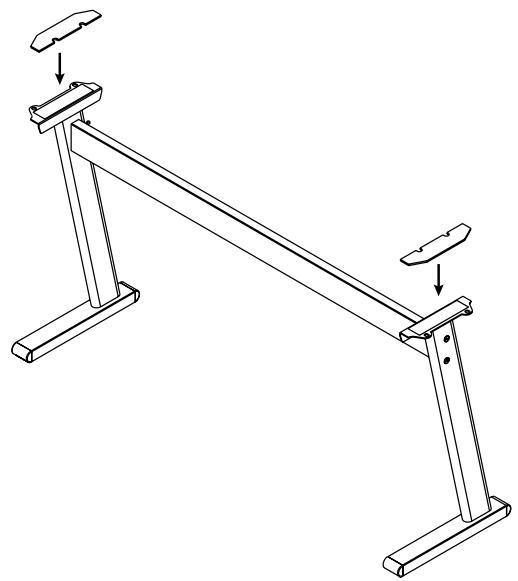
natural_image
Technical line drawing of a mechanical support frame with two supports and a roller, showing structural details (no text or symbols)Connecting Pedals
- Connect the pedal included with the FP-2 to one of the Pedal jacks.
When connected to the Damper jack, the pedal can be used as a damper pedal.
When connected to Sostenuto(FC1) jack, the pedal can be used as a sostenuto pedal. In addition, it can be set to function as an another works (p. 39, p. 48).
When connected to Soft(FC2) jack, the pedal can be used as a soft pedal. In addition, it can be set to function as an another works (p. 39, p. 48).
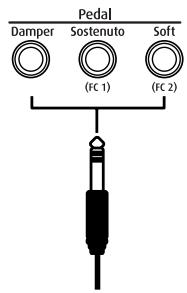
text_image
Pedal Damper Sostenuto Soft (FC 1) (FC 2)* Unplugging a pedal cord from the unit while the power is on may cause the pedal's effect to be applied without stopping. The power of the FP-2 must be turned off before inserting or removing a pedal cord.
Damper Pedal
Use this pedal to sustain the sound. While the pedal is depressed, long lingering reverberations continue to be added to the sound after you release from the keys.
The pedal included with the FP-2 functions as a half-damper pedal, which allows you to adjust the amount of resonance. When you depress the damper pedal on an acoustic piano, the sound from the strings that were struck resonates with other strings, adding rich reverberations and broadness to the sound. You can adjust this resonance (sympathetic resonance) when the damper pedal is depressed.
* Set the switch on the included pedal to “Continuous” when the pedal is connected.
Sostenuto Pedal
This pedal sustains only the sounds of the keys that were already played when you pressed the pedal.
→ With the pedal connected to the Sostenuto(FC1) jack, it can be assigned other functions as well. Refer to “Changing How the Pedals Work” (p. 39), “Using the Pedal to Switch Setup (Pedal shift)” (p. 48).
Soft Pedal
This pedal is used to make the sound softer.
Playing with the soft pedal depressed produces a sound that is not as strong as when otherwise played with the equivalent strength. This is the same function as the left pedal of an acoustic piano.
→ With the pedal connected to the Soft(FC2) jack, it can be assigned other functions as well. Refer to “Changing How the Pedals Work” (p. 39), “Using the Pedal to Switch Setup (Pedal shift)” (p. 48).
→ By obtaining a second and third pedal, you can then use three pedals simultaneously. If you wish to purchase the optional pedal (DP series), please contact the dealer where you purchased the FP-2.
Turning the Power On and Off
* Once the connections have been completed (p. 8), turn on power to your various devices in the order specified. By turning on devices in the wrong order, you risk causing malfunction and/or damage to speakers and other devices.
■ Turning On the Power
- Before you switch on the power, turn the volume down all the way by rotating the [Volume] knob.
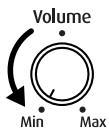
- Press the [Power] switch on the back of the unit.
The power will turn on, and "FP2" appears in the display.
After a few seconds, the unit becomes operable and playing the keyboard produces sound.
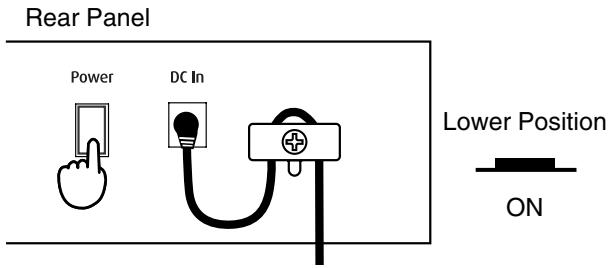
text_image
Rear Panel Power DC In Lower Position ON* This unit is equipped with a protection circuit. A brief interval (a few seconds) after power up is required before the unit will operate normally.
- Adjust the volume to obtain the proper volume level.
■ Turning Off the Power
- Before switching the power off, turn the volume all the way down by rotating the [Volume] knob.
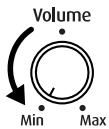
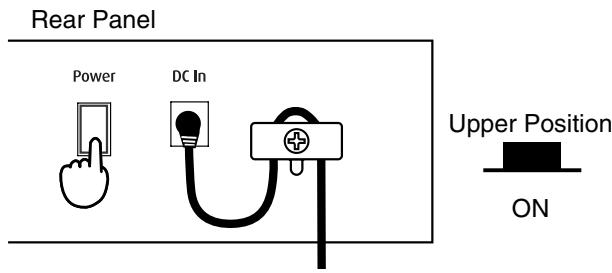
- Press the [Power] switch on the back of the unit.
The power is switched off.
text_image
Rear Panel Power DC In Upper Position ONAdjusting the Sound's Volume and Brilliance
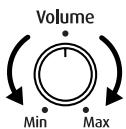
- Use the [Volume] knob to adjust the overall volume level.
Rotating the knob clockwise increases the volume; counterclockwise rotation decreases it.
Connecting Headphones
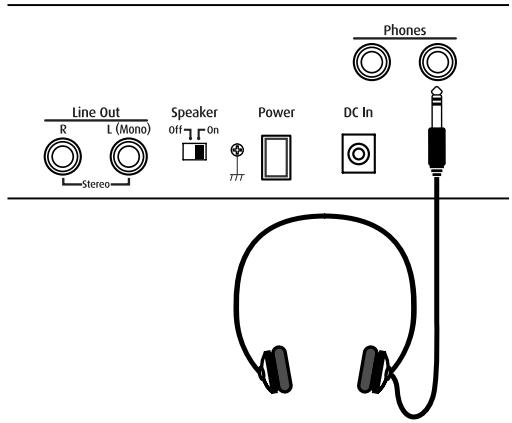
Connecting headphones allows you to enjoy playing anytime, even at night, without concern.
* Headphones are not included. Consult your Roland dealer if you want to purchase.
text_image
Line Out R L (Mono) Stereo Speaker off On Power 777 DC In Phones- Plug the headphones into the Phones jack at the rear of the piano.
Use the [Volume] knob on the FP-2 to adjust the volume of the headphones.
* Make sure to use stereo headphones.
* Make sure to use only Roland headphones. Headphones from other manufacturers may be unable to provide sufficient volume.
Some Notes on Using Headphones
- To prevent damage to the cord, handle the headphones only by the headset or the plug.
- The headphones may be damaged if the volume is too high when they are plugged in. Lower the volume on the FP-2 before plugging in the headphones.
- To prevent possible auditory damage, loss of hearing, or damage to the headphones, the headphones should not be used at an excessively high volume. Use the headphones at a moderate volume level.
Chapter 1 Playing the Keyboard
Listening to Demo Songs
Now, try listening to demo songs.
The FP-2 comes with eight demo songs.
The six Tone buttons, the [Start/Stop] button, and the [Play/Stop] button are each assigned one demo song.
| Button | Indication | Composer/Copyright |
| Piano | Pno | Masasi & Kazuko Hirashita / © 2003 Roland Corporation |
| E.Piano | E.Pn | Masasi & Kazuko Hirashita / © 2003 Roland Corporation |
| Organ | OrG | Masasi & Kazuko Hirashita / © 2003 Roland Corporation |
| Guitar/Bass | Gtr | Masasi & Kazuko Hirashita / © 2003 Roland Corporation |
| Strings/Pad | Str | Masasi & Kazuko Hirashita / © 2003 Roland Corporation |
| Voice/GM2 | Sct | © 2003 Roland Corporation |
| Start/Stop | SP | John Maul / © 2003 Roland Corporation |
| Play/Stop | SnG | Masasi & Kazuko Hirashita / © 2003 Roland Corporation |
NOTE
All rights reserved.
Unauthorized use of this material for purposes other than private, personal enjoyment is a violation of applicable laws.
NOTE
No MIDI data for the music that is played will be output.

text_image
Reverb Effects Transpose Split Demo(Key Touch Setup Tone Piano E.Piano Organ Guitar/Bass Strings/Pad Voice/GM2 1,4 2,3 8.8.8 Display - + Bf Session Partner Chord Progression Recorder Sound Control Equalizer 2,3 2,31. Hold down the [Reverb] button and press the [Effects] button.
The indicators for the Tone and [Start/Stop] and [Play/Stop] buttons flash in red.
The following appears in the display.
![ROLAND FP-2 - Hold down the [Reverb] button and press the [Effects] button. - 1](/content/2025/01/130701/images/9b900e12ccb45a31e496f96fdc361150170799947a32fb604851e7c712b0d7cb.jpg)
2. Press one of the flashing buttons other than the [Reverb] or the [Effects] button to select the song.
Songs play back continuously. The button for the song currently being played back flashes on and off.
When playback of the last song is reached, playback continues by returning to the first song and playing that again.
3. To stop playback, press the flashing button.
4. Press the [Reverb] button or the [Effects] button to exit Demo mode.
The indicators return to their previous state.
![ROLAND FP-2 - Press the [Reverb] button or the [Effects] button to exit Demo mode. - 1](/content/2025/01/130701/images/30893077d8974d873258882834d17629e92f641e7bc67c3aad0a2b0b3782ebf8.jpg)
The demo song cannot be played back while recorded performance data remains in the FP-2's memory. Press [Rec] button to delete the performance data (p. 13).
![ROLAND FP-2 - Press the [Reverb] button or the [Effects] button to exit Demo mode. - 2](/content/2025/01/130701/images/571c3021ed570a9fde2147f1f5cd78e10e3f75c6f584bb9d3d1b5aed4f31c9a6.jpg)
Press a button not assigned to a demo song to exit Demo mode.
Listening to Internal Songs
Now, try listening to Internal songs.
The FP-2 comes with sixty five internal songs.

For more on internal song names, refer to "Internal Song List" (p. 66).

text_image
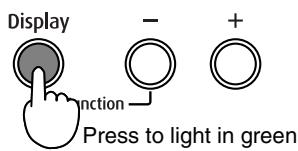
Reverb Effects Transpose Split Piano E.Piano Organ Guitar/ Bass Strings/ Pad Voice/GM2 Demo(Key Touch)% setup Tone 8.88 Display - + Function AV Session Partner_ Start/ Stop Part Chord Progression Recorder_ R 1 2 Track Play/ Stop Rec Sound Control Equalizer 1 2 3,4- Press the [Display] button several times, getting its indicator to light in green.
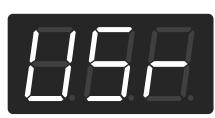
The following appears in the display.
text_image
Display - + nction Press to light in green
- Press the [-] or [+] button to select the song.
- Press the [Play/Stop] button.
The song will begin playing back.
The selected song is played to the end, and then playback stops.
- To stop playback, press the [Play/Stop] button once more.
The next time you press the [Play/Stop] button, the song that was stopped is played from the beginning.
■ Playing Back All Songs Continuously (All Song Play)
Listening to all of internal songs repeatedly played back in succession is known as “All Song Play.”

Pressing the [Display] button alternately displays the tempo, the currently selected Rhythm number (indicated by an initial "r"), and the currently selected Song number (indicated by an initial "S").
| button | indicator |
| Red | Rhythm number |
| Orange | Tempo |
| Green | Song number |
Only the display of the tempo and rhythm number alternates when you press the [Display] button while performing with Session Partner.

text_image
Reverb Effects Transpose Split Piano E.Piano Organ Guitar/ Bass Strings/ Pad Voice/ GM2 Demo(Key Touch)% setup Tone 8.88 Display - + Function + AV Session Partner Chord Progression Recorder Play/ Stop Rec Sound Control Equalizer 1 2 1 2- Hold down the [Display] button and press the [Play/Stop] button.
Songs play back continuously.
When playback of the last song is reached, playback continues by returning to the first song and playing that again.
- To stop playback, press the [Play/Stop] button.
All Song Play is exited when the performance is stopped.
The next time you press the [Play/Stop] button, the song that was stopped is played.

About the Display of the Internal Songs
USr (User)—Stores recorded Performances (for more on recording →p. 34). When “S.” is added—Indicates one of the piano songs
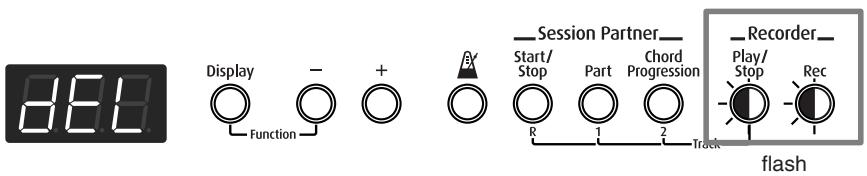
When the following appears in the display
If there is any performance data stored in the FP-2's memory, the following appears in the display.
text_image
Display Function Session Partner Start/ Stop Part Chord Progression Recorder Play/ Stop Rec Track flashUntil you erase the performance data, you cannot play back an internal song.
To erase the performance data and play back the internal song, press the [Rec] button.
If you don't want to erase the song, press the [Play/Stop] button.
■ Listening to Each Part Separately
With the internal songs, you can select the performance part that is to be played back.
You can also practice each hand separately while playing along with the song.
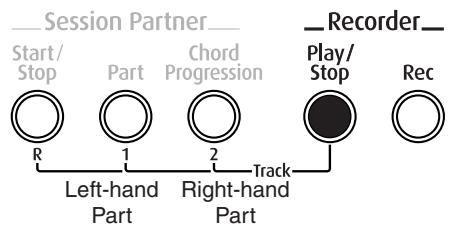
The performance data is assigned to the Track buttons as shown below.
text_image
Session Partner Start/Stop Part Chord Progression R 1 2 Left-hand Part Right-hand Part Track Recorder Play/Stop Rec- Select the song to be played back (p. 12).
- Hold down the [Play/Stop] button and press either [Part] button or [Chord Progression] button to select the part for which you want the sound to not be played.
The indicator on the selected button goes out.
The sound for the performance part selected in Step 2 is not played.
Temporarily preventing the sounds of a specified part from playing is called "muting."
- Hold down the [Play/Stop] button and press the button selected in Step 2.
The sound of the muted part is then played.
- Press the [Play/Stop] button to stop playback.

While pressing down the [Play/Stop] button, the Track button for the part being played back lights in green.

Changing the song cancels the mute setting.
Performing with a Variety of Sounds
The FP-2 features over 300 different internal sounds, allowing you to enjoy performing with sounds suitable for many different types of music.
These onboard sounds are called “Tones.” The Tones are divided into six different groups, each of which is assigned to a different Tone button.
The Tone “Grand Piano 1” is selected when the instrument’s power is turned on.

For more on Tones, refer to "Tone List" (p. 54)

text_image
Reverb Effects Transpose Split Demo(Key Touch Setup) Tone Piano E.Piano Organ Guitar/Bass Strings/Pad Voice/GM2 888 Display - + Function Session Partner_ Start/Stop Part Chord Progression Recorder/ R 1 2 Track Play/Stop Rec Sound Control Equalizer 1 21. Press one of the Tone buttons to choose a Tone Group.
You'll hear the Tone assigned to Tone number 1 in the selected Tone Group. Try fingering the keyboard.
The Tone number appears in the display.
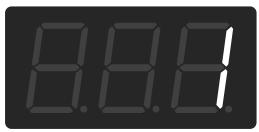
2. Press the [-] or [+] button to select a Tone from the Tone Group.
The Tone you've selected is heard when you finger the keyboard.
The next time you choose this Tone button, the tone you've selected here is played.
Performing With Two Layered Tones (Dual Play)
You can play two different sounds from a single key at the same time. This method of performance is called "Dual Play."
Example: Try Layering Piano and String Tones

text_image
Reverb Effects Transpose Split Piano E.Piano Organ Guitar/Bass Strings/Pad Voice/GM2 Demo(Key Touch Setup Tone 1 8.8.8 Display - + Function + AV Session Partner Chord Progression Recorder Play/Stop Rec Sound Control Equalizer Start/Stop Part R 1 2 Track1. Hold down the [Piano] button and press the [Strings/Pad] button.
The indicators for both buttons light.
Try fingering the keyboard. Both the piano and string sounds play.
Pressing two Tone buttons at the same time in this manner activates Dual Play.
Of these two selected tones, the one for the Tone button you pressed first is called the "Upper Tone," and the one for the Tone button you pressed after that is called the "Lower Tone."
The Tone button's indicator lights in red for the Upper Tone, and in orange for the Lower Tone.
![ROLAND FP-2 - Hold down the [Piano] button and press the [Strings/Pad] button. - 1](/content/2025/01/130701/images/837a8344441b2cc10eac0f4a0214268dd9550217c3a28f107984191d42ec4e8b.jpg)
text_image
Tone Piano E.Piano Organ Guitar/ Bass Strings/ Pad Voice/ GM2 red Upper Tone orange Lower ToneHere, the piano tone is the Upper Tone and the strings tone is the Lower Tone.
2. To exit Dual Play, press either Tone button.
Now, only the tone of the button you just pressed is sounded.
■ Changing the Tone variations
Changing the Upper Tone Variations
Press the [-] or [+] button.
Changing the Lower Tone Variations
Hold down the Tone button for the Lower Tone, and press the [-] or [+] button.

You can change the pitch of the Lower Tone an octave at a time. Refer to “Changing the Pitch of the Lower Tone in Octave Steps (Octave Shift)” (p. 41).

You can vary the volume-level balance of the two tones. Take a look at "Changing the Volume Balance for Dual Play and Split Play" (p. 18).

Although when you press the pedal while in Dual Play, the effect is applied to both tones, you can set the FP-2 so that the effect is not applied to the Lower Tone. Refer to “Changing How the Pedal Effects Are Applied” (p. 39).
Performing With Different Tones in the Left and Right Sides of the Keyboard (Split Play)
Performing with the keyboard divided at a certain key into a left side and a right side is called “Split Play,” and the point at which the keyboard is divided is called the “split point.”
In Split Play, you can have a different tone sound in the left and right sides.
When the instrument is turned on, the split point is set to "F # 3." The split point key is included in the left side.
While in Split Play, a sound played in the right side is called an “Upper Tone,” and the sound played in the left side is called a “Lower Tone.”
Example: Let's try split play with the piano tones.

You can specify which part is to have priority when the effects assigned to the Upper Tone and Lower Tone differ. Refer to "Setting the Part to Which Effects Are Added" (p. 41).

text_image
Reverb Effects Transpose Split Piano E.Piano Organ Guitar/ Bass Strings/ Pad Voice/ GM2 Demo(Key Touch)% setup 2,3 1 Tone 8.88 Display - + Function + BY Session Partner_ Start/ Stop Part Chord Progression R 1 2 Track Recorder_ Play/ Stop Rec Sound Control Equalizer1. Press the [Piano] button.
Now, the piano tone is selected.
2. Press the [Split] button, getting its indicator to light.
The keyboard is divided into upper and lower sections.
![ROLAND FP-2 - Press the [Split] button, getting its indicator to light. - 1](/content/2025/01/130701/images/0986f17701ab965d35de1d82333b08f29502661d551039af74161ec582a2e639.jpg)
text_image
F#3 (Split Point) Lower Tone ← → Upper ToneThe right-hand section of the keyboard plays piano tone, and the left-hand section plays A. Bass+Ride tone.
You can play a tone for the right side (the Upper Tone) before splitting the keyboard.
The Tone button's indicator lights in red for the Upper Tone, and in green for the Lower Tone.
![ROLAND FP-2 - Press the [Split] button, getting its indicator to light. - 2](/content/2025/01/130701/images/5e2b59131dd2302bf82fd38ec168b964822364e7119350562aa8456468b34bd8.jpg)
text_image
Tone Piano E.Piano Organ Guitar/ Bass Strings/ Pad Voice/ GM2 red Upper Tone green Lower Tone3. To exit Split Play, press the [Split] button once more.
The [Split] button's indicator light goes out and the upper tone becomes the tone for the entire keyboard.
![ROLAND FP-2 - To exit Split Play, press the [Split] button once more. - 1](/content/2025/01/130701/images/076a75b52b1e370fab7984e05cb38672178422cfc412e776cc0a174b7cfaeacf.jpg)
You can vary the volume-level balance of the two tones. Take a look at "Changing the Volume Balance for Dual Play and Split Play" (p. 18).
![ROLAND FP-2 - To exit Split Play, press the [Split] button once more. - 2](/content/2025/01/130701/images/01cb26f9c53ff0df5778ef2370fe8b54b90d60d4fb9aef9dc0bb311b97793a59.jpg)
When you switch from Dual Play (p. 15) to Split Play, the Upper Tone used in Dual Play is selected as the Upper Tone for Split Play.
■ Changing Tone Group and Tone Variation.
Changing the Upper Tone
- Press the Tone button to choose a Tone Group.
- Press the [-] or [+] buttons to select the Tones.
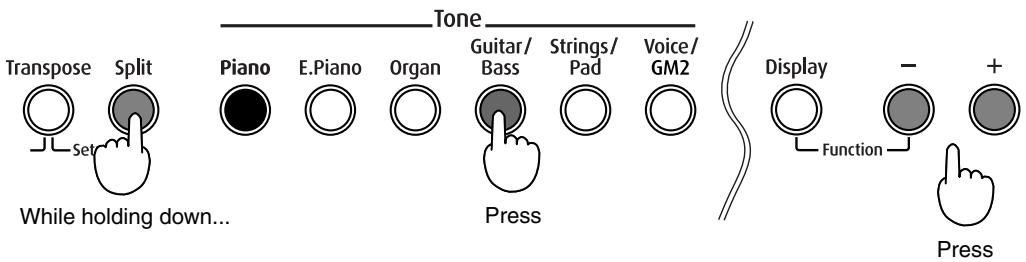
Changing the Lower Tone
- Hold down the [Split] button and press the Tone button to choose a Tone Group.
- Hold down the [Split] button and press the [-] or [+] buttons to select a Tones.
text_image
Transpose Split Piano E.Piano Organ Guitar/ Bass Strings/ Pad Voice/ GM2 While holding down... Press Display Function + PressFor more on selecting tones, refer to “Performing with a Variety of Sounds” (p. 14).

When the tone of the same Tone button is selected for both the Upper and Lower Tones, the indicator for Tone button flash in green while the [Split] button is held down.

You can change the pitch of the Lower Tone an octave at a time. Refer to “Changing the Pitch of the Lower Tone in Octave Steps (Octave Shift)” (p. 41).
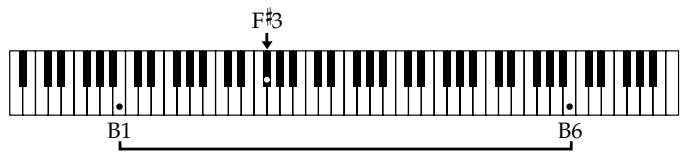
■ Changing the Keyboard's Split Point
You can change the location where the keyboard is divided (the split point) within the range of B1 through B6.
This is set to "F#3" when the instrument is turned on.
This setting remains in effect until you turn off the power.
text_image
F#3 B1 B61. Hold down the [Split] button and press a key set as the split point.
The key you pressed becomes the split point, and appears in the display.
The key being used as the split point belongs to the left-hand section of the keyboard.
When you release the [Split] button, you return to the previous screen.
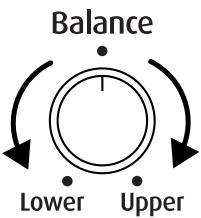
Changing the Volume Balance for Dual Play and Split Play
You can change the volume balance of the Upper and Lower Tones in Dual Play (p. 15) and Split Play (p. 16).
flowchart
graph TD
    A["Balance"] --> B["Lower"]
    A --> C["Upper"]
    B --> D["Central Circle"]
    C --> D
    D --> E["Arrow Up"]
    D --> F["Arrow Down"]
1. Use the [Balance] knob to adjust the volume balance.
![ROLAND FP-2 - Use the [Balance] knob to adjust the volume balance. - 1](/content/2025/01/130701/images/06f221d0119ee223ce2f81509dbd0aae552bd6bf92c862d2714c9ebf57a52722.jpg)
The name of the key acting as the split point is indicated in the display, as shown below.
| Display | C | d_ | d | E_ |
| Letter name | C | D | D | E |
| Display | E | F | F^- | G |
| Letter name | E | F | F^ | G |
| Display | A_ | A | b_ | b |
| Letter name | A | A | B | B |
Changing the Keyboard's Touch
You can change the touch sensitivity, or response of the keys.
When the instrument is turned on, this is set to "N (Normal)."

text_image
Reverb Effects Transpose Split Demo Key Touch Setup 1,3 Tone Piano E.Piano Organ Guitar/ Bass Strings/ Pad Voice/ GM2 8.00 Display - + Function Session Partner Start/ Stop Part Chord Progression Recorder Play/ Stop Rec Sound Control Equalizer R 1 2 Track1. Hold down the [Effects] button and press the [Transpose] button.
The indicators for the [Transpose] and [Reverb] buttons flash in red.
The currently selected keyboard touch appears in the display.
![ROLAND FP-2 - Hold down the [Effects] button and press the [Transpose] button. - 1](/content/2025/01/130701/images/3baa425c94f5d18859ff00bdfdac99f892c4a4585d539e0217523126ceb6321b.jpg)
2. Press the [-] or [+] buttons to select the touch.
| Indicate | Description |
| OFF(Fixed) | The sound plays at one set volume, regardless of the force used to play the keys. |
| -L-(Light) | A light keyboard touch is selected. You can achieve fortissimo (ff) play with a less forceful touch than usual, so the keyboard feels lighter. This setting makes it easy to play, even for children. |
![ROLAND FP-2 - Press the [-] or [+] buttons to select the touch. - 1](/content/2025/01/130701/images/18997b5c3896ead602272c41d7d44f041c758c49e592abcd46763162e3eaf53c.jpg) -N-(Normal) -N-(Normal) | This sets the standard keyboard touch. You can play with the most natural touch. This is the closest to the touch of an acoustic piano. |
| -H-(Heavy) | Here, a heavy keyboard touch is selected. You have to finger the keyboard more forcefully than usual in order to play fortissimo (ff), so the keyboard touch feels heavier. Dynamic fingering adds even more feeling to what you play. |
3. Press the [Effects] button or the [Transpose] button.
The indicators return to their previous state.
NOTE
With certain sounds, the touch may not change.
■ Changing the Velocity When the Key Touch Is Set to "Fixed"
This sets the velocity the sound will have when the keyboard touch is set to "Fixed (p. 19)."
1. Hold down the [Effects] button and press the [Transpose] button.
The indicators for the [Transpose] and [Reverb] buttons flash in red.
2. Hold down the [Effects] button and the [Transpose] button, and press the [-] or [+] button to change the velocity.
You can set this to any value from 1 to 127.
![ROLAND FP-2 - Hold down the [Effects] button and the [Transpose] button, and press the [-] or [+] button to change the velocity. - 1](/content/2025/01/130701/images/2da327cfc954a0a22b85fce1f5b9a2818f89046925b45422517d20c85d929f51.jpg)
flowchart
graph LR
    A["Reverb"] --> B["Der"]
    B --> C["Effects"]
    C --> D["Key Touch"]
    D --> E["Transpose"]
    E --> F["Split"]
    F --> G["tup"]
    G --> H["While holding down..."]

    I["Display"] --> J["Function"]
    J --> K["Press"]
    K --> L["+"]
    M["100"] --> N["Output"]
3. Press the [Effects] button or the [Transpose] button.
The indicators return to their previous state.
Adding Reverberation to Sounds (The Reverb Effect)
You can apply a reverb effect to the notes you play on the keyboard. With the reverb effect, you obtain a pleasant reverberation, making it sound as if you were performing in a concert hall or similar space.

text_image
Reverb Effects Transpose Split Piano E.Piano Organ Guitar/ Bass Strings/ Pad Voice/ GM2 Demo(Key Touch)% setup Tone 8.98 Display - + Function AV Start/ Stop Part Chord Progression Recorder R 1 2 Play/ Stop Rec Sound Control Equalizer Track 1,2- Press the [Reverb] button, getting its indicator to light.
Try fingering the keyboard.
The reverb effect is applied to the entire tone.
- The eliminate the Reverb effect, press the [Reverb] button once more, extinguishing the indicator.
■ Changing the Depth of Reverb Effect
You can select from ten levels of depth for the reverb effect.
- Hold down the [Reverb] button and press the [-] or [+] button.
The selected depth for the reverb effect appears in the display.

flowchart
graph LR
    A["Reverb"] --> B["Demo"]
    C["Effects"] --> D["Key Touch"]
    E["Transpose"] --> F["Setup"]
    G["Split"] --> H["While holding down..."]
    I["Display"] --> J["Function"]
    K["Press"] --> L["+"]
    M["8.85"] --> N["Digital Display"]
NOTE
You cannot make separate reverb effect depth settings for each individual tone.
NOTE
You cannot change reverb effect depth of Session Partner, Demo songs, and Internal song.
Adding a Variety Effects to the Sound
In addition to reverb, you can apply a variety of changes to the FP-2's sounds.
These are referred to as “effects.” With the FP-2, you can select from ten different effect types.
With the factory default settings, effects have been preselected for each tone.

Effects may not be applied with some of sounds.

text_image
Reverb Effects Transpose Split Piano E.Piano Organ Guitar/ Bass Strings/ Pad Voice/ GM2 Demo(Key Touch Setup Tone 8.8.8 Display - + B/Y Session Partner Chord Progression Recorder Play/ Stop Rec Sound Control Equalizer 1,2 Function R 1 2 Track- Press the [Effects] button, getting its indicator to light.
Try fingering the keyboard.
The effect is applied to the currently selected tone.
- To remove the effect, press the [Effects] button once more, extinguishing the indicator.
■ Changing the Depth of Effect
You can select from ten levels of depth for the effect.
- Hold down the [Effects] button and press the [-] or [+] button.
The depth for the effect being applied to the currently selected tone appears in the display.

flowchart
graph LR
    A["Reverb"] --> B["Dem"]
    B --> C["Effects"]
    C --> D["Key Touch"]
    D --> E["Transpose"]
    E --> F["Setup"]
    F --> G["Split"]
    G --> H["8.85"]
    I["Display"] --> J["Function"]
    J --> K["Press"]
    style A fill:#fff,stroke:#000
    style B fill:#fff,stroke:#000
    style C fill:#fff,stroke:#000
    style D fill:#fff,stroke:#000
    style E fill:#fff,stroke:#000
    style F fill:#fff,stroke:#000
    style G fill:#fff,stroke:#000
    style H fill:#fff,stroke:#000
    style I fill:#fff,stroke:#000
    style J fill:#fff,stroke:#000
    style K fill:#fff,stroke:#000
The next time you choose the same tone, the effect with the depth you've selected here is applied.

Some tones initially have effect applied. Selecting such a tone makes the [Effects] button's indicator light up automatically.

You can specify which part is to have priority when the effects assigned to the Upper Tone and the Lower Tone differ. Refer to "Setting the Part to Which Effects Are Added" (p. 41).

You cannot change the levels of depth for the rotary effect.

You can change the effect type. Refer to “Changing the Effect Type” (p. 40).
■ Adding a Spinning Sound to Organ Tones (Rotary Effect)
The Rotary effect is applied to some Organ tones you can select with the [Organ] button. When one of these tones is selected, you can use the [Effects] button to change the speed of the rotary effect.
What the rotary effect does is to add a “spinning” effect similar to the sound of an organ using a rotating speaker.
1. Press the [Organ] button and select the organ tone.
When a tone that has the Rotary effect added is selected, the [Effects] button's indicator flashes or blinks in green.
2. Each time pressing the [Effects] button, switch the speed of the rotary effect between rapid and slow rotation.
When the [Effects] button's indicator flashes, a more rapid rotary effect is applied.
When the [Effects] button's indicator blinks, a slower rotary effect is applied.
![ROLAND FP-2 - Each time pressing the [Effects] button, switch the speed of the rotary effect between rapid and slow rotation. - 1](/content/2025/01/130701/images/19104ea8b18a813575e8b57b0f24a9686bc32793c7ac82743d561d412298491b.jpg)
To prevent the Rotary effect from being applied, select an effect type other than the Rotary effect and then remove the effect. Refer to "Changing the Effect Type" (p. 40).
Transposing the Key of the Keyboard (Key Transpose)
You can transpose the key of a performance without having to shift the position of your fingers on the keyboard. This feature is called "Key Transpose."
This lets you take a song in a difficult key with lots of sharps ( ) and flats ( ) and play it in a key with fingering that's easier for you. This is handy when playing accompaniment to a song, to match what you play to the pitch of the singer's voice.

text_image
Reverb Effects Transpose Split Piano E.Piano Organ Guitar/ Bass Strings/ Pad Voice/ GM2 Demo(Key Touch Setup Tone 8.8.8 Display - + Function Session Partner_ Start/ Stop Part Chord Progression Recorder_ 8 1 2 Play/ Stop Rec Sound Control Equalizer Press the corresponding key1. Hold down the [Transpose] button and press the key corresponding to the tonic of the desired key.
The Key Transpose settings value continues to appear in the display while the [Transpose] button is held down.
With the [Transpose] button held down, you can change the value, even by pressing the [-] or [+] button.
The available range is -6–0–5.
When you release the [Transpose] button, you return to the previous screen.
Example: Playing a Song in the Key of E Major After Transposition to C Major
Hold down the [Transpose] button and press the E key (since E is the tonic).
Counting from C as a reference point, one moves up four keys, including the black keys, to reach E, thus “4” appears in the display.
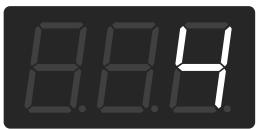

By holding down the [Transpose] button and pressing both the [-] and [+] buttons simultaneously, the setting returns to its original value(0).
Using the Metronome
Here's how you can make use of the metronome.

text_image
Reverb Effects Transpose Split Piano E.Piano Organ Guitar/ Bass Strings/ Pad Voice/ GM2 Demo(Key Touch Setup Tone 8.88 Display - + Function Session Partner_ Start/ Stop Part Chord Progression Recorder_ Play/ Stop Rec Sound Control Equalizer 1,2 R 1 2 Track- Press the [ 📄 (Metronome)] button to have the metronome sound.
The [ ▶ (Metronome)] button's indicator flashes in red and green in time with the beat selected at that time. The indicator lights in red on the downbeats, and in green on weak beats.
- To stop the metronome, press the [▲ (Metronome)] button again.
■ Changing the Tempo
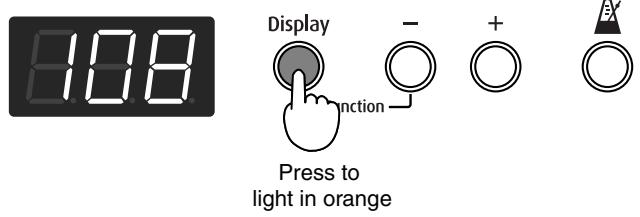
- Press the [Display] button, getting its indicator to light in orange.
The tempo is displayed.
text_image
10.8 Display - + Ex nction Press to light in orange- Press the [-] or [+] button to adjust the tempo.
■ Changing the Volume
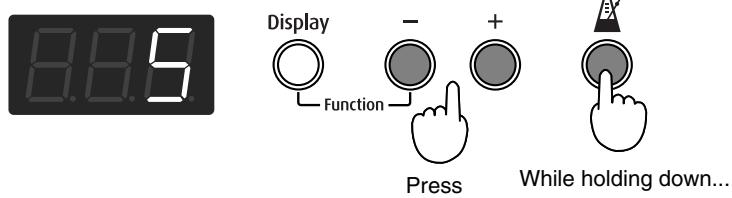
The volume of the metronome can be adjusted, with ten volume levels available.
This is set to "5" when the instrument is turned on.
- While holding down the [▲ (Metronome)] button, press the [-] or [+] button.
The currently selected metronome volume is displayed.
text_image
8.8.5 Display Function - + Press While holding down...
Pressing the [Display] button alternately displays the tempo, the currently selected Rhythm number (indicated by an initial "r"), and the currently selected Song number (indicated by an initial "S").
| button | indicator |
| Red | Rhythm number |
| Orange | Tempo |
| Green | Song number |
Only the display of the tempo and rhythm number alternates when you press the [Display] button while performing with Session Partner.

You can change the beat of metronome. Refer to p. 42.
Boosting the Low-Frequency Range (Sound Control)
Switching on the Sound Control function suppresses differences in volume for a more consistent sound.
This is set to ON when the power is turned on.

text_image
Reverb Effects Transpose Split Piano E.Piano Organ Guitar/ Bass Strings/ Pad Voice/ GM2 Demo(Key Touch)% setup Tone 8.8.8 Display - + Function Session Partner_ Start/ Stop Part Chord Progression R Play/ Stop Rec Sound Control Equalizer 2 1,3- Press the [Sound Control] button, getting its indicator to light.
- While holding down the [Sound Control] button, press the [-] or [+] button to change the type.
| Display | Description |
| 1 | Gives a consistent, well-balanced sound from the low- to the high-frequency ranges. |
| 2 | This further boosts the high-frequency range. |
| 3 | This type particularly boosts the bass range. |
- To remove this function, press the [Sound Control] button once more, extinguishing the indicator.
Changing the Tonal Quality (Equalizer)
You can use the equalizer to adjust the tonal quality.

1 is selected when the power is turned on.

Sounds may become distorted with certain tones.

The Sound Control and equalizer functions are not applied to the sounds of external devices connected to the Line In jacks and the MIDI connectors.

text_image
Reverb Effects Transpose Split Piano E.Piano Organ Guitar/ Bass Strings/ Pad Voice/ GM2 Demo(Key Touch Setup Tone 8.8.8 Display - + Function Session Partner_ Start/ Stop Part Chord Progression Recorder- Play/ Stop Rec Sound Control Equalizer 1,2- Press the [Equalizer] button.
The indicators for the [Equalizer] button lights in green, and the tonal quality is changed.
- To remove this function, press the [Equalizer] button once more, extinguishing the indicator

You can make more exacting changes to the equalizer settings. Refer to p. 44.
Chapter 2 Playing Along with Rhythms
What is Session Partner?
"Session Partner" Lets You Enjoy Playing with a Session-Like Feel
"Session Partner" is an easy-to-use function that plays accompaniment in a variety of musical styles.
Playing along with this accompaniment, with its realistic sounds, gives you the feel that you are playing live with a band backing you.
For example, playing with “Session Partner” instead of using the metronome always lets you practice the piano with something different.
You can also change the accompaniment as you like to suit whatever you are playing.
By changing the chords and Rhythms, even while playing the same melody, you can easily create all kinds of new arrangements.
We encourage you to enjoy the variety of performance options open to you by using the “Session Partner” feature.
What You Can Do With "Session Partner"
"Session Partner" lets you mainly do the following things.
- Play piano with a session-like feel along with Rhythms while the chord progression continues automatically (p. 28).
- Play the piano to provide your own accompaniment as you specify chords with the left hand (the left part of the keyboard) (p. 31).
- Enjoy freer piano performances using your own original chord progressions (p. 32).
"Session Partner" lets you add accompaniment with the "rhythms" and performance parts you select.
You can play intros, endings, and fill-ins (short phrases inserted at transition points in the song) by pressing buttons as you play the keyboard.
What are the FP-2's "Rhythms?"
The FP-2 features internal “Rhythms” complementing Pops, Jazz, and other various musical genres.
“Rhythms,” or combinations of elements from a musical genre that recreate the mood or signature sound of a particular style, form the foundation of the accompaniment used in “Session Partner.”
A “Rhythm” is composed from the following three items.
- Drum Part
- Bass Part
- Chord Part
You can select the part to be played with the [Part] button.
Performing Along With Session Partner

text_image
Reverb Effects Transpose Split Piano E.Piano Organ Guitar/ Bass Strings/ Pad Voice/ GM2 Demo(Key Touch Setup Tone 8.8.8 Display - + Function Session Partner_ Start/ Stop Part Chord Progression Recorder_ Play/ Stop Rec Sound Control Equalizer 1,2Now, let's try performing along with Session Partner.
Since a wide variety of musical genres is provided, be sure to use a Rhythm that best suits the song you are performing. Please refer to “Selecting a Rhythm” (p. 29).
1. Press the [Start/Stop] button.
The [Start/Stop] button's indicator lights in red, and the intro begins to play. After the intro is played, the light's color changes to green.
The chord progression advances automatically, freeing you up to play the melody.
2. When you press the [Start/Stop] button once more, the ending is played, and the Rhythm stops.
While the ending is being played, the [Start/Stop] button's indicator lights in red. When the Rhythm stops, the [Start/Stop] button's indicator goes out. Additionally, when the [Start/Stop] button's indicator is lit in red, if you then press the [Start/Stop] button once more, you can immediately stop the intro or ending, even when while these are being played.
■ Changing the Volume
flowchart
graph TD
    A["Display"] --> B["Function"]
    B --> C["Press"]
    D["Session Partner"] --> E["Start/Stop"]
    D --> F["Part"]
    D --> G["Chord Progression"]
    H["←"] --> I["While holding down..."]
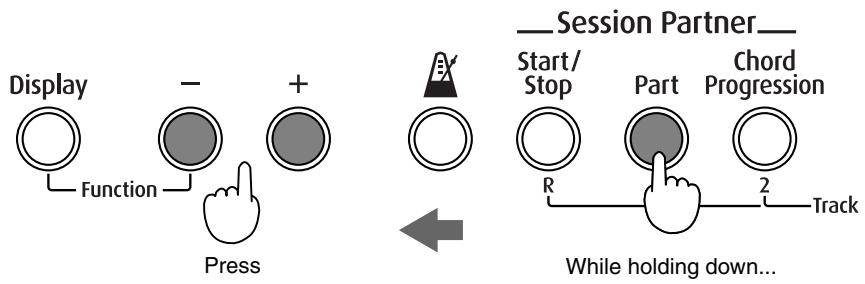
1. While holding down the [Part] button, press the [-] or [+] button.
![ROLAND FP-2 - While holding down the [Part] button, press the [-] or [+] button. - 1](/content/2025/01/130701/images/e93b56c9a0dff29ba69b50ccb3d10310c3af00bd81949b5cfcd2f783ddcc7152.jpg)
For more information on the different Rhythm types, refer to “Rhythm List” (p. 59).
![ROLAND FP-2 - While holding down the [Part] button, press the [-] or [+] button. - 2](/content/2025/01/130701/images/bd56c10c4028975557028f9a98e7356bd1718bf14519d3e9682ea2c48c13d7f8.jpg)
You can set the Chord display on or off (p. 43).
![ROLAND FP-2 - While holding down the [Part] button, press the [-] or [+] button. - 3](/content/2025/01/130701/images/467e719d793a4a4b24accabfbaf213a7789d8f45351daa30d64aeddeecc2af83.jpg)
You can also specify the chords to be played in a Rhythm. For details, refer to "Performing With the Chord Progression Specified in the Left Hand (Chord Progression off)" (p. 31).
![ROLAND FP-2 - While holding down the [Part] button, press the [-] or [+] button. - 4](/content/2025/01/130701/images/89b79d6ed501c389a31fa0da72777a0add82dd87be1e47278ce131e462b46e58.jpg)
You can change the chord progression patterns. Refer to “Selecting a Rhythm’s Chord Progression” (p. 30).
![ROLAND FP-2 - While holding down the [Part] button, press the [-] or [+] button. - 5](/content/2025/01/130701/images/00abc12d61f188aba3242484952ad7fc30703d32c47eed360273a9b887fc04a0.jpg)
You can press the [Start/Stop] button to finish without playing an Intro or Ending. Refer to "Setting the Intro and Ending On or Off" (p. 43).
■ Selecting Parts
You can select the part to be played.
1. Press the [Part] button.
The part or group of parts enabled for performance changes each time you press the [Part] button, as shown below.
| Indicator | Part |
| Lit in red | Drum, Bass, Chord |
| Lit in orange | Drum, Bass |
| Lit in green | Drum |
Selecting a Rhythm
Now, try changing the Rhythm being performed.

When you press the [Part] button, the volume level of session partner is displayed.

For more information on the different Rhythm type, refer to “Rhythm List” (p. 59).

text_image
Reverb Effects Transpose Split Piano E.Piano Organ Guitar/ Bass Strings/ Pad Voice/ GM2 Demo(Key Touch)% setup Tone 8.8.8 Display - + Function + By 1 2 Session Partner_ Start/ Stop Part Chord Progression Recorder_ Play/ Stop Rec Sound Control Equalizer R 1 2 Track1. Press the [Display] button, getting its indicator to light in red.
The Rhythm number is displayed.
Rhythm numbers are indicated by an "r" before the number.
![ROLAND FP-2 - Press the [Display] button, getting its indicator to light in red. - 1](/content/2025/01/130701/images/b848356bdb983d7433a97e394865268f2fbb8ac6ecd0d35b1299f3b558078a95.jpg)
![ROLAND FP-2 - Press the [Display] button, getting its indicator to light in red. - 2](/content/2025/01/130701/images/a8525b5fc1234423c39ebd19a0bb1ae56b51ae115276b7d1442f6d54fabf7b76.jpg)
text_image
Display - + - nction Press to light in red2. Press the [-] or [+] button to select the Rhythm.
Changing Rhythms As You Perform
If you change Rhythms while a Rhythm is being played, the selected Rhythm begins after the fill-in is played.
What's a "Fill In"?
A short improvisational phrase inserted at the bar line is called a "Fill In." The phrase best suited to the selected Rhythm is played.

Pressing the [Display] button alternately displays the tempo, the currently selected Rhythm number (indicated by an initial "r"), and the currently selected Song number (indicated by an initial "S").
| button | indicator |
| Red | Rhythm number |
| Orange | Tempo |
| Green | Song number |
Only the display of the tempo and rhythm number alternates when you press the [Display] button while performing with Session Partner.
Changing a Rhythm's Tempo
The FP-2 has an optimal tempo for each Rhythm.
You can change the tempo of the selected Rhythm.
Furthermore, you can change the tempo as the Rhythm is being played.

text_image
Reverb Effects Transpose Split Piano E.Piano Organ Guitar/ Bass Strings/ Pad Vioc/ GM2 Demo(Key Touch Setup Tone 8.88 Display - + Function By Session Partner Chord Progression Recorder Play/ Stop Rec Sound Control Equalizer 1 2 R 1 Z Track1. Press the [Display] button, getting its indicator to light in orange.
The tempo is displayed.
Pressing the [Display] button alternately displays the tempo, the currently selected Rhythm number (indicated by an initial "r"), and the currently selected Song number (indicated by an initial "S").
2. Press the [-] or [+] buttons to adjust the tempo.
The tempo can be changed within the range from ♪ = 20 250 .
When the [Start/Stop] button is pressed, the Rhythm is played at the selected tempo.
When the tempo is displayed, you can set it to the optimal tempo to appear in the display, then pressing the [-] and [+] buttons at the same time.
Selecting a Rhythm's Chord Progression
The FP-2 has an optimal chord progression pattern for each Rhythm.
When playing the Chord Part while performing, the chord progression is automatic. You can change the chord progression pattern if you want.

If you change the Rhythm during Session Partner play, the tempo won't change. At such times, you can set it to the optimal tempo by getting the tempo to appear in the display, then pressing the [-] and [+] buttons at the same time.

For more information on chord progression patterns, refer to the
"Chord Progression Pattern List" (p. 60).

You can change the root note of the first chord. refer to "Setting the Root Note of the Chord Progression" (p. 43).

text_image
Reverb Effects Transpose Split Piano E.Piano Organ Guitar/Bass Strings/Pad Voice/GM2 Demo(Key Touch Setup Tone 8.8.8 Display - + Function AY Session Partner Chord Progression Recorder Sound Control Equalizer Start/Stop Part R 1 Z Track Track1. Hold down the [Chord Progression] button and press the [-] or [+] button to change the chord progression pattern.
The currently selected chord progression pattern number is displayed.
![ROLAND FP-2 - Hold down the [Chord Progression] button and press the [-] or [+] button to change the chord progression pattern. - 1](/content/2025/01/130701/images/ab4c0e365f5cfe6a109bcc7f3a16dca9ccb6e605e1d837630a007b2b00e534c3.jpg)
![ROLAND FP-2 - Hold down the [Chord Progression] button and press the [-] or [+] button to change the chord progression pattern. - 2](/content/2025/01/130701/images/7dc09e0312ec16d54bcd97b70450c283a35cb2837877fd72936a1ec9e790fcdd.jpg)
Recorded chord progression patterns are saved to
![ROLAND FP-2 - Hold down the [Chord Progression] button and press the [-] or [+] button to change the chord progression pattern. - 3](/content/2025/01/130701/images/1aa90e5fbfe585dd4159b37f0b1f04298784ca2bb4cf87bcbae6d63d650c6b11.jpg)
You can select "USF" patterns by pressing the [-] button when pattern number 1 is displayed.
Performing With the Chord Progression Specified in the Left Hand (Chord Progression off)
Performing with the keyboard divided at a certain key into a left side and a right side is called "Split Play."
While in Split Play, you can use the left side to specify chords instead of using it to play the Lower Tone.
NOTE
When specifying the chords in the left part of the keyboard, Dual Play (p. 15) is disabled in the right part.

text_image
Reverb Effects Transpose Split Piano E.Piano Organ Guitar/ Bass Strings/ Pad Voice/ GM2 Demo(Key Touch Setup Tone 8.88 Display - + R Session Partner Chord Progression Recorder Play/ Stop Rec Sound Control Equalizer 3 1,4- Press the [Chord Progression] button, getting its indicator to go out.
The [Split] button's indicator lights up.
The indicator for the [Start/Stop] button flashes in red, and the FP-2 is put into standby mode.
- The chord is specified with a key in the left part of the keyboard, and the Rhythm begins.
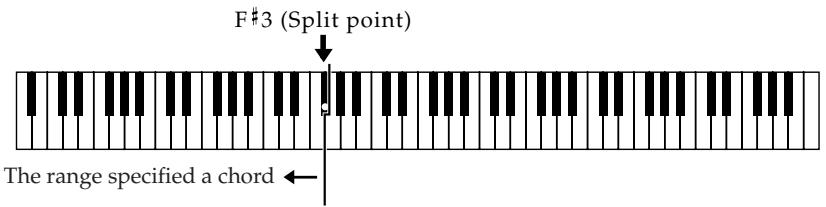
text_image
F#3 (Split point) The range specified a chord ←Specify the chord in the left part of the keyboard, and perform the melody in the right side.
It is not necessary to continue holding down the keys for chords in the left side. Even after you release the key, the same chord continues until the next chord is played.
When specifying chords, sounds from the left side of the keyboard are not played.
- To stop the Rhythm, press the [Start/Stop] button.
After the ending is done, the performance stops.
The indicator for the [Start/Stop] buttons then start flashing in red, and the FP-2 is put into standby mode.
- To exit, press the [Chord Progression] button.

You can specify chords simply with your finger, even without playing the keys for all the chords' constituent notes. For more information about chord fingering, refer to the "Chord Fingering List" (p. 62).

The button's indicator does not go out when you press the [Split] button here. At this point, you can perform with the Lower Tone while specifying chords in the left part of the keyboard. When you press the [Split] button once more, the button's indicator does go out, and you can perform while specifying chords over the entire keyboard.

The point at which the keyboard is divided is called the “split point”; you can also change this split point. For more information, take a look at “Changing the Keyboard’s Split Point” (p. 18).
Recording the Chord Progression (Chord Progression)
You can save a chord progression you've specified using the left-hand section of the keyboard.

You can listen to a wide variety of styles with a favorite chord progression. Refer to “Fixing a Set Chord Progression” (p. 43).

text_image
Reverb Effects Transpose Split Piano E.Piano Organ Guitar/ Bass Strings/ Pad Voice/ GM2 Demo(Key Touch Setup Tone 8.88 Display - + Function Session Partner Start/ Stop Part Chord Progression Recorder Play/ Stop Rec Sound Control Equalizer 3 11. Hold down the [Chord Progression] button and press the [Rec] button.
The [Chord Progression] and the [Rec] buttons' indicator flashes in red, the [Start/Stop] button's indicator flashes in orange, and the FP-2 is put into recording standby.
The “UCP (User Chord Progression)” appears in the display.
![ROLAND FP-2 - Hold down the [Chord Progression] button and press the [Rec] button. - 1](/content/2025/01/130701/images/8bcf2701be627328e4d9b7e61f1a34962baa7e381bcfa4c7cb7fdbbf7c282f44.jpg)
2. The chord is specified with a key in the left part of the keyboard, and the Rhythm begins.
The chord being played is indicated in the display. You can store up to sixteen chords.
3. Recording stops when the performance exceeds eight measures or when you press the [Start/Stop] button.
Changing the Stored Measure Count
You can change the number of measures recorded for the chord progression. This is set to eight measures when the FP-2 is turned on. Measure counts of “4/8/12/16” can be selected.
1. Hold down the [Chord Progression] button and press the [Rec] button.
The “UCP (User Chord Progression)” appears in the display.
2. Press the [-] or [+] button to select measure counts.
3. The chord is specified with a key in the left part of the keyboard, and the Rhythm begins.
4. Press the [Start/Stop] button to stop recording.
![ROLAND FP-2 - Press the [Start/Stop] button to stop recording. - 1](/content/2025/01/130701/images/0cb0b087e46baf8054c71061042872371e1eefcf8211c1de26a91038bdaa6914.jpg)
Press the [Chord Progression] button or the [Rec] button to exit from recording standby.
![ROLAND FP-2 - Press the [Start/Stop] button to stop recording. - 2](/content/2025/01/130701/images/8be328cad5dc53f7d13a3c5fa1e62a2f389024eec9b1231f7f3b93fb8e36da4a.jpg)
Recorded chord progression patterns are saved to "USR."
You can select "USr" patterns by pressing the [-] button when pattern number 1 is displayed.
![ROLAND FP-2 - Press the [Start/Stop] button to stop recording. - 3](/content/2025/01/130701/images/9a5572e530f3c36a92e192af5de7fed5f3a1ec0973150d2860785dfcffcd3fec.jpg)
The song may not play back correctly if the performance is played with a different beat than the one used in recording the original chord progression.
![ROLAND FP-2 - Press the [Start/Stop] button to stop recording. - 4](/content/2025/01/130701/images/a7fb080fbba8d0ebb37ac4685fad41287119bccff705043b0abf5f0665daf208.jpg)
You can store up to sixteen chords. Regardless of the number of measures set, recording stops when the seventeenth chord is specified.
![ROLAND FP-2 - Press the [Start/Stop] button to stop recording. - 5](/content/2025/01/130701/images/6aab08474347299c9a3780b76c8308608d4d2529da2f5f20c8159ab2113ecf08.jpg)
The recorded chord progression will be discarded as soon as the power is turned off. If you want to keep it, you'll need to save the Setup (p. 33).
Storing Settings (Setup)
You can save favorite combinations of Tone settings, settings for dual and split play, Session Partner settings, and the like as a "Setup."
Once saved in this way, you can instantaneously switch the instrument to the desired group of settings simply by calling up the Setup.
You can store up to 6 different Programs.
The recommended settings were stored in the instrument when it shipped from the factory.

The Setup contains stored and unstored settings. Refer to "Settings Stored in the Setup" (p. 68).

text_image
Reverb Effects Transpose Split Piano E.Piano Organ Guitar/ Bass Strings/ Pad Voice/GM2 Demo Key Setup Tone 8.6.8 Display - + Function Session Partner_ Start/ Stop Part Chord Play/ Stop Rec R 1 2 Track Recorder_ Sound Control Equalizer 1- Hold down the [Transpose] button and the [Split] button, and press the ether Tone button.
The pressed Tone button and the display flash, and the current settings are stored.
■ Selecting Stored Settings
- Press the [Transpose] button and the [Split] button, getting these indicator to light.
The Tone button's indicator flashes in green.
- Press the Tone button to which the settings you want to call up have been stored.
Only the indicator on the selected button flashes in green.
Chapter 3 Recording a Performance
You can easily record your performances.
You can play back a performance you have recorded to check what and how you played, and play melodies on the keyboard along with prerecorded accompaniment using the Rhythm.
Notes Regarding Recording
- Only one song can be recorded. With second or later recordings, the previously recorded song is erased as the new material is recorded.
When recording a new performance, it is probably a good idea to erase the previously recorded performance first (p. 37). - Recorded performances are erased when the power is turned off.
Recording a Performance
This records only what you play on the keyboard, without using the Session Partner.

To Record Without Erasing the Previously Recorded Performance...
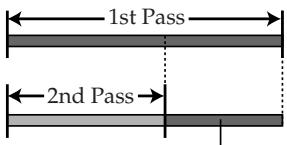
text_image
1st Pass 2nd PassThe first Performance is preserved

text_image
Reverb Effects Transpose Split Demo(Key Touch Setup Tone Piano E.Piano Organ Guitar/ Bass Strings/ Pad Voice/ GM2 8.98 Display - + Function Session Partner_ Start/ Stop Part Chord Progression Recorder- R 1 2 Track Play/ Stop Rec Sound Control Equalizer 3 1 2 4 6,8 7 5- Press the [Display] button, getting its indicator to light in green.
- Press the [-] button to display the "USr."
- Select the Tone to be played (p. 14).
- If necessary, sound the metronome.
While listening the metronome, select the tempo and beat of the song (p. 25). - Press the [Rec] button.
The [Rec] button's indicator lights, the [Play/Stop] button's indicator begins flashing, and the FP-2 is put into recording standby. - Press the [Play/Stop] button or play a key on the keyboard to begin recording.
Press the [Play/Stop] button, and after two measures of count sound, recording begins.
Recording starts when you start playing the keyboard (without pressing any button). In this case, a count is not sounded.

Pressing the [Display] button alternately displays the tempo and the currently selected Rhythm number (indicated by an initial "r"), and the Song number (indicated by an initial "S").

You can save recorded songs to an external sequencer. Refer to "Connecting to the USB Connector" (p. 45) and "How to Enjoy MIDI" (p. 46).

During the count-in, the count measure is indicated in the display as “-2” then “-1.”
7. Press the [Rec] button or the [Play/Stop] button to stop recording.
The indicators for the [Rec] and [Play/Stop] buttons are extinguished, and recording stops.
Listening to the Recorded Performance
8. Press the [Play/Stop] button.
Press the [Play/Stop] button again, and playback stops.
■ Recording a Performance Using Session Partner
You can also easily record session performances to the session partner.

About "USr" in the Display
When recording is stopped, the “USr” indication
changes to “USr” in the display. The “.” in the display indicates that there is Performance material already recorded.

text_image
Reverb Effects Transpose Split Piano E.Piano Organ Guitar/ Bass Strings/ Pad Voice/ GM2 Demo(Key TouchSetup) 8.88 Display - + Session Partner Chord Progression Recorder Play/ Stop Rec Sound Control Equalizer Function R 1 Z Track 3 4,5 2- Select the Tone or Rhythm to be played (p. 28-p. 32).
- Press the [Rec] button.
The [Rec] button's indicator lights up, the [Play/Stop] button's indicator flashes, and the FP-2 is put into recording standby. - Recording starts when you begin the performance with Session Partner (p. 28, p. 31).
The Rhythm starts to play, while simultaneously recording begins. - Press the [Play/Stop] button to stop recording.
Listening to the Recorded Performance
- Press the [Play/Stop] button.
Press the [Play/Stop] button again to stop playback.

The demo song cannot be played back while recorded performance data remains in the FP-2's memory. Press [Rec] button to delete the performance data (p. 13).

For more on selecting tone and Rhythm, refer to p. 14 and p. 29.

For more information on the different Rhythm and Chord progression pattern, refer to the “Rhythm List” (p. 59) and “Chord Progression Pattern List” (p. 60).

If you want to record with the chord progression specified (p. 31), the chord is specified with a key in the left part of the keyboard, and recording begins.
■ Recording Selected Track buttons
FP-2's Recorder has three Track buttons.
When you press the [Rec] button, all Track buttons are set to be recorded, but by selecting Track buttons that are not to be recorded, you can then record only on the specific Track buttons you want.
For example, you can record each hand's performance to different Track buttons, or record over only certain Track buttons in a previously recorded performance.
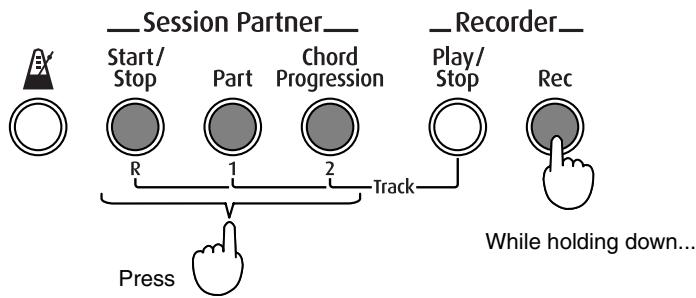
flowchart
graph TD
    A["Start/Stop"] --> B["Session Partner"]
    B --> C["Part"]
    C --> D["Chord Progression"]
    D --> E["Play/Stop"]
    E --> F["Recorder"]
    F --> G["While holding down..."]
    H["Press"] --> I["1"]
    I --> J["2"]
    J --> K["Track"]
- While holding down the [Rec] button, and turn off the indicator light for the Track button, whether the [Start/Stop], [Part], or [Chord Progression] button, for any track not to be recorded.
The [Rec] button's indicator lights up, the [Play/Stop] button's indicator flashes, and the FP-2 is put into recording standby.
- With the FP-2 in standby, go on to record the performance according to the procedures as described in "Recording a Performance" (p. 34), "Recording a Performance Using Session Partner" (p. 35), starting from Step 3.
The performance is not recorded only to the Track buttons whose indicator was turned off.
Recording along with internal songs
You can also record your own performance as you play along with the internal piano songs.
When recording to specific Track buttons, the sounds on the selected Track buttons are not played. For example, you can record what you are playing with your right hand as you listen to the left-hand part.
- With the [Display], [-] and [+] buttons select the song.
- Hold down the [Rec] button and turn off the indicator light for the track button of the track you intend not to play yourself.
The [Rec] button's indicator lights up, the [Play/Stop] button's indicator flashes, and the FP-2 is put into recording standby.
- Press the [Play/Stop] button to start recording.
- Press the [Rec] or [Play/Stop] button to stop recording.

About the Lighting of Track Button Indicators
when the [Rec] button is pressed, track button indicate the status of recording, as shown below.
| Dark | Not Recording |
| Flash in red | Recording |

Correspondence Between Internal Piano Song Track Buttons and Performance
[1] button: left-hand Part [2] button: right-hand Part No performance data is assigned to the [R] button.
Erasing Recorded Performances
You can erase recorded performances.

text_image
Reverb Effects Transpose Split Piano E.Piano Organ Guitar/ Bass Strings/ Pad Voice/ GM2 Demo(Key Touch Setup Tone 888 Display - + Rr Session Partner Recorder Function 1 Start/ Stop Part Chord Progression Play/ Stop Rec Sound Control Equalizer 2 1 R 1 2 Track1. Hold down the [Display] button and press the [Rec] button.
A confirmation message appears in the display.
![ROLAND FP-2 - Hold down the [Display] button and press the [Rec] button. - 1](/content/2025/01/130701/images/1e9da854ba283cefbcc5078a9e407083d158187e153913a1e18343a0b1db0a61.jpg)
text_image
881 Display Function Session Partner Start/ Stop Part Chord Progression Recorder Play/ Stop Rec R 1 2 Track flash2. Press the [Rec] button.
The recorded performance is erased.
If you do not want to erase the performance, press the [Play/Stop] or [Display] button.
Correspondence Between Recorded Performance and Track Buttons
A recorded performance will be assigned to the Track buttons as follows.
| Track button | Performance recorded |
| [R] | Session Partner (p. 27)A performance of drum set tones |
| [1] | Lower Tone in Dual play or Split play (p. 15, p. 16)(except drum set tones) |
| [2] | The performance of the entire keyboard (except drum set tones)Upper Tone in Dual play or Split play (p. 15, p. 16)(except drum set tones) |
* You can also record to the [1] button regular keyboard performances in which only the [1] button is specified.
Chapter 4 Other Functions
You can make a variety of performance- and recording-related settings in "Function Mode."
How to Make Settings
- Hold down the [Display] button, and press the [-] button.
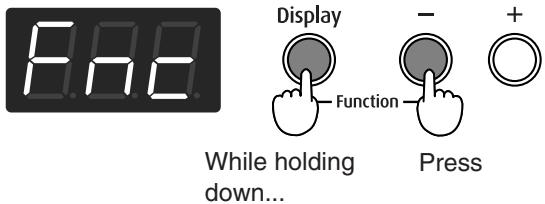
text_image
F88 Display - + Function While holding down... Press"Fnc" appears in the display, and the FP-2 switches to Function Mode.
The indicators flash on the [Display] button and buttons to which a function is assigned.
- Press any flashing button (other than the [Display] button).
The indicators on all buttons except the pressed button and the [Display] button go off.
Each value is displayed.
While pressing the button, function name is displayed.
- Press the [-] or [+] button or play a key on the keyboard to set.
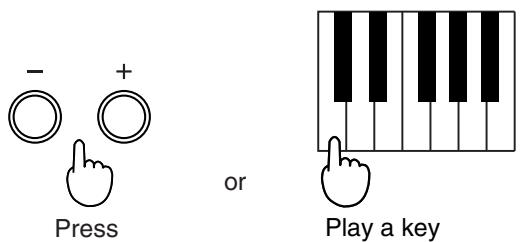
text_image
- + Press or Play a key- Press the [Display] button to exit Function Mode.
The button's indicator will return to the previous state.
| Button | Function | Page |
| [Reverb] | Setting the part to which effects are added | p. 41 |
| [Effects] | Effect Type | p. 40 |
| [Transpose] | Temperament | p. 42 |
| [Split] | Octave shift | p. 41 |
| [Piano] | Master Tuning | p. 41 |
| [E. Piano] | How the soft pedal(FC2) effects are applied | p. 39 |
| [Organ] | How the sostenuto pedal(FC1) effects are applied | p. 39 |
| [Guitar/Bass] | How the damper pedal effects are applied | p. 39 |
| [Strings/Pad] | Soft pedal(FC2)s work | p. 40 |
| [Voice/GM2] | Sostenuto pedal(FC1)s work | p. 40 |
| [(Metronome)] | Metronome beat | p. 42 |
| [Start/Stop] | Setting the Intro and Ending on or off | p. 43 |
| [Part] | Root note of the chord progression | p. 43 |
| [Chord Progression] | Fixing a set chord progression | p. 43 |
| [Play/Stop] | Chord display | p. 43 |
| [Rec] | MIDI settings | p. 47 |
| [Sound Control] | Bulk Dump, Pedal Shift, Transferring the program change | p. 48 |
| [Equalizer] | Equalizer | p. 44 |
Changing How the Pedal Effects Are Applied
When the pedal is pressed in Dual Play (p. 15) or Split Play (p. 16), the pedal's effect is applied to both the Upper Tone and the Lower Tone, but you can change the settings for the tone to which the effect is applied.
| Indication | Description |
| U-L | All enabled |
| -U- | Applied only to the Upper Tone |
| -L- | Applied only to the Lower Tone |
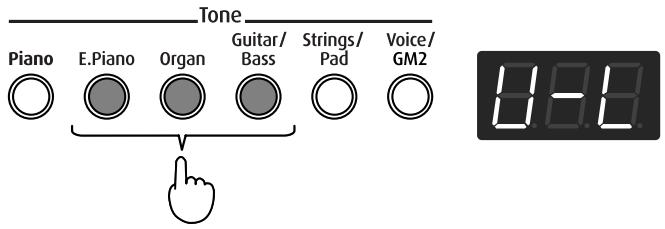
text_image
Tone Piano E.Piano Organ Guitar/ Bass Strings/ Pad Voice/ GM2 8-8■ How the Soft Pedal(FC2) effects are applied
-
Switch to Function mode (p. 38), and press the [E.Piano] button.
-
Press the [-] or [+] button to select how the pedal effects are to be applied.
■ How the Sostenuto Pedal(FC1) effects are applied
-
Switch to Function mode (p. 38), and press the [Organ] button.
-
Press the [-] or [+] button to select how the pedal effects are to be applied.
■ How the Damper Pedal effects are applied
-
Switch to Function mode (p. 38), then press the [Guitar/Bass] button.
-
Press the [-] or [+] button to select how the pedal effects are to be applied.
Changing How the Pedals Work
A pedal connected to the Soft(FC2) jack normally functions as a soft pedal (p. 9). A pedal connected to the Sostenuto(FC1) jack normally functions as a sostenuto pedal (p. 9).
It can also be set to function as an another works.
You can select from the following pedal functions.
* With certain sounds, the function may not work.
| Indication | Description |
| dnP(Damper) | Sets function to damper pedal. |
| SFt(Soft) | Sets function to soft pedal. |
| Stn(Sostenuto) | Sets function to sostenuto pedal. |
| EPr(Expression) | Allows control of the volume. Connect a separately available expression pedal (EV-5).* You cannot change volume level of session partner. |
| r.St(Start/Stop) | Allows control the start/stop of Session Partner by pressing the pedal, instead of pressing the buttons. |
| L.bS(Leading bass) | Allows control the on/off of leading bass function*. It is turned on while having stepped on the pedal. |
| EFF(On/Off of Effects) | Effects can be switched on/off by pressing the pedal instead of pressing the [Effects] button.When effect type is rotary, you can control the slow/fast of spinning. |
| b.uP(Bend Up) | Pitch rises by pressing the pedal. |
| b.dn(Bend Down) | Pitch lowers by pressing the pedal. |
| Mod(Modulation) | Vivrato is added by pressing the pedal. |
\* What is the leading bass function?
The function that sounds the lowest note of a fingered chord as the bass tone is called “Leading Bass.”
* Use only the specified expression pedal (EV-5; sold separately). By connecting any other expression pedals, you risk causing malfunction and/or damage to the unit.
* The function may not work properly if a pedal other than the supplied pedal or expression pedal is used.
* Be sure to switch off the power to the unit before attempting to disconnect or connect a pedal cord.
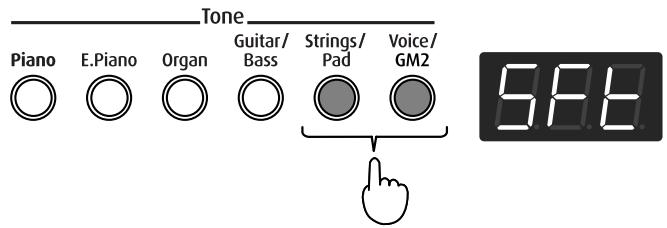
text_image
Tone Piano E.Piano Organ Guitar/ Bass Strings/ Pad Voice/ GM2 5.8■ Works of the Soft Pedal(FC2)
When the instrument is turned on, this is set to function as a soft pedal.
- Switch to Function mode (p. 38), and press the [Strings/Pad] button.
- Press the [-] or [+] button to select the pedal function.
■ Works of the Sostenuto Pedal(FC1)
When the instrument is turned on, this is set to function as a sostenuto pedal.
- Switch to Function mode (p. 38), and press the [Voice/GM2] button.
- Press the [-] or [+] button to select the pedal function.
Changing the Effect Type
- Switch to Function mode (p. 38), and press the [Effects] button.
The effect number appears in the display.
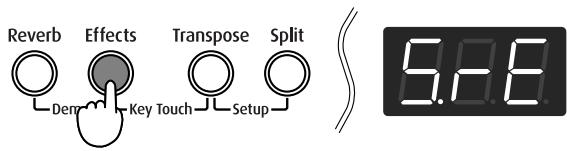
text_image
Reverb Effects Transpose Split Dend Key Touch Setup 5.28.2. Press the [-] or [+] button to select the effect.
You can select from the following.
| Indication | Effects | Description |
| S.rE | SYMPATHETIC RESONANCE | When you depress the damper pedal on an acoustic piano, the sound from the strings that were struck resonates with other strings, adding rich reverberations and broadness to the sound. |
| Enh | ENHANCER | This controls the overtone structure of the high frequencies, adding sparkle and tightness to the sound. |
| dLy | DELAY | This effect adds a delay sound like an echo. |
| Cho | CHORUS | You can give the sound greater dimension, with more fatness and breath. |
| t.ch | TREMOLO CHORUS | This effect is Chorus effect with added cyclic modulation of volume. |
| rot | ROTARY | This effect adds spinning sounds similar to the sound of an organ using a rotating speaker of the past. |
| Pha | PHASER | This effect adds a phase-shifted sound to the direct sound, producing a twisting modulation that creates spaciousness and depth. |
| FLn | FLANGER | This effect produces a metallic resonance that rises and falls like a jet airplane taking off or landing. |
| Odr | OVERDRIVE | This effect creates a soft distortion similar to that produced by vacuum tube amplifiers. |
| dSt | DISTORTION | This effect produces a more intense distortion than Overdrive. |
Setting the Part to Which Effects Are Added
This specifies which part is to have priority when the effects assigned to the Upper Tone and Lower Tone differ in Dual Play(p. 15) or Split Play(p. 16).
- Switch to Function mode (p. 38), and press the [Reverb] button.
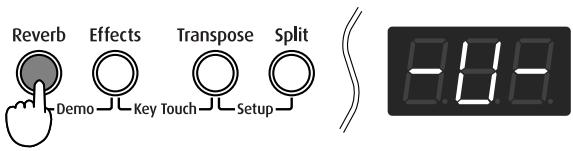
text_image
Reverb Effects Transpose Split Demo Key Touch Setup 818- Press the [-] or [+] button to select Upper or Lower.
| Indication | Description |
| -U- (Upper) | Effects are added to the Upper Tone. |
| -L- (Lower) | Effects are added to the Lower Tone. |
→ If same effects are assigned to the Upper Tone and Lower Tone, the same effects are added to both of Tones.
Changing the Pitch of the Lower Tone in Octave Steps (Octave Shift)
You can change the pitch of the Lower Tone in Dual Play (p. 15) and Split Play (p. 16) an octave at a time.
Altering the pitch in one-octave units in this way is called "Octave Shift."
For example, you can raise the pitch of the Lower Tone to the same pitch of the Upper Tone in Split Play.
- Switch to Function mode (p. 38), and press the [Split] button.
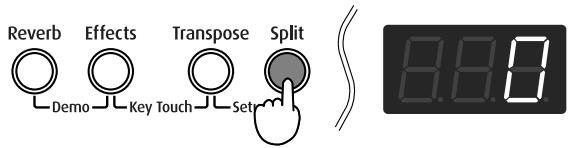
text_image
Reverb Effects Transpose Split Demo Key Touch Set 8.8.0- Press the [-] or [+] button to select the pitch.
The range of available pitch change spans from two octaves higher to two octaves lower.
The pitch is lowered one octave each time the [-] button is pressed, while each press of the [+] button raises the pitch by one octave.
To return to the original pitch, press the [-] and [+] buttons simultaneously.
Tuning to Other Instruments' Pitches (Master Tuning)
When playing ensemble with other instruments and in other such instances, you can match the standard pitch to another instrument.
The standard pitch generally refers to the pitch of the note that's played when you finger the middle A key. For a cleaner ensemble sound while performing with one or more other instruments, ensure that each instrument's basic pitch is in tune with that of the other instruments. This tuning of all the instruments to a standard pitch is called "master tuning."
When the instrument is turned on, the standard pitch is set to "440.0 Hz."
- Switch to Function mode (p. 38), and press the [Piano] button.

text_image
Tone Piano E.Piano Organ Guitar/ Bass Strings/ Pad Voice/ GM2 40.0The last three digits of the current standard pitch setting appear in the display.
- Press the [-] or [+] button to change the standard pitch.
You can set the standard pitch anywhere in a range of 415.3 Hz to 466.2 Hz.
The pitch is lowered 0.1 Hz each time the [-] button is pressed. When the button is held down, the pitch drops continuously.
The pitch is raised 0.1 Hz each time the [+] button is pressed. When the button is held down, the pitch rises continuously.
To return to the original pitch, press the [-] and [+] buttons simultaneously.
Adjusting the Tuning (Temperament)
You can play classical music such as baroque pieces using their original tuning.
Most modern songs are composed and played with the assumption that equal temperament (the most common tuning in use today) will be used, but when classical music was composed, there were a wide variety of other tuning systems in existence. Playing a composition with its original tuning lets you enjoy the sonorities of the chords that the composer originally intended.
1. Switch to Function mode (p. 38), and press the [Transpose] button.
![ROLAND FP-2 - Switch to Function mode (p. 38), and press the [Transpose] button. - 1](/content/2025/01/130701/images/e4f23cb52fb165b4a968186dfb9c789a74c342be7a5cc4d4f0155ec02deaa800.jpg)
text_image
Reverb Effects Transpose Split Demo Key Tour Setup 10.8 Temperament Tonic2. Press the [-] or [+] button to change the temperament.
You can choose from among the seven tunings described below.
![ROLAND FP-2 - Press the [-] or [+] button to change the temperament. - 1](/content/2025/01/130701/images/10824791e93eaf4648c589a41c17875d1cfe023b97a24d24f72d8e813db9c16f.jpg) |
| Temperament | Qualities | |
| 7 | Kirnberger | This is an improvement of the Mean Tone and Just tunings that provides a high degree of freedom of modulation. Performances are possible in all keys (III). |
3. Hold down the [Transpose] button, and press a key corresponding to the keynote.
The display is as follows:
| Display | C | d_ | d | E_ | E | F | F^- | G | A_ | A | b_ | b |
| Letter name | C | D | D | E | E | F | F^\# | G | A | A | B | B |
When playing with tuning other than equal temperament, you need to specify the keynote for tuning the song to be performed (that is, the note that corresponds to C for a major key or to A for a minor key).
If you choose an equal temperament, there's no need to select a keynote.
* When performing in ensemble with other instruments, be aware that depending on the key, there may be some shifting of the pitch. Tune the FP-2 to the fundamental pitch of the other instruments.
Changing the Beat of Metronome
- Switch to Function mode (p. 38), and press the [ ] (Metronome)] button.
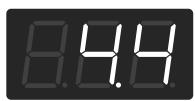

2. Press the [-] or [+] button to change the beat.
The currently selected beat is displayed.
→ You cannot change the metronome beat while a song or Rhythm is being played.
* When you change the rhythm or the Internal song, the beat of metronome is changed.
You can select from the following beats.
| Display | Beat | Display | Beat | |
| 2.2 | 2/2 | 6.4 | 6/4 | |
| 0.4 | Weak beats only | 7.4 | 7/4 | |
| 2.4 | 2/4 | 3.8 | 3/8 | |
| 3.4 | 3/4 | 6.8 | 6/8 | |
| 4.4 | 4/4 | 9.8 | 9/8 | |
| 5.4 | 5/4 | 12.8 | 12/8 |
Setting the Intro and Ending On or Off
This sets session partner Intro and Ending on or off. When set to “Off,” pressing the [Start/Stop] button causes the Intro and Ending not to be played.
- Switch to Function mode (p. 38), and press the [Start/Stop] button.
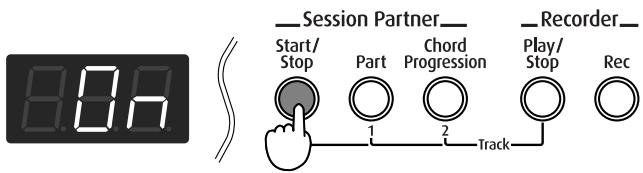
text_image
8.0h Session Partner Start/ Stop Part Chord Progression Play/ Stop Rec Track- Press the [-] or [+] button to set on or off.
| Indication | Description |
| On | Pressing the [Start/Stop] button causes the Intro and Ending to be played. |
| OFF | Pressing the [Start/Stop] button causes the Intro and Ending not to be played. |
Fixing a Set Chord Progression
When changing the Session Partner Rhythm, select whether or not the chord progression is to change along with the Rhythm.
- Switch to Function mode (p. 38), and press the [Chord Progression] button.
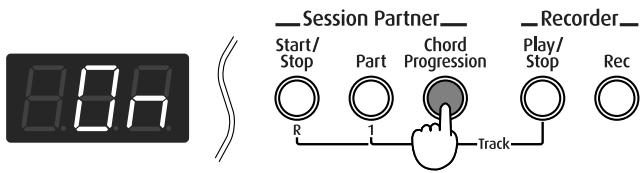
text_image
8.0n Session Partner Start/ Stop Part Chord Progression Play/ Stop Rec R 1 Track- Press the [-] or [+] button to set on or off.
| Indication | Description |
| On | When the rhythm changes, a change to the optimal chord progression is made. |
| OFF | When the rhythm changes, the chord progression does not change. |
Setting the Root Note of the Chord Progression
This sets the root note of the chord progression.
- Switch to Function mode (p. 38), and press the [Part] button.
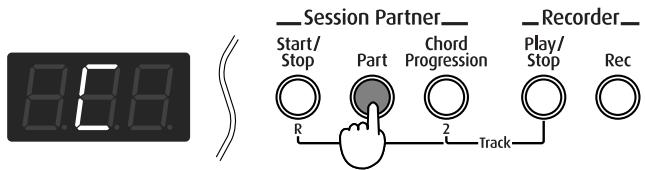
text_image
8.6.8 Session Partner Start/ Stop Part Chord Progression Play/ Stop Rec R 2 Track- Press the key corresponding to the root note of the first chord.
The root is indicated in the display as shown below.
| Display | C | d_ | d | E_ | E | F | F^- | G | A_ | A | b_ | b |
| Letter name | C | D^b | D | E^b | E | F | F^\# | G | A^b | A | B^b | B |
→ You can hold down the [Part] button and pressing the [-] or [+] button to change the cord progression pattern.
Setting the Chord Display On or Off
This setting determines whether or not the chords are indicated in the display during performances using Session Partner.
- Switch to Function mode (p. 38), and press the [Play/Stop] button.
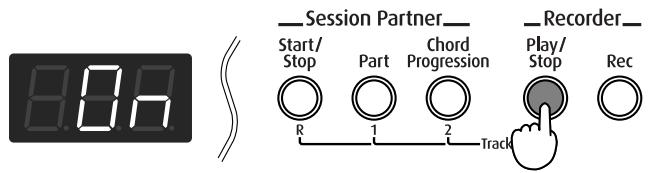
text_image
8.0n Session Partner Start/ Stop Part Chord Progression Play/ Stop Rec R 1 2 Track Recorder- Press the [-] or [+] button to set on or off.
| Indication | Description |
| On | Chords are displayed. |
| OFF | Chords are not displayed. |
Changing the Equalizer Settings
You can make fine, detailed changes to the equalizer settings.
- Switch to Function mode (p. 38), and press the [Equalizer] button.
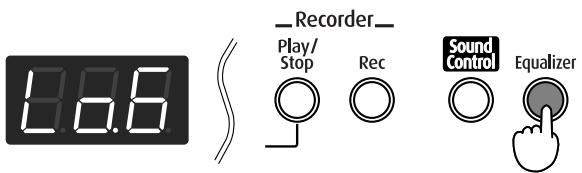
text_image
8.6 Recorder Play/ Stop Rec Sound Control Equalizer- Hold down the [Equalizer] button, and press the [-] or [+] button to select item.
- Press the [-] or [+] button to change the settings.
| Parameter | Indication | Value | Description |
| Low Gain | Lo.G | -12–+12dB | Adjusts the level of the low-frequency range. |
| Low Freq | Lo.f | 100, 200, 400 (Hz) | Frequency point in the low-frequency range. Generally, this changes the level at and below this frequency. |
| Low Mid Gain | Lm.G | -12–+12dB | Adjusts the level of the low-frequency range to midrange. |
| Low Mid Freq | Lm.F | 200, 250, 315, 400, 500, 630, 800, 1.00, 1.25, 1.60, 2.00, 2.50, 3.15, 4.00, 5.00, 6.30, 8.00 | Frequency point in the low-frequency range to midrange. This changes the level of the specified bandwidth centered on this frequency. |
| Low Mid Q | Lm.q | 0.5, 1.0, 2.0, 4.0, 8.0 | Changes the bandwidth of the low-frequency range to midrange. The bandwidth affected by the controls narrows as the value increases. |
| High Mid Gain | Hm.G | -12–+12dB | Adjusts the level of the mid-to high-frequency range. |
| High Mid Freq | Hm.F | 200, 250, 315, 400, 500, 630, 800, 1.00, 1.25, 1.60, 2.00, 2.50, 3.15, 4.00, 5.00, 6.30, 8.00 | Frequency point into the mid-to high-frequency range to midrange. This changes the level of the specified bandwidth centered on this frequency. |
| High Mid Q | Hm.q | 0.5, 1.0, 2.0, 4.0, 8.0 | Changes the bandwidth of the mid- to high-frequency range. The bandwidth affected by the controls narrows as the value increases. |
| Parameter | Indication | Value | Description |
| Low Gain | Lo.G | -12–+12dB | Adjusts the level of the low-frequency range. |
| Low Freq | Lo.f | 100, 200, 400 (Hz) | Frequency point in the low-frequency range. Generally, this changes the level at and below this frequency. |
| Low Mid Gain | Lm.G | -12–+12dB | Adjusts the level of the low-frequency range to midrange. |
| Low Mid Freq | Lm.F | 200, 250, 315, 400, 500, 630, 800, 1.00, 1.25, 1.60, 2.00, 2.50, 3.15, 4.00, 5.00, 6.30, 8.00 | Frequency point in the low-frequency range to midrange. This changes the level of the specified bandwidth centered on this frequency. |
| Low Mid Q | Lm.q | 0.5, 1.0, 2.0, 4.0, 8.0 | Changes the bandwidth of the low-frequency range to midrange. The bandwidth affected by the controls narrows as the value increases. |
| High Mid Gain | Hm.G | -12–+12dB | Adjusts the level of the mid-to high-frequency range. |
| High Mid Freq | Hm.F | 200, 250, 315, 400, 500, 630, 800, 1.00, 1.25, 1.60, 2.00, 2.50, 3.15, 4.00, 5.00, 6.30, 8.00 | Frequency point into the mid-to high-frequency range to midrange. This changes the level of the specified bandwidth centered on this frequency. |
| High Mid Q | Hm.q | 0.5, 1.0, 2.0, 4.0, 8.0 | Changes the bandwidth of the mid- to high-frequency range. The bandwidth affected by the controls narrows as the value increases. |
| Parameter | Indication | Value | Description |
| High Gain | Hi.G | -12–+12dB | Adjusts the level of the high-frequency range. |
| High Freq | Hi.F | 2.00, 4.00, 8.00 (KHz) | Frequency point in the high-frequency range. Generally, this changes the level at and over this frequency. |
* Sounds may become distorted as the Gain level increases.
→ The equalizer is switched on whenever the settings are changed.
→ The FP-2 remembers the settings even while its power is turned off.
Connecting to Audio Equipment
You can connect audio devices to play the sound of the FP-2 through the speakers of your audio system, or to record your performance on a tape recorder or other recording device.
When connecting, please use an audio cable with a standard phone plug (sold separately).
Connection Examples
* To prevent malfunction and/or damage to speakers or other devices, always turn down the volume, and turn off the power on all devices before making any connections.
Playing the sound of the FP-2 through the speakers of an audio system/Recording the performance of the FP-2 on a recording device
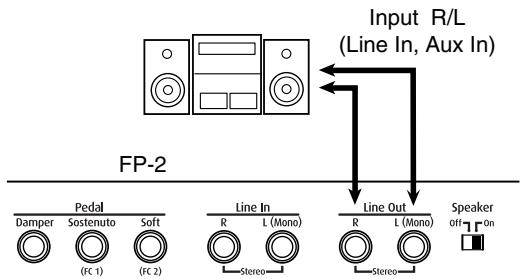
flowchart
graph TD
    A["Input R/L (Line In, Aux In)"] --> B["FP-2"]
    B --> C["Line In"]
    B --> D["Line Out"]
    C --> E["Damper"]
    C --> F["Sostenuto"]
    C --> G["Soft"]
    D --> H["R Mono"]
    D --> I["L Mono"]
    D --> J["Speaker off On"]
    style A fill:#f9f,stroke:#333
    style B fill:#ccf,stroke:#333
○ Use the following procedure when turning on the power.
- Set the volume of the FP-2 and of the connected devices to the minimum position.
- Set the speaker switch to "Off" located on the rear panel.
- Turn on the power of the FP-2.
- Turn on the power of the connected device.
- Adjust the volume of each device.
When Recording FP-2 Performances on a Recording Device
- Start recording with the connected device.
- Perform on the FP-2.
- When the performance ends, stop recording on the connected equipment.
Playing the sound of an audio device through the speakers of the FP-2
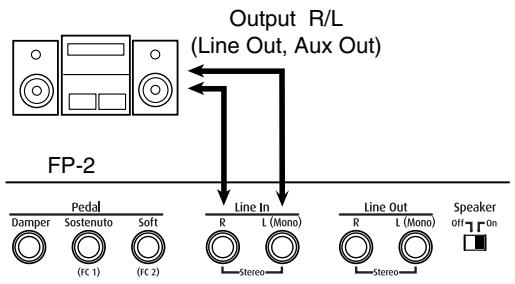
flowchart
graph TD
    A["Speaker Off"] --> B["Line In"]
    B --> C["Line Out"]
    C --> D["FP-2"]
    D --> E["Output R/L (Line Out, Aux Out)"]
    E --> F["Line In"]
    F --> G["Damper"]
    F --> H["Sostenuto"]
    F --> I["Soft"]
    F --> J["(FC 1)"]
    F --> K["(FC 2)"]
    F --> L["Stereo"]
    F --> M["L (Mono)"]
    F --> N["Stereo"]
    F --> O["R"]
    F --> P["L (Mono)"]
○ Use the following procedure when turning on the power.
- Set the volume of the FP-2 and the connected devices to the minimum position.
- Set the speaker switch to "On" located on the rear panel.
- Turn on the power of the connected device.
- Turn on the power of the FP-2.
- Adjust the volume of each device.
Turning off the power
- Set the volume of the FP-2 and the connected devices to the minimum position.
- Turn off the power to the FP-2.
- Turn off the connected equipment.
About the FP-2 Sound Generator
The FP-2 come equipped with GM2 sound generators.
General MIDI

The General MIDI is a set of recommendations which seeks to provide a way to go beyond the limitations of proprietary designs, and standardize the MIDI capabilities of sound generating devices. Sound generating devices and music files that meets the General MIDI standard bears the General MIDI logo. Music files bearing the General MIDI logo can be played back using any General MIDI sound generating unit to produce essentially the same musical performance.
General MIDI 2

The upwardly compatible General MIDI 2 recommendations pick up where the original General MIDI left off, offering enhanced expressive capabilities, and even greater compatibility. Issues that were not covered by the original General MIDI recommendations, such as how sounds are to be edited, and how effects should be handled, have now been precisely defined. Moreover, the available sounds have been expanded. General MIDI 2 compliant sound generators are capable of reliably playing back music files that carry either the General MIDI or General MIDI 2 logo.
In some cases, the conventional form of General MIDI, which does not include the new enhancements, is referred to as "General MIDI 1" as a way of distinguishing it from General MIDI 2.
Connecting to the USB Connector
You can use a USB connector to connect the FP-2 to your computer. For more details, refer to the separate "USB Installation Guide."
* Connecting your computer to the FP-2 for the first time requires installation of the "USB Driver" (on the included CD-ROM) to the computer. For more details, refer to the separate "USB Installation Guide."
* Only MIDI data can be transmitted using USB.
* To prevent malfunction and/or damage to speakers or other devices, always turn down the volume, and turn off the power on all devices before making any connections.
* USB cables are not included. Consult your Roland dealer if you need to purchase.
* Turn on the power to the FP-2 before starting up MIDI applications on the computer. Do not turn the FP-2 on or off while any MIDI application is running.
* Do not connect or disconnect the USB cable while the FP-2's power is on.
* If not using USB, disconnect the USB cable from the FP-2.
* If, during the transmission/reception of data, the computer switches to energy-saving mode or suspended mode, or if the FP-2's power is switched on or off, the computer may freeze, or the FP-2's operation may become unstable.
* When using your computer's sequencer software to record FP-2 performances, we recommend setting the sequencer software's Soft Thru to "OFF," or setting MIDI Out mode (p. 51) to "4."
Connecting MIDI Devices
About MIDI
MIDI stands for “Musical Instrument Digital Interface,” and is a worldwide standard for the exchange of performance data (MIDI messages) and other information among electronic instruments and computers.
The FP-2 features a MIDI connector and a computer connector to allow performance information to be exchanged with external devices. Connecting the keyboard to other devices with these connectors provides you with an even greater variety of ways to use your keyboard.
* A separate publication titled "MIDI Implementation" is also available. It provides complete details concerning the way MIDI has been implemented on this unit. If you should require this publication (such as when you intend to carry out byte-level programming), please contact the nearest Roland Service Center or authorized Roland distributor.
* MIDI cables are not included. Consult your Roland dealer if you need to purchase.
Connectors
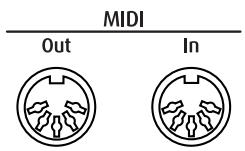
MIDI Out Connector
Sends data about what is being played on the keyboard and other performance data.
Connect to the MIDI In connector on the external MIDI device.
MIDI In connector
Receives messages sent from external MIDI devices.
Connect to the MIDI Out connector on the external MIDI device.
■ Making the Connections
* To prevent malfunction and/or damage to speakers or other devices, always turn down the volume, and turn off the power on all devices before making any connections.
- Turn the volume all the way down on the FP-2 and the device you're about to connect.
- Turn off the power to the FP-2 and the device being connected.
-
Connect a MIDI cable (sold separately) between the MIDI connectors on each device.
-
Switch on the power to the FP-2 and the connected device.
- Adjust the volume level on the FP-2 and the connected device.
- You should also set the MIDI settings as needed. Make the settings for the MIDI send and receive channels (p. 47) and for Local On/Off (p. 47).
■ How to Enjoy MIDI
Recording Data of Performances Played on the FP-2 to a Sequencer* and Automatically Playing Recorded Performance Data on the FP-2
Connection example:
Connecting to a sequencer (the Roland MT series, etc.)
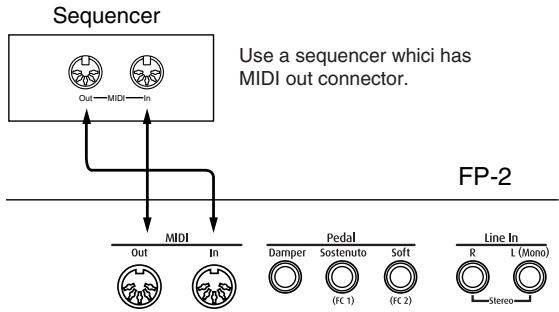
flowchart
graph TD
    A["Sequencer"] --> B["Out—MIDI—in"]
    B --> C["MIDI"]
    C --> D["Out"]
    C --> E["In"]
    D --> F["FP-2"]
    E --> F
    G["Use a sequencer which has MIDI out connector."] --> H["MIDI"]
    I["Line In"] --> J["Damper"]
    K["Sostenuto"] --> L["(FC 1)"]
    M["Soft"] --> N["(FC 2)"]
    O["R"] --> P["Stereo"]
    Q["L (Mono)"] --> R["Line In"]
→ When connecting a sequencer, we recommend using it with the settings described below.
- Local Control off (p. 47)
- MIDI Out Mode 4 (p. 48)
When the instrument is turned on, MIDI Out Mode is set to "1."
Performing on the FP-2 Using Sounds from Another Sound Module\*
Connection Example: Connecting to a MIDI Sound Module
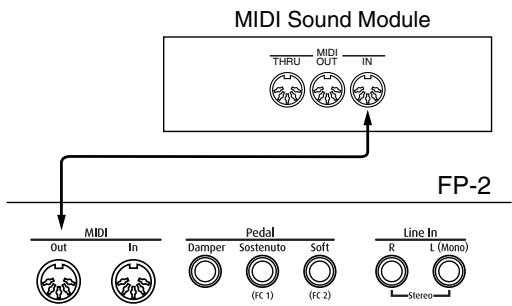
flowchart
graph TD
    A["MIDI Sound Module"] --> B["THRU"]
    A --> C["IN"]
    A --> D["Out"]
    A --> E["In"]
    A --> F["Pedal"]
    A --> G["Soft"]
    A --> H["Line In"]
    I["FP-2"] --> J["Out"]
    I --> K["In"]
    I --> L["Damper"]
    I --> M["Sostenuto"]
    I --> N["(FC 1)"]
    I --> O["(FC 2)"]
    I --> P["Stereo"]
    I --> Q["R"]
    I --> R["L (Mono)"]
→ When connecting to a MIDI sound module, we recommend using the system with MIDI Out Mode set to "2" (p. 48). When the instrument is turned on, MIDI Out Mode is set to "1."
What is a Sequencer?
A sequencer is a device that records the stream of MIDI messages that is sent out by an instrument. These messages convey all the details of what has occurred while the instrument is played; including the timing of notes, their sound, the force used to play them, and for how long. Afterwards, you can send the recorded MIDI information back to the instrument, and it will play automatically.
What is a MIDI Sound Module?
Inside a synthesizer or electronic piano is the section that actually produces sound, known as the sound module. A MIDI sound module produces sounds as the result of MIDI messages sent to it by other devices.
■ MIDI Settings
MIDI Send Channel Settings
Select the transmission channel of FP-2.
MIDI features sixteen MIDI channels, numbered 1–16.
Simply connecting a cable is not enough for communication to take place. The connected devices must be set to use the same MIDI channels. Otherwise, no sound will be produced, and no sounds can be selected.
When the instrument is turned on, this is set to Channel "1." The FP-2 receives messages on all channels, 1–16.
* When the keyboard is in dual play, the channel you've set here is transmitted.
* When the keyboard is split into left and right sides, the transmission channel for messages from the left-hand side is fixed at "3."
-
Switch to Function mode(p. 38), and press the [Rec] button.
-
Hold down the [Rec] button, and press the [-] or [+] button so "Ch" is displayed.
Press
While holding down...
- Press the [-] or [+] button to select the transmission channel.
Select the transmission channel (1–16) of the FP-2.
Switching Local Control On and Off
When connecting a MIDI sequencer, set Local Control to "Off."
When the instrument is turned on, this is set to "On."
As illustrated, information describing what has been played on the keyboard is passed to the internal sound generator over two different routes, (1) and (2). As a result, you hear overlapping or intermittent sounds. To prevent this from happening, route (1) must be severed, by setting the unit to what is known as “Local Off.”
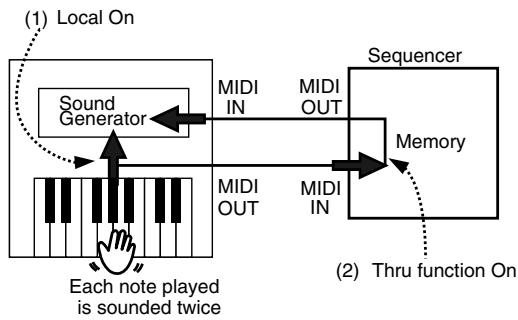
flowchart
graph TD
    A["Local On"] --> B["Sound Generator"]
    B --> C["MIDI IN"]
    C --> D["MIDI OUT"]
    D --> E["Sequencer"]
    E --> F["Memory"]
    F --> G["(2) Thru function On"]
    H["Each note played is sounded twice"] --> I["MIDI OUT"]
    I --> J["MIDI IN"]
    J --> E
Local Control ON: The keyboard and the internal sound generator are in a linked state.
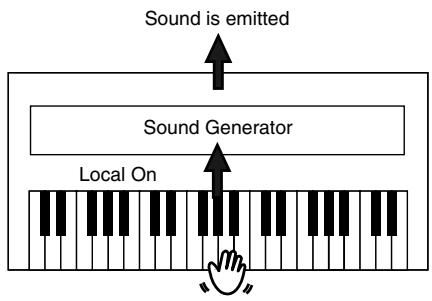
flowchart
graph TD
    A["Local On"] --> B["Sound Generator"]
    B --> C["Sound is emitted"]
    style A fill:#f9f,stroke:#333
    style B fill:#ccf,stroke:#333
    style C fill:#dfd,stroke:#333
Local Control OFF: The keyboard and the internal sound generator are in an unlinked state. No sound will be produced by the keyboard when it is played.
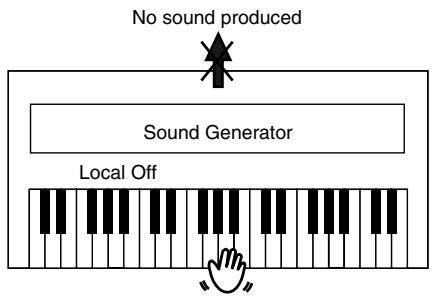
flowchart
graph TD
    A["Local Off"] --> B["Sound Generator"]
    B --> C["No sound produced"]
    style A fill:#f9f,stroke:#333
    style B fill:#ccf,stroke:#333
    style C fill:#dfd,stroke:#333
* When connecting a unit in the Roland MT series, you don't need to switch off Local Control. MT units transmit Local Off messages when their power is switched on. If you first switch on the FP-2, then the MT-series device, Local Control is automatically switched off on the FP-2.
- Switch to Function mode (p. 38), and press the [Rec] button.
- Hold down the [Rec] button, and press the [-] or [+] button so "L.Ct" is displayed.
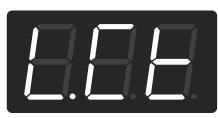
Press

While holding down...
- Press the [-] or [+] button to switch Local Control on and off.
Setting the MIDI Out Mode
By setting the MIDI Out Mode, you can select to have a more suitable (to the external MIDI device) selection of MIDI data be output from the MIDI Out connector when you make tone changes on the FP-2.
Four settings for the MIDI Out Mode are available.
"MIDI Out Mode 1" is the power-up default setting.
| Indication | Descriptions |
| 1 | MIDI Out Mode 1This setting is suitable for the connection of sequencers. The MIDI information (for example: Bank select, Program Change, Settings of Effects, and so on) is output from the MIDI Out connector when you make a tone change on the FP-2. |
| 2 | MIDI Out Mode 2This setting is suited for connecting to a sound module. The MIDI information (for example: Program change) is not output from the MIDI Out connector when you make a tone change on the FP-2. |
| 3 | MIDI Out Mode 3You can transmit performance data recorded with the FP-2.Additionally, the MIDI messages that are output have the same content as those in MIDI Out Mode 1. |
| 4 | MIDI Out Mode 4The MIDI messages that are output have the same content as those in MIDI Out Mode 3. However, these are not transmit to FP-2's sound module.Additionally, the local control is switched to off (p. 47). |
- Switch to Function mode (p. 38), and press the [Rec] button.
- Hold down the [Rec] button, and press the [-] or [+] button so "OUt" is displayed.
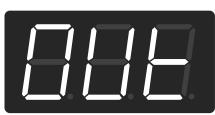

Press
While holding down...
- Press the [-] or [+] button to select the MIDI Out Mode.
Transferring the Program Change Message
When a setup is switched, a Program Change message is transmitted.
- Use a MIDI cable (optional) to connect the FP-2's MIDI OUT connector to the MIDI IN connector on an external sequencer, or use a USB cable to connect the computer.
- Switch to Function mode, and press the [Sound Control] button.
- Hold down the [Sound Control] button, and press the [-] or [+] button to select bank select MSB, LSB or Program change (PC).
Press

While holding down...
- Press [-] or [+] button to select the number.
- Exit Function mode to register the setup to the settings (p. 33).
Using the Pedal to Switch Setup (Pedal shift)
You can use the pedal which is connected to the sostenuto(FC1) jack or the soft(FC2) jack as a dedicated switch for selecting Setup in order.
- Switch to Function mode (p. 38), and press the [Sound Control] button.
- Hold down the [Sound Control] button, and press the [-] or [+] button so "SFt" is displayed.
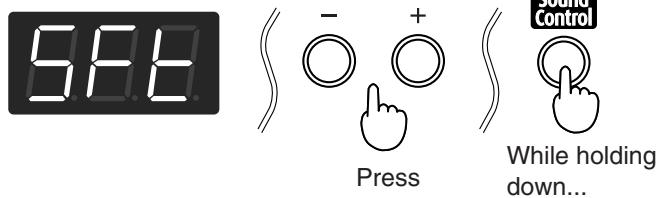
text_image
5.88 Press + While holding down...- Press the [-] or [+] button to select pedal setting.
| Indication | Description |
| OFF | You can use a function assigned to the sostenuto(FC1) pedal and the soft(FC2) pedal. |
| FC1 | The sostenuto(FC1) pedal is dedicated to switching Setup. The function assigned to the sostenuto(FC1) pedal cannot be used. |
| FC2 | The soft(FC2) pedal is dedicated to switching Setup. The function assigned to the soft(FC2) pedal cannot be used. |
Transferring the FP-2's Settings to an External MIDI Device (Bulk Dump)
You can transfer the contents of FP-2's Setup settings to an external MIDI device. This operation is called "bulk dump."
- Use a MIDI cable (optional) to connect the FP-2's MIDI OUT connector to the MIDI IN connector on an external sequencer, or use a USB cable to connect the computer.
- Switch to Function mode (p. 38), and press the [Sound Control] button.
- Hold down the [Sound Control] button, and press the [-] or [+] button to select bulk dump.
“dnP” is displayed, and the [Play/Stop] button's indicator begin flashes.
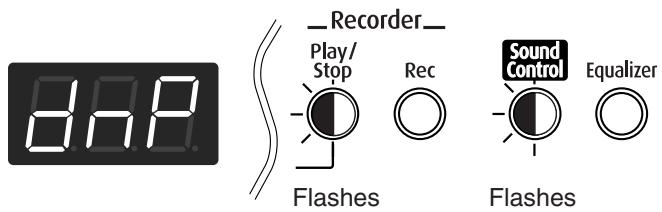
text_image
dnap Recorder Play/ Stop Rec Sound Control Equalizer Flashes Flashes- Put the external sequencer in record mode.
- Press [Play/Stop] to transmit the settings.
After the transmitting is finished, "dnP" is appeared in display.
- Stop the external sequencer.
Using the V-LINK function
Connecting the FP-2 to a V-LINK compatible image device allows you to control the images with the FP-2.
* To prevent malfunction and/or damage to speakers or other devices, always turn down the volume, and turn off the power on all devices before making any connections.
V-LINK
V-LINK (V-LINK) is functionality promoted by Roland that allows linked performance of music and visual material. By using V-LINK-compatible video equipment, visual effects can be easily liked to, and made part of the expressive elements of a performance.
■ How to Use the V-LINK
- Hold down the [Reverb] button and press the [Split] button.
The display changes as shown below, and the FP-2 switches to Image Control mode.

text_image
8.8.5 → 8.8.5.* The display does not change when chords are displayed. You can control images using the twelve keys at the left end of the keyboard.
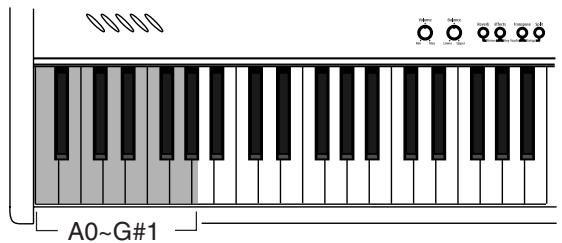
text_image
A0~G#1* While V-LINK is switched on, no sound is produced when you press any of the twelve keys at the left end of the keyboard.
- Hold down the [Reverb] button and press the [Split] button once again to exit.
Making the Settings for the USB Driver
If you intend to connect to a computer using the USB connector, you need to make the following setting before you make the connection.
- Hold down the [-] and [+] button, press the [Power] switch to turn on the power.
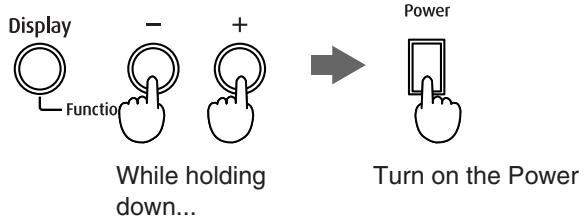
flowchart
graph LR
    A["Display"] --> B["Function"]
    B --> C["While holding down..."]
    C --> D["Power"]
    D --> E["Turn on the Power"]
- Press the [-] or [+] buttons to select the driver.
| Indication | Description |
| vdr(Vender) | Select this when using the supplied driver with a USB connection. |
| GEn(Generic) | Select this when using a generic USB driver included with the OS with a USB connection. |
- Turn on the power once again.
Restoring the Settings to the Factory Condition (Factory Reset)
The settings stored in the FP-2 can be returned to their factory settings.
* Executing "Factory Reset" results in deletion of the Settings. If you want to keep any data you have stored, use the "Bulk Dump" operation to save the data to an external sequencer (p. 49).
- Turn the volume to the minimum, and press the [Power] switch to turn off the power.
- Hold down the [Reverb] button, and press the [Power] switch to turn on the power.
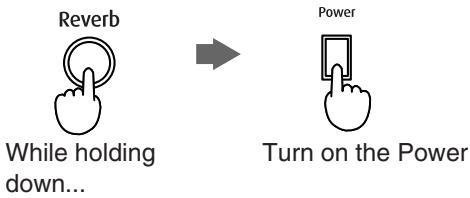
text_image
Reverb While holding down... Power Turn on the PowerContinue pressing the button until "Fct" appears in the display.
"Fct" appears in the display, and the button's indicators flash for several seconds. Then, the screen and buttons go back to normal.
Disabling Everything Except Piano Play (Panel Lock)
Once Panel Lock is engaged, the instrument will allow only normal piano playing. All buttons (except for the [Reverb] button, the [Sound Control] button, and the [Equalizer] button) will not function. This prevents the settings from being inadvertently modified even if children press the buttons accidentally.
- Turn the volume to the minimum, and press the [Power] switch to turn off the power.
- Hold down the [Piano] button and press the [Power] switch to turn on the power.
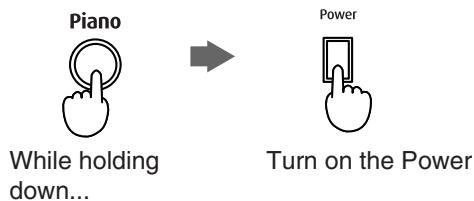
text_image
Piano While holding down... Power Turn on the PowerThen, continue to hold down these two buttons by following display will appear.
- Adjust the volume.
When you play the keyboard, the grand piano sound will be heard.
It cannot be changed to another tone.
- To defeat the Panel Lock function, turn the volume down to the minimum, and turn on the power once again.
Troubleshooting
| Case | Cause/What to do |
| No Power | Is the power cord properly connected? (p. 8) |
| No Sound | Is the volume level of the FP-2 (p. 10) or connected device turned all the way down? |
| Are headphones plugged in? Has a plug remained connected to the Phones jack? (p. 10) | |
| Is the Speaker switch to “ON”? (p. 7) | |
| Is Local Off selected? When Local Control is set to OFF, no sound is produced by playing the keyboard. Set Local Control to “ON”(p. 47). | |
| Is the MIDI Out mode set to “4”? (p. 48) | |
| No Sound (With a MIDI Device Connected) | Is the power to all devices turned on? (p. 44) |
| Is the MIDI cable connected and plugged in correctly? (p. 46) | |
| Does the MIDI channel match the connected instrument? (p. 47) | |
| No Sound From the Left Side | Is the [Chord Progression] button's indicator off? (p. 31) No sound from the left side is produced if the [Chord Progression] button's indicator is off while the Session Partner is playing. |
| Is V-LINK switched on (p. 49)? When V-LINK is switched on, the twelve keys at the left end of the keyboard are used to control images, and no sounds are played with these keys. | |
| The Volume of the Keyboard is Too Low | Is the volume balance turned all the way down? (p. 18) |
| Two Sounds are Produced When the Keyboard is Played | Is the FP-2 in Dual Play? (p. 15) |
| When the FP-2 is connected to an external sequencer, set it to the Local OFF mode (p. 47). Alternatively, set SOFT THRU on the sequencer to “OFF.” | |
| Not All Sounds Are Played | The FP-2 has a maximum polyphony of 64 voices. When playing together with a song or Rhythm along with heavy use of the damper pedal, the performance data may exceed the number of available voices, and as a result, some notes or sounds played on the keyboard may not sound. |
| Case | Cause/What to do |
| The accompaniment sounds when the keys are played | Is the [Chord Progression] button's indicator off? (p. 31)When the [Chord Progression] button's indicator is off, the Session Partner begins if you finger a keyboard. |
| The Keyboard or Song Register or Pitch is Off | Have you set Transpose? (p. 24) |
| Are the settings for the Temperament (p. 42) correct? | |
| Is the setting for Master Tuning correct? (p. 41) | |
| Song Doesn't Play Back | Does “dEL” appear in the display? (p. 13)The internal songs cannot be played back while recorded performance data remains in the FP-2's memory. Try playing back the song after deleting the performance data. |
| Only the Sound of a Particular Instrument in a Song Does Not Play | Is Track Mute on? (p. 13)If the button's light is out when you hold down the [Play/Stop] button, the music on that track is not heard. Press the track button so the light is illuminated. |
| Cannot Record | Have you selected which of the Track Buttons to be recorded? (p. 36) |
| Tempo of Recorded Song or Metronome is Off | When you select for recording an internal song that features tempo changes, the tempos of Performances recorded on other tracks are altered along with these changes. In addition, the Metronome tempo is also changed the same way. |
| Recorded Performance is Erased | Performances that have been recorded are erased when the power for the FP-2 is turned off. Once erased, Performances cannot be recovered. |
| The [Split] button's lindicator won't go out | Is the [Chord Progression] button's indicator off? (p. 31) |
| Effects Not Applied | When the part to which the effects are applied is assigned to the Lower Tone, the effects are then not applied to the Upper Tone (p. 41). |
| Reverb Remains Even After Reverb is Lifted | As the FP-2 piano sounds faithfully reproduce the depth and reverberation of actual acoustic pianos, reverberation may still be audible even after the reverb effect is removed from sounds. |
| Pedal Has No Effect, or Effect “Sticks” | Is the pedal connected correctly? Connect the pedal securely to the Pedal jack (p. 9). |
| Are you using a pedal made by another manufacturer? Use the pedal included with the FP-2 or an optional DP Series or similar pedal. | |
| Unplugging a pedal cord from the unit while the power is on may cause the pedal's effect to be applied nonstop. Be sure to switch off the power to the unit before attempting to disconnect or connect a pedal cord (p. 9). | |
| Once it's been assigned as a setup switch, a soft pedal or sostenuto pedal cannot be used for its original function (p. 48). | |
| Sound Suddenly Changes at Key in Upper Octaves | With the acoustic piano settings, sounds in the upper 1 1/2-octave range are extended to the end regardless of the damper pedal actions. The tone is also different in this range. Roland's pianos faithfully reproduce the sonic qualities of acoustic pianos. Furthermore, you can use the instrument's Key Transpose setting to change that range over which the damper pedal has no effect. |
| High-Pitched Whine is Produced | When listening through headphones: Certain piano tones that feature vibrant, sparking sounds contain a large high-frequency component, which may make it appear that a metallic reverberation has been applied. This faithfully reproduces the characteristics of acoustic pianos, and does not indicate any malfunction. Since this reverberation becomes particularly audible when supplemented by heavy reverb, you may be able to diminish the problem by reducing the amount of reverb applied to the sound.When listening through speakers: Here, a different cause (such as resonance produced by the FP-2) would be suspect. Consult your Roland dealer or nearest Roland Service Center. |
| Case | Cause/What to do |
| Low End SoundsAre Strange/Havea Rattling Sound | When listening through speakers:Playing at loud volumes may cause instruments near the FP-2 to resonate. Resonation can also occur with fluorescent light tubes, glass doors, and other objects. In particular, this problem occurs more easily when the bass component is increased, and when the sound is played at higher volumes. Use the following measures to suppress such resonance.- Place speakers so they are 10–15 cm from walls and other surfaces.- Reduce the volume.- Move the speakers away from any resonating objects.- Check to make sure that the screws holding the music stand in place are not loose.When listening through headphones:The cause lies somewhere else. Consult your Roland dealer or nearest Roland Service Center. |
| With certain tones, the sounds may seem to be distorted. | |
| The volume levelof the instrumentconnected to LineIn Jack is too low | Could you be using a connection cable that contains a resistor?Use a connection cable that does not contain a resistor. |
Error Messages/Other Messages
| Display | Meaning |
| USr | User. Stores recorded Performances (p. 12, p. 35). |
| Usr. | The “.” in the display indicates that there is Performance material already recorded (p. 12, p. 35). |
| S. | Piano song number (p. 12). |
| r. | Rhythm number (p. 29). |
| dEL | This appears when you attempt to delete a recorded song (p. 37).Additionally, this appears after recording a song when you try to select another song (p. 13). |
| SUP | This appears when you store setting to set up, or select stored settings (p. 33). |
| dnP | Bulk Dump. This appears when you transfer the FP-2’s settings to an external sequencer (p. 49). |
| Fct | Factory Reset. This appears when you restore the settings to the factory condition (p. 50). |
| E.32 | The amount of performance information is too large, and further recording is not possible. |
| E.40 | Too much MIDI data was sent from the external MIDI instrument at one time, and the unit could not process the data. Reduce the amount of MIDI data being sent to the FP-2. |
| E.41 | A problem such as a loose MIDI cable or computer cable occurred. Make sure the MIDI cables and computer cables are correctly hooked up. |
| E.51 | A system error has occurred. Try performing the procedure over again.Should this message continue to appear even after repeated attempts, please consult the nearest Roland Service Center. |
* Error messages are indicated by an “E.” before the number When the Error message appears, the [-] and [+] button indicators flashes in red. Press the [-] or [+] button, and you can cancel the error message.
→ "Performing with a Variety of Sounds" (p. 14)
Piano
| 1 | Grand Piano 1 |
| 2 | Piano+Strings |
| 3 | Grand Piano 2 |
| 4 | Piano+Pad |
| 5 | Rock Piano |
| 6 | Mellow Piano |
| 7 | Honky-tonk |
| 8 | Harpsichord |
E.Piano
| 1 | Pop E.Piano |
| 2 | Stage E.Piano |
| 3 | 60's E.Piano |
| 4 | 70's E.Piano |
| 5 | E.Grand |
| 6 | FM E.Piano 1 |
| 7 | FM E.Piano 2 |
| 8 | Clav. |
| 9 | Vibraphone |
| 10 | Morning Lite |
Organ
| 1 | Jazz Organ |
| 2 | Mellow Bars |
| 3 | Rock Organ |
| 4 | Purple Spin |
| 5 | Lower Organ |
| 6 | Ballad Organ |
| 7 | 60's Organ |
| 8 | Church Organ 1 |
| 9 | Church Organ 2 |
| 10 | Nason Flute |
Guitar/Bass
| 1 | Steel Gtr |
| 2 | Nylon Gtr |
| 3 | Jazz Guitar |
| 4 | Blusey OD |
| 5 | Acoustic Bass |
| 6 | A.Bass+Ride |
| 7 | Finger Bass |
| 8 | Slap Bass |
| 9 | Synth Bass |
| 10 | Vox Bass |
Strings/Pad
| 1 | Rich Strings |
| 2 | Velo Strings |
| 3 | Fat Strings |
| 4 | Synth Strings |
| 5 | Synth Pad 1 |
| 6 | Synth Pad 2 |
| 7 | Glasswaves |
| 8 | Orchestra |
| 9 | Voyager Brass |
Voice/GM2
| 1 | Jazz Scat |
| 2 | Choir |
| 3 | Beauty Vox |
| 4 | Voice Oohs |
| 5 | Holy Voice |
| 6 | Tenor Sax |
| 7 | Flute |
Rhythm
→ "Rhythm Set List" (p. 56)
8 Pop Drum Set
9 Jazz Drum Set
10 Voice Drum Set
11 House Drum Set
12 GM2 STANDARD
13 GM2 ROOM
14 GM2 POWER
15 GM2 ELECTRIC
16 GM2 ANALOG
17 GM2 JAZZ
18 GM2 BRUSH
19 GM2 ORCHESTRA
20 GM2 SFX
GM2
21 Piano 1
22 Piano 1 (wide)
23 Piano 1 (dark)
24 Piano 2
25 Piano 2 (wide)
26 Piano 3
27 Piano 3 (wide)
28 Honky-tonk 1
29 Honky-tonk 2
30 E.Piano 1
31 St.Soft EP
32 FM+SA EP
33 60's E.Piano
34 E.Piano 2
35 Detuned EP 2
36 St.FM EP
37 EP Legend
38 EP Phase
39 Harpsichord
40 Coupled Hps.
41 Harpsi (wide)
42 Harpsi (key Off)
43 Clav.
44 Pulse Clav
45 Celesta
46 Glockenspiel
47 Music Box
48 Vibraphone
49 Vibraphone (wide)
50 Marimba
51 Marimba (wide)
52 Xylophone
53 Tubular-bell
54 Church Bell
55 Carillon
56 Santur
57 Organ 1
58 Trem. Organ
59 60's Organ
60 70's E.Organ
61 Organ 2
62 Chorus Or.2
| 63 | Perc. Organ | 137 | OrchestraHit | 211 | Echo Pan |
| 64 | Organ 3 | 138 | Bass Hit | 212 | Star Theme |
| 65 | Church Org.1 | 139 | 6th Hit | 213 | Sitar 1 |
| 66 | Church Org.2 | 140 | Euro Hit | 214 | Sitar 2 |
| 67 | Church Org.3 | 141 | Trumpet | 215 | Banjo |
| 68 | Reed Organ | 142 | Dark Trumpet | 216 | Shamisen |
| 69 | Puff Organ | 143 | Trombone 1 | 217 | Koto |
| 70 | Accordion Fr | 144 | Trombone 2 | 218 | Taisho Koto |
| 71 | Accordion It | 145 | Bright Tb | 219 | Kalimba |
| 72 | Harmonica | 146 | Tuba | 220 | Bagpipe |
| 73 | Bandoneon | 147 | Muted Trumpet 1 | 221 | Fiddle |
| 74 | Nylon-str.Gt | 148 | Muted Trumpet 2 | 222 | Shanai |
| 75 | Ukulele | 149 | French Horns 1 | 223 | Tinkle Bell |
| 76 | Nylon Gt (key Off) | 150 | French Horns 2 | 224 | Agogo |
| 77 | Nylon Gt.2 | 151 | Brass 1 | 225 | Steel Drums |
| 78 | Steel-str.Gt | 152 | Brass 2 | 226 | Woodblock |
| 79 | 12-str.Gt | 153 | Synth Brass 1 | 227 | Castanets |
| 80 | Mandolin | 154 | Pro Brass | 228 | Taiko |
| 81 | Steel + Body | 155 | Oct SynBrass | 229 | Concert BD |
| 82 | Jazz Gt. | 156 | Jump Brass | 230 | Melo. Tom 1 |
| 83 | Pedal Steel | 157 | Synth Brass 2 | 231 | Melo. Tom 2 |
| 84 | Clean Gt. | 158 | SynBrass sfz | 232 | Synth Drum |
| 85 | Chorus Gt. | 159 | Velo Brass | 233 | 808 Tom |
| 86 | Mid Tone GTR | 160 | Soprano Sax | 234 | Elec Perc |
| 87 | Muted Gt. | 161 | Alto Sax | 235 | Reverse Cym. |
| 88 | Funk Pop | 162 | Tenor Sax | 236 | Gt.FretNoise |
| 89 | Funk Gt.2 | 163 | Baritone Sax | 237 | Gt.Cut Noise |
| 90 | Jazz Man | 164 | Oboe | 238 | String Slap |
| 91 | Overdrive Gt | 165 | English Horn | 239 | Breath Noise |
| 92 | Guitar Pinch | 166 | Bassoon | 240 | Fl.Key Click |
| 93 | DistortionGt | 167 | Clarinet | 241 | Seashore |
| 94 | Feedback Gt. | 168 | Piccolo | 242 | Rain |
| 95 | Dist Rtm GTR | 169 | Flute | 243 | Thunder |
| 96 | Gt.Harmonics | 170 | Recorder | 244 | Wind |
| 97 | Gt. Feedback | 171 | Pan Flute | 245 | Stream |
| 98 | Acoustic Bs. | 172 | Bottle Blow | 246 | Bubble |
| 99 | Fingered Bs. | 173 | Shakuhachi | 247 | Bird 1 |
| 100 | Finger Slap | 174 | Whistle | 248 | Dog |
| 101 | Picked Bass | 175 | Ocarina | 249 | Horse-Gallop |
| 102 | Fretless Bs. | 176 | Square Wave 1 | 250 | Bird 2 |
| 103 | Slap Bass 1 | 177 | Square Wave 2 | 251 | Telephone 1 |
| 104 | Slap Bass 2 | 178 | Sine Wave | 252 | Telephone 2 |
| 105 | Synth Bass 1 | 179 | Saw Wave | 253 | DoorCreaking |
| 106 | Synth Bass 101 | 180 | OB2 Saw | 254 | Door |
| 107 | Acid Bass | 181 | Doctor Solo | 255 | Scratch |
| 108 | Clavi Bass | 182 | Natural Lead | 256 | Wind Chimes |
| 109 | Hammer | 183 | Sequenced Saw | 257 | Helicopter |
| 110 | Synth Bass 2 | 184 | Syn.Calliope | 258 | Car-Engine |
| 111 | Beef Bass | 185 | Chiffer Lead | 259 | Car-Stop |
| 112 | Rubber Bass | 186 | Charang | 260 | Car-Pass |
| 113 | Attack Pulse | 187 | Wire Lead | 261 | Car-Crash |
| 114 | Violin | 188 | Solo Vox | 262 | Siren |
| 115 | Slow Violin | 189 | 5th Saw Wave | 263 | Train |
| 116 | Viola | 190 | Bass & Lead | 264 | Jetplane |
| 117 | Cello | 191 | Delayed Lead | 265 | Starship |
| 118 | Contrabass | 192 | Fantasia | 266 | Burst Noise |
| 119 | Tremolo Str | 193 | Warm Pad | 267 | Applause |
| 120 | Pizzicato Str | 194 | Sine Pad | 268 | Laughing |
| 121 | Harp | 195 | Polysynth | 269 | Screaming |
| 122 | Yang Qin | 196 | Space Voice | 270 | Punch |
| 123 | Timpani | 197 | Itopia | 271 | Heart Beat |
| 124 | Strings | 198 | Bowed Glass | 272 | Footsteps |
| 125 | Orchestra | 199 | Metal Pad | 273 | Gun Shot |
| 126 | 60s Strings | 200 | Halo Pad | 274 | Machine Gun |
| 127 | Slow Strings | 201 | Sweep Pad | 275 | Laser |
| 128 | Synth Strings 1 | 202 | Ice Rain | 276 | Explosion |
| 129 | Synth Strings 3 | 203 | Soundtrack | ||
| 130 | Synth Strings 2 | 204 | Crystal | ||
| 131 | Choir Aahs | 205 | Syn Mallet | ||
| 132 | Chorus Aahs | 206 | Atmosphere | ||
| 133 | Voice Oohs | 207 | Brightness | ||
| 134 | Humming | 208 | Goblin | ||
| 135 | SynVox | 209 | Echo Drops | ||
| 136 | Analog Voice | 210 | Echo Bell |
Rhythm Set List
| Pop Drum Set | Jazz Drum Set | Vox Drum Set | House Drum Set | |||||
| 21 | R&B Snare | R&B Snare | R&B Snare | R&B Snare | ||||
| 22 | Rock Snare 2 | Pop Snare 3 | Rock Snare 2 | Rock Snare 2 | ||||
| 23 | Rock Snare 2 | Pop Snare 3 | Rock Snare 2 | Rock Snare 2 | ||||
| 24 | Pop Snare 3 | Pop Snare 3 | Pop Snare 3 | Pop Snare 3 | ||||
| 25 | Pop Snare Ghost | Pop Snare Ghost | Pop Snare Ghost | Pop Snare Ghost | ||||
| 26 | Pop Snare 3 | Pop Snare 3 | Pop Snare 3 | Pop Snare 3 | ||||
| 27 | Finger Snap | Finger Snap | Finger Snap | Finger Snap | ||||
| 28 | 707 Claps | 707 Claps | 707 Claps | 707 Claps | ||||
| 29 | Hand Clap | Hand Clap | Hand Clap | Hand Clap | ||||
| 30 | Hand Clap2 | Hand Clap2 | Hand Clap2 | Hand Clap2 | ||||
| 31 | Hand Clap | Hand Clap | Hand Clap | Hand Clap | ||||
| 32 | Pop Pedal HH [EXC1] | Pop Pedal HH [EXC1] | Pop Pedal HH | Pop Pedal HH [EXC1] | ||||
| 33 | Hand Clap | Hand Clap | Hand Clap | Hand Clap | ||||
| 34 | Pop Snare Ghost | Pop Snare Ghost | Vox Dut | Pop Snare Ghost | ||||
| 35 | Pop Kick | Pop Kick | Vox Dom | 808 Kick 2 | ||||
| 36 | Pop Kick | Pop Kick | Vox Tuush | 909 BD 2 | ||||
| 37 | Rock Side Stick | Jazz Brsh Swirl 1 | Vox Hehho | 808 Rimshot | ||||
| 38 | Pop Snare 1 | Jazz Snare 2 | Vox Doyear | DRS Dregg | ||||
| 39 | Pop Snare Ghost | Jazz Brsh Swirl 2 | Vox Thu! | Hand Clap | ||||
| 40 | Pop Snare 2 | Jazz Snare 2 | Vox That | 707 Claps | ||||
| 41 | Pop Low Tom Flm | Jazz Low Tom Flm | Vox Aahhh | Room Tom 5 | ||||
| 42 | Pop CHH 1 [EXC1] | Pop CHH 1 [EXC1] | Vox Tu | 909 CHH [EXC1] | ||||
| 43 | Pop Low Tom | Jazz Low Tom | Vox Dooh | Room Tom 5 | ||||
| 44 | Pop CHH 2 [EXC1] | Pop CHH 2 [EXC1] | Vox Ptu | 808 CHH 2 [EXC1] | ||||
| 45 | Pop Mid Tom Flm | Jazz Mid Tom Flm | Vox Down | Room Tom 6 | ||||
| 46 | Pop OHH [EXC1] | Pop OHH [EXC1] | Vox Pa | 909 OHH [EXC1] | ||||
| 47 | Pop Mid Tom | Jazz Mid Tom | Vox Bom | Room Tom 6 | ||||
| C3 | Pop High Tom Flm | Jazz High Tom Flm | Vox Toear | Room Tom 2 | ||||
| 48 | Pop Crash Cymbal 1 | Jazz Crash Cymbal 1 | Vox Aahhu | Pop Crash Cymbal 1 | ||||
| 50 | Pop High Tom | Jazz High Tom | Vox Toya | Room Tom 2 | ||||
| 51 | Pop Ride Cymbal 1 | NewJzRide1 | Vox Thu | Pop Ride Cymbal 1 | ||||
| 52 | Pop Crash Cymbal 2 | Jazz Crash Cymbal 2 | Vox Cheey | ReverseCymbl | ||||
| 53 | Pop Ride Bell | NewJzRide1 | Vox Cymm | Pop Ride Bell | ||||
| 54 | Tambourine | Tambourine | Vox Tub | Tambourine | ||||
| 55 | Splash Cymbal | Splash Cymbal | Vox Pruru | Splash Cymbal | ||||
| 56 | Cha Cha Cowbell | Cha Cha Cowbell | Vox Tut | 808 Cowbell | ||||
| 57 | Pop Crash Cymbal 3 | Jazz Crash Cymbal 3 | Vox Tyun | Pop Crash Cymbal 3 | ||||
| 58 | Vibraslap | Vibraslap | Vox Tdum | Vibraslap | ||||
| 59 | Pop Ride Cymbal 2 | Pop Ride Cymbal 2 | Vox Afahhhh | Pop Ride Cymbal 2 | ||||
| C4 | High Bongo 2 | High Bongo 2 | High Bongo 2 | 808 High Bongo | ||||
| 60 | Low Bongo 2 | Low Bongo 2 | Low Bongo 2 | 808 Low Bongo | ||||
| 61 | Mute Conga | Mute Conga | Mute Conga | 808 High Conga | ||||
| 62 | High Conga 2 | High Conga 2 | High Conga 2 | 808 Mid Conga | ||||
| 63 | Low Conga 2 | Low Conga 2 | Low Conga 2 | 808 Low Conga | ||||
| 64 | High Timbale 2 | High Timbale 2 | High Timbale 2 | High Timbale 2 | ||||
| 65 | Low Timbale 2 | Low Timbale 2 | Low Timbale 2 | Low Timbale 2 | ||||
| 66 | High Agogo | High Agogo | High Agogo | High Agogo | ||||
| 67 | Low Agogo | Low Agogo | Low Agogo | Low Agogo | ||||
| 68 | Shaker 3 | Shaker 3 | Shaker 3 | Shaker 3 | ||||
| 69 | Shaker 4 | Shaker 4 | Shaker 4 | Shaker 4 | ||||
| 70 | ShortWhistle [EXC2] | ShortWhistle [EXC2] | ShortWhistle [EXC2] | ShortWhistle [EXC2] | ||||
| 71 | ||||||||
| 72 | Long Whistle [EXC2] | Long Whistle [EXC2] | Long Whistle [EXC2] | Long Whistle [EXC2] | ||||
| 73 | Short Guiro [EXC3] | Short Guiro [EXC3] | Short Guiro [EXC3] | Short Guiro [EXC3] | ||||
| 74 | Long Guiro [EXC3] | Long Guiro [EXC3] | Long Guiro [EXC3] | Long Guiro [EXC3] | ||||
| 75 | Claves | Claves | Claves | 808 Claves | ||||
| 76 | High Wood Block | High Wood Block | High Wood Block | High Wood Block | ||||
| 77 | Low Wood Block | Low Wood Block | Low Wood Block | Low Wood Block | ||||
| 78 | Mute Cuica [EXC4] | Mute Cuica [EXC4] | Mute Cuica [EXC4] | Mute Cuica [EXC4] | ||||
| 79 | Open Cuica [EXC4] | Open Cuica [EXC4] | Open Cuica [EXC5] | Open Cuica [EXC4] | ||||
| 80 | Mute Triangl [EXC5] | Mute Triangl [EXC5] | Mute Triangl [EXC5] | Mute Triangl [EXC5] | ||||
| 81 | Open Triangl [EXC5] | Open Triangl [EXC5] | Open Triangl [EXC5] | Open Triangl [EXC5] | ||||
| 82 | 808 Maracas | 808 Maracas | 808 Maracas | 808 Maracas | ||||
| 83 | Jingle Bell | Jingle Bell | Jingle Bell | Jingle Bell | ||||
| C6 | Bar Chimes | Bar Chimes | Bar Chimes | Bar Chimes | ||||
| 84 | Castanets | Castanets | Castanets | Castanets | ||||
| 85 | Mute Surdo [EXC6] | Mute Surdo [EXC6] | Mute Surdo [EXC6] | Mute Surdo [EXC6] | ||||
| 86 | Open Surdo [EXC6] | Open Surdo [EXC6] | Open Surdo [EXC6] | Open Surdo [EXC6] | ||||
| 87 | ---- | ---- | ---- | ---- | ||||
| 88 | Flamenco Hi-Timbale | Flamenco Hi-Timbale | Flamenco Hi-Timbale | Flamenco Hi-Timbale | ||||
| 89 | Flamenco Lo-Timbale | Flamenco Lo-Timbale | Flamenco Lo-Timbale | Flamenco Lo-Timbale | ||||
| 90 | Flamenco Tmbi Flam | Flamenco Tmbi Flam | Flamenco Tmbi Flam | Flamenco Tmbi Flam | ||||
| 91 | Shaker 1 | Shaker 1 | Shaker 1 | Shaker 1 | ||||
| 92 | Shaker 2 | Shaker 2 | Shaker 2 | Shaker 2 | ||||
| 93 | Low Bongo Mute | Low Bongo Mute | Low Bongo Mute | Low Bongo Mute | ||||
| 94 | Cabasa Up | Cabasa Up | Cabasa Up | Cabasa Up | ||||
| 95 | ||||||||
| C7 | Cabasa Down | Cabasa Down | Cabasa Down | Cabasa Down | ||||
| 96 | ---- | ---- | ---- | ---- | ||||
| 97 | ---- | ---- | ---- | ---- | ||||
| 98 | ---- | ---- | ---- | ---- | ||||
| 99 | Flamenco Hand Clap | Flamenco Hand Clap | Flamenco Hand Clap | Flamenco Hand Clap | ||||
| 100 | Flamenco Hand Clap | Flamenco Hand Clap | Flamenco Hand Clap | Flamenco Hand Clap | ||||
| 101 | Bongo Cowbell | Bongo Cowbell | Bongo Cowbell | Bongo Cowbell | ||||
| 102 | ---- | ---- | ---- | ---- | ||||
| 103 | Bongo Cowbell | Bongo Cowbell | Bongo Cowbell | Bongo Cowbell | ||||
| 104 | Wah Gtr Noise 1 | Wah Gtr Noise 1 | Wah Gtr Noise 1 | Wah Gtr Noise 1 | ||||
| 105 | Wah Gtr Noise 2 | Wah Gtr Noise 2 | Wah Gtr Noise 2 | Wah Gtr Noise 2 | ||||
| 106 | Wah Gtr Noise 3 | Wah Gtr Noise 3 | Wah Gtr Noise 3 | Wah Gtr Noise 3 | ||||
| 107 | Wah Gtr Noise 4 | Wah Gtr Noise 4 | Wah Gtr Noise 4 | Wah Gtr Noise 4 | ||||
*----: No sound.
*[EXC]: will not sound simultaneously with other percussion instruments of the same number.
| GM2 Standard Set | GM2 Room Set | GM2 Power Set | GM2 Electric Set | GM2 Analog Set | ||||||
| 21 | ---- | ---- | ---- | ---- | ---- | |||||
| 22 | ---- | ---- | ---- | ---- | ---- | |||||
| 23 | ---- | ---- | ---- | ---- | ---- | |||||
| 24 | ---- | ---- | ---- | ---- | ---- | |||||
| 25 | ---- | ---- | ---- | ---- | ---- | |||||
| 26 | ---- | ---- | ---- | ---- | ---- | |||||
| 27 | High-Q | High-Q | High-Q | High-Q | High-Q | |||||
| 28 | Slap | Slap | Slap | Slap | Slap | |||||
| 29 | ScratchPush | [EXC7] | ScratchPush | [EXC7] | ScratchPush | [EXC7] | ScratchPush | [EXC7] | ScratchPush | [EXC7] |
| 30 | ScratchPull | [EXC7] | ScratchPull | [EXC7] | ScratchPull | [EXC7] | ScratchPull | [EXC7] | ScratchPull | [EXC7] |
| 31 | Sticks | Sticks | Sticks | Sticks | Sticks | |||||
| 32 | SquareClick | SquareClick | SquareClick | SquareClick | SquareClick | |||||
| 33 | Mtrmm.Click | Mtrmm.Click | Mtrmm.Click | Mtrmm.Click | Mtrmm.Click | |||||
| 34 | Mtrmm.Bell | Mtrmm.Bell | Mtrmm.Bell | Mtrmm.Bell | Mtrmm.Bell | |||||
| 35 | Jazz Kick 1 | Mix Kick | Standard KK1 | Power Kick1 | Power Kick1 | |||||
| C2 | Mix Kick | Standard KK1 | Power Kick1 | Elec Kick 1 | 808 Kick 1 | |||||
| C3 | Rock Side Stick | Rock Side Stick | Rock Side Stick | Rock Side Stick | 808 Rimshot | |||||
| C38 | Standard SN1 | Room SN1 | Dance Snare1 | Elec. Snare | 808 Snare 1 | |||||
| C40 | Hand Clap | Hand Clap | Hand Clap | Hand Clap | Hand Clap | |||||
| Standard SN2 | Room SN2 | Elec Snare 4 | Elec Snare 2 | Elec Snare 6 | ||||||
| Real Tom 6 | Room Tom 5 | Room Tom 5 | Synth Drum 2 | 808 Tom 2 | ||||||
| C41 | Close HiHat2 | [EXC1] | Close HiHat2 | [EXC1] | Close HiHat2 | [EXC1] | Close HiHat2 | [EXC1] | 808 CHH [EXC1] | |
| C43 | Real Tom 6 | Room Tom 6 | Room Tom 6 | Synth Drum 2 | 808 Tom 2 | |||||
| C43 | Pedal HiHat2 | [EXC1] | Pedal HiHat2 | [EXC1] | Pedal HiHat2 | [EXC1] | Pedal HiHat2 | [EXC1] | 808 CHH 1 | [EXC1] |
| C45 | Real Tom 4 | Room Tom 2 | Room Tom 2 | Synth Drum 2 | 808 Tom 2 | |||||
| C45 | Open HiHat2 | [EXC1] | Open HiHat2 | [EXC1] | Open HiHat2 | [EXC1] | Open HiHat2 | [EXC1] | 808 OHH 2 | [EXC1] |
| C47 | Real Tom 4 | Room Tom 2 | Room Tom 2 | Synth Drum 2 | 808 Tom 2 | |||||
| C3 | Real Tom 1 | Rock Tom 1 | Rock Tom 1 | Synth Drum 2 | 808 Tom 2 | |||||
| C38 | Crash Cym.1 | Crash Cym.1 | Crash Cym.1 | Crash Cym.1 | 808 Crash | |||||
| C39 | Real Tom 1 | Rock Tom 1 | Rock Tom 1 | Synth Drum 2 | 808 Tom 2 | |||||
| C40 | Ride Cymbal | Ride Cymbal | Ride Cymbal | Ride Cymbal | Ride Cymbal | |||||
| C41 | ChinaCymbal | ChinaCymbal | ChinaCymbal | ReverseCymbl | ChinaCymbal | |||||
| C42 | Ride Bell | Ride Bell | Ride Bell | Ride Bell | Ride Bell | |||||
| C43 | Tambourine | Tambourine | Tambourine | Tambourine | Tambourine | |||||
| C45 | Splash Cym. | Splash Cym. | Splash Cym. | Splash Cym. | Splash Cym. | |||||
| C45 | Cowbell | Cowbell | Cowbell | Cowbell | 808 Cowbell | |||||
| C47 | Crash Cym.2 | Crash Cym.2 | Crash Cym.2 | Crash Cym.2 | Crash Cym.2 | |||||
| C47 | Vibraslap | Vibraslap | Vibraslap | Vibraslap | Vibraslap | |||||
| C47 | Ride Cymbal4 | Ride Cymbal4 | Ride Cymbal4 | Ride Cymbal4 | Ride Cymbal4 | |||||
| C48 | Bongo High | Bongo High | Bongo High | Bongo High | Bongo High | |||||
| C48 | Bongo Lo | Bongo Lo | Bongo Lo | Bongo Lo | Bongo Lo | |||||
| C48 | Mute H.Conga | Mute H.Conga | Mute H.Conga | Mute H.Conga | 808 High Conga | |||||
| C48 | High Conga 2 | High Conga 2 | High Conga 2 | High Conga 2 | 808 Mid Conga | |||||
| C48 | Low Conga 2 | Low Conga 2 | Low Conga 2 | Low Conga 2 | 808 Low Conga | |||||
| C48 | High Timbale 2 | High Timbale 2 | High Timbale 2 | High Timbale 2 | High Timbale 2 | |||||
| C48 | Low Timbale 2 | Low Timbale 2 | Low Timbale 2 | Low Timbale 2 | Low Timbale 2 | |||||
| C48 | High Agogo | High Agogo | High Agogo | High Agogo | High Agogo | |||||
| C48 | Low Agogo | Low Agogo | Low Agogo | Low Agogo | Low Agogo | |||||
| C48 | Cabasa | Cabasa | Cabasa | Cabasa | Cabasa | |||||
| C48 | Maracas | Maracas | Maracas | Maracas | 808 maracas 2 | |||||
| C48 | ShortWhistle | [EXC2] | ShortWhistle | [EXC2] | ShortWhistle | [EXC2] | ShortWhistle | [EXC2] | ShortWhistle | [EXC2] |
| C48 | Long Whistle | [EXC2] | Long Whistle | [EXC2] | Long Whistle | [EXC2] | Long Whistle | [EXC2] | Long Whistle | [EXC2] |
| C48 | Short Guiro | [EXC3] | Short Guiro | [EXC3] | Short Guiro | [EXC3] | Short Guiro | [EXC3] | Short Guiro | [EXC3] |
| C48 | Long Guiro | [EXC3] | Long Guiro | [EXC3] | Long Guiro | [EXC3] | Long Guiro | [EXC3] | Long Guiro | [EXC3] |
| C48 | Claves | Claves | Claves | Claves | Claves | |||||
| C48 | High Wood Block | High Wood Block | High Wood Block | High Wood Block | High Wood Block | |||||
| C48 | Low Wood Block | Low Wood Block | Low Wood Block | Low Wood Block | Low Wood Block | |||||
| C48 | Mute Cuica | [EXC4] | Mute Cuica | [EXC4] | Mute Cuica | [EXC4] | Mute Cuica | [EXC4] | Mute Cuica | [EXC4] |
| C48 | Open Cuica | [EXC4] | Open Cuica | [EXC4] | Open Cuica | [EXC4] | Open Cuica | [EXC4] | Open Cuica | [EXC4] |
| C48 | Mute Triangl | [EXC5] | Mute Triangl | [EXC5] | Mute Triangl | [EXC5] | Mute Triangl | [EXC5] | Mute Triangl | [EXC5] |
| C48 | Open Triangl | [EXC5] | Open Triangl | [EXC5] | Open Triangl | [EXC5] | Open Triangl | [EXC5] | Open Triangl | [EXC5] |
| C48 | Shaker 3 | Shaker 3 | Shaker 3 | Shaker 3 | Shaker 3 | |||||
| C48 | Jingle Bell | Jingle Bell | Jingle Bell | Jingle Bell | Jingle Bell | |||||
| C48 | Bar Chimes | Bar Chimes | Bar Chimes | Bar Chimes | Bar Chimes | |||||
| C48 | Castanets | Castanets | Castanets | Castanets | Castanets | |||||
| C48 | Mute Surdo | [EXC6] | Mute Surdo | [EXC6] | Mute Surdo | [EXC6] | Mute Surdo | [EXC6] | Mute Surdo | [EXC6] |
| C48 | Open Surdo | [EXC6] | Open Surdo | [EXC6] | Open Surdo | [EXC6] | Open Surdo | [EXC6] | Open Surdo | [EXC6] |
| C48 | ---- | ---- | ---- | ---- | ---- | |||||
| C48 | ---- | ---- | ---- | ---- | ---- | |||||
| C48 | ---- | ---- | ---- | ---- | ---- | |||||
| C48 | ---- | ---- | ---- | ---- | ---- | |||||
| C48 | ---- | ---- | ---- | ---- | ---- | |||||
| C48 | ---- | ---- | ---- | |||||||
*----: No sound.
*[EXC]: will not sound simultaneously with other percussion instruments of the same number.
| GM2 Jazz Set | GM2 Brush Set | GM2 Orchestra Set | GM2 SFX Set | ||||
| 21 | ---- | ---- | ---- | ---- | |||
| 22 | ---- | ---- | ---- | ---- | |||
| 23 | ---- | ---- | ---- | ---- | |||
| 24 | ---- | ---- | ---- | ---- | |||
| 25 | ---- | ---- | ---- | ---- | |||
| 26 | ---- | ---- | ---- | ---- | |||
| 27 | High-Q | High-Q | Close HiHat2 | [EXC1] | ---- | ||
| 28 | Slap | Slap | Pedal HiHat2 | [EXC1] | ---- | ||
| 29 | ScratchPush | [EXC7] | ScratchPush | [EXC7] | Open HiHat2 | [EXC1] | ---- |
| 30 | ScratchPull | [EXC7] | ScratchPull | [EXC7] | Ride Cymbal4 | ---- | |
| 31 | Sticks | Sticks | Sticks | ---- | |||
| 32 | SquareClick | SquareClick | SquareClick | ---- | |||
| 33 | Mtrnm.Click | Mtrnm.Click | Mtrnm.Click | ---- | |||
| 34 | Mtrnm. Bell | Mtrnm. Bell | Mtrnm. Bell | ---- | |||
| 35 | Mix Kick | Mix Kick | Concert BD | ---- | |||
| C2 | Jazz Kick 1 | Jazz Kick 1 | Mix Kick | ---- | |||
| 36 | Rock Side Stick | Rock Side Stick | Rock Side Stick | ---- | |||
| 37 | Standard SN3 | Brush Swirl | Concert Snr | ---- | |||
| 38 | Hand Clap | Brush Slap1 | Castanets | High-Q | |||
| 39 | Elec Snare 5 | Brush Swirl | Concert Snr | Slap | |||
| 40 | Real Tom 6 | Brash Tom 2 | Timpani F | ScratchPush [EXC7] | |||
| 41 | Close HiHat2 | [EXC1] | Pop CHH 1 | [EXC1] | Timpani F# | ScratchPull [EXC7] | |
| 42 | Real Tom 6 | Brash Tom 2 | Timpani G | Sticks | |||
| 43 | Pedal HiHat2 | [EXC1] | Pop CHH 2 | [EXC1] | Timpani G# | SquareClick | |
| 44 | Real Tom 4 | Brash Tom 2 | Timpani A | Mtrnm.Click | |||
| 45 | Open HiHat2 | [EXC1] | Pop OHH [EXC1] | Timpani A# | Mtrnm. Bell | ||
| 46 | Real Tom 4 | Brash Tom 2 | Timpani B | Gt.FretNoiz | |||
| 47 | |||||||
| C3 | Real Tom 1 | Brash Tom 2 | Timpani C | Gt.CutNoise (Up) | |||
| 48 | Crash Cym.1 | Crash Cym.3 | Timpani C# | Gt.CutNoise (Down) | |||
| 50 | Real Tom 1 | Brash Tom 2 | Timpani D | String Slap | |||
| 51 | Ride Cymbal | NewJzRide1 | Timpani D# | Fl.KeyClick | |||
| 52 | ChinaCymbal | ChinaCymbal | Timpani E | Laughing | |||
| 53 | Ride Bell | NewJzRide1 | Timpani F | Screaming | |||
| 54 | Tambourine | Tambourine | Tambourine | Punch | |||
| 55 | Splash Cym. | Splash Cym. | Splash Cym. | Heart Beat | |||
| 56 | Cowbell | Cowbell | Cowbell | Footsteps 1 | |||
| 57 | Crash Cym.2 | Crash Cym.2 | Con.Cymbal2 | Footsteps 2 | |||
| 58 | Vibraslap | Vibraslap | Vibraslap | Applause | |||
| 59 | Ride Cymbal4 | Ride Cymbal4 | Concert Cym. | Creaking | |||
| C4 | Bongo High | Bongo High | Bongo High | Door | |||
| 60 | Bongo Lo | Bongo Lo | Bongo Lo | Scratch | |||
| 61 | Mute H.Conga | Mute H.Conga | Mute H.Conga | Wind Chimes | |||
| 62 | High Conga 2 | High Conga 2 | High Conga 2 | Car-Engine | |||
| 63 | Low Conga 2 | Low Conga 2 | Low Conga 2 | Car-Stop | |||
| 64 | High Timbale 2 | High Timbale 2 | High Timbale 2 | Car-Pass | |||
| 65 | Low Timbale 2 | Low Timbale 2 | Low Timbale 2 | Car-Crash | |||
| 66 | High Agogo | High Agogo | High Agogo | Siren | |||
| 67 | Low Agogo | Low Agogo | Low Agogo | Train | |||
| 68 | Cabasa | Cabasa | Cabasa | Jetplane | |||
| 69 | Maracas | Maracas | Maracas | Helicopter | |||
| 70 | ShortWhistle | [EXC2] | ShortWhistle | [EXC2] | ShortWhistle | [EXC2] | Starship |
| 71 | |||||||
| C5 | Long Whistle | [EXC2] | Long Whistle | [EXC2] | Long Whistle | [EXC2] | Gun Shot |
| 72 | Short Guiro | [EXC3] | Short Guiro | [EXC3] | Short Guiro | [EXC3] | Machine Gun |
| 73 | Long Guiro | [EXC3] | Long Guiro | [EXC3] | Long Guiro | [EXC3] | Lasergun |
| 74 | Claves | Claves | Claves | Explosion | |||
| 75 | High Wood Block | High Wood Block | High Wood Block | Dog | |||
| 76 | Low Wood Block | Low Wood Block | Low Wood Block | HorseGallop | |||
| 77 | Mute Cuica | [EXC4] | Mute Cuica | [EXC4] | Mute Cuica | [EXC4] | Bird |
| 78 | Open Cuica | [EXC4] | Open Cuica | [EXC4] | Open Cuica | [EXC4] | Rain |
| 79 | Mute Triangl | [EXC5] | Mute Triangl | [EXC5] | Mute Triangl | [EXC5] | Thunder |
| 80 | Open Triangl | [EXC5] | Open Triangl | [EXC5] | Open Triangl | [EXC5] | Wind |
| 81 | Shaker 3 | Shaker 3 | Shaker 3 | Seashore | |||
| 82 | Jingle Bell | Jingle Bell | Jingle Bell | Stream | |||
| C6 | Bar Chimes | Bar Chimes | Bar Chimes | Bubble | |||
| 84 | Castanets | Castanets | Castanets | ||||
| 85 | Mute Surdo | [EXC6] | Mute Surdo | [EXC6] | Mute Surdo | [EXC6] | ---- |
| 86 | Open Surdo | [EXC6] | Open Surdo | [EXC6] | Open Surdo | [EXC6] | ---- |
| 87 | Applause | ||||||
| 88 | |||||||
| 89 | |||||||
| 90 | |||||||
| 91 | |||||||
| 92 | |||||||
| 93 | |||||||
| 94 | |||||||
| 95 | |||||||
| C7 | Cabasa Up | Cabasa Up | Cabasa Up | ||||
| 96 | Cabasa Down | Cabasa Down | Cabasa Down | ||||
| 97 | |||||||
| 98 | |||||||
| 99 | |||||||
| 100 | |||||||
| 101 | |||||||
| 102 | |||||||
| 103 | |||||||
| 104 | |||||||
| 105 | Wah Gtr Noise 1 | Wah Gtr Noise 1 | Wah Gtr Noise 1 | Wah Gtr Noise 1 | |||
| 106 | Wah Gtr Noise 2 | Wah Gtr Noise 2 | Wah Gtr Noise 2 | Wah Gtr Noise 2 | |||
| 107 | Wah Gtr Noise 3 | Wah Gtr Noise 3 | Wah Gtr Noise 3 | Wah Gtr Noise 3 | |||
| 108 | Wah Gtr Noise 4 | Wah Gtr Noise 4 | Wah Gtr Noise 4 | Wah Gtr Noise 4 | |||
*----: No sound.
*[EXC]: will not sound simultaneously with other percussion instruments of the same number.
Rhythm List
→ "Selecting a Rhythm" (p. 29)
→ "Selecting a Rhythm's Chord Progression" (p. 30)
| No. | Genre | Chord Progression Pattern No. | Beat |
| r.1 | Bounce Rock | 11 | 4/4 |
| r.2 | 12 | ||
| r.3 | Guitar Ballad | 13 | 4/4 |
| r.4 | 14 | ||
| r.5 | Loose Rock | 15 | 4/4 |
| r.6 | 16 | ||
| r.7 | 8 Beat Pop | 17 | 4/4 |
| r.8 | 18 | ||
| r.9 | Euro Dance | 19 | 4/4 |
| r.10 | 20 | ||
| r.11 | Y2K Funk | 21 | 4/4 |
| r.12 | 22 | ||
| r.13 | Pop | 23 | 4/4 |
| r.14 | 24 | ||
| r.15 | HipHop | 25 | 4/4 |
| r.16 | 26 | ||
| r.17 | Guitar Funk | 27 | 4/4 |
| r.18 | 28 | ||
| r.19 | Cutting Guitar | 29 | 4/4 |
| r.20 | 30 | ||
| r.21 | Fusion | 31 | 4/4 |
| r.22 | 32 | ||
| r.23 | 70's Soul | 33 | 4/4 |
| r.24 | 34 | ||
| r.25 | Contemporary | 35 | 4/4 |
| r.26 | 36 | ||
| r.27 | Medium Pop | 37 | 4/4 |
| r.28 | 38 | ||
| r.29 | 808 HipHop | 39 | 4/4 |
| r.30 | 40 | ||
| r.31 | Guitar Pop | 41 | 4/4 |
| r.32 | 42 | ||
| r.33 | Country Pop | 43 | 4/4 |
| r.34 | 44 | ||
| r.35 | Shuffle | 45 | 4/4 |
| r.36 | 46 | ||
| r.37 | 8 beat Rock | 47 | 4/4 |
| r.38 | 48 | ||
| r.39 | Gospel | 49 | 6/8 |
| r.40 | 50 |
| No. | Genre | Chord Progression Pattern No. | Beat |
| r.41 | Gospel Shout | 51 | 4/4 |
| r.42 | 52 | ||
| r.43 | Honky Pop | 53 | 4/4 |
| r.44 | 54 | ||
| r.45 | Boogie | 55 | 4/4 |
| r.46 | 56 | ||
| r.47 | Fast Jazz | 57 | 4/4 |
| r.48 | 58 | ||
| r.49 | Jazz | 59 | 4/4 |
| r.50 | 60 | ||
| r.51 | Double Time Feel | 61 | 4/4 |
| r.52 | 62 | ||
| r.53 | Scat Swing | 63 | 4/4 |
| r.54 | 64 | ||
| r.55 | Piano Jazz | 65 | 4/4 |
| r.56 | 66 | ||
| r.57 | Ballad | 67 | 4/4 |
| r.58 | 68 | ||
| r.59 | E.Piano Ballad | 69 | 4/4 |
| r.60 | 70 | ||
| r.61 | R&B Ballad | 71 | 4/4 |
| r.62 | 72 | ||
| r.63 | 808 Ballad | 73 | 4/4 |
| r.64 | 74 | ||
| r.65 | New Age Ballad | 75 | 4/4 |
| r.66 | 76 | ||
| r.67 | 6/8 Ballad | 77 | 6/8 |
| r.68 | 78 | ||
| r.69 | Mambo | 79 | 4/4 |
| r.70 | 80 | ||
| r.71 | Latin | 81 | 4/4 |
| r.72 | 82 | ||
| r.73 | Latin Pop | 83 | 4/4 |
| r.74 | 84 | ||
| r.75 | Bossa Nova | 85 | 4/4 |
| r.76 | 86 | ||
| r.77 | Beguine | 87 | 4/4 |
| r.78 | 88 | ||
| r.79 | Piano Waltz | 89 | 3/4 |
| r.80 | 90 |
Chord Progression Pattern List
* It is the Chord Progression Pattern List by each measure. These are basic chord progression pattern from No. 1 to No. 10, and these are suitable chord progression for the internal rhythm from No. 11 to No. 90.
| No. | Rhythm No. | Chord Progression | |||||||||||||||
| 1 | 2 | 3 | 4 | 5 | 6 | 7 | 8 | 9 | 10 | 11 | 12 | 13 | 14 | 15 | 16 | ||
| 1 | — | C | Am | Dm7 | G7 | C | Am | Dm7 | G7 | ||||||||
| 2 | — | Am | G | F | E7 | Am | G | F | E7 | ||||||||
| 3 | — | CM7 | Am7 | Dm7 | G7 | CM7 | Am7 | Dm7 | G7 | ||||||||
| 4 | — | Dm7 | G7 | CM7 | Am7 | Dm7 | G7 | CM7 | A7 | ||||||||
| 5 | — | C | Bm7 | Em7 | Am | F | G | Csus4 | C | ||||||||
| 6 | — | Dm7 | G7 | CM7 | FM7 | Bm7↓5 | E7 | Am7 | A7 | ||||||||
| 7 | — | C7 | F7 | C7 | F7 | C7 | G7 | F7 | C7 | G7 | |||||||
| 8 | — | CM7 | Cdim | Dm9 | G7 | CM7 | Dm9 | CM7 | Cdim | Dm9 | G7 | CM7 | |||||
| 9 | — | C | Am7 | Dm7 | G7sus4 | ||||||||||||
| 10 | — | C | C/B | Am | Am/G | F | G | C | |||||||||
| 11 | r. 1 | C | C7sus4 | F | B↓7Sus4 | C | C7sus4 | F | Fm6 | ||||||||
| 12 | r. 2 | Am | E7 | C7 | F | Fm6 | Em7 | F | G | ||||||||
| 13 | r. 3 | Dm | G7 | C | A7 | Dm | G7 | Am | D7 | ||||||||
| 14 | r. 4 | F | G | C | Csus7 | F | G | Am | A7 | ||||||||
| 15 | r. 5 | Am | G | Am | F | D | |||||||||||
| 16 | r. 6 | D | C | D | F | G | |||||||||||
| 17 | r. 7 | C | E↓7 | F7 | C | E↓7 | B↓ | ||||||||||
| 18 | r. 8 | Csus7 | C7 | B↓sus7 | B↓7 | Csus7 | C7 | A↓sus7 | B↓sus7 | ||||||||
| 19 | r. 9 | Am | D | Am | G | ||||||||||||
| 20 | r.10 | C | B↓ | C | E↓ | G | |||||||||||
| 21 | r.11 | F | B↓ | F | B↓ | ||||||||||||
| 22 | r.12 | Dm | C | Dm | C | B↓ | Gm | C | |||||||||
| 23 | r.13 | C | Gm7 | FM7 | B↓7 | C | Gm7 | F | F/G | ||||||||
| 24 | r.14 | FM9 | F/G | C | Am7 | FM9 | F/G | B↓7 | F/G | ||||||||
| 25 | r.15 | C | B↓ | C | Gm7 | C | B↓ | C | Gm7 | ||||||||
| 26 | r.16 | C | G7 | C | G7 | C | G7 | C | B↓ | ||||||||
| 27 | r.17 | C | Am7 | Dm7 | G7 | C | Am7 | Dm7 | G7 | ||||||||
| 28 | r.18 | FM7 | CM7 | Am7 | FM7 | Fm7 | F/G | ||||||||||
| 29 | r.19 | Am7 | D7 | Am7 | D7 | Am7 | D7 | Am7 | F/G | ||||||||
| 30 | r.20 | C | Am7 | C | F/G | ||||||||||||
| 31 | r.21 | CM9 | A↓M7 | CM9 | A↓M7 | CM9 | A↓M7 | FM9 | F/G | ||||||||
| 32 | r.22 | A↓M9 | B↓9 | A↓M9 | B↓9 | ||||||||||||
| 33 | r.23 | CM9 | Am9 | CM9 | Am9 | FM9 | G6 | ||||||||||
| 34 | r.24 | FM9 | G6 | FM9 | G6 | FM9 | G6 | FM9 | G6 | CM9 | F/G | ||||||
| 35 | r.25 | C | FM7 | C | F/G | ||||||||||||
| 36 | r.26 | Dm7 | G7 | C | Am7 | Dm7 | G7 | C | |||||||||
| 37 | r.27 | C | G | G7 | C | C7 | F | C | Am7 | Dm7 | G | C | C7 | ||||
| 38 | r.28 | FM7 | G | FM7 | G | FM7 | G | G7 | C | F/G | |||||||
| 39 | r.29 | Am7 | D7 | Am7 | D7 | Gm7 | C7 | Gm7 | E7↑9 | ||||||||
| 40 | r.30 | Am7 | D7sus4 | Am7 | D7 | FM7 | E7↑9 | Am7 | B↓M7 | ||||||||
| 41 | r.31 | CM7 | Am7 | Dm7 | G7 | ||||||||||||
| 42 | r.32 | C | F | Dm | G | C | F | G | C | ||||||||
| 43 | r.33 | C | Am | C | Am | C | Am | F | G | ||||||||
| 44 | r.34 | C | G | F | G | C | G | F | G7 | ||||||||
| 45 | r.35 | C | F7sus4 | F7 | G7sus4 | G7 | |||||||||||
| 46 | r.36 | FM7 | G7 | C | FM7 | G7 | C | ||||||||||
| 47 | r.37 | C | G | C | G | ||||||||||||
| 48 | r.38 | F | Am | G7 | Dm7 | F | Am7 | G7 | |||||||||
| 49 | r.39 | C | Fm7 | C | C‡dim | Dm7 | G7 | ||||||||||
| 50 | r.40 | F | F‡dim | C/G | A7 | D7 | G7 | ||||||||||
| 51 | r.41 | C | F | C | F | C | F | C | G7 | ||||||||
| 52 | r.42 | C | C7 | G | F7 | G7 | F7 | G7 | |||||||||
| 53 | r.43 | C | F | G | |||||||||||||
| 54 | r.44 | F | C | F | G | ||||||||||||
| 55 | r.45 | A7 | D7 | A7 | D7 | A7 | E7 | D7 | A7 | E7 | |||||||
| 56 | r.46 | C | F | C | C7 | F7 | C | A7 | D7 | G7 | C | G7 | |||||
| 57 | r.47 | F | C7 | Am7 | C7 | F7 | B♭7 | F/C | C7 | ||||||||
| 58 | r.48 | A7 | D7 | G7 | C7 | ||||||||||||
| 59 | r.49 | C6 | Dm7 | G7 | Dm7 | G7 | C6 | Am | Am9 | Dm7 | G(11) | C6 | F/G | ||||
| 60 | r.50 | C6 | Dm7 | G7 | Dm7 | G7 | C6 | Am | A♭aug | Dm7 | G(11) | C6 | |||||
| 61 | r.51 | C | C7 | F | C | G7 | F7 | C | G7 | ||||||||
| 62 | r.52 | C | F | C | C7 | F7 | C | A7 | D7 | G7 | C | G7 | |||||
| 63 | r.53 | C | F | C | F | ||||||||||||
| 64 | r.54 | Em7 | A7♭9 | Dm7 | G7 | Em7 | C‡dim | Dm7 | G7 | ||||||||
| 65 | r.55 | CM9 | F/G | CM9 | C9 | FM9 | F/G | ||||||||||
| 66 | r.56 | FM9 | F/G | CM9 | Am9 | Dm7♭5 | G7♭9 | CM7 | F/G | ||||||||
| 67 | r.57 | C | Gm7 | C | Gm7 | ||||||||||||
| 68 | r.58 | F | G7 | C | C7 | F | G7 | Am | F/G | ||||||||
| 69 | r.59 | CM7 | C‡dim | Dm7 | G7 | CM7 | C‡dim | Dm7 | G7 | ||||||||
| 70 | r.60 | FM7 | G7 | CM7 | FM7 | G7 | C | C7 | |||||||||
| 71 | r.61 | Cm7 | Fm7 | Cm7 | Fm7 | Cm7 | Fm7 | Cm7 | Fm7 | ||||||||
| 72 | r.62 | Ddim | G7♭9 | Ddim | G7♭9 | Ddim | G7♭9 | Ddim | G7♭9 | ||||||||
| 73 | r.63 | Gm | Am7♭5 | D7 | Gm | Am7♭5 | D7 | ||||||||||
| 74 | r.64 | E♭6 | D7 | Gm7 | C7 | E♭M7 | D7 | Gm | |||||||||
| 75 | r.65 | C | Dm | Dm7/G | C | F | Em7 | E♭ | D | ||||||||
| 76 | r.66 | C | Bm7 | Em9 | A7 | Am | D7 | Dm9 | G7sus4 | ||||||||
| 77 | r.67 | C | Am | F | G | C | Am | F | G | ||||||||
| 78 | r.68 | F | Em | Dm | C | Em | Am | F | F/G | G7 | |||||||
| 79 | r.69 | C | G7 | C | G7 | C | |||||||||||
| 80 | r.70 | F | C | G7 | C7 | F | C | G7 | C | ||||||||
| 81 | r.71 | Am | E7 | Am | E7 | Am | E7 | Dm7 | E7 | ||||||||
| 82 | r.72 | Am | E7 | Am | E7 | Dm7 | G7 | Bm7 | E7 | ||||||||
| 83 | r.73 | DM7 | CM7 | F♯m9 | F9 | Em9 | E♭9 | ||||||||||
| 84 | r.74 | DM7 | C♯m7♭5 | Bm7 | Am7 | GM7 | Fm7♭5 | Em9 | A7 | ||||||||
| 85 | r.75 | C | D6 | Dm7 | G7 | C | |||||||||||
| 86 | r.76 | F | Fm | C | F | Fm | G7sus4 | G7 | |||||||||
| 87 | r.77 | C | G | G7 | G | G7 | C | ||||||||||
| 88 | r.78 | C | G7 | C | G7 | Dm7 | G7 | C | |||||||||
| 89 | r.79 | C | CM7 | C7 | F | CM7 | C‡dim | Dm7 | Fm | C | |||||||
| 90 | r.80 | Dm | D♯dim | Em7 | A7 | Dm7 | G7 | C | |||||||||
Chord Fingering List
- symbol: indicates the constituent notes of chords.
★ symbol: Chords shown with an “★” can be played by pressing just the key marked with the “★”.
→ "Performing With the Chord Progression Specified in the Left Hand (Chord Progression off)" (p. 31)
C
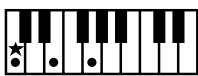
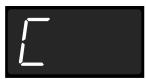
C# / Db


D
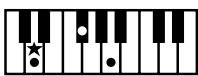
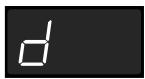
CM7
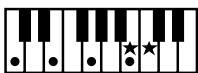
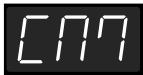
C#M7 / DbM7
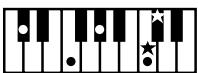
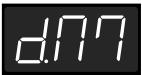
DM7
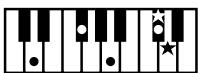
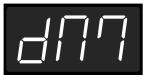
C7
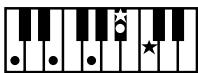
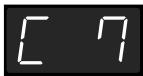
C#7 / Db7
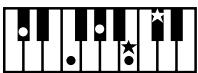
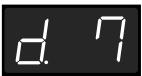
D7

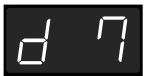
Cm
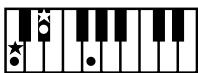
C#m / Dbm
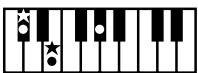
Dm
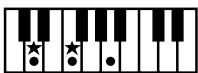
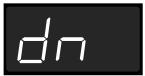
Cm7
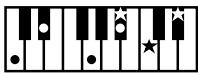
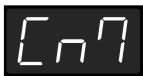
C#7m / Db7m
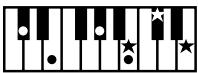
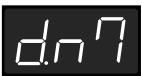
Dm7
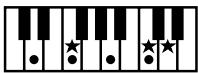
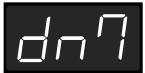
Cdim
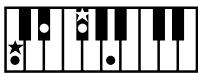
C#dim / Dbdim
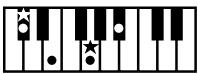
Ddim
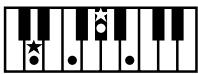

Cm7 (b5)
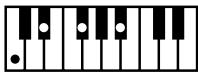
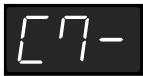
C#m7(b5) / Dbm7(b5)
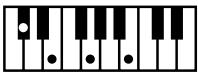
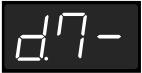
Dm7 (b5)
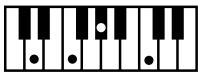
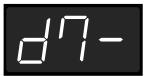
Caug
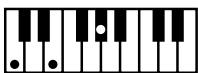
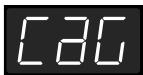
C#aug / Dbaug
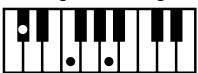
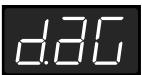
Daug
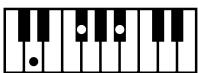
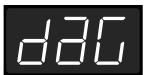
Csus4
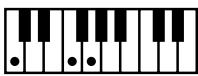
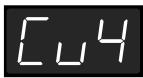
C#sus4 / Dbsus4
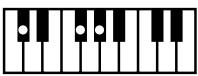
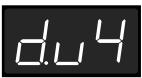
Dsus4
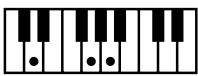
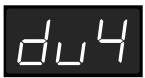
C7sus4
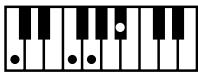
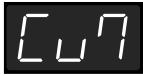
C#7sus4 / Db7sus4
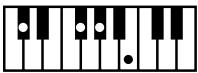
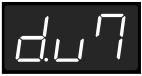
D7sus4
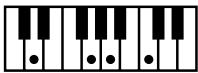
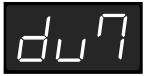
C6
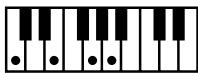
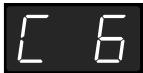
C#6 / Db6
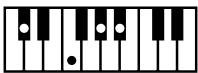
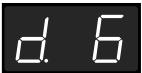
D6
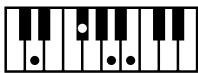
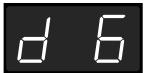
Cm6
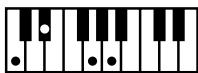
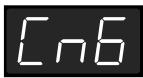
C#m6 / Dbm6
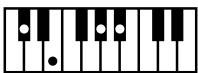
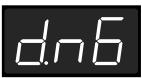
Dm6
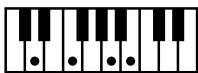
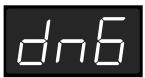
C other
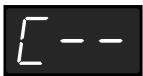
C# other / Dbother
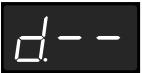
D other
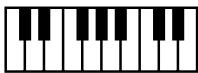
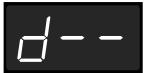
Eb
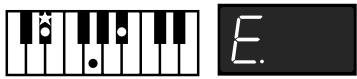
Eb M7
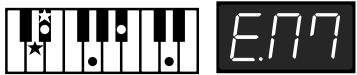
Eb7
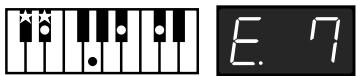
Eb m
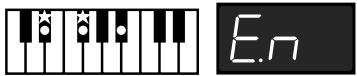
Eb m7
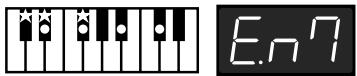
Eb dim
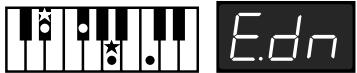
Eb m7 (b5)
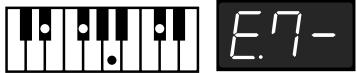
Eb aug
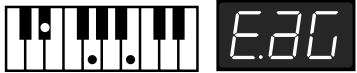
Eb sus4
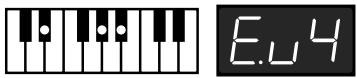
Eb 7sus4
Eb6
Eb m6
Eb other
E
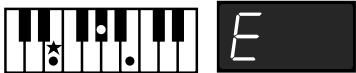
EM7
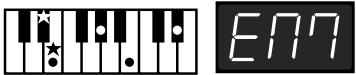
E7
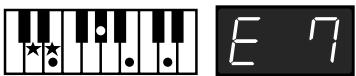
Em
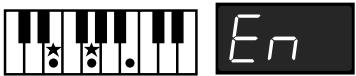
Em7
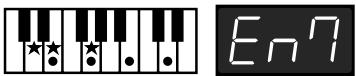
Edim
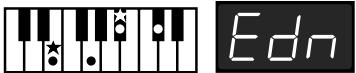
Em7 (b5)
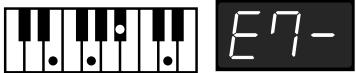
Eaug
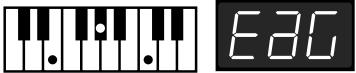
Esus4
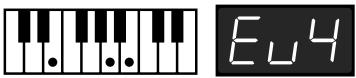
E7sus4
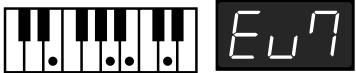
E6
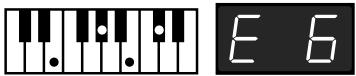
Em6
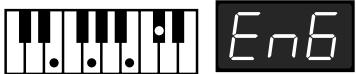
E other
F
FM7
F7

Fm
Fm7
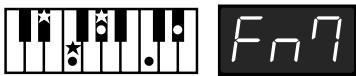
Fdim
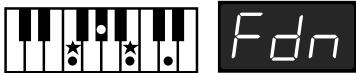
Fm7 (b5)
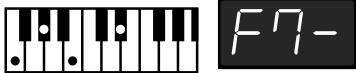
Faug
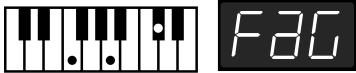
Fsus4
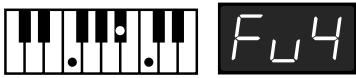
F7sus4
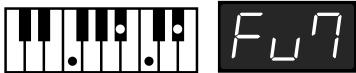
F6
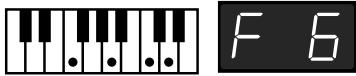
Fm6
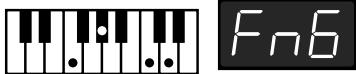
F other
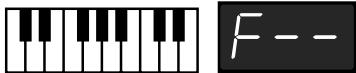
F# / Gb
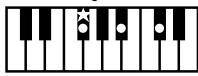
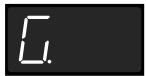
F#M7 / GbM7
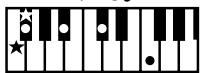
F#7 / Gb7
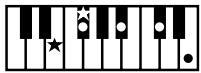
F#m / Gbm
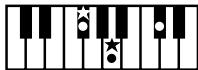
F#m7 / Gbm7
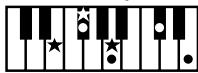
F#dim / Gbdim
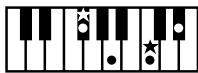
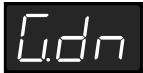
F#m7(b5) / Gbm7(b5)
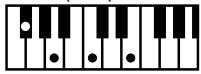
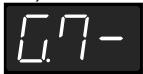
F#aug / Gbaug


F#sus4 / Gbsus4
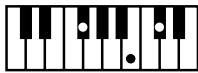
F#7sus4 / Gb7sus4
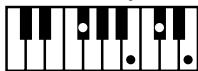
F#6 / Gb6
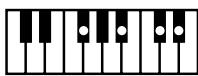
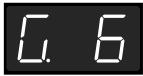
F#m6 / Gb m6
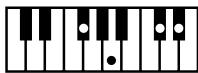
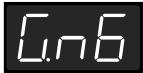
F# other / Gb other
G
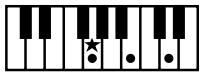

GM7
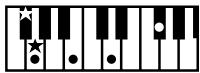
G7
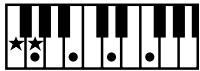
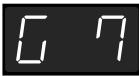
Gm
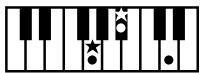
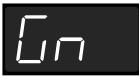
Gm7
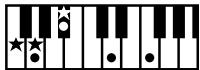
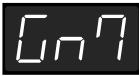
Gdim
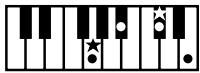
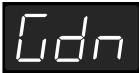
Gm7 (b5)
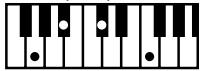
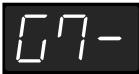
Gaug
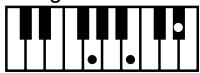
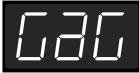
Gsus4
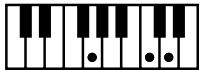
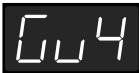
G7sus4
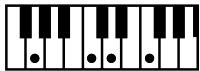
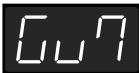
G6
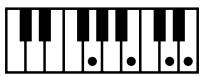
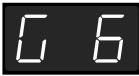
Gm6
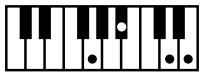
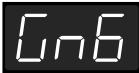
G other
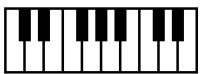
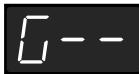
Ab
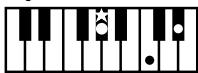

AbM7
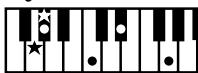
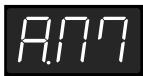
Ab7
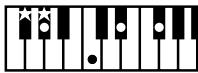
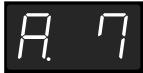
Abm
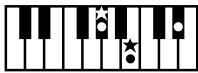
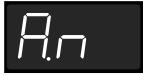
Abm7
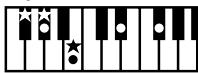
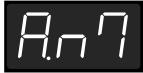
Abdim
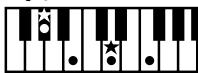
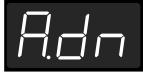
Abm7 (b5)
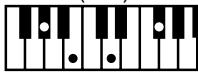
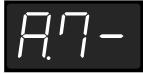
A b aug
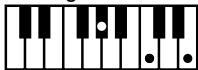
Absus4
Ab7sus4
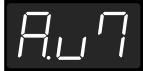
Ab6
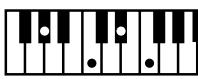
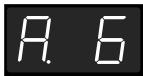
Abm6
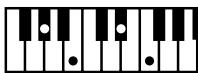
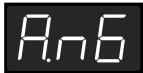
Abother
A
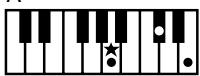

AM7
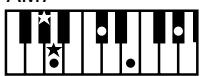
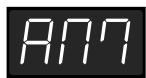
A7
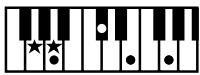
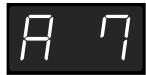
Am
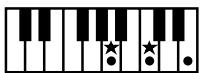
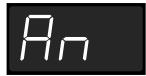
Am7
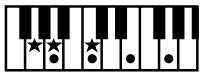
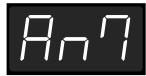
Adim
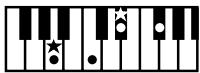
Am7 (b5)
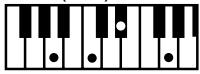
Aaug
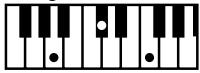
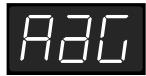
Asus4
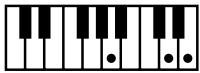
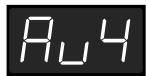
A7sus4
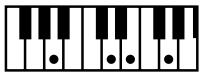
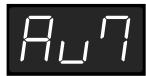
A6
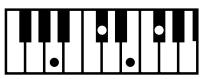
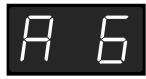
Am6
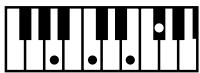
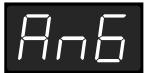
A other
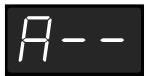
Bb
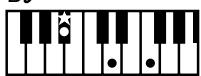

Bb M7
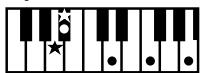
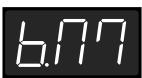
Bb 7
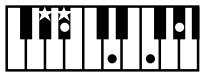
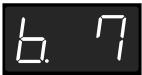
Bb m
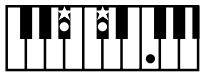
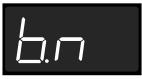
Bb m7
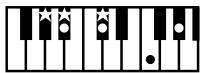
Bb dim
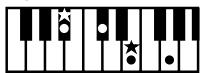
Bb m7 (b5)
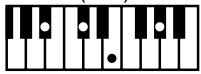
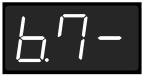
Bb aug
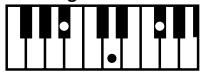
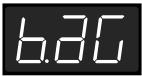
Bb sus4
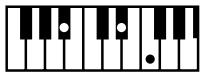

Bb 7sus4
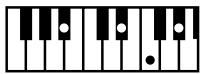
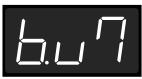
Bb6
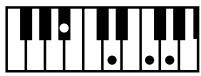
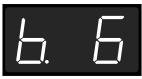
Bbm6
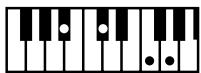
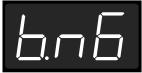
Bb other
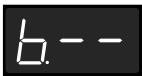
B
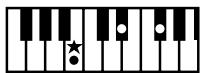

BM7
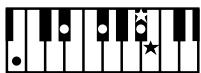
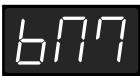
B7
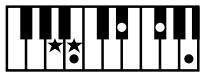
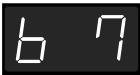
Bm
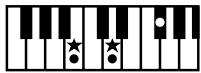
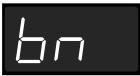
Bm7
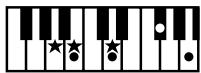
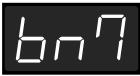
Bdim
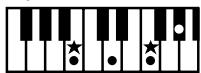
Bm7 (b5)
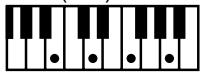
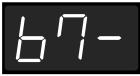
Baug
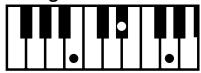
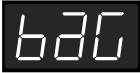
Bsus4
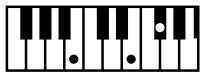
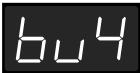
B7sus4
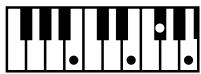
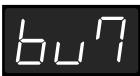
B6
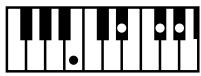
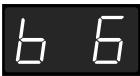
Bm6
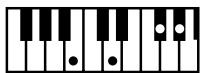
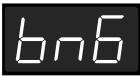
B other
Internal Song List
→ "Listening to Demo Songs" (p. 11)
| Song No. | Song Name | Composer | Copyright |
| S. 01 | Late Night Chopin | F. Chopin/ Arranged by John Maul | © 2002 Roland Corporation |
| S. 02 | L'éveil del l'amour | Masashi & Kazuko Hirashita | © 2000 Roland Corporation |
| S. 03 | Fly Free | J. Maul | © 1998 Roland Corporation |
| S. 04 | Paganini Boogie Variation: Jazz Variation Based on “Caprice No. 24 in A Minor” | N. Paganini/ Arranged by John Maul | © 1998 Roland Corporation |
| S. 05 | Hungarian Rag: Hungarian Dance No. 5 Ragtime Arrangement For Solo Piano | J. Brahms/ Arranged by John Maul | © 1996 Roland Corporation |
| S. 06 | Sonate für Klavier No. 15 | W. A. Mozart | © 1996 Roland Corporation |
| S. 07 | Liebesträume III | F. Liszt | © 2001 Roland Corporation |
| S. 08 | Étude, op.10-3 | F. Chopin | © 2001 Roland Corporation |
| S. 09 | Je te veux | E. Satie | © 1997 Roland Corporation |
| S. 10 | Valse, op.64-1 | F. Chopin | © 2001 Roland Corporation |
| S. 11 | Golliwog's Cake walk | C. Debussy | © 1995 Roland Corporation |
| S. 12 | Fantaisie-Impromptu | F. Chopin | © 2001 Roland Corporation |
| S. 13 | 1ère Arabesque | C. Debussy | © 1995 Roland Corporation |
| S. 14 | An der schönen, blauen Donau | J. Strauss (II) | © 1996 Roland Corporation |
| S. 15 | Auf Flügeln des Gesanges | F. Mendelsshon | © 1996 Roland Corporation |
| S. 16 | Mazurka No.5 | F. Chopin | © 1995 Roland Corporation |
| S. 17 | 1ère Gymnopédie | E. Satie | © 1997 Roland Corporation |
| S. 18 | Étude, op.25-1 | F. Chopin | © 1995 Roland Corporation |
| S. 19 | Clair de Lune | C. Debussy | © 1998 Roland Corporation |
| S. 20 | Étude, op.10-5 | F. Chopin | © 2001 Roland Corporation |
| S. 21 | Doctor Gradus ad Parnassum | C. Debussy | © 1995 Roland Corporation |
| S. 22 | Grande Valse Brillante | F. Chopin | © 1995 Roland Corporation |
| S. 23 | La prière d'une Vierge | T. Badarzewska | © 1996 Roland Corporation |
| S. 24 | Course en Troïka | P. Tchaikovsky | © 1996 Roland Corporation |
| S. 25 | To The Spring | E. Grieg | © 1996 Roland Corporation |
| S. 26 | Valse, op.64-2 | F. Chopin | © 1996 Roland Corporation |
| S. 27 | Radetzky Marsch | J. Strauss (I) | © 1996 Roland Corporation |
| S. 28 | Träumerei | R. Schumann | © 1996 Roland Corporation |
| S. 29 | Moments Musicaux III | F. Schubert | © 1996 Roland Corporation |
| S. 30 | Prélude, op.28-15 | F. Chopin | © 1996 Roland Corporation |
| S. 31 | The harmonious blacksmith | G. Handel | © 1996 Roland Corporation |
| S. 32 | Ungarische Tänze V | J. Brahms | © 1996 Roland Corporation |
| S. 33 | Türkischer Marsch (Beethoven) | L. v. Beethoven | © 1996 Roland Corporation |
| S. 34 | Nocturne No.2 | F. Chopin | © 1996 Roland Corporation |
| S. 35 | Frühlingslied | F. Mendelsshon | © 1996 Roland Corporation |
| S. 36 | Präludium | J. S. Bach | © 1996 Roland Corporation |
| S. 37 | Jägerlied | F. Mendelsshon | © 1996 Roland Corporation |
| S. 38 | Menuet Antique | M. Ravel | © 1996 Roland Corporation |
| S. 39 | Für Elise | L. v. Beethoven | © 1996 Roland Corporation |
| S. 40 | Türkischer Marsch (Mozart) | W. A. Mozart | © 1996 Roland Corporation |
| S. 41 | Ständchen | F. Schubert | © 1996 Roland Corporation |
| S. 42 | Humoreske | A. Dvořák | © 1996 Roland Corporation |
| S. 43 | Blumenlied | G. Lange | © 1996 Roland Corporation |
| S. 44 | Alpenglöckchen | T. Oesten | © 1996 Roland Corporation |
| S. 45 | Menuett G dur (Beethoven) | L. v. Beethoven | © 1996 Roland Corporation |
| S. 46 | Venezianisches Gondellied | F. Mendelsshon | © 1996 Roland Corporation |
| S. 47 | Alpenabendröte | T. Oesten | © 1996 Roland Corporation |
| S. 48 | Farewell to the Piano | L. v. Beethoven | © 1996 Roland Corporation |
| S. 49 | Brautchor | R. Wagner | © 1996 Roland Corporation |
| S. 50 | Battle of Waterloo | W. Anderson | © 1996 Roland Corporation |
| S. 51 | Wiener Marsch | C. Czerny | © 1996 Roland Corporation |
| S. 52 | Le Coucou | L. C. Daquin | © 1996 Roland Corporation |
| S. 53 | Menuett G dur (Bach) | J. S. Bach | © 1992 Roland Corporation |
| S. 54 | Spinnerlied | A. Ellmenreich | © 1996 Roland Corporation |
| S. 55 | Gavotte | F. Gossec | © 1996 Roland Corporation |
| S. 56 | Heidenröslein | G. Lange | © 1996 Roland Corporation |
| S. 57 | Zigeuner Tanz | H. Lichner | © 1996 Roland Corporation |
| S. 58 | La Cinquantaine | G. Marie | © 1996 Roland Corporation |
| S. 59 | Csikos Post | H. Necke | © 1996 Roland Corporation |
| S. 60 | Dolly's Dreaming Awakening | T. Oesten | © 1996 Roland Corporation |
| S. 61 | La Violette | L. Streabbog | © 1996 Roland Corporation |
| S. 62 | Fröhlicher Landmann | R. Schumann | © 1996 Roland Corporation |
| S. 63 | Sonatine op.36-1 (Clementi) | M. Clementi | © 1996 Roland Corporation |
| S. 64 | Sonatine op.20-1 (Kuhlau) | F. Kuhlau | © 1996 Roland Corporation |
| S. 65 | Sonatine No.5 (Beethoven) | L. v. Beethoven | © 1996 Roland Corporation |
* All rights reserved. Unauthorized use of this material for purposes other than private, personal enjoyment is a violation of applicable laws.
Settings Stored in the Setup
Stored Settings
| settings | page |
| The Tone which is selected in the Upper Tone or the Lower Tone | p. 14 to p. 16 |
| The Tone number which is assigned to each Tone button | p. 14 |
| Settings for dual and split play | p. 15 to p. 18 |
| The volume balance for dual and split play | p. 18 |
| Keyboard's touch | p. 19 |
| The velocity when the keyboard touch is set to “Fixed” | p. 20 |
| Reverb switch's on or off, and the depth of reverb | p. 21 |
| The effect type and the depth of effects (*1) | p. 22, p. 40 |
| Key transpose's on or off, and its value | p. 24 |
| Session partoner's settings (*1) | p. 28 to p. 32, p. 43 |
| How the pedal effects are applied | p. 39 |
| Pedals work | p. 39 |
| Setting the part to which effects are applied | p. 41 |
| Octave shift | p. 41 |
| MIDI send channel settings | p. 47 |
| Transferring the program change number | p. 48 |
| Sound Control's on or off | p. 26 |
| Equalizer's on or off | p. 26 |
Not Stored Settings
| settings | page |
| Recorded performance | p. 34 to p. 36 |
| Master tuning | p. 41 |
| Metronome settings | p. 25, p. 42 |
| Temperament | p. 42 |
| Local control | p. 47 |
| MIDI Out mode | p. 48 |
| Pedal Shift | p. 48 |
| USB Driver settings (*2) | p. 50 |
| Panel lock | p. 50 |
| Equalizer Settings (*2) | p. 44 |
*1 Only the settings related to the selected tone or rhythm are stored.
*2 Though not stored in the Setup, the FP-2 remembers the settings even while its power is turned off.
Easy Operation List
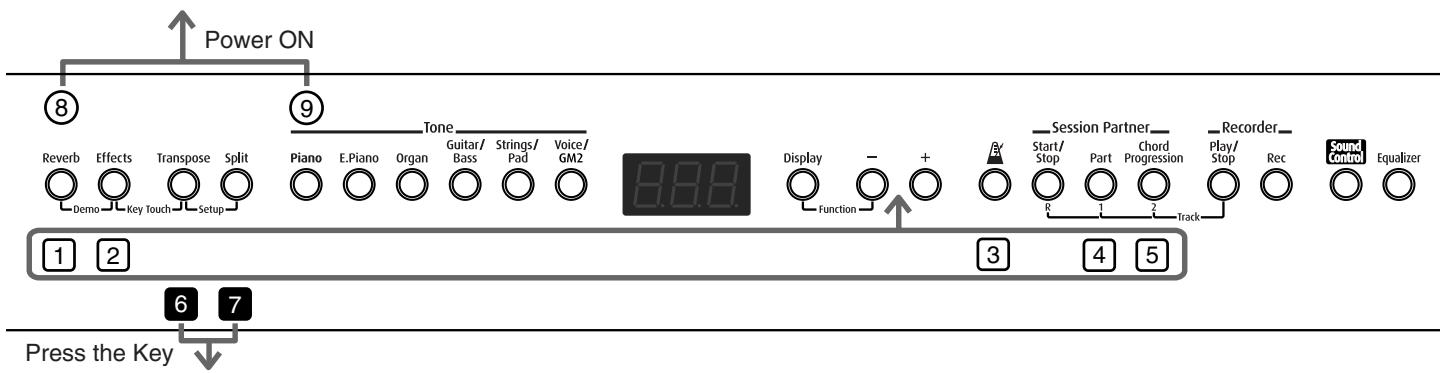
flowchart
graph TD
    A["Power ON"] --> B["8"]
    B --> C["9"]
    C --> D["Tone"]
    D --> E["8.8.8"]
    E --> F["Display"]
    F --> G["-"]
    G --> H["+"]
    H --> I["By"]
    I --> J["Session Partner"]
    J --> K["Start/Stop"]
    J --> L["Part"]
    J --> M["Chord Progression"]
    M --> N["Recorder"]
    N --> O["Play/Stop"]
    N --> P["Rec"]
    P --> Q["Sound Control"]
    P --> R["Equalizer"]
    S["Press the Key"] --> T["6"]
    T --> U["7"]
    U --> V["1"]
    V --> W["2"]
    W --> X["3"]
    X --> Y["4"]
    Y --> Z["5"]
| No. | You want to | Buttons | Page |
| Switch to Function mode | [Display] + [-] | p. 38 | |
| Key Touch | [Effects] + [Transpose] | p. 19 | |
| Demo | [Reverb] + [Effects] | p. 11 | |
| All Song Play | [Display] + [Play/Stop] | p. 12 | |
| Storing settings to Setup | [Transpose] + [Split] + Tone | p. 33 | |
| Recording Chord Progression | [Chord Progression] + [Rec] | p. 32 | |
| Erasing the recorded performance | [Display] + [Rec] | p. 37 | |
| Selecting the Lower Tone in Split play | [Split] + Tone | p. 17 | |
| Hold down the [☐] button and press the [-] or [+] button. | |||
| No. | You want to | Buttons | Page |
| 1 | Depth of the Reverb effect | [Reverb] + [-] [+] | p. 21 |
| 2 | Depth of the Effect | [Effects] + [-] [+] | p. 22 |
| 3 | Volume level of metronome | [Metronome] + [-] [+] | p. 25 |
| 4 | Volume level of Session Partner | [Part] + [-] [+] | p. 28 |
| 5 | Selecting a Chord Progression Pattern | [Chord Progression] + [-] [+] | p. 30 |
| Hold down the [■] button and press the key. | |||
| 6 | Key Transpose | [Transpose] + key | p. 24 |
| 7 | Split Point | [Split] + key | p. 18 |
| Hold down the [○] button and press the [Power] switch. | |||
| 8 | Factory Reset | [Reverb] + Power ON | p. 50 |
| 9 | Panel Lock | [Piano] + Power ON | p. 50 |

text_image
1 2 3 4 5 6 7 8 9 10 Reverb Effects Transpose Split Piano E.Piano Organ Guitar/ Bass Strings/ Pad Voice/GM2 Demo Key Touch Setup Tone 8.8.8 Display - + Function Session Partner_ Start/ Stop Part Chord Play/ Stop Rec Sound Control Equalizer B/ R 1 Z Track| Function mode | |||
| No. | You want to | Buttons | Page |
| 1 | Setting the Part to which Effects are added | [Reverb] | p. 41 |
| 2 | Effect Type | [Effects] | p. 40 |
| 3 | Temperament | [Transpose] | p. 42 |
| 4 | Octave shift | [Split] | p. 41 |
| 5 | Master Tuning | [Piano] | p. 41 |
| 6 | How the Soft Pedal(FC2) effects are applied | [E.Piano] | p. 39 |
| 7 | How the Sostenuto Pedal(FC1) effects are applied | [Organ] | p. 39 |
| 8 | How the Damper Pedal effects are applied | [Guitar/Bass] | p. 39 |
| 9 | Soft Pedal(FC2)s Work | [Strings/Pad] | p. 40 |
| 10 | Sostenuto Pedal(FC1)s Work | [Voice/GM2] | p. 40 |
| 11 | Metronome beat pattern | [(Metronome)] | p. 42 |
| 12 | Setting the Intro and Ending ON or OFF | [Start/Stop] | p. 43 |
| 13 | Root Note of the Chord Progression | [Part] | p. 43 |
| 14 | Fixing a set Chord Progression | [Chord Progression] | p. 43 |
| 15 | Setting the Chord Display ON or OFF | [Play/Stop] | p. 43 |
| 16 | MIDI Out modeMIDI send channel settingsLocal Control | [Rec] | p. 47,p. 48 |
| 17 | Bulk dump,Pedal Shift,Transferring the Program Change | [Sound Control] | p. 48,p. 49 |
| 18 | Equalizer Settings | [Equalizer] | p. 44 |
MIDI Implementation Chart
| Function... | Transmitted | Recognized | Remarks | |
| Basic Channel | Default Changed | 1 1-16 | 1-16 1-16 | |
| Mode | Default Messages Altered | Mode 3 x********** | Mode 3 Mode 3, 4(M=1) | *2 |
| Note Number : True Voice | 15-113********** | 0-127 0-127 | ||
| Velocity | Note ON Note OFF | O x 8n v=64 | O x | |
| After Touch | Key's Ch's | x x | O *1 O *1 | |
| Pitch Bend | O | O *1 | ||
| Control Change | 0, 32 1 5 6, 38 7 10 11 64 65 66 67 71 72 73 74 75 76 77 78 84 91 93 98, 99 100, 101 | O O X X X X O O X O O X X X X X X X O O X | O *1 O *1 O *1 O *1 O *1 O *1 O O O O O O O O O O O O O O O O O O O O O O O O O O O O O O O O O O O O O O O O O O O O O O O O O O O O O O O O O O O O O O O O O O O O O O O O O O O O O O O O O O O O O O O O O O O O O O O O O O O O | Bank select Modulation Portamento time Data entry Volume Panpot Expression Hold 1 Portamento Sostenuto Soft Resonance Release time Attack time Cutoff Decay time Vibrato rate Vibrato depth Vibrato delay Portamento control Effect1 depth Effect3 depth NRPN LSB, MSB RPN LSB, MSB |
| Prog Change : True Number | 0-127********** | O 0-127 | Program number 1-128 | |
| System Exclusive | O | O | ||
| System Common : Song Pos Common : Song Sel : Tune | x x x | x x x | ||
| System Real Time : Commands | O O | x x | ||
| Aux Message : All sound off : Reset all controllers : Local Control : All Notes OFF : Active Sense : Reset | x x x x x O x | O (120, 126, 127) O O O O (123-125) O x | ||
| Notes | *1 O x is selectable by SysEx. *2 Recognized as M=1 even if M≠1. | |||
Mode 1 : OMNI ON, POLY
Mode 2 : OMNI ON, MONO
O: Yes
Mode 3 : OMNI OFF, POLY
Mode 4 : OMNI OFF, MONO
X : No
Main Specifications
FP-2: Digital Piano
88 keys (hammer action keyboard)
Touch Sensitivity
Light/Normal/Heavy/Fixed (adjustable velocity)
Keyboard Mode
Whole
Dual
Split (adjustable split point)
Conforms to General MIDI 2 System
Max. Polyphony
64 voices
Tones
Tones: 6 groups 58 variations (include 4 Drum Sets)
GM2 Tones: 256 + 9 Drum Sets
Effects
Reverb
Multi Effects (10 Types)
Sound Control (3 Types)
4-band Digital Equalizer
Transposition
-6 to +5 (semitone steps)
Temperament
7 types, selectable tonic
Master Tuning
415.3 Hz to 466.2 Hz (0.1 Hz Step)
Rhythms
80 Rhythms
Chord Progression
Automatic or input with keyboard
User Programmable
Metronome
Beat: 2/2, 0/4, 2/4, 3/4, 4/4, 5/4, 6/4, 7/4, 3/8, 6/8, 9/8, 12/8
Volume: 10 levels
Tracks
3 tracks (only Rhythm sound can be recorded to Track [R] button.)
Song
1 song
Tempo
Quarter note = 20 to 250
Resolution
120 ticks per quarter note
Setup
6
Internal Songs
Demo songs: 8
Piano songs: 65
Speakers
8 cm × 12 cm × 2
Rated Power Output
7 W x 2
Display
7 segments, 3 characters (LED)
Connectors
Line Out jacks (L/Mono, R)
Line In jacks (L/Mono, R)
Phones jacks (rear panel) x 2
USB connector (MIDI)
MIDI connectors (In/Out)
Pedal jacks (Damper, Soft*, Sostenuto*)
* Assignable
DC In Jack
Power Supply
DC 9 V (AC adaptor)
Power Consumption
22 W
Dimensions
FP-2 (Without the music stand):
1,291 (W) x 299 (D) x 125(H) mm
50-7/8 (W) x 11-13/16 (D) x 5 (H) inches
Weights
FP-2: 14.6 kg / 32 lbs 3 oz
Accessories
Owner's manual
USB Installation guide
CD-ROM (Roland Digital Piano USB Driver)
AC adaptor
Power Cord
Music Stand / 2 screws for the music stand
Pedal (DP-8)
Spacer
Options
Keyboard Stand (FPS-11A)
Pedal (DP-2/8)
Expression Pedal (EV-5)
MIDI Implementation
* In the interest of product improvement, the specifications and/or appearance of this unit are subject to change without prior notice.
Index
A
AC adaptor 8
All Song Play 12
B
Balance knob 18
Beat (Metronome) 42
Bend Down 39
Bend Up 39
Bulk Dump 49
C
Chord Fingering List 62
Chord Progression
Automatically 28
Fixing 43
Recording 32
Root Note 43
Selecting pattern 30
Specifying the chords 31
Chord Progression button 30–32, 36, 43
Chord Progression off .... 31
Chord Progression Pattern List 60
Connecting
Audio Equipment 44
MIDI 46
Power 8
USB 45
Cord hook 8
D
Damper jack 9
Damper Pedal 9,39
Demo Song 11
Display 53
Display button 12, 25, 29–30, 34, 37–38
Dual Play 15
E
E.Piano button 39
Easy Operation List 69
Effects 22, 39, 41
Pedal 39
Type 40
Effects button 11, 19–20, 22, 40
Ending 28,43
Equalizer 26,44
Equalizer button 26,44
Erasing 37
Expression Pedal 39
F
Factory Reset 50
Fill In 29
Function Mode 38
G
General MIDI 45
General MIDI 2 45
Guitar/Bass button 39
H
Headphones 10
|
Including pedal 9
Internal Song 12
Recording 36
Internal Song List 66
Intro 28,43
K
Key Transpose 24
Keyboard Touch 19-20
L
Leading bass 39
Local Control 47
Lower Tone 15-16
M
Master Tuning 41
Messages 53
Metronome 25
Beat 42
Volume 25
Metronome button 25,42
MIDI 46
MIDI Out Mode 48
MIDI Send Channel 47
MIDI Sound Module 47
Modulation 39
Music Stand 9
Muting 13
0
Octave Shift 41
Organ button 39
P
Panel Lock 50
Part button 29,36,43
Pedal 9,39
Effects 39
Works 39
Pedal Shift 48
Phones jack 10
Piano button 41,50
Play/Stop button 34, 43
Playback All Songs .... 12
Demo song 11
Each part separately .... 13
Internal song 12
Power 8,10
Power Cord 8
Program Change 48
R
Rec button 34-37, 47-48
Recording 34
Along with internal songs 36
Only what you play on the keyboard 34
Performance using Session Partner 35
Selected Tracks 36
Reverb button 11, 21, 41, 49–50
Reverb Effect 21
Rhythm 27
selecting 29
Rhythm List 59
Rotary Effect 23
S
Sequencer 47
Session Partner 27–28, 43
Recording 35
Setup 33
Soft Pedal 9,39–40
Soft(FC2) jack 9,39
Sostenuto Pedal 9,39–40
Sostenuto(FC1) jack 9,39
Sound Control 26
Sound Control button 26, 48–49
Split button 16, 33, 41, 49
Split Play 16
Split Point 18
Standard pitch 41
Start/Stop button 28,36,43
Start/Stop of Session Partner 39
Strings/Pad button 40
Sympathetic Resonance 9,40
T
Temperament 42
Touch sensitivity 19–20
Track Button .... 13, 36 Recording .... 36–37
Transpose 24
Transpose button 19–20, 24, 33, 42
Troubleshooting 51
Tuning 41-42
U
Upper Tone 15–16
USB 50
USr 35
V
Velocity 20
V-LINK 49
Voice/GM2 button 40
Volume Metronome 25
Part 28
Volume level 10
Volume Balance 18
Volume knob 10
AFRICA
EGYPT
Al Fanny Trading Office 9, EBN Hagar A1 Askalany Street,
ARD E1 Golf, Heliopolis, Cairo 11341, EGYPT
Cairo 11541, LGP TEL: 20-2-417-1828
REUNION
Royal Cape Park, Unit 24 Londonderry Road, Ottery 7800 Cape Town, SOUTH AFRICA TEL: (021) 799 4900
ASIA
CHINA
Roland Shanghai Electronics Co., Ltd. 5F. No.1500 Pingliang Road Shanghai 200090, CHINA TEL: (021) 5580-0800
Roland Shanghai Electronics Co., Ltd.
(BEIJING OFFICE) 10F. No.18 3 Section Anhuaxili Chaoyang District Beijing 100011 CHINA
TEL: (010) 6426-5050
HONG KONG
Tom Lee Music Co., Ltd. Service Division 22-32 Pun Shan Street, Tsuen Wan, New Territories, HONG KONG
TEL: 2415 0911
Parsons Music Ltd. 8th Floor, Railway Plaza, 39 Chatham Road South, T.S.T, Kowloon, HONG KONG TEL: 2333 1863
INDIA
Rivera Digitec (India) Pvt. Ltd. 409, Nirman Kendra Mahalaxmi Flats Compound Off. Dr. Edwin Moses Road, Mumbai-400011, INDIA TEL: (022) 2493 9051
INDONESIA
PT Citra IntiRama J1. Cideng Timur No. 15J-150 Jakarta Pusat INDONESIA TEL: (021) 6324170
KOREA
Cosmos Corporation 1461-9, Seocho-Dong, Seocho Ku, Seoul, KOREA TEL: (02) 3486-8855
MALAYSIA
Roland Asia Pacific Sdn. Bhd. 45-1, Block C2, Jalan PJU 1/39, Dataran Prima, 47301 Petaling Jaya, Selangor, MALAYSIA TEL: (03) 7805-3263
PHILIPPINES
G.A. Yupangco & Co. Inc. 339 Gil J. Puyat Avenue Makati, Metro Manila 1200, PHILIPPINES TEL: (02) 899 9801
SINGAPORE
SWEE LEE MUSIC COMPANY PTE. LTD. 150 Sims Drive, SINGAPORE 387381 TEL: 6846-3676
SRI LANKA
Penguin Electronics (Pvt) Ltd.
115, Maya Avenue,
Colombo 06, SRI LANKA
TEL: (11) 2552376
TAIWAN
ROLAND TAIWAN ENTERPRISE CO., LTD. Room 5, 9fl. No. 112 Chung Shan N.Road Sec.2, Taipei, TAIWAN, R.O.C. TEL: (02) 2561 3339
THAILAND
Theera Music Co., Ltd. 330 Soi Verng NakornKasem, New Road, Sumpantawongse, Bangkok 10100, THAILAND TEL: (02) 224-8821
VIETNAM
SAIGON MUSIC DISTRIBUTOR (TAN DINH MUSIC) 138 Tran Quang Khai Street Dist. 1, Ho Chi Minh City VIETNAM TEL: (08) 848-4068
AUSTRALIA/ NEW ZEALAND
AUSTRALIA/
NEW ZEALAND
Roland Corporation Australia Pty., Ltd. 38 Campbell Avenue Dee Why West. NSW 2099 AUSTRALIA
For Australia Tel: (02) 9982 8266 For New Zealand Tel: (09) 3098 715
CENTRAL/LATIN AMERICA
ARGENTINA
Instrumentos Musicales S.A. Av.Santa Fe 2055 (1123) Buenos Aires ARGENTINA TEL: (011) 4508-2700
BARBADOS
A&B Music Supplies LTD 12 Webster Industrial Park Wildey, St.Michael, Barbados TEL: (246)430-1100
BRAZIL
Roland Brasil Ltda. Rua San Jose, 780 Sala B Parque Industrial San Jose Cotia - Sao Paulo - SP, BRAZIL TEL: (011) 4615 5666
CHILE
Comercial Fancy II S.A. Rut.: 96.919.420-1 Nataniel Cox #739, 4th Floor Santiago - Centro, CHILE
TEL: (02) 688-9540
COLOMBIA
Centro Musical Ltda. Cra 43 B No 25 A 41 Bododega 9 Medellin, Colombia TEL: (574)3812529
COSTA RICA
JUAN Bansbach Instrumentos Musicales Ave.1. Calle 11, Apartado 10237, San Jose, COSTA RICA TEL: 258-0211
CURACAO
Zeelandia Music Center Inc. Orionweg 30
Curacao, Netherland Antilles TEL:(305)5926866
DOMINICAN REPUBLIC
Instrumentos Fernando Giraldez Calle Proyecto Central No.3 Ens.La Esperilla Santo Domingo, Dominican Republic TEL:(809) 683 0305
ECUADOR
Mas Musika Rumichaca 822 y Zaruma Guayaquil - Ecuador TEL:(593-4)2302364
EL SALVADOR
OMNI MUSIC 75 Avenida Norte y Final Alameda Juan Pablo II, Edificio No.4010 San Salvador, EL SALVADOR TEL: 262-0788
GUATEMALA
Casa Instrumental
Calzada Roosevelt 34-01, zona 11
Ciudad de Guatemala
Guatemala
TEL:(502) 599-2888
HONDURAS
Almacen Pajaro Azul S.A. de C.V. BO.Paz Barahona 3 Ave.11 Calle S.O San Pedro Sula, Honduras TEL: (504) 553-2029
MARTINIQUE
155, New National Road
Patras 26442, GREECE
TEL: 2610 435400
HUNGARY
Roland East Europe Ltd.
Warehouse Area 'DEPO' Pf.83
H-2046 Torokbalint,
HUNGARY
TEL: (23) 511011
IRELAND
Roland Ireland
G2 Calmount Park, Calmount Avenue, Dublin 12
Republic of IRELAND
TEL: (01) 4294444
ITALY
Roland Italy S. p. A. Viale delle Industrie 8, 20020 Arese, Milano, ITALY TEL: (02) 937-78300
NORWAY
Roland Scandinavia Avd.
Kontor Norge
Danvik Center 28, 2 tr
S-131 30 Nacka SWEDEN
TEL: (0)8 702 00 20
SWITZERLAND
Roland (Switzerland) AG
Atlantic Close, Swansea
Enterprise Park, SWANSEA
SA7 9FJ,
UNITED KINGDOM
TEL: (01792) 702701
MIDDLE EAST
BAHRAIN
Moon Stores
No.16, Bab Al Bahrain Avenue,
P.O.Box 247, Manama 304,
State of BAHRAIN
TEL: 17 211 005
IRAN
MOCO INC.
No.41 Nike St., Dr.Shariyati Ave.,
Roberoye Cerahe Mirdamad
Tehran, IRAN
TEL: (021) 285-4169
ISRAEL
Halilit P. Greenspoon & Sons
Ltd.
8 Retzif Ha'aliya Hashnya St.
Tel-Aviv-Yafo ISRAEL
TEL: (03) 6823666
JORDAN
Abdullah Salem Street,
Safat, KUWAIT
TEL: 243-6399
LEBANON
Chahine S.A.L.
Gerge Zeidan St., Chahine
Bldg., Achrafieh, P.O.Box: 16-
5857
Beirut, LEBANON
TEL: (01) 20-1441
OMAN
TALENTZ CENTRE L.L.C.
Malatan House No.1
Al Noor Street, Ruwi
SULTANATE OF OMAN
TEL: 2478 3443
QATAR
Al Emadi Co. (Badie Studio &
Stores)
P.O. Box 62, Doha, QATAR
TEL: 4423-554
SAUDI ARABIA
aDawliah Universal
Electronics APL
Corniche Road, Aldossary
Bldg., 1st Floor, Alkhobar,
SAUDI ARABIA
P.O.Box 2154, Alkhobar 31952
SAUDI ARABIA
TEL: (03) 898 208
SYRIA
Technical Light & Sound
Center
Rawda, Abdul Qader Jazairi St.
Bldg. No. 21, P.O.BOX 13520,
Damascus, SYRIA
TEL: (011) 223-538
TURKEY
ZUHAL DIS TICARET A.S.
Galip Dede Cad. No.37
Beyoglu - Istanbul / TURKEY
TEL: (0212) 249 85 10
U.A.E.
Zak Electronics & Musical
Instruments Co. L.L.C.
Zabeel Road, Al Sherooq Bldg.,
No. 14, Grand Floor, Dubai,
U.A.E
TEL: (04) 3360715
NORTH AMERICA
Roland Canada Ltd.
(Head Office)
5480 Parkwood Way
Richmond B. C., V6V 2M4
CANADA
TEL: (604) 270 6626
Roland Canada Ltd.
(Toronto Office)
170 Admiral Boulevard
Mississauga On L5T 2N6
CANADA
TEL: (905) 362 9707
U. S. A.
Roland Corporation U.S.
5100 S. Eastern Avenue

For EU Countries
This product complies with the requirements of European Directive 89/336/EEC.
For the USA
FEDERAL COMMUNICATIONS COMMISSION RADIO FREQUENCY INTERFERENCE STATEMENT
This equipment has been tested and found to comply with the limits for a Class B digital device, pursuant to Part 15 of the FCC Rules. These limits are designed to provide reasonable protection against harmful interference in a residential installation. This equipment generates, uses, and can radiate radio frequency energy and, if not installed and used in accordance with the instructions, may cause harmful interference to radio communications. However, there is no guarantee that interference will not occur in a particular installation. If this equipment does cause harmful interference to radio or television reception, which can be determined by turning the equipment off and on, the user is encouraged to try to correct the interference by one or more of the following measures:
– Reorient or relocate the receiving antenna.
– Increase the separation between the equipment and receiver.
- Connect the equipment into an outlet on a circuit different from that to which the receiver is connected.
- Consult the dealer or an experienced radio/TV technician for help.
This device complies with Part 15 of the FCC Rules. Operation is subject to the following two conditions:
(1) This device may not cause harmful interference, and
(2) This device must accept any interference received, including interference that may cause undesired operation.
Unauthorized changes or modification to this system can void the users authority to operate this equipment.
This equipment requires shielded interface cables in order to meet FCC class B Limit.
For Canada
NOTICE
This Class B digital apparatus meets all requirements of the Canadian Interference-Causing Equipment Regulations.
AVIS
This owner's manual is printed on recycled paper.