
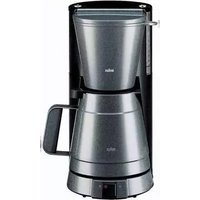
PurAroma KF 7020 - Coffee machine BRAUN - Free user manual and instructions
Find the device manual for free PurAroma KF 7020 BRAUN in PDF.
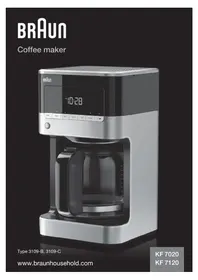


| Product type | Filter coffee machine |
| Brand | Braun |
| Model | PurAroma KF 7020 |
| Dimensions (W x H x D) | 27 x 35 x 23 cm |
| Weight | Approximately 3.5 kg |
| Power supply | 220-240 V, 50-60 Hz, 1200 W |
| Carafe capacity | 1.25 L (10 cups) |
| Coffee type | Ground or beans (built-in grinder) |
| Automatic shut-off function | Yes, after 2 hours |
| Keep warm | Yes, hot plate |
| Noise level | Approximately 65 dB(A) during grinding |
| Water filter | Yes, removable filters (model not specified) |
| Maintenance and cleaning | Removable parts dishwasher safe (carafe, filter holder, reservoir) |
| Descaling | Recommended every 3 months with suitable descaler |
| Safety | Automatic shut-off, overheat protection, lockable lid |
| Spare parts and repairability | Carafe, filter holder, reservoir, water filter available online |
| Color | Black and stainless steel |
| Warranty | 2 years |
| General information | Filter coffee machine with integrated grinder for fresh aroma |
Frequently Asked Questions - PurAroma KF 7020 BRAUN
User questions about PurAroma KF 7020 BRAUN
0 question about this device. Answer the ones you know or ask your own.
Ask a new question about this device
Download the instructions for your Coffee machine in PDF format for free! Find your manual PurAroma KF 7020 - BRAUN and take your electronic device back in hand. On this page are published all the documents necessary for the use of your device. PurAroma KF 7020 by BRAUN.
USER MANUAL PurAroma KF 7020 BRAUN

Our products are engineered to meet the highest standards of quality, functionality and design. We hope you thoroughly enjoy the new Braun appliance.
Please read instructions carefully and completely before using the appliance.
Caution
- This appliance can be used by children aged from 8 years and above and persons with reduced physical, sensory or mental capabilities or lack of experience and knowledge if they have been given supervision or instruction concerning use of the appliance in a safe way and understand the hazards involved.
- Children shall not play with the appliance.
- Cleaning and user maintenance shall not be made by children unless they are older than 8 years and supervised.
- Children younger than 8 years shall be kept away from the appliance and its mains cord.
- If the supply cord is damaged, it must be replaced by the manufacturer, its service agent or similarly qualified persons in order to avoid a hazard.
- This appliance is designed for household use only and for processing normal household quantities.
- Only use the appliance with water and for preparing coffee to avoid any damage to the appliance.
- Before plugging into a socket, check whether your voltage corresponds with the voltage printed on the bottom of the appliance.
- Avoid touching hot surfaces, especially the keep warm plate. Never let the cord come in contact with the keep warm plate.
- Do not put the glass carafe on other heated surfaces (such as stove plates, hot trays, etc.).
- The keep warm plate is subject to residual heat after the appliance is switched off.
- Do not use the glass carafe in the microwave.
- Before you start preparing a new pot of coffee, always allow the coffee maker to cool down for approx. 5 minutes (switch off the appliance), otherwise steam can develop when filling the water tank with cold water. Always use cold water to make coffee.
- Never immerse the unit in water or other liquids.
(A) Description
1 On/Off button 2 LED control panel and clock 3 Water reservoir incl. water level indicator (inside) 4 Filter basket with anti-drip system 5 Reservoir cover 6 Keep warm plate 7 Cord storage 8 Lid 9 Glass carafe
Maximum water capacity: 12 cups
LED Control Panel
a. start
Use to start the brew and keep warm cycles.
b. timer
Use to program the start time of the brew cycle. The AUTO ON time can be set for any time, day or night.
c. calc
Use to activate the descaling mode and set the water hardness level.
d. clock
Displays time of day and use to set time for automatic functions (timer).
e. set
Use to program the time of day, timer and water hardness.
f. strong
Use to select the brew strength (strong/normal).
g. 1-4
Use to brew smaller amounts of coffee (up to 4 cups).
Switching On/Off
- To switch on the coffee maker, press the On/Off button (1). The green indicator light will illuminate indicating that the coffee maker is in «ready» mode.
- To switch off the coffee maker, press the On/Off button again. The green indicator light will turn off indicating that the coffee maker is in «stand by» mode.
Auto Off Function
For your convenience and also additional safety, the appliance will switch off automatically 40 minutes after the brewing cycle is complete.
Programming the Coffee Maker
Note: The device features a 60-second power loss back-up system that remembers all programmed information, including time of day and auto on times in the event of a tripped breaker, unit is unplugged, or power failure.
Setting the Time
When the coffee maker is first plugged in or when power is restored after an interruption, the LED control panel will start flashing 02:00.
- To set the hour, press the CLOCK button (d) for a minimum of 3 seconds. The LED control panel will start flashing (24h).
- Press the SET button to select the time format (24h or 12h). To save the time format and to set the hours, press the CLOCK button. The hours will start flashing.
- Press and hold the SET button (e) to scroll through numbers. Release the button once the desired hour is displayed.
- To set the minutes, press the CLOCK button. The LED control panel will start flashing.
- Press and hold the SET button (e) to scroll through numbers. Release the button once the desired hour is displayed.
- Press the CLOCK button again to save the desired time.
- If during the setting process, no button is pressed for 10 seconds the time currently set will be saved.
Before programming, always switch on the coffee maker.
Programming and Activating the Timer
- Press the TIMER button (b) for a minimum of 3 seconds.
- The hours in the LED panel will start flashing.
- Press and hold the SET button (e) to scroll through numbers. Release the button once the desired hour is displayed.
- To set the minutes, press the TIMER button. The LED control panel will start flashing.
- Press and hold the SET button (e) to scroll through numbers. Release the button once the desired hour is displayed.
- Press the TIMER button again to save the desired time.
- The pre-set auto on time will disappear after 3 seconds and the time of day will show on the LED control panel.
- If during the setting process, no button is pressed for 10 seconds, the auto on time currently set will be saved.
This function can only be activated if the auto on time and the time of the day have been set.
To activate the timer function:
- Press the TIMER button (b). The green LED above the button will illuminate and the coffee maker will start to brew at the pre-set auto on time.
- The pre-set auto on time disappears after 3 seconds.
- When the appliance starts brewing, the green LED START will continually flash and the LED TIMER turns off.
- Press the TIMER button (b) again to switch off the function: the green LED light will disappear.
NOTE: The timer function remains activated even when the appliance has been switched off (1).
Setting the Water Hardness Level
Set the water hardness level on the coffee maker to the water hardness level for your local area.
- Press the CALC button (c) for a minimum of 3 seconds.
- The default setting (h3) will start flashing.
- Press the SET button (e) to scroll through the options (h1 = soft, h2 = normal, h3 = hard) and select the appropriate water hardness level.
- Press the CALC button again to save the hardness level.
- The pre-set water hardness disappears after 3 seconds and the time of day will show on the LED control panel.
Brew Strength Selector
- Press the STRONG button (f) to select brew strength «strong».
- The green LED above the button will illuminate.
1 – 4 Cups Setting
- Press the «1-4» button (g). The green LED above the button will illuminate.
- Press START (a) to start brewing.
- The green LED turns off after the brewing cycle is finished.
(B) Making Coffee
Before using the coffee maker for the first time, or after a long period of not using it, run the coffee maker through a complete brew cycle without ground coffee. Use a full carafe (12 cups) of fresh cold water. This will remove any dust from the manufacturing process or residues that have remained in the unit.
- Open the reservoir cover (5).
- When filling the water reservoir (3) with fresh cold water, refer to the carafe height markings or the water level indicator (inside the water reservoir) and fill to the desired number of cups.
- To prepare the exact amount of coffee for the Braun thermal mug (available separately as accessory), fill to the corresponding water mark (330 ml) inside the reservoir.
- Insert a paper filter (cone type # 4) in the filter basket (4).
- Alternatively you can use the gold tone permanent filter which is available separately.
- Add the desired amount of ground coffee, corresponding to the number of cups being brewed. We recommend using 1 coffee measuring scoop of ground coffee per cup, but use more or less to suit your taste.
- Close the water reservoir and place the carafe in its position on the keep warm plate (6).
- Plug the cord into an electrical outlet.
- Press the START button (a) to start brewing immediately or press TIMER (b) to commence brewing at the pre-set time.
- During brewing, the indicator light will flash continuously. Once the brewing cycle is complete, the light will turn solid green indicating the coffee maker is in «keep warm» mode.
NOTE: The anti-drip system halts the flow of coffee from the filter basket when the carafe is removed, so a cup can be poured before brewing is finished. The carafe should be returned to the keep warm plate (maximum 20 seconds) to prevent the filter basket from overflowing.
For Best Results
- When using paper filters, be sure that it is completely open and fully inserted in the basket. It may help to fold and flatten the seams of the paper filter beforehand.
- Once the coffee has finished brewing, stir it before serving to blend the flavors. The coffee at the bottom of the carafe will be somewhat stronger than the coffee at the top.
Note: The maximum amount of ground coffee the coffee maker can take is 11 coffee measuring scoops. Exceeding this amount may cause overflow.
Descaling
For the best performance from your Braun coffee maker, descale the unit when the LED CALC (c) lights up solid green. This indicates it is time to descale your coffee maker.
To set water hardness see «Setting the Water Hardness Level».
The removal of built-up calcium deposits from the water reservoir will help extend the life of your coffee maker and keep your coffee tasting great. Frequency will depend upon the hardness of your tap water and how often you use the coffee maker.
You can use a commercially available decalcifying agent not affecting aluminum.
We recommend using the Braun Descaling Solution (can be purchased in stores, through the Braun website, or by calling Customer Service).
Note: The entire cleaning cycle including rinsing can take up to 45 minutes to complete.
- Follow the package instructions of the decalcifying agent.
- Place the empty carafe in its position on the keep warm plate (6).
- Press the CALC button (c) to select the descaling program.
- The green LED above the button will start flashing.
- To start the descaling program press START (a). The green LED is still flashing.
- When the descaling program has been completed, the green LED (c) will turn off.
- Discard the cleaning solution and rinse the carafe thoroughly with clean water.
- Fill the water reservoir with a full carafe (12 cups) of clean, fresh water. Run the coffee maker through two complete brew cycles to flush the unit after descaling. Use a full carafe of fresh cold water each time.
- Repeat the procedure as many times as necessary in order to reduce the brewing time per cup to a normal level.
(C) Cleaning and Maintenance
- Always turn coffee maker off and remove the plug from the electrical outlet before cleaning.
- Lift up the reservoir cover. Remove the paper filter and discard the ground coffee.
- Remove the carafe from the keep warm plate.
- The filter basket, carafe and lid are dishwasher-safe.
- Do not use any scouring agents or harsh cleansers on any part of the coffee maker.
- Never immerse the unit in water or other liquids.
- To clean base, simply wipe with a clean, damp cloth and dry before storing.
- Do not put any water in the unit once the filter basket has been removed.
- Fingerprints and other blemishes on the housing can be wiped off with soap and water or a non-abrasive cleaning solution.
- Do not dry the inside of the water reservoir with a cloth, as lint may remain.
Please do not dispose of the product in the household waste at the end of its useful life. Disposal can take place at a Braun Service Centre or at appropriate collection points provided in your country.

Subject to change without notice
Troubleshooting Guide
| Problem Potential Causes Solution | ||
| The ON/OFF switch does not light up. | The appliance is unplugged.There was a power outage.ON/OFF button was not pressed. | Plug unit in.Wait for power to be restored.Press ON/OFF button. |
| Display does not show a time. | The appliance is unplugged.There was a power outage. | Plug unit in.Wait for power to be restored. |
| Display flashes 02:00. Initial operation or there was a power outage. | Set clock. | |
| It is not possible to set the AUTO ON time. | ON/OFF button is not pressed.Clock has not been set. | Press ON/OFF button.Set clock time. |
| It is not possible to activate the timer. | ON/OFF button was not pressed.AUTO ON time has not been set. | Press ON/OFF button.Set AUTO ON time. |
| The green LED light above. START does not light up. | The appliance is unplugged.There was a power outage.ON/OFF button was not pressed and the START button was not pressed. | Plug unit in.Wait for power to be restored press ON/OFF button, followed by START. |
| Coffee is not brewing. The appliance is unplugged.There was a power outage.START button was not pressed. | Plug unit in.Wait for power to be restored.Press START button.Pour water into the reservoir. | |
| There is no water in the reservoir. | ||
| The coffee maker is only brewing water. | There are no coffee grounds in the filter basket. | Add the desired amount of coffee to the filter. |
| The coffee maker is overflowing. | The filter basket is not properly inserted. | Insert the filter basket correctly. |
| The carafe was not properly positioned on the keep warm plate. | Be sure the carafe is centered directly under the filter basket. | |
| The lid is not on the carafe. Place the lid on the carafe. | ||
| Carafe was removed for more than 20 seconds while the unit is brewing. | Carafe should be replaced promptly after removing. | |
| Using too much coffee grounds. Remove | ve filter from the filter basket.If using a paper filter, replace with new one.Restart the coffee brewing process with proper amount of coffee grounds. | |
| Using coffee that is too finely. Use only | coffee that is ground for drip coffee makers. | |
| Coffee is flowing out of the filter basket onto the keep warm plate when the carafe is not in place. | The filter basket spring popped out during cleaning. | Reattach the spring to the filter basket. |
| Coffee is not hot. | There was a power outage. Wait for power to be restored. | |
| 40min auto shut off has been activated. | ---- | |
| There are coffee grounds at the bottom of the carafe. | The paper filter was not inserted correctly into the filter basket. | Rinse filter basket, set filter into the filter basked and restart brewing. |
| Paper filter collapsed. R | emove filter, rinse filter basket and restart brewing with a new paper filter. | |
| Display shows «E01», «E02» or «E03». | ---- Contact Braun Customer Service. | |
For UK Only
Guarantee Information
All Braun Household products carry a minimum guarantee period of two years. The rights and benefits under this guarantee are additional to your statutory rights which are not affected.
Please keep your receipt as this will form the basis of your guarantee.
In the unlikely event of a breakdown you have access to professional help from our team simply by calling: 02392 392333
For service in the Republic of Ireland please call: 012475471
Braun Household undertakes within the specified period to repair or replace any part of the appliance, free of charge (with the exception of any glass or porcelain-ware incorporated in the product) found to be defective provided that;
• We are promptly informed of the defect. - The product is used and maintained in accordance with the User Instructions. - The appliance has not been altered in any way or subjected to misuse or repair by a person other than an authorised service agent for Braun Household. - No rights are given under this guarantee to a person acquiring the appliance second hand or for commercial or communal use. - Any repaired or replaced appliance will be guaranteed on these terms for the unexpired portion of the guarantee. - The need for repair has not been caused by insufficient aftercare or cleaning: or damage caused by the chemical or electrochemical effects of water.
Under no circumstances shall the application of this guarantee give rise to the complete replacement of the appliance or entitle the consumer to damages.
Braun Household, New Lane, Havant, Hampshire PO9 2NH
www.braunhousehold.co.uk
Thank You for choosing Braun. We are confident that you will get excellent service from this product.
TO IMPROVE YOUR EXPERIENCE
Register now at www.braunhousehold.co.uk By registering we may send you from time to time details on exclusive offers, promotions, recipes and inside tips.
Country of origin: China
Year of manufacture
To determine the year of manufacture, refer to the 5-digit production code located near the type plate. The first digit of the production code refers to the last digit of the year of manufacture.
The next 2 digits refer to the calendar week in the year of manufacture.
And the last 2 digits show the print date automatically calculated since 1992.
Example: 30421 - The product was manufactured in week 4 of 2013.
Country of origin: China

- CAUTION
- DESCRIPTION
- LED CONTROL PANEL
- SWITCHING ON/OFF
- AUTO OFF FUNCTION
- PROGRAMMING THE COFFEE MAKER
- SETTING THE TIME
- BEFORE PROGRAMMING, ALWAYS SWITCH ON THE COFFEE MAKER
- PROGRAMMING AND ACTIVATING THE TIMER
- TO ACTIVATE THE TIMER FUNCTION
- SETTING THE WATER HARDNESS LEVEL
- BREW STRENGTH SELECTOR
- CUPS SETTING
- MAKING COFFEE
- FOR BEST RESULTS
- DESCALING
- CLEANING AND MAINTENANCE
- FOR UK ONLY
- PLEASE KEEP YOUR RECEIPT AS THIS WILL FORM THE BASIS OF YOUR GUARANTEE
- TO IMPROVE YOUR EXPERIENCE
- COUNTRY OF ORIGIN: CHINA
- YEAR OF MANUFACTURE
Brand : BRAUN
Model : PurAroma KF 7020
Category : Coffee machine