
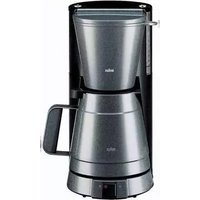
AromaSelect KF 170 - Coffee machine BRAUN - Free user manual and instructions
Find the device manual for free AromaSelect KF 170 BRAUN in PDF.
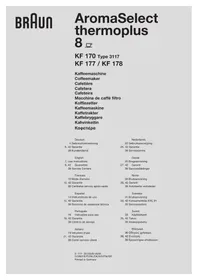


| Product type | Filter coffee machine |
| Brand | Braun |
| Model | AromaSelect KF 170 |
| Capacity | 10 cups (1.25 L) |
| Power | 1000 W |
| Power supply voltage | 220-240 V / 50-60 Hz |
| Dimensions (W x D x H) | 24 x 19 x 34 cm |
| Weight | 1.5 kg |
| Body material | Plastic |
| Carafe | Graduated glass carafe with spout |
| Filter | Permanent coffee filter (included) + compatible with size 4 paper filters |
| Aroma selector | AromaSelect: adjusts brewing time for mild or strong coffee |
| Automatic shut-off | Yes, after 2 hours |
| Anti-drip function | Yes, allows removing the carafe during brewing |
| Hot plate | Keeps coffee warm |
| Visible water level | Transparent level indicator with markings |
| Automatic shut-off in case of overheating | Yes |
| Cleaning and descaling | Regular descaling recommended with a descaling product or white vinegar |
| Spare parts available | Carafe, permanent filter, water tank |
| Repairability | Repairability score not provided |
Frequently Asked Questions - AromaSelect KF 170 BRAUN
User questions about AromaSelect KF 170 BRAUN
0 question about this device. Answer the ones you know or ask your own.
Ask a new question about this device
Download the instructions for your Coffee machine in PDF format for free! Find your manual AromaSelect KF 170 - BRAUN and take your electronic device back in hand. On this page are published all the documents necessary for the use of your device. AromaSelect KF 170 by BRAUN.
USER MANUAL AromaSelect KF 170 BRAUN
AromaSelect thermoplus
8
KF 170 Type 3117
KF 177 / KF 178
Kaffeemaschine
Coffeemaker
Cafetière
Cafetera
Cafeteira
GB Helpline Should you require any further assistance please call Braun (UK) Consumer Relations on 0800 783 70 10
IRL Helpline 1 800 509 448
- For hottest coffee: prewarm carafe, brew larger quantities, keep lid closes when not pouring.
- Clean the carafe with warm, clear water.
- To remove stains from carafe inside, use kitchen salt with a little water.
IMPORTANT


Our products are engineered to meet the highest standards of quality, functionality and design. We hope you thoroughly enjoy the new Braun appliance.
Caution
Read all instructions before using the product.
This appliance must be kept out of the reach of children! Before plugging into a socket, check whether your voltage corresponds with the voltage printed on the bottom of the appliance. Braun electric appliances meet applicable safety standards. Repairs or the replacement of the mains cord must only be done by authorised service personnel. Faulty, unqualified repair work may cause considerable hazards to the user.
Important
This appliance was constructed to process normal household quantities. Always use cold water to make coffee. Warm water or other liquids could cause damage to the coffeemaker. Before using it for the first time, or when the coffeemaker has not been used for some time, fill the water container ③ to the maximum level with cold water (i.e. without coffee and without a filter). Turn on the coffeemaker and allow the water to flow through. After a brewing cycle is finished, switch off the appliance and allow the coffeemaker to cool down for 5 minutes approximately. Otherwise steam can develop when pouring cold water into the water container which might cause scalding.
Maximum cups
8 cups (125 ml each) 12 cups (83 ml each)
Description
① Cord storage ② Water level indicator ③ Water container ③a Maximum filling level of the water container ④ Space compensator ④a Water filter cartridge (not with model KF 178) ④b Dial for water filter exchange ⑤ AromaSelect dial ⑥ Cover for the water container ⑦ Filter support bracket ⑧ Filter holder ⑨ Stand for thermal carafe ⑩ On/off switch (with red control lamp) ⑪ Thermal carafe ⑫ Lid
Thermal carafe
The flask of the thermal carafe is made of double walled, vacuum glass material. Streaks in the glass which sometimes look like faults or cracks do not have any influence on the use of the flask. However, this material is very fragile. Always check for damage if you knock or drop the carafe. If the flask should be damaged in any way, please have it repaired at your Braun Customer Service. Replacement carafes are available at your dealer or at the Braun Service Centre.
It is important to avoid sudden and extreme differences in temperature. Never fill ice cubes in the thermal carafe. Never submerge the carafe in water, nor put it in a dishwasher.
Do not place the carafe on a hotplate or other heat sources as this would damage the plastic base part of the carafe. Both, the base of the carafe and the stand to put the carafe on will get warm during brewing.
Do not use the thermal carafe in the microwave oven.
In order to make best use of the heat-retention properties of the thermal carafe it is essential to prewarm it. This can be done by rinsing the thermal carafe with hot water.
To open the lid of the thermal carafe turn the grip clockwise until the arrow on the lid matches the arrow on the carafe (f) and take it off. In order to close the lid again, make sure to engage it exactly in this position (f) and then turn it anti-clockwise until the arrow matches the point marking (g). During brewing the coffee runs through a special opening of the closed lid. If you want to pour out coffee after brewing is finished, give the lid a further turn anti-clockwise until the arrow matches the cup symbol (h). After pouring out, always turn the lid back to the point marking in order to close the carafe. Keep the carafe upright at all times.
Filling with water
Important: When filling with water and during coffee preparation either the space compensator ④ or the water filter cartridge ④ must be installed in the water container ③. Otherwise the water level indicator ② will not function correctly and the carafe may overflow.
To fill in water, lift the cover of the water container ⑥ and pour in cold water (max. = arrow marking in the water container). The amount of water is shown on the water level indicator ②.
Filling with coffee
Swing out the filter holder ⑧ (a) and insert the filter.
Put coffee (not ground too finely) into the filter and close the filter holder again (a) until it snaps in place. Measure coffee according to the strength desired.
Pre-selecting the taste – AromaSelect dial
By turning the AromaSelect dial ⑤ before brewing, you can adjust the taste of your coffee to suit your personal preference – milder with less bitter aftertaste or stronger, but always with the same full flavour.
If you prefer milder coffee, turn the AromaSelect dial in the direction of the symbol (b). Should you prefer a stronger taste, turn the AromaSelect dial towards the symbol. Regardless of the position you select, the coffee will always have the same full
coffee flavour only with a milder or stronger aftertaste.
With the cover of the water container ⑥ closed, the selected setting can always be seen (c).
Switches
AromaSelect dial ⑤

On/off switch ⑩
On = Ⓞ (the red control lamp is on)
Off = ○
The red control lamp lights up when the coffeemaker is switched on. It goes out when the appliance is switched off.
Making coffee
Place the prewarmed thermal carafe with the closed lid (g) onto the stand of the coffeemaker ⑨. After having filled coffee into the filter, snap the filter holder in place and switch on the coffeemaker. Brewing time is approx. 50 seconds per cup (including dripping). A “drip stop” prevents dripping when removing the carafe before brewing is finished.
Switch off the coffeemaker after the brewing is finished.
Remove the filter holder ⑧ to empty grounds (d) (see section “Cleaning”).
When filled completely, the thermal carafe keeps coffee hot for several hours. If partly filled, the warm-keeping time is reduced depending on the filling level. Therefore, and in particular for small quantities remaining in the carafe, it is absolutely necessary to prewarm the flask before brewing coffee. In order to obtain very hot coffee even when preparing small quantities (up to 4 cups) we recommend to fill approx. 1 more cup of water in the water container. By switching on the appliance, allow this additional quantity of water to run through the empty filter into the thermal carafe, then switch off the appliance. Wait for a moment before emptying the carafe. Then you can fill coffee grounds in the filter and start the real brewing cycle as described above.
Space compensator
The space compensator ④ in the water container ③ takes up the space which is intended for the water filter cartridge ④a. Unless the water filter cartridge is installed in the water container, the space compensator must always be inside the water container when filling with water and brewing to avoid overfilling. Keep the space compensator as it has to be installed in the water container if you have to decalcify your coffeemaker.
Water filter cartridge (not with model KF 178)
The water filter cartridge ④a is suitable for drinking water only. It gives you purer tasting coffee by removing chlorine, bad tastes and odors as well as scale. Provided the cartridge is regularly replaced, it provides not only better tasting coffee, but also can increase the life of your coffeemaker by preventing calcification.
Installing the water filter cartridge
Unpack the water filter cartridge ④a.
Remove the space compensator ④ from the water container and replace it with the water filter cartridge ④a. Make sure to keep the space compensator, as it may be needed if you do not use the water filter any longer in the future or for decalcification.
After installing a new water filter cartridge, allow the maximum amount of fresh, cold water to run through the coffeemaker.
To ensure proper functioning of the filter cartridge, replace it after 2 months of regular use of the coffeemaker. To remind you to replace the filter in time, you may set the dial 40 incorporated in the cover of the water container to the month when the cartridge has to be exchanged.
Dial for water filter exchange
After installing a new filter cartridge, set the dial ④ 2 months further by turning it from the reverse side of the water container cover.
Cleaning
Always pull the plug out of the socket before cleaning. The appliance should never be cleaned under running water nor immersed in water. Swing out the filter holder and lift it off (d). To replace it, set the curved protruding rim of the filter holder onto the support bracket ⑦. Be sure that the rib under the rim of the filter holder fits snugly into the groove of the support bracket so that the filter holder closes easily (d).
The filter support bracket can be taken off for cleaning. Swing it out, push it up, and pull it diagonally downwards (e). To replace, insert the top first.
Never submerge the thermal carafe in water nor put it in the dishwasher. After using the carafe, rinse it with warm, clear water. The glass flask has to be handled carefully. Do not use hard objects or scouring powder to clean it. Never reach with your hand into the flask.
Coffee stains that may form on the glass after the carafe has been used for some time can be removed easily by means of kitchen salt. Fill a handful of kitchen salt into the thermal carafe and add some cold water. Then swirl the mixture gently until the salt crystals have eliminated the brown stains in the glass flask. Alternatively, a denture cleaner tablet can be used: Fill the flask with warm water and add a denture cleaner tablet. Let it rest for five minutes, then swirl gently, pour out, and rinse thoroughly with warm water.
Clean the outside of the carafe with a damp cloth.
Decalcifying
If you have hard water and you use your coffeemaker without a water filter, it has to be decalcified regularly. When using the water filter cartridge and exchanging it regularly, you normally will not need to decalcify. However, if your coffeemaker takes much longer than normal to brew, the appliance has to be decalcified.
Important: Replace the water filter with the space compensator for any decalcifying procedure. When decalcifying, turn the AromaSelect dial ⑤ to the □ symbol.
You can either use a commercially available decalcifying agent which does not affect aluminium, or vinegar essence, available in food stores.
- Follow the instructions of the manufacturer of the decalcifying agent.
- Repeat this procedure with a newly prepared decalcifying solution as many times as necessary for reaching the original flow time of approx. 50 - 60 seconds per cup.
- Allow the maximum amount of fresh cold water to run through at least twice to cleanse the machine.
If you use vinegar essence, please proceed as follows:
- Fill the water container ③ to the mark for 3 cups with cold water.
- Add vinegar essence to the mark for 6 cups.
- Place the carafe with the closed lid onto the stand ⑨, close the filter holder ⑧ (without any type of filter) and switch on the coffeemaker.
- Allow the decalcifying solution to run through.
- Repeat this procedure with a newly prepared decalcifying solution as many times as necessary for reaching the original flow time of approx. 50 - 60 seconds per cup.
- Allow the maximum amount of fresh cold water to run through at least twice to cleanse the machine.
Subject to change without notice.
This product conforms to the European Directives EMC 89/336/EEC and Low Voltage 73/23/EEC.
At the end of the product's useful life, please dispose of it at appropriate collection points provided in your country.


Guarantee
We grant 2 years guarantee on the product commencing on the date of purchase. Within the guarantee period we will eliminate, free of charge, any defects in the appliance resulting from faults in materials or workmanship, either by repairing or replacing the complete appliance as we may choose. This guarantee extends to every country where this appliance is supplied by Braun or its appointed distributor.
This guarantee does not cover: damage due to improper use, normal wear or use as well as defects that have a negligible effect on the value or operation of the appliance. The guarantee becomes void if repairs are undertaken by unauthorised persons and if original Braun parts are not used.
To obtain service within the guarantee period, hand in or send the complete appliance with your sales receipt to an authorised Braun Customer Service Centre.
For UK only:
This guarantee in no way affects your rights under statutory law.
8 cups (125 ml each)
12 cups (83 ml each)
Description
Guarantee and Service Centers
Gillette Australia Pty. Ltd.,
Scoresby, 5 Caribbean Drive
Melbourne, Victoria 3179, ☎1 800 641 820
Bahrain
Yaquby Stores,
Bab AlBahrain,
P. O. Box 158, Manama,
02-28 88 7
Barbados
Dacosta Mannings Inc.,
P. O. Box 176, Pier Head,
Bridgetown,
431-8700
Belarus
Electro Service & Co LLC, Chernyshevskogo str. 10 A,
220015 Minsk,
2 85 69 23
Belgium
Gillette Group Belgium NV,
J. E. Mommaertslaan 18 A,
1831 Diegem
02-71 19 104
Bermuda
Gibbons Company
21 Reid Street
P.O. Box HM 11
Hamilton
295 00 22
Brasil
Gillette Canada Company,
Braun Consumer Service
4 Robert Speck Parkway,
Mississauga L4Z 4C5,
Ontario.
1 800 387 6657
Czech Republic
PH SERVIS s.r.o.,
V Mezihori 2,
18000 Prague 8,
266 310 574
Chile
Viseelec,
Braun Service Center Chile,
550 Sanlin Road, Pudong,
Shanghai 200124,
0 0 86 21 5849 8000
Colombia
Gillette de Colombia S.A.,
Calle 100
No. 9A - 45 Piso 3.
Bogotá, D.C.
01 8000 5 27286
Croatia
Iskra elektronika d.o.o.,
Bozidara Magovca 63,
10020 Zagreb,
1 - 6 60 17 77
Cyprus
Kyriakos Papavasiliou Trading
70, Kennedy Ave.,
1663 Nicosía,
02 314111
Danmark
Gillette Group
Danmark A /S,
Teglholm Allé 15,
2450 København SV,
70 15 00 13
25 Makram Ebied Street,
P.O. Box 7607, Cairo.
02-2740652
Spain
Braun Española S.A.,
Braun Service,
Enrique Granados, 46,
08950 Esplugues de
Llobregat
(Barcelona),
901 11 61 84
Estonia
Servest Ltd.
Raua 55, EE 10152 Tallin,
627 87 32
France
Gillette Group UK Ltd.,
Braun Consumer Service,
Aylesbury Road,
Thame OX9 3AX
Oxfordshire
1800 783 70 10
Greece
Berson S.A.,
47, Agamemnonos,
17675 Kallithea Athens,
(210)-9 47 87 00
Guadeloupe
Ets. André Haan S.A.,
Zone Industrielle
B.P. 335,
97161 Pointe-à-Pitre,
26 68 48
Hong Kong
Audio Supplies Company,
Room 506,
St. George Building,
2 ICE House Street,
Hong Kong,
(852) 2524 9377
Hungary
Gillette Group Hungary
Kereskedelmi Kft.,
1037 Budapest,
Szépvölgyi út 35-37
1801 - 3800
Iceland
Verslunin Pfaff h f.,
Grensasvegur 13,
Box 714,
121 Reykjavik,
53 32 22
India
Braun Division,
c/o Gillette Div. Op. Pvt. Ltd.,
- Okhla Industrial Estate.
New Delhi 110 020,
Iran
Tehran Bouran Company
145 Ghaem Magham
Farahani,
Tehran
+982 18 31 27 66
Ireland (Republic of)
Gavin's Electronics,
83-84, Lower Camden Street,
Dublin 2,
1800 509 448
Israel
S. Schestowitz Ltd.,
8 Shacham Str.
Tel-Aviv, 49517.
1 800 335 959
Italia
Gillette Group Italy S.p.A.,
Via G. B. Pirelli, 18,
20124 Milano,
02 / 6678623
Jordan
Interbrands
Wadi Al-Sir, Adwiat alhekmah
St. Mekadabi bld.
Amman
+692 582 75 67
Kenya
Radbone – Clark Kenya Ltd.,
P. O. Box 40833
Mombasa Road,
Nairobi,
2 82 12 76
Korea
Gillette Korea Ltd.
144-27 Samsung-dong,
Kangnam-ku,
Seoul, Korea,
080-920-6000
Kuwait
Union Trading Company,
Braun Service Center,
P. O. Box 28 Safat,
Safat Code 13001, Kuwait,
04 83 32 74
Latvia
72 Bullu Street, House 2,
Riga 1067,
2 40 39 11
Lebanon
Magnet SAL - Fattal HLDG.
Lot 24 Rawang Housing
& Industrial Estate
Mukim Rawang, PO No 210
48,000 Rawang
Selangor Malaysia
(603) 6091 4343
Malta
Kind's,
287, Republic Street,
Valletta VLT04,
24 71 18
Morocco
FMG
depot TMTA
Rue Chefchaouen, Oukacha
Casablanca
+212 022 66 47 69
Martinique
Decius Absalon,
J. Kalachand & Co. Ltd.
DBM Industrial Estate, Stage
11, P.O.B. 634, Plaine Laużun,
2 12 84 10
Mexico
Gillette Manufactura, S.A. de
C.V./
Netherlands Antilles
Rupchand Sons n.v. (ram's),
Front Street 67, P.O. Box 79
St. Maarten, Philipsburg
052 29 31
New Zealand
Key Service Ltd.,
69 Druces Road.,
Manakau City,
09 - 262 58 38
Nippon
Gillette Japan Inc.,
Queens Tower, 13F
3-1, Minato Mirai 2-Chome
Nishi-Ku, Yokohama 220-6013
Japan
045-680 37 00
Norge
Naranjee Hirjee & Co.,
10 Ruwi High
P.O. Box 9, Muscat 113,
703 660
Pakistan
Gillette Pakistan Limited,
Dr. Ziauddin Ahmend Road,
Karachi 74200,
21 56 88 930
Paraguay
Paraguay Trading S. A.,
Gillette Philippines Inc.,
Corporate Corner Commerce
Avenues
20/F Tower 1,
IL Corporate Centre
1770 Muntinlupa city
02-771071 02-06/-16
Poland
Gillette Group Poland
Sp.Z o.o.
ul. Domaniewska 41,
02-672 Warszawa.
22 548 89 74
Portugal
Grupo Gillette Portugal, Lda.,
Braun Service.
Gillette Romania srl.
opposite to Fetihi center,
Al Forsan
P.O. Box: 269
21411 Jeddah
02 - 651 8670
Singapore (Republic of)
Beste (S) Pte. Ltd.,
No. 6 Tagore Drive,
# 03-04 Tagore Industrial
Building,
Singapore 787623,
(65) 6552 2422
Slovakia
Techno Servis Bratislava.
Bajzova 11/A,
82108 Bratislava,
(02) 55 56 37 49
Slovenia
Iskra Prins d.d.
Rozna dolina c. IX/6
1000 Ljubljana,
386 01 476 98 00
South Africa (Republic of)
Fixnet After Sales Service,
159 Queen Street,
Kensington South,
PO. Box 751770
Johannesburg 2094,
Kensington South,
11 615 6765
St. Maarten
Rupchand Sons n.v. (ram's),
P. O. Box 79, Philipsburg,
Netherlands Antilles,
52 29 31
St. Thomas
Boolchand's Ltd.,
31 Main Street,
P. O. Box 5667,
00803 St. Thomas,
US Virgin Islands,
340 776 0302
Finland
Gillette Group Finland Oy,
P.O. Box 9,
Niittykatu 8, PL 9,
02200 Espoo,
09-45 28 71
Sweden
Gillette Group Sverige AB,
Dept. Sweden, Stockholm
Gillette
Räsundavägen 12,
Box 702, 16927 Solna,
020-21 33 21
Syria
Ahmed Hadaya Company
Hadaya building
Ain Keresh
Unisyria, P. O. Box 35002,
Damascus,
963 011-231433
Taiwan
Audio & Electr. Supplies Ltd..
Brothers Bldg., 10th Floor,
85 Chung Shan N Rd., Sec. 1,
Taipei (104)
(886) 02 2523 3283
Thailand
Gillette Thailand Ltd.,
175 South Sathorn Road,
Tungmahamek, Sathorn,
11/1 Floor, Sathorn City Tower
Bangkok 10520
(66) 2344 9191/Exten. 9135
Tunisia
Hlybotchytska str. 53, Kyiv
380-44-417-24-15
United Arab Emirates
The New Store LLC.
Burjman shopping mall,
Bur Dubai
Dubai.
+9714 359 19 19
Uruguay
Driva S. A.,
Marcelino Sosa 2064.
11800 Montevideo,
2 924 95 76
USA
The Gillette Company
Braun Consumer Service,
1, Gillette Park 4k-16,
Boston,
MA 02127-1096,
1-800-272-8611
Venezuela
Gillette de Venezuela S.A.,
Av. Blandin,
Centro San Ignacio
Torre Copérnico, Piso 5
La Castellana, Caracas
0800-4455388
Yemen (Republic of)
Saba Stores for Trading,
26th September Street,
P. O. Box 5278.
Taiz.
4-25 23 88
Yugoslavia
BG Elektronik.
Bulevar kralja Aleksandra 34,
11000 Beograd,
11 3240 030

- AROMASELECT THERMOPLUS
- IMPORTANT
- CAUTION
- READ ALL INSTRUCTIONS BEFORE USING THE PRODUCT
- MAXIMUM CUPS
- DESCRIPTION
- THERMAL CARAFE
- FILLING WITH WATER
- FILLING WITH COFFEE
- PRE-SELECTING THE TASTE – AROMASELECT DIAL
- SWITCHES
- MAKING COFFEE
- SPACE COMPENSATOR
- WATER FILTER CARTRIDGE (NOT WITH MODEL KF 178)
- DIAL FOR WATER FILTER EXCHANGE
- CLEANING
- DECALCIFYING
- GUARANTEE
- FOR UK ONLY
- BAHRAIN
- BARBADOS
- BELARUS
- BELGIUM
- BERMUDA
- BRASIL
- CZECH REPUBLIC
- CHILE
- COLOMBIA
- CROATIA
- CYPRUS
- DANMARK
- SPAIN
- ESTONIA
- FRANCE
- GREECE
- GUADELOUPE
- HONG KONG
- HUNGARY
- ICELAND
- INDIA
- IRAN
- IRELAND (REPUBLIC OF)
- ISRAEL
- ITALIA
- JORDAN
- KENYA
- KOREA
- KUWAIT
- LATVIA
- LEBANON
- MALTA
- MOROCCO
- MARTINIQUE
- MEXICO
- NETHERLANDS ANTILLES
- NEW ZEALAND
- NIPPON
- NORGE
- PAKISTAN
- PARAGUAY
- POLAND
- PORTUGAL
- SINGAPORE (REPUBLIC OF)
- SLOVAKIA
- SLOVENIA
- SOUTH AFRICA (REPUBLIC OF)
- ST. MAARTEN
- ST. THOMAS
- FINLAND
- SWEDEN
- SYRIA
- TAIWAN
- THAILAND
- TUNISIA
- UNITED ARAB EMIRATES
- URUGUAY
- USA
- VENEZUELA
- YEMEN (REPUBLIC OF)
- YUGOSLAVIA
Brand : BRAUN
Model : AromaSelect KF 170
Category : Coffee machine