
VS04G2081 - Vacuum Cleaner SIEMENS - Free user manual and instructions
Find the device manual for free VS04G2081 SIEMENS in PDF.


| Product Type | Canister Vacuum Cleaner |
| Brand | Siemens |
| Model | VS04G2081 |
| Maximum Power | 600 W |
| Bag Type | Disposable Dust Bag |
| Bag Capacity | 4 L |
| Filtration | Washable HEPA Filter |
| Noise Level | 76 dB(A) |
| Cable Length | 8 m |
| Operating Radius | 10 m |
| Weight | 5.5 kg |
| Dimensions (LxWxH) | 400 x 280 x 260 mm |
| Main Nozzle | Combined Hard Floor/Carpet Nozzle |
| Included Accessories | Crevice Tool, Brush Nozzle |
| Power Adjustment | Electronic on Body |
| Filter Maintenance | Wash every 6 months |
| Bag Replacement | When indicator lights up |
| Safety | Automatic shut-off in case of overheating |
| Energy Class | A |
| Parts Availability | Spare parts available for 10 years |
Frequently Asked Questions - VS04G2081 SIEMENS
User questions about VS04G2081 SIEMENS
0 question about this device. Answer the ones you know or ask your own.
Ask a new question about this device
Download the instructions for your Vacuum Cleaner in PDF format for free! Find your manual VS04G2081 - SIEMENS and take your electronic device back in hand. On this page are published all the documents necessary for the use of your device. VS04G2081 by SIEMENS.
USER MANUAL VS04G2081 SIEMENS


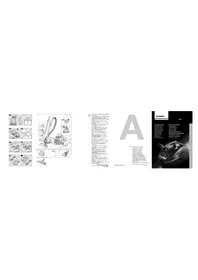
Gerätebeschreibung
7 Upholstery nozzle*
8 Crevice nozzle*
9 Power cord
10 On/off button with electronic suction regulator
11 Parking aid
12 Hepa filter
13 Storage aid (on underside of unit)
14 Dust collector
15 Vacuum cleaner lid
16 Carrying handle
17 Exhaust grille
18 Dust bag change indicator*
*Depending on equipment
Replacement parts and accessories

Thread lifter (1) and polishing strips (2) can be ordered through the after-sales department.
A Replacement filter pack VZ52AFG1
Contains: 5 self-sealing dust bags 1 micro-hygiene filter
B Textile filters (permanent filters) VZ10TFG
Reusable filter with Velcro fastener.
C TURBO UNIVERSAL® brush for upholstery
VZ46001
All in one brushing and vacuuming of upholstered furniture, mattresses, car seats, etc. Especially suitable for picking up pet hair. The brush roller is driven by the cleaner's suction air flow.
No separate electrical connection is needed.
D TURBO UNIVERSAL® brush for floors VZ102TBB
All in one brushing and vacuuming of short-pile rugs and carpets and all hard floor coverings. Especially suitable for picking up pet hair. The brush roller is driven by the suction of the air flow.
No separate electrical connection is needed.
E Hard-floor brush VZ122HD
For vacuuming hard floors (parquet flooring, tiles, terracotta, etc.)
Please keep this instruction manual When passing the vacuum cleaner on to a third party, please also pass on this instruction manual.
Intended use
This vacuum cleaner is intended for domestic use and not for commercial use.
This vacuum cleaner should only be used in accordance with these instructions for use.
The manufacturer will not accept any responsibility for damage caused by improper use or incorrect operation.
Therefore, please note the following points. The vacuum cleaner must only be operated with:
■Manufacturer's original dust bags.
■Manufacturer's original replacement parts, accessories and optional accessories
The vacuum cleaner is not to be used for:
■Vacuuming persons or animals
■Vacuuming up:
- Insects or spiders.
- Hazardous, sharp-edged, hot or burning substances.
- Damp or liquid substances.
– Highly flammable or explosive substances and gases. - Ash, soot from tiled stoves and central heating systems
Safety information
This vacuum cleaner complies with the recognised rules of technology and the relevant safety regulations. We confirm compliance with the following European directives: 89/336/EEC (amended by Directives 91/263/EEC, 92/31/EEC and 93/68/EEC). 73/23/EEC (amended by Directive 93/68/EEC).
■Always observe the information on the rating plate when using the vacuum cleaner and connecting to the power supply.
■Do not use the vacuum cleaner without the dust collector or dust bag fitted => The appliance could be damaged.
■Only allow children to use the vacuum cleaner under supervision.
- Keep suction away from your face when using the handle, nozzles or pipe.
=> Risk of injury.
■Never carry the vacuum cleaner by the power cord.
■Fully extend the power cord when using the vacuum cleaner continuously for several hours.
■When disconnecting the appliance from the mains, pull the plug, not the power cord.
■Do not pull the power cord around sharp corners or allow it to become trapped.
■Unplug the vacuum cleaner from the mains before carrying out any work on it.
■Do not use the vacuum cleaner if it is damaged. Unplug the power cord from the mains if a fault is detected.
■ To prevent you from being exposed to risks, vacuum cleaner repairs and the fitting of replacement parts must only be carried out by the authorised after-sales service.
■ Protect the vacuum cleaner from moisture and sources of heat.
■Switch off the vacuum cleaner when it is not in use.
■At the end of its life, the vacuum cleaner should be disposed of in an appropriate manner.
Disposal information
Packaging
The packaging is designed to protect the vacuum cleaner from being damaged during transportation.
It is made of environment-friendly materials and therefore can be recycled.
Dispose of packaging which is no longer required at recycling points.
■Used vacuum cleaners
Used vacuum cleaners still contain many recyclable materials.
Therefore, please take used vacuum cleaners to your retailer or recycling centre so that they can be recycled.
Please enquire about current disposal methods at your retailer or local council.
Please note
● The mains socket must be protected by a 16 amp fuse.
If a fuse is be tripped when you switch on the vacuum cleaner, this may be because other electrical appliances which have a high current draw are connected to the same power circuit.
To prevent the fuse from tripping, select the lowest power setting before switching the vacuum cleaner on, and increase the power only once it is running.
Fold out picture pages.

Before using for the first time
Figure 1*
Push the handle onto the flexible tube and until it engages.
Setting up
Figure 2
a) Push the hose connector into the opening on the vacuum cleaner until it engages.
b) To remove the flexible hose, press the two lugs together and pull the hose out.
Figure 3*
Connect the handle and the suction pipe together.
Figure 4*
Connect the floor tool and suction hose/telescopic tube together.
Figure 5*
a) Connect the suction pipes together.
b) Disconnect the telescopic tube and adjust its length by moving the adjusting button/sliding sleeve in the direction of the arrow.
Figure 6
Holding the power cord by the plug, pull out the required length and plug it into the mains socket.
Figure 7
Press the on/off button in the direction of the arrow to switch your vacuum cleaner on/off.
Figure 8
Adjust the suction by turning the on/off button in the direction of the arrow.
Vacuuming
Figure 9
Adjusting the floor tool:
a) Rugs and carpets
b) Hard floors
Figure 10
Attach the nozzles to the suction pipe or handle as required:
a) Crevice nozzle for vacuuming crevices and corners, etc.
b) Upholstery nozzle for vacuuming upholstered furniture, curtains, etc.
Figure 11
You can use the parking aid on the back of the vacuum cleaner if you wish to stop vacuuming for a short time.
Slide the catch on the floor tool into the groove at the rear of the appliance.
Figure 12
The appliance can also be carried using the two handles when vacuuming steps, for example.
When the work is done
Figure 13
Unplug the vacuum cleaner.
Tug the power cord briefly and let go. The cable then rewinds automatically.
Figure 14
To store or transport the vacuum cleaner, use the storage aid on the underside of the vacuum cleaner.
Stand the vacuum cleaner up on its end. Slide the catch on the floor tool into the groove on the underside of the appliance.
You have purchased a floor vacuum cleaner which can vacuum up any type of dry dirt using the dust collector or dust bag.
We recommend that you use:
- the dust collector, in particular for your hobbies, e.g. to remove wood shavings, etc.
- the dust bag principally for everyday household cleaning.
Using the dust collector
Figure 15
Set the power setting to maximum for the best results when vacuuming.
We recommend that you reduce the setting only when vacuuming very delicate materials.
■ Attention: The dust bag change indicator
- only functions correctly in conjunction with a dust bag.
Emptying the dust collector
To achieve an optimal result when vacuuming, the dust collector should be emptied each time the vacuum cleaner is used.
Figure 16
Turn the dust compartment locking lever in the direction of the arrow to open the dust compartment cover.
Figure 17
Remove the dust container from the appliance.
Figure 18
■Release the two snap locks on the bottom flap in the direction of the arrow, open the flap until it clicks into the stop position and the container will then empty the dirt in a downwards direction.
■If the bottom flap is very dirty, (thick dirt) clean it before closing, by vacuuming it with the crevice nozzle, for example.
(You must fit the dust bag in the vacuum cleaner when you do this - see Figure 23)
■Close the bottom flap so that it can be heard snapping into position.
Figure 19
Put the dust bag back into the vacuum cleaner and close the dust bag compartment lid.
Caution: The inside of the dust container may become scratched with use and start to look opaque. This does not, however, affect the performance of the vacuum cleaner in any way, i.e. it will continue to function as normal.
Cleaning the permanent filters and micro filters in the dust container
The filters must be cleaned:
■After any operating malfunctions, i.e. after a blockage is cleared.
■At least every six months.
Figure 20
■Press the fastener on the rear side of the container and remove the micro filter from the bottom of the container.
■Remove the permanent filter from the bottom plate of the container.
Figure 21
■ Wash the micro- and permanent filters. The filter must then be left to dry for at least 24 hours.
■ After cleaning, place the permanent filter on the bottom plate of the container.
Put the micro filter onto the container and fix it in place by pushing in the direction of the arrow. You will hear the flap snap shut.
Blockages
Removing a blockage in the dust container.
Figure 22
■Empty the container (see figure 18)
■Loosen the blockage, e.g. with a screwdriver, and tap or vacuum it out.
(You must fit a dust bag in the vacuum cleaner before vacuuming it out - see Figure 23)
■Close the bottom flap so that it can be heard snapping into position.
■ Caution: The micro- and permanent filters
- must be cleaned following any operating problem (see Figure 20 and 21).
Using dust bags
If necessary, a dust bag may be used instead of the dust collector.
Part number on the spare filter packaging:
VZ52AFG1
Figure 23
■Open the vacuum cleaner lid (see Figure 16)
■Remove the dust collector and insert a dust bag.
■Close the vacuum cleaner lid.
You have bought an extremely powerful device. The highest suction setting is therefore only recommended for heavily soiled, short-pile carpets and hard floors.
The required suction power can be selected by adjusting the suction regulator (see Figure 8).
■Low suction range:
For vacuuming delicate fabrics, e.g. curtains.
■Middle suction range:
For daily vacuuming of lightly soiled floors.
■High suction range:
For vacuuming durable floor coverings, hard floors and for heavily soiled surfaces.
Replacing the dust bag
Figure 24*
If the dust bag change indicator is completely yellow when the floor tool is lifted from the floor and the highest suction power is selected, the dust bag must be changed, even though it may not yet be full. In this case it is essential to change the dust bag due to the type of material it contains.
The nozzle, suction pipe and flexible tube must not be blocked, as this would also lead to dust bag change indicator being triggered.
Attention: The dust bag change indicator - only functions correctly in conjunction with a dust bag.
Figure 25
Open the lid by moving the locking lever in the direction of the arrow.
Figure 26
Seal the dust bag by pulling the locking tab and then remove it.
Figure 27
Place a new dust bag in the holder and close the vacuum cleaner lid.
Caution: The dust bag compartment lid will only close when the dust bag, textile filter or dust collector are inserted.
Cleaning the motor protection filter
The motor protection filter should be cleaned regularly by knocking out the dirt and rinsing.
Figure 28*
■ Open the dust bag compartment lid (see Figure 16).
■ Pull out the motor protection filter in the direction of the arrow.
■ Clean the motor protection filter by tapping it.
■ If it is very dirty, the motor protection filter should be rinsed.
The filter must then be left to dry for at least 24 hours.
■ After cleaning, slide the motor protection filter into the vacuum cleaner and close the dust bag compartment lid.
Care
Always switch off the vacuum cleaner and disconnect the power cord from the mains before cleaning the appliance.
The vacuum cleaner and plastic accessories can be cleaned with a commercial plastic cleaner.
Do not use a scourer, glass-cleaning agent or multipurpose cleaning product.
Never immerse the vacuum cleaner in water.
If necessary, the dust compartment can be cleaned with a second vacuum cleaner or simply wiped with a dry cloth or dusting brush.
Subject to technical modifications.
Primera utilización
Figura 1*

Fallersleber Straße 50
40227 Düsseldorf
Oberbilker Allee 270 A
44287 Dortmund
Rodenbergstraße 47
45141 Essen
Bamlerstraße 1 a
47805 Krefeld
BSH Home Appliances Pty Ltd
57-63 McNaughton Roads
3168 CLAYTON
+61 (3) 9541 5555
+61 (3) 9541 5595
www.bosch.com.au/sha/default.asp
BA Bosnia-Herzegovina
"HIGH" d.o.o.
Odoba_ina 57
Sarajewo 71000
Tel.: 033 - 21 35 13
Info-Line: 061 - 10 09 05
mailto:delicnanda@hotmail.de
BE Belgium, Belgien, Belgique
BSH Home Appliances s.a. n.v.
Old Wolverton (P.O.Box 118)
MK12 5ZR Milton Keynes
Tel.: (8705) 678910
Fax:(1908) 328660
www.boschappliances.co.uk/
GR Greece, Hellas
BSH Ikiakes Syskeves ABE
17km Ethnikis Odou Athinon-Lamias
& Potamou 20
14574 Kifissia
Tel.: (210) 4277-700
Fax: (210) 4277-669
HK Hong Kong
BSH Home Appliances Limited
Unit 1&2B, 7th Floor
North Block, Skyway House
3 Sham Mong Road
Tai Kok Tsui - Hongkong/Kowloon
+852 (2565) 6151
+852 (2565) 6252
www.bosch-shop.com.hk/
HR Croatia
Andabaka Commerce
Gunduliceva 10
21000 Split
Tel.: (21) 481 403
Info-Line: (21) 322 010
andabaka@inet.hr
Industrial Park North
71293 Lod
Tel.: (8) 9777 222
Fax: (8) 9777 245
csb-serv@zahav.net.il
IR Ireland
Appliance Care
Unit F4, Ballymount Drive
Ballymount Industrial Estate
Walkinstown
Dublin 12
Tel.: (1) 4502622
Fax: (1) 4502520
Outside of 01-area: 18903 22222
IS Iceland
Smith & Norland H/F
Noatuni 4
105 Reykjavik
Tel.: (520) 3000
Fax: (520) 3010
www.sminor.is
IT Italy, Italia
72 Buluju street, house 2.
1067 Riga
Tel.: (7) 44 2114
Fax: (7) 47 3300
latinter@latinter.lv
MK Macedonia
„RIMEKO SG“
Londonska 19
1000 Skopje
Tel.: (2) 377 744
MT Malta
Aplan Limited
Aplan Centre B - Kara By Pass
B - Kara BKR
Tel.: 21 480590
Fax: 21 480598
lapap@aplan.com.mt
NL Netherlands
14-16 Constellation Drive
1310 Mairangi Bay Auckland
Tel.: (9) 4786158
Fax: (9) 4782914
PL Poland
BSH Home Appliances (SEA) Pte.
Ltd.
Cemal Sahir Sok. No. 26-28
80470 Mecidiyeköy - Istanbul
Tel.: 212 275 47 75
Fax: 212 275 55 04
www.siemensevaletleri.com
TW Taiwan
Achelis Taiwan Co., Ltd.
6th floor, No 2. Sec.3
Min Sheng E. Road
Taipei
Tel.: (2) 2321 6222
Fax: (2) 2397 1235
www.achelis.com.tw
Kundendienst-Zentren · Central-Service-Depots · Service Après Vente · Servizio Assistenza
Centrale Servicestation · Asistencia técnica · Servicevaerkter · Apparatservice · Huolto
UA Ukraine, Украина
KNEB
СП» Транс-Сервис«
тел: +380 (044) 568-51-50
ООО »Дойчэлектросераис«
тел.: (044) 467-80-46
ООО »Три О Сервис«
тел: (044) 565-93-99
VN Vietnam
T&C Co., Ltd
34 Ngu Truong To St.
Ba Dinh District
Hanoi
Tel.: (4) 8230407
Fax:(4) 8437873
siemens-hcm@bdvn.vnd.net
YU Yugoslavia
SZR Specijaelektro
III Bulevar 34, Blok 23
11070 Novi Beograd
Tel.: (11) 2147110
Fax: (11) 139689
Info-Line: +381 (11) 138 552
Spec.el@EUnet.yu
ZA South Africa
BSH-SA
15 th Rd., Randjespark
Private Bag X36, Randjespark
1685 Midrand - Johannesburg
Tel.:(11) 265 7800
Fax: (11) 265 7867
DE Garantie
GB Conditions of guarantee
For this appliance the guarantee conditions as set out by our representatives in the country of sale apply. Details regarding same may be obtained from the dealer from whom the appliance was purchased. For claims under guarantee the sales receipt must be produced.
FR Conditions de garantie
de
This appliance is labelled in accordance with European Directive 2002/96/EG concerning used electrical and electronic appliances (waste electrical and electronic equipment - WEEE). The guideline determines the framework for the return and recycling of used appliances as applicable throughout the EU
fr
es


- GERÄTEBESCHREIBUNG
- REPLACEMENT PARTS AND ACCESSORIES
- INTENDED USE
- SAFETY INFORMATION
- DISPOSAL INFORMATION
- PACKAGING
- USED VACUUM CLEANERS
- PLEASE NOTE
- FOLD OUT PICTURE PAGES
- BEFORE USING FOR THE FIRST TIME
- FIGURE 1
- SETTING UP
- FIGURE 2
- FIGURE 3
- FIGURE 4
- FIGURE 5
- FIGURE 6
- FIGURE 7
- FIGURE 8
- VACUUMING
- FIGURE 9
- FIGURE 10
- FIGURE 11
- FIGURE 12
- WHEN THE WORK IS DONE
- FIGURE 13
- FIGURE 14
- USING THE DUST COLLECTOR
- FIGURE 15
- ATTENTION: THE DUST BAG CHANGE INDICATOR
- EMPTYING THE DUST COLLECTOR
- FIGURE 16
- FIGURE 17
- FIGURE 18
- FIGURE 19
- CLEANING THE PERMANENT FILTERS AND MICRO FILTERS IN THE DUST CONTAINER
- THE FILTERS MUST BE CLEANED
- FIGURE 20
- FIGURE 21
- BLOCKAGES
- FIGURE 22
- USING DUST BAGS
- VZ52AFG1
- FIGURE 23
- REPLACING THE DUST BAG
- FIGURE 24
- FIGURE 25
- FIGURE 26
- FIGURE 27
- CLEANING THE MOTOR PROTECTION FILTER
- FIGURE 28
- CARE
- PRIMERA UTILIZACIÓN
- FIGURA 1
- BA BOSNIA-HERZEGOVINA
- BE BELGIUM, BELGIEN, BELGIQUE
- GR GREECE, HELLAS
- HK HONG KONG
- HR CROATIA
- IR IRELAND
- IS ICELAND
- IT ITALY, ITALIA
- MK MACEDONIA
- MT MALTA
- NL NETHERLANDS
- PL POLAND
- TW TAIWAN
- UA UKRAINE, УКРАИНА
- VN VIETNAM
- YU YUGOSLAVIA
- ZA SOUTH AFRICA
- DE GARANTIE
- GB CONDITIONS OF GUARANTEE
- FR CONDITIONS DE GARANTIE
- DE
- FR
- ES
Brand : SIEMENS
Model : VS04G2081
Category : Vacuum Cleaner