
GFR 25 Professional - Hedge Trimmers BOSCH - Free user manual and instructions
Find the device manual for free GFR 25 Professional BOSCH in PDF.


| Product type | Hedge trimmer |
| Brand | Bosch |
| Model | GFR 25 Professional |
| Category | Gardening |
| Total length | 95 cm |
| Blade length | 60 cm |
| Weight | 3.8 kg |
| Power supply | Corded, 230 V |
| Power consumption | 600 W |
| Cutting speed | 3400 strokes/min |
| Max. cutting capacity | 25 mm |
| Sound level (LpA) | 92 dB(A) |
| Vibration (front handle) | 5.5 m/s² |
| Blade type | Double blade, hardened steel |
| Ergonomic handle | Yes, with SoftGrip coating |
| Anti-vibration protection | Yes |
| Emergency stop | Yes, blade brake |
| Blade guard | Supplied with blade cover |
| Recommended maintenance | Cleaning after each use, regular oiling of the blade |
| Spare parts available | Replacement blade, blade cover, handle |
| Warranty | 2 years |
Frequently Asked Questions - GFR 25 Professional BOSCH
User questions about GFR 25 Professional BOSCH
0 question about this device. Answer the ones you know or ask your own.
Ask a new question about this device
Download the instructions for your Hedge Trimmers in PDF format for free! Find your manual GFR 25 Professional - BOSCH and take your electronic device back in hand. On this page are published all the documents necessary for the use of your device. GFR 25 Professional by BOSCH.
USER MANUAL GFR 25 Professional BOSCH
OBJ DOKU-38710-0112.fm Page 1 Monday, August 3, 2015 8:112 AM
natural_image
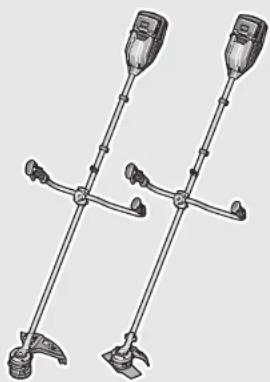
Illustration of two identical metal detector holders with adjustable arms and connectors (no text or symbols)Robert Bosch GmbH
Power Tools Division
70764 Leinfelden-Echterdingen
GERMANY
www.bosch-professional.com
F 016 L81 055 (2015.08) 0/129 WEU

GFR Professional
25|42

BOSCH
Bosch Lawn and Garden Ltd., PT-HG/ENS-PA2,
Stowmarket, Suffolk IP14 1EY, England
Henk Becker
Helmut Heinzelmann
Executive Vice President
Head of Product Certification
Engineering
PT/ETM9


Robert Bosch GmbH, Power Tools Division
70764 Leinfelden-Echterdingen, GERMANY
03.08.2015
Montage und Betrieb
Fehlersuche


Warning! Read all safety warnings and all instructions. Failure to follow the warnings and instructions may result in serious injury.
Please keep the instructions safe for later use!
Use the machine only when you fully understand and can perform all functions without limitation, or have received appropriate instructions.
Explanation of symbols on the machine

General hazard safety alert.

Read instruction manual.

Pay attention that bystanders are not injured through foreign objects thrown from the machine.

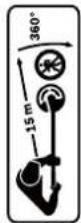
Warning: Keep a safe distance from the machine when operating.

Beware of Blade Thrust and Kick Back

Remove battery before adjusting or cleaning, and before leaving the machine unattended for any period.
Wear eye and ear protection.

Wear hard hat.

Wear protective gloves.

Wear foot protection.


Beware of thrown or flying objects. Keep bystanders a safe distance from the machine when operating.
Operation
▶ Do not cut walls.
▶ Never allow children or people unfamiliar with these instructions to use the machine. Local regulations may restrict the age of the operator. When not in use store the machine out of reach of children.
▶This machine is not intended for use by persons (including children) with reduced physical, sensory or mental capabilities, or lack of experience and
English | 13
knowledge, unless they have been given supervision or instruction concerning use of the machine by a person responsible for their safety. Children should be supervised to ensure that they do not play with the machine.
▶ Never work while people, especially children, or pets are nearby.
▶The operator or user is responsible for accidents or hazards occurring to other people or their property.
▶ Do not operate the machine when barefoot or wearing open sandals, always wear substantial footwear and long trousers.
▶ Thoroughly inspect the area where the machine is to be used and remove all stones, sticks, wires, bones and other foreign objects.
▶ Do not operate in areas where live cables may be present.
▶ Before using, always visually inspect to see that the blade, blade nut and cutter assembly are not worn or damaged.
Replace worn or damaged blade and nut in sets to preserve balance.
▶Work only in daylight or in good artificial light.
- Avoid operating the machine in bad weather conditions especially when there is a risk of lightning.
▶For your safety, please take care whilst operating the machine in wet grass.
▶ Walk, never run and stay in a stable position.
- Keep firm footing and balance. Do not overreach.
▶ Always wear ear and eye protection when operating the machine.
▶ Never operate the machine with missing or broken guards or shields or without guards or shields in position.
▶ Always check for signs of wear or damage before and after use.
▶ Never operate the product when you are tired, ill or under the influence of alcohol, drugs or medicine.
▶ Working on banks can be dangerous. - Do not work on excessively steep slopes.
- Always be sure of your footing on slopes or wet grass.
- Work across the face of slopes – never up and down.
- Exercise extreme caution when changing direction on slopes.
▶ Keep hands and feet away from the cutting means at all times, especially when switching on the motor.
▶ Wait until the cutting head has completely stopped before touching it. The head continues to rotate after the machine is switched off, the cutting system can cause injury/damage.
▶ Take care against injury from any device fitted for trimming the filament line length. After extending new cutter line always return the machine to its normal operating position before switching on.
14 | English
▶ Switch off when transporting the machine to and from the area to be worked on.
▶Switch off and remove the battery from the battery cartridge:
- whenever you leave the machine unattended for any period,
- before clearing a blockage,
– before replacing the cutting head,
– before checking, cleaning or working on the machine,
– after striking a foreign object. Inspect the machine for damage and make repairs as necessary, - if the machine starts to vibrate abnormally (check immediately).
- Do not modify this product. Unauthorized modifications may impair the safety of your product and may result in increased noise and vibration.
▶ Only use Bosch Professional Garden Tool recommended and approved accessories.
▶Beware that the tool may kick back when a blade suddenly strikes a hard object when cutting brush or scrub vegetation. Take care to minimise the effects of kick back.
▶This tool is designed to be used with the shoulder harness provided. Take care to adjust the harness to balance the tool correctly and reduce the potential for operator fatigue in use.
▶For Transport and Storage, Blade should be protected using an appropriate cover.
Maintenance
For Your Safety
▶ Warning: Switch off and remove battery from machine before adjusting or cleaning.
▶ Use correct battery and charger.
▶ Always wear protective gloves when handling or working near the sharp blades.
▶ Please use the correct guards with the correct cutting heads.
See figure 4 of illustrations.
▶ To ensure long and reliable service, carry out the following maintenance regularly:
- Keep all nuts, bolts and screws tight using tool kit provided to be sure that the machine is in safe working conditions.
▶ Examine the machine and replace worn or damaged parts for safety.
▶ Ensure Bosch approved correct replacement parts are used.
▶ Have the machine repaired only by an authorized customer service agent.
Cleaning
▶ Before transport or storage ensure machine is clean and free from debris, if necessary clean with a soft, dry brush.
▶The following cleaning schedule should be carried out after every 10 hours of work:
- Remove slip plate and thoroughly clean area below.
- Open bump head spool and remove any debris.
English | 15
Recommendations for Optimal Handling of the Battery and Charger
▶ Warning! Do not attempt to charge non rechargeable batteries with the charger.
- Inserting the battery pack into the machine with the switch on is dangerous.
▶ Ensure battery is the right way up.
▶ Insert the battery until the locking mechanism clicks. To remove the battery, operate locking lever. Take care not to drop the battery through the hole.
▶ For care use and maintenance please use charger and battery manuals which are supplied with the products or available at www.bosch-professional.com.
Symbols
The following symbols are important for reading and understanding the operating instructions. Please take note of the symbols and their meaning. The correct interpretation of the symbols will help you to use the garden product in a better and safer manner.
Symbol Meaning
| Movement direction | |
 | Reaction direction |
| [17] | Switching On |
| [18] | Switching Off |
| CLICKI | Audible noise |
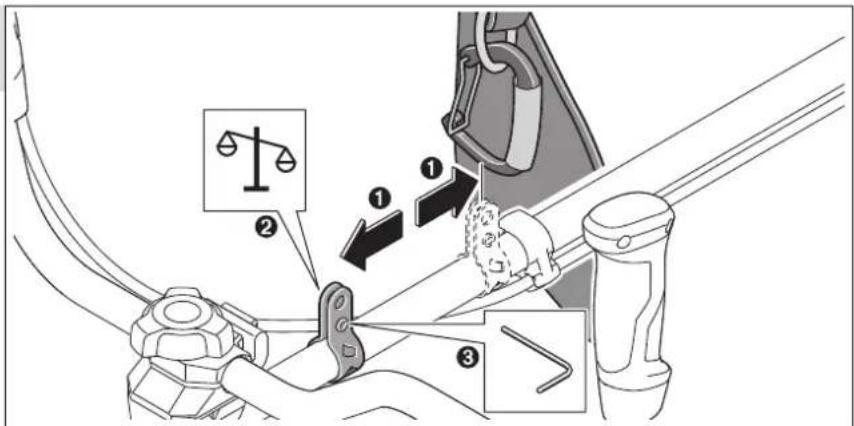
| [045C] | Balance Point |
| [19] | Accessories/Spare Parts |
Intended Use
The garden product is intended for Professional use.
Technical Data
| Brushcutter GFR 25 | GFR 42 | ||
| Professional | Professional | ||
| Article number | 3 600 J13 000 | 3 600 J13 001 | |
| Cutting head type | Metal blade Bump feed head & line | ||
| Cutting width | cm 25 42 | ||
| Type of handle | Bike handle Bike handle | ||
| Voltage | V | 3 | 6 |
| Overall length (without cutting attachment) | cm 197 197 | ||
| Weight (without batteries)according to EPTA-Procedure 01/2003 | kg 6.5 6.5 | ||
| Serial number | see type plate on the garden product | ||
Only Li-ion batteries GBA 36V 6.0Ah Hw-D (Art. No. 2 607 336 065) and battery charger AL 36100 CV Professional (Art. No. 1 600 A00 1...) can be used with this machine.
Please do not use non-rechargeable batteries with this appliance, only those specified by the manufacturer.
16 | English
Noise/Vibration Information
| Sound emission values determined according to EN 50636-2-91. | 3 600 J13 000 3 600 J13 001 | ||
| Typically the A-weighted noise levels of the product are: | |||
| Sound pressure level | dB(A) | 68 | 81 |
| Sound power level | dB(A) | 78 | 91 |
| Uncertainty K | dB | =3 | =2 |
| Wear hearing protection! | |||
| Vibration total values ah (triax vector sum) and uncertainty K deter-mined according to EN 50636-2-91: | |||
| Vibration emission value ah | m/s^2 | <2.5 | <2.5 |
| Uncertainty K | m/s^2 | =1.5 | =1.5 |
Declaration of Conformity C€
| 3 600 J13 000 3 600 J13 001 | ||
| We declare under our sole responsibility that the product described under “Technical data” is in conformity with all relevant provisions of the directives 2011/65/EU, until 19 April 2016: 2004/108/EC, from 20 April 2016 on: 2014/30/EU, 2006/42/EC, 2000/14/EC including their amendments and complies with the following standards: EN 60335, ISO 11806. | ||
| 2000/14/EC: Guaranteed sound power level: | dB(A) 79 | 93 |
| Conformity assessment procedure according to Annex V. | ● | - |
| Conformity assessment procedure according to Annex VI. | - | ● |
Equipment category: 33
Notified body:
DEKRA Certification B.V.
Meander 1051
6825 MJ Arnhem
Netherlands
Nr. 0344
Technical file (2006/42/EC, 2000/14/EC) at:
Bosch Lawn and Garden Ltd., PT-HG/ENS-PA2,
Stowmarket, Suffolk IP14 1EY, England
Henk Becker
Executive Vice President
Engineering
Helmut Heinzelmann
Head of Product Certification
PT/ETM9
PPa

Robert Bosch GmbH, Power Tools Division
70764 Leinfelden-Echterdingen, GERMANY
03.08.2015
Mounting and Operation
The numbering of the figures refer to the illustrations of the machine on the graphics page.
| Action Figure Page | |
| Delivery Scope | 1 120 |
| Handle Assembly | 2 121 |
Action Figure Page
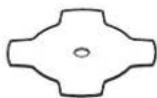
| Mounting the blade guardMounting the Friction Plate | 3 121 |
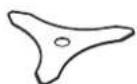
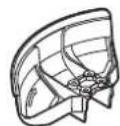
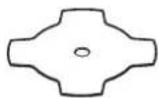
| Combination of Cutting Tools and Guards | 4 122 |
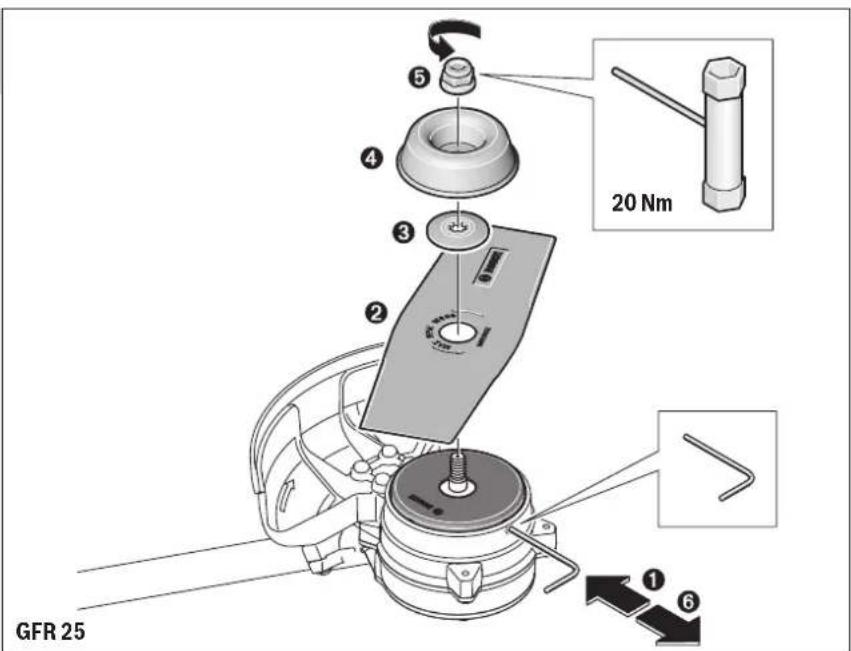
| Replace the Blade | 5 123 |
| Replace the Spool | 6 123 |
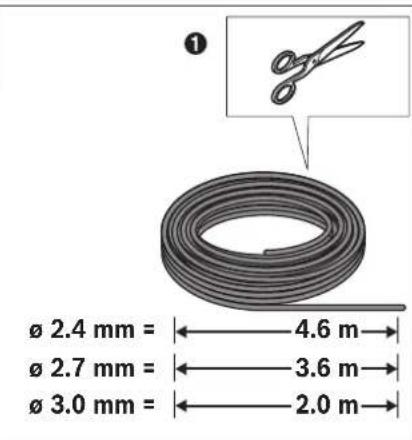
| Replace the Line | 7 124 |
| Inserting/Removing the Battery | 8 125 |
| Mounting the Comfort Harness | 9 125 |
| Switching On and Off | 10 125 |
| Working Advice | 11 126 |
| Selecting Accessories | 12 127-128 |
Product Transportation
▶ Always transport machine with safety guard fitted.
▶ Always transport machine without battery fitted.
▶ Eyelet can be used to tether machine for secure transportation.
Working Advice
Should the cutting blade jamb in long or dense grass, simply release then re-engage the switches.
This will activate the auto-release function that releases the jamb by quickly reversing the motor for a short time.
For optimum performance and finish always use correct cutting accessory as shown below.
Cutting system Usage application area
| Grass Light vegetation Heavy vegetation Bushes, thin trees | ||
 | 2.4 mm line | |
| 2.7 mm line | ||
| 3.0 mm line | ||
 | ||
 | ||
 | ||
 | ||
 | ||
 | ||
 | ||
Troubleshooting


Problem Possible Cause Corrective Action
| Blade guard can not be mounted over cutting blade | Incorrect assembly Remove cutting blade and mount blade guard first |
Machine fails to operate Battery discharged Recharge battery
Battery too hot/cold Allow to cool/warm
18 | English
| Problem | Possible Cause | Corrective Action |
| Machine runs intermittently | Motor protector has activated | Allow motor/electronics to cool for 5 minutes and cut in stages |
| Internal wiring of machine damaged Contact Service Agent | ||
| On/Off switch defective Contact Service Agent | ||
| External cabling damaged Contact Service Agent | ||
| Machine does not cut Cutting blade damaged Replace the blade (always wear protective gloves). Ensure blade is not upside-down (8T and saw blades). | ||
| Increased vibration Cutting blade damaged Replace the blade (always wear protective gloves) | ||
| Machine leaves ragged finish and/or labours | Grass too high/dense Grass too high: Cut in stages | Grass too dense: Reduce rate of cutting every time |
| Cutting blade blunt Flip/replace blade | ||
| Cutting blade obstructed Check underneath the machine and clear out as necessary (always wear protective gloves) | ||
| Blade fitted in incorrect direction of rotation Re-fit blade correctly (only 8T and saw blades) | ||
| Debris build up on cutting head Clean slip plate groove | ||
| Motor starts then stops immediately | Low battery capacity | Ensure battery is fully charged before use |
| Battery not fully charged | Check battery display - charge battery if necessary | |
| Battery too hot/cold | Allow battery to cool down/warm up - check battery display | |
| Grass too high/dense Grass too high: Cut in stages | Grass too dense: Reduce rate of cutting every time | |
| Nut cannot be removed to release cutting blade | Damaged thread on nut/shaft | Lubricate shaft to aid removal |
| Locking pin not located correctly | Reinsert locking pin and apply light pressure whilst rotating shaft (see figure 5 of illustrations) | |
English | 19
| Problem | Possible Cause | Corrective Action |
| Cutting blade fails to ro-tate | Cutting blade obstructed Check underneath the machine and clear out as necessary (always wear protective gloves) | |
| Blade nut loose Tighten nut bolt to 20 Nm ensuring the blade,nut shield and dome washer are all present and central (always wear protective gloves) (see figure 5 of illustrations) | ||
| Low battery charge Check the charge remaining in the battery - shown on the battery display | ||
| Grass too high/dense Grass too high: Cut in stagesGrass too dense: Reduce rate of cutting every time | ||
| Battery too hot/cold Allow battery to cool down/warm up - check battery display | ||
| Motor protector has activated | Allow motor/electronics to cool for 5 minutes and cut in stages | |
| Poor cutting performance | Cutting guard encrusted with debris Clean inside of cutting guard | |
| Cutting blade blunt Flip/replace blade | ||
| Cutting line short Bump head to expose more line | ||
| No cutting line Replenish line (see figure 7 of illustrations) | ||
| Poor motor performance | Remove cutting system and slip plate and clean slip plate groove | |
If you are unable to resolve the problem using the Troubleshooting guide then please contact your dealer in the first instance.
After use/Storage
Correct storage is essential for maintaining the life of the product. If possible, avoid storage areas with high humidity which could cause rust or corrosion.
End of season storage: Remove battery and store both machine and battery in a dry safe place away from direct sunlight.
Do not place objects on top of the machine.
When storing for extended periods, thoroughly clean the product beforehand.
After-sales Service and Application Service
www.bosch-professional.com
In all correspondence and spare parts orders, please always include the 10-digit article number given on the type plate of the garden product.
Great Britain
Robert Bosch Ltd. (B.S.C.)
P.O. Box 98
Broadwater Park
North Orbital Road
Denham
Uxbridge
UB 9 5HJ
At www.bosch-pt.co.uk you can order spare parts or arrange the collection of a product in need of servicing or repair.
Tel. Service: (0344) 7360109
E-Mail: boschservicecentre@bosch.com
Ireland
Origo Ltd.
Unit 23 Magna Drive
Magna Business Park
City West
Dublin 24
Tel. Service: (01) 4666700
Fax: (01) 4666888
20 | English
Australia, New Zealand and Pacific Islands
Robert Bosch Australia Pty. Ltd.
Power Tools
Locked Bag 66
Clayton South VIC 3169
Customer Contact Center
Inside Australia:
Phone: (01300) 307044
Fax:(01300)307045
Inside New Zealand:
Phone: (0800) 543353
Fax: (0800) 428570
Outside AU and NZ:
Phone:+61395415555
www.bosch.com.au
Republic of South Africa
Customer service
Hotline: (011) 6519600
Gauteng - BSC Service Centre
35 Roper Street, New Centre
Johannesburg
Tel.: (011) 4939375
Fax: (011) 4930126
E-Mail: bsctools@icon.co.za
KZN - BSC Service Centre
Unit E, Almar Centre
143 Crompton Street
Pinetown
Tel.: (031) 7012120
Fax: (031) 7012446
E-Mail: bsc.dur@za.bosch.com
Western Cape - BSC Service Centre
Democracy Way, Prosperity Park
Milnerton
Tel.: (021) 5512577
Fax:(021)5513223
E-Mail: bsc@zsd.co.za
Bosch Headquarters
Midrand, Gauteng
Tel.: (011) 6519600
Fax:(011)6519880
E-Mail: rbsa-hq.pts@za.bosch.com
Transport
The contained lithium-ion batteries are subject to the Dangerous Goods Legislation requirements. The user can transport the batteries by road without further requirements. When being transported by third parties (e.g.: air transport or forwarding agency), special requirements on packaging and labelling must be observed. For preparation of the item being shipped, consulting an expert for hazardous material is required.
Dispatch batteries only when the housing is undamaged. Tape or mask off open contacts and pack up the battery in such a manner that it cannot move around in the packaging. Please also observe possibly more detailed national regulations.
Disposal
Do not dispose of garden products, battery chargers and batteries/rechargeable batteries into household waste!
Only for EC countries:

According to the European law 2012/19/EU, electrical and electronic equipments that are no longer usable, and according to the European law 2006/66/EC, defective or used battery packs/batteries, must be separated from the tool and collect-
ed separately. If battery is broken or leaking please dispose of in an environmentally correct manner according to local regulations.
Batteries no longer suitable for use can be directly returned at:
Great Britain
Robert Bosch Ltd. (B.S.C.)
P.O. Box 98
Broadwater Park
North Orbital Road
Denham
Uxbridge
UB 9 5HJ
At www.bosch-pt.co.uk you can order spare parts or arrange the collection of a product in need of servicing or repair.
Tel. Service: (0344) 7360109
E-Mail: boschservicecentre@bosch.com
Battery packs/batteries:

Li-Ion:
Please observe the instructions in section "Transport".
Subject to change without notice.
Français | 21
Français
Henk Becker Executive Vice President Engineering Helmut Heinzelmann Head of Product Certification PT/ETM9

Robert Bosch GmbH, Power Tools Division 70764 Leinfelden-Echterdingen, GERMANY 03.08.2015
Robert Bosch (France) S.A.S.
Bosch Lawn and Garden Ltd., PT-HG/ENS-PA2,
Stowmarket, Suffolk IP14 1EY, England
Henk Becker
Helmut Heinzelmann
Executive Vice President
Head of Product Certification
Engineering
PT/ETM9


Robert Bosch GmbH, Power Tools Division
70764 Leinfelden-Echterdingen, GERMANY
03.08.2015
Montaje y operación
Bosch Lawn and Garden Ltd., PT-HG/ENS-PA2,
Stowmarket, Suffolk IP14 1EY, England
Henk Becker
Executive Vice President
Engineering
Helmut Heinzelmann
Head of Product Certification
PT/ETM9


Robert Bosch GmbH, Power Tools Division
70764 Leinfelden-Echterdingen, GERMANY
03.08.2015
Bosch Lawn and Garden Ltd., PT-HG/ENS-PA2,
Stowmarket, Suffolk IP14 1EY, England
Henk Becker
Helmut Heinzelmann
Executive Vice President
Head of Product Certification
Engineering
PT/ETM9


Robert Bosch GmbH, Power Tools Division
70764 Leinfelden-Echterdingen, GERMANY
03.08.2015
Montaggio ed uso
Bosch Lawn and Garden Ltd., PT-HG/ENS-PA2.
Stowmarket, Suffolk IP14 1EY, England
Henk Becker
Helmut Heinzelmann
Executive Vice President
Head of Product Certification
Engineering
PT/ETM9

Robert Bosch GmbH, Power Tools Division
70764 Leinfelden-Echterdingen, GERMANY
03.08.2015
Montage en gebruik
Teknisk dossier (2006/42/EF, 2000/14/EF) ved:
Bosch Lawn and Garden Ltd., PT-HG/ENS-PA2,
Stowmarket, Suffolk IP14 1EY, England
Henk Becker
Executive Vice President
Engineering
Helmut Heinzelmann
Head of Product Certification
PT/ETM9

i.v. h=w
Robert Bosch GmbH, Power Tools Division
70764 Leinfelden-Echterdingen, GERMANY
03.08.2015
Montering og drift
Bosch Service Center
Telegrafvej 3
2750 Ballerup
På www.bosch-pt.dk kan der online bestilles reservedele eller oprettes en reparations ordre.
Tlf. Service Center: 44898855
Fax: 44898755
E-Mail: vaerktoej@dk.bosch.com
Transport
Bosch Service Center
Telegrafvej 3
2750 Ballerup
Danmark
Tel.: (08) 7501820 (inom Sverige)
Fax: (011) 187691
Transport
Bosch Lawn and Garden Ltd., PT-HG/ENS-PA2,
Stowmarket, Suffolk IP14 1EY, England
Henk Becker
Executive Vice President
Engineering
Helmut Heinzelmann
Head of Product Certification
PT/ETM9
προ

Robert Bosch GmbH, Power Tools Division
70764 Leinfelden-Echterdingen, GERMANY
03.08.2015
Bosch Lawn and Garden Ltd., PT-HG/ENS-PA2,
Stowmarket, Suffolk IP14 1EY, England
Henk Becker
Helmut Heinzelmann
Executive Vice President
Head of Product Certification
Engineering
PT/ETM9


i.v. h=mc
Robert Bosch GmbH, Power Tools Division
70764 Leinfelden-Echterdingen, GERMANY
03.08.2015
106 | Ελληνικά
Bosch Lawn and Garden Ltd., PT-HG/ENS-PA2, Stowmarket, Suffolk IP14 1EY, England
Henk Becker
Executive Vice President Engineering
Helmut Heinzelmann
Head of Product Certification PT/ETM9


Robert Bosch GmbH, Power Tools Division 70764 Leinfelden-Echterdingen, GERMANY 03.08.2015
Montaj ve işletim
3


122
4





5


6




8


9
10


126
11



natural_image
Illustration of a person using a pole-mounted device to lift a wall, with flowers and striped background (no text or symbols)12


∅ 2.4 mm x 30 m:
F 016 800 390
∅ 2.4 mm x 90 m:
F016800391
∅ 2.4 mm x 260 m:
F016800392
∅ 2.7 mm x 24 m:
F016800393
∅ 2.7 mm x 70 m:
F 016 800 394
∅ 2.7 mm x 206 m:
F 016 800 395
∅ 3.0 mm x 166 m:
F 016 800 398

F 016 800 387

F016800401
F016800402

F016800403

F 016 800 389

F 016 800 404
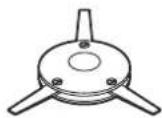
F 016 800 399
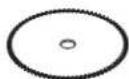
F 016 800 405

F 016 800 400
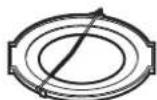
F 016 800 409

F016800412
12

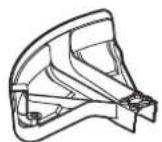
F 016 800 406

F016800178

F016800407

natural_image
Line drawing of a harness with straps and buckles (no text or symbols)F 016 800 410

F016800408

F016800411

natural_image
Technical line drawing of a Bosch electric shock absorber (no text or symbols on the device itself)1 600 A00 1GC (UK)
1 600 A00 1GB (WEU)

2 607 336 065




- GFR Professional
- BOSCH
- Montage und Betrieb
- Fehlersuche
- Explanation of symbols on the machine
- Operation
- English | 13
- | English
- Maintenance
- For Your Safety
- Cleaning
- Recommendations for Optimal Handling of the Battery and Charger
- Symbols
- Intended Use
- Mounting and Operation
- Product Transportation
- Working Advice
- Troubleshooting
- After use/Storage
- After-sales Service and Application Service
- www.bosch-professional.com
- Great Britain
- Ireland
- | English
- Australia, New Zealand and Pacific Islands
- Republic of South Africa
- Customer service
- Gauteng - BSC Service Centre
- KZN - BSC Service Centre
- Western Cape - BSC Service Centre
- Bosch Headquarters
- Transport
- Disposal
- Only for EC countries:
- Battery packs/batteries:
- Li-Ion:
- Français
- Montaje y operación
- Montaggio ed uso
- Montage en gebruik
- Montering og drift
- Montaj ve işletim
- 11
- 12
Brand : BOSCH
Model : GFR 25 Professional
Category : Hedge Trimmers