
MC 057C AX0 - Microwaves HOTPOINT - Free user manual and instructions
Find the device manual for free MC 057C AX0 HOTPOINT in PDF.
User questions about MC 057C AX0 HOTPOINT
0 question about this device. Answer the ones you know or ask your own.
Ask a new question about this device
Download the instructions for your Microwaves in PDF format for free! Find your manual MC 057C AX0 - HOTPOINT and take your electronic device back in hand. On this page are published all the documents necessary for the use of your device. MC 057C AX0 by HOTPOINT.
USER MANUAL MC 057C AX0 HOTPOINT
EN Operating instructions
FR Mode d'emploi
RU Hnctpykunno 3Kcnnyataun
TR Kullanma talimatlari
Please fully read this manual before you start using this device. Please keep the manual for future reference.
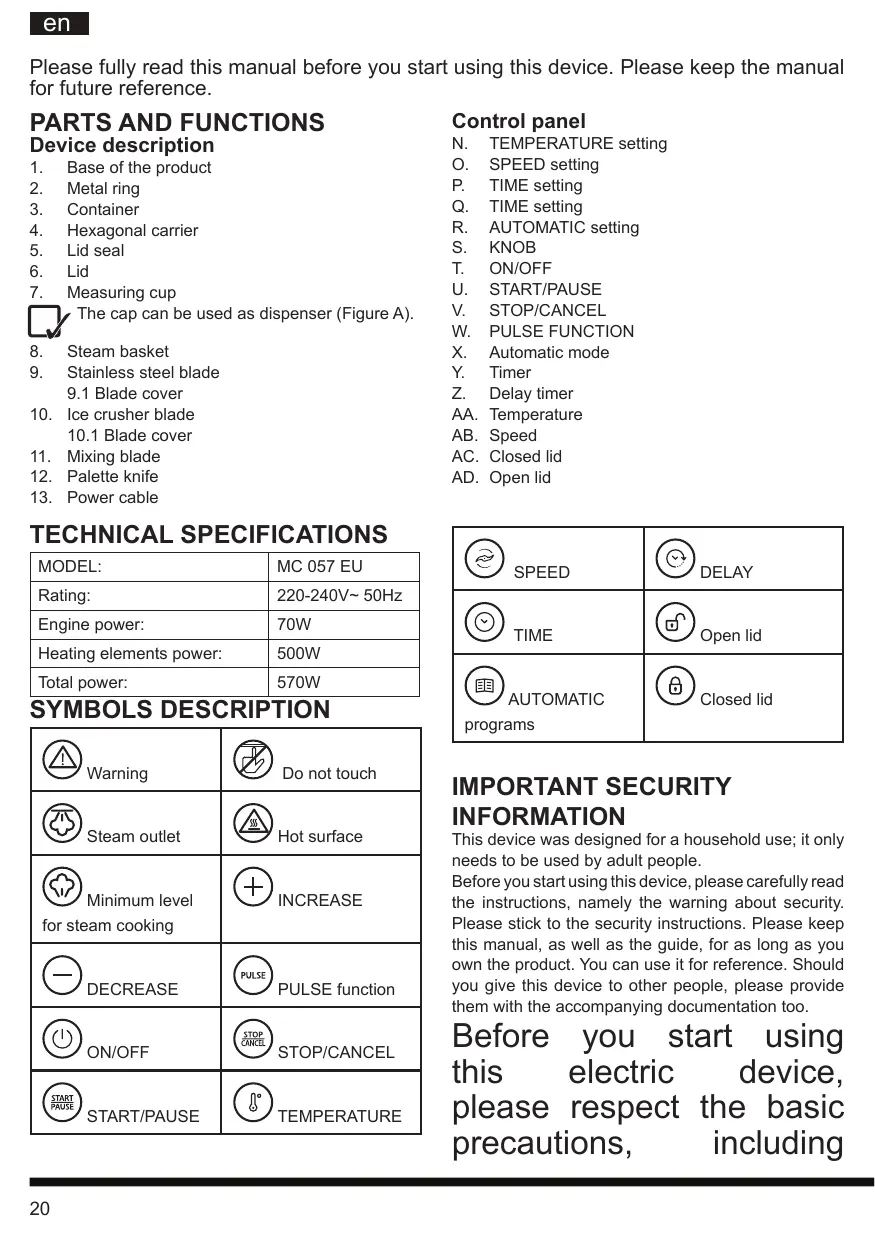
PARTS AND FUNCTIONS Device description
- Base of the product
- Metal ring
- Container
- Hexagonal carrier
- Lid seal
- Lid
- Measuring cup

The cap can be used as dispenser (Figure A).
- Steam basket
- Stainless steel blade 9.1 Blade cover
- Ice crusher blade 10.1 Blade cover
- Mixing blade
- Palette knife
- Power cable
TECHNICAL SPECIFICATIONS
SYMBOLS DESCRIPTION
| MODEL: | MC 057 EU |
| Rating: | 220-240V~ 50Hz |
| Engine power: | 70W |
| Heating elements power: | 500W |
| Total power: | 570W |
| Warning | Do not touch |
| Steam outlet | Hot surface |
| Minimum level for steam cooking | + INCREASE |
| — DECREASE | PULSE PULSE function |
| ON/OFF | STOP CANCEL STOP/CANCEL |
| START/PAUSE START/PAUSE | TEMPERATURE |
Control panel
N. TEMPERATUREReseting
O. SPEED setting
P. TIME setting
Q. TIME setting
R. AUTOMATIC setting
S. KNOB
T. ON/OFF
U. START/PAUSE
V. STOP/CANCEL
W. PULSE FUNCTION
X. Automatic mode
Y. Timer
Z. Delay timer
AA. Temperature
AB. Speed
AC. Closed lid
AD. Open lid
| SPEED | DELAY |
| TIME | Open lid |
| AUTOMATIC programs | Closed lid |
IMPORTANT SECURITY INFORMATION
This device was designed for a household use; it only needs to be used by adult people.
Before you start using this device, please carefully read the instructions, namely the warning about security. Please stick to the security instructions. Please keep this manual, as well as the guide, for as long as you own the product. You can use it for reference. Should you give this device to other people, please provide them with the accompanying documentation too.
Before you start using this electric device, please respect the basic precautions, including
what follows:
- Please read all instruction.
- After taking the device out of the box, please check it is intact and compare it with the drawing. Please mark any damages caused by transport. In case of doubt, please do not use the device and contact an authorised service center.
- Before you connect the device, please check that the electric data mentioned in the plate correspond to the technical data of the available national grid. The rating plate is on the bottom of the device.
- This device must only be used for the reason why it was produced, which is to say as KITCHEN ROBOT WITH COOKING FUNCTION for household use. Any
other use is considered not in line with the device and is therefore considered dangerous.
- The non-respect of these instructions or the abuse of the device can cause injuries.
- The device must not be used by children. Please keep the device and its power cable out of the reach of children.
- Children must not play with this device.
- This device can be used by children starting from 8 years and by adults with limited physical, sensory or mental capabilities, or with limited knowledge on the use of the device, only if they are supervised or informed about the use of the device and on condition that they understood the risks involved. Children must not play with this device. Cleaning and
service operations must not be carried out by children, unless they are older than 8 and on condition that they are supervised.
- Please supervise the device when it's working.
- Do not use the device with an external timer or a separate remote control system.
- The use of nonre com m e n d e d accessories, or accessories not sold by the producer is not recommended at all, as this could cause fires, electric shocks or injuries.
- Please turn off the device before you replace its accessories or before you approach its moving parts when it's working.
- Please do not use the device if the cable is damaged or again in
case or malfunctioning or if the device was damaged.
- Do not let the cable hang from the table or from the work surface or from a hot surface.
- Do not immerse the cable or the device of the mixer in water, as this could cause electric shocks.
- Should the power cable be damaged, please contact the producer, an authorized technician or a qualified person, and ask for a replacement, in order to avoid any dangerous situations.
- It will be necessary to closely supervise the device when it's used in proximity of children or invalid people.
-
Please do not put the device on or close to hot gas or heat-emitting ovens.
-
Please unplug when the device is not working, before inserting or extracting parts and before you clean it.
- Please check that the control is set on OFF before you plug the power cable to the wall socket. To unplug, please set the control on OFF, then take out the plug from the wall socket.
- Please avoid any contact with moving parts.
- Please keep hands, clothes, palette knives and other accessories far from moving parts when the device is working: in this way it will be possible to reduce injuries to people and/or damages to the device itself.
- Please keep both the device and the power cable out of the reach of children younger than 8
years old.
- Do not use in the open air.
- Please keep these instructions.
- ATTENTION! CHOKING HAZARD The packing material is not a toy for children. Please keep the plastic bag out of the reach of children.
- ATTENTION! ELECTRIC SHOCK DANGER The electric safety of this device is guaranteed only when the device is connected to an effective grounding system, as defined in the current electric safety regulations. Please check this fundamental safety requirement; in case of doubts please ask a skilled technician to carry out an accurate control of the system.
- Please DO NOT use the device near a sink full of water. When it is working, the device must be in a safe position, and it must not fall into the sink.
- Please DO NOT turn on the device if the power cable is damaged. The cable must be replaced with an original cable provided by an authorised service centre.
- Please DO NOT use the device with wet hands, naked or soaked feet.
- Please DO NOT pull the power cable or the device in order to unplug it from the wall socket.
- Please DO NOT put the power cable on corners or sharp edges: it could get damaged.
- DO NOT immerse the engine body in water; never put it under a running water tap.
- Please carefully wipe the container contacts, which are in the lower part, before you put it back into place.
- Please periodically check the seal integrity of the hexagonal insert as well as of the container connector. Should they be worn out, please contact the authorised service center.
- ATTENTION! DANGER OF FIRE The device must not be used under or near combustible materials, such as curtains. Please position the device far from heat-sensitive surfaces. Please let the device cool down before you put it back.
- Please do not use extension leads or adapters. Please fully insert the power cable where it belongs. Totally unwind the power cable before you connect the device to the wall socket. Oil and heated fats could catch fire.
- ATTENTION! BURNS DANGER
- NEVER exceed the maximum level shown in the container, 1,5 L, in order to avoid hot water
and food overflow.
- NEVER use the device without the dispenser cap in the lid with the pulse function or speeds higher than 5, because the hot parts could be splashed at the user or the surrounding environment.
- NEVER use the mixing blade with the pulse function or speeds higher than 5.
- When the device is working, its surfaces can reach very high temperatures; please always use the suitable oven gloved to handle the container, the lid, the mixing blade, the jagged ice crusher blade, the stainless steel blade, the steam basket and the dispenser cap during use or after the product was used.
- During cooking, please pay attention to any splashes of hot food, to heat or steam which could come towards your face when opening the lid.
- When the device is used without lid, the device can be compared to any standard pot: very hot liquids are easily accessible.
- Please always check the food temperature of the cooked food before you eat it, or before a child eats it.
- Periodically check the integrity of the lid seal. Should this be worn out, please contact an authorised service centre. Please replace it at least every two years.
- Before you close the lid, please check the seal is intact as well as correctly positioned.
- When you put the hexagonal insert back into place, please check that the seal is there and that it is intact too.
- ATTENTION! RISK OF DAMAGE TO PRODUCTS OR THINGS NEARBY
- DO NOT put the container in the oven, in the microwave oven or in the freezer.
- DO NOT place the device next to heat sources or in hot areas.
- DO NOT obstruct air outlets and make sure there is an adequate ventilation around the device when it is working.
- DO NOT expose the device to wet conditions or to the action of weather agents.
- NEVER make the device work without food inside.
- DO NOT use the jagged ice crusher blade, the stainless steal blade and the mixing blade to process hard ingredients in block which are bigger than 1,5 cm per side.
-
Please make sure there is enough free space above the device and around it, in order to prevent any damages caused by the head produced by the device.
-
NEVER immerse the device in water.
- This device is not suitable to knead heavy mixtures such as those for bread, pasta, pizza, shortcrust pastry, etc.
- This device is not suitable to fry foods.
- Please do not lift the device by using the container handle.
- ATTENTION! DANGER OF INJURIES
- Position the body on a stable flat and smooth horizontal surface. Leave a certain space from the edges, so that the device cannot fall when it being used. The suction cups must strongly adhere to the leaning surface. Please do not move the device when it's ON.
- Blades are sharp, please handle with care, in order to avoid cuts and grazes.
- When mounting and un-mounting the hexagonal insert, please pay attention in order not to get your fingers crushed when turning the metal ring.
- Please open the lid only after the jagged ice crushed blade, the stainless steel blade and the mixing blade have stopped working.
- Please pull out the jagged ice crusher blade, the stainless steal blade and the mixing blade before you extract the food from the container.
- Please make sure that the power cable is not handing from the work surface on which the device is located.
- DO NOT use near the cooking surface of the kitchen.
- Please pay attention: avoid that the power cable and the device get in contact with hot surfaces, free flames, pots and other accessories.
- Before you start any cleaning of service operation, please turn off the power button and unplug from the wall socket.
- DO NOT turn on the device if the housing is damaged or if the device fell off. Please contact an authorised service centre.
- DO NOT insert fingers or accessories inside the device when it is working in order to avoid getting injured or damaging the device.
- NEVER use the mixing blade with the pulse function or speeds higher than 5.
- Do not cover the lid with towels or other objects.
- Please check that the security device on the column on the base of the device is clean enough. When the lid is open, on the display there must be the symbol of an open lock.
BEFORE USE
Cleaning

Blades are sharp, please handle with care, in order to avoid cuts and grazes.
- Unpack the device and extract any inserts or adhesive labels which might be present on the device surface.
- Take out the protection from the jagged ice crusher blade and from the stainless steel blade.
- Carefully wash by hand with hot water and soap for dishes all the moving parts which get in contact with food:
the dispenser cap, the lid and its seal, the palette blade, the mixing blade and the steam basket.
- the stainless steel blade and the jagged ice crusher blade with a small brush and taking them from the upper part in order not to get cut.
the container.
- Clean the engine with a wet cloth, well squeezed, and the container housing; please avoid to have water in the area where the container connector is located.

The container, the cover and the measuring cup can be washed in the dishwasher.

To wash in the dishwasher please put the cup into a higher position, away from direct splashes of water and use a medium-low temperature cycle.

Please carefully dry all washed parts.
Mounting
- Position the engine on a horizontal flat surface, leave some distance from the edges, so that small movements and/or vibrations during the use do not cause any damage to the device. The suction cups must strongly adhere to the leaning surface.
- Insert the container in its housing pushing down until you hear a click.
-
Mount the suitable accessory according to what you need to do:
-
the stainless steel blade or the jagged ice crusher blade by taking them from the top in order not to get cut, and insert them on the hexagonal insert.

take out the protection cover before you start using the device
the mixing blade, by inserting it on the hexagonal insert.
- position the steam basket directly in the container after pouring water up to the requested level for steam cooking.
- Position the lid seal so that the protruding edge appears as it does in Figure A.
- Mount it on the lid in the direction shown by the arrows on the external part of the seal.
- Position the lid on the container as shown in picture A, then turn clockwise until you come to a complete closed state.
- Insert the dispenser tap in the lid.
DEVICE DESCRIPTION
Introduction
This household appliance unites the ROBOT function to the COOKING function; both functions can be executed independently or simultaneously.
You can also add the TIMER function, so that the device can stop at the end of the process.
You can also set step-by-step the different phases of the recipes, up to the cooked dish. The device also features 15 programs to automatically execute all the passages linked to the execution of multiple recipes, just like they are described in the recipe book.
In order to learn how to fully exploit the potential of this device, please initially follow all recipes
as they are described in the recipe book, which includes examples and recommendations for any type of processing.
In this way you'll learn the different process techniques and the limitations in terms of quantity; after this, you'll be able to automatically execute different versions, in a very easy way.
Robot Function
The engine rotation, with regulation from 1 to 10, allows very slow speeds, which are ideal to mix during cooking, but also high speeds, which guarantee the typical features of kitchen robots / mixers. Speed setting number 1 enables the intermittent working of the engine, at minimal speed;

please use this setting to prepare meat, for example braised meat or stews, or in general which don't need a continuous mixing.
When you activate pulses in the engine (PULSE function), this is very useful in order to have a better
control of the minced meat or to include more air in certain types of processes.
For hard foods, the maximum size of foods to be inserted in the container is about 1,5 cm per side (almost as big as a stock cube or a sugar cube). Soffer foods (fruit and vegetables) can be inserted in bigger chunks.
This device is not suitable to mince hard foods (coffee, cereal, etc.), to pulverize and knead some flour-based recipes (bread, pizza, dough and shortcrust pastry).
Do not use the stainless steel blade to crush ice or frozen foods, in order not to ruin its sharpening: use the suitable ice crusher blade, do not use frozen ingredients. If you need to use frozen ingredients, please take them out of the freezer about 10/15 minutes before using them.
The accessories dedicated to the robot feature are the mixing blade, the stainless steel blade and the ice crush blade, which must be used as follows:
| Accessory | Speed | Function | Note |
| Blade Mixing | 1-3 | To gently mix food during cooking without damaging them or breaking them into bits (rice, mushrooms, vegetables, etc). | Never use the mixing blade at an higher speed then 5 or pulse in order to avoid splashes and excessive vibrations. |
| 4-5 | To emulsify and mix sauces and other processes | ||
| Inox blade | 4-5 | To knead soft bases for cakes, batter, etc. | |
| 6-8 | To mince different foods | Use with the dispenser cap correctly fitted in order to avoid splashes | |
| 9-10 | In order to roughly mince dried food (parmesan cheese, biscuits, dried bred) | ||
| 9-10 | To roughly mix/homogenize semi-liquid foods | ||
| Pulse | To mice different kinds of food, by keeping under control the processed food To give volume to the processing | ||
| Jagged blade Ice crusher | 6-10 Pulse | In order to crush ice, frozen fruit or bases for ice-cream | Use with the dispenser cap correctly fitted in order to avoid splashes |
Cooking function
The temperature setting allows you to cook different types of food at the correct temperature, in a more precise way if compared to the traditional cooking method in the pot. The temperature can be set from a minimum of 37^ - which is the ideal body temperature for children's food - up to a maximum of 100^ , in order to guarantee boiling and steam cooking.

This device was not designed to fry foods.

Please always check the temperature of the cooked food before you eat it or make a child eat it.
The cooking is generally matched with the rotation of the mixing blade or of the stainless steel blade in order to guarantee a mixing which prevents the food from sticking to the bottom of the pan during the cooking process.
| Temperature | Degrees | Function |
| Warm | 37°C | To bring milk or food for children to body-temperature |
| Hot | 50-60°C | To mildly heat milk or food for children To melt delicate foods which could get damaged at high temperature (chocolate, butter, etc.) |
| Very hot | 70-80°C | To heat milk To melt some foods (cheese, sugar) To cook sauces/creams/puddings made from flour or eggs |
| Piping hot | 90-100°C | To fry lightly various types of food To cook various types of food To simmer or boil To steam |
Cooking without lid
You can execute the different types of cooking without lid: in this case, the "robot" feature (engine speed setting and pulse working) is disabled for security reasons.
Steam cooking
Steam cooking must be executed at a temperature of 100^ with the steam basket and the lid. You must insert at least as much water as the minimum level indicated inside the container: this guarantees that the machine works correctly for 60 minutes.
Cooking by boiling
Cooking by boiling must be executed at a temperature of 100^ , with or without the mixing blade accessory. You must insert maximum 1 litre of water; please pay attention: do not exceed the 1,5 litres limit after inserting the food.
Timer function
The use of the timer allows you to set the desired processing time and to be warned at the end. The device stops automatically.
The timer function is particularly useful for long cooking periods because it allows you not to go over correct times for the type of food being cooked. In this way you don't burn the food you are cooking.
USE OF THE DEVICE
- Unwind the power cable
- Insert the cable connector in the connector housing of the cable, pushing until the very end.
- Make sure the product is on a flat surface.
- Connect the power cable to a wall socket.
- Insert both the container and the lid
- Turn on the device: the panel will turn on and a
beep can be heard:
-
if the lid is open, on the display there is a lock symbol and the SPEED engine key and the PULSE key cannot be selected; the engine function is disabled.
If the lid is closed, on the display the closed lock symbol will appear. -
Insert both ingredients and accessories by following the instructions on the recipe book.
- Close the lid and insert the dispenser cap if this is indicated in the recipe.
- Proceed with the manual setting of time, speed and temperature or by using an automatic program.
In case no button is pressed, the device goes in "energy save" mode after 5 minutes and the display turns off. To turn it back on, press the POWER button.
Manual setting
You can set the ROBOT function and the COOKING function separately or at the same time, if possible by using the TIMER feature in order to set the processing time with automatic stop at the end.
Robot function setting: engine speed from 1 to 10
- Press the engine SPEED button: on the display the corresponding icon flashes.
- Set the speed by turning the knob clockwise + and anti-clockwise - to increase or decrease the selected value (Figure B).
Position the lid, otherwise the engine function cannot be set.
Setting of the cooking function: temperatures from 37^ to 100^ .
- Press the TEMPERATURE button: on the display the corresponding icon is flashing.
- Set the temperature by turning the knob clockwise + and anti-clockwise - to increase or decrease the selected value (Figure C).
Setting the timer function
- Press the TIMER button: on the display the corresponding icon flashes as well as the area dedicated to minutes.
- By pressing again the TIMER button you select the area dedicated to seconds.
- Set the time by turning the knob clockwise + and anti-clockwise - to increase or decrease the selected value (Figure C). The maximum time which can be set corresponds to 99 minutes (Figure D).
Start of processing

Please do not move the device when it's ON.
Activate the device by pressing the START / PAUSE button; on the display you will see (Figure E):
- Set speed
- Set temperature: the C^ symbol flashes until the temperature is reached
The elapsed time, unless a specific timer was set
The residual time before the end of the processing if the timer was set
Change settings
You can change speed, temperature or set time even after starting the processing:
- Press the buttons about engine speed, temperature or timer: the corresponding icon flashes.
- Set the value by turning the knob
- You can change the set value as long as the icon keeps flashing.
Temporary stop of the processing
If necessary, please open/close the lid in order to check the processing status; pause and proceed as follows:
- By pressing the START / PAUSE button: the processing temporarily stops (temperature, speed and time).
- To restart immediately, press again the START/ PAUSE button. If this button is not pressed within
20 minutes the device turns off.
If the lid is opened without pausing first the device immediately blocks - for safety reasons - the engine rotation; the cooking and timer functions remain active in order to allow the continuation of the process. To restart the processing just close the lid.
The POWER button and the STOP/CANCEL button must be pressed for about 1 second in order to be activated.

The POWER and the STOP/CANCEL button cancel current settings.
Pulse function
Hold pressed the PULSE button for 2/3 seconds, then release it; repeat this operation several times; on the display the corresponding icon will light.
The PULSE function (pulse processing) cannot be used on a previously set processing.
End of the processing
When the timer-set time is over (or after 30 minutes from the start of the processing without timer) the device will emit an acoustic signal and on the display "END" will appear; the device will keep mixing for 2 more minutes in order to prevent the food from sticking on the bottom of the container.
Press the STOP button when you prefer. Should this button not be pressed within 3 minutes, the device switches to "energy save" mode.
Automatic programs
- Press the AUTOMATIC programs button: a screen very similar to the one showed in Figure F will appear.
- Turn the knob in order to reach the selected program.
- After selecting the program you can select the portions by pressing again the automatic programs button; times and ingredients quantities will vary accordingly.
If the container is removed during an automatic cycle, the display shows the "E3" error message. Replace the container on the unit and press STOP/CANCEL to re-activate the screen and go on with the processing.

At the end of the cycle the display shows the "END" message.
| Name | Program no. | Portions no. | Step no. | Speed | Minutes | Total time | Temperature (°C) |
| Browning | 1 | 2 | 1 | 1 | 6 | 25 | 100 |
| 2 | 1 | 6 | 100 | ||||
| 3 | 1 | 13 | 100 | ||||
| 4 | 1 | 1 | 9 | 31 | 100 | ||
| 2 | 1 | 10 | 100 | ||||
| 3 | 1 | 12 | 100 | ||||
| Risottos and stews | 2 | 2 | 1 | 2 | 6 | 24 | 100 |
| 2 | 2 | 4 | 100 | ||||
| 3 | 2 | 14 | 100 | ||||
| 4 | 1 | 2 | 7 | 26 | 100 | ||
| 2 | 2 | 5 | 100 | ||||
| 3 | 2 | 14 | 100 | ||||
| Boiled meat and steam cooking | 3 | 2 | 1 | 0 | 4 | 14 | 100 |
| 2 | 0 | 10 | 100 | ||||
| 4 | 1 | 0 | 4 | 16 | 100 | ||
| 2 | 0 | 12 | 100 | ||||
| Braised meat | 4 | 2 | 1 | 1 | 6 | 46 | 100 |
| 2 | 1 | 15 | 100 | ||||
| 3 | 1 | 25 | 100 | ||||
| 4 | 1 | 1 | 9 | 60 | 100 | ||
| 2 | 1 | 19 | 100 | ||||
| 3 | 1 | 32 | 100 | ||||
| Rice-pasta | 5 | 2 | 1 | 1 | 12 | 44 | 100 |
| 2 | 1 | 13 | 100 | ||||
| 3 | 1 | 19 | 100 | ||||
| 4 | 1 | 1 | 15 | 61 | 100 | ||
| 2 | 1 | 20 | 100 | ||||
| 3 | 1 | 26 | 100 | ||||
| Soups | 6 | 2 | 1 | 1 | 18 | 33 | 100 |
| 2 | 1 | 15 | 100 | ||||
| 4 | 1 | 1 | 20 | 38 | 100 | ||
| 2 | 1 | 18 | 100 | ||||
| Vegetables and cereals creams | 7 | 2 | 1 | 1 | 25 | 28 | 100 |
| 2 | 8 | 3 | 100 | ||||
| 4 | 1 | 1 | 40 | 43 | 100 | ||
| 2 | 8 | 3 | 100 | ||||
| Veloutés | 8 | 2 | 1 | 1 | 20 | 23 | 100 |
| 2 | 6 | 3 | 100 | ||||
| Vegetables | 9 | 2 | 1 | 1 | 10 | 25 | 90 |
| 2 | 1 | 15 | 90 | ||||
| Sweet creams | 10 | - | 1 | 5 | 1 | 7 | 0 |
| 2 | 2 | 1 | 90 | ||||
| 3 | 2 | 5 | 90 | ||||
| Low-tempera-ture cooking | 11 | - | 1 | 1 | 5 | 65 | 100 |
| 2 | 1 | 20 | 80 | ||||
| 3 | 1 | 40 | 80 | ||||
| Hot sauces | 12 | - | 1 | 1 | 3 | 15 | 80 |
| 2 | 3 | 3 | 80 | ||||
| 3 | 3 | 9 | 80 | ||||
| Cold prepara-tions | 13 | - | 1 | 5 | 2 | 6 | - |
| 2 | 5 | 4 | - | ||||
| Mixtures for cakes | 14 | - | 1 | 1 | 3 | 11 | 70 |
| 2 | 4 | 3 | - | ||||
| 3 | 4 | 5 | - | ||||
| Jellys | 15 | - | 1 | - | 10 | 26 | 90 |
| 2 | 1 | 14 | 90 | ||||
| 3 | 8 | 2 | 90 |
At the end of the process
When the timer-set time is over the device will emit an acoustic signal and on the display "END" will appear.

The device will keep mixing for 2 more minutes in order to prevent the food from sticking on the rim of the container.
Press the STOP button when you prefer. Should this button not be pressed within 3 minutes, the device switches to "energy save" mode.
Delay function
The DELAY function can be associated to automatic programmes; this will allow you to set a delay in the start of the automatic program.
To set the delay function you have to:
- Select the automatic program
- Set the DELAY by pressing the suitable key and and select the delay time by turning the knob.

The first two digits on the display show the hours, the third and the forth indicate minutes.

The minimum time which can be set is 30 minutes; the maximum time which can be set is 48 hours and 30 minutes.

By pressing the delayed start button you can respectively set hours or minutes.
- After setting the desired time for delayed start, press the START/PAUSE button

The display shows the corresponding icon and the countdown before the beginning of the
cycle.
End of the use
- Turn off the device
- Pull out the power cable plug from the wall socket
- Take out the lid by turning it clock-wise
- Take out the container from the device
- Remove the accessory inside the container
- Remove the food by using a palette blade
The product has a protection device which intervenes when the engine undergoes overheating. Please do not execute more than 3 long consecutive processes in order not to overload the engine.
CLEANING AND MAINTENANCE
- Unplug the device and wait for it to cool down completely before you clean it
- Clean the external surface with a wet cloth, so dry with a dry cloth.
- Remove any excess residues from the power cable.
- Pull out the container.
- Unmount the hexagonal insert by turning the metal ring anti-clockwise, in order to clean any food residues which might be present on the seal.

Pat attention not to have your fingers smashed when turning the metal ring.
- Extract the hexagonal insert from the inside of
the container.
- Manually wash the hexagonal insert, its seal and its metal ring with hot water and dishes soap. Then, clean carefully.
- Re-insert the hexagonal insert in the container by holding it with your hand.
- Insert the metal ring and turn clockwise until the end of the stroke.

The container, the cover and the measuring cup can be washed in the dishwasher.

To wash in the dishwasher please put the cup in a higher position, away from direct splashes of water and use a medium-low temperature cycle.

Please regularly check the seal and lid integrity, as well as the integrity of the hexagonal insert of the contacts and of the container's connector. Id they be worn out, please contact an authority center.
Clean food residues after use

NEVER immerse the body in water. NEVER put the engine under running water.

In some cases, depending on food and the preparations, there should be a residual film on the bottom; try and remove this with a palette knife. In this it is still there, try and remove it with a metallic or abrasive sponge.
Carefully wash by hand with hot water and soap for dishes all the moving parts which get in contact with food:
the dispenser cap, the lid, the lid seal and the palette blade,
the mixing blade and the steam basket.
- the stainless steel blade and the ice crusher blade with a small brush and taking them from the upper part in order not to get cut.

We recommend to wash all blades immediately after use; please avoid leaving them in contact with food.
- Wash the container with vinegar to remove any residual scale traces.
- Clean the engine and the container's housing with a well-squeezed wet cloth; please avoid to get water in the area where the connector is located.
- Please remove any food residues from the security device which is located on the column on the base of the product.

Carefully dry the washed parts.
Cleaning using the engine
At the end of the processing, please clean the inside of the container as follows:
- Remove from the container the food and the accessory you've used.
- Insert the stainless steel blade.
- Please fill the container with hot water up to 1 litre and add a drop of dishes soap. If you don't want to use dishes soap you can add thick salt, in order to better remove food residues, or lemon juice, in order to eliminate any smells.
- Close the cover and insert the dispenser cap.
Activate the PULSE button for the time you deem necessary. - Empty the container and wash it under running water.
PROBLEMS AND SOLUTIONS
| Error/Problem | Causes | Solutions |
| E1 | Engine overload | Reduce the quantity of food inside the container.Pull out any food residues from the blades. |
| E3 | The container is not properly fixed to the base.The container was removed during the processing or during a program. | Correctly fit the container. |
| E5 | Engine abnormality. | Let the engine cool for about 30 minutes, especially if you've done intense and prolonged processes. Should the problem be still there after the cooling period, please contact an authorised service center. |
| The device is not working. | The device is not connected to the wall socket. Insert the power cable plug in the wall socket. | The cable connector wasn't properly connected to the wall socket. |
| The cable connector wasn't properly connected to the device. | Please make sure the cable is properly connected to the product's plug. | |
| The keys do not react immediately. | The touch keys of the commands panel require the correct contact time. | Press the keys for a longer time. Should the problem still be there, maybe there is an electromagnetic interference in the network: unplug and plug back the power cable. |
| Water is coming out of the lid. | The lid seal is not installed correctly. | Correctly mount the seal of the lid. |
| The lid seal is damaged. | Please contact an authorised service center. |
| The lid is open but on the display there is a symbol of a closed lid. | There are some food residue in the safety devices. | Please remove any food residues from the security devices. Should the problem persist, please do not use the device and contact the authorised service center. |
| The program stopped before the end. | Momentary black-out. | Turn the device back on and check that the connector is properly inserted in the cable; restart the processing by referring to the equivalent recipe with manual settings. |
| The engine function (engine speed and pulse) cannot be activated. | The lid is not properly closed. | Correctly close the lid. |
DISPOSAL OF OLD ELECTRICAL APPLIANCES

The European Directive 2012/19/EU on Waste Electrical and Electronic Equipment (WEEE), requires that old household electrical appliances must not be disposed of in the normal unsorted municipal waste stream.

Old appliances must be collected separately in order to optimise the recovery and recycling of the materials they contain and the impact on human health and the envi-t. The crossed out "wheeled bin" symbol on auct reminds you of your obligation, that when pose of the appliance it must be separately used. Consumers should contact their local au- orr retailer for information concerning the cor-posal of their old appliance.
TEXHNUECKNXAPAKTEPNUCTUKN
JIe3BHe n3 HepXaBeOuSei CTaNN nn 3y6caToe Je3BHe NbdoOpboNk, DePka IX CBepxU, YTObI He Iope3aTbcS, IN BCTaBbTe INx Ha WeCTnIRpaHHU O BCTaKBy.
IpeD BKNIOUeHnEM ycTPOINCTBa CHIMNITe 3aUNTHyIO KpbIuKy
- Je3BnE IJN CMeUHbAHN, BCTaBb ERO Ha ⅢeCTuRpaHHyO BCTaBky.
-
yctaHOBITe npoByo KOp3nHy HeNOCpeDCTBeHNO B YaSe Nocne 3aINbKIN BObl Do JeenaMOrO ypOBHn DnI npiroTOBHeHn Ha napy.
-
YctahOBHTe ynTOnHeHne KpbIuKn TAK, UTObI BbICTyNaHOUsn KpaBbIgJrJeN, KaK Ha pncyHKe A.
- YctahOBHTe erO Ha KpbIiKe B HappaBHeHn, NOKa3aHHOM CTpeKkAmn Ha BHeuHeN YaCTN yPiNtHeHn.
- YctahOBInTe KpbIiKy Ha YaIy, KaK Noka3aHO Ha pIcyHKe A, 3aTeM NOBepHInTe No YacOBoi CTpeNke, NOKA OHa NONHOCTbIO He 3aKpoETcY.
- BCTaBbTe Do3npyoUoN KOnNaOvB KpbIuKy.
Описане усточtersы
BVeDHeHc
3TOT 6bIbTOBn npN6op BkIIOuAeT Be6a FyHKUIO PO5OTA n FyHKUIO IPNIGOTOBLEHIN IINU; O6e FyHKUIN MOrYt NcNoIb3OBAtbcr He3aBVCIMOn UIN OJHOBpeMeHHO.
BbI TaKKe MoKeTe Do6aBnTb FyHKUHO TaMepa, TaK YTO yCTpOInCTBO MoKET OCTaHOBnTCB KOHcE npOcecca.
TaKKe Bbl MOKeTe NocTeHNO yCTaHOBnTb pa3nHoe Bpem npiroTOBneHnI pypeCNTOB, BnIOtB DO BapeHoro 6nIOJa. YcTpoiCTBO TaKke IMeET 15 nporpamM DnA BtOMaTHueCKOrO BbINoJIHeHnBCex WArOB, CB3aHHbIX C npiroTOBJIeHnEM NO HECKOJbKIMpeCenTAm, TAK JKe, KaK OHN ONICAHbIB KHNrpepeCNTOB.
ДяТOrO,УTOБы y3HaTb,KaKВПОЛНМеpe ИСПОЛБ3OBaTb BO3MOXHOCHTN 3TOrO yCTpoIcTBa, СЧаJa ИСПОЛБ3уTe BCE peцentы TAK,
KAK OHN OONCAHBI B KHNRE peceENTOB, KOtopara BKJIouaET B Ce6B npIMepbI IN pekOMeHaZIN dIpa3JIuHbIX TINOB pNIROTOBHeHn.
TakIM o6pa3OM, Bby y3Haete pa3nHhble cncocobI npriTOBHeHn I OrpaHnHeHn C TOnKn 3peHn KOnHeCTBa; nOcne 3TORo,
Bbl CMOXeTe OueHb IPOCTO aBTOMaTnueCeKN IcNoJIb3OBaTb pa3JIuHbIe BapNaHTbI pIPIROTOBNeHnA.
Функця робota
BpaueHne MoTOpa, C Bo3MOxHocThbO peryIuPobAHnNCKopoctn O T 1 Do 10, N03BOJraTe IcNoJIb3ObaT bOeyHbN3Kne O6oPoTbI, KOToPbIe IdeaIbHO NOxOJaT dIaN CMeUWBaHn BO Bpem PrnroTOBHeHn IuSIn, B TaKke N BbICOKne CKoPOCTn, KOTOpbIe rapaHTnpuyOT Bo3MOxHocTh bNCNoJIb3OBAHnCtAndapThbIX yHKcuNkyXOHbIX poBoTob / MmKcepOB. CKoPoCTb Homep 1 IcNoJIb3yETcI dI pypepbIbIcTOn pa6oTbI MOTopa Ha MINHMaJIbHOI CKoPOCTn;
IcnoIb3yIe 3OT NapaMeTp InI npiroTOBJeHnI Mca, Haprimep, TuweHoRo Mca IIN TyeHoRo 6bnOda, INI ObUHybIX 6bnOd, KOtOpBe He HyKDaIOTcR
B HenpepbIBHOM NepemEwBaHN.
PnB KBNIOHIN NmNpIbCHOIyHKUIN B MoTope (fynKUIN PULSE) 3TO OueHb IOne3HO, YTObI NyUWe KOHTPOINPOBaT nprirotOBJIeHne 6IIOI n3 φapwa nnIOOecneHb NOCTyIIeHne 60JIbIero KONIYeCTBA BO3dyxa B HekOTOpbIX pOceccax.
PnN NcNoIb3OBAHmN TBepdbIX PnpOyKTOB dnn POMeUeHnB YaWuNX MaKcImaIbHbN pa3Mep DOnJKeH CoCTabJIbTb OKo10 1,5 CM C KaKdoI CTOpOHbI (NoTuK KAc 6yIbOHbI Ky6nK nIN KycOeK caxapa). MrgKne npOyKTb (ppykTb I OBOuN) MoryT POMeUaTbc6OJIbShIMN KYCKAMN.
3To yctpoCTBO He noxDxOaNT DnI IN3MeIbYeHnI TbePbIX PNOyKTOB (KoFe, 3epHOBbIe n T.d.), DnI paCnblJeHnI N 3aMeCA TeCTa NO peIeNTam, PpeINoJIraHouzIM NcNoJIb3ObaHne MyKn (XJe6, NiuCa, TeCTO I neCOUHoe TectO).
He nCnoB3yIte ne3Bne n3 HepKabeUoSei CTaIN DnI DpO6JIeHn IbDa nIN 3AmOpOKeHHbIX npOyKToB, YTObI He 3aTyIITb ero: nCNoB3yIte NOxOJaUe Ne3Bne NbDDpO6NJIKn, He nCNoB3yIte 3AmOpOKeHHbIe INrpeDIneHTbl. EcIn Bam HuxHo INCNoB3OBaTb 3AmOpOKeHHbIe INrpeDIneHTbl, IOCTaHbTe INx IN3 MOpO3NlBnHa Ka 3a 10/15 mHyT nepeD nCNOB3OBaHnEM.
AkeccsyapblI pyHKnPi npoBoTa:Je3Bne IncreMueINBaHnI,Je3Bne n3 HepKabeUoSei CtaNN Ie3Bne IbdoDpObnKn, KOToPbIe DOnJkHbI NcNoJIb3OBaTbCnEduOuIM O6pa3OM:
UcTaHOBnTe KpbIshky, B npOTNBHOM Cnyuae
ФункцЯ MOTopa He CMOXET 6bITb
yCTaHOBJIeHHoN.
YctaHOBka
Функци
npuroTOBJeHn:
tempepatya oT 37^ do 100^
- Haxmnte KhoNky TEMNEPATyPbI: ha dincnilee 3aropntc COOTBeTCTByOuJa IKOHka.
- YctahOBHTe TemnepaTpy, noBOPaHbA pyky no YacBOB CTpeJIke + n npOTNB YacBOB CTpeIKN -ДЯ yBeHnueHn IIn IyMeHbSeHn Bbl6paHHoro 3NaHeHn (Pnc.C).
HacTroponkaФункuni Taimepa
- Haxmnte KhoNky TAmMEPA: Ha DnCnIe 3aRopITcraCoTBeTCTbYUOuN 3HaUOK, a TaKKe 6bnaCTb, CoOTBeTCTbYUOua MInHyTaM.
- Пи NOВTOPHOM Hажати HA KHOПКУ TAIМЕРAMOЖНOBbIбрatho6JIaCTb, COOTBETCTByIOUcEkyHdAm.
- YctahOBHTe BpeM, BpaIaI pyKy no YacOBoN CTpeJIke + n npOTnB YacOBoN CTpeJIkn -ДЯ yBeJIuHEnH NII mYeHbJIeHn Bbl6paHHOrO 3NaUeHn (Pnc. C). MAcCmJaIbHoe BpeM, KOtOpoe MoKet 6bITb YcTaHOBHeHO, COOTBETCTByET 99 MNHyTAM (Pnc. D).
HauaJno 6pa6oTkn

He nepemeaTe yctpoiCTBO, KOrda OHO BKNIOyeHO.
BkHouaTe yCTpoCTBO nyTEM HaxaTna KHOPIK "IYCK /IAY3A"; Ha dinCnlee (Pnc. E):
3aHaHaaCKOpocTb
3aàHnHa TEmnepaTpa: CmBOn “C” BydTe MInrTa IDo Tex Nop, Ioka He BydTe DoctnHyTa Tpe6yemar TemnepaTpa
- IcTeKUeBpeM,ecnHe 6bIy yCTaHOBJIeH TaIMeP
OctabuweecBpemrdoOKOHuaHnOBpa60K, ecTn TaMep 6bl yCTaHOBneH
I3MeHeHn HacTpoek
Bbl MOKTe N3MeHnTb CKOpOCTb, TempepaTypu IIN yCTaHOBHeHHoe Bpem DaXe nocne HaYana o6pa6oTkn:
- HaximMaTe KHOPIK cKOpOCTu MOTopa, TempeatypbI NII TaIMepa: 3arOpNTcA COOTBETCTBYIOUaIKOHKa
- YctaHOBNTe COOTBeTCTByIOUe ee 3HaueHHe, NOBOPaYINBa pyKy
- Bbl MOKeTe N3MeHnTb yCTaHOBJIeHHOE 3NaueHHe, nOKa 3NaOH KpODoJkaET MIRaTb.
BpeMeHHa octAHOBka 06pa6oTKn
Прин HeobxOДIMOCtN, OTKpoIte / 3akpoIte KpbIshky, YTObbl pOBePntb CTaTcObpa6OTK; HaxKMTe Ha nay3y N BbIOnHNTe CNeDyUOuNe DeiCTBn:
- Пи Нжати На Кноку "ПУСК / ПАУЗA": obpaбOTka ВрemeHNo npekpaцаETcЯ (Temперatype, ckорoctь и Врems).
- Дя Немеденно NOBTOPHoro BKHIOUeHnny yctpoiCTba CHOBA haxMnte KhONky "IYCK/ nay3a". Ecni 3ta KhONka He 6ydet HAKATA B TeueHne 20 MInHyt, yctpoiCTBO bBykHNoHaeTcR.
Ecnn KpbIka 6yDet OTKpbITa 6e3 npedBapntelHoN OCTaHOBKn pa60tbyctpoiCTBa, OHO HeMeJeHNo 3a6nOKNpyETcno COo6paJxHm 6e3oNaChOCTn — BpauSeHne MOTopa; fYHKuPiPuroTOBJIeHn I TaMepa OCTaHTcB KblUeHHbIMN, YTObI pOceCC MOr 6bITb PPOJOnKeH. YTObI nepe3anyCTnTb o6pa6OTky, IpocTo 3akpoTe KpbIkiKy.
Дя BKLOHЯ Heo6xOДmo HaxaTb ydepkBaTb KhONkpy nTaHn Y KhONky CTOnI/OTMEHA npimepno 1cekyHny.
Пинжати Кногкп птань (POWER) n KhoIGNC CTON/OTMEHA (STOP/CANCEL) OTMeHЯOTcR TeKUJIne HAcTpoIKN.
Mmnybchayfynkun
Haxmnte u ydepkmbaute 2/3 cekyHdbi KHOIky
IMnynbchoi fynkuin, 3aTEM OTnyctnte ee;
IOBtOpnte 3Ty onepaunio Heckonbko pa3; Ha dincpiie
3aROPNTCAOTBETCTBYOUSAIKOHka.
-
YTO6bI yCTaHOBnTb 0yHKUH 3aJePJKN, Heo6XoDIMO:
-
BbIbpaTb aBtOMaTHueckyU npOrpamMy.

UctaHOBuTB 3AIDEPKKY nyTeM haxKaTnA COOTBeTCTByUoSei KHOKN I BbIbpaTb BpeMa JKKN, NOBepHyB pyKy.
IepBbIe DBe CnpbI Ha dncnlee noka3bIbaOT Yacbl, TpeTbI NcTbepta Yka3bIbaOT MNHyTbI.
MHHIMaJIbHoe BpEmra, KOToOpoe MOKeT 6bITb yCTaHOBNeHo, -30 MNHyT; MaKcIMaJIbHoe BpEmra, KOTOpoe MOKeT 6bITb yCTaHOBNeHo, -15 YacOB n 30 MNHyT.
Ipi NaKaTnHa KhONkY 3aepKKn Nycka Bbl MoKeTe COOTBeTCTBeHNO YCTaHOBntb Yacbl NII MInHytbl.
Ha, KpbIshky I MepHyO KpyKKy MOxHO MbITb B NocydomoeyHoi MaunHe.

Дя мойк Кржек CTаKaHOB B IOcYdOMoeHyOH Maшине COBetyem CTaBt b INx BBepx DHom, NO
daJIbWe OT npЯMbIX CTpyB OdbI, IcNoJIb3yI nporpaMMbI CO cpeDHeN Hn3KoT empePaTyOi.

PeryIpaHOp npOBepaTe yIIOTHHeNc IeNoCTHOCTb KpbIuK, a TaKke IeIOCTHOCTb
yIINOTHEHnI YeCTNRpaHHoB BCTaBKn, KOHTaKTOB I pa3bema YauN. EcnOn OCh N3HOWeHbI, 06paTtTeCb B aBTOpN3OBaHHbI cepBnChbl cHTp.
IocJe nCNoJIb3OBAHnY ydaJIaIYe octaTkn Niu

HINKOrIa He norpyuKaIte KOpnyc B BoNy. HNkOrIa He MoITe MOTop IoD IpOToUHOJ.

B HeKOTopbIX CnyaX, B 3abNCIMOCTn OT NIIuN OOCeHHoCTe npiroTOBHeHn, Ha DHe
MOKET HAXODITbCS OCTaTOHna PJIENKa;NONbTaIteCb ydaNTbeJe IonaTko.Ecnn OHa Bce Jxe octaHetc, nonpo6yTe ydaNTbe EeMetaJIInuecko abpa3nBHO ry6ko.
Tsqatelbno MoTe BpyHyu ropaye BoDoi n CpeDCTBOM IJI MblbIPOcydbI BCE DnJxUyIeCeAuctN, KOToPbIe COpNIkAcAOTcC NIIuEBlIMnpOdyKTAMN:
- Do3npyuOui KOnnaQok, KpbIuKy, yNIOThHeHne KpbIuKIn IOnaTky,
JIe3BVEIJcMcEiINBaHnI NapOByIOKOp3NHy,
JIe3BVe I3 HepKaeBIOue CTaI, Je3BVe NbdoPobuIKn C HeboJbwo JcETKO, IN CHIMaTe INC BepXHe qACTN, YTObI He nope3aTbCra.

Mbl pekOMeHnyemMbITb BCE Ie3BnI cpa3y
NOCNE NcNoIb3OBAHnI; He OCTaBJIaTe INX C NIIuSeBbIMN PNOyKTAMN.
BbIMoTe yauy yKcycOM, YTO6bl ydaJIInTB JIO6bIe OCTaToCHIe Cnebl.
OuHCTIe MOTOp IN KOPNc YaShn C NOMOuBHO XOPOU BIXKaToB BNaXHoN TKAHN; N36BaIte IONaDaHn BODbl B MeCTo, rDe paCNoIOJKe H pa3bem
UdaIInTe BCE OCTaTKI NsIc C 3aIHTHO yCTPoiCTBa, KOToPoE paCNoLOXeHO Ha BepTnKaJIbHOM CTepXHe HA OCHOBaHm I3dEIny.

TtataeBbHO BbICyWHTe BbIMbITbIe YaCTI.
OuHCTKA C HcIOJIb3OBAHHEM MOTOPA
B KOHcE 6Opa6oTkn, npOn3BeDnte OuNCTky BHyTpeHHei NOBepxHocTn YaShn CNeDuOzIM o6pa3OM:
- YdaJInte n3 qaun pIuSy u akceccyap, KoTOpbl Bbl NcNoJIb3OBAJI.
BcTaBbTeJe3BHeI3HepXKaBeIOUeI cTaN.
3anolnnte yauy ropaye BDOJdo 1 nI doabbte kannIO cpeCTBa dJIaMbITbnoocdyI Ecnn Bbl He xOTnTe nCOnjB3ObaTb cpeCTBO dJIaMbITb noCydbI, MOKHO doabNtB ToIcTyo COJIb, YTObI LyuWe ydaNtB ocTaTKn NiUun, INI JIMoHbHb COK, YTObI yCTpaHHTb IIObIe 3anaxn.
3akpoTe KpbIuKy I BCTaBbTe Do3npyUoN KOnnaQK.
Haxmnte KHOPIKY mnybCHOI yHKUIN Ha BpeM, KOtOpoe CHTaete HeoXOIMbIM.
OnycTouHTe yau npomOte ee noD npOTouHO BDOI.
HENCPABHOCTN IN PELSEHNA IO INX YCTPAHEHIO
CEPBNUCHOE OBCJNYXINBAHNE
BecnlaTHa rOpaJyJIHHa: 88003333887*
* (Ucnyra 6ecnlaTHa Dnna a6oHeHToB BcEx ctaunohapnbix linHH Ha Bcei TeppntOpnn Pocnn) Mbl 3abOTnMcO CbOux NOKyNaTeIaX n CTapaEMcR o6ecneHTb BbICOKoe KaueCTBO cepBnCHOrO 06cLyKINBaHn. Mbl NoctoHNO COBepSeHCTByeM HauN npOdykTb, YTObI CdelaT BaIe ObSeHne C TEXHNKO pOcSTbIM IN pPnTHbIM.
YxOa 3a TeXHnKoI
Линна npoфессонаньнix cpecdTB Professional no yxody 3a texнко, pekomehdyemaj Hotpoint Ariston, npodnnt cpoK ekCnPyataun Baew TeXhNKu n CHN3NT BepoTHOCTb ee NpOMKn. Llnna npofoceconohbHbIX cpeCD TB Professional co3daHa c yetom oc6eHHocTei Baew texHKn. PnpOkytbl npOn3B0dYrca B NtAlnn C c6bnHOENm EBICOKx eBponecknx cTaNdaptOB b O6NaCTn KaueCTBa, kONorim N 6e3oNaChocTN nCNoNb3ObaHn. Y3haJIte noDpOboHe na caIte www.hotpoint-ariston. ru B pa3dene «CepBnc» n cnpaunBaIte B mara3Inhax BaWero roPOda.
ABTOPIN3OBaHHbIe cepBnCHbIe cHTpbI
YTO6bIb6blJKe KHaUNM NOTpe6nteJIaM, Mbl CO3dJIIN 1WnPOKyo CepBnCHyO CeTb, Oc06eHNHO tIO KOtOpoi YBJIaETc BblCOKa NOIROTOBka, IpoPeCCNOHaJIIN3M N YeCTHOCTb CepBnCHbIX MaCTepOB.
Pn BO3HKnHOBeHHn HEnCnpaBHOCTN
Ipeed Tem, kak obpatntbce B Cnyk6y CepBica npOBebpTe, HeNb3a JIN yCTpaHnTB HeNCnpaBHocTb camOcToTaeBHO (CM. pa3den «HeNCnpaBHocTn mToDblx yCTpaHEnHa»).
ObpaNTbcBcCnyKbCy CepBnca MoxHNo nTo TenefoHy 6ecnlaTHoRopyey IHHN INIIN NO TenefoHam, yka3aHHbIM B rapaHTnHOM DOKymeHTe.
! Mbl pekomehnyem obpaatabct TOnbko KaBTOPn3OBaHHbIM CepBnCHbIM CEHTpam ! PnppeMOHTe Tpebyte NcNoJIb3OBaHnOpunHaNbHbIX 3anachbIX YacTei
Ipeid o6paueHnem B Cnyk6y CepBnca Heo6xOAnMo y6eIntbCra, YTO Bbl roTobbl coo6uNTb onepaTopy:
OncsHne HncpabHOCTn;
Homep rapaHTnHOro DOKyMeNTa (cepBnCHOn KHMKKN, cepBnCHOrO cepTnΦnKATA n T.n.);
MoIeIb I cepinHbI Homep (S/N) n3dEInna, yka3aHHbIe B INΦopMaUOHHoT Ta6nUKe, paCNoIooKeHHoHa n3dEInn Nn rapaHTnHOM DokyMeHTe;
- Daty npodaxn n3dennr.
LIMPAR USANDO O MOTOR
Bn 3MOxTe aBTOMaTNUHO BUKOHyBaTu pi3Hi BapiaHTN DyKe IPOCTM CNOCO6OM.
Функця АВТOMAT
Moxnibicbpeyniobahnno6eptaHb DBNrhya B diana30hi Bi 1 do 10 Do3BONAE BCtAHOBJIOBaTN dyke Hn3bKi WBNkOcTi, 0o iDeaIbHO NiXoJaTB dIra Onpaui 3MiUyBaHHN npOdyKTiB npoceci npiroTyBaHHa CtpaB, a TAKOX BnCOKI WBNkOcTi, 0o BiIDNObiaIoT b TINOBIM XapaKTePncTikam KxOHnHex KOMbaHIB/3MiUyBaiv. 3NaueHna WBNkOcTi Homep 1 3abe3neue nepeepnuacty po6ot DBNrhya Ha miHaJIbHI WBNkOcTi;
L 贝 napaMeTp BnKOpNCtOByTbCZ DnI npriroTuBaHHa M'ra, HapnKnaD, TyuKOBaHoro M'ra ca abo M'acHO rPi6Ho rary, abo iHsIX cTpaB, 0 He noTpe6yHb 6e3nepePBHOrO 3MiUyBaHH.
Pexim nybcauii Dvuryha(ychkia «PULSE》 (NylbcAIC) dyke kopncn dIy toro, 06 Kpaue
KOHTPONIOBATN BINOTOBNEHNApUy a6o HAcuHHeCTpaB 6iNbOIO KINbKICTH NOBITpy B DeaKnx Tnax npocicB.
Длг Тьердх npodyktib MaKcIMaJIbHn рОзмір kyckIB IHrpeDiEHTB,po3MiUeHIN B YAшi,He NOВинен nepeBnIyBaTn 1,5 cm 3 KoxHoI CTOpOHN (TO6TO NOBInHepn6Iln3HO DopIBHOBaTn BeJInuHAM CTOpIH KybNka 6yIbNoHy a6o IMaToUka UkyPy).M'aki npodykTN (ФpykTN N OBOUi) MoKуTb po3MiUyBaTncRбIbS BeNikmU ShMaTkAm.
Ley npncpi He npn3naeHn I naoipbHeHHa TbepnnpOyKtIB (kABn, 3epHOBNx npOdyKtIB iT.D.) a TaKoX dIy ToHKO r OmeJeHHr IHrpeiEHTB
ДлгязамicyocHOBNДЯВицИкN(xJI6a,niцi,ticTa i nicouногTicTa).
He BnKOpNCTOByTe HIX i3 HepXaBIOOcCTani Dnna NpOpiBHeHnA bOy aOo 3AmopoxeHHN npOdyKTIB, Oo He 3iInCyBaTn Ioro 3aToeHHN: BnKOpNCTOByTe BiINOBiDnH HIX dIe NpOpiBHeHH NbOy, npN CbOMy HE BnKOpNCTOByTe 3AmopoxeHi INrpeiEHTN. B pa3i Heo6XiIDHOCTI BnKOpNCtAHN 3AmopoxeHHx IHrpeiEHTB, BNTaRHTb IX 3 MOpOzIIbHOI Kamepr npInbI3No 3a 10-15 XbJIINH npei IX BnKOpNCtAHNAM. HacaIKN, 0o BiINoBIaHOb fYHKcii ABTomata: HIX DnIe 3MiUyBaHnH, HIX 3 HepXaBIOOcCTani I HIX Dnna NpOpiBHeHH NbOy NOBHNH BnKOpNCTOByBaTncs HACTYNHM YINOM:
Lcien npncptpi He npn3haeHn nn npnroTyBaHHcMaKeHnx CtpaB.
Ipeed cnoxmbaHm ctpab a6o nepeed Tm, kDaBAti dItam, o6OB'3KOBO nepeBiprTe TEMnepatypy rotobnx ctpab.
Приготуваим страв, як павиLO, сунровджуETьСОобертыням HOЖА ДЯ 3MiшУвань aбо HOЖa i3 Нерхавiiюоi CTaniI, StOB 3a6e3neHTnTnepeMiшУвань, StO 3anobirae PrnilnauHHIO npodkyTIB Do Дна EMHOCTI B pnoceci prirotoуваим.
BCTaHOBIT KpNIuKy Ha MlCue, B iHOMy BnIaNky FyHKciA BCTaHOBHeHHa npaMeTpIB Ha E HeIOCTynHOIO.
HaunaybaHHyHKii npnroTyBaHH i: BCTaHOBHeHH TeMnepeAtypn B diana3oHi 37^- 100^
- HatncHtB kHONky Bn60py TeMnpaTpyn: Ha DInCpIe BiD6pa3ntbCBy BiNObiDnHn 6nmaIOuOH 3HaOK.
- BcTaHOBiTb TemnepaTypy, nobEpaOuHy puKy 3a roDHHNKOBOIO (+) i npOTn roDHHNKOBoi CTpiIkn (-), BiNObiIDHO nJr 36JIbSeHnA abo 3MeHseHnA 3HaueHnA, IIO oBnPaεTbcra (pnc.C)
HanaaHTyBaHHФнкii TaMepa
- HatncHtB KhONky TaIMepa: Ha IINcPnei BiO6pa3ntbSc BIDNOBIDHm 6bnmaOCHn 3Naoyok, a TAKOX 30Ha HalaU TyBaHHa XBUNH.
- Пи NOВTOPHOMY HATUNCKAHHI KHOJIK Taimepa obupaetbca 30Ha HalaunTyBaHHc cekyHd.
- BctaHOBIb Yac, nobepTaOu npUky 3a roHNHHKOBOO (+) i npOTn roDHHNKOBoi CTPIKN (-), BiNIOBIDNO dny 36JIbSeHnA 60 MeHHeHn 3HaHeHn, 0o 0bnpaETbcra (pnc. C). MakcmaIbHn Yac, kyn MoKe 6ytn BCTaHOBNEHO, DOpIBHoe 99 XbUNIHam (pnc D).
IpoataK npocecy kyniHapHOoi 6ob6kn

He nepecsybaTe npicrtpi, kOJI BIn BKIIoueHNI.
BknHouTb npncTpi, HataChyBwn KhoNky NYCK/ IAY3A; Ha dncnnei BiO6pa3ntbcra (pnc. E):
BctaHOBnHa WbNkictb
BctaHOBHeHa TeMnepaTpya: 3NaOH «C°» 6yde 6nMaE dOtn, nOK He 6yde doocHyTa
BIDIOBIDHa TEMNepaTpa
Yac, 0MHyB, KKIO He BCTaHO TaIMep
- Yac, 3aIIMIBcI Do KIncKynIHapHOI o6pO6Kn, kTcTmep BCTaHOBnHo
3MiHa BCTaHOBneHnx napameTpib
Mожна ЗмIHOBaTN ШИДКICTb, TemпepaТуру abO BCTaHOBJIeHn Yac HabITb nICЯ NOUATky KyniHapHOI Oбpo6kn:
- Hatnchitb KhoNkH HanaWtBuHHa o6epTIBBnryHa, Tempeatypn a6o TaMepa: noUHe 6nMaTn BiIDNoBIDHn 3HaQOK.
- BcTaHOBiBt 3HaueHHn, NOBepTaHOny pyKv
- MoXHa 3MIHOBaTn BCTaHOBNeHe 3NaYeHnI Do Tnx nip, NOKN 3NaYOK 6nMaE.
TmUacOba 3ynnka kylInapHOi o6pO6kn
B pazi Heo6xidnocti BiJdkpniTe/3aKpnIe KpiuKy, 0o6 nepeBipntn ctaTyc o6p6kn; dny 3yInHKn BnKoHaTe hactynHi di:
- Пин haTnckaHHI KhoNkI NYCK/IIAY3A obpo6ka TmUacOBO npINHЯETbcr (36epiraIOb8cra napameTpri TempepaTyPi, WbUdkocTi i yacy).
- Μύδ HeraɪnHo nepeəzʌŋcTntɪ npoʊec, Μe pa³ haɪncɪtɪb kHɒŋkɪy PYNCK/ΠAY3A. Jkʌŋo kHɒŋka He 6yɪa Haɪnchʊγta npoʊrrom 20 xBɪŋnH, npɪsctpii BɪdʌŋuɔætɒcR.
A Kkuo Kpnka BiDknpTa i nepe TmH He 6yno
ObpaHO yHKuio nay3n, 3 MIPkyBaHb 6e3neKn
HeraiHo 6nOkyeTbcg yHKui Bn6Opuy cactOTn
ObeptAHn DvBHyHa; npu Cbomy fynKcii npiroTyBaHH
iKi i TaImepa 3aJIINsAIObCg AKTNBHMn, YIM
3a6e3neUeTbcg npoOBXeHNr ppoecy. Lio6
pepe3anyctntn npocc kynIHapHOi obo6Kn, npocTo
3akpNiTe KpnkKy.
IyBIMKHyTN KONKN JNBJEHHJ i CTON/ BIMHA Heo6xio ytpmByatn ix HATINCHYTMNI pOraTOM npnbni3HO 1 cekyni.
IpnHaTnCKaHnKhONOKXNBLEHHrI CTOI/ BIDMIHA BiDmHiaHOTbcnoTOUChi HanaHTyBaHHa.
Функци npьcauii
UtpmyTe KhONky PYNbCAUJHaTnchyToIO npTgrom 2-3 cekHy,notim BiDnyctiB ii; nobTopitb zu Onpaio KInbka pa3iB; Ha dncnne 3arOpntbc BIDNOBIDHn 3NaOK.
Ticn 3akInueHn BcTaHOBneHOrO yacy TaMepa lyHae 3ByKOBn CnHan i Ha DInCnJIeI 3'ABnEeTbcra nobIDOMJHeHH KIHEUb.

Ipioctpi 6yde npoobxbyatnpocec nepemiuBaHn npotrom 2 xBnuHn,io6 irtn pinnnaHn npodykTb do dHa yawi.
HaTncHtB KHONKy Cton konn 3abaxaete. JaKuo KhONka He 6ynde HaTncHyTa npoTgrom 3 XBnINH, npicTpi nepexOoHb B pexkM Eheproz6bepekeHHa.
ФункцяЗатунмkn
Функця 3ATPUMKA може 6ут n BCTaHOBJIeHaВ abTOMaTHUHOMy pexIMi; ue Do3BOJNTb BCTaHOBHTn 3aTPMkY Ha NOUaTOK BIKOHAHHa ABTomaTHUHOI nporpamn.
Ic0b BCTaHOBNTn cyHKciIO 3aTpIMKn, Heo6XiIDHO BIKOHATN HAcTyNIi II:
- BnBepiB abTomatunHy nporpamy
- BctaHObitb 3ATPUMKY,HaTnCHyBUn BiIDNoBIDHy KhoNky,i Bn6epiTyac 3aTPMKN,ObepTaHOnpyuKy BCTaHOBJIeHHNApamEtpy

Bn6epit abTomatnHy nporpamy
BcTaHOBiTb 3ATPIMKU, HATNCHyBUN
BIDIOBIDHy KHONKy, i Bn6epiTb Yac 3aTpIMK, ObepTaOChy pyUky BCTaHOBJeHH npaMeTppy.

Pepsi Diu cnpn Ha dncnpei Bka3yOToB rOdInH, TpeT i YeTBePa - XBNINH.
MimImaIbHn Yac, kIM MOKe 6yTN BCTaHOBJeHO,

dopibHIOe 30 xBUNIHAM; MaKcIMaJIbHnYac dOpibHIOe 15 roINHAM i 30 xBUNIHAM.
При Натиckанни Ka KhoNTy 3aTpIMKn BKNIOUeHnMoXHa BCTaHOBtN BiIDNoBIdHO rOdINH a6O XBInHn.
3)Пися BCTaHOBJIeHЯnotpiIbHorOуacy 3aTpIMKnBkHoueHHHaTNCiTh KHOKNy PYCK/PIAY3A
HaДиспгел BiDобраЗntbcs BiNObiHm 3NaUOK i 3BOPOTHn BiDlNk pepeNd noaTkom ZKJy.
Пия ВИКОРИСТАНЯ
- BiДКЛЮЧТь пистуй
- BntarHitb Bnky shhya XnBneHHa 3 po3eTkn
- BnIMiTb KpnUky, NOBepHyBUn ⅡI 3a IroDHHNKOBOHO CTPIKIO
- BnmiTb yauy 3 npunctpoio
- BntraHrItb dOnomixhI KOMnOHeHTn 3 cepeunu Hauwi
- BntaHitb ctpaby 3a donomoroio IonaTkn

Ipojkyt ochaenH npictpoem 3axncty, kH Bklnucaebcra, KOJI NDbvHy NIIdaeTbcpaiby. Ioo he nepeBaHTaJyBatn DvBHy, He yte 6iNbwe 3 DoBnx nocniobHNx npocecib.
OuHueHHa TADoTnA
- Парацьшим ВIMKHiTb npictpi i daIte NOMy NOBHCtO OXJOHOHTN.
- OuHCTITb 3OBHIiHIO NOBepxHIO BOJIOROIO TKAHHHO TO npOTpiTb HAcyXo CyXoTO TKAHHIOU.
- BvdaIITb 3aIIuShKn npOdyKtIB 3i shHypa XINBHeHHJ.
- BntaHnItb yaUy.
- 506 ouhctnTn Bci 3aIIuikn npoDyKTiB 3
yuilbHeHHBID'EnHaIe 10eTnrgpaHHy niklaKny, NOBepHyBm MeTaIeBe KInbue npOTn rOINHHKOBoCTpIKN.

Bydte obepexHnmi, 06 He noKoHTn nalbpi np nobopoti metanebofo KjIbza.
- BntaHnItb IeCTnIgpanHy npokJaKy 3cepeDnHi aasi.
- BmMnTe BpyHy 8ecTnRpaHny npoklaKnky, yuJIbHeHHy i Iyoro Metanebe KjIbce rapayoBOdoIO 3 MInOHyM 3acObom dIpy Nocdy. Picna CboRO peTeBHO OOnIOCHITb IX.
- BCTaBTe ⅢeCTnIgpaHny npoknaIky B yauy, npITpIMyUOu II pykoHO.
- BCTaBTe MeTaneBe KJIbIe i NOBepHITb Ioro 3a roDHHNKOBOIO CTPIIKOIO Do KINcra XoYd

Uauy, KpnuKy i MipHni KyxOJIb MOXHa MNTn B nocydomnHi MaunHi.

ДлЯ MЛТТВ NOCYDOMHи MaшинI NOCTaBTe
74aushkyB6ilbW BnCOkOMy NonoXeHHi, daJeKO
BID nprrnix 6pn30K BODi i BUKOPNCOByBaTN cepenHbO-Hn3bkN TeMpeaTyPhN cIKJ.

Perynepno nepebipreTc iinichctb yuinbHeHHa
i KpniuKn, a TaKoXzIJIICHcTb yUJIbHeHHa
IeCTnIRpaHHoI npOKnaDKN, KOHTaKTIB i nepexiDnHka
3A5OPOHRACTbCRA 3aHpyoBaTn npncTpiy
Bódy. 3ABOPOHJÉTbC TpIMaTI pOjUkT niD
IPOTOUHO BOIOJ.

Y deKaNX BnnaKax, 3aIeKHO BiD npOdykTbI
pexkmy npiroToyBaHnHa, Ha DiHi 3aIiMaeTbcra
nIIBka; cnpo6yIte 3HrTn II IonoaTKOu. Y BInpaIky,
YKUO BOHA He 3Himaetbcra, cnpo6yute BuaNTn
MeTaJIeBOIO a6pa3aIBHO rYbKOIO.
PeTeIbHO BIMMInTe BpyHy rapaOIO BOIOIO i
3acobom DnMNTTn NocyDy Bc pyxomi YactHn,aki
3HaxOJaTbCByKoHTaKTI3XapUOBIMnPpOyKTamI:
KpIuKy 3 Do3aTOpOM, KpIuKy, yUJIbHeHnKpIuKn iJlonaTky,
HIXI3MiUyBaHHi napOBNI KOUNK
HIX3 HEPXABIOOCTani i HIXdIPOpiHeHHa
IbOy BmNITe MaJIeHbKOIO UItKOIO, YTpIMyOHy Ix 3a BepXHO qACTnHy, Uo6 He nopiz3aTnCra.

Mn peKomeHnyeMo MNTu Bci HOxI BiDpa3y
nicBnKOpncTaHH; He 3aIIuAaTe ix B KOHTaKTI 3 XapOvBMn IpOdyKTamN.
BIMnTe 3 OcTOM, IOb nobHicTO BuaNTu TBepdi 3aunuK.
Ouicitb DvBHyi Kopnyc yaasi doabe BnuabIeHO BOIoroIO TKaHINHO; yHkaIte nonadaHHBOINB3OHyPO3TaUByBaHHo3'EMy.
Budanitb Bci 3aaniu kn npoduktb i3 3axnchoro npnctroo, po3taosobahoro ha ctiui kopnycy Bnpo6y.

PetelbHO BucywiB BMnTi YactHn.
CHUSEHH3A DONOMOIO DBNYHA
Hapnkihi npoccy ouctb BnytpiHIO nobepxnoaui HactynHM YINOM:
Budanitb 3 yushi BnKOpncTaHi npOdykTn Ta npuna.
BctaTe Hix 3 HepXabioyoi ctaJI
3aONBHITb yaSy rapaOIO BOODO Do 1 i IdoaIte kpanJIIO 3acOby DnI MNTTg Nocdy. Rkso Bn He XoYeTe BIKOpNCTOByBaTN 3acIb DnI MNTTg Nocdy, MoKHa DOnaTIcNb rpy6oro NOMeHn, 06 KpaSe BnDaJIHTN 3aIIuKn npOduKyTtB, a6o JIMMOHN CIK, 6o6 NobHicTHO yCyHyTu 3anax.
3aKpIe KpnUky i BcTaBte KpnUky 3do3aTOpOM.
- Hatnchitb KhoNky npIbcauii B o6paHn BamMOMeHT Yacy.
CnpoxhItb yauy i npomnTe ii nid npoToHOBOIOJ.
HECINPABHOCTI TA IX YCYHEHHY
- ΘHIMHI Heri3i
- MeTann caKInHa
- KoHTeHep
- AINTBkbpYCTaFbIi
- KaNaKa TbIfb3aFbIuBb
- KaKa
- Θηωeγ canTbiaFbl

KaKnakTbI DnCneHcepeTiHde naDanaHyFa 6oNaDbI (A cypeti).
- By Kəрзehkeci
- Tot 6acnaiTbIH 6oJaTTah JkaCaNfH nbIwaK
9.1Пьшakкkanьшы
- My3 Jxahuy nbilafbl
10.1Пьшakхankbipbl - ApaIacTbIpy nbIiTaIbI
- UnaTeNb Təpi3di nbIwaK
- Kyaṭ kābēni
TEXHNUKAJbIK CINATTAMAJAP
Ophatyfa 6oNaTbH eH a3 yaKbIT - 30 MNHyT; opHaTyfa 6oNaTbH eH KeN yaKbIT - 15 caFaT, HYT.

Keuiiktipinre h icke kocy Tuymecin bacy apkblc
bona#.
3) Keuiktipinre Hen icke kocy yuih KaKet yaKbITbI opHaTuDan KeiH BACTAY/KIIDPTY TyMeciH bacbHb3

BaapnamhblbactayaIbHdaIncneJe caike6beniwe xhe Kepi cank Kcpctineidi.
PaiJaIaHybIn CoHbI
- KypbInfbHbEwipy
- KyaT ka6eJIiH aawacbI hpo3eTKaDaH cybIpblHbI3
- Carat Tijimeh 6tpy apKbIbI KaKaNaKTB1 bIfapblbl3
- bIbIcTbI KypblfBlaH WlifapblHbI3
- bIbIc iWiiHderi KocaJIbI KypbIInfblHbI aJIbIHbI3
- ⅢnataTeB Teip3di nbIwaKTbI naIdaIaHa OtbipIn TAMaKTbI aJIbIHbI3

ΘHIMDe K03faNTKbIb KbIbIN KeTc apanacatbIH KOPray KypblfbcIb 6ap. Ko3faNTKbIbKa apTbIK Me TycipMey ysiH 3-TeH Ken y3ak petti npoecti daMaHbI3.
TA3AJAY XHE TEXHNIKJIbIK Kbl3MET KOPCETY
- Ta3aIay aIbIHda KpyblfbiHbI po3eKaadHaXkbpaTbIHbI3 XHe TOJIbIFImeH caIKbIHdaybIH KyTIiJ3.
- Cbiptkbl beTTi bInfaIbI bIybepekeNeh Ta3aNaHbI3, Kypfak wSybepekene KenTIpiHj3.
- Kyat ka6eHHeH apTbIK KaIdbIKTapDbI KeTIpiH3.
-
bIDbICTb TapTbIN WbIFapbHbI3.
-
TbIfb3daTbIuTa 6onybl MyMkiH TaMaK KaIbIKTapbIH Ta3anay yWIn MetaJIc KaNHaHbI caFat tiniHe Kepi bpy apkbl aNTbl Kblpbl kipictipMeHi axblpaTbHbI3.

MeanncaknHaHb6yprHaCaycaKTapbl KbcInaJIMaHbI3.
- Aantbl Kblpbl kipictipMeHi bIdbc iHHeH bIfapMaHbI3.
- AITbI KbIpNbI KipicTipMeHi, OHbIH TbIfb3aFbIbUH XHe OHbIH MeTaN CaINHaCbIH bICTbIK CyMeH XHe bIDbc-ayK caBbHbIMeKoTMeH KybHb3. COnAH KeiH MyKnrT Ta3aNaHb3.
- Konmeh yctan typbin, anTb Kbpnb kipictipmehi bldbCKa KaTa caBbHb3.
- Metann caknHaHbI canbl, kypictiH cohBaHa DeHH carat tiimeh 6ypbHb3.

bldbictb, kaknaktbXehe eJlwey sbihbiafBbH bIDbc xyy MaunHaCbHda xyyfa bonaDbI.

blblic KjyfbIuTa KjyblHb3 cydah Tikelei WaabipaHbIbnap 6actan, zoFapbl opbHda kece
KoJxKeHe opTa TEmeH TemnepaTpa CuknnaDanaHbIHbI3.

TbIbIbIaDbIu XaHe KaKnak TyTaCtblfbIH, COhBIme 6ipre, Tyicnepepin XaHe bIDbc
kaJfAfbIbIbIHbH aJtbl KbIpbl KipictipMe TblfI3dafbIbIH jyIeJI Typde TeKcepHiz. Onap To3fAH 60nca, ekinetti cepBnctik optaIbIKKa xa6apnaCbIHbI3.
PaiJaIaHydAn KaIbIKTapbiH
Kein
TAMAK

Kopnyctbl cyfa EUKALJAH 6aTbipMaHbI3. Ko3fajTKblUJTB1 aFBiH cydbIH acTbHa EUKAUAJAH aHbI3.

Kei6ip XaFdaJnapa, TaMaKa XeHe 3zipNeynepre BaJlaHbCTbl TynTe KaIdbIK
Ka6aT 6oanaI; MyHbI Xaannak nbIwaKneH KeTipin KepiH3. On anI 6oIca, metanl abpa3nBtik ry6kamEH Ketipin KepiH3.
TamaKka TneTIH 6apIbIK K03fAlaTbIH 6eJIiTepdi BICTbIK CymEH XHe bIDbc-ajKa apHaNFaH ca6bIHMeH KOImEH MyKnRT XyblHbI3:
DINCEHcep KaKnafbI, KaKnak, KaKnak TbIfb3daBbIbI JxHe WnataJIb Tepi3I nbIwaK,
apanaactbipy nbilawfbyxHe by kapehkeci.
Kecin aImay yuih TOT 6acnaiTbH 6oNaTTah XacaIfAH NbiwakTbI KHe My3 KaHsy NbiwafBHy
TEXHnueCKN CNEUΦnKAuIN
| MOДЕЛ: | MC 057 EU |
| Клас: | 220-240V~ 50Hz |
| Мошност на двига对接: | 70W |
| Мошност на трубнITE eLEMеньи: | 500W |
| ОвSETS мошност: | 570W |
ONUCAHNE HA CUMBOLNTE
Ha DoCTbPnHaTa Ha- CuNoHaJIHa MpeKa. CTrKePbT Ce HAmpa B DoJIHaTa Yact Ha yCTpO'CTBOTO.
- ToBa yCTpoiCCTBO TpЯБа Дa ce n3NoJ3Ba Camo 3a ФабрчHOTO My npeДиA3NaUeHne, a ИмЕнHo KUXHEHC-KN POBOT CФУHK-UЯ 3A IOTBEHE 3a ДOMaшна уNotpe-6a. Bсяka dpyra yNotpe6a ce cUnTa 3a HeCbOTBETCTBnE C yCTpoICTBOTo n CJIe-DoBaTeJIHO ce cUnTa 3a OnaСha.
- Hecna3BaHeTo Ha Te3n INHCTpyKcNn NJIH He npaBnHa yNoTpe6a Ha ycTpoiCTBOTo Moat Da npuHrT HapaHbAHn.
- ToBa yCTpoiCTBO He TpЯБВа Дa ce n3ПОЛЗВa OT Deцa. MoЯ,ДрьЖTe yCTpoiCTBOTO И HerOВnia 3axpaHbAùs Ka6eI DaJIeU OT DoCTbNa Ha
deua.
- Децata He Тябвада си ИграТС TOBA yCTpoIcTBO.
- ToBa yCtpoiCTBO MoKe Da Ce N3PON3Ba OT Deua HaI 8 roDInn OOT Bb3paCTHn IINuCa COrpaHnueHn Qn3NueCKn, CETNBn IIN yMCTBeHN CnOcO6HOCTn, IIN TaKnBa C OrpaHnueHn PO3HaHn 3a POn3BaHETo Ha yCtpoiCTBOTO Camo aKO ce HAMnPaT IOd Na3Op INn Ca INΦOpMnPaHn 3a NaUHa Ha POn3BaHe Ha YCtpoiCTBOTO n Prn UcNoBHe, Ye pa3bIpAT CBp3aHnTe C TOBa pNcKOBe. DeuTa He TPr6Ba Da cN nIgPaT C TOBa yCtpoiCTBO. PpeIapTu3a POnuCTBaHe n DeiHOCTn PO cepBn3HO ObcJyXBAHe He Tpr6Ba Da Ce N3BbPWBat OT Deua OCBen aKO ca Ha Bb3paCT HaI 8 rOdInn I Prn ycNoBne ye Ce
HamiPAT NOI Hau3Op.
- MoЯ, ynpaЖЯВаTe NaДЗОр Ha yCtpoIcTBo-TO, KOraTo ce HAmIPA B OпepaТИВeH peЖIM.
10.He CBbP3BaITe TOBa yCTPOIcTBO KbM BbHsEHN TaIMep ININ CnCTeMa C DnCTaHcNtOHNOynpaBJIeHne.
11.He ce npenopbUba n3PON3BaHETO Ha He npenopbUaHn akceCoapn IIN PrncnoCobJeHn, KOHTo He Ce npOdaBAt OT PpOn3BOdnteIa, Tb' KaTO TOBa MoJKe Da DoBeDe DoNoXapn, TOKOBu ydapn IJIi HapaHЯBaHn.
12.MoЯ, n3KJIuOye Te yCTPOIcTBOTO, ppei Na CMeHnTe HeROBInTe akcecoapn IJI nppei Da npnbJnxTe Do HeROBn DvIXeUc Ce qactN, KOraTO ce HAMpa B OnpaTINbEN peJxIM.
13.Môя, He n3PON3BaǐTe
yCTPOIcTBOTO, aKO Ka-6eJIbTe e NOBpeH, nIN B ClyuAa Ha He npaBnHO fUHKcIOHnpaHe nIN aKO yCTPOIcTBOTO e NOBpeH.
14.He octabray Te KaebbT Da BnCn OT Macata,OT pa60THaTa NOBbpxHOCT IIN OT Ropeu a NOBbpxHOCT.
15.He notanayTe Kaeba nIyCTPOYCTBOTO Ha CMEcHTeJIy BbB BOda, TbI KaTO TOBa MoJe Da npuHHn TOKOB ydap.
16.Ako 3axpaHbauT Ka6eI Ce IOBpeN, MoJ, CbByPKeTe Ce C npOn3BOdnteJI, OTOpN3nPaHO TexHnuecko IInZe INI KBaJInΦuCiHaPO HIOJISe, INONCKaI-Te CMyHa, 3a Da Ce n36eHnat EBeHTyaJIHn ONaCHN cNTyaUcN.
17.Heo6xOdImo e ynpaXnHaHeTo Ha cTpor KOHTPOI NaYcTPOIcTBOTO, KOraTO Ce n3POn3Ba B 6n3OCT
ToBa yCTpoiCTBO He e npEHa3NaYeHO 3a PbXKeHe Ha xpaHn.

MOnIa, BnHaI npOBepaBaiTe TempepaTpaTa Ha rotBeHata xpaHa npEi JaHe uPi DaBaHe 3a XpaHe H aTeTo.
PnirTBAHETO ObIKHOBeHO CbBnada CBbPteHTo HA CMeCInJIHHa HOK IJIHa HOXAOT HEPBXJaEMA CTOMHa, 3a da ce rapaHTnpa CmecBaHe, KOEt npEeIOTBpTaRb 3aJIeNBAHe Ha XpaHata KbM DbHOTO Ha CbDa nO BpeMe Ha npoueca Ha rotBeHe.
HAUYH HA YNOTPEBA HAYCTPOICTBOTO
- Pa3BnIte 3axpaHbaua KaeBn
- BkapaTe KOHeKTopa Ha Ka6ena B Kopnyca Ha CbeDNHTeNa Ha Ka6ena, 6yTHete Do camna KpaI.
- YBepTe ce, Ye npOyKTBe Ha paBHa NOBbpxHOCT.
- CbpxkeTe 3axpaHbuaaKa6eJ KbM KOHTaKT Ha cteHaTa.
-
IocTaBeTe DbTa KOHTeHepa N Kanaka
-
BkIIOUeTe yCtpoiCTBOTO: naHEnbT ige ce BkIIOuN I ue Ce Yye NcCykaa 3ByK:
akokanaBt e OTbOpeH,Ha DNcJIeIe IMa CmBbON 3a 3aKJIuYBaHe N KJIOna 3a CKOPOCTTA n PYNLCAUNTE He MoKe Da ce n3bupar; fynKunraTa Ha dBnrgatela e DeakTINbupaHa.
AkoKaapanTe 3aTBopeH,HaDnCnIeJe CeNoBn CmBOJbT Ha3aKnIOueH KaTHAp.
- Пoctabete cьstabknTe n akcecoapnTe, kaTo CneBaTe INHCTpykUnTe B KHInrata C peuentn.
- 3aTbOpTe KaNaka n NoCTaBete Do3aTopHaTa KaNaUka, aKo TOBa e NocOueHO B peCenTaTata.
- Пюдьлжeteс рьчна Habstpoиka Ha Врeme, ckopoctи TempepaTypa, Ипуpeз ИЗПОЛЗВаHe Na abTomatNHy nporpama.
B cnyuaye He e HaTnCHaT 6yToH, ycTpoiCTBOTO npemnHaBa B pexkM "PecTeHe Ha eHeprna" cIe5 MmHyTu n DncPiJeT ce N3KlIOuBa. 3a da ro BKJIIOHTe OTHOBO, HATNCHEtPOWER 6yToHa.
PbUHa HacTpoKa
Moxkete da hactponTe fynkunra POBOT n fynkunra TOTBEHE nooTdeHNO nn no eHNO n CbUO BpeMe, aKo e Bb3MOxHO ue3 fynkunra TAIMEP, 3a da hactponTe BpemTo 3a o6pa6OTka c aBTOMaTuHOCnnpaHe B Kpa.
Hactpoika Ha yHKuJa Po60t: ckopocHa Dnuratela ot 1 do 10
- HataHcHeTe 6yToHa 3a CKOPOCT Ha DnBraTeIa: Ha dncJIe 3aNoUba da Mira cBoTBeTHaTa NkoHa.
- OnpeJeIeTe cKOpocTtA Upe3 3aBbPtaHe Nocoka Ha YacOBHnKOBaTa CTePknKa + N O6paTHa Ha YacOBHnKOBaTa CTePknKa -, 3a Da yBeJIuHTe INN HAMaJIte HNBOTo Ha N3bPaHaTa CToIHOCT (fHrypa B).

IocTabete Kanaka, B npotuBEN clyuaI ΦyHKUraTa Ha dBnRaTeJI He MoKe da ceON.
HacptoTe yHKnraTa 3a rotBeHe: Tempeatypn ot 37^ do 100^
- HatncheTe 6yToHa 3a TEMIePATyPA : Ha DnCJIeR 3aONuBa Da Mmra CbOTBeTHata IKoHa.
- HactpoTe TemnepaTypa Tpe3 3abpTaHe Ha KonUeTo No YacOBHnKOBaTc CTpeJIka + N o6paTHo Ha YacOBHnKOBaTc CTpeJIka -, 3a Da yBelenuTe IIN HamaIIne HnBOTO Ha n3bpaHaTa cToHocT (Furpa B).
HacpoBaHe Ha yHKnraTa Ha TaMepa
- HATINCHETe 6yToHa Ha TAIIMEPA : Ha IINCIIeR 3aONUBa Da MIna CbOTBeTHaTaNKoHa, KaKTo IN NOpTe 3a N36Op Ha MNHyTN.
- KaTo HaTnCHeTe OTHOBo 6yToHa Ha TAIIMEPA , MoKTe Da n36epeTe nOteTo 3a n36op H a CeKyHdN.
- 3aJaIte BpeMeTo, KaTo 3aBbPTnTe No YacOBHnKOBaTa CtpeIka + N O6paTHo Ha YacOBHnKOBaTa CtpeIka -, 3a Da yBeJIuNHe IIN HamaJIte HnBOTO Ha n3bpaHata CToHOCT (ФИгурВ). МakcIMaJIHOTO BpeMe, KoETO MoKe Da ce NaCTpOn, OTROBaPra Ha 99 MInHyTu (ФИгурA)
Haayano ha o6pa6oTkata

Mojla, He dBnKeTe yctpoiCTbTO, KOraTo e BkIIOHeHO.
AknBpuaTe yctpoiCTBOTo, KaTo HauNCHte 6yToHa CTAPT/IIAY3A; HaДиCnPJIe ce BIXkDa (ФИгурД):
Hactpoika 3a ckopoocTta
Hac troka 3a tempeatypa: cmbona "C" Mira,doKaTo Ce DoCTnIhe Tempepatypata
- I3MnHaITo Bpeme, OCBeH aKO He e 3aJaDeH KOHKpeTeH TaIMep
OctaTbUHOTOBpeMe npeNi KpaHa o6pa60kata, aKo TaIMepbTe 3aadaen
Помяна На HabстpoиКNTe
Moxete da npomehaTe ckopocTta, TemnepaTpata
HIN Da HacptponTe BpeMeTo DOpN i Cnei KaTO
3anoHne o6pa6oTKata:
- HatncheTe 6ytoHnTe 3a 0bOpOTte Ha dBnraTeIe, TempeaTypa TJIu TaMepa: CboTBETHaTkoHa 3aIOUBA da Mira.
- OnpeDenete cToHocTt ape3 3aBbptane Ha konyeto
- Moxete da npomeHnte 3aandeHaTa CToHocT, DOKATO IKOHATA pOIObJIKKaBA Da Mira.
BpemEnHo cnipane Ha o6pa6oTbaHeto
Ako e Heo6xOJIMO, MOJIa, OTBopeTe / 3aTbopeTe KaIaKa, 3a Da npOBepiTe CbCTOHNIETo Ha o6pa6OTKa; HATNCHETe Na3a N DeiCTBaIte, KAKTO CNEDa:
- Upe3 Hatackane Ha 6yToHa CTAPT / IAY3A : o6pa60kata BpeMeHHo Cnnpa (TemnepaTpa, ckopoc n BpeMe).
- 3a da pectaptnape TeBdHaRa, HATNCHEte OTHOBO CTAPT /IAY3A 6yToHa.AKO To3n 6yToH He e HAtncHat 3a OKOJIO 20 MNHyTN, yCTPOINCTBOTO CE N3KJIIOUBA.
Ako KaNAkBT Ce OTBOpN 6e3 PpeDnBapNTenHa nay3a, yCTPOINCTBOTO BeHnAra 6bOKnPa -OT Cbo6paJKeHnna 3a 6e3ONaCHOCT - BbPTHe Ha DInrataTnla; FyHKnITe 3a rOtBeHe N TaIMep OCTaBat aKTHNBn, 3a DaCe DaJe Bb3MOXHOCT 3a npoDbJIxKaBaHe Ha npocea. 3a pectapTnpaHe Ha o6pAbOTkATA npocTo 3aTbOpTe Kanaka.
Bytonite POWER u STOP/CANCEL Tp6Ba da ce HaTncHaT 3a OKoNo 1 cekyHda, 3a da ce aKtNBpuT.
BytoHnTe POWER n STOP/CANCEL oTmeHr TeKyuIte NaCTpoiKn.
Функцу npIcaunn
3aDpBxTe HaTnchat 6yToHa 3a PYNCALUNI 3a 2/3 CEkyHn, CNeI TOBa r OTOynCHe; HAKOKN PbTN NOBTOpe Ta3N ONepaun; Na DnCnpeJe 5e CBetHe CbOTBeTHata IKoHa.
ФункцятAPULSE(o6pa60kaHaIMmnynca)HEMOXe da ce n3noJ3Ba npn
npeBapnteHNo 3aadaena o6pa60ka.
Kpau ha o6pa6oTkata
Korato BpemTo Ha TaMepa 3aJaDeHo Hn (Hn Cnei 30 MInyTu OT Hauanoto Ha OboaboTkata 6e3 TaMep), yCTpoiCTBTO 7e N3daTe 3BykOB CnHAn Hn DaCnJIeJe 7e Ce nOraBn "End"; yCTpoiCTBTO 7e npoDbJnx CmecBaHeTo B npoDbJnxKeHne Ha OSe 2 MInyTu, 3a Da CE npedOTbPaTn 3aIenBaHe Ha xpaHATA Na DbHOTo HA KOHTeHepa.
HaTncheTe 6yToHa STOP , KOrato npednoHntate. Ako e To3n 6yToH He ce HaTncHe B pAMKInTe Ha 3 MInHytN, yCTpOJCTBOTO npeBkIIOvBa Ha NKOHOMuH eHeprIneH peXIM.
ABTomatnuyH nporpamn
- HataHcHeTe 6yToHa ABTOMATUHH nporpaMn: Ie Ce nOBn ekpan MHO rOIO6bEN Ha To3N, Nokaah Ha fHypA E.
- 3aBbptete KOnHcTe, 3a Da DoCTnHcTe Do n36paHaTa npOrpMa.
- Cnei n3bopa Ha nporpaMaTa MoKeTe da n3bepete OTdJIHnTE qAcTH Npe3 NOBTOpHO HATUCKaHe Ha 6yToHa 3a ABTomAtuHo nporpaM; BpeMeTo I CbCTabHnTE KOINcHCTBa ue BapnP aTcbOTBeTHO.
Ako pe3epBoapbT 6bIe OTcTpaHEn IIO BpeMe Ha aBTOMaTHUeH cKbJ, Ha dncnJIe Ce noka3Ba cboBSeHne 3a rpeHa "E3". NpOmeHeTe KOHTeHepa Ha ypeHa u HATNCHeTe CToN / OTKa3, 3a da AKTNbIPate OTHO BO ekpaHa n Da npOdbJXnTe c o6pa6oTkata.
B KpaHa zukbna Ha dncnpe ce n3nncBa cboobseHne "END".
| Имe | Прогама норер | Часту норер | Сълка норер | Сrokerost | Минут | Овseo врeme | Tempepatура (℃) |
| Залъхвае | 1 | 2 | 1 | 1 | 6 | 25 | 100 |
| 2 | 1 | 6 | 100 | ||||
| 3 | 1 | 13 | 100 | ||||
| 4 | 1 | 1 | 9 | 31 | 100 | ||
| 2 | 1 | 10 | 100 | ||||
| 3 | 1 | 12 | 100 | ||||
| Риztоти Яхим | 2 | 2 | 1 | 2 | 6 | 24 | 100 |
| 2 | 2 | 4 | 100 | ||||
| 3 | 2 | 14 | 100 | ||||
| 4 | 1 | 2 | 7 | 26 | 100 | ||
| 2 | 2 | 5 | 100 | ||||
| 3 | 2 | 14 | 100 | ||||
| Варень месо и варень на пара | 3 | 2 | 1 | 0 | 4 | 14 | 100 |
| 2 | 0 | 10 | 100 | ||||
| 4 | 1 | 0 | 4 | 16 | 100 | ||
| 2 | 0 | 12 | 100 | ||||
| Пьжень месо | 4 | 2 | 1 | 1 | 6 | 46 | 100 |
| 2 | 1 | 15 | 100 | ||||
| 3 | 1 | 25 | 100 | ||||
| 4 | 1 | 1 | 9 | 60 | 100 | ||
| 2 | 1 | 19 | 100 | ||||
| 3 | 1 | 32 | 100 | ||||
| Орз-нада | 5 | 2 | 1 | 1 | 12 | 44 | 100 |
| 2 | 1 | 13 | 100 | ||||
| 3 | 1 | 19 | 100 | ||||
| 4 | 1 | 1 | 15 | 61 | 100 | ||
| 2 | 1 | 20 | 100 | ||||
| 3 | 1 | 26 | 100 | ||||
| Сули | 6 | 2 | 1 | 1 | 18 | 33 | 100 |
| 2 | 1 | 15 | 100 | ||||
| 4 | 1 | 1 | 20 | 38 | 100 | ||
| 2 | 1 | 18 | 100 | ||||
| Зеленчци и кremове със зрочeni кучтури | 7 | 2 | 1 | 1 | 25 | 28 | 100 |
| 2 | 8 | 3 | 100 | ||||
| 4 | 1 | 1 | 40 | 43 | 100 | ||
| 2 | 8 | 3 | 100 | ||||
| Велуte | 8 | 2 | 1 | 1 | 20 | 23 | 100 |
| 2 | 6 | 3 | 100 | ||||
| Зеленчци | 9 | 2 | 1 | 1 | 10 | 25 | 90 |
| 2 | 1 | 15 | 90 | ||||
| сладки Кремове | 10 | - | 1 | 5 | 1 | 7 | 0 |
| 2 | 2 | 1 | 90 | ||||
| 3 | 2 | 5 | 90 | ||||
| Готва bene на Ниска Температура | 11 | - | 1 | 1 | 5 | 65 | 100 |
| 2 | 1 | 20 | 80 | ||||
| 3 | 1 | 40 | 80 | ||||
| Горец сosomes Сосове | 12 | - | 1 | 1 | 3 | 15 | 80 |
| 2 | 3 | 3 | 80 | ||||
| 3 | 3 | 9 | 80 | ||||
| Стояden Заготовки | 13 | - | 1 | 5 | 2 | 6 | - |
| 2 | 5 | 4 | - | ||||
| Смеси за торту | 14 | - | 1 | 1 | 3 | 11 | 70 |
| 2 | 4 | 3 | - | ||||
| 3 | 4 | 5 | - | ||||
| Желета | 15 | - | 1 | - | 10 | 26 | 90 |
| 2 | 1 | 14 | 90 | ||||
| 3 | 8 | 2 | 90 |
B kpaHa npoeca
Korato 3aadaHOTOBpeme Ha TaMepa CbbpHn, yctpoiCTBOTO ue n3daJe 3ByKOBCnHaI NHa dncnpeJe ce neoBn "End".

UcTpoCTBOTO Ⅲ npOdbJnx CmecBaHeTo B npOdbJxKeHne Ha OSe 2 MInHyTu, 3a da ce
IpeoTbpaTn 3aJeNbaHe Ha xpaHaTa IIO DbHOTo Ha KOHTeHepa.
HaTushe 6yToHa STOP, kOrato npEiNoHTate. Ako To3n 6yToH He ce HaTusche B paMKte Ha 3 MInHyTu, yCTpOJCTBOTO pReBKnIOUba Ha NKOHOMuH eHeprnH peKIM.
Функцязабавянe
Функцята DELAY може да бдe CBьрзан савTomatчнпрогам;TOBa USe Ддe ВьзмoxHOCТддадete 3abBHe B HauJITo Ha abTomatuHa nporpama.
3a da hactponTe fynkunra 3a 3abare, Tpyba:
1.Даи3беретe abTomatнчнata nporpama
2. HacptpoTeФyHKUraTa 3a 3ABABHE qpe3 HaTnCKaHe Ha NDOxOJaIe KJIouH nN36epeTe BpeMeTo Ha 3a6abAHe qpe3 3AbbPTaHe Ha KOJIHTo.

ПьрпгдБе сифпсн ДИССПЕЯ NOKAЗВАТУСАСОВЕТ,а TpeTATA И YETBbPТАТА сифра

NOKa3BaT MHyTITe.

MHHIMaJIHOTOBpeme, KOEt MOKe Da 6bJe HAcTpoEHO, e 30 MNHyTN; MAKcIMaJIHOTOBpeme 3a HAcTpoiBaHe e 15 Yaca n 30 MNHyTN.
IOnHCTBAHEcIEyNOTPEBA HA DIBRATeJIa
B Kpa Ha o6pa6oTkata, MoJ, noUcTeTe BbTpueHocTtHa KaHTeHepa, KaKTo CneDbA:
I3BaTe HeHAMipaata Ce BbTpE n akcecoapnte, KOnTO CTe H3NoJ3BaJI.
- NocTaBeTe HOka OT HepbXkaeMa CTomHa.
MOnr, HanbHHeTe Cbda C ropeua B0da Do 1 NITbp N IO6aBeTe KAnka Canyh 3a CbdoBe. Ako He NCKaTe Da N3N0J3BaTe CanyH 3a CbdoBe, MOKeTe Da IO6aBnTe De6eNa con, 3a Da ce OTCTpaHrT No-IO6pe XpaHnTeJIHnTe OcTaTbU, INI JIMHOOB COK, 3a Da CE npemaxHaT BCRAKBN MInu3Mn.
3aTbopete kana Ka nocTabete Do3aTophata kanaqka.
- AKTINBupaTe 6yToHa 3a PYNCALUIN BpeMeTO, KOeTO ppeueHnTe 3a Heo6xOIMO.
- I3npa3HeTe KOHTeHepa n ro I3MmIte noD Teuaa BOda.
ПОБЛЕМИ ПЕSUЕнЯ
TEXHnuecko OBCJyKBAHE
!Hikora He n3noJ3BaIte ycIyIte Ha HeOTOpn3IpaH TEXHNK.
IoprotBete cJeHaTa INΦopMaζη:
TIN Ha Bb3HKnHaJnna npo6JeM.
- MoDeI Na ypeJa (Mod.).
- cepueH Homep (S/N).
Tazn INΦopMaζη Ce HAmipa Na TaβeŋKaTa C daHnBbpxy ypeə.
I3XBbPJIaHE HA CTAPN EJEKTPnueCKn yPeDi

Ebponeckata DnpeKtNb2012/19/EU
OTHOCHO OTnAdbCn OT eNeKtpuYecko neneKtpoHNo obOpyDbaHe (OEEO)
IpeDnKda CTapnte eNeKToPOMaKNHcNуpeNi Da He Ce DeNoHnpaT Ype3
ObHKOBeHnZKbI3a TBbpIOnTaNbC. Ctapnte ypeNi ce cb6upat pa3dElnHO, 3a da ce onTNMn3upa Bb3CTAHOBraHETo peuKNpAHeTO Ha MaTePnaJIte, KONTO cbDbpxKaT, 3a da ce orpaHnU b3DeiCTBnETo Bbpy 3dpabEt Ho Xopata n OKoHaTa cpea.
CmBbnt cbc 3aueptan KOHTeHep 3a OTnabu Bbpxy npdykta BN HAnOMHra 3a TOBa,Ye CTe 3aDbJxKeHN Da DeNoHnpate ypeHa MRCTO 3a pa3dEnHO cbOpapane Ha OTnabu.
IotpebnteTtp6Ba da ce CbpxkATc MeCTHNTe BnactuIN TbpROBUN 3a INHOpMaun BvB Bp3ka C npabuHOTO denOHnpaHe Ha ypea.
BuncepBn3EOO
Yn. Xaɪnyúka nòjǎn 57-59,
1612 Codma
TeI. (02) 955 35 95; aKc. (02) 955 35 96

Hotpoint
Hotpoint
ARISTON
Indesit Company SpA
Viale Aristide Merloni, 47
60044 Fabriano (AN), Italy
www.ingesitcompany.com
ÜLKKEYE ÖZGÜ BILGILER KITAPÇIGIN SON SAYFASINDA BULABILIRSINIZ