
DHT-500SD - Home Theater System DENON - Free user manual and instructions
Find the device manual for free DHT-500SD DENON in PDF.


| Product Type | 5.1-channel home theater system with DVD player |
| Brand | Denon |
| Model | DHT-500SD |
| Main unit dimensions (W x H x D) | 430 x 95 x 340 mm |
| Main unit weight | 4.2 kg |
| Speaker dimensions (W x H x D) | 140 x 280 x 160 mm each |
| Speaker weight (each) | 1.8 kg |
| Subwoofer dimensions (W x H x D) | 230 x 410 x 310 mm |
| Subwoofer weight | 6.5 kg |
| Power supply | 220-240 V AC, 50/60 Hz |
| Power consumption | 120 W (operating), < 1 W (standby) |
| Output power (total) | 500 W RMS (5 x 100 W) |
| Supported audio formats | Dolby Digital, DTS, PCM |
| Connectivity | Optical and coaxial digital audio inputs, analog RCA inputs, composite and component video output |
| Main functions | DVD/VCD/CD playback, FM/AM radio, multi-channel amplification, acoustic adjustments |
| Maintenance and cleaning | Dust with a soft, dry cloth. Clean the player's lens with a suitable kit. |
| Safety | Unplug before cleaning. Do not expose to moisture. Use only in a well-ventilated area. |
| Spare parts and repairability | Remote control, speaker cables, FM/AM antenna. Repair by Denon authorized center. |
| General information | Complete home theater system for an immersive experience. Compatible with most TVs. |
Frequently Asked Questions - DHT-500SD DENON
User questions about DHT-500SD DENON
0 question about this device. Answer the ones you know or ask your own.
Ask a new question about this device
Download the instructions for your Home Theater System in PDF format for free! Find your manual DHT-500SD - DENON and take your electronic device back in hand. On this page are published all the documents necessary for the use of your device. DHT-500SD by DENON.
USER MANUAL DHT-500SD DENON
(SC-A500SD) (SC-C500SD) (DSW-500SD) (SC-A500SD)
| FOR ENGLISH READERS | PAGE | 3 ~ PAGE | 35 |
| FÜR DEUTSCHE LESER | SEITE | 36 ~ SEITE | 88 |
| POUR LES LECTEURS FRANÇAIS | PAGE | 69 ~ PACE | 101 |
| PER IL LETTORE ITALIANO | PAGINA | 102 ~ PAGINA | 134 |
| PARA LECTORES DE ESPAÑOL | PAGINA | 135 ~ PAGINA | 167 |
| VOOR NEDERLANDSTALIGE LEZERS | PAGINA | 158 ~ PAGINA | 200 |
| FOR SVENSKA LASARE | SIDA | 201 ~ SIDA | 233 |
ENGLISH DEUTSCH FRANCAIS ITALIANO ESPAÑOL NEDERLANDS SVENSKA

CAUTION
RISK OF ELECTRIC SHOCK DO NOT OPEN

CAUTION:
TO REDUCE THE RISK OF ELECTRIC SHOCK, DO NOT REMOVE COVER (OR BACK). NO USER SERVICEABLE PARTS INSIDE. REFER SERVICING TO QUALIFIED SERVICE PERSONNEL.

The lightning flash with arrowhead symbol, within an equilateral triangle, is intended to alert the user to the presence of uninsulated "dangerous voltage" within the product's enclosure that may be of sufficient magnitude to constitute a risk of electric shock to persons.

The exclamation point within an equilateral triangle is intended to alert the user to the presence of important operating and maintenance (servicing) instructions in the literature accompanying the appliance.
CLASS 1 LASER PRODUCT
LUOKAN 1 LASERLAITE KLASS 2 LASERARRADA
ADVARSEL:
- 2017年1月1日
[Non-Text]
VAROITUSI
[Non-Text]
[Non-Text]
WARNING-
USYNLIG LASERSTRÅLING VED ÅBNING, NÅR SIKKERHEDSAFBRYDERE ER UDE AF FUNKTION. UNDGÅ UDSAETTELSE FOR STRÅLING.
LAITTEEN KÄYTTÄMINEN MUULLA KUIN TÄSSÄ KÄYTTÖOHJEESSA MAINITULLA TAVALLA SAATTAA ALTISTAA KÄYTTÄJÄN TURVALLISUUSLUOKAN 1
YLITTÄVÄLLE NÄKYMÄTTÖMÄLLE LASERSÄTEILYLLE. OM APPARATEN ANVÄNDS PÅ ANNAT SÄTT ÄN I DENNA BRUKSANVISNING SPECIFICERATS, KAN ANVÄNDAREN UTSÄTTAS FÖR OSYNLIG LASERSTRÄLNING SOM ÖVERSKRIDER GRÄNSEN FÖR LASERKLASS 1.
"CLASS 1 LASER PRODUCT"
• DECLARATION OF CONFORMITY
We declare under our sale responsibility that this product, to which this declaration relates, is in conformity with the following standards: EN60065, EN55013, EN55020, EN61000-3-2 and EN61000-3-3.
Following the provisions of 73/23/EEC, 89/33/EEC and 93/58/EEC Directive.
Allow for sufficient heat dispersion when installed on a rack.
- Handle the power cord carefully.
- Keep the set free from moisture, water, and duct.
- Unplug the power card when not using the set for long periods of time.
* (For sets with ventilation holes)
- Do not lot insecticides, benzene, and thinner come in contact with the act.
- Never disassemble or modify the set in any way.
- The ventilation should not be impeded by covering the ventilation openings with items, such as newspapers, table cloths, curtains, etc.
- No naked flame sources, such as lighted candles, should be placed on the apparatus.
- Please be cared the environmental aspects of battery disposal. - The apparatus shall not be exposed to clipping or splashing t
- No objects filled with liquids, such as vases, shall be placed on the apparatus.
INTRODUCTION
Thank you for choosing the DENON DHT-500SD Home Theater System. This remarkable component has been engineered to provide superb surround sound listening with home theater sources such as DVD, as well as providing outstanding high fidelity reproduction of your favorite music sources. As this product is provided with an immense array of features, we recommend that before you begin hookup and operation that you review the contents of this manual before proceeding.
TABLE OF CONTENTS
| 1 | Before Using....3 | 11 | Basic Operation....21, 22 |
| 2 | Cautions on Installation....3 | 12 | Surround Mode....23, 24 |
| 3 | Cautions on Handling....3, 4 | 13 | Playback....24–26 |
| 4 | Features....5 | 14 | On-Screen Display....26 |
| 5 | Discs....5 | 15 | Using the On-Screen Display....27 |
| 6 | Cautions on Handling Discs....6 | 16 | Special playback....28, 29 |
| 7 | Connections....6–9 | 17 | Changing the Default Settings (DVD)....30–32 |
| 8 | Part Names and Functions....9–12 | 18 | Listening to the Radio....32–34 |
| 9 | Remote Control Unit....12–15 | 19 | Troubleshooting....34 |
| 10 | Setting up the System....16–20 | 20 | Specifications....35 |
ACCESSORIES
■ ADV-500SD (DVD Surround Receiver)
Check that the following parts are included in addition to the main unit:
| 1 Operating instructions....1 | 2 Service station list....1 | 3 Remote control unit(HC-973)....1 |
| 4 R6P/AA batteries....2 | 5 AM loop antenna....1 | |
| 6 FM indoor antenna....1 | 7 Video cord....1 | |
 |  |  |
■ SYS-500SD (speaker system)
Before using, check that the package contains the main speaker units (SC-A500SD x 4 units, SC-C500SD x 1 unit, DSW-500SD x 1 unit) and the accessories shown below.
| 1 Speaker cord A ....2(Used to connect the SC-A500SD)Length: Approx. 10 meters3 Anti-Slip pad (4 pcs / 1 sheet)....5 | 2 Speaker cord B ....4(Used to connect the SC-A500SD, SC-C500SD andDSW-500SD)Length: Approx. 3 meters |
1 BEFORE USING
Pay attention to the following before using this unit:
- Moving the set
To prevent short circuits or damaged wires in the connection cords, always unplug the power cord and disconnect the connection cords between all other audio components when moving the set.
- Before turning the power switch on
Check once again that all connections are proper and that there are not problems with the connection cords. Always set the power switch to the standby position before connecting and disconnecting connection cords.
- Store this instructions in a safe place.
After reading, store this instructions along with the warranty in a safe place.
- Note that the Illustrations in this Instructions may differ from the actual set for explanation purposes.
② CAUTIONS ON INSTALLATION
Noise or disturbance of the picture may be generated if this unit or any other electronic equipment using microprocessors is used near a tuner or TV. If this happens, take the following steps:
- Install this unit as far as possible from the tuner or TV.
- Set the antenna wires from the tuner or TV away from this unit's power cord and input/output connection cords.
- Noise or disturbance tends to occur particularly when using indoor antennas or 300 Ω/ohms feeder wires. We recommend using outdoor antennas and 75 Ω/ohms coaxial cables.
For heat dispersal, leave at least 10 cm of space between the top, back and sides of this unit and the wall or other components.


3 CAUTIONS ON HANDLING
- Switching the input function when input jacks are not connected
A clicking noise may be produced if the input function is switched when nothing is connected to the input jacks. If this happens, either turn down the MASTER VOLUME control or connect components to the input jacks.
- Muting of PRE OUT jacks, HEADPHONE jack and SPEAKER terminals
The PRE OUT jacks, HEADPHONE jacks and SPEAKER terminals include a muting circuit. Because of this, the output signals are greatly reduced for several seconds after the power switch is turned on or input function, surround mode or any other-set-up is changed. If the volume is turned up during this time, the output will be very high after the muting circuit stops functioning. Always wait until the muting circuit turns off before adjusting the volume.
- Whenever the power switch is in the STANDBY state, the apparatus is still connected on AC line voltage.
Please be sure to unplug the cord when you leave home for, say, a vacation.
ENGLISH
When installing, carefully examine the place and method of installation for safety.
When using a stand, brackets, etc., follow the instructions included with the stand or brackets and check for safety before installing and using. Denon will accept no responsibility for damages or accidents caused by the unit falling.
Cautions on Installation
The quality of the sound produced from the speaker system is affected by the size and type (Japanese or Western) of the room, as well as by the method of installation. Consider the points listed below before installing the speaker system.
Note that placing the speaker system on the same stand or shelf as a record player may result in howling.
If there is a wall, glass door, etc., directly in front of or behind the speaker system, cover the wall or door with a thick curtain to prevent resonance and reflection.
The SYS-500SD speaker systems are of the low-leakage-flux type and can be used near televisions, but depending on the TV there may be color blotching on the picture. If this happens, turn off the TV's power, wait 15 to 30 minutes, then turn the TV's power back on. The TV's automatic degaussing circuit should reduce the blotching on the picture. If blotching persists, move the speaker further away.
The center speaker (SC-C500SD) is equipped with anti-slip pads upon shipment from the factory. If necessary, however, also apply the included anti-slip pads (cork, approximately 2 mm thick).
When placing the satellite speaker system (SC-A500SDI) on a stand, etc., stick the included anti-slip pads (cork, approximately 2 mm thick) at the four corners of the bottom surface. (Refer to the illustration below.)
[Bottom of SC-A500SD]
Stick the anti-slip pads (cork, approximately 2 mm thick) here.

Stick the anti-slip pads (cork, approximately 2 mm thick) here.
When mounting the satellite speaker system (SC-A500SD) on a stand or bracket, M5 nuts are inserted into the bottom of the satellite speaker system (SC-A500SD) at intervals of 60 mm. When mounting, following the instructions in the manual included with the speaker stand or ceiling mount bracket, and be sure to install properly and securely.
When the satellite speaker system (SC-A500SD) is mounted on a ceiling mount bracket, it is turned upside down due to the installation angle. The Denon mark is also turned upside down, so detach the speaker net and reattach it in the opposite direction.
CAUTION:
- To ensure safety, do not place any objects on top or lean objects against the speaker system.
- The speaker may topple down or fall if force is applied to the sides. Be particularly careful to avoid this, as this could cause injury or other serious accidents.
WARNING:
- When installing the speaker systems on the ceiling or wall, to ensure safety, have specialists do the installation work.
- Be sure to fasten the speaker cords to a wall, etc., to prevent people from tripping over them or otherwise pulling on them accidentally, causing the speaker systems to fall.
- Be sure to check for safety after installing the speaker systems. Afterwards, perform safety inspections at regular intervals to be sure there is no danger that the speaker systems will fall. Denon will accept no responsibility for damages or accidents caused by inappropriate choice of the place of installation or improper installation procedures.
Speaker stand/speaker bracket mount screw holes
Other Cautions
Note that color blotching may occur on a TV, etc., due to interaction with the speaker system if there is a magnet or an object generating magnetic force nearby.
Examples: (a) When there are magnets on the door of the rack, stand, etc.
(b) When a health device, etc., equipped with magnets is placed nearby. (c) When toys or other objects using magnets are placed nearby.
Note that the illustrations in this instructions may differ from the actual set for explanation purposes.
■Be sure to keep the operating instructions.
After reading these operating instructions, store them in a safe place. We also recommend filling in the necessary items on the back cover.
4 FEATURES
-
Slim body (80 mm wide) and half mirror/aluminum panel (ADV-500SD) The slim, neat body just 80 mm wide and half mirror/aluminum panel make for an elegant design that further enhances your interior decor.
-
Stylish 5.1-channel surround AV speaker system (SYS-500SD)
Satellite speaker equipped with a super tweeter unit capable of reproducing a wide frequency range of up to 90 kHz, plus a passive subwoofer producing clear, firm bass sound.
-
Remote control unit with pre-memory function This unit comes with a remote control unit equipped with a pre-memory function. The remote control command codes for video decks and TVs of major manufacturers are prestored in the memory.
-
Progressive Scan function
The ADV-500SD is equipped with a progressive scan function achieving playback with high picture quality. Movies and other DVD software can be recreated with a picture quality near that of the original.
- Dolby Digital
Using advanced digital processing algorithms, Dolby Digital provides up to 5.1 channels of wide-range, high fidelity surround sound. Dolby Digital is the default digital audio delivery system for DVD and North American DTV.
- DOLBY PRO LOGIC IIx compatibility
DOLBY PRO LOGIC IIx furthers the matrix decoding technology of DOLBY PRO LOGIC II to decode audio signals recorded on two channels into up to 7.1 playback channels, including the surround back channel. DOLBY PRO LOGIC IIx also allows 5.1-channel sources to be played in up to 7.1 channels.
The mode can be selected according to the source. The Music mode is best suited for playing music, the Cinema mode for playing movies, and the Game mode for playing games. The Game mode can only be used with 2-channel audio sources.
- DOLBY PRO LOGIC II Game mode compatibility
In addition to the previously offered Music and Cinema modes, the ADV-500SD also offers a Game mode optimum for games.
- DTS (Digital Theater Systems)
DTS provides up to 5.1 channels of wide-range, high fidelity surround sound, from sources such as laser disc, DVD and specially-encoded music discs.
- DTS-ES Extended Surround and DTS Neo:6
The ADV-500SD can be decoded with DTS-ES Extended Surround, a multi-channel format developed by Digital Theater Systems Inc. The ADV-500SD can be also decoded with DTS Neo6, a surround mode allowing 6.1 channels playback of regular stereo sources.
- DTS 96/24 compatibility
The ADV-500SD can be decoded with sources recorded in DTS 96/24, a multi-channel digital signal format developed by Digital Theater Systems Inc.
DTS 96/24 sources can be played in the multi-channel mode on the ADV-500SD with high sound quality of 96 kHz/24 bits or 88.2 kHz/24 bits.
- Auto Surround Mode
This function stores the surround mode last used for an input signal in the memory and automatically sets that surround mode the next time that signal is input.
- Multiple functions
(1) Picture CD ,MP3, Windows Media-formatted file playback function (NOTE 1)
Kodak Picture CDs can be played on the ADV-500SD.
MP3, Windows Media-formatted file and Still images stored in JPEG format on CD-R/RWs can also be played.
(2) GUI (Graphical User Interface) function
The display button on the remote control unit can be used to display player and disc information on the TV screen.
(3) Playback disable function
This function can be used to disable playback of DVDs you do not want children to watch.
NOTE1:
• "KODAK" is a trademark of Eastman Kodak Company.
• Manufactured under license from Dolby Laboratories.
"Dolby" and the double-D symbol are trademarks of Dolby Laboratories.
- "DTS", "DTS-ES", "Neo:6" and "DTS 96/24" are trademarks of Digital Theater Systems, Inc.
5 DISCS
- The types of discs listed on the table below can be used on the ADV-500SD.
The marks are indicated on the disc labels or jackets.
| Unable discs | Mark Ilogol | Recorded signals | Disc size |
| DVD video (NOTE 1) | Digital audio + digital video (IMPE02) | 12 cm | |
| 8 cm | |||
| Video CD (NOTE 1) | Digital audio + digital video (IMPE01) | 12 cm | |
| 8 cm | |||
| CD CD4A CD4AW (NOTE 2) | Digital audio VPO WMA Digital music UPFS1 | 12 cm | |
| 6 cm | |||
| Audio Optics/Video = CD (VIDEO) | 12 cm |
■The following types of discs cannot be played on the ADV-500SD:
• DVDs with region numbers other than "2" or "ALL"
• DVD-ROM/RAMs
• SACD
- CD-ROMs
• CDVs (Only the audio part can be played.)
• CD-Gs (Only the audio is output.)
- Photo CDs
NOTE 1: Some, DVD video and video CD discs do not operate as described in this manual due to the intentions of the discs' producers.
NOTE 2: According to recording quality, some CD-R/RW cannot be played.
■Disc terminology
- Titles and chapters (DVD-videos)
DVD-videos are divided into several large sections called "titles" and smaller sections called "chapters".
Numbers are allotted to these sections. These numbers are called "title numbers" and "chapter numbers".
For example:

• Tracks (video and music CDs)
Video and music CDs are divided into sections called "tracks". Numbers are allotted to these sections. These numbers are called "track numbers".
For example:
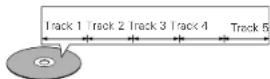
• Playback control (video CDs)
Video CDs including the words "playback control" on the disc or jacket are equipped with a function for displaying menus on the TV screen for selecting the desired position, displaying information, etc., in dialog fashion. In this manual, playing video CDs using such menus is referred to "menu playback". Video CDs with playback control can be used on the ADV-500SD.
NOTE:
This DVD player is designed and manufactured to respond to the Region Management Information that is recorded on a DVD disc. If the Region number described on the DVD disc does not correspond to the Region number of this DVD player, this DVD player cannot play this disc.
The Region number for this DVD player is 2.

ENGLISH
6 CAUTIONS ON HANDLING DISCS
Discs
Only the discs including the marks shown on page 5 can be played on the ADV-500SD.
Note, however, that discs with special shapes (heart-shaped discs, hexagonal discs, etc.) cannot be played on the ADV-500SD. Do not attempt to play such discs, as they may damage the player.


Holding Discs
Avoid touching the surface of discs when loading and unloading them.
Be careful not to get fingerprints on the signal surface (the side which shines in rainbow colors).
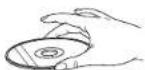
Cleaning Discs
■ Fingerprints or dirt on the disc may lower sound and picture quality or cause breaks in playback. Wipe off fingerprints or dirt.
■ Use a commercially available disc cleaning set or a soft cloth to wipe off fingerprints or dirt.


Wipe gently from the middle outwards.
Do not wipe with a circular motion.
NOTE:
Do not use record spray or antistatic. Also do not use volatile chemicals such as benzene or thinner.

Cautions on Handling Discs
- Do not get fingerprints, grease or dirt on discs.
- Be especially careful not to scratch discs when removing them from their cases.
- Do not bend discs
- Do not heat discs
- Do not enlarge the center hole.
- Do not write on the labeled (printed) side with a ball-point pen or a pencil.
- Water droplets may form on the surface if the disc is moved suddenly from a cold place to a warm one. Do not use a hairdryer, etc., to dry the disc.
Cautions on Storing Discs
• Always eject discs after playing them
- Keep discs in their cases to protect them from dust, scratches and warping.
- Do not put discs in the following places:
-
Places exposed to direct sunlight for long periods of time
-
Humid or dusty places
- Places exposed to heat from heaters, etc.
Cautions on Loading Discs
- Only load one disc at a time. Loading one disc on top of another may result in damage or scratch the discs.
- Load 8 cm discs securely in the disc guide, without using an adapter. If the disc is not properly loaded, it may slip out of the guide and block the disc tray.
- Be careful not to let your fingers get caught when the disc tray is closing.
- Do not place anything but discs in the disc tray.
- Do not load cracked or warped discs or discs that have been fixed with adhesive, etc.
- Do not use discs on which the adhesive part of cellophane tape or glue used to attach the label is exposed, or discs with traces of tape or labels that have been peeled off. Such discs may get stuck inside the player, resulting in damage.
7 CONNECTIONS
CAUTION:
- Switch off the power to all equipment before making connections.
- Read the instructions of each component you intend to use with this unit.
- Be sure to insert each plug securely. To prevent hum and noise, avoid bundling the signal interconnection cables together with the AC power cord or speaker cables
(1) Connection to a TV and other equipment
Connect the unit using one of the following terminations to your TV or monitor. The connections are listed in order of quality of picture from the best possible first. Additional information on each connection type is provided below:
If your TV or monitor is compatible with progressive scan, connect the TV via the COMPONENT VIDEO jacks using a component video cable, and press the "PROGRESSIVE SCAN" button on the front panel so that "P.SCAN" lights on the display. This results in a high quality picture with little flickering.
Progressive video signals are output from only component terminals.
Connecting the RGB SCART output(AV CONNECTOR) using an RGB-ready SCART cable, or connecting the COMPONENT VIDEO using a component video cable is next to it.
S-VIDEO is your third choice.
Composite video output (SCART-COMPOSITE or VIDEO OUT) would be your last choice.
- For better picture quality, do not connect more than one video cable.
- Please connect this unit to a TV directly. If the TV is connected through a video cassette recorder, playback of a copy protected DVD disc could result in distorted picture quality.
A COMPONENT VIDEO jack
If your TV or monitor has COMPONENT VIDEO IN jacks, connect them with a quality component video cable. In the default setting, COMPONENT VIDEO OUT jack is not active. If you want to use COMPONENT VIDEO OUT, follow the following steps.
- Connect the VIDEO jacks with a RCA video cable.
You can use the provided cable - Connect the COMPONENT VIDEO lacks with a component video cable.
- Turn the unit and TV on, and select "COMPONENT" in the DVD SETUP menu.
- Turn the unit off and disconnect the RCA video cable from the VIDEO jacks.
ADV-500SD

ENGLISH
S-VIDEO connection is your second choice and is superior to the standard composite video connection. If the component has a S-VIDEO jack, connect them with a high quality S-VIDEO cable.
S-VIDEO OUT S-VIDEO IN (TV)
If neither COMPONENT VIDEO nor S-VIDEO is available, connect the component with a high quality RCA cable designed for video applications.
VIDEO OUT VIDEO IN TV
C AV Connector (SCART jack)
SCART jack on the unit to the SCART IN jack on the TV using the Scart Cable.
D VIDEO1,VIDEO2 jack
Connect the component with RCA cords. Make sure to connect:
white plug white jack (top left)
red plug red jack (F-1)
yellow plug yellow looks
- 2017年1月1日

Cautions during analog recording of DVDs or digital input sources:
- Do not switch the INPUT mode or SURROUND mode, and do not plug or unplug headphone during recording. Doing so will interrupt the sound being recorded. We recommend setting the SURROUND mode to "STEREO".
E DIGITAL IN/OUT jacks
Connect the component with optional coaxial cables or optical cables.
DIGITAL IN DIGITAL OUT(CD, etc.)
DIGITAL OUT DIGITAL-IN(CD-R, MD, etc.)
- Connect any one of the DIGITAL terminals. (OPTICAL or COAXIAL)
- To record digitally, connect the source(CD player, etc.) to DIGITAL IN and the recorder(CD-R, MD, etc.) to DIGITAL OUT.
- When an optical fiber cable is used for connection, remove the caps protecting both ends of the optical cable.
CAUTION:
Connect either OPTICAL or COAXIAL with suitable jack.

flowchart
graph TD
    A["ADV-500SD"] --> B["INPUT OPTICAL"]
    B --> C["OPTICAL CABLE"]
    C --> D["CD Player, etc."]
    D --> E["OUTPUT"]
    E --> F["OPTICAL"]
    style A fill:#f9f,stroke:#333
    style D fill:#ccf,stroke:#333
    style E fill:#cfc,stroke:#333
F SUBWOOFER PRE OUT jack
Use Subwoofer jack to connect in case you had additional active subwoofer.
You can connect a larger active subwoofer to the system. Connect the active subwoofer to the SUBWOOFER PRE-OUT jack using a shielded audio cable.

ENGLISH
G SURR. BACK PRE OUT jack
Use SURR. BACK PRE OUT jack to connect additional POWER AMPLIFIER and two speaker systems. You can enjoy 7.1ch surround system.
H AC Power Cord
When all the connections have been finished, plug the AC power cord into an AC wall socket
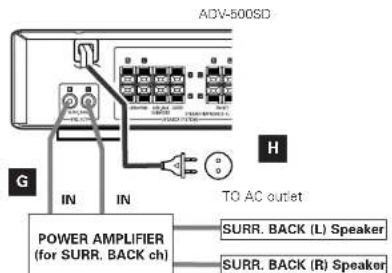
- Connect the power amplifier for center and SURR. BACK speaker system.
(2) Connection to Speakers (SYS-500SD)
Speaker Connections
CAUTION:
To avoid damaging the speakers with a sudden high-level signal, be sure to switch the power off before connecting the speakers.
- The ADV-500SD's red speaker terminals are the "+" (positive) terminals and the black terminal's are the "-" (negative) terminals.
- The "+" side of the speaker cable is marked to make it distinguishable from the "-" side of the cable. Connect this marked side to the red "+" terminal and the unmarked side to the black terminal.
- Prepare the speaker cords for connection by stripping off approximately 10 mm or less (no more as this could cause a short-circuit) of the outer insulation.
Twist the wires tightly together so that they are not straggly.


How to connect
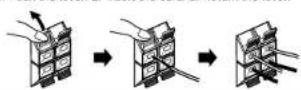
Press the lever, insert the stripped and twisted end (approx. 3/6') of the cord, then release the lever: Make sure it is fastened securely by pulling the cord lightly.
CAUTION:
The metal portions of the two separate wires should not touch or an electrical short can occur. Shorted wires can create a fire hazard or induce a failure in your equipment.
Connection the speaker terminals
- Push the lever. 2. Insert the cord. 3. Return the lever.
Positioning of the Speakers
The positioning of speakers differs according to the size and acoustics of the listening room. While actually listening to a program source, try various speaker positions to determine which layout provides the best surround effect. Place the speakers connected to "L" to your left, and "R" to your right.
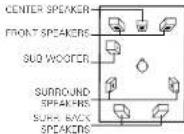
A Front speakers (SC-A500SD)
Place the front speakers in front of the listening position, to the left and right of a TV. Front speakers are required for all surround modes.
B Center speaker (SC-C500SD)
Place a center speaker between the front speakers, on or below the TV. This speaker stabilizes the sound image.
C Surround speakers (SC-A500SD)
Install these speakers above the level of the listener's ears, to the left and right. Do not install the surround speakers too far behind the listening position. It might be effective to direct the rear speakers towards a wall or ceiling to further disperse the sound.
D Passive Subwoofer (DSW-500SD)
Reproduces powerful and deep bass sounds. Subwoofer are most effective when placed on or near the floor and in a corner of the room. Refer to the instructions that came with your subwoofer for placement suggestions.
E Surround back speakers (SURR. BACK SP.)
If you add the Surround back speaker(s), you can enjoy 6.1 ch surround sound or 7.1 ch surround sound, lex: DOLBY DIGITAL EX, DOLBY PRO LOGIC IIx, DTS ES, DTS NEO 6, etc.)

flowchart
graph TD
    A["A"] --> Process
    B["B"] --> Process
    C["C"] --> Process
    D["D"] --> Process
    E["E"] --> Process
    Process --> A
    Process --> B
    Process --> C
    Process --> D
    Process --> E
    style Process fill:#f9f,stroke:#333
    note right of Process: '(1 or 2 speck'
(1 or 2 speakers)
(3) Connecting Antennas

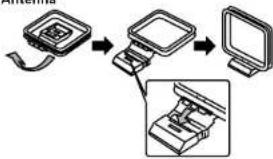
AM Indoor Loop Antenna
The high-performance AM loop antenna provided with this unit is sufficient for good reception in most areas.
To stand the loop antenna on a surface, fix the claw to the slot.
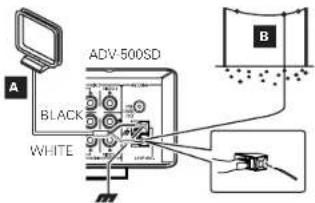
Connect the loop antenna's wires to the AM antenna terminals as shown.
(Connect the white wire to the upper terminal, and the black wire to the lower terminal.)
Place the antenna on a shelf, for example, or hang it on a window frame, etc., in the direction which gives the best reception, as far away as possible from the entire system, speaker cords and the power cord, to prevent unwanted noise.
If there is no room for the AM loop antenna, you may mount it on the wall using screws (not supplied).
AM Antenna
flowchart
graph TD
    A["Device Icon"] --> B["Desktop Icon"]
    B --> C["Computer Icon"]

AM Outdoor Antenna
If the AM loop antenna provided does not deliver sufficient reception (often due to being too far from the transmitter or in a concrete building, etc.), it may be necessary to use an outdoor AM antenna.
Use an insulated wire more than 15 ft (5 m) long, strip one end, and connect this to the terminal as shown.
The antenna wire should be string outdoors or indoors near a window. For better reception, connect the GND terminal to a reliable ground.
Note:
Even when using an outdoor AM antenna, do not disconnect the AM loop antenna.

FM Indoor Antenna
Connect the lead-type FM antenna to the FM 75 Ω socket, extend the lead and fix it to a window frame or wall with thumbtacks, or the like, where reception is best.


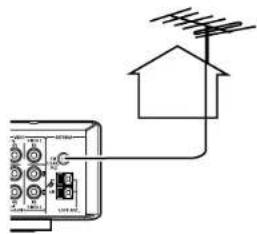
FM Outdoor Antenna
In an area where FM signals are weak, it will be necessary to use an outdoor FM antenna. Generally, a 3-element antenna will be sufficient; if you live in an area where the FM signals are particularly weak, it may be necessary to use one with 5 or more elements.

PART NAMES AND FUNCTION
(1) Front Panel

① POWER (ON/STANBY) switch
- Press this switch to turn the unit on or off (standby).
② Disc tray
③ OPEN/CLOSE (▲) button
- Use this button to open and close the disc tray.
④ FUNCTION (DVD, TUNER, VIDEO1, VIDEO2, TV) button
- This button is used to select a function.
⑤ SURROUND MODE button
- Use this button to select a surround mode.
⑥ PROGRESSIVE SCAN button
- Press this to switch the component video output between PROGRESSIVE and INTERLACED SCAN.
⑦ PLAY (▶)/BAND button
• In DVD mode, use this button to start playback.
- In TUNER mode, use this button to select FM or AM.
- In TUNER mode, press this button for more than 2 seconds to alternate between Tuning mode and Preset mode.
8 PAUSE/STEP (III)/MEMORY button
- Pause playback or recording temporarily / press repeatedly for frame-by-frame playback
- In TUNER mode, use this button to memory the preset channels.
⑨ STOP (■)/FM MODE button
- In TUNER mode, press this button to select stereo or monoral mode, while listening to FM broadcasts.
- In TUNER mode, use this button to clear Preset Memory.
• In DVD mode, stops playback.
⑩ TONE/DIMMER button
- This button is used to adjust BASS and TREBLE, or to dim the display. Press this button repeatedly to select BASS, TRE or DIM, and then turn the VOLUME dial to adjust.
⑪ SKIP (I◄◄, ►►I)/TUNING buttons
- In DVD mode, use these buttons to skip chapters or tracks.
- During PBC playback of a VCD, these buttons are used to advance the menu page.
- In TUNER mode, use these buttons to tune in a station.
⑫ VOLUME Dial
- Turn the VOLUME dial to adjust the master
⑬ Display
- When the unit is on, the current status of the unit is displayed.
14 STANDBY Indicator
- This indicator lights when the unit is in the standby mode.
When the unit is turned on, it goes off.
15 PHONES
- For private listening, insert the headphones plug into this jack, and adjust the volume by turning the VOLUME knob.
16 REMOTE SENSOR
- When operating the remote control unit, point it towards the REMOTE SENSOR.
ENGLISH
(2) Display

① Indicates current title number.
② Indicates current track number.
③ Indicates current chapter number.
4 STEREO indicates in the tuner mode.
⑤ Iluminates when a station is tuned.
6 Iluminates during all track repeat playback.
7 Iluminates during repeat playback.
8 Iluminates when PRESET mode is selected
9 Displays current status or time.
10 BDS MODE Indicators
⑪ TA indicates Traffic Announcement is received in RDS MODE.
12 PROG indicates programmed playback is active.
13 Speaker icons.
⑭ Iluminates during shuffle playback.
⑮ Iluminates when SLEEP TIMER is set.
⑯ Iluminates curing mute.
⑰ Iluminates when an analog source is selected
18 Iluminates when a digital source is selected.
19 type of disc loaded
20 surround mode
② indicates encoding format of the current disc.
22 Iluminates when Progressive video signals are
being output from only component terminals
23 indicates Current disc format
24 operating status indicator
25 AUTO indicates auto decode mode is active.
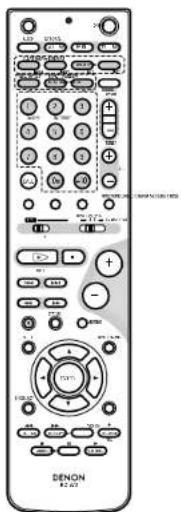
(3) Remote control unit
- For details on the functions of these parts, refer to the pages given in parentheses ( )
- Some of the buttons on the remote control unit have some functions.
The functions are switched using the remote control mode selector switches.

① Transmission indicator
② SLEEP timer button .....(22)
3 NTSC/PAL button....(30)
4 CLEAR button....1291
5 A-B REPEAT button ..... (28)
6 PROG/DIRECT button....(29)
7 REPEAT button....(28)
8 Number buttons (0\~9, +10).....(13, 15, 26)
⑨ CALL button....(29)
⑩ TEST TONE button....(19, 20)
⑪ INPUT MODE selector button ..... (21)
12 DVD PLAY button 124, 25, 28, 29
13 DVD STOP button 24.25
14 DVD SKIP buttons....(24, 25)
15 DVD SEARCH buttons (25.26)
16 DVD PAUSE button....(24, 26)
17 STATUS button 124.31)
18 SETUP button (16-20, 30)
19 CH SELECT button 119.20
20 RETURN button (24)
② DISPLAY button (26)
27 ANGLE button....(27)
23 AUDIO selector button 127.30)
24 Remote control signal transmission window (12)
25 POWER button .....(13, 21)
26 * SYSTEM buttons....(11, 12)
27 ZOOM button....1271
28 RANDOM button (28)
24 INPUT SOURCE select buttons....111
30 TUNER TUNING +/- buttons .....(32, 33)
31 TUNER PRESET CH +/- buttons ..... (33)
32 FUNCTION selector button (21)
33 SURBOUND mode selector button (23, 24)
24 Mode selector switches (11, 14, 15, 22, 32)
35 Main volume control buttons (21)
36 MUTING button (22)
③7 TONE/ DIMMER button .....(21)
ENTER button (16)
CURSOR button (16)
40 TOP MENU button (24)
41 MENU button (24)
42 SUBTITLE button 027-30
43 SYSTEM buttons....(11, 15)
- For details on the function and operation of the various parts, refer to the pages indicated in (parentheses).
- Buttons indicated are DVD control buttons and can be operated when the remote control mode selector switch is set to the A/V and DVD position.
- The functions of the system buttons (2) are switched using the remote control mode selector switch.
(4) Names and functions of remote control unit buttons on the ADV-500SD
- Buttons in sections ① - ③ can be operated regardless of the position of mode switches 1 and 2.
- Consider a A/Vs stand DVD positions, and switch as necessary to operate.

1
Set mode switch 1 to the "AV" position.

2
Set mode switch 2 to the position of the function you want to operate (DVD, TUNER or AV AMPI.

① Surround amplifier control buttons
ON : Turns the ADV-500SD's power on
OFF : Turns the ADV-500SD's power off.
FUNCTION : Function selection (in order)
SURROUND : Surround mode selection
INPUT MODE: Input mode selection
TEST TONE : Test tone on/off
+ : Main volume up
- : Main volume down
MUTING : Muting on/off
STATUS : Status display selection
TONE/DIMMER : Tone/DIMMER selection and
setting
SET UP : Setup mode on/off
CH SELECT : Channel level selection and
setting
▲, ▼, ◀, ▶: Cursor up, down, left and right
ENTER : Enter setting
② DVD control buttons
: Play (auto power on and auto
function selection
■: Stop
|◀◀,▶▶| : Skip (cueing)
◀◀, ▶▶ : Search (fast-reverse and fast-
forward
III: Pause and frame-by-frame
③ Tuner control buttons
CH +/- : Preset channel up/down
(auto power on and auto function
selection)
3
Operate the ADV-500SD
[1] Surround amplifier system buttons
(Operated with mode switch 2 set to "AV AMP")
• These operations are possible with
mode switch 1 at any position.
The operations in gray print can be performed.

SLEEP
Sleep on/off
DVD
Function DVD
TUNER
Function TUNER
TV
Function TV
VIDEO-1
Function VIDEO-1
VIDEO 2
Function VIDEO-2
[2] DVD system buttons
Operated with mode switch 2 set to
"DVD")

NTSC/PAL
NTSC/PAL selection
ZOOM : Zoom on/off
A-B REPEAT : A-B repeat playback
setting
CLEAR : Program clear
RANDOM : Random play on/off
REPEAT : Repeat play setting
PROG/DIRECT: Program/direct play
selection
CALL : Program call
0 - 9. +10 : Number buttons
TOP MENU : Top menu call
MENU : Menu call
DISPLAY : Display call/selection
[3] Tuner system buttons
[Operated with mode switch 2 set to "TUNER"]
BAND : FM/AM band selection
MEMO : Preset memory
MODE : FM auto/mono mode
selection
TUNER +/- : Tuning up/down
1 \~ 10, +10 : Preset channel number
buttons
RDS : Use this button to automatically
tune to stations using the radio data system.
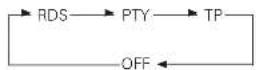
PTY : Press this button after selecting "PTY" with the RDS button to select one of the 29 program types.
CT Use this to correct the time of the clock on the ADV 500SD. Press this button when the time service of an RDS station is being properly received. "TIME" is displayed for 2 seconds and the ADV-500SD's clock is corrected. "NO DATA" is displayed if the RDS station does not offer a time service and when the broadcast is not being received properly.
RT : Press this button when receiving RDS stations to select the frequency, PS (or Station name), PTY or RT display.
Note that this button will not function if the reception is poor.
The display mode changes as follows each time the button is pressed.

※ The station name is displayed with priority instead of the PS display when a channel whose station name has been preset is tuned in.
9
REMOTE CONTROL UNIT
- The included remote control unit (RC-973) can be used to operate not only this unit but other remote control compatible DENON components as well. In addition, the memory contains the control signals for other remote control units, so it can be used to operate non-DENON remote control compatible products.
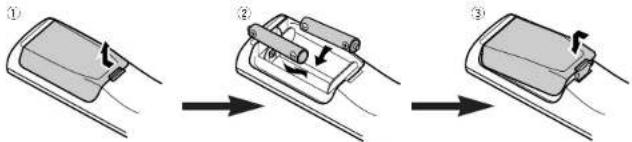
(1) Inserting the batteries
① Remove the remote control unit's rear cover.
② Set three R6P/AA batteries in the battery compartment in the indicated direction.
③ Put the rear cover back on.
Notes on Batteries
- Use R6P/AA batteries in the remote control unit.
- The batteries should be replaced with new ones approximately once a year, though this depends on the frequency of usage.
- Even if less than a year has passed, replace the batteries with new ones if the set does not operate even when the remote control unit is operated nearby the set. (The included battery is only for verifying operation. Replace it with a new battery as soon as possible.)
- When inserting the batteries, be sure to do so in the proper direction, following the and marks in the battery compartment.
• To prevent damage or leakage of battery fluid
- Do not use a new battery together with an old one.
- Do not use two different types of batteries.
- Do not short-circuit, disassemble, heat or dispose of batteries in flames.
- Remove the batteries from the remote control unit when you do not plan to use it for an extended period of time.
- If the battery fluid should leak, carefully wipe the fluid off the inside of the battery compartment and insert new batteries.
- When replacing the batteries, have the new batteries ready and insert them as quickly as possible.
(2) Using the remote control unit

- Point the remote control unit at the remote sensor on the main unit as shown on the diagram.
- The remote control unit can be used from a straight distance of approximately 7 meters/22 feet from the main unit, but this distance will be shorter if there are obstacles in the way or if the remote control unit is not pointed directly at the remote sensor.
- The remote control unit can be operated at a horizontal angle of up to 30 degrees with respect to the remote sensor.
NOTES:
- It may be difficult to operate the remote control unit if the remote sensor is exposed to direct sunlight or strong artificial light.
- Do not press buttons on the main unit and remote control unit simultaneously. Doing so may result in malfunction.
- Neon signs or other devices emitting pulse-type noise nearby may result in malfunction, so keep the set as far away from such devices as possible.
(3) TV and video deck preset memories
- Components of other brands can be operated with the included remote control unit by storing their codes in the preset memory. Note that depending on the model some operations may not be possible and some buttons may not operate properly.

■ Not set upon shipment from the factory.

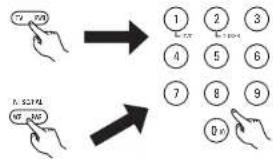
3 Press the power ON button and the OFF button simultaneously. • The transmission LED (indicator) flashes.

4 Press the TV PWR button to preset a TV, the VCR PWR button to preset a video deck, then input the 3-digit number corresponding to the brand of the component whose signals are to be stored in the preset memory refer to the tables of remote control codes on pages 13 to 19.
NOTES:
- When buttons are pressed while setting the preset memory, their signals are sent from the remote control transmitter, so cover the remote control sensor when setting the preset memory to prevent accidental operation.
- Depending on the model and year of make, some of the remote control codes for the brands included on the tables may not operate properly.
- For some brands there are multiple types of remote control codes. If an operation does not work, try changing to one of the other codes.
Combinations of preset codes for different brands
| TV | |||
| Admiral 045, 121 | Fortress | 012 | |
| Adventura 122 | Fujitsu 004, 062 | ||
| Aiko 054 | Funai | 004, 062 | |
| Akai 016, 077, 046 | Futuretech | 004 | |
| Alleron 062 | GE | 020, 036, 037, 040, 044, 058, 066, 088, 119, 120, 125, 147 | |
| A-Mark 007 | |||
| Amitron 061 | Goldstar | 015, 029, 031, 039, 048, 051, 056, 057, 067, 068, 069, 116, 165 | |
| Anam 006, 007, 036 | |||
| Anam Nacional 061, 147 | |||
| AOC 003, 007, 033, 038, 039, 047, 048, 049, 133 | Grundy 062 | ||
| Archer 007 | Hitachi | 029, 031, 051, 052, 070, 111, 112, 113, 124, 134 | |
| Audiovox 007, 061 | Hitachi Pay TV | 151 | |
| Bauer 155 | Infinity | 017, 071 | |
| Belcor 047 | Janeil | 122 | |
| Bell & Howell 045, 118 | JBL | 017, 071 | |
| Bradford 061 | JC Penny | 020, 034, 039, 040, 041, 044, 048, 050, 058, 066, 069, 076, 088, 090, 095, 125, 136, 159 | |
| Brockwood 003, 047 | |||
| Candle | 003, 030, 031, 032, 038, 047, 049, 050, 122 | JCB | 046 |
| Capohan | 003 | JVC | 019, 051, 052, 072, 073, 091, 117, 128 |
| Celebrity | 046 | ||
| Circuit City | 003 | Kawasho | 018, 046 |
| Citizen | 029, 030, 031, 032, 034, 038, 047, 049, 050, 054, 061, 095, 122, 123 | Konwood | 038, 056, 057 |
| Kloss | 010, 032 | ||
| Kloss Novabeam | 005, 122, 127, 131 | ||
| Concerto | 031, 047, 049 | KTV | 074, 123 |
| Colortyme | 003, 047, 049, 135 | Loewa | 071 |
| Contec | 013, 051, 052, 061 | Logik | 144 |
| Cory | 051, 052, 061 | Luxman | 031 |
| Craig | 004, 061 | LXI | 009, 014, 017, 024, 040, 044, 063, 071, 075, 076, 077, 118, 125 |
| Crown 029 | |||
| Curtis Mathos | 029, 034, 038, 044, 047, 049, 053, 095, 118 | Magnavox | 005, 010, 017, 030, 033, 038, 050, 058, 071, 078, 079, 095, 099, 109, 109, 110, 127, 131, 132, 145 |
| Daewoo | 027, 029, 039, 048, 049, 054, 055, 106, 107, 137 | ||
| Daytron | 003, 049 | ||
| Dimersia | 044 | Marantz | 015, 017, 071, 080 |
| Dixi | 007, 015, 027 | Matsui | 027 |
| Electroband | 046 | Moniorox | 014, 027, 045, 083, 118, 144 |
| Electrohome | 029, 058, 057, 058, 147 | Matz | 160, 161, 162, 163, 164 |
| Eta | 027 | MGA | 081, 039, 048, 056, 057, 058, 065, 081, 083 |
| Emerson | 029, 051, 059, 060, 061, 062, 118, 123, 124, 139, 149 | ||
| Envision | 038 | Midland | 125 |
| Etron | 027 | Minutz | 066 |
| Fisher | 014, 021, 063, 064, 065, 118 | Mitsubishi | 001, 016, 039, 048, 056, 057, 058, 065, 081, 082, 083, 105 |
| Formenti | 155 | Montgomery Ward | 011, 020, 144, 145, 146 |
ENGLISH
ENGLISH
| Motorola 121, 147 | SBR 015 | |
| MTC 031, 034, 039, 048, 095 | Schneider | 015 |
| NAD 008, 075, 076, 128 | Scott | 062 |
| National 002, 036, 061, 147 | Sears 008, 014, 021, 022, 023, 024,025, 040, 052, 057, 062, 063,064, 065, 073, 075, 076, 097,099, 125, 159 | |
| National Quentes 002 | ||
| NEC 031, 038, 039, 048, 057, 084,066, 135, 147 | ||
| Nikko 054 | Sharp | 011, 012, 013, 026, 093, 099,103, 104, 121 |
| NTC 054 | ||
| Optimus 128 | Siemens | 013 |
| Optionica 011, 012, 093, 121 | Signature | 045, 144 |
| Orion 004, 139 | Simpson | 050 |
| Panasonic 002, 009, 017, 036, 037, 071,141, 143, 147 | Sony | 043, 048, 138, 146, 150 |
| Philco 005, 010, 030, 050, 051, 056,079, 085, 127, 131,132, 145, 147 | Sounddesign | 039, 050, 062 |
| Spectricon | 007, 033 | |
| Squareview | 004 | |
| Supre-Vlacy | 032, 122 | |
| Philips 005, 015, 017, 050, 051, 056,078, 087, 088, 089,131, 132, 147 | Supreme | 046 |
| Sylvania 005, 010, 017, 030, 078, 079,065, 069, 101, 127, 131, 132,145, 155 | ||
| Pioneer 124, 128, 142 | ||
| Portland 054 | Symphonic | 004, 149 |
| Price Club 095 | Tandy | 012, 121 |
| Proscar 040, 044, 125 | Tatung 036, 124 | |
| Proton 035, 051, 092, 129 | Technics | 037 |
| Pulsar 042 | Teknika | 001, 030, 032, 034, 052, 054,078, 083, 095, 144, 156, 157 |
| Quasar 036, 037, 074, 141 | ||
| Radio Shack 011, 044, 063, 093, 118 | Tera | 035, 129 |
| RCA 040, 044, 125, 130, 137, 151,152 | Toshiba 008, 014, 034, 063, 075, 076,095, 097, 136, 158, 159 | |
| Realistic 014, 063, 093, 118 | Universal | 020, 066, 088 |
| Saisha 027 | Victor | 019, 073, 126 |
| Samsung 003, 015, 034, 053, 065, 057,094, 095, 136, 163 | Video Concepts | 016 |
| Viking 032, 122 | ||
| Sansui 139 | Wards 005, 045, 066, 078, 085, 069,069, 093, 102, 103, 131, 132,148 | |
| Sanyo 013, 014, 021, 022, 063, 064,061, 096 | ||
| Zenith | 042, 114, 115, 140, 144, 149 | |
| Zonda | 007 | |
| VCR | |||
| Admiral 081 | Hitachi | 009, 013, 023, 026, 058, 108, 109, 110, 111 | |
| Aiko 095 | |||
| Aiwa | 009 | JC Penny | 004, 005, 007, 023, 029, 049, 052, 055, 067, 088 |
| Akai | 026, 027, 070, 072, 082, 083, 084 | ||
| Jensen | 013, 026 | ||
| Alba 055 | JVC | 004, 005, 006, 026, 029, 043, 044, 045, 046, 085 | |
| Amstradi | 009 | ||
| ASA 042 | Kenwood | 004, 005, 006, 026, 029, 033, 045, 065, 080 | |
| Asha | 067 | ||
| Audio Dynamic | 005, 085 | Kodak | 068 |
| Audiovox | 088 | Lloyd | 009, 094 |
| Boaumark 097 | LXI | 088 | |
| Broksonic | 086, 093 | Magnavox | 015, 016, 042, 049, 063, 106 |
| Calix 088 | Magnin | 087 | |
| Candle | 006, 087, 088, 089, 090 | Marantz 004, 005, | 006, 015, 042, 049, 085, 093 |
| Canon | 049, 057 | ||
| Capehart 025, 055, 056, 071 | Marta | 068 | |
| Carver 015 | MEI | 049 | |
| CCF 095 | Memorex | 009, 033, 049, 053, 060, 081, 087, 088, 091, 094, 115 | |
| Citizen | 006, 007, 087, 088, 089, 090, 095 | ||
| Motz | 123, 124, 125, 126, 127, 128 | ||
| Craig | 007, 087, 088, 091, 115 | MGA | 001, 017, 027, 041, 097 |
| Curtis Mathes | 006, 049, 073, 080, 087, 090, 092 | MGN Technology | 087 |
| Midland 011 | |||
| Cybornox | 087 | Minolta | 013, 023 |
| Daewoo | 025, 055, 059, 074, 089, 093, 095, 096 | Mitsubishi | 001, 003, 008, 013, 014, 017, 027, 029, 039, 040, 041, 045, 097 |
| Daytron | 025, 055 | ||
| DBX 005, 085 | Motorola 081 | ||
| Dumont 053 | Montgomery Ward001, 002, 007, 009, 049, 063, 091, 115, 117 | ||
| Dynatech | 009 | ||
| Electrohoma | 001, 088, 097 | MTC 009, 087, 094 | |
| Electrophonic | 088 | Multitech | 007, 009, 011, 087, 090, 094 |
| Emerson 001, 009, 017, 027, 086, 088, 089, 092, 093, 097, 100, 101, 102, 103, 104, 117 | NAO 038 | NEC 004, 005, 006, 018, 026, 029, 045, 061, 062, 085 | |
| Fisher | 008, 026, 031, 053, 054, 091, 098, 099, 115 | Nikko 086 | |
| Noblex | 087 | ||
| GE | 007, 011, 049, 050, 051, 052, 073, 080, 087 | Optimus 081, 086 | |
| Optonica 021 | |||
| Go Video | 047, 043 | Panasonic 024, 049, 064, 066, 067, 068, 069, 107 | |
| Goldstar | 006, 012, 062, 088, 129 | ||
| Gradients | 094 | Pordio | 009 |
| Grundig | 042 | Pentax | 006, 013, 023, 058, 090 |
| Harley Davidson | 094 | Philco 015, 016, 049 | |
| Harman Kardon | 040, 062 | Philips 015, 021, 042, 049, 105 | |
| Hi-O 091 | Pilot 088 | ||
| Pioneer 005, 013, 029, 036, 037, 038,045, 065 |
| Portland 025, 065, 090 |
| Proscar 063, 080 |
| Pulsar 060 |
| Quartz 033 |
| Quasar 034, 035, 049 |
| Radio Shack 001, 002, 021, 061, 067, 068,091, 094, 097, 098, 115 |
| Radix 088 |
| Randex 088 |
| HCA 007, 013, 019, 023, 058, 063,064, 065, 073, 080, 082, 087 |
| Realistic 009, 021, 031, 033, 049, 053,081, 087, 086, 091, 094, 097,098 |
| Ricoh 055 |
| Salors 033, 041 |
| Samsung 007, 011, 051, 059, 070, 063,087, 089, 113 |
| Sanky 081 |
| Sansui 005, 026, 029, 045, 061, 085,114 |
| Sunyo 032, 033, 053, 087, 091, 115,116 |
| SBR 042 |
| Scott 017, 020, 066, 009, 093, 117 |
| Sears 013, 023, 026, 031, 033, 053,054, 068, 091, 098, 099, 115 |
| Sentra 055 | |
| Sharp | 001, 002, 021, 097 |
| Shogun 087 | |
| Sony 075, 076, 077, 078, 079, 121 | |
| 122 | |
| STS | 023 |
| Sylvania | 009, 015, 016, 017, 041, 049, 094 |
| Symphonic | 009, 094 |
| Tardy | 009 |
| Tashiko 009, 088 | |
| Latung 004, 026, 030 | |
| Teao 004, 009, 026, 094 | |
| Technics | 024, 049 |
| Teknika 009, 010, 022, 049, 088, 094 | |
| TMK | 087, 092 |
| Toshiba 013, 017, 020, 041, 059, 089, 098, 099, 117 | |
| Tatevision | 007, 087, 088 |
| Unirech | 087 |
| Vaccior Research | 005, 062, 095, 089, 090 |
| Victor | 005, 045, 046, 095 |
| Video Concepts | 005, 027, 085, 089, 090 |
| Videosonic | 007, 087 |
| Wards 013, 021, 023, 087, 088, 089, 091, 094, 097, 116, 119, 120 | |
| XR-1000 | 094 |
| Yamaha | 004, 005, 006, 026, 062, 085 |
| Zenith | 060, 078, 079 |
(4) Operating the TV/video deck after storing its remote control signals in the preset memory

| TV PWR | Power on/off |
| 0-9 | Channel numbers |
| TV IN | TV input switching |
| TV VOL +,- | Volumes up/down |
| TV CH +,- | Channel switching |


| 3 | Operate the video component. |
| For details, refer to the component's operating instructions. | |
| It may not be possible to operate some models. |
NOTE:
The TV's "TV PWR" and "TV IN" buttons can be operated as long as mode switch 1 is set to the "AW" position, regardless of the position of mode switch 2.
ENGLISH
10 SETTING UP THE SYSTEM
(1) System setup items
- Once all connections with other AV components have been completed as described in "CONNECTIONS" (see pages 6 to 9), make the various settings described below on the monitor screen using the ADV 500SD's on-screen display function.
- Use the following buttons to set up the system:

Setup items and default values (set upon shipment from the factory)
| Setup | Default settings | ||||||||||
| QUICK SETUP | Set the size of the room and the listening position. | ROOM SPACE | SEATING POSITION | FRONT SP. | CENTER SP. | SURROUND SP | SUB-WOOFFR | SURR, BACK | |||
| MEDIUM 42m x 42m | BACK | SMALL 2.7m (8 ft) | SMALL 2.4m (3 ft) | SMALL 2.1m (7 ft) | YES 2.7m (9 ft) | - | |||||
| ADVANCED SETUP | SYSTEM SETUP | SPEAKER CONFIGURATION | Input the combination of speakers in your system and their corresponding sizes (SMALL for regular speakers, LARGE for full-size, full-range) to automatically set the composition of the signals output from the speakers and the frequency response. | FRONT SP. | CENTER SP. | SURROUND SP. | SURROUND SP. | ||||
| SMALL | SMALL | SMALL | YES | NONE | |||||||
| SW FREQ. = 150 Hz / SW MODE = LFE / SPEAKER OUT = SW | |||||||||||
| DELAY TIME | This parameter is for optimizing the timing with which the audio signals are produced from the speakers and subwoofer according to the listening position. | FRONT & SW CENTER | SURROUND | SURR, BACK | |||||||
| 2.7m (8 ft) | 2.4m (8 ft) | 2.1m (7 ft) | - | ||||||||
| CHANNEL LEVEL | At the listening position, listen to the test tones output from the different speakers and set so that the playback level from the different speakers is equal. | FRONT L | CENTER | FRONT R | SURROUND R | SURROUND R | SURR, BACK I/O | SURR, BACK R | |||
| 0 dB | 0 dB | 0 dB | 0 dB | 0 dB | - | - | |||||
| LANGUAGE | Set the OSD Language | ENGLISH | |||||||||
| SUBTITLE | Set the subtitle Language | OFF | |||||||||
| TV ASPECT | Set the screen size for the TV being used. | 4:3 PS | |||||||||
| TV TYPE | Set the video system for the TV being used. | PAL | |||||||||
| WALL PAPER | Set the wallpaper for the setup and operation screens. | BLUE | |||||||||
| VIDEO OUT | Set the connector from which interlaced signal are to be output IS VIDEO, COMPONENT, or SCART. | S-VIDEO | |||||||||
| VIDEO MODE | Select the desired video mode. | AUTO | |||||||||
| MID NIGHT MODE | Set the dynamic range output when playing discs. | OFF | |||||||||
| RATING LEVEL | Make the playback restriction setting for DVDs with restricted viewing. | NO LIMIT | |||||||||
| PASSWORD | 0000Change the password. | ||||||||||
(2) Before setting up the system
- This section describes surround-related setup operations. For DVD-related setup operations, see page 30.
- The setup operations cannot be performed while discs are playing. Set the stop mode first.


1 Refer to "CONNECTIONS" (pages 6 to 9) and check that all connections are correct.
2 Turn on the power.
Press the POWER switch (button).


Main unit
Remote control unit
When pressed, the power turns on and the display lights. The sound is muted for several seconds, after which the unit operates normally. When pressed again, the power turns off, the standby mode is set and the display turns off. Whenever the ON/STANDBY button is in the STANDBY state, the apparatus is still connected on AC line voltage. Please be sure to unplug the cord when you leave home for, say, a vacation.
3 Press the SETUP button


Remote control unit
- At this time, "SETUP" briefly appears on the display of front panel.
4 Use the 🔒 and 🕒 cursor buttons on the remote control unit to select the setting menu. • There are three types of setup menus.

Remote
control unit
© QUICK SETUP
: Select "ROOM SPACE"
and "SEATING POSITION".
SYSTEM SETUP
: Detailed settings of the
© PND GENTU
AV system function
: Detailed settings of the DVD function
5 Press the ENTER button to display the setting screen of the respective menu.

Remote
control unit
(3) Quick system settings
- The ADV-500SD is preset with Quick System settings for a 5.1-channel surround system using specified 5.1ch speakers (SYS-500SD).
* See "(4) System setting charges" (pages 18 to 20 when using speaker systems other than the ones described below or if you wish to change the settings.
1 At the setup screen, select "QUICK SETUP", then press the ENTER button. (See page 17.1)
2 Use the ⊖ and ⊗ cursor buttons to select "Room Space", then use the ⊖ and ⊗ cursor buttons to set the size of the room.
• The set size is displayed in yellow.

Remote control unit
5 Press the SETUP button to quit the setup mode.
You can also quit the setup mode by using the cursor button at the setup screen to display "Quit setup" in yellow then pressing the ENTER button.

Remote control unit
※ To change the settings
At the setup screen, select "SYSTEM SETUP" from "
About the quick system settings
ROOM SPACE:
Set the size of the room in which you are using the product.
SMALL: 3.0 m x 3.0 m (10 ft x 10 ft)
MED: 4.2 m x 4.2 m /12 ft x 12 ft
LARGE: 6.0 m x 6.0 m (30 ft x 30 ft)
SEATING POSITION:
Set whether the seating position is near the center of the room or towards the back.
CENTER
BACK
Settings
When "ROOM SPACE" or "SEATING POSITION" is selected, the distance from the listening position to the different speakers is displayed automatically.
If the relative distance is very different from the actual distance (for example if a shorter distance is displayed for the front speakers than for the center speaker but actually the opposite is true), set the distance as described in "ADVANCED SETUP" (page 18).
SURR. BACK speakers
This "QUICK SETUP" is not available to set about SURR. BACK speakers.
3 Use the 🔒 and ✅ cursor buttons to select "Seating Position", then use the ⏻ and ⏻ cursor buttons to set the seating position.
• The set position is displayed in yellow.

4 Press the ENTER button to enter the setting. • The setup screen reappears.

Remote control unit
ENGLISH
(4) System setting changes
- The quick system settings and factory default settings are changed at the system setting charge menu.
- The settings are stored in the memory until they are next changed, even when the power is turned off.
[1] Setting the type of speakers
NOTE:
The following setting is NOT needed to be changed as far as using this products with specified 5.1ch speakers (SYS-500SD). Change it only when you would add an extra "SURR. BACK" speaker, or when would change any of 5.1ch speakers.
- The composition of the signals output from the different channels and the frequency response are adjusted automatically according to the combination of speakers actually being used.
1 At the SETUP MENU, select "SYSTEM SETUP" and press the ENTER button
2 At the SYSTEM SETUP MENU screen, use the 🔒 and color buttons to select the speaker system you are using. "SPEAKER CONFIGURATION" and press the ENTER button.

Remote control unit Remote control unit
3 Set whether or not speakers are connected and, if so, their size parameters.

Remote control unit
- The item to be set is displayed in yellow, and the values of the other items are displayed in green.

4 Enter the setting. • The SYSTEM SETUP MENU reappears.

Remote control unit
NOTE:
Select "Large" or "Small" not according to the actual size of the speaker but according to the speaker's capacity for playing low frequency (approximately 100 Hz and below) signals. If you do not know, try comparing the sound at both settings (setting the volume to a level low enough so as not to damage the speakers) to determine the proper setting.
Parameters
LARGE...Select this when using speakers that can fully reproduce low sounds of below 100 Hz.
SMALL...Select this when using speakers that do not provide sufficient volume for playing low frequencies of 100 Hz and less. When this setting is made, frequencies below the frequency set at the subwoofer frequency setting are assigned to the subwoofer.
NONE... Select this when no speakers are installed.
YES/NO. Select "Yes" when a subwoofer is installed, "No" when a subwoofer is not installed.
If the subwoofer has sufficient low frequency playback capacity, good sound can be achieved even when "Small" is set for the front, center and surround speakers.
For the majority of speaker system configurations, using the SMALL setting for all five main speakers and Subwoofer. On with a connected subwoofer will yield the best results.
SURR. BACK
1 SP/2 SP/NONE ....Select the number of speakers to be used for the SURR. BACK speakers.
SPEAKER OUT
Select the output SURR. BACK/SUBWOOFER speaker terminals.
Subwoofer frequency (SW FREQ.)
- For the subwoofer frequency at the speaker setting screen, set the bass crossover frequency for playback from the subwoofer.
- Select "80 Hz", "100 Hz", "120 Hz" or "150 Hz" 1-6 dB for each). Bass sound below these frequencies is played from the subwoofer. (This is set to "150 Hz" by factory default.)
Assignment of low frequencies
- In the Dolby Digital, Dolby Pro Logic II, DTS, and virtual surround modes, the low frequency signals for channels whose speaker settings are set to "Small" are assigned to the subwoofer. The low frequencies of channels set to "Large" are played from those channels.
If set to "120 Hz", channels set to "Small" play sounds of 120 Hz and greater, while bass frequencies of under 120 Hz are played from the subwoofer.) - In surround modes other than the ones listed above, low frequencies below the frequency set at the subwoofer frequency setting are played from the subwoofer regardless of whether the speakers are set to "Large" or "Small".
- Set the subwoofer frequency according to the low frequency playback abilities of your speakers and subwoofer.
Subwoofer mode (SW MODE)
- The subwoofer mode setting is only valid when "LARGE" is set for the front speakers and "YES" is set for the subwoofer in the "SPEAKER CONFIGURATION" settings.
- When the "LFE=MAIN" playback mode is selected, the low frequency signal range of channels set to "LARGE" are produced simultaneously from those channels and the subwoofer channel. In this playback mode, the low frequency range expand more uniformly through the room, but depending on the size and shape of the room, interference may result in a decrease of the actual volume of the low frequency range.
- Selection of the "LFE" play mode will play the low frequency signal range of the channel selected with "LARGE" from that channel only. Therefore, the low frequency signal range that are played from the subwoofer channel are only the low frequency signal range of LFE only during Dolby Digital or DTS signal playback) and the channel specified as "SMALL" in the setup menu.
- Select the play mode that provides bass reproduction with body.
- When the subwoofer is set to "YES", bass sound is output from the subwoofer regardless of the subwoofer mode setting in surround modes other than Dolby/DTS.
ENGLISH
[2] Setting the speaker distance
- Input the distances from the listening position to the speakers and set the surround delay time.
- The default settings below are set upon shipment from the factory.
Preparations:
Measure the distances from the listening position to the speakers (L1 to L4 on the diagram at the right).

L1: Distance from center speaker to listening position
L2: Distance from front speakers to listening position
L3: Distance from surround speaker to listening position
L4: Distance from SURB, BACK speaker to listening
position
1 To perform these operations from places other than the system setting charge menu, see page 18.
2 At the SYSTEM SETUP MENU select "DELAY TIME".
Remote control unit Remote control unit
- Switch to the DELAY TIME screen.

- Use the and cursor buttons to select the distance unit, "METERS" or "FEET". Press the door button to proceed to the next step if you do not wish to change this.
3 When "YES" is selected for "DEFAULT", the delay times for the various speakers are set to the default values.
© YES. FRONT & SW > 2.7 m
CENTER •2.4 m
SURROUND -2.1 m
[1]
SURR. BACK ·2.7 m
© NO: The current settings are used.
4 Select the speaker to be set using the ☐ and ☐ cursor buttons, then setting the distance between the speakers and the listening position using the Ⓗ and cursor buttons.
- Set the distance between the center speaker and listening position. The distance changes in units of 0.1 meters (1 foot) each time the button is pressed. Select the value closest to the measured distance.
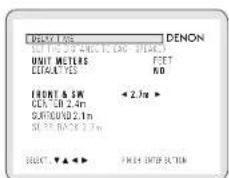
* The difference of the distances set for the different speakers must be no greater than 3.0 m (10 ft). If an inapplicable distance is set, "CAUTION: INVALID DISTANCE" is displayed. Change the speaker position and reset.
5 Enter the setting. • The SYSTEM SETUP MENU reappears.

Remote
control unit
[3] Setting the channel level
- Use this setting to adjust so that the playback level between the different channels is equal.
• From the listening position, listen to the test tones produced from the speakers to adjust the level. - The level can also be adjusted directly from the remote control unit. ITEST TONE, CH SELECT button.) (See page 20.1)
1 To perform these operations from places other than the system setting change menu, see page 10.
2 At the SYSTEM SETUP MENU select "CHANNEL LEVEL".
![DENON DHT-500SD - [3] Setting the channel level - 1](/content/2026/06/1277781/images/737b2596d3b19a6d1f7d2e2220baec326c59fcbe3ed1844613fdabfcaf604791.jpg)
Remote control unit Remote control unit
- Switch to the CHANNEL LEVEL screen.

3 SELECT "TEST TONE MODE" • SELECT THE MODE,
![DENON DHT-500SD - [3] Setting the channel level - 3](/content/2026/06/1277781/images/f758021af8c98018a805ef56c52453e15dc33569eb244f68a8a84495f0922ef9.jpg)
Remote control
unit
Select "AUTO" or "MANUAL".
- AUTO: Adjust the level while listening to the test tones produced automatically from the different speakers.
- MANUAL: Select the speaker from which you want to produce the test tone to adjust the level.
4 If "YES" is selected at "LEVEL CLEAR", the level settings for all the speakers are set to 0 dB.
◎ "YES": The levels of the different speakers are all set to 0dB.
© "NO": The speakers stay at their currently set levels.
5 Adjusting the channel levels in the "test tone" mode
- Set the "TEST TONE START" mode using the ☐ and 📋 cursor buttons, then select "YES" with the 🔒 cursor button to output test tones.
6 ① When "AUTO" is selected in the "TEST TONE MODE"

- Test tones are automatically emitted from the different speakers.
- The test tones are emitted from the different speakers in the following order, at 4-second intervals the first time and second time around, 2-second intervals the third time around and on:
→TRONFL→CENTER→FRONTR→SURROUND
SUBWOOFET←SUNROUND L←SUNR BACK L←SUNR BACK N
- Use the CURSOR buttons to adjust all the speakers to the same volume.
- The volume can be adjusted between -10 dB and +10 dB in units of 1 dB.
② When the "MANUAL" mode is selected

- Use the CURSOR to select the speaker for which you want to output test tones, then use the CURSOR and adjust so that the volume of the test tones from the various speakers is the same.
ENGLISH
7 After the above settings are completed, press the ENTER button.
- The "SYSTEM SETUP MENU" screen reappears
*To cancel the setting after adjusting
Display the channel level adjustment screen, then use the 🔒 and cursor buttons.
to select "LEVEL CLEAR" and "YES". The level settings for all the speakers are set to 0 dB.
NOTES:
- When you adjust the channel levels while in the SYSTEM SETUP CHANNEL LEVEL mode, the channel level adjustments made will affect ALL surround modes. Consider this mode a Master Channel Level adjustment mode.
- After you have concluded the SYSTEM SETUP CHANNEL LEVEL adjustments, you can then activate the individual surround modes and adjust channel levels that will be remembered for each of those modes. Then, whenever you activate a particular surround sound mode, your preferred channel level adjustments for just that mode will be recalled. Check the instructions for adjusting channel levels within each surround mode on page 23.
[4] After completing system setup
- Once the speaker settings, delay time setting and channel level adjustments are made, there is no need to reset them unless the AV components or speakers are changed or the speakers are moved to different positions.
1 At the SYSTEM SETUP MENU, press the SETUP button.
- The changed settings are entered and the on-screen display turns off.
![DENON DHT-500SD - [4] After completing system setup - 1](/content/2026/06/1277781/images/762bbf13ed72ee104fbe0aea71640311450c56386ede3ce383c8c0f696e47324.jpg)
Remote control unit
This button can be pressed at any time during the system setup process to complete the process.
NOTE:
- If the quick system settings are selected after setting up the system using the system setting change menu, the speaker and delay time settings are changed to the values preset for the quick system settings.
NOTES:
Channel level setting by Remote Control unit. (TEST TONE, CH SELECT button)
- This section describes channel level setting by Remote Control unit.

(1) AUTO MODE
1 Press the TEST TONE button.

Remote control unit
2 Test tones are output from the different speakers. Use and buttons to adjust so
that the volume of the test tones is the same for all the speakers.
- The channel to be adjusted can be charged using the CH SELECT button and the I and Korsor buttons on the remote control unit during the adjustments using the test tones.
Remote control unit
3 After completing the adjustment, press the TEST TONE button.

Remote control unit
(2) MANUAL MODE
- Even after adjusting using the test tones I AUTO MODEI, the various channels can be adjusted using the procedure described below to suit the program source and your preferences.
1 Select the speaker whose level you want to adjust.
- The channel switches as shown below each time the button is pressed.
Remote control unit

2 Adjust the volume level of the selected speaker while the channel level is displayed.

Remote control unit
According to SURROUND mode and SPEAKER CONFIGURATION, test tones should not be out from some speakers.
When you select STEREO about the surround mode and SW NO about SPEAKER CONFIGURATION, test tones are out from Front L and R speakers.
11 BASIC OPERATION
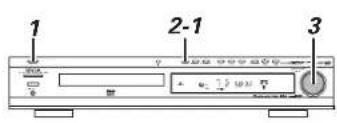

1 Press the POWER switch to turn the unit on.

Main unit Remote control unit
2.1 Select a source by pressing the FUNCTION button.
The selected source is shown on the front panel's display.
DVD
TUNER
VIDEO
VIDEO 2

Main unit Remote control unit
2-2 Pressing the INPUT MODE button alternates between ANALOG and DIGITAL (AUTO, PCM, DTS).
- When you select a digital source, DIGITAL' indicator might blink on the display. It blinks when the unit cannot perceive the digital signal. In that case, connect a digital device to the DIGITAL IN terminal, and switch it on.

Remote control unit
3 Play the source, and gradually turn up the volume to the required level by turn VOLUME dial on the main unit or press VOLUME button (+,-) on the remote control unit (RC-973).
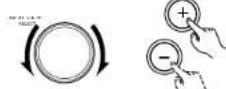
Main unit Remote control unit
"Tone Control" and "DIMMER"


1 Press the TONE/DIMMER button to select "BASS", "TREBLE" or "DIMMER".
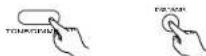
Main unit Remote control unit
Each time the TONE/DIMMER button is pressed, the mode is changed as follows:
BASS → TREBLE → DIMMER
(TONE OFF)
To adjust the level of low frequency sound range, select "BASS".
To adjust the level of high frequency sound range, select "TRE".
To dim the front panel's display, select "DIM".
2 Either turn Volume dial on the main unit or press "+" , "-" button on the remote Control unit to change the setting.
BASS" and "TRE"
The level can be adjusted in 2dB steps from -10 to +10.
“DIM”: DIM OFF (Volume +) DIM ON (Volume +)
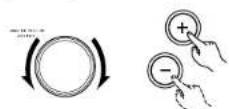
Main unit Remote control unit
- When you set the sleep timer, the dimmer function is turned on automatically.
ENGLISH
Muting
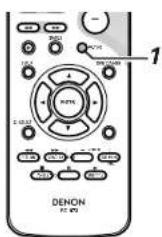
1 To mute the sound temporarily, press the MUTING button. Press the MUTING button again to restore the sound. If you change the volume during the muting or in Tona mode, the muting will be cancelled.
- White muting is engaged, the MUTE indicator lights on the display.

Remote control unit
Headphones

For private listening, first reduce the volume level of the ADV-800SD to minimum. Than insert the plug from your headphones into the PHONES jack, and adjust the volume level. The sound from speakers will be cut off while the headphones are plugged in.
• Each time headphones plugged or unplugged, signal cut off for a moment from audio output connectors.
Sleep Timer
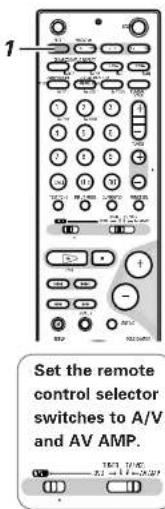
1
The power can be switched to the standby mode after a specified amount of time. Press the SLEEP button repeatedly until desired time appears on the display. The sleep time can be changed by 10 minutes' step.

SLEEP- 10 (20, 30...or 120)
The SLEEP indicator lights, and the power will be switched off 10 (20, 30...or 120) minutes later.
- SLEEP button is available only AV AMP mode. If you set the SLEEP TIMER, set the remote control selector switches to AV and AV AMP.
- When you set the sleep timer, the dimmer function is turned on automatically.
- If you want to check the remaining time, press the SLEEP button once. The remaining time will be displayed for 4 seconds.
- To turn the sleep timer off, press the SLEEP button repeatedly until the "SLEEP" indicator turns off. The sleep timer can also be turned off by press the power button on the main unit or the remote control unit to turn the entire system's power to the standby mode.

Remote control unit

Main unit

control unit
12 SURROUND MODE


flowchart
graph TD
    A["DOLBY PRO LOGIC II (PRO LOGIC II) CINEMA"] --> B["DOLBY PRO LOGIC II (PRO LOGIC II) MUSIC"]
    B --> C["DOLBY PRO LOGIC II (PRO LOGIC II) GAME"]
    C --> D["DOLBY PRO LOGIC"]
    D --> E["DTS NEO CINEMA"]
    E --> F["DTS NEO MUSIC"]
    F --> G["HALL"]
    G --> H["CINEMA"]
    H --> I["CONCERT"]
    I --> J["5 STEREO(6 or 7 STEREO)"]
    J --> K["STEREO"]
Each time the SURROUND button is pressed, the surround mode is changed as follows:
Select the appropriate surround mode according to the program source.
- When a Dolby Digital format signal is input, the surround mode automatically switches to the DOLBY DIGITAL mode.
- When you press the SURROUND button, the sound and output signals (digital and analog) are cut off for a moment.
- It is recommended to use a center speaker when operating unit in DTS/DOLBY DIGITAL/DOLBY PRO LOGIC II (PRO LOGIC III) Surround modes.
- Note that surround speakers are necessary for DOLBY DIGITAL/OTS/DOLBY PRO LOGIC II (PRO LOGIC IX) mode to function, and a Back Surround speaker is needed for the HALL. CINEMA, CONCERT, DTS NEO; 6, DTS ES and DOLBY DIGITAL, EX mode to function.
DOLBY DIGITAL EX
In a movie theater, film soundtracks that have been encoded with Dolby Digital surround EX technology are able to reproduce an extra channel which has been added during the mixing of the program.
This channel, called Surround Back, places sounds behind the listener in addition to the currently available front left, front center, front right, surround right, surround left and subwoofer channels.
This additional channel provides the opportunity for more detailed imaging behind the listener and brings more depth, spacious ambience and sound localization than ever before.
Dolby Digital EX is not available in the system without surround back speakers).
DTS MODE(Dts, Neo:6 Cinema, Neo:6 Music)
This mode is for DTS encoded source materials such as LASER DISC, CD, and DVD. Note:6 is to some 2 channel signal source.
DTS
This mode is enabled when playing source materials encoded in DTS multi channel.
Playing multi-channel encoded 5.1 - channel DTS sources provides five main audio channels (left, center, right, surround left and surround right) and Low Frequency Effect channel.
DTS-ES decoding is not available in this mode. The DTS mode cannot use when an analog input has been selected.

DTS-ES Extended Surround is a new multi-channel digital signal format developed by Digital Theater Systems Inc. While offering high compatibility with the conventional DTS Digital Surround format, DTS-ES Extended Surround greatly improves the 360-degree surround impression and space expression thanks to further expanded surround signals. This format has been used professionally in movie theaters since 1999.
In addition to the 6.1 surround channels (FL, FR, C, SL, SR and LFE), DTS-ES Extended Surround also offers the SB (Surround Back) channel for surround playback with a total of 6.1 channels. DTS-ES Extended Surround includes two signal formats with different surround signal recording methods, as DTS-ES Discrete 6.1 and DTS-ES Matrix 6.1.
"DTS", "DTS-ES", "Neo:6" and "DTS 96/24" are trademarks of Digital Theater Systems, Inc.
NEO: 6 Cinema, NEO:6 Music
This mode decodes 2-channel signals into 6-channel signals using high-accuracy digital matrix technology. The DTS NEO:6 decoder has near-discrete properties in the frequency characteristics of the channels as well as in channel separation.
According to the signals to by played back, DTS NEO:6 uses either the NEO:6 CINEMA mode optimized for movie playback or the NEO:6 MUSIC mode optimized for music playback.
Notes :
- Neo:6 mode is available to 2ch input signal which is encodedDolby Digital or PCM format.
- PCM-audio signals can be subjected to Pro Logic processing when the sampling frequency is 32kHz, 44.1 kHz or 48 kHz.
DOLBY PRO LOGIC II brings the excitement of surround sound to any stereo mix, while making existing Dolby Surround mixes sound more like discrete 5.1 channels Surround sound.
DOLBY PRO LOGIC IIx is an extension of DOLBY PRO LOGIC II technology. This highly sophisticated algorithm processes native stereo and 5.1-channel content to produce 6.1 or 7.1 output channels. And DOLBY PRO LOGIC IIx is not available in the system without surround Beck Speaker(s).
DOLBY PRO LOGIC II (PRO LOGIC IIx) has below 3 modes.
Note :
• DOLBY PRO LOGIC II (PROLOGIC IIx) will not work on monaural source.
DOLBY PRO LOGIC II (PRO LOGIC IIx) MUSIC
The Music mode creates a rich and enveloping surround ambience.....delivered to the subwoofer, optimizing the visceral of panned rear effects. This mode can only be used with 2-channel audio sources.
DOLBY PRO LOGIC II (PRO LOGIC IIx) CINEMA
The CINEMA mode is optimized for movies or programs with Dolby Surround soundtracks. This mode is also appropriate for use with video game.
DOLBY PRO LOGIC II (PRO LOGIC IIx) GAME
The Game mode was implemented to ensure that the bass impact from pure surround effects are fully delivered to the subwoofer, optimizing the visceral of panned rear effects. This mode can only be used with 2-channel audio sources.
DOLBY PRO LOGIC
This mode emulated original Dolay Pro Logic decoding.(3/1 surround) Suit for Dolay Surround encoded stereo movie soundtracks. This mode is available in the system without surround speakers).
ENGLISH
OTHER SURROUND
HALL
When playing recordings of live music, this mode provides a feeling similar to actually being in a concert hall.
When this mode is selected, the normal program source is directed to the main speakers and a reverberated sound is directed to the surround speakers.
This mode is suited to program sources which contain a large amount of reverberation.
CINEMA
This mode provides a three dimensional surround effect similar to that of movie theater. With this mode, you can enjoy a surround effect similar to Dolby Surround sound even when playing a video program which is not encoded with the Dolby Surround system.
CONCERT
The reverberation of this mode produces a sound field which recreates the sound of a stadium.
5 STEREO, 6 STEREO or 7 STEREO
The Front left channel signals are output to the surround and surround back signal left channels, the front right channel signals are output to the surround and surround back signal right channels, and the in-phase component of the left and right channels is output to the center channel.
Use this mode to enjoy stereo sound.
STEREO
Sound is output from front speakers.
- When DTS or DOLEY DIGITAL is selected, the surround sound is down mixed to 2 channel.
■ To check the currently surround settings, etc. Press the STATUS button on the remote control unit.

Remote control unit
The surround settings and current program source are shown on the display each time the STATUS button is pressed.
13 PLAYBACK
(1) DVD/CD/VCD
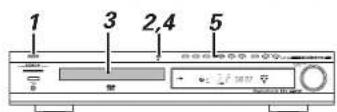

1 Press the POWER switch to turn the unit on.

Main unit

Remote control unit
2 Press the OPEN/CLOSE button. - When you press the OPEN/CLOSE button, the function is set to DVD automatically.

Main unit
3 Place a disc on the tray with the printed label face up.
Never place more than one disc on the tray.
4 Press the OPEN/CLOSE button to close the tray When a DVD is loaded, the playback may start automatically.

Main unit
5 Press the PLAY button to start playback.

Main unit

Remote control unit
DVD
If a title menu appears on the screen, select an item by pressing the 🎨 / 🌐 / 📈 / 🔒 buttons and then press the "ENTER" button.
- Depending on the disc, you can use the numeric buttons to select an item.
- "Title menu" may simply be called "menu" or "TOP MENU" in the instructions supplied with the disc.
- If you press the "MENU" button or the TOP MENU button during playback, title menu will appear on the screen. (In some cases, the playback might restart from the beginning of the disc automatically.)
Video CDs with PBC
When a Video CDI Version 2.01 with Playback Control functions(PBC) is loaded, a menu will appear on the screen.
Select an item by pressing the numeric buttons to start playback.
- Press the ▶▶ button to advance to the next chapter. Press the ◀◀ button to return to the previous chapter.
- If you press the RETURN button during playback, the menu will appear on the screen.
- Press the TCP MENU button to turn the PBC function on or off.
If you press the TCP MENU button during playback, playback will stop.
When the PBC function is off:
If you press the PLAY button (▶) in the stop mode, playback will start from the first track.
When the PBC function is on:
If you press the PLAY button!▶ I in the stop mode, a menu will appear on the screen.
Select an item by pressing the numeric buttons to start playback.
(2) MP3/WMA
MP3/WMA
When an MP3WMA disc is loaded, the recorded directories will be shown on the screen. Select a directory by pressing the 📐 🎋 buttons and press the "ENTER" button.
A list of track numbers and titlesfile names! will be shown on the right side of the screen. Select a track and press the "ENTER" button or the PLAY button. Playback will start from the selected track.
- // button done (work) during playback.
- If you want to select another directory, select [...] by pressing the Button and press the
"ENTER" button to go back to the ROOT directory. - Depending on the disc, invisible directories such as "TRASH" might be shown on the screen. Please disregard directories which do not contain MP3 files.
MP3/MMA
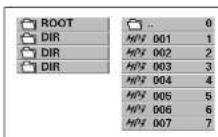


1 To start playback in the stop mode, press the PLAY button.

Main unit Remote control unit
2 To suspend playback temporarily (pause mode)
Press the PAUSE button during playback. The video will stop on a single frame on DVD discs, and music will interrupt on MP3 and CD discs.
To resume playback, press the PLAY button
Play will continue from where you paused the playback.

To open the disc tray
Press the OPEN/CLOSE button to open and close the disc tray.
- Even when another function is selected, this button works, and the function will change to DVD.

Main unit
4 To stop playback of CD and MP3 Press the STOP button.

Remote
control unit
- This unit can play CD-R/RW music files that have been recorded in the WMA (Windows Media Audio)* audio compression format.

※ WMA (Windows Media Audiot: New audio coding of Microsoft Corporation (U.S.A.)
- Uses of recordings you have made other than for your personal enjoyment are not permitted under the Copyright Law without permission of the copyright holder.
- The method of playback is the same as this page. - In the file display of the disc information screen, WMA files will be displayed with the "WMA" icon instead of the "MP3" icon. (Files for which the "WMA" icon is not displayed cannot be played.)
(3) Resume Playback
DVD
STANDBY/ON OPEN/CLOSE STOP

FUNCTION PAUSE
To stop and resume playback of DVD
If you press the STOP button during playback of DVD, "RESUME" briefly appears on the display, and the unit enters RESUME mode. If you want to cancel the RESUME mode and stop playback completely, press the STOP button again.
How to resume playback
During playback of DVD, press the STOP button at the point where you want to interrupt playback. "RESUME" briefly appears on the display, and the time counter of the front panel display stops. Press the PLAY button to start playback from the interrupted point.
(4) Playing Still Pictures (Pausing)
DVD/CD/MP3/WMA
During playback, press the PAUSE button on the main unit or the remote control unit. - Press the PLAY button to resume normal playback.
(5) Playback from a specific chapter/track
DVD/CD/MP3/WMA

To skip to a specific chapter/track
During playback, press the SKIP button(◀◀ or ▶▶▶) repeatedly until the desired chapter or track is found.
The selected chapter/track will be played from the beginning.
When the I◀◀ button is pressed during playback of a CD, VCD with PBC OFF mode, DVD the track being played will be played from the beginning. To return to the beginning of the previous track, press the I◀◀ button twice.
(6) Forward / Reverse Searching
DVD/CD/MP3/WMA
During playback, press one of the ◀◀/▶▶ buttons on the remote control unit
Reverse direction Forward direction
- When pressed again, the search speed increases (in four steps).
- Press the PLAY button to resume normal playback.

Remote control unit
Search for a part of a chapter/track
During playback, press and hold the SKIP button (◀◀ or ▶▶▶) for more than 1.0 second until the search function is activated. Press the PLAY button (▶) when the part you want to listen to is found.
Each time the SKIP button (or) is pressed for more than 1.0 seconds during search, the search speed is incremented.
- The sound is muted during playback of DVD. The sound skips during playback of MP3.
- When the search speed of a DVD is x4 or faster, subtitles will not appear on the screen.
• This function may not work with some discs.
NOTE:
- In some cases the menu screen may reappear when one of the ◀◀/▶▶ buttons is pressed during menu playback on a video CD.
ENGLISH
(7) Slow-Motion Playback
DVD
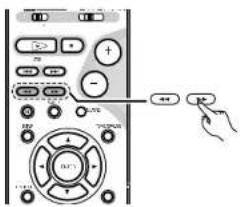
DVD only
To play a disc in slow-motion, press the ◀◀, ▶▶ buttons at the still mode (Pause).
; slow forward playback
◀◀: slow reverse playback
Each time the ◀◀ or ▶▶ button is pressed, the speed is changed. (Four step) (Three step on VCDs)
To resume normal playback, press the PLAY button (▶)
• The sound is muted during slow-motion playback.
- This function is not available for CD and MP3/WMA.
- Reverse slow play is not possible on VCDs.
(8) Single Stepping Playback
DVD

To play a disc frame by frame, press the ■ button during playback. The DVD will "freeze" on a single video frame. Each time the ■ button is pressed, the picture advances by one frame.
To resume normal playback, press the PLAY button (▶).
- This function is not available for CD and MP3WMA.
(9) Direct playback (except DVD)
CD

Select a track by pressing the numeric buttons. Playback starts from the selected track. example: To select track No.8
example: To select track No.18 Press "+10", and press "6" within 2 seconds.
14 ONSCREEN DISPLAY
■ Use this function to display and change information on the disc titles, chapters, time, etc.).
NOTE:
- The on-screen display function does not work when PBC is turned on with video CDs. Press the TOP MENU button to turn PBC off.
1
In the play mode, press the DISPLAY button.
• The On-Screen Display appears
• The picture on the TV screen switches each
time the button is pressed.
• The items displayed differ from disc to disc.

Remote control unit
2

Example. For video and music CDs

flowchart
graph TD
    A["Start"] --> B["TRACK\nSINGLE ELAPSED 01/10\n0:26:11"]
    B --> C["SINGLE REMAIN\n0:03:17"]
    C --> D["TOTAL ELAPSED\n0:06:15"]
    D --> E["TOTAL REMAIN\n0:32:05"]
3
Input using the number buttons, then press the ENTER button.
① Changing the title, track or chapter
- For DVDs
Use the 🔒 and 🔒 cursor buttons to select the track input
• For video and music CDs
Use the 🔒 and 📋 cursor buttons to select the track. The selected item is displayed with a yellow frame.
Input using the number buttons. Playback starts from that track.
② Changing the elapsed time
- For DVDs
Use the Ⓑ and Ⓒ cursor buttons to select the elapsed
time. The selected item is displayed with a yellow frame.
Example: For 1 Hour 32 minute 47 seconds • "13247"
: For 1 minute 26 seconds → "00126"
• For video and music CDs
Use the 🔒 and 🕒 cursor buttons to select the elapsed
time. The selected item is displayed with a yellow frame.
Example : For 1 minute 26 seconds → "0126"


Remote control unit
15 USING THE ONSCREEN DISPLAY
(1) Select an Audio Language
1 To select an audio language, press the AUDIO button during playback. Each time you press the AUDIO button, a language and its sound recording system included on the disc appears on the screen.
- Some discs allow you to change audio language only via the disc menu. In that case, press the MENU button and change the settings.

Remote control unit
DVD


flowchart
graph TD
    A["Audio Formats"] --> B["Delby Digital"]
    A --> C["dis"]
    A --> D["PCM : PCM"]
    E["Channel Numbers"] --> F["5.1ch"]
    E --> G["5.0ch"]
    E --> H["2ch (STEREO)"]
    I["Audio 1/3 DIGITAL ENG"] --> J["Number of Audio Language"]
    K["ENC, DEU"] --> L["Kind Language"]
(2) Select a Subtitle Language
DVD

SUBTITLE 1/2 ENG
Kind of subtitle ENG, DEU...
1 To select a subtitle language, press the SUBTITLE button during playback. Each time you press the SUBTITLE button, the subtitle languages included on the disc appear on the display.

Remote control unit
- It may take a few seconds till a selected subtitle appears on the screen.
- When no subtitles are recorded on the disc, "OFF" will be displayed.
- In some cases, a subtitle cannot be turned off even if you select "OFF". Movies recorded in a foreign language for the region being played often have "permanent" subtitles.
- Some discs allow you to change subtitles only via the disc menu. In that case, press the MENU button and change the settings.
- The maximum number of subtitle languages stipulated by the manufacturer is 32/32.
(3) Change the Angle
DVD
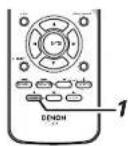

3/5
1 When a scene recorded with multiple angles is played, the angle icon appears on the screen. Each time you press the ANGLE button while the angle icon is displayed, the camera angle changes.

Remote control unit
- When no other angle is recorded, the PROHIBIT icon Ⓧ will be displayed
- You can change the setting so that the angle icon isn't displayed even when a scene recorded with multiple angles is played.
- The maximum number of angles stipulated by the manufacturer is 9/9.
(4) Picture Zoom
DVD

1 Zoom allows you to zoom in and enlarge the picture on the screen to either 2 times(x2) or 4 times(x4) or 16 times (x16) it normal size. To zoom the picture, press the ZOOM button during playback.

Remote control unit
Each time the 700M button is pressed, the magnification level changes. : between : x2, x4, x16, off
- You can shift the zoom point by pressing the / / / B / 0 buttons during zoom playback.
- Zooming does not work on subtitles or menu screens.
• Some DVD might not respond to zoom.
(5) JPEG

- Turn around
: Toward the right : Toward the left
Turn over : Up and down : Left and Right
ENGLISH
16 SPECIAL PLAYBACK
(1) Repeat Playback
Repeat Playback of DVD
DVD/CD/MP3

1 Each time the REPEAT button is pressed during playback, the mode is changed as follows:

Repeat (DVD)
+ CHAPTER REPEAT ON → TITLE REPEAT ON → REPEAT OFF
Repeat (CD)

Repeat (MP3)
1 FILE REPEAT ON → FOLDER PLAY MODE → FOLDER REPEAT ON DISC (ALL) REPEAT ON → DISC PLAY MODE
Chapter Repeat
The chapter being played will be played repeatedly. If you select another chapter in CHAPTER REPEAT mode, the chapter you selected will be played repeatedly.
- REPEAT indicator lights, and 'CHP' blinks on the front panel display.
Title Repeat
All the chapters of the current title will be played repeatedly. During programmed playback, programmed chapters will be played repeatedly.
- REPEAT indicator lights, and "TITLE" blinks on the front panel display.
- If MP3 DISC loaded, REPEAT button also can change Play mode. (Folder Play mode, Disc Play model)
- If one of the following buttons is pressed, repeat mode will be cancelled: STOP in the stop mode, OPEN/CLOSE, POWER FUNCTION
Repeat Playback of a Designated Section (A-B Repeat)
DVD/CD

Each time the A-B REPEAT button is pressed, the mode is changed as follows:

Remote control unit
REPEAT-A → REPEAT-B → REPEAT OFF
1 Start playback and designate the point at which the A-B repeat should start (point A) by pressing the A-B REPEAT button.
"REPEAT - A" appears on the screen, and "ACO" lights on the front panel display.
2 When the point at which repeat playback should end (point B) is reached, press the A-B button again.
"REPEAT -B" appears on the screen, and "ACDB" lights on the front panel display.
The designated section will be played repeatedly.
- When playing a CD, the point A and B should be selected from the same track.
- When playing a DVD, the point A and B should be selected from the same title.
- There should be more than 2 seconds between A and B.
- If one of the following buttons is pressed, A-B repeat mode will be cancelled:
STOP (VCD, CD), STOP in the stop mode (DVD)
SKIP, A-B REPEAT, TOP MENU OPEN/CLOSE, POWER, FUNCTION
(2) Shuffle Playback
CD

Tracks of a disc can be played randomly.
1 Press the RANDOM button during the playback.
"RANDOM ON" appears on the screen, and "RANDOM" indicator lights on the front panel display.

Remote control unit

2 Press the PLAY button ▶ to start shuffle playback.

Remote control unit
- If you press the ▶ button during shuffle playback, the next track will be randomly selected and played.
A track cannot be replayed during shuffle playback.
• To stop shuffle playback, press the STOP and the RANDOM button. - This function does not work when PBC is turned on with Video CDs. Press the TOP MENU button to turn PBC off.
- If one of the following buttons is pressed, shuffle mode will be cancelled:
SHUFFLE in the stop mode, PROG/DIRECT in the stop mode, OPEN/CLOSE, POWER, FUNCTION
(3) Program Playback (CD)
Up to 20 tracks can be programmed in the desired order.
- This function does not work when PBC is turned on with Video CDs. Press the TOP MENU button to turn PBC off.
CD

1
Press the PROG/DIRECT button in the stop mode.
"PROG." lights on the front panel display.

Remote control unit
IL ANALOG SLEEP BL BC
2
Press the numeric button to select a track.
3
Press the ENTER button

Remote control unit
programed track number

total time of the programmed tracks
Repeat step2 and 3 to program more tracks.
- If one of the following buttons is pressed, program mode will be cancelled :
PROG/DIRECT, OPEN/CLOSE, POWER, FUNCTION
4
When the selection of track numbers has been finished, press the PLAY button to start programmed playback.

Remote control unit
To switch to normal play
Press the STOP button (■), and press the PROG/DIRECT button then press the PLAY button (▶).
To revert to playing a series of programmed tracks
Press the PROG/DIRECT button in stop mode, then press the PLAY button (▶).
To check the order in which to play a series of programmed tracks:
In stop mode with "PROG." lit, press the CALL buttons as many times as necessary
- If you press the REPEAT button and select "REPEAT ALL", the programmed tracks will be played repeatedly.
- If one of the following buttons is pressed, program mode will be cancelled :
PROG/DIRECT, OPEN/CLOSE, POWER, FUNCTION
CD
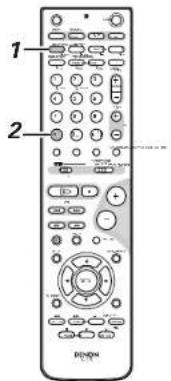
ENGLISH
Checking the programmed content
1
In the stop mode, press the CALL buttons repeatedly.
Track number, program number and the total playback time is displayed in order.

Remote control unit
How to delete tracks from a program
2
To clear a programmed track
Select the track with the 🎨 / 🎨 buttons,
then press the CLEAR button.

Remote control unit
To clear all programmed tracks at once
- Press the one of the following buttons.
PROG/DIRECT, OPEN/CLOSE, POWER, FUNCTION
ENGLISH
17 CHANGING THE DEFAULT SETTINGS (DVD)

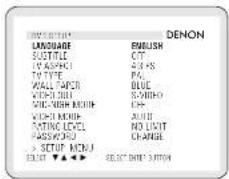
This chapter describes how to use the DVD SETUP menu. Most settings and adjustments are required to be set when you first use the system.
Using the DVD SETUP menu, you can adjust the picture size, set a language for the OSD (on screen displays), limit playback by children, etc..
MAKE SURE YOUR TV IS CONNECTED TO ADV-500SD AND TURNED ON. SET UP USES ON SCREEN MENUS TO PROGRAM.
1 in the stop mode, press the SETUP button.
At the Setup Menu, use the and ocursor buttons
to select "DVD SETUP" and press the "ENTER" button.
- "SETUP" briefly appears on the display of front panel.

Remote control unit
2 Select an item you want to change using the and buttons.
To change the setting, press the "ENTER" button repeatedly until the setting you want to select appears.
Use the 🔒 and 📋 buttons and the "ENTER" button to select and set other items.
3 When all the settings have been finished, press the SETUP button to exit the DVD SETUP menu.

Remote control unit

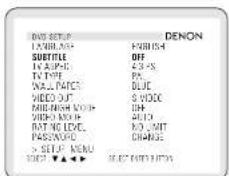

① Selecting SET UP Languages
(ENGLISH, FRENCH, SPANISH, GERMAN)
You can select the language for OSD (On Screen Display).(See page 26.)
This setting allows you select a preferred language for the DVD SETUP menu operating messages and sound track language. The default language is ENGLISH.
Note:
In case of Resume playing the Language setting what you selected before will be appear.
② SUB-TITLE
(OFF, ENGLISH, FRENCH, SPANISH, GERMAN, ITALIAN)
You can select a preferred language for audio, subtitle and disc menu respectively.
- When you select a preferred language that is not recorded on the DVD, one of the actual recorded languages is automatically selected.
- You can override the AUDIO and the SUBTITLE language settings in the SET UP menu simply by pressing the AUDIO and the SUBTITLE button respectively on the remote control unit while a DVD disc is playing.

Remote control unit

Remote control unit
③ TV ASPECT
Select the aspect ratio to match your TV.
4:3 PS (Pan & Scan mode)
When you connect a normal TV to the system, this setting displays a wide picture on the whole TV screen with a portion (right and left sides of the picture) automatically cut off.
4:3 LB (Letterbox mode)
When you connect a normal TV to the system, this setting displays a wide picture with bands displayed on the upper and lower portions of the screen.
16:9 WIDE (Wide-screen mode)
Use this setting when you connect a wide-screen TV to the system.
④ TV TYPE
You have to select the color system to match your TV. When all the connection has been done, turn the ADV-500SD and the connected TV
If your TV is MULTI or PAL, press the PAL/NTSC button repeatedly until "MULTI" or "PAL" appears on the TV screen.
The default setting is PAL
PAL : Select PAL when a PAL TV(Furopean standstard) is connected.
MULTI: Select MULTI when a
MULTI TV is connected.
NTSC : Select NTSC When a NTSC
TV is connected.

Remote
ontrol unit
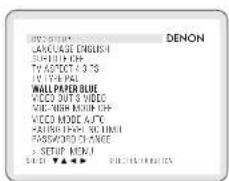


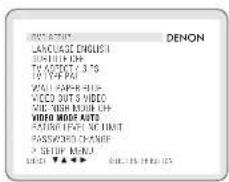
⑤ WALL PAPER
BLUE
Select this to display a blue background on the TV display.
PICTURE
Select this to display the wallpaper on the TV display.
⑥ VIDEO OUT
S-VIDEO
Select this when your TV or monitor is connected via the S-VIDEO jack. S-VIDEO signal is output from the S-VIDEO jack.
COMPONENT :
Select this when your TV or monitor is connected via the COMPONENT VIDEO jack.
Component video signal is output from the COMPONENT VIDEO OUT jack.
SCART
Select this when your TV or monitor is connected via the SCART VIDEO jack.
SCART VIDEO signal is output from the AV CONNECTOR.
- Regardless of the setting, the VIDEO OUT jack is always active on INTERLACE SCAN mode.
- If your TV is compatible with progressive scan, connect the TV via the COMPONENT VIDEO jack and SELECT COMPONENT VIDEO out. Press the "PROGRESSIVE SCAN" button on the main unit. If you want to charge INTERFACE SCAN mode, please check the preview.
- When P-SCAN set to ON, the VIDEO output format will be fixed to the "MULTI" mode automatically regardless of the TV TYPE setting. (See page 30.)
For example, if the DVD Video (PAL format) reproduces with P-SCAN mode, the VIDEO output format will be fixed only PAL format.
- Also STATUS button can change this setting while "SETUP" briefly appears on the display of front panel.
⑦ VIDEO MODE
Select one of followings video mode.
AUTO
The set identifies the type of material on the disc being played (film or video) and selects the mode automatically. This mode is suited for playing discs containing both film and video material.
FILM
This mode is best suited for playing discs containing film material or video material recorded with the progressive scan method.
VIDEO :
This mode is best suited for playing discs containing video material.


ENGLISH
⑧ MIDNIGHT MODE
Dynamic Range Compression
In many listening situations, you may find loud passages objectionable. Adjusting this setting allows you to compress the sounds into a range that you may find more suitable for a particular listening situation. Dolby Digital satisfies these needs through the dynamic range controlling.
Select one of the followings to fit the individual listening situation of the audience.
MAX: Audio with fully compressed dynamic range.
STD :Audio with partially compressed dynamic range.
MIN :Audio with lowest limit compressed dynamic range.
OFF: Audio with uncompressed dynamic range. Select this when you don't want to use the night mode.
- This function is effective only when playing back a DVD disc recorded with Doloy Digital. This control has no effect on other discs.
⑨ RATING LEVEL
You can prohibit the playing of specified DVDs which are unsuitable for children. Some DVD discs contain a restriction level which enables parents to remove scenes or prevent playback of discs by children. Your DVD player has a password device designed to prevent children from changing the level.
-
Press the ENTER button
-
Use the number buttons to input the password (a 4-digit number), then press the ENTER button.
• The password is initially set to "0000"
- The password can be changed by changing it to a now password at "PASSWORD". (See page 32.1)
- Press the ENTER button several times and select "LEVEL".
NO LIMIT (factory default)
LEVEL 1 to 7
The lower the level, the stricter the restrictions.
No restrictions
Select this when you want to play all DVDs (for adults, general audiences and children).
ENGLISH

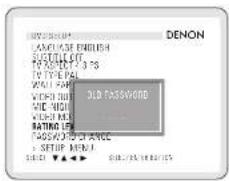


How to set and change the password for Rating
- Press the ENTER button.
- Use the number buttons to input the previously set password (a 4-digit number), next input the new password, then input the new password again, and finally press the ENTER button.
• The password is initially set to "0000" - Be careful not to forget the password.
- The settings cannot be changed until the proper password is input.
18 LISTEN TO THE RADIO
(1) Tuning to the Radio

FM MODE


3 Select the station you want to listen to (auto selection).
Hold down the TUNING (-, +) button for 0.5 to 2 seconds.
When a station is tuned in, the tuning process will stop automatically.
If you want to stop the tuning process, press the TUNING (-, +) button.
Selecting stations which cannot be tuned automatically (manual selection)
Select the manual tuning mode.
When the TUNING (-, +) button is pressed momentarily (0.5 second or less), the frequency charges by a fixed step.
FM : 50 kHz steps
AM : 9 kHz steps
Press the TUNING (-, +) button repeatedly until the station you want to listen to is found
- "STEREO" is displayed when a stereo broadcast is tuned in.
- "Tuned" is displayed when a broadcast is correctly tuned in.
FM MODE Button
Pressing this button alternates between Stereo mode and Mono mode.
Stereo
FM stereo broadcasts are received in stereo and the "STEREO" indicator lights in the display.
Mono
To compensate for weak FM stereo reception, select this mode. Reception will now be forced monaural, reducing unwanted noise.
(2) Preset Tuning
You can store Preset stations from Channel 1 to 30 respectively.
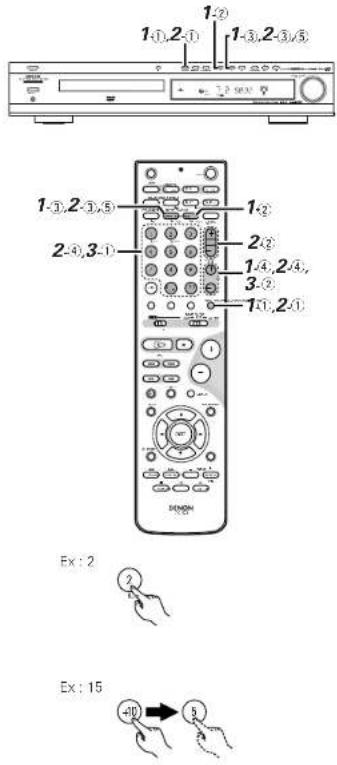
1 Automatic Memory Presetting (ONLY FM STATIONS)
① Select Tuner FUNCTION by press FUNCTION button.
② Select FM/AM by press the BAND button.
③ Press the MEMORY button for more than 2 second.
Up to 30 of the best received stations in your area will be stored automatically. Then you can select each station's easily.
④ You can select each stations by pressing CH +, - button.
2 Manual Memory Presetting
① Select Tuner FUNCTION by press the FUNCTION button repeatedly (or press the Tuner button of the remote control unit).
② Select the station what you want to listen by pressing the TUNING “-”, “+” buttons.
③ Press the MEMORY button briefly.
④ While the "PROG" indicator is appears, select a preset channel (ex. 01, 02 ... 30) to store the station using the CH +, - buttons or Numeric buttons.
⑤ Press MEMORY button.
To store more stations, repeat steps ② to ⑤.
3 How to select preset stations
① Press a preset number.
To select a station stored in preset 2 for example, press 2. If you want to select a station stored in preset "15" for example, press "+10" and then "5".
② Preset stations can also be selected by the CH +r - button.
(3) RDS (Radio Data System)
RDS (works only on the FM band) is a broadcasting service which allows station to send additional information along with the regular radio program signal. The following three types of RDS information can be received on this unit:
Program Type (PTY)
PTY identifies the type of RDS program.
The program types and their displays are as follows:

■ Traffic Program (TP)
TP identifies programs that carry traffic announcements.
This allows you to easily find out the latest traffic conditions in your area before you leaving home.
Radio Text (RT)
RT allows the RDS station to send text messages that appear on the display.
NOTE: The operations described below using the RDS, PTY and RT buttons will not function in areas in which there are no RDS broadcasts.
(4) RDS search
Use this function to automatically tune to FM stations that provide RDS service.

ENGLISH
(5) PTY search
Use this function to find RDS stations broadcasting a designated program type (PTY). For a description of each program type, refer to "Program Type (PTY)".
1
Set the band to "FM"

Remote control unit
2
Press the RDS button until "PTY" appears on the display.

Remote control unit
3
Watching the display, press the PTY button to call out the desired program type.

Remote control unit
4
Press the TUNING + (UPI) or - IDOWNI button to automatically begin the PTY search operation.
Remote control unit
5
The station name is displayed on the display after searching stops.
- If no station broadcasting the designated program type is found when all the frequencies are searched, "NO PROG" is displayed.
(6) TP search
Use this function to find RDS stations broadcasting traffic program (ITP stations)
1
Set the band to "FM"

Remote control unit
2
Press the RDS button until "TP" appears on the display.

Remote control unit
3
Press the TUNING + (UPI or - IDOWN) button TP search begins.

Remote control unit
4
The station name is displayed on the display after searching stops.
- If no TP station is found when all the frequencies are searched, "NO PROG" is displayed.
(7) RT (Radio Text)
"RT" appears on the display when radio text data is received.
1
To turn the RT mode on, press the RT button on the remote control unit until the RT indicator is it.

Remote control unit
2
When the station currently tuned in is offering a radio text message service, the message scrolls on the display.
- When the RT mode is turned on while an RDS radio station not offering an RT service is tuned in, "NO DATA" is displayed on the display, then the mode automatically switches to the PS mode.
- In the same way, the mode automatically switches to the PS mode when the RT service is finished. In this case, the mode automatically switches from the PS mode back to the RT mode when an RT broadcast is resumed.
- The RT mode cannot be set in the AM band or for FM stations not offering RDS broadcasts.
- To turn the RT mode off, press the RT button and switch to the desired display mode. (Sea pages 12, 33.)
19
TROUBLESHOOTING
In case you experience any problem with this unit, please take the time to look through this chart and see if you can solve the problem yourself before you call your dealer or a nearest DENON sales office.
No power
■Check the connection to the AC wall outlet. Make sure the outlet is not switched by a lamp switch by plugging in another electrical device to see if the outlet is "live".
Playback does not start
■Reload the disc with the label side UP ■Clean the disc.
PROHIBIT Icon Appears on the screen
■The operation is not permitted by the disc or the unit.
■Note that during playback of a title part (cautions, software maker's logo, etc.), most operations are prohibited by the disc.
■If another operation is still in process, wait a moment and try again.
Picture playback stops and operation buttons do not work.
■Turn the unit off and back on again and restart the playback.
No picture.
■Turn on the TV
■Check that the system is connected properly.
■Make sure you have selected the proper video input on the TV so that you can view the pictures from the DVD player.
Picture noise
■If video from this system has to go through your VCR to get to your TV, the copy-protection applied to some DVD programs could affect picture quality. Please connect the unit directly to your TV.
The image is distorted or monochromatic.
■The color system selected does not match your TV. Press the PAL/NTSC button of the remote control unit once or twice.
■Select the aspect ratio to match your TV.
The aspect ratio of the screen cannot be changed.
■The aspect ratio might be fixed by the disc.
■Depending on the TV, you may not be able to change the aspect ratio.
There is no sound or only a very low-level sound
is heard.
■Check that the speakers and components are connected securely.
■Check the operation of the connected component.
■Check the audio output setting.
■The sound is muted during pause, slow motion, fast forward/reverse, and stepping playback. Press the PLAY button to resume normal playback.
Severe hum or noise is heard.
■Check that the speakers and components are connected securely.
■Make sure the line cords and speaker cables are as far away from the AC supply as possible.
Remote control doesn't work.
When the function selected by the main unit and remote control unit differs, remote control doesn't work. Press the FUNCTION buttons of the remote control unit to select correct function. Even when the FUNCTION buttons are pressed without pointing at the main unit, the function of the remote control unit will be changed.)
■If the batteries are dead, change the batteries.
■Use remote control unit within and point at the front panel.
■Clear obstacles between the remote control unit and the main unit.
■If a strong light is near the unit, turn it off.
Cannot play.
■Load a disc with the playback side facing down. If the disc is dirty, clean the surface of the disc.
■A blank disc has been loaded. Load a prerecorded disc.
■Check the region code of the DVD.
Sound skips
■Place the unit on a stable place to avoid vibration and shock.
■if the disc is dirty, clean the surface of the disc.
■Don't use scratched, damaged or warped discs.
If normal operation cannot be recovered, unplug the power cord from the outlet and plug it in again. This resets the internal micro-computer which can be disturbed during electrical storms, power interruptions, et cetera.

SPECIFICATIONS
(1) DVD Surround Receiver (ADV-500SD)
■Audio section
• Power amplifier
| Output power (6 Ω/ohms, 1 kHz, 10% THD, 100W) |
| - TStereo ......2 x 100 W |
| Output power (6 Ω/ohms, 1 kHz, 10% THD, 100W) |
| - Front left/right ......2 x 100 W |
| - Center ......100 W |
| - Surround left/right ......2 x 100 W |
| - Subwoofer ......100 W |
Signal-to-Noise Ratio
| Stereo-TV | >67 dB (IHF-A) |
| Surround front/center/rear | >65 dB (IHF-A, -20 dB FS) |
| Frequency Response | 10 Hz - 20 kHz, -3 dB/+1 dB |
| Input Sensitivity | 300 mV / 47 kΩ/kohms |
| Cross-talk (separation) | |
| Stereo-TV line | >55 dB |
| Dolby Digital | >45 dB |
Tuner section
| Tuning Range | FM 87.5 ~ 108 MHz (50 kHz steps) |
| AM 522 ~ 1611 kHz (9 kHz steps) | |
| 26 dB, Quieting Sensitivity | FM < 22 dBF |
| AM < 3250 m | |
| Harmonic Distortion (15 kHz LPF on) | FM Mono < 3% |
| FM Stereo < 2% | |
| Signal-to-Noise Ratio | FM Mono > 60 dB |
| FM Stereo > 60 dB | |
| AM > 40 dB | |
| Frequency Response | FM 20 Hz - 15 kHz, -3 dB |
| Selectivity | AM > 25 dB |
■Video section
- Standard video jacks
| Input / output level and impedance:......1 Vp-p, 75 Ω/ohms |
- S-video jacks
| Input / output level and impedance:......Y (brightness) signal1 Vp-p, 75 Ω/ohmsC (color) signal 0.3 Vp-p, 75 Ω/ohms | |
| connector......Video output1 Vp-p, 75 Ω/ohmsRGB output (DVD only)R/G/B signal — 0.7 Vp-p, 75 Ω/ohmsAudio output L/R (Fixed output) |
DVD section
| Signal system | NTSC/PAL |
| Applicable discs | (1)DVD-Video discs |
| 1-layer 12 cm single-sided discs, 2-layer 12 cm single-sided discs, 2-layer 12 cm double-sided discs (1 layer per side) | |
| 1-layer 8 cm single-sided discs, 2-layer 8 cm single-sided discs, 2-layer 8 cm double-sided discs (1 layer per side) | |
| (2)Compact discs (CD-DA, Video CD) | |
| 12 cm discs, 8 cm discs | |
| Audio output | Fixed output level: 2 Vrms, (VIDEO1 OUT, TV) |
ENGLISH
General
| Power supply | AC 230 V, 50 Hz |
| Power consumption | 155 W (Standby 1 W) |
| Maximum external dimensions | 434 (width) x 80 (height) x 368 (depth) mm |
| Mass | 5.4 kg |
| te control unit | RC 973 |
| Type | Infrared pulse |
| Power supply | DC 3 V, 2 "H6P/AA" batteries |
This product incorporates copyright protection technology that is protected by method claims of certain U.S. patents and other intellectual property rights owned by Macrovision Corporation and other rights owners. Use of this copyright protection technology must be authorized by Macrovision Corporation, and is intended for home and other limited viewing uses only unless otherwise authorized by Macrovision Corporation. Reverse engineering or disassembly is prohibited.
* Design and specifications are subject to change without notice in the course of product improvement.
(2) Speaker System (SYS-500SD)
■Satellite (Front/Rear) speaker system (SC-A500SD)
| Type | 2-way, 3-speakers |
| Closed box / Low-leaksgo-flux | |
| Speakers | 5.7 cm cone bass-mid x 2 |
| 1.9 cm super-high range x 1 | |
| Input impedance | 6 Ω/ohms |
| Max. input | 40 watts (IEC) 100 watts (PEAK) |
| Frequency range | 120 Hz ~ 90 kHz |
| Dimensions | 70 (W) x 210 (H) x 155 (D) mm |
| Mass | 1.1 kg (one unit) |
■Center speaker system (SC-C500SD)
| Type.... | 2-way, 3-speakers | |
| Closed box / Low-leakage flux | ||
| Speakers.... | 5.7 cm cone bass mid x 2 | |
| 1.9 cm super-high range x 1 | ||
| Input impedance.... | 6 Ω/ohms | |
| Max. input.... | 40 watts (IEC) | 100 watts (PEAK) |
| Frequency range.... | 120 Hz ~ 90 kHz | |
| Dimensions.... | 210 (W) x 72 (H) x 155 ID) mm | |
| Mass.... | 1.1 kg (one unit) | |
■Passive subwoofer (DSW-500SD)
| Type | 1-way, 1-speaker |
| Rollbox box / Low-loakago-flux | |
| Speaker | 16 cm cone woofer x 1 |
| Input impedance | 6 Ω/ohms |
| Max. input | 50 watts (IFC) 100 watts (PEAK) |
| Frequency range | 29 Hz ~ 240 Hz |
| Dimensions | 210 WI x 310 HI x 352 (DI mm) |
| Mass | 5.8 kg (one unit) |
DEUTSCH
EINFÜHRUNG
■ADV-500SD (DVD-Surround-Receiver)
E DIGITAL IN/OUT-Buchsen

③ OPEN/CLOSE (▲)-Taste
32 INPUT COURSE Review/Research
© INFO1 SOURCE-Australia Institute ....(44)
30 TUNER TUNING 4;--lasten....(65, 66)
31 TUNER PRESET CH +/- -Fasten ......(66)
SMALL: 3.0 m × 3.0 m (10 ft × 10 ft)
MED: 4.2 m x 4.2 m (12 ft x 12 ft)
LARGE: 6.0 m x 6.0 m (30 ft x 30 ft)
SEATING POSITION:
STANDBY/ON OPEN/CLOSE STOP

FUNCTION PAUSE
Nur DVD
→ CHAPTER REPEAT ON → TITLE REPEAT ON → REPEAT OFF →
Wiederholung (CD)
1TR REPEAT ON → REPEAT ALL → REPEAT OFF
Wiederholung (MP3)
1 FILE REPEAT ON → FOLDER PLAY MODE → FOLDER REPEAT ON DISC (ALL) REPEAT ON → DISC PLAY MODE
REPEAT-A REPEAT-B REPEAT OFF
NL ANALOG /SLEEP ECLBC!
(OFF, ENGLISH, FRENCH, SPANISH, GERMAN, ITALIAN)
(1) DVD-Surround-Receiver (ADV-500SD)
■Audio-Bereich
Kinton (15 kHz LFF 6m) ......OKW Mono < 3%
UKW Stereo < 2%
Bauschabstand. UKW Mono > 60 dB
UKW Stover + 60 mP
OK/STARED
MW > 40 dB Frequenzgang ....UKW 20 Hz - 15 kHz, -3 dB Tregneschäfte. MW > 25 dB
- St. Rogo (Jask 1) - Crohn,
Jacks DIGITAL IN/OUT
Jack SUBWOOFER PRE OUT
FRANCAIS

Jack SURR. BACK PRE OUT

DÉSIGNATION DE PIÈCES ET FONCTIONS
(1) Panneau avant

③ Touche OPEN/CLOSE ( △)
SLEEP : Activation/désactivation repos
DVD : Function DVD
TUNER : Fonction TUNER
TV : Function TV
flowchart
graph LR
    A["① Initial State"] --> B["② Intermediate State"]
    B --> C["③ Final State"]
STANDBY/ON OPEN/CLOSE STOP

FUNCTION PAUSE
DVD uniquement
(5) JPEG

The Ground Truth image displays a single, solid horizontal line. According to Rule 2 (UNDERSCORE & LINE RULES), this is a stylistic or background line, not a placeholder underscore. Therefore, the OCR result must ignore it and output nothing or only meaningful text. The provided OCR content is "____", which consists of four underscores. This is an incorrect interpretation of the line as a placeholder, violating the rule that stylistic lines must be ignored. The OCR has hallucinated underscores where none should exist based on the GT's visual context. Hence, the OCR result is inconsistent with the Ground Truth.
(OFF, ENGLISH, FRENCH, SPANISH, GERMAN, ITALIAN)
Distorsion harmonique (15 kHz LFF 6n) .....FVI Mono < 3%
FVI Stereo < 2%
Rapport Signal-Strufl ......FM Mono > 60 dB FM C#f#e: 60 dB
FM Stereo> AM > 40 dB
Dimensions 70 (L) x 210 (H) x 155 (P) HMI
Poids 1,1 kg (une unite)
E Jack DIGITAL IN/OUT
DIGITAL IN DIGITAL OUT (CD, ecc.)
DIGITAL OUT DIGITALN (CD-R, MD, ecc.)
F Jack SUBWOOFER PRE OUT
SUBWOOFER ATTIVO
ITALIANO
G Jack SURR. BACK PRE OUT
C Altoparlanti surround (SC-A500SD)
flowchart
graph TD
    A["Device Icon"] --> B["Desktop Icon"]
    B --> C["Computer Icon"]
    D["Image of Desktop Icon"] --> E["Computer Icon"]

Antenna esterna AM

③ Tasto OPEN/CLOSE ( ▲)
Note sulle batterie
MED: 4.2 m x 4.2 m (12 ft x 12 ft)
LARGE: 6.0 m x 6.0 m (30 ft x 30 ft)
SEATING POSITION:

flowchart
graph TD
    A["DOLBY PRO LOGIC II (PRO LOGIC IX) CINEMA"] --> B["DOLBY PRO LOGIC II (PRO LOGIC IX) MUSIC"]
    B --> C["DOLBY PRO LOGIC II (PRO LOGIC IX) GAME"]
    C --> D["DOLBY PRO LOGIC"]
    D --> E["DTS NEO CINEMA"]
    E --> F["DTS NEO MUSIC"]
    F --> G["HALL"]
    G --> H["CINEMA"]
    H --> I["CONCERT"]
    I --> J["5 STEREO (6 o 7 STEREO)"]
    J --> K["STEREO"]
STANDBY/ON OPEN/CLOSE STOP

FUNCTION PAUSE
Solo per | DVD
14 DISPLAY SULLO SCHERMO
NL ANALOG SLEEP BL BC
(OFF, ENGLISH, FRENCH, SPANISH, GERMAN, ITALIAN)
DIGITAL IN DIGITAL OUT (CD, etc.)
DIGITAL OUT DIGITALN (CD-R, MD, etc.)
F Terminal SUBWOOFER PRE OUT
ACTIVE SUBWOOFER
ESPAÑOL
G Terminal SURR. BACK PRE OUT
C Altavoces surround (SC-A500SD)

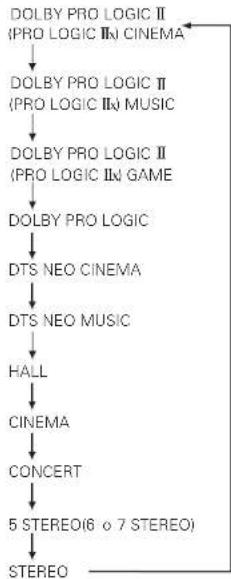
flowchart
graph TD
    A["DOLBY PRO LOGIC II (PRO LOGIC II) CINEMA"] --> B["DOLBY PRO LOGIC II (PRO LOGIC II) MUSIC"]
    B --> C["DOLBY PRO LOGIC II (PRO LOGIC II) GAME"]
    C --> D["DOLBY PRO LOGIC"]
    D --> E["DTS NEO CINEMA"]
    E --> F["DTS NEO MUSIC"]
    F --> G["HALL"]
    G --> H["CINEMA"]
    H --> I["CONCERT"]
    I --> J["5 STEREO(6 o 7 STEREO)"]
    J --> K["STEREO"]
STANDBY/ON OPEN/CLOSE STOP

FUNCTION PAUSE
Sólo DVD
→ CHAPTER REPEAT ON → TITLE REPEAT ON → REPEAT OFF →
Repetición (CD)
→ 1TR REPEAT ON → REPEAT ALL → REPEAT OFF
Repetición (MP3)
- FILE REPEAT ON → FOLDER PLAY MODE → FOLDER REPEAT ON —
- DISC (ALL) REPEAT ON← DISC PLAY MODE
→ REPEAT-A → REPEAT-B → REPEAT OFF
NL ANALOG SLEEP EL BC!
(OFF, ENGLISH, FRENCH, SPANISH, GERMAN, ITALIAN)
(1) Receptor surround de DVD (ADV-500SD)
Sección de audio
- Amplificador
Potencia de salida (6 Ω/ ohmios, 1 kHz, 5% THD, 100W)
Estórico 2 x 100 V
Potencia de salida (6 Ω/ ohmios, 1 kHz, 5% THD, 100W)

SURR. BACK PRE OUT-aansluiting
Surroundluidsprekers (SC-A500SD)

NAMEN VAN ONDERDELEN EN HUN FUNCTIE
(1) Voorpaneel


Snanningsschakelaar
(POWER (ON/STANBY))
Opmerkingen betreffende batterijen
LARGE: 6,0 ft × 6,0 ft (30 ft × 30 ft)
SEATING POSITION:
2 Kies "DELAY TIME" in net SYSTEM SETUP MENU.

Afstandsbediening Afstandsbediening
© YES. FRONT & SW > 2.7 m
CENTER ·2.4 m
SURROUND ·2.1 m
[CURR BACK 27 m]
SONH. BACK *2,7-11
Kies "AUTO" of "MANUAL".

flowchart
graph TD
    A["DOLBY PRO LOGIC II (PRO LOGIC IIc CINEMA)"] --> B["DOLBY PRO LOGIC II (PRO LOGIC IId MUSIC)"]
    B --> C["DOLBY PRO LOGIC II (PRO LOGIC IIe GAME)"]
    C --> D["DOLBY PRO LOGIC"]
    D --> E["DTS NEO CINEMA"]
    E --> F["DTS NEO MUSIC"]
    F --> G["HALL"]
    G --> H["CINEMA"]
    H --> I["CONCERT"]
    I --> J["5 STEREO(6 of 7 STEREO)"]
    J --> K["STEREO"]
5 STEREO, 6 STEREO of 7 STEREO
STANDBY/ON OPEN/CLOSE STOP

FUNCTION PAUSE
Enkel DVD
flowchart
graph TD
    A["Track"] --> B["SINGLE ELAPSED 01:10 0:30:11"]
    B --> C["SINGLE REMAIN 0:03:17"]
    C --> D["TOTAL ELAPSED 0:06:15"]
    D --> E["TOTAL REMAIN 0:32:05"]
    E --> F["End"]
3
→ CHAPTER REPEAT ON → TITLE REPEAT ON → REPEAT OFF
Herhaling (CD)
→ 1TR REPEAT ON → REPEAT ALL → REPEAT OFF
Herhaling (MP3)
- 1FILE REPEAT ON → FOLDER PLAY MODE → FOLDER REPEAT ON
DISC (ALL) REPEAT ON — DISC PLAY MODE
→ REPEAT-A → REPEAT-B → REPEAT-DFF
(OFF, ENGLISH, FRENCH, SPANISH, GERMAN,
ITALIAN)
TV (Europese norm) is
pargesloten.
MULTI: Kies MULTI wannocr con
MULTI-TV is aargosloten.

By 2

By. 15

AM 522 \~ 1611 kHz (in stappen van 9 kHz)
| 26 dB Dompingsgevoeligheid......FM < 22 dBf |
AM < 3250 lm
■ADV-500SD (DVD-surroundreceiver)
SVENSKA
B S-VIDEO- eller VIDEO-jack
E DIGITAL IN/OUT-jack
DIGITAL OUT DIGITAL IN (CD-R, MD, etc.)
F SUBWOOFER PRE OUT-jack
SVENSKA
G SURR. BACK PRE OUT-jack
C Surroundhögtalare (SC-A500SD)
flowchart
graph TD
    A["Device Icon"] --> B["Desktop Icon"]
    B --> C["Computer Icon"]
    D["Image of Desktop Icon"] --> E["Computer Icon"]


DELARNAS NAMN OCH FUNKTION
(1) Frontpanel
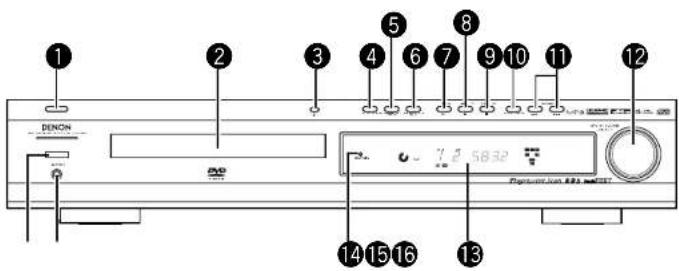

POWER (ON/STANDBY)-knapp
PAUSE/STEP (III)/MEMORY-tangent
STOP (■)/FM MODE-tangent
1 Överföringsindikator
② SLEEP-timertangent .....(220)
3 NTSC/PAL-tangent....(228)
4 CLEAR-tangent (227)
5 A-B REPEAT-tangent 1226
6 PROG/DIRECT-tangent .....(227)
CLEAR : Radera program
RANDOM : Slumpmässig
upspelning på/av
Figure 4.5: new radio
Space: 0.1 mV and 500 V
[1] "I" is a question of that "Out
Väl "SYSTEM SETUP" under "<ADVANCED
SMALL: 3.0 m × 3.0 m (10 ft × 10 ft)
MED: 4.2 m x 4.2 m (12 ft x 12 ft)
LARGE: 6.0 m x 6.0 m (30 ft x 30 ft)
SEATING POSITION:
© YES: FRONT & SW→2.7 m
CENTER→2.4 m
SURROUND→2.1m
SURB. BACK →27 m
[Figure]
STANDBY/ON OPEN/CLOSE STOP
FUNCTION PAUSE
Endast DVD
→ CHAPTER REPEAT ON → TITLE REPEAT ON → REPEAT OFF →
Upprepad (CD)
- 1TR REPEAT ON —— REPEAT ALL —— REPEAT OFF —
Upprepad (MP3)
FILE REPEAT ON → FOLDER PLAY MODE → FOLDER REPEAT ON
DISC (ALL) REPEAT ON ← DISC PLAY MODE ←
REPEAT-A → REPEAT-B → REPEAT OFF
OPEN/CLOSE, POWER, FUNCTION
SVENSKA
AL ANALOG SLEEP FL EC
2
(OFF, ENGLISH, FRENCH, SPANISH, GERMAN, ITALIAN)
(1) DVD-surroundreceiver (ADV-500SD)
■Audio-del
| • Förstärkare | |
| Uteffekt 16 Ω/ohmiga, 1 kHz, 5% THD, 100W | |
| - Stereo ......2 x 100 W | |
| Uteffekt 16 Ω/ohmiga, 1 kHz, 5% THD, 100W | |
| - Front vänster/höger ......2 x 100 W | |
| - Center ......100 W | |
| - Surround vänster/höger ......2 x 100 W | |
| - Subwoofer ......100 W | |
| Signalbrusförhållande | |
| - Stereo-TV ......> 67 dB (IHF-A) | |
| - Surround front/center/bak ......> 65 dB (IHF-A, -20 dB FS) | |
| Frekvensstergivning ......10 Hz - 20 kHz, -3 dB/-1 dB | |
| Ingångskänslighet ......300 mV / 47 kΩ/kohmiga | |
| Cross-talk (separation) | |
| - Stereo-TV linjel ......> 55 dB | |
| - Dolby Digital ......> 45 dB |
Tuner-del
Printed in China 511 4197 105



- ENGLISH DEUTSCH FRANCAIS ITALIANO ESPAÑOL NEDERLANDS SVENSKA
- CAUTION
- CAUTION:
- "CLASS 1 LASER PRODUCT"
- • DECLARATION OF CONFORMITY
- INTRODUCTION
- ACCESSORIES
- ■ ADV-500SD (DVD Surround Receiver)
- ■ SYS-500SD (speaker system)
- BEFORE USING
- Pay attention to the following before using this unit:
- - Moving the set
- - Before turning the power switch on
- - Store this instructions in a safe place.
- - Note that the Illustrations in this Instructions may differ from the actual set for explanation purposes.
- ② CAUTIONS ON INSTALLATION
- CAUTIONS ON HANDLING
- - Switching the input function when input jacks are not connected
- - Muting of PRE OUT jacks, HEADPHONE jack and SPEAKER terminals
- - Whenever the power switch is in the STANDBY state, the apparatus is still connected on AC line voltage.
- ENGLISH
- Cautions on Installation
- WARNING:
- Other Cautions
- FEATURES
- DISCS
- CAUTIONS ON HANDLING DISCS
- Discs
- Holding Discs
- Cleaning Discs
- NOTE:
- Cautions on Handling Discs
- Cautions on Storing Discs
- Cautions on Loading Discs
- CONNECTIONS
- Connection to a TV and other equipment
- A COMPONENT VIDEO jack
- S-VIDEO OUT S-VIDEO IN (TV)
- VIDEO OUT VIDEO IN TV
- C AV Connector (SCART jack)
- D VIDEO1,VIDEO2 jack
- E DIGITAL IN/OUT jacks
- DIGITAL IN DIGITAL OUT(CD, etc.)
- F SUBWOOFER PRE OUT jack
- G SURR. BACK PRE OUT jack
- H AC Power Cord
- Connection to Speakers (SYS-500SD)
- Speaker Connections
- How to connect
- Positioning of the Speakers
- A Front speakers (SC-A500SD)
- B Center speaker (SC-C500SD)
- C Surround speakers (SC-A500SD)
- D Passive Subwoofer (DSW-500SD)
- E Surround back speakers (SURR. BACK SP.)
- Connecting Antennas
- AM Indoor Loop Antenna
- AM Outdoor Antenna
- FM Indoor Antenna
- FM Outdoor Antenna
- PART NAMES AND FUNCTION
- Front Panel
- ① POWER (ON/STANBY) switch
- ② Disc tray
- ③ OPEN/CLOSE (▲) button
- ④ FUNCTION (DVD, TUNER, VIDEO1, VIDEO2, TV) button
- ⑤ SURROUND MODE button
- ⑥ PROGRESSIVE SCAN button
- ⑦ PLAY (▶)/BAND button
- PAUSE/STEP (III)/MEMORY button
- ⑨ STOP (■)/FM MODE button
- ⑩ TONE/DIMMER button
- ⑪ SKIP (I◄◄, ►►I)/TUNING buttons
- ⑫ VOLUME Dial
- ⑬ Display
- STANDBY Indicator
- PHONES
- REMOTE SENSOR
- Display
- Remote control unit
- Names and functions of remote control unit buttons on the ADV-500SD
- 3
- 9
- REMOTE CONTROL UNIT
- Inserting the batteries
- Notes on Batteries
- Using the remote control unit
- NOTES:
- TV and video deck preset memories
- Operating the TV/video deck after storing its remote control signals in the preset memory
- SETTING UP THE SYSTEM
- System setup items
- Before setting up the system
- Quick system settings
- About the quick system settings
- ROOM SPACE:
- SEATING POSITION:
- Settings
- SURR. BACK speakers
- System setting changes
- [1] Setting the type of speakers
- Parameters
- SURR. BACK
- SPEAKER OUT
- Subwoofer frequency (SW FREQ.)
- Assignment of low frequencies
- Subwoofer mode (SW MODE)
- [2] Setting the speaker distance
- Preparations:
- [3] Setting the channel level
- [4] After completing system setup
- AUTO MODE
- MANUAL MODE
- 1
- SLEEP- 10 (20, 30...or 120)
- SURROUND MODE
- DOLBY DIGITAL EX
- DTS MODE(Dts, Neo:6 Cinema, Neo:6 Music)
- Notes :
- Note :
- DOLBY PRO LOGIC II (PRO LOGIC IIx) MUSIC
- DOLBY PRO LOGIC II (PRO LOGIC IIx) CINEMA
- DOLBY PRO LOGIC II (PRO LOGIC IIx) GAME
- DOLBY PRO LOGIC
- OTHER SURROUND
- HALL
- CINEMA
- CONCERT
- STEREO, 6 STEREO or 7 STEREO
- STEREO
- PLAYBACK
- DVD
- Video CDs with PBC
- When the PBC function is off:
- When the PBC function is on:
- MP3/WMA
- MP3/WMA
- Resume Playback
- To stop and resume playback of DVD
- How to resume playback
- Playing Still Pictures (Pausing)
- DVD/CD/MP3/WMA
- Playback from a specific chapter/track
- To skip to a specific chapter/track
- Forward / Reverse Searching
- Search for a part of a chapter/track
- ONSCREEN DISPLAY
- 2
- USING THE ONSCREEN DISPLAY
- Select an Audio Language
- Select a Subtitle Language
- SUBTITLE 1/2 ENG
- Change the Angle
- Picture Zoom
- SPECIAL PLAYBACK
- Repeat Playback
- Chapter Repeat
- Title Repeat
- Shuffle Playback
- Program Playback (CD)
- To switch to normal play
- To check the order in which to play a series of programmed tracks:
- Checking the programmed content
- How to delete tracks from a program
- To clear all programmed tracks at once
- CHANGING THE DEFAULT SETTINGS (DVD)
- ① Selecting SET UP Languages
- (ENGLISH, FRENCH, SPANISH, GERMAN)
- ② SUB-TITLE
- (OFF, ENGLISH, FRENCH, SPANISH, GERMAN, ITALIAN)
- ③ TV ASPECT
- 4:3 PS (Pan & Scan mode)
- 4:3 LB (Letterbox mode)
- 16:9 WIDE (Wide-screen mode)
- ④ TV TYPE
- The default setting is PAL
- ⑤ WALL PAPER
- BLUE
- PICTURE
- ⑥ VIDEO OUT
- S-VIDEO
- COMPONENT :
- SCART
- ⑦ VIDEO MODE
- AUTO
- FILM
- VIDEO :
- ⑧ MIDNIGHT MODE
- Dynamic Range Compression
- ⑨ RATING LEVEL
- No restrictions
- How to set and change the password for Rating
- LISTEN TO THE RADIO
- Select the station you want to listen to (auto selection).
- Selecting stations which cannot be tuned automatically (manual selection)
- FM : 50 kHz steps
- FM MODE Button
- Mono
- Preset Tuning
- Automatic Memory Presetting (ONLY FM STATIONS)
- Manual Memory Presetting
- How to select preset stations
- RDS (Radio Data System)
- RDS search
- PTY search
- TP search
- RT (Radio Text)
- TROUBLESHOOTING
- No power
- Playback does not start
- PROHIBIT Icon Appears on the screen
- Picture playback stops and operation buttons do not work.
- No picture.
- Picture noise
- The image is distorted or monochromatic.
- The aspect ratio of the screen cannot be changed.
- There is no sound or only a very low-level sound
- is heard.
- Severe hum or noise is heard.
- Remote control doesn't work.
- Cannot play.
- Sound skips
- SPECIFICATIONS
- DVD Surround Receiver (ADV-500SD)
- ■Audio section
- ■Video section
- Speaker System (SYS-500SD)
- DEUTSCH
- EINFÜHRUNG
- ■ADV-500SD (DVD-Surround-Receiver)
- E DIGITAL IN/OUT-Buchsen
- ③ OPEN/CLOSE (▲)-Taste
- DVD-Surround-Receiver (ADV-500SD)
- ■Audio-Bereich
- Jacks DIGITAL IN/OUT
- Jack SUBWOOFER PRE OUT
- FRANCAIS
- Jack SURR. BACK PRE OUT
- DÉSIGNATION DE PIÈCES ET FONCTIONS
- Panneau avant
- DVD uniquement
- E Jack DIGITAL IN/OUT
- F Jack SUBWOOFER PRE OUT
- ITALIANO
- G Jack SURR. BACK PRE OUT
- C Altoparlanti surround (SC-A500SD)
- Antenna esterna AM
- Note sulle batterie
- Solo per | DVD
- DISPLAY SULLO SCHERMO
- DIGITAL IN DIGITAL OUT (CD, etc.)
- DIGITAL OUT DIGITALN (CD-R, MD, etc.)
- F Terminal SUBWOOFER PRE OUT
- ESPAÑOL
- G Terminal SURR. BACK PRE OUT
- C Altavoces surround (SC-A500SD)
- Sólo DVD
- Receptor surround de DVD (ADV-500SD)
- Sección de audio
- SURR. BACK PRE OUT-aansluiting
- Surroundluidsprekers (SC-A500SD)
- NAMEN VAN ONDERDELEN EN HUN FUNCTIE
- Voorpaneel
- Snanningsschakelaar
- (POWER (ON/STANBY))
- Opmerkingen betreffende batterijen
- STEREO, 6 STEREO of 7 STEREO
- Enkel DVD
- (OFF, ENGLISH, FRENCH, SPANISH, GERMAN,
- ITALIAN)
- SVENSKA
- B S-VIDEO- eller VIDEO-jack
- E DIGITAL IN/OUT-jack
- F SUBWOOFER PRE OUT-jack
- G SURR. BACK PRE OUT-jack
- C Surroundhögtalare (SC-A500SD)
- DELARNAS NAMN OCH FUNKTION
- Frontpanel
- POWER (ON/STANDBY)-knapp
- PAUSE/STEP (III)/MEMORY-tangent
- STOP (■)/FM MODE-tangent
- Endast DVD
- DVD-surroundreceiver (ADV-500SD)
- ■Audio-del
- Tuner-del
Brand : DENON
Model : DHT-500SD
Category : Home Theater System