
PR-2120 - Loudspeaker HAMA - Free user manual and instructions
Find the device manual for free PR-2120 HAMA in PDF.


| Product type | Portable speaker |
| Brand | Hama |
| Model | PR-2120 |
| Dimensions (W x H x D) | 15 x 10 x 10 cm |
| Weight | 0.5 kg |
| Power supply | Mains (230 V) or batteries (not included) |
| Rated power | 5 W RMS |
| Connectivity | Bluetooth, 3.5 mm AUX input |
| Main functions | Wireless audio playback, volume controls, microSD card support |
| Care and cleaning | Clean with a soft, dry cloth. Do not use abrasive products. |
| Safety | Do not expose to water or moisture. Keep out of reach of children. |
| Spare parts and repairability | Spare parts not available. Repair by a professional recommended. |
| General information | Versatile portable speaker for use at home or on the go. |
Frequently Asked Questions - PR-2120 HAMA
User questions about PR-2120 HAMA
0 question about this device. Answer the ones you know or ask your own.
Ask a new question about this device
Download the instructions for your Loudspeaker in PDF format for free! Find your manual PR-2120 - HAMA and take your electronic device back in hand. On this page are published all the documents necessary for the use of your device. PR-2120 by HAMA.
USER MANUAL PR-2120 HAMA
Operating Instructions
Bedienungsanleitung
Mode d'emploi
Controls and Displays
A Speaker:
- Subwoofer
- Satellite speakers
- MODE button
- ▶▶ | button, next title
6 ▶ || Play/Pause button - |◀◀ button, previous title
- Volume control
- USB/MicroSD-Slot
- 230 V mains supply
- ON/OFF, on/off switch
- Stereo audio input RCA right/left
-
Bass control
-
Remote control (for details see Fig. B)
-
Satellite speaker connection right/left
B Remote control:
POWER - on/standby switch
INPUT – Switch between the individual audio sources AUX/Bluetooth/USB/microSD
MUTE - mute switch
VOL +/- - General volume control (master)
▶II — Play/Pause button
|◀◀ - Previous title
▶▶| - Next title
TUN- — Button has no function on this remote control
TUN+ — Button has no function on this remote control
0-9 - Track number selection
EQ — Button has no function on this remote control
Thank you for choosing a Hama product.
Take your time and read the following instructions and information completely. Please keep these instructions in a safe place for future reference. If you sell the device, please pass these operating instructions on to the new owner.
1. Explanation of Warning Symbols and Notes

Risk of electric shock
This symbol indicates product parts energized with a dangerous voltage of sufficient magnitude to constitute a risk of electric shock.

Warning
This symbol is used to indicate safety instructions or to draw your attention to specific hazards and risks.

Note
This symbol is used to indicate additional information or important notes.
2. Package Contents
- Subwoofer
• 2 satellite speakers
• 1 Y-audio adaptor cable
• 1 audio connection cables - Remote control
- 2 AAA batteries
• These operating instructions
3. Safety Notes
- The product is intended for private, non-commercial use only.
- Protect the product from dirt, moisture and overheating and us it in dry rooms only.
- As with all electrical devices, this device should be kept out of the reach of children.
- Do not drop the product and do not expose it to any major shocks.
- Do not operate the product outside the power limits given in the specifications.
-
Keep the packaging material out of the reach of children due to the risk of suffocation.
-
Dispose of packaging material immediately according to locally applicable regulations.
- Do not modify the device in any way. Doing so the warranty.

Risk of electric shock
- Do not open the device or continue to operate it becomes damaged.
- Do not use the product if the AC adapter, adapter cable or power cable is damaged.
- Do not attempt to service or repair the product yourself. Leave any and all service work to qualified experts.

Warning Batteries
- When inserting batteries, note the correct polarity (+ and - markings) and insert the batteries accordingly. Failure to do so could result in the batteries leaking or exploding.
it. if Do not allow children to change batteries without supervision.
ter Remove the batteries from products that are not being used for an extended period.
- Do not short-circuit batteries.
• Do not charge batteries. - Do not throw batteries in a fire.
- Keep batteries out of the reach of children.
- Do not mix old and new batteries or batteries of a different type or make.
4. Wiring diagram

5. Getting Started
5.1 Remote control
- Open the battery compartment cover. It is located the rear of the remote control.
- Pull the closing tab back (if present) and lift the With other models of remote control, it suffices to simply push the casing in the direction indicated.
Sliding cover

natural_image
Simple line drawing of a rectangular object with a downward arrow symbol inside, no text or labels present.Insert the batteries, paying attention to match the polarities correctly. The correct polarity is indicated by the plus and minus symbols in the battery compartment.
5.2 Speaker
- Connect the two satellite speakers with the corresponding audio outputs at the rear of the subwoofer, as shown in the wiring diagram Point
- Then connect the corresponding AUX audio input with the signal source (computer/DVD/Blueray/MP3 player etc.), with the help of one of the enclosed audio cables.
- Connect the subwoofer's power supply cable to an undamaged electrical socket which has been installed correctly.

Note
- Only connect the product to a socket that has been approved for the device. The electrical socket must always be easily accessible.
- When using a mult-socket power strip, make sure that the sum power draw of all the connected devices does not exceed its maximum throughput rating.
- If you will not be using the product for a long period of time, disconnect it from mains power.
5.3 On/off switch / standby
- Turn the speaker system on by turning the on/off switch ON/OFF at the rear of the subwoofer to ON.
- Turn the speaker system off completely by turning the on/off switch ON/OFF on the rear side of the subwoofer to OFF.
- When the speaker system is turned on press the POWER button on the remote control or the MODE button on the subwoofer's front display for approximately 3 seconds to switch the speaker system to standby mode.
- Press the POWER button in standby mode on the remote control or the MODE button on the front display of the subwoofer to activate the speaker.

Note – Automatic standby
- Please note that the speaker system switches to standby mode after 15 minutes of no activity (no audio playback / no other activity).
- Press any button on the remote control or the subwoofer to re-activate the speaker system.
6. Audio source selection
6.1 AUX playback
- Press the INPUT button on the remote control or the MODE button on the subwoofer several times to select the AUX connection as the audio source. The AUX selection is shown on the subwoofer's display and signalled by an "AUX" speech message.
6.2 Playback usingBluetooth®
- Press the INPUT button on the remote control or the MODE button on the subwoofer several times to select Bluetooth® as the audio source. The BLUE selection is shown on the subwoofer's display and signalled by a "Bluetooth" speech message.
6.3 DVD playback
- Press the DVD/BT button on the remote control or press the MODE button on the subwoofer several times to select the DVD connection as the audio source. The DVD selection is shown on the subwoofer's display and signalled by an "DVD" speech message.
6.4 USB/MicroSD playback
- Insert a USB memory stick or SD/SDHC card into device.
- Press the USB/MicroSD button on the remote color press the MODE button on the subwoofer seven times to select USB/MicroSD as the audio source.
USB/MicroSD selection is shown on the subwoofer's display and signalled by an "USB" speech message
7. Advanced features
7.1 General and individual volume control
- Press VOL+ or VOL- to increase or decrease the volume of the system.
7.2 Bluetooth ^® first connection (pairing)
- Make sure that your Bluetooth®-capable terminal device is on and Bluetooth® is activated.
- Make sure that the speaker is located within the Bluetooth® range of max. 10 metres.
- Open the Bluetooth® settings on your terminal device and wait until "Hama PR-2120" appears in the list of Bluetooth® devices found.
- Select "Hama PR-2120" and wait until the speaker is listed as connected in Bluetooth® settings on your terminal device.
- If the Bluetooth® has connected successfully BLUE will be shown on the display.

Note
- Check whether your mobile device (MP3 player, mobile phone, etc.) Bluetooth® capable.
- If not, you can only use the speaker for playback using the included audio cable.
- Note that the maximum rangeBfootooth® is 10 metres without obstacles such as walls, people, etc.
7.3 Numeric keypad 0-9
- Select an audio file on a USB or SD storage medium. The selection is only possible on the audio sour active at that time.
8 the Care and Maintenance
- Only clean this product with a slightly damp, lint-free cloth and do not use aggressive cleaning agents.
9 Warranty Disclaimer
Hama GmbH & Co. KG assumes no liability and provides no warranty for damage resulting from improper installation/mounting, improper use of the product or from failure to observe the operating instructions and/or safety notes.
10. Service and Support
Please contact Hama Product Consulting if you have any questions about this product.
Hotline: +49 9091 502-115 (German/English)
Further support information can be found here: www.hama.com
11. Technical Data
| Bluetooth® Technology | Bluetooth® v4.0 |
| Frequency 60 Hz - 20 kHz | |
| Impedance 6 Ω | |
| Distortion factor ≥ 0.5% (1K, 1W) | |
| Power supply | 230 V AC / 50 Hz0,4 A Max |
| Power supply remote control | 2 AAA batteries |
| Connections | Cinch, USB(Host, Type A), microSD |
| Performance | |
| Max. total music performance | 20 W |
| Subwoofer 1x 10 W | |
| Satellites/Centre | 2 W x 5 |
| Size (B x T x H)/Weight | |
| Total ca. 2500 g | |
| Subwoofer | 14.5 x 21.5 x 23 cm ca. 1300 g |
| Satellites/Centre | 90 x 92 x 133 cm ca. 250 g |
12. Recycling Information
Note on environmental protection:
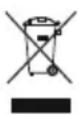
After the implementation of the European Directive 2012/19/EU and 2006/66/EU in the national legal system, the following applies:
Electric and electronic devices as well as batteries must not be disposed of with household waste. Consumers are obliged by law to return electrical and electronic devices as well as batteries at the end of their service lives to the public collecting points set up for this purpose or point of sale. Details to this are defined by the national law of the respective country. This symbol on the product, the instruction manual or the package indicates that a product is subject to these regulations. By recycling, reusing the materials or other forms of utilising old devices/Batteries, you are making an important contribution to protecting our environment.
13. Declaration of Conformity
CE Hama GmbH & Co. KG hereby declares that the device complies with the essential requirements and other relevant provisions of Directive 2014/53/EU. See www.hama.com for the declaration of conformity with the relevant directive.
▶II — Play/Pause — Taste
natural_image
Simple line drawing of a vertical stack of papers or documents (no text or symbols)▶II — Touche, lecture/pause
natural_image
Simple line drawing of a rectangular object with a downward arrow symbol (no text or labels)natural_image
Simple line drawing of a vertical stack of books with a small spiral, no text or symbols presentnatural_image
Simple line drawing of a rectangular object with a curved top (no text or symbols)natural_image
Simple line drawing of a vertical stack of books with a small number at the top (no text or symbols)natural_image
Simple line drawing of a rectangular object with a downward arrow and a small spiral symbol inside (no text or labels)natural_image
Simple line drawing of a rectangular object with a downward arrow and a small circular symbol inside (no text or labels)natural_image
Simple line drawing of a rectangular object with a downward arrow and dot, no text or symbols present.natural_image
Simple line drawing of a rectangular object with a downward arrow and a small circular symbol inside (no text or labels)▶II — Play/Pause — gomb
natural_image
Simple line drawing of a vertical stack of books with a small number, no text or symbols presentnatural_image
Simple line drawing of a rectangular object with a downward arrow and dot, resembling a stylized lamp or button (no text or symbols)natural_image
Simple line drawing of a rectangular object with a downward arrow and dot, no text or symbols present.▶II — Tecla — Play/Pause
natural_image
Simple line drawing of a rectangular object with a downward arrow and dot pattern (no text or symbols)natural_image
Simple line drawing of a rectangular object with a downward arrow symbol inside, no text or labels present.86652 Monheim/ Germany
www.hama.com
All listed brands are trademarks of the corresponding companies. Errors and omissions excepted, and subject to technical changes. Our general terms of delivery and payment are applied.



- Controls and Displays
- A Speaker:
- B Remote control:
- Explanation of Warning Symbols and Notes
- Risk of electric shock
- Warning
- Note
- Package Contents
- Safety Notes
- Warning Batteries
- Wiring diagram
- Getting Started
- Remote control
- Speaker
- On/off switch / standby
- Note – Automatic standby
- Audio source selection
- AUX playback
- Playback usingBluetooth®
- DVD playback
- USB/MicroSD playback
- Advanced features
- General and individual volume control
- Bluetooth ® first connection (pairing)
- Numeric keypad 0-9
- the Care and Maintenance
- Warranty Disclaimer
- Service and Support
- Technical Data
- Recycling Information
- Note on environmental protection:
- Declaration of Conformity
Brand : HAMA
Model : PR-2120
Category : Loudspeaker