
DP2GS - Dishwasher INDESIT - Free user manual and instructions
Find the device manual for free DP2GS INDESIT in PDF.




| Product Type | Built-in Dishwasher |
| Brand | Indesit |
| Model | DP2GS |
| Dimensions (W x D x H) | 60 x 60 x 85 cm |
| Net Weight | 45 kg |
| Capacity | 12 place settings |
| Electrical Supply | 230 V, 10 A, 1900 W |
| Installation Type | Built-in under counter |
| Wash Programs | Intensive, Eco, Glasses, Quick 30', Prewash |
| Available Temperatures | 45°C, 50°C, 55°C, 65°C, 70°C |
| Child Safety | Yes (control lock) |
| Leak Protection | Yes (Aquastop system) |
| Noise Level | 49 dB(A) |
| Energy Class | E (former class A+) |
| Water Consumption per Cycle | 9.5 L |
| Energy Consumption per Cycle | 0.92 kWh |
| Number of Baskets | 2 (height-adjustable upper basket) |
| Tub Material | Stainless Steel |
| Drying Type | Condensation Drying |
| Maintenance and Cleaning | Regular cleaning of filters and wash arms |
| Spare Parts Available | Yes (filters, arms, gaskets, etc.) |
Frequently Asked Questions - DP2GS INDESIT
User questions about DP2GS INDESIT
0 question about this device. Answer the ones you know or ask your own.
Ask a new question about this device
Download the instructions for your Dishwasher in PDF format for free! Find your manual DP2GS - INDESIT and take your electronic device back in hand. On this page are published all the documents necessary for the use of your device. DP2GS by INDESIT.
USER MANUAL DP2GS INDESIT
Instructions for use
Installation, 10
Use, 10
Maintenance, 10
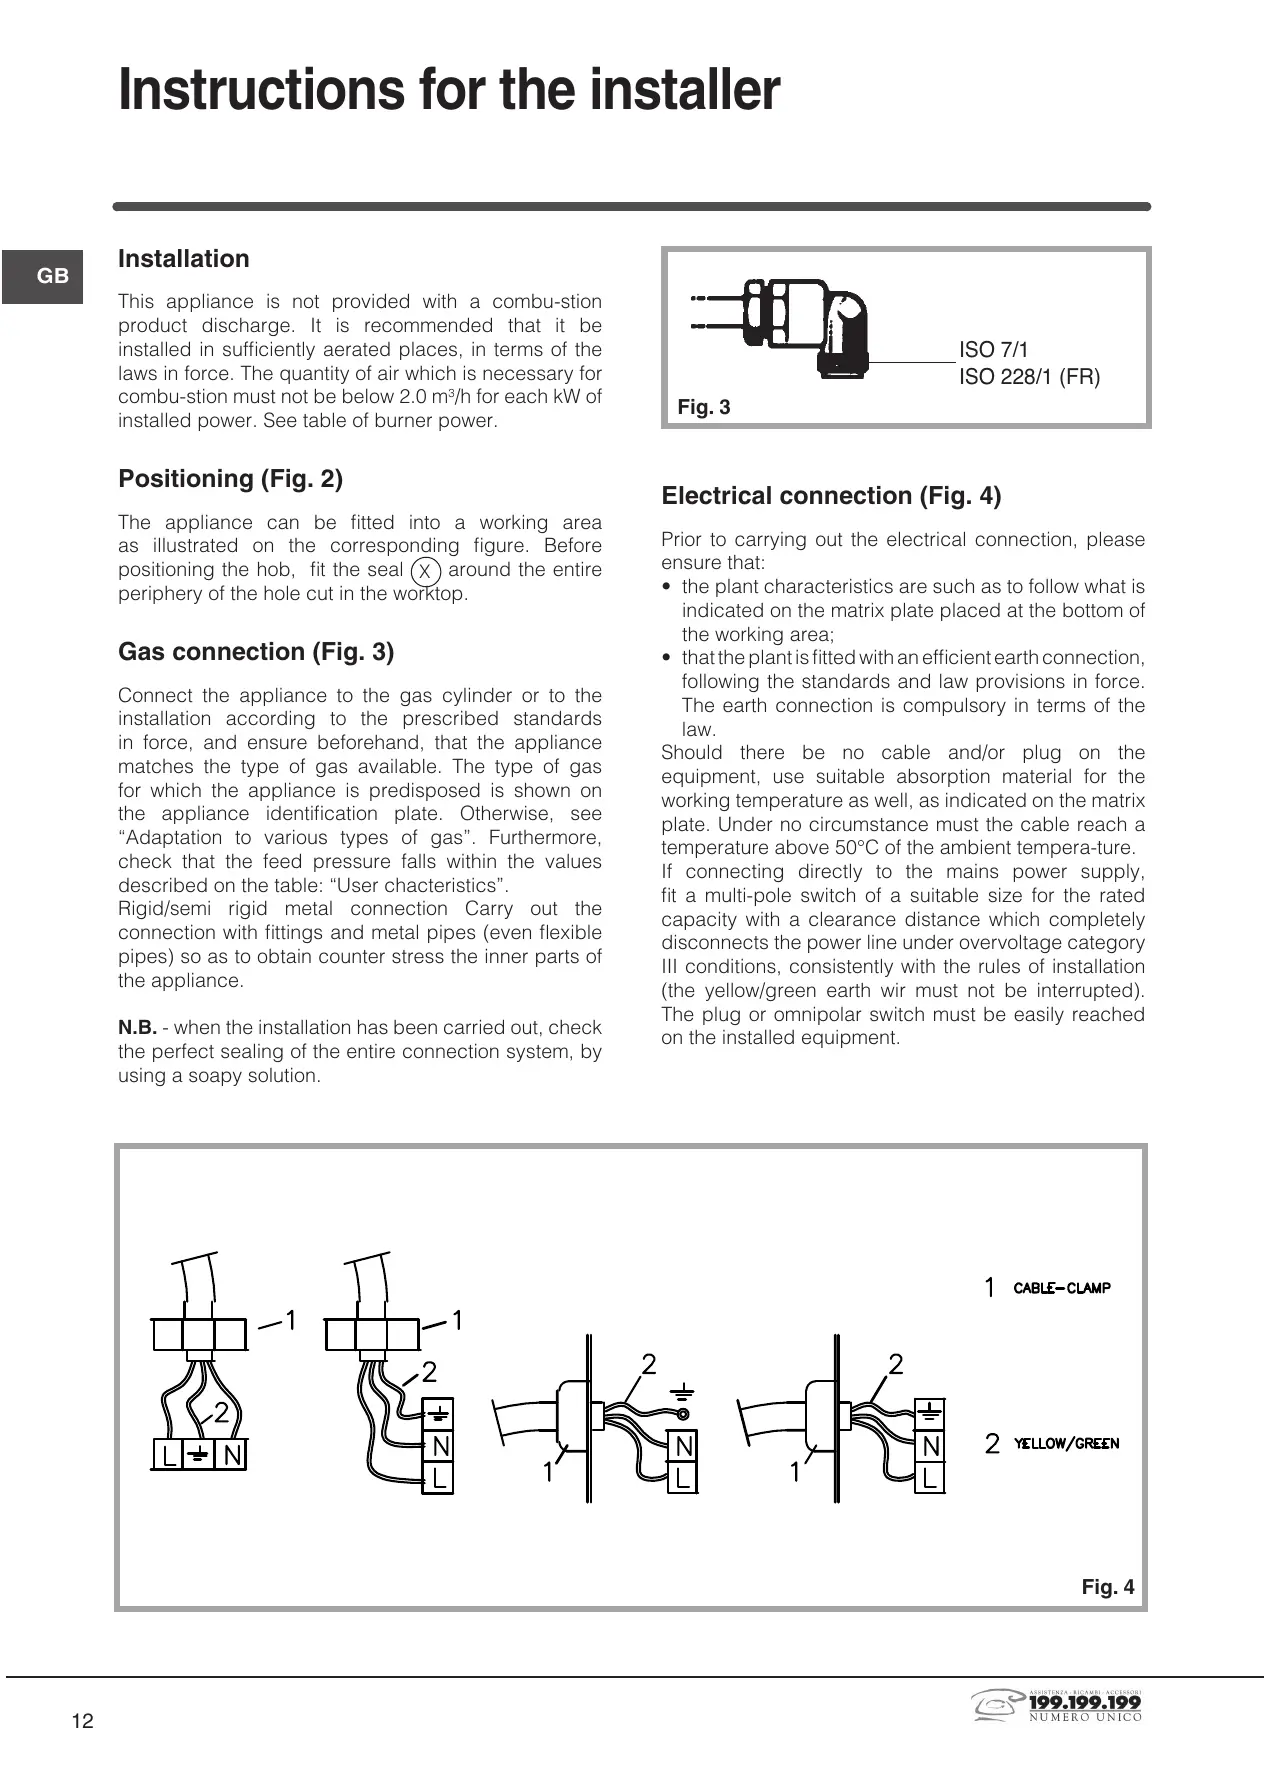
Instructions for the installer
Installation, 12
Gas connection, 12
Electrical connection, 12
User characteristics, 13
Assistance, 14
THIS APPLIANCE IS CONCEIVED FOR DOMESTIC USE ONLY. THE MANUFACTURER SHALL NOT IN ANY WAY BE HELD RESPONSIBLE FOR WHATEVER INJURIES OR DAMAGES ARE CAUSED BY INCORRECT INSTALLATION OR BY UNSUITABLE, WRONG OR ABSURD USE.
Dear customer,
We thank you and congratulate you on your choice. This new carefully designed product, manufactured with the highest quality materials, has been carefully tested to satisfy all your cooking demands. We would therefore request you to read and follow these easy instructions which will allow you to obtain excellent results right from the start. May we wish you all the very best with your modern appliance!

INDESIT
THE MANUFACTURER
Installation
All operations related to installation (electrical and gas connections, adaptation to gas type, necessary adjustments, etc.) must be carried out by qualified technicians, in accordance with current standards. For specific instructions, please read the section reserved for the installation technician.
Use
Gas burners (Fig. 1-3).
To ignite the gas burner, hold a small flame near the upper part holes of the burner, then press and turn the corresponding knob counterclockwise until the maximum position aligns with the marker. Once the burner is lit, adjust the flame as needed. The minimum position is at the end of the counterclockwise rotation. On models with automatic ignition, operate the knob as described above while pressing the corresponding push button. For models with automatic/simultaneous ignition (one hand), simply follow the same procedure using the knob. The electric spark between the ignition plug and the burner ignites the burner. After ignition, release the push button immediately and adjust the flame as needed. For models with a thermoelectric safety system, ignite the burner as described above, keeping the knob fully pressed in the maximum position for about 3 to 5 seconds. After releasing the knob, ensure the burner is actually lit.
N.B.:
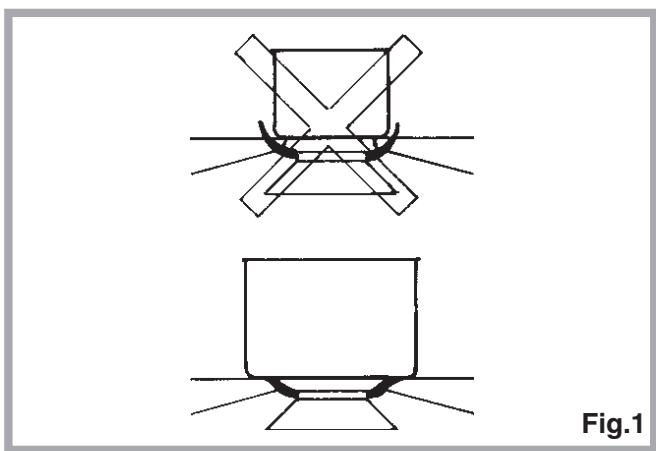
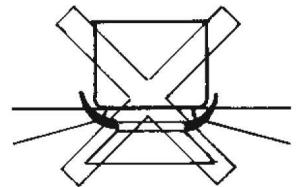
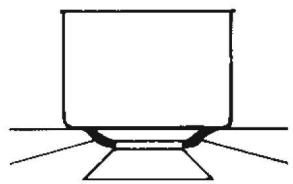
- We recommend using pots and pans with a diameter matching that of the burner, to prevent the flame from escaping from the bottom and surrounding the pot.
- Do not leave empty pots or pans on the fire.
- Do not use grill-cooking tools on Crystal hobs. When cooking is finished, it is also good practice to close the main gas pipe tap and/or cylinder.
Important
a) On floors with thermoelectric protection, do not keep the ignite button pushed for more than 15 seconds. If the burner has not ignited after 15 seconds, open the room door and wait at least one minute before trying again. b) On floors without protection, if the burner flame goes out, close the corresponding gas cock and wait at least one minute before attempting to ignite it again.
Gas
wok 20-32
fast 20-26
auxiliary 010-14
Maintenance Gas/Electrical
Prior to any operation, disconnect the appliance from the electrical system. For long-life to the equipment, a general cleaning operation must take place periodically, bearing in mind the following:
- the glass, steel and/or enamelled parts must be cleaned with suitable non-abrasive or corrosive products (found on the market). Avoid chlorine-base products (bleach, etc.);
- avoid leaving acid or alkaline substances on the working area (vinegar, salt, lemon juice, etc.).
- the wall baffle and the small covers (mobile parts of the burner) must be washed frequently with boiling water and detergent, taking care to remove every possible encrustation. Dry carefully and check that none of the burner holes is fully or partially clogged;
- the stainless steel grids of the working area, after having been heated, take on a bluish tint which does not deteriorate the quality. To bring colour back to its original state, use a slightly abrasive product.
N.B. - Cleaning of the taps must be carried out by qualified personnel, who must be consulted in case of any functioning anomaly. Check periodically the state of conservation of the flexible gas feed pipe. In case of leakage, call immediately the qualified technicians for its replacement.
DO NOT USE STEAM CLEANERS
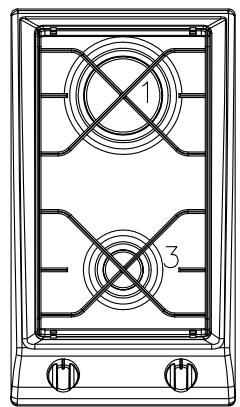
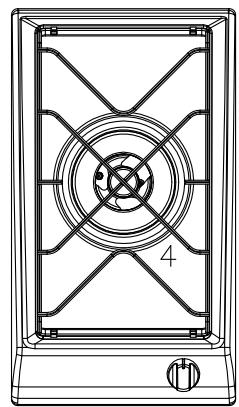
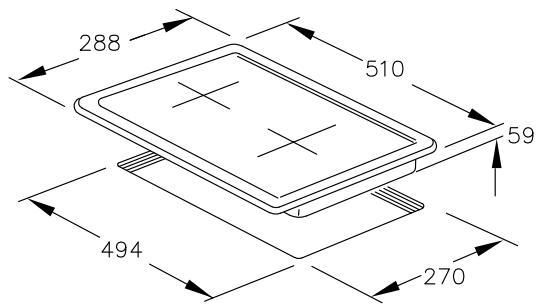
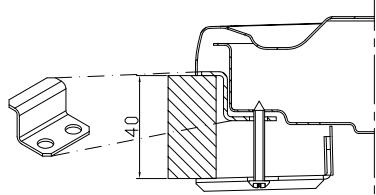
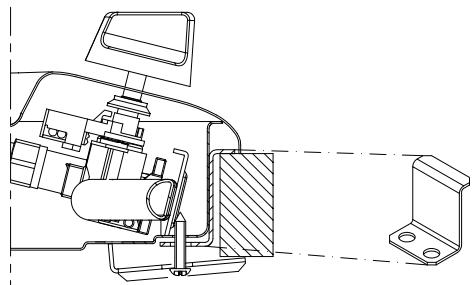
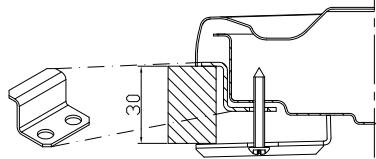
Fig. 2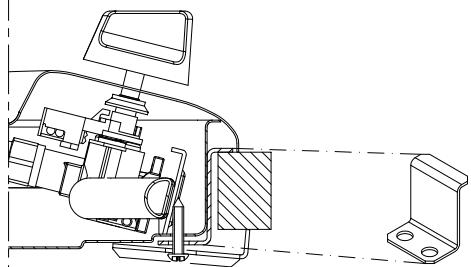
Installation
This appliance is not provided with a combustion product discharge. It is recommended that it be installed in sufficiently aerated places, in terms of the laws in force. The quantity of air which is necessary for combustion must not be below 2.0m3/h for each kW of installed power. See table of burner power.
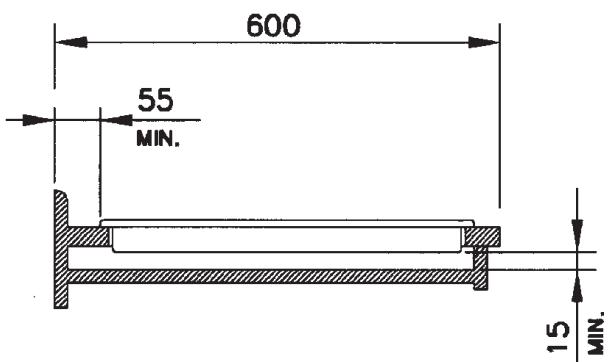
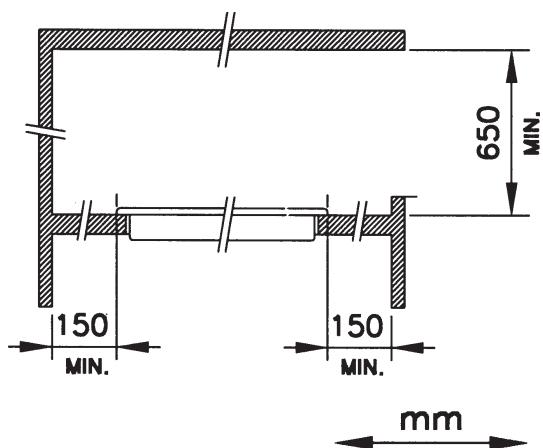
Positioning (Fig. 2)
The appliance can be fitted into a working area as illustrated on the corresponding figure. Before positioning the hob, fit the seal × around the entire periphery of the hole cut in the worktop.
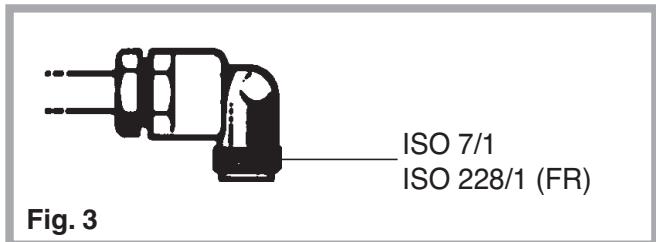
Gas connection (Fig. 3)
Connect the appliance to the gas cylinder or to the installation according to the prescribed standards in force, and ensure beforehand, that the appliance matches the type of gas available. The type of gas for which the appliance is predisposed is shown on the appliance identification plate. Otherwise, see "Adaptation to various types of gas". Furthermore, check that the feed pressure falls within the values described on the table: "User characteristics".
Rigid/semi-rigid metal connection: Carry out the connection with fittings and metal pipes (even flexible pipes) so as to obtain counter stress on the inner parts of the appliance.
N.B. - When the installation has been carried out, check the perfect sealing of the entire connection system by using a soapy solution.
Electrical connection (Fig. 4)
Prior to carrying out the electrical connection, please ensure that:
- The plant characteristics are such as to follow what is indicated on the matrix plate placed at the bottom of the working area;
- That the plant is fitted with an efficient earth connection, following the standards and law provisions in force. The earth connection is compulsory in terms of the law.
Should there be no cable and/or plug on the equipment, use suitable absorption material for the working temperature as well, as indicated on the matrix plate. Under no circumstance must the cable reach a temperature above 50°C of the ambient temperature. If connecting directly to the mains power supply, fit a multi-pole switch of a suitable size for the rated capacity with a clearance distance which completely disconnects the power line under overvoltage category III conditions, consistently with the rules of installation (the yellow/green earth wire must not be interrupted). The plug or omnipolar switch must be easily reached on the installed equipment.
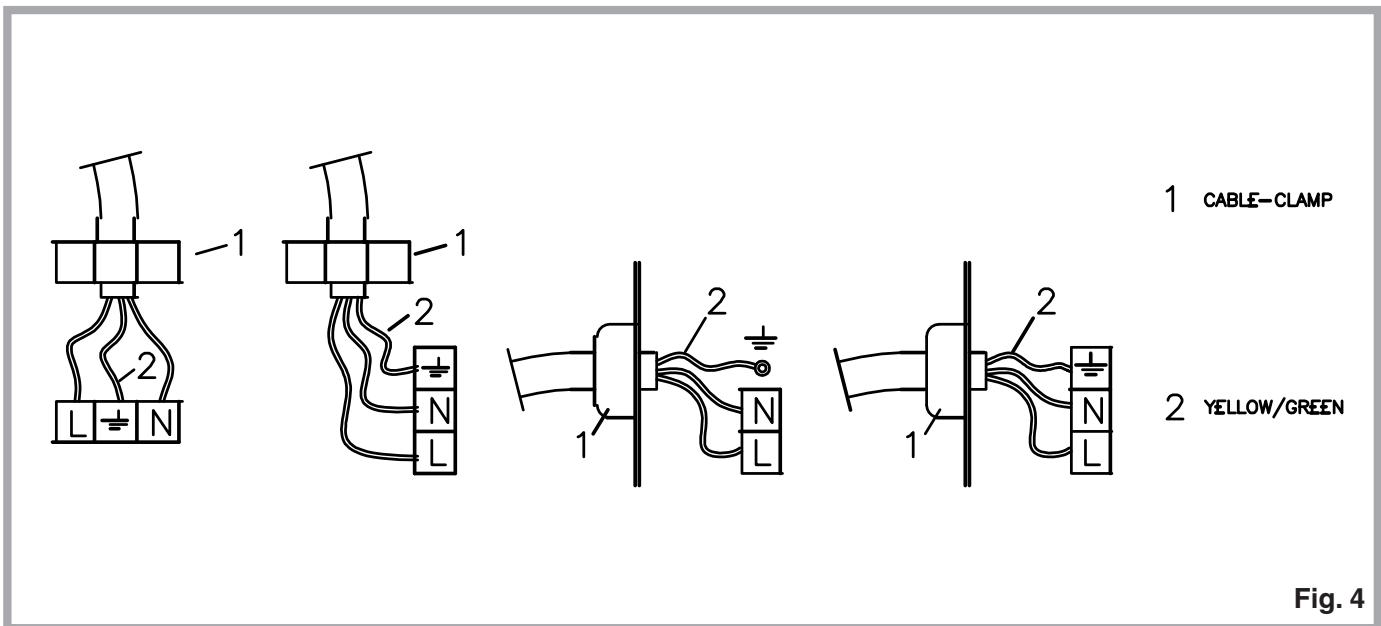
To avoid all risk, if the power cable becomes damaged, it must only be replaced by the manufacturer, by an authorized service centre, or by a qualified electrician.
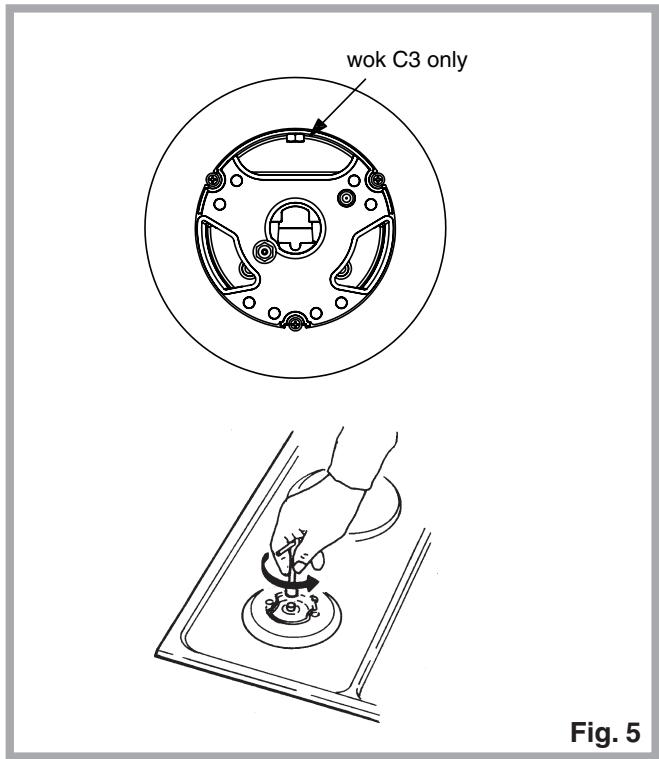
Adaptation to various types of gas (Fig. 5)
Should the appliance be pre-set for a different type of gas than that available, proceed as follows:
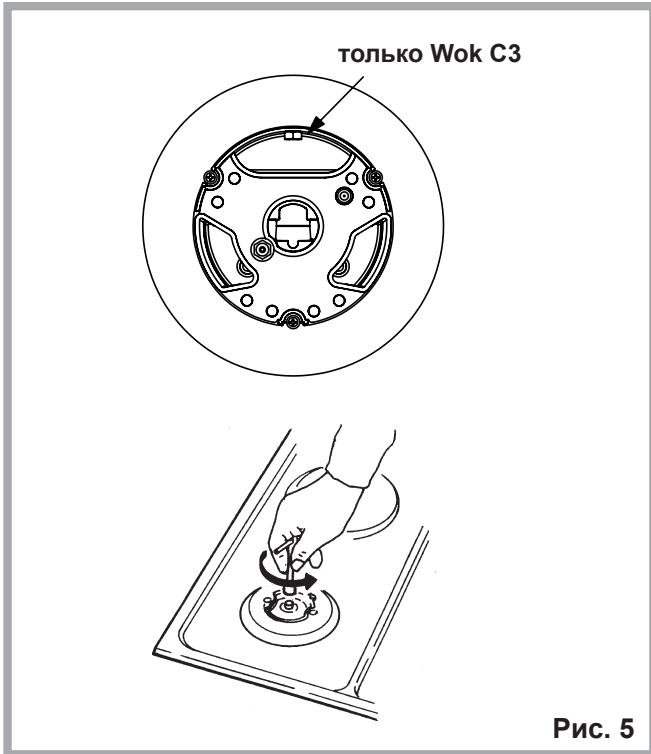
- Replace the injectors (Fig. 5) with the corresponding type of gas to be used (see table "Uses characteristics").
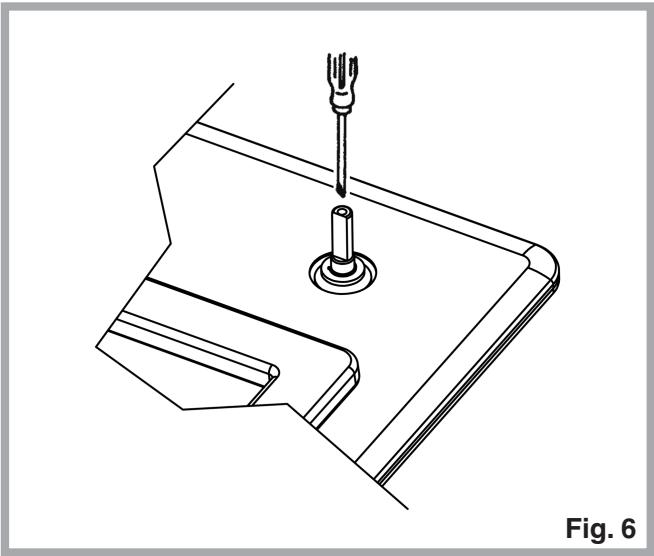
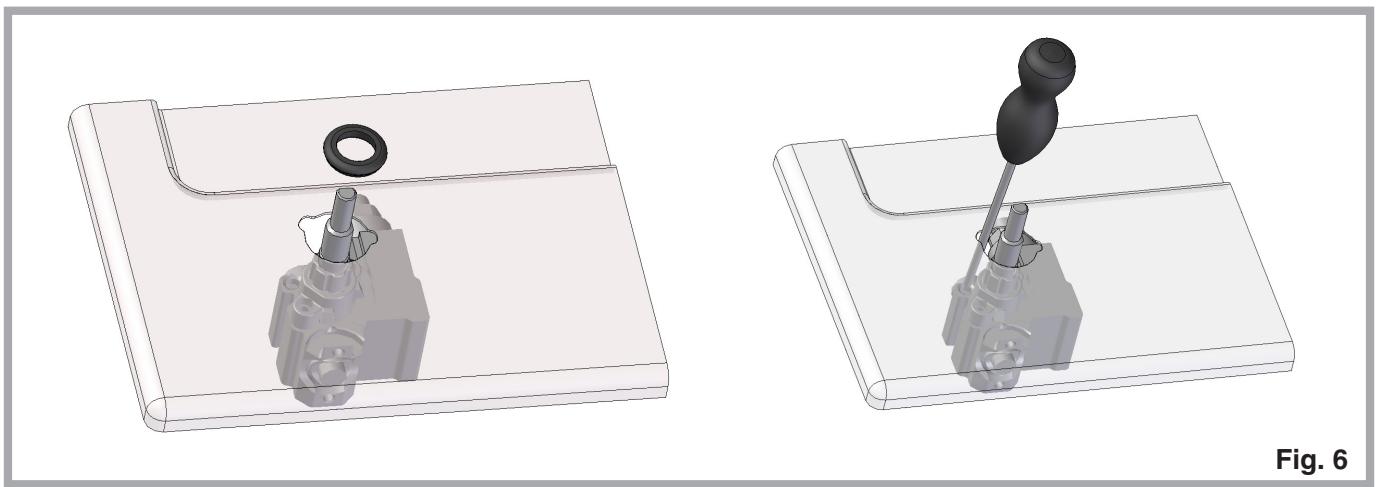
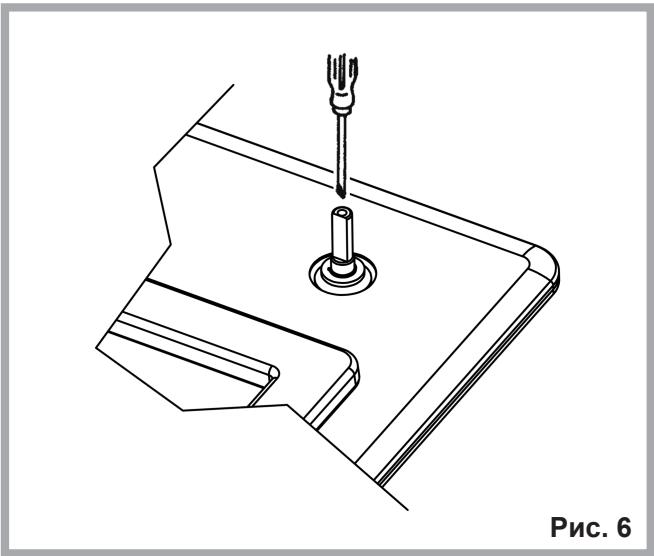
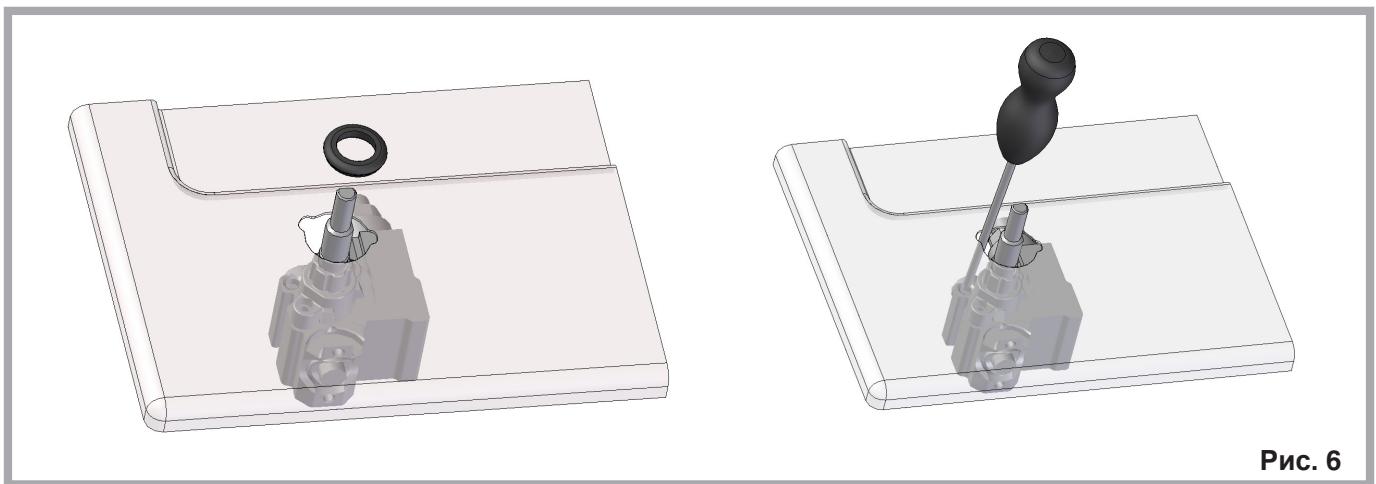
- To adjust to the minimum, use a screwdriver on the screw placed on the tap (Fig. 6) after turning the tap to its minimum position. For LPG (butane/propane) screw tight.
| USER CHARACTERISTICS | ||||
| GAS BURNERS | ||||
| TYPE PRESSURE mbarNORM. | BURNER Ø INJECTORS1/100 mm | THERMAL CAPACITY NOMINALW | CONSUMPTION | |
| natural gas G20 20 | fast auxiliary wok 3 | 12977141 | 300010003500 | 28695333 |
| liquefied gas G30/G31 28-30/37 | fast auxiliary wok 3 | 875094 | 300010003500 | 21873254 |
Assistance
Before contacting After-Sales Service:
- See if you can solve the problem yourself.
- Switch the appliance on again to see if the problem has been solved. If it has not, disconnect the appliance from the power supply and wait for about an hour before switching on again.
- If the problem persists after this course of action, contact After-Sales Service.
Specify:
the nature of the fault, the model - the service number (the number after the word SERVICE on the rating plate on the rear of the appliance) - your full address, - your telephone number and area code.
Never call on unauthorized technicians and always refuse to purchase non-original spare parts.
The manufacturer declines all responsibility for possible inaccuracies contained in this pamphlet, due to printing or copying errors. We reserve the right to make on our own products those changes to be considered necessary or useful, without jeopardizing the essential characteristics.


Portuguese

Persian
TR
Turkish

Russian
DP 2G (IX)
DP 2GS (IX)
DP 2G (IX) GH
DP 1TC (IX)
DP 1TC (IX) GH
DP 2G (IX) AG
DP 2GS (IX) AUS
DP 1TC (IX) GH AUS
Index
User manual
Installation, 16
Mode d'emploi, 16
Entretien, 16
THIS PRODUCT IS DESIGNED EXCLUSIVELY
FOR DOMESTIC USE. THE
MANUFACTURER DECLINES ALL
RESPONSIBILITY FOR DAMAGES
AND INJURIES CAUSED BY AN
INCORRECT INSTALLATION OR BY
IMPROPER, WRONG OR ABSURD USE.
Dear customer,
THIS PRODUCT IS DESIGNED AS
POSSIBLE DAMAGE TO THINGS OR PEOPLE
INCORRECT OR IMPROPER USE,
WRONG OR ABSURD.

INDESIT
Ex.mo. Sr. Persona,
:
1
:
Gai
ii
DP 2G (IX) DP 2GS (IX) DP 2G (IX) GH DP 1TC (IX) DP 1TC (IX) GH DP 2G (IX)AG DP 2GS (IX) AUS DP 1TC (IX) GH AUS

English

Spanish

Persian

French

Portuguese

Turkish
W
4.
4.
6.
6.

INDESIT
Italian
GB
English
FR
French
DE
German
ES
Spanish
PT
Portuguese
AR
IR
Persian
TR
Turkish
RU
Russian
DP 2G (IX) DP 2GS (IX) DP 2G (IX) GH DP 1TC (IX) DP 1TC (IX) GH DP 2G (IX)AG DP 2GS (IX) AUS DP 1TC (IX) GH AUS
1
P0-P0
P0-P9
10 - 1 F α
j/15 1
J 1 J 1 J 1 J 1 J 1 J 1 J 1 J 1 J 1 J 1 J 1 J 1 J 1 J 1 J 1 J 1 J 1 J 1 J 1 J 1 J 1 J 1 J 1 J 1 J 1 J 1 J 1 J 1 J 1 J 1 J 1 J 1 J 1 J 1 J
j g w p a b n o g j y h a h k d s s s s s s s s s s s s s s s s s s s s s s s s s s s s s s s s s s s s s s s s s s s s s s s s s s s s s s s s s s s s s s s s s s s s s s s s s s s s s s s s s s s s
1 1 1 1 1 1 1 1 1 1 1 1 1 1 1 1 1 1 1 1 1 1 1 1 1 1 1 1 1 1 1 1 1 1 1 1 1 1 1 1 1 1 1 1 1 1 1 1 1 1 1
.5s0dlaewl jy golgojgol
JgBwGgCwBwBwSckDnN .N.B jduLkWgK JgRgRgRgRgRgRgRgRgRgRgRgRgRgRgRgRgRgRgRgRgRgRgRgRgRgRgRgRgRgRgRgRgRgRgRgRgRgRgRgRgRgRgRg
.
The equipment is configured for gas type 3a. Perform the following:
Replace the injectors (fig. 5) with the corresponding gas type that will be used (see table of injector characteristics); - To adjust the minimum gas pressure, use the screwdriver to turn the screw located on the valve (fig. 6) to the minimum position. For LPG (butane/propane), the screw must be fully tightened.
| ХAPAKTEPRICTКI FOPEJOK И JUNKLEPOB | ||||
| ГАЗОВБIE FOPEЛКИ | ||||
| АДАПТAU经K RAЗПИЧБIM TИПAM FA3A ТП П GA3A IДАЛECHINE FA3A, МБAP HOPM. | FOPEЛКА Ф JUNKLEPOB 1/100 mm | HOMINAJIbHЯ ТЕПЮВАМоц- HOCTь, BT | PACXOD | |
| Прирознii G20 20 | БыICTра 129 | 3000 | 286 | |
| Вспомогателова 77 | 1000 | 95 | # | |
| Wok 3 141 | 3500 | 333 | ||
| Сжиненьii G30/G31 28-30/37 | БыICTра 87 | 3000 | 218 | |
| Вспомогателова 50 | 1000 | 73 | # | |
| Wok 3 94 | 3500 | 254 | ||
Help
- INSTRUCTIONS FOR USE
- INSTRUCTIONS FOR THE INSTALLER
- ASSISTANCE
- DEAR CUSTOMER
- INSTALLATION
- USE
- GAS BURNERS (FIG. 1-3)
- N.B
- IMPORTANT
- GAS
- MAINTENANCE GAS/ELECTRICAL
- DO NOT USE STEAM CLEANERS
- POSITIONING (FIG. 2)
- GAS CONNECTION (FIG. 3)
- ELECTRICAL CONNECTION (FIG. 4)
- ADAPTATION TO VARIOUS TYPES OF GAS (FIG. 5)
- BEFORE CONTACTING AFTER-SALES SERVICE
- SPECIFY
- INDEX
- USER MANUAL
- EX.MO. SR. PERSONA
- J
- HELP
Brand : INDESIT
Model : DP2GS
Category : Dishwasher