
SEC-ALARM110 - Alarm bell KONIG - Free user manual and instructions
Find the device manual for free SEC-ALARM110 KONIG in PDF.


| Product type | Alarm sounder |
| Brand | Konig |
| Model | SEC-ALARM110 |
| Dimensions (approx.) | 100 x 80 x 40 mm |
| Weight (approx.) | 200 g |
| Power supply | 9V battery (not included) |
| Main functions | Emits a powerful audible alarm signal; compatible with third-party alarm systems |
| Sound level | Up to 110 dB |
| Sound type | Continuous or intermittent siren |
| Indicator light | Flashing red LED |
| Installation | Wall mountable |
| Housing material | Impact-resistant ABS |
| Operating temperature | -10°C to 50°C |
| Operating humidity | 10% to 90% non-condensing |
| Maintenance and cleaning | Clean with a soft, dry cloth |
| Safety | Use only recommended batteries; do not expose to water |
| Spare parts and repairability | No detachable parts; device not repairable |
| General information | Ideal for home alarm systems |
Frequently Asked Questions - SEC-ALARM110 KONIG
User questions about SEC-ALARM110 KONIG
0 question about this device. Answer the ones you know or ask your own.
Ask a new question about this device
Download the instructions for your Alarm bell in PDF format for free! Find your manual SEC-ALARM110 - KONIG and take your electronic device back in hand. On this page are published all the documents necessary for the use of your device. SEC-ALARM110 by KONIG.
USER MANUAL SEC-ALARM110 KONIG

SEC-ALARM100/110/120
Alarm systems
Introduction:
Multi functional Plug and Play wireless alarm system. Easy and quick installation. It operates on batteries, thus making adapters and wiring redundant. Secures houses, offi ces, shops, etc. in just a few minutes. The alarm unit with ultra loud siren and LED indicators shows which sensor is triggered. Supplied with 2x RF controlled remote controls to arm or disarm the system. Function switch on alarm unit for alarm or door bell use (chime).
SEC-ALARM100
1x Alarm unit
6x Door/window sensor
2x Remote control

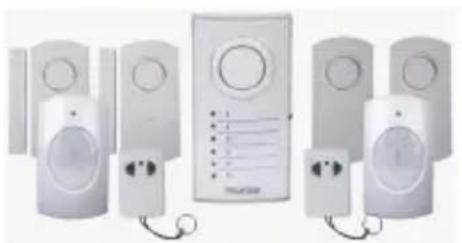
SEC-ALARM110
1x Alarm unit
2x Door/window sensor
2x PIR sensor
2x Vibrate sensor
2x Remote control
SEC-ALARM120
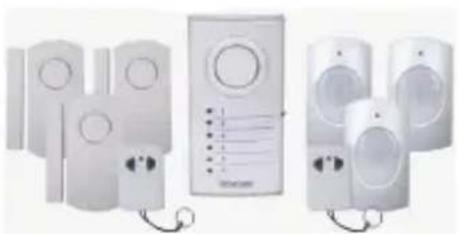
1x Alarm unit
3x Door/window sensor
3x PIR sensor
2x Remote control

Description alarm unit (SEC-ALARM100/110/120):
Figure 1

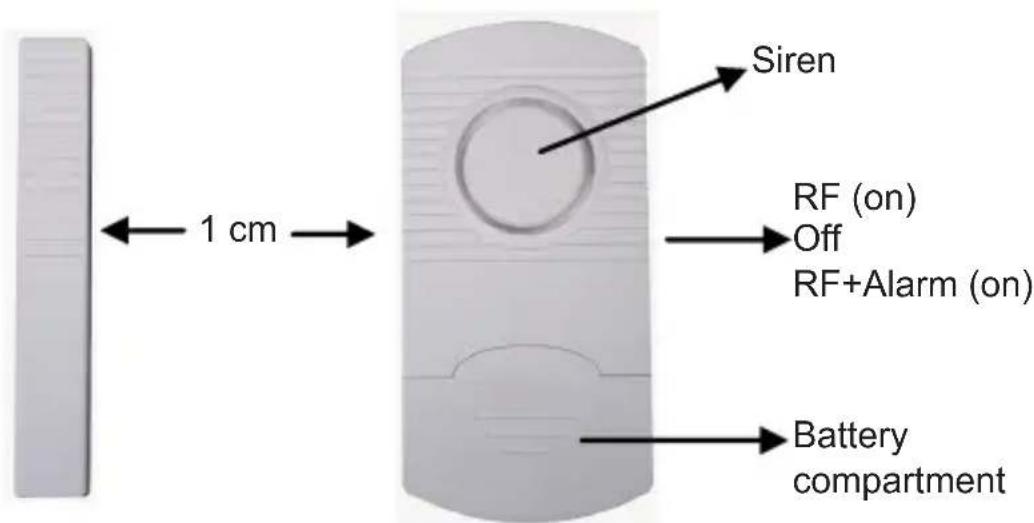
Description door/window sensor (SEC-ALARM100/110/120):
Figure 2
Description PIR sensor (SEC-ALARM110/120):
Figure 3

Description vibrate sensor (SEC-ALARM110):
Figure 4

Description remote control (SEC-ALARM100/110/120):
Figure 5

Installation SEC-ALARM100
- Insert, according to the diagram inside the battery compartment, (backside) the batteries for the alarm unit (3x AA).
- Install the door/window sensor with the adhesive tape to doors and windows. Note: maximum 1 cm distance between magnetic contact and sensor (see figure 2). Switch on the sensor to RF or RF+ALARM. If switched to RF+ALARM, the sensor will send, when triggered, a signal to the alarm unit and the siren of the sensor itself will also sound. In this case the siren of the sensor and the alarm unit will both sound.
- Remove the transparent front cover of the alarm unit to write down the position of the sensors corresponding with the numbered LED. (e.g. sensor 1 = front door, 2= kitchen window, etc.)
-
Install the alarm unit to a location. The distance between the alarm unit and the most far away door/window sensor may not exceed 60 m (open area)*
-
Switch on the alarm unit to ALARM or CHIME function. If switched to CHIME, the alarm unit will sound like a door bell when a door or window is opened. Switched to ALARM generates a 100 dB loud siren. When the alarm unit is switched on, the alarm is not armed (active) yet. Push the ON button on the remote control to arm the alarm and OFF to disarm. The delay time for entering and leaving the protected area is between 20\~25 seconds.
-
It's recommended to test the alarm system for correct operation with first use and every 3 months.
Procedure:
a) Switch the alarm unit on to ALARM or CHIME (for testing recommended).
b) Push the ON button on the remote control to arm the alarm.
c) Wait for 20\~25 seconds (delay time).
d) Open every door or window one by one and check if the corresponding LED lights up and the CHIME sounds.
e) Disarm the alarm if everything operates correct.
f) The alarm system is ready to use.
Note:
1) the alarm unit will give a conformation tone when armed or disarmed. The tone for CHIME is different as for ALARM.
2) If a sensor does not need to be switched on, it's possible to switch off every sensor individually with the on/off switch. In this case the sensor is no part of the alarm system anymore when armed.
3) A sensor switched to RF+ALARM will always give an alarm sound on the sensor itself, unless the alarm unit is armed or disarmed.
4) When a sensor is triggered and the siren of the alarm unit sounds, it needs to be switched off with on/off switch of the alarm unit. After that the alarm unit can be switched on again. When the alarm keeps on going after arming the system, check if every door or window is closed properly.
Installation SEC-ALARM110
- Insert, according to the diagram inside the battery compartment, (backside) the batteries for the alarm unit (3xAA).
- Install the door/window sensor with the adhesive tape to doors and windows. Note: maximum 1cm distance between magnetic contact and sensor (see figure 2). Switch on the sensor to RF or RF+ALARM. If switched to RF+ALARM, the sensor will send, when triggered, a signal to the alarm unit and the siren of the sensor itself will also sound. In this case the siren of the sensor and the alarm unit will both sound.
- Install the vibration sensor with the adhesive tape to windows (on the glass). Switch on the sensor to RF or RF+ALARM. If switched to RF+ALARM, the sensor will send, when triggered, a signal to the alarm unit and the siren of the sensor itself will also sound. In this case the siren of the sensor and the alarm unit will both sound. Note: the vibrate sensor is very sensitive. The slightest vibration will trigger the sensor. It's not recommend to install the vibrate sensor on windows near to doors. Slamming doors will trigger the sensor.
- Insert, according to the diagram inside the battery compartment, (backside) the batteries for PIR sensor (3xAAA). The PIR sensor needs to warm up for 30\~40 seconds for first use. In this period it can not detect motion. Install the PIR sensor at a height of 1\~1.5m for best performance. Do not install the PIR sensor into direct sunlight, facing towards windows, objects that move easily and heat or cold source.
- Remove the transparent front cover of the alarm unit to write down the position of the sensors corresponding with the numbered LED. (e.g. sensor 1 = front door, 2 = kitchen window, etc.).
-
Install the alarm unit to a location. The distance between the alarm unit and the most far away sensor may not exceed 60m (open area)*
-
Switch on the alarm unit to ALARM or CHIME function. If switched to CHIME, the alarm unit will sound like a door bell when a door or window is opened. Switched to ALARM generates a 100dB loud siren. When the alarm unit is switched on, the alarm is not armed (active) yet. Push the ON button on the remote control to arm the alarm and OFF to disarm. The delay time for entering and leaving the protected area is between 20\~25 seconds.
-
It's recommended to test the alarm system for correct operation with first use and every 3 months.
Procedure:
a) Switch on the alarm unit to ALARM or CHIME (for testing recommend).
b) Push the ON button on the remote control to arm the alarm.
c) Wait for 20\~25 seconds (delay time).
d) For testing door/window sensor, open every door or window one by one and check if the corresponding LED lights up and the CHIME sounds.
e) For testing PIR sensor, move around the PIR sensor and check if the corresponding LED lights up and the CHIME sounds. Note: the LED indicator on the PIR sensor lights up also.
f) For testing vibrate sensor, hit carefully on the window and check if the corresponding LED lights up and the CHIME sounds.
g) Disarm the alarm if everything operates correct.
h) The alarm system is ready to use.
Note:
1) the alarm unit will give a conformation tone when armed or disarmed. The tone for CHIME is different as for ALARM.
2) If a sensor does not need to be switched on, it's possible to switch off every sensor individually with the on/off switch. In this case the sensor is no part of the alarm system anymore when armed (except PIR sensor).
3) A sensor switched to RF+ALARM will always give an alarm sound on the sensor itself, unless the alarm unit is armed or disarmed.
4) When a sensor is triggered and the siren of the alarm unit sounds, it needs to be switched off with on/off switch of the alarm unit. After that the alarm unit can be switched on again. When the alarm keeps on going after arming the system, check if every sensor is installed properly.
Installation SEC-ALARM120
- Insert, according to the diagram inside the battery compartment, (backside) the batteries for the alarm unit (3xAA).
- Install the door/window sensor with the adhesive tape to doors and windows. Note: maximum 1cm distance between magnetic contact and sensor (see figure 2). Switch on the sensor to RF or RF+ALARM. If switched to RF+ALARM, the sensor will send, when triggered, a signal to the alarm unit and the siren of the sensor itself will also sound. In this case the siren of the sensor and the alarm unit will both sound.
- Insert, according to the diagram inside the battery compartment, (backside) the batteries for PIR sensor (3xAAA). The PIR sensor needs to warm up for 30\~40 seconds for first use. In this period it can not detect motion. Install the PIR sensor at a height of 1\~1.5m for best performance. Do not install the PIR sensor into direct sunlight, facing towards windows, objects that move easily and heat or cold source.
- Remove the transparent front cover of the alarm unit to write down the position of the sensors corresponding with the numbered LED. (e.g. sensor 1 = front door, 2= kitchen window, etc.).
-
Install the alarm unit to a location. The distance between the alarm unit and the most far away sensor may not exceed 60m (open area)*
-
Switch on the alarm unit to ALARM or CHIME function. If switched to CHIME, the alarm unit will sound like a door bell when a door or window is opened. Switched to ALARM generates a 100dB loud siren. When the alarm unit is switched on, the alarm is not armed (active) yet. Push the ON button on the remote control to arm the alarm and OFF to disarm. The delay time for entering and leaving the protected area is between 20\~25 seconds.
-
It's recommended to test the alarm system for correct operation with first use and every 3 months.
Procedure:
a) Switch on the alarm unit to ALARM or CHIME (for testing recommend).
b) Push the ON button on the remote control to arm the alarm.
c) Wait for 20\~25 seconds (delay time).
d) For testing door/window sensor, open every door or window one by one and check if the corresponding LED lights up and the CHIME sounds.
e) For testing PIR sensor, move around the PIR sensor and check if the corresponding LED lights up and the CHIME sounds. Note: the LED indicator on the PIR sensor lights up also.
f) Disarm the alarm if everything operates correct.
g) The alarm system is ready to use.
Note:
1) the alarm unit will give a conformation tone when armed or disarmed. The tone for CHIME is different as for ALARM.
2) If a sensor does not need to be switched on, it's possible to switch off every sensor individually with the on/off switch. In this case the sensor is no part of the alarm system anymore when armed (except PIR sensor).
3) A sensor switched to RF+ALARM will always give an alarm sound on the sensor itself, unless the alarm unit is armed or disarmed.
4) When a sensor is triggered and the siren of the alarm unit sounds, it needs to be switched off with on/off switch of the alarm unit. After that the alarm unit can be switched on again. When the alarm keeps on going after arming the system, check if every sensor is installed properly.
Specifications:
Alarm unit (fi gure 1):
• Power: 4.5 VDC (3x battery AA, not included)
- Standby current: < 1.5 mA
• Chime current: <90 mA
• Alarm current: <130 mA
• Alarm volume: 100 dB (0.5m)
• Chime volume: 90 dB (0.5m)
- Switch: alarm/chime/off
• LED indicator: 6
• Frequency: 433 MHz ±250 kHz
• Dimensions: 5.7(W) x 3.9(D) x 10.9(H)cm
- Delay time: 20 \~ 25 sec.
Door/window sensor (fi gure 2):
• Power: 4.5 VDC (3x battery LR44, included)
• Standby current: <10μA
• Transmission current: <6 mA
- Working distance: +/- 60 m (open area)*
• Alarm volume: 95 dB (0.5m)
- Switch: RF + alarm/RF/off
• Frequency: 433 MHz ±250 kHz
- Dimensions with magnet contact: 6(W) x 1(D) x 9.9(H)cm
PIR sensor (fi gure 3):
• Power: 4.5 VDC (3x battery AA, not included)
• Standby current: <100μA
• Transmission current: <5mA
- Working distance: +/- 60 m (open area)*
• Detecting range: 5\~8 m
• Detecting angle: 100° (horizontal) / 80° (vertical)
• Installation height: 1.5 m (recommended)
• Frequency: 433 MHz ±250 kHz
• Dimensions: 6(W) x 5(D) x 9.8(H)cm
Vibrate sensor (fi gure 4):
• Power: 4.5 VDC (3x battery LR44, included)
• Standby current: <10μA
• Transmission current: <6mA
- Working distance: +/- 60m (open area)*
• Frequency: 433 MHz ±250 kHz
• Alarm volume: 95 dB (0.5m)
• Dimensions: 4.8(W) x 1(D) x 9.9(H)cm
Remote control (fi gure 5):
• Power: 12 VDC (3x battery LR44, included)
- Standby current: 0
• Transmission current: <10 mA
- Working distance: +/- 30 m (open area)*
- Buttons: on/off
- LED indicator: 1
• Frequency: 433 MHz ±250 kHz
• Dimensions: 3.5(W) x 1.3(D) x 5.2(H)cm
* Working distance of remote control and sensors can vary due to environmental circumstances.
Safety precautions:
Do not expose the product to water or moisture.
Maintenance:
Clean only with a dry cloth. Do not use cleaning solvents or abrasives.
Warranty:
No guarantee or liability can be accepted for any changes and modifications of the product or damage caused due to incorrect use of this product.
General:
Designs and specifications are subject to change without notice. All logos brands and product names are trademarks or registered trademarks of their respective holders and are hereby recognized as such. We are not responsible for damage and/or burglary due to incorrect operation of this product.

Attention:
This product is marked with this symbol. It means that used electrical and electronic products should not be mixed with general household waste. There is a separate collections system for these products.
Declaration of conformity
We,
Nedis B.V.
De Tweeling 28
Declare that product:
Name: Konig Electronic
Model: SEC-ALARM100, 110, 120
Description: Wireless alarm system
Is in conformity with the following standards
Art. 3.1(a): EN 50371:2002, EN 60950-1:2006/A11:2009
Art. 3.1(b): EN 301 489-1/-3
Art. 3.2: EN 300 220-1/-2
Following the provisions of the R&TTE 1999/5/EC directive.
's-Hertogenbosch, 01-11-2011

SEC-ALARM110
SEC-ALARM120
Installation SEC-ALARM100
Installation SEC-ALARM110
Installation SEC-ALARM120
Name: Konig Electronic
Modell: SEC-ALARM100, 110, 120
SEC-ALARM110
SEC-ALARM120
Installation SEC-ALARM100
Installation SEC-ALARM110
Installation SEC-ALARM120
SEC-ALARM110
1x Alarmeenheid
2x Deur-/raamsensoren
2x PIR-sensoren
2x Vibratiesensoren
2x Afstandsbedieningen

SEC-ALARM120
1x Alarmeenheid
3x Deur-/raamsensoren
3x PIR-sensoren
2x Afstandsbedieningen

SEC-ALARM110
SEC-ALARM120
ALARMA DE SEGURIDAD 110
ALARMA DE SEGURIDAD 120
SEC-ALARM110
SEC-ALARM120
SEC-ALARM110
SEC-ALARM120
- Painikkeet: on/off
• LED-merkkivalo: 1
SEC-ALARM100/110/120
Larmsystem
Inledning:

SEC-ALARM110
SEC-ALARM120
Popis poplachových jednotek (SEC-ALARM100/110/120):
Obr. 1

Instalace SEC-ALARM120
Model: SEC-ALARM100/110/120
SEC-ALARM100/110/120 Sisteme de alarmă
Introducere:
SEC-ALARM110
SEC-ALARM120
Descrierea centralei (SEC-ALARM100/110/120):
Figura 1

Description: Wireless Alarm System


- SEC-ALARM100/110/120
- ALARM SYSTEMS
- INTRODUCTION
- SEC-ALARM100
- SEC-ALARM110
- SEC-ALARM120
- DESCRIPTION REMOTE CONTROL (SEC-ALARM100/110/120)
- INSTALLATION SEC-ALARM100
- NOTE
- INSTALLATION SEC-ALARM110
- INSTALLATION SEC-ALARM120
- SPECIFICATIONS
- ALARM UNIT (FI GURE 1)
- DOOR/WINDOW SENSOR (FI GURE 2)
- PIR SENSOR (FI GURE 3)
- VIBRATE SENSOR (FI GURE 4)
- REMOTE CONTROL (FI GURE 5)
- SAFETY PRECAUTIONS
- MAINTENANCE
- WARRANTY
- GENERAL
- ATTENTION
- DECLARATION OF CONFORMITY
- ALARMA DE SEGURIDAD 110
- ALARMA DE SEGURIDAD 120
- LARMSYSTEM
- INLEDNING
- INSTALACE SEC-ALARM120
- SEC-ALARM100/110/120 SISTEME DE ALARMĂ
- INTRODUCERE
Brand : KONIG
Model : SEC-ALARM110
Category : Alarm bell