
NVS30 - Server Intellinet - Free user manual and instructions
Find the device manual for free NVS30 Intellinet in PDF.


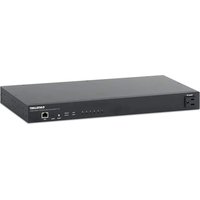
| Product Type | 1U Rackmount Server |
| Brand | Intellinet |
| Model | NVS30 |
| Dimensions (W x D x H) | 48.3 x 55.0 x 4.4 cm |
| Weight | 12.5 kg |
| Power Supply | 550W Redundant Dual Power Supply |
| Processor | Intel Xeon E-2300, up to 8 cores |
| RAM Memory | 32GB DDR4 ECC, expandable to 128GB |
| Storage | 2x 3.5" Hot-Swap SATA/SAS Bays |
| Network Interfaces | 2 Gigabit Ethernet Ports, 1 IPMI Management Port |
| Main Functions | Virtualization, NAS Storage, Application Server |
| Cooling | Redundant Fans with Failure Detection |
| Operating Temperature | 10°C to 35°C |
| Relative Humidity | 20% to 80% non-condensing |
| Power Consumption | 250W idle, 450W full load |
| Maintenance and Cleaning | Regular dusting of ventilation grilles, use a soft cloth |
| Security | Lockable Chassis, Integrated TPM 2.0 Module |
| Spare Parts and Repairability | Hot-swappable hard drives, fans, power supply, memory |
| Warranty | 3 years parts and labor |
| Certifications | CE, FCC, RoHS |
Frequently Asked Questions - NVS30 Intellinet
User questions about NVS30 Intellinet
0 question about this device. Answer the ones you know or ask your own.
Ask a new question about this device
Download the instructions for your Server in PDF format for free! Find your manual NVS30 - Intellinet and take your electronic device back in hand. On this page are published all the documents necessary for the use of your device. NVS30 by Intellinet.
USER MANUAL NVS30 Intellinet
natural_image
Four green military-style security camera units with red checkmarks and antennas, arranged in a row (no visible text or symbols)natural_image
Close-up of a white surveillance camera with 'INTELLINIT' branding on the lens (no additional text or symbols visible)
natural_image
Close-up of a black camera lens with visible lens and sensor (no text or symbols)
natural_image
Collage of outdoor scenes including a building, trees, and vehicles (no visible text or symbols)
natural_image
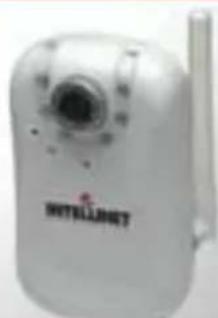
White portable electronic device with a camera lens and antenna (no visible text or symbols)DEUTSCH
natural_image
Symbol of a trash bin crossed out by a diagonal line, with no text or labels present.Safety and Regulatory Notices

This equipment has been tested and found to comply with the limits for a Class B computing device pursuant to Subpart B of Part 15 of FCC rules, which are designed to provide reasonable protection against such interference when operated in a
commercial environment.

Operation of this equipment in a residential area is likely to cause interference, in which case the user, at his own expense, will be required to take whatever measures may be required to correct the interference. This digital equipment fulfills the requirements for radiated emission according to limit B of
EN55022/1998, and the requirements for immunity according to EN55024/1998 residential, commercial and light industry.
R&TTE Compliance Statement

This equipment complies with all the requirements of DIRECTIVE 1999/5/EC OF THE EUROPEAN PARLIAMENT AND THE COUNCIL of March 9, 1999, on radio equipment and telecommunication terminal equipment and the mutual recognition of their conformity (R&TTE). The R&TTE Directive repeals and replaces Directive 98/13/EEC (Telecommunications Terminal Equipment and Satellite
Earth Station Equipment) as of April 8, 2000.
Waste Electrical & Electronic Equipment
Disposal of Electric and Electronic Equipment
(Applicable in the European Union and other European countries with separate collection systems)

natural_image
Symbol of a trash bin crossed with a diagonal line, no text or numbers presentThis symbol on the product or its packaging indicates that this product shall not be treated as household waste.
Instead, it should be taken to an applicable collection point for the recycling of electrical and electronic equipment. By ensuring this product is disposed of correctly, you will help prevent potential negative consequences to the environment and human health, which could otherwise be caused by inappropriate waste handling of this product. If your equipment contains easily removable
batteries or accumulators, dispose of these separately according to your local requirements. The recycling of materials will help to conserve natural resources. For more detailed information about recycling of this product, contact your local city office, your household waste disposal service or the shop where you purchased this product. In countries outside of the EU: If you wish to discard this product, contact your local authorities and ask for the correct manner of disposal.
Connecting to the Camera
Connect the RJ45 network cable from the camera's LAN port to your network; e.g., the router or a LAN switch, then power on the camera. The boot sequence will take about one minute. You will need to use the camera's power adapter, unless your camera supports PoE. In that case you can connect the RJ45 cable to a PoE-enabled switch or injector to power the camera.
By default, the network camera (or video server) searches for a DHCP server on the network and obtains an IP address automatically. A very common DHCP server is a router, a device that is found on most networks.
The presence of a DHCP server on your network simplifies the installation and users with limited knowledge of TCP/IP networks can install the network camera in minutes. If no DHCP server is found, the network camera will revert to its default IP address: 192.168.1.221.
On Windows systems, you want to use the IP Installer utility that finds the camera on the network and lets you make changes to the configuration.
Once the camera is set up properly, it can be accessed with the computer's Web browser. The following sections describe the procedure for Windows, MacOS and Linux users.
Windows XP, Vista and Windows 7
Insert the Installation CD into the CD or DVD drive. After a few moments, the CD will automatically start and display the screen to the right. If that does not happen, you need to browse the CD with Windows Explorer and double-click the autorun.exe file.

1. User Manuals
The user manual for the
INTELLINET NETWORK SOLUTIONS Network Camera is available in electronic form on the installation CD, along with user manuals in different languages.
If you encounter differences between the screen shots shown in the user manual and the actual screen contents, it is recommended that you open the manual from the CD, as it may be a newer edition than the printed version.
2. IP Installer for Windows
This utility is designed to find the network camera on your network and lets you make changes to the configuration.

Click on "Yes" to begin the installation.

When the program starts, you are presented with the screen shown above. The IP Installer utility lists all cameras that can be found on your network. With this utility you can make changes to the configuration, perform a firmware upgrade, restore the camera to factory default values, and reboot the camera. Note: It may take up to three minutes for IP Installer to show a camera that has been recently (re-)started.
Refer to the user manual for more detailed instructions on the camera setup.
3. Video Surveillance Software
Refer to user manual on the CD for the 16-channel NVR (network video recorder).
MacOS
The installation on Apple systems running MacOS X does not involve the INTELLINET installation CD. The INTELLINET NETWORK SOLUTIONS network camera supports Apple's Bonjour service.
Open the Safari Web browser and open the Bookmarks toolbar, where you will find the Bonjour link.
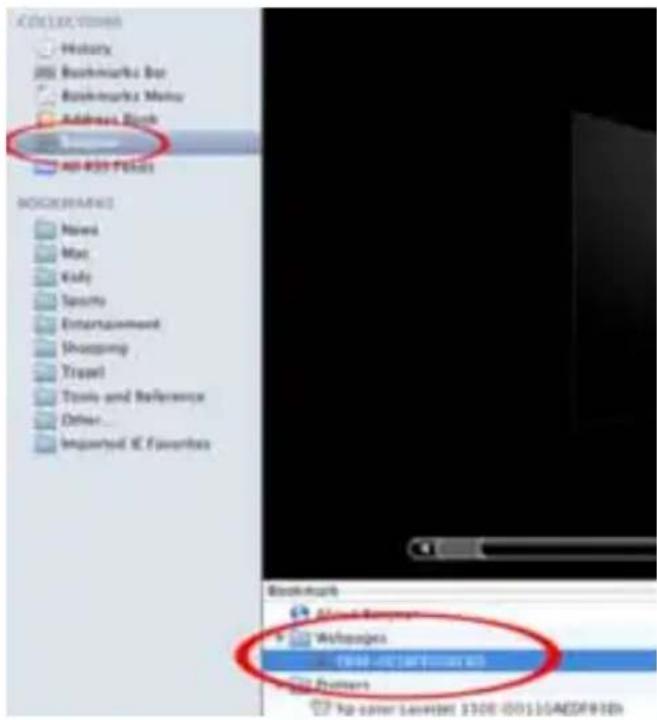
The Network Camera is shown in the category Webpages. In order to connect to the camera, double-click the circled link.
Safari then connects to the camera and a message may appear: "An applet from "xxxxx" is requesting unrestricted access to your computer."
Click on "Allow" and you will see the camera live image a few moments later.
Refer to the user manual for more detailed instructions on the camera setup.
Linux
The installation on Linux systems does not require any special software. The network camera is compatible to Web browsers such as Firefox and Konqueror.
The initial installation requires the setup of the camera's IP address. As the camera by default obtains an IP address from a DHCP server in the network (e.g., a router), you can access the camera as soon as you have obtained the IP address from the router's DHCP client log. Alternatively, you may use Bonjour (mDNSResponder), which is also available for Linux.
If no DHCP server is connected to your network, the camera reverts to its default IP address: 192.168.1.221. In order to gain access to the camera, you need to change the IP settings of your system manually. Set up the IP address to be in range of 192.168.1.xxx (where xxx is not 221). Then open your Web browser and connect to address http://192.168.1.221. Log in to the camera and click on the Settings link to open the administrator menu. Refer to section 5.2 Settings Page in the user manual for more details.
Hardware Installation and Additional Information
For additional information about the installation process, the configuration and functions of the camera or network video server, please refer to the user manual on the INTELLINET installation CD.
ESPAÑOL
Waste Electrical & Electronic Equipment
Disposal of Electric and Electronic Equipment
(Applicable in the European Union and other European countries with separate collection systems)

natural_image
Symbol of a trash bin crossed out by a diagonal line, with no text or numbers present.natural_image
Symbol of a trash bin crossed with a diagonal line and a horizontal bar below (no text or numbers present)Ovaj simbol na proizvodu ili pakiranju označava da se taj proizvod ne tretira kao kućni otpad, već bi trebao biti odnesen na posebno odlagalište za reciklažu električne i elektroničke opreme.
Kliknite "Yes" za početak instalacije.

Kada se program pokrene, pojavit će se ekran kao na slici iznad. IP Installer prikazuje sve kamere koje se nalaze na mreži. Možete promijeniti postavke konfiguracije, nadograditi firmware, vratiti kameru na tvorničke postavke i ponovno pokrenuti kameru. Napomena: IP Installeru može trebati do tri minute da prikaže kameru koja je bila nedavno ponovno pokrenuta.
Pogledajte upute za uporabu za detaljnije pojašnjenje postavki kamere.
3. Software za video nadzor
Pogledajte upute za uporabu na CD-u za 16-kanalni NVR (mrežni video snimač).
MacOS
Na Apple uređajima koji koriste MacOS X, INTELLINET instalacijski CD ne sadrži instalacijski postupak. INTELLINET NETWORK SOLUTIONS mrežna kamera podržava Apple's Bonjour servis.
Otvorite Safari Web preglednik i otvorite Bookmarks alatnu traku, gdje ćete pronaći Bonjour poveznicu.

Mrežna kamera je prikazana u kategoriji "Webpages". Za spajanje na kameru, dvostruki klik na zaokruženu poveznicu.
Safari se priključuje na kameru i pojavljuje se poruka: "An applet from "xxxxx" is requesting unrestricted access to your computer."
natural_image
Symbol of a trash bin crossed with a diagonal line, no text or numbers presentEnglish For warranty information, go to www.intellinet-network.com/warranty.
INTELLINET NETWORK SOLUTIONS™ offers a complete line of active and passive networking products.
Ask your local computer dealer for more information or visit
www.intellinet-network.com
Copyright © INTELLINET NETWORK SOLUTIONS
All products mentioned are trademarks or registered trademarks of their respective owners.

- DEUTSCH
- Safety and Regulatory Notices
- R&TTE Compliance Statement
- Waste Electrical & Electronic Equipment
- Disposal of Electric and Electronic Equipment
- (Applicable in the European Union and other European countries with separate collection systems)
- Connecting to the Camera
- Windows XP, Vista and Windows 7
- User Manuals
- IP Installer for Windows
- Video Surveillance Software
- MacOS
- Linux
- Hardware Installation and Additional Information
- ESPAÑOL
- Software za video nadzor
Brand : Intellinet
Model : NVS30
Category : Server