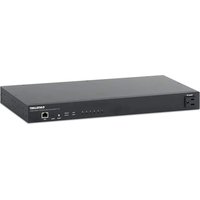
120234 - Server Intellinet - Free user manual and instructions
Find the device manual for free 120234 Intellinet in PDF.


| Product Type | Smart PDU / Surge Protector |
| Brand | Intellinet |
| Model | 120234 |
| Dimensions | 19 inches (1U rack), height 4.4 cm, depth approx 20 cm |
| Weight | Approximately 1.5 kg |
| Power Input | AC IEC 3-pin input, 100-240 V, 50/60 Hz |
| Number of Outlets | 6 controlled outlets (NEMA 5-15R) + 1 always-on outlet |
| Main Functions | Power distribution and monitoring, remote control via web browser, surge protection, LED status display, rack or desktop mounting |
| Connectivity | 1 RJ45 Ethernet port for IP management |
| Buttons | Power on/off, system reset (5-20s) |
| Care and Cleaning | Disconnect device before cleaning; use a dry, non-abrasive cloth |
| Safety | Class I equipment, mandatory grounding; do not expose to moisture |
| Spare Parts and Repairability | Not user-repairable; contact technical support for any issues |
| General Information | Manual downloadable for free; product registration possible at intellinet-network.com |
Frequently Asked Questions - 120234 Intellinet
User questions about 120234 Intellinet
0 question about this device. Answer the ones you know or ask your own.
Ask a new question about this device
Download the instructions for your Server in PDF format for free! Find your manual 120234 - Intellinet and take your electronic device back in hand. On this page are published all the documents necessary for the use of your device. 120234 by Intellinet.
USER MANUAL 120234 Intellinet
19" 1U Rackmount 6-Outlet Smart PDU / Surge Protector
Instructions
Model 120234 (IPDU-SUS6OUT-C13IN-1U)
Important: Read before use. • Importante: Leer antes de usar.
natural_image
Exterior view of an IntelInet network device with visible ports and control buttons (no readable text beyond branding)
INTELLINET®
NETWORK SOLUTIONS
For additional benefits:
Scan to register your product warranty

or go to: register.intellinet-network.com/r/120234
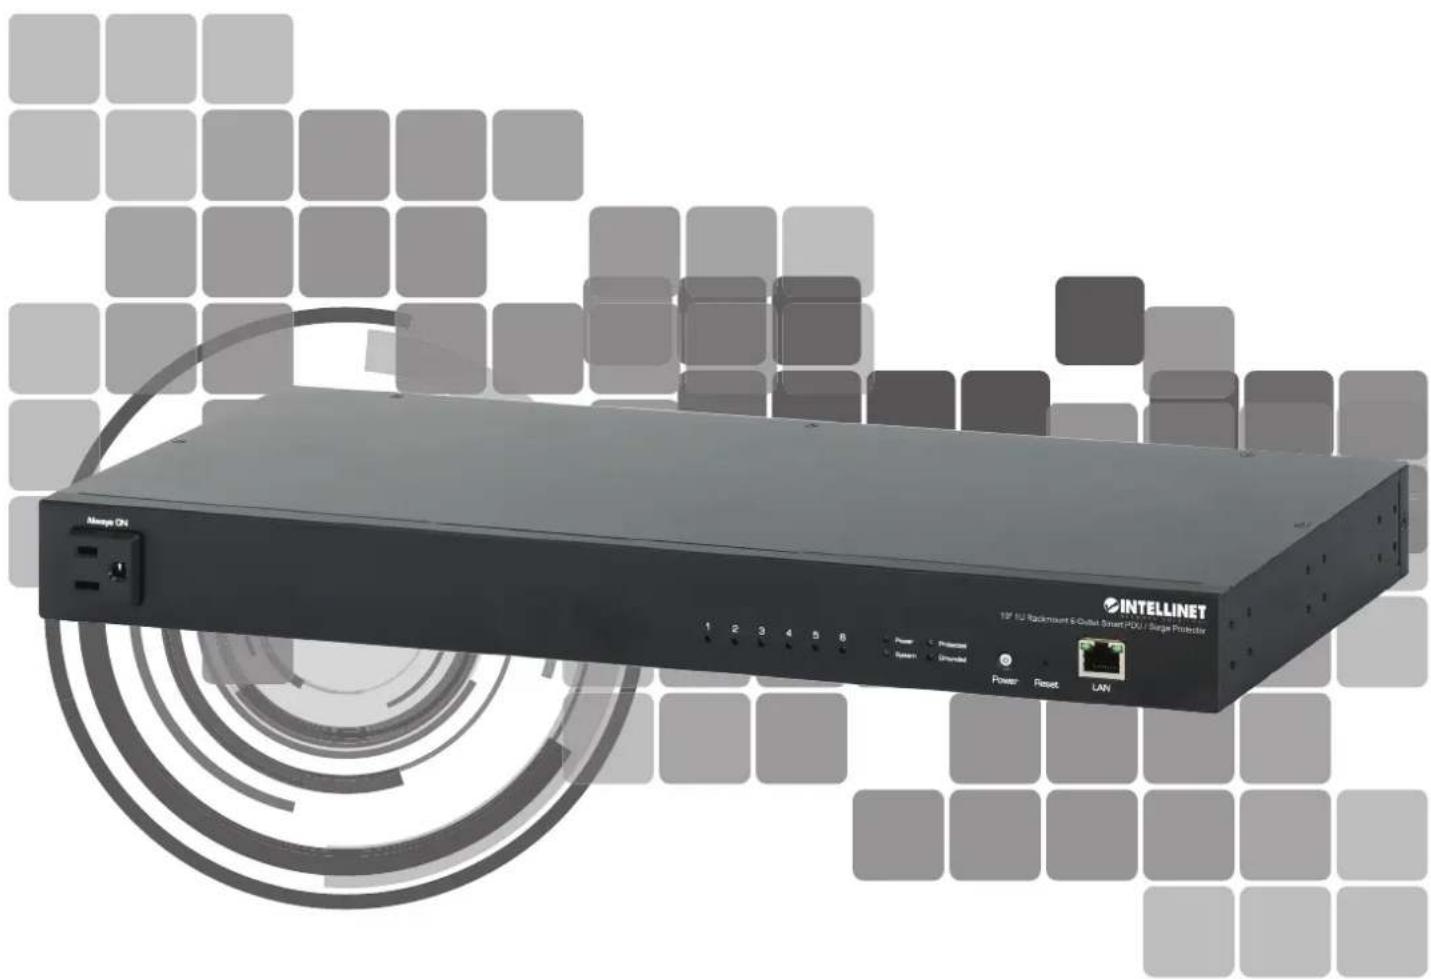
The 19" 1U Rackmount 6-Outlet Smart PDU / Surge Protector safely distributes and monitors power to the equipment in your network rack, server room or data center. It features 6 metered US NEMA 5-15R outlets with remote access and control, complimented by one non-metered bypass outlet. Access and manage the PDU via a web browser using the RJ45 Ethernet port on the front panel, while monitoring the delivered power in voltage and current. It can be installed horizontally in a standard 19" rack with the included rackmount brackets, or placed on its rubber feet for non-slip desktop use.
This guide presents the basic steps to set up and operate this device.
For the user manual and specifications, visit intellinet-network.com. Register your product at register.intellinet-network.com/r/120234 or scan the QR code on the cover.

Front Panel
A B C D E F

natural_image
Pure electrical circuit lines without any symbolsA Always-On Outlet – Provides constant power.
B LED indicators – Show if the outlets are supplying power to connected devices.
C Status Indicator – Displays the status of the PDU (e.g. Power, System Status, Surge Protection, and Grounding).
D AC Power Button – Press to manually turn the outlet on and off.
E Reset Button – Press and hold:
- 5\~8 seconds to reset the system
- 10 \~20 seconds to restore to factory defaults.
F Ethernet Port – Connects to network for IP control and monitoring.

Rear Panel
ABC

A Controlled outputs 1-6 – Provides power for connected devices. All outputs are switchable (IP controlled).
B Circuit Breaker Reset Button- Press this button to restart the PDU to provide overload protection.
C AC Input - For 3-pin IEC power cord

Placement
Desktop Installation
Prior to use, it is recommended that the switch be placed:
- on a level surface that can support the weight of the PDU (and possibly other objects);
- with at least 25 mm (approx. 1") of clearance for ventilation, shock or vibration (attach rubber feet on the bottom at each corner of the PDU);
- away from sources of electrical noise (radios, transmitters, broadband amplifiers);
- where it cannot be affected by excessive moisture;
- and within 100 m (approx. 328') of network devices it's to be connected to.
Wall Installation
1 Disconnect any cables from the PDU.
2 Position a bracket over the mounting holes on one side of the PDU and secure it in place with screws.
3 Repeat Step 2 on the other side of the PDU
4 Install screws into the wall at the distance of the spaces on the brackets of the PDU.
5 Position the PDU in the rack and screw the brackets to the rack.
6 Reconnect any cables.
Rack Installation
The PDU includes brackets and screws for optional rack mounting.
1 Disconnect any cables from the PDU.
2 Position a bracket over the mounting holes on one side of the PDU and secure it in place with screws.
3 Repeat Step 2 on the other side of the PDU.
4 Position the PDU in the rack and screw the brackets to the rack.
5 Reconnect any cables.

Connections
1 Connect the power cord to the PDU and plug the other end of the cord into an electrical outlet. Check the power cord is plugged into a grounded outlet. Verify that the Power and System LEDs on the PDU are lit. Wait for the PDU to complete booting up. This process may take several minutes.
2 Connect one end of the Cat5/6 Ethernet cable to the Ethernet port on the front panel and the other end to the Ethernet port on the computer.

Basic Web-Based Browser Management
The default PDU address setting is static IP address. Use the following IP address settings:
• IP Address: 192.168.2.X
(last octet can be any numbers)
- Subnet mask: 255.255.255.0
Login to the PDU:
1 Open your Web browser.
2 Enter http:// and the IP address of the PDU in the Address field. The default management IP address is 192.168.2.1.
3 Press Enter to display the login screen. In the Username field, enter admin; in the Password field, enter SN on the bottom of the switch. Click OK.
natural_image
Pure electrical circuit lines without any symbolsnatural_image
Pure electrical circuit lines without any symbols(Applicable In The European Union And Other European Countries With Separate Collection Systems)
ENGLISH: This symbol on the product or its packaging means that this product must not be treated as unsorted household waste. In accordance with EU Directive 2012/19/EU on Waste Electrical and Electronic Equipment (WEEE), this electrical product must be disposed of in accordance with the user's local regulations for electrical or electronic waste. Please dispose of this product by returning it to your local point of sale or recycling pickup point in your municipality.
This equipment has been tested and found to comply with the limits for a Class A digital device, pursuant to Part 15 of the Federal Communications Commission (FCC) Rules. These limits are designed to provide reasonable protection against harmful interference when the equipment is operated in a commercial environment. This equipment generates, uses and can radiate radio frequency energy, and if not installed and used in accordance with the instruction manual may cause harmful interference to radio communications.
Operation of this equipment in a residential area is likely to cause harmful interference, in which case the user will be required to correct the interference at his own expense. Any changes or modifications made to this equipment without the approval of the manufacturer could result in the product not meeting the Class A limits, in which case the FCC could void the user's authority to operate the equipment.
CE/UKCA
ENGLISH: This device complies with the requirements of CE 2014/30/EU (UKCA Electromagnetic
Compatibility Regulations 2016) and / or 2014/35/EU (UKCA Electrical Equipment [Safety] Regulations 2016). The Declaration of Conformity for is available at:
WARNING – Class I Equipment
This equipment must be earthed. The power plug must be connected to a properly wired earth ground socket outlet. An improperly wired socket outlet could place hazardous voltages on accessible metal parts
CAUTION: Risk of Explosion if Battery is replaced by an Incorrect Type.
Dispose of Used Batteries According to the Instructions.
CAUTION:
- Lithium Battery Caution: Danger of explosion if battery is incorrectly replaced Replace only with same or equivalent type. Dispose batteries according to manufacturer's instructions
- Disposal of a BATTERY into fire or a hot oven or mechanically crushing or cutting of a BATTERY that can result in an EXPLOSION
• Leaving a BATTERY in an extremely high temperature surrounding environment that can result in an EXPLOSION or the leakage of flammable liquid or gas - A BATTERY Subjected to extremely low air pressure that may result in an EXPLOSION or the leakage of flammable liquid or gas.
WARNING:
There is danger of explosion if the battery is mishandled or incorrectly replaced. Replace only with the same type of battery. Do not disassemble it or attempt to recharge it outside the System. Do not crush puncture dispose of in fire short the external contacts, or expose to water or the liquids, Dispose of the battery in accordance with local regulations and instructions from your service provider
WARNING: - BATTERIES
- When inserting batteries, note the correct polarity (+ and - markings) and insert the batteries accordingly. Failure to do so could result in the batteries leaking or exploding.
- Only use batteries (or rechargeable batteries) that match the specified type.
- Before you insert the batteries, clean the battery contacts and the polar contacts.
- Do not allow children to change batteries without supervision.
- Do not mix old and new batteries or batteries of a different type or make.
- Remove the batteries from products that are not being used for an extended period (unless these are being kept ready for an emergency).
- Do not short-circuit batteries.
- Do not charge batteries.
- Do not throw batteries in a fire.
- Keep batteries out of the reach of children.
- Never open, damage or swallow batteries or allow them to enter the environment. They can contain toxic, environmentally harmful heavy metals.
- Immediately remove and dispose of dead batteries from the product.
- Avoid storing, charging or using the device in extreme temperatures and extremely low atmospheric pressure (for example, at high altitudes).
support.intellinet-network.com/barcode/120234





North America
IC Intracom America
550 Commerce Blvd.
Oldsmar, FL 34677 USA
Asia & Africa
IC Intracom Asia
4-F, No. 77, Sec. 1, Xintai 5th Rd.
Xizhi Dist., New Taipei City 221, Taiwan
Europe
IC Intracom Europe
Löhbacher Str. 7, D-58553
Halver, Germany
All trademarks and trade names are the property of their respective owners.
All trademarks and trade names are the property of their respective owners. © IC Intracom. All rights reserved. Intellinet Network Solutions is a trademark of IC Intracom, registered in the U.S. and other countries.


Brand : Intellinet
Model : 120234
Category : Server