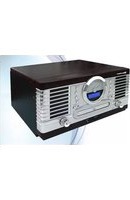
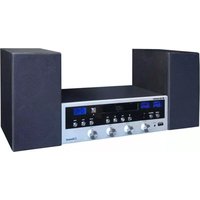
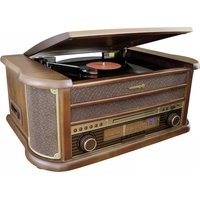
HIF-9088TUMPN - Hi-Fi System ROADSTAR - Free user manual and instructions
Find the device manual for free HIF-9088TUMPN ROADSTAR in PDF.


| Product Type | Hi-Fi System |
| Brand | Roadstar |
| Model | HIF-9088TUMPN |
| Dimensions (W x H x D) | Approx. 360 x 140 x 250 mm (main unit) |
| Weight | Approx. 3.5 kg (main unit with speakers) |
| Power Supply | AC 230V ~ 50Hz |
| Power Consumption | 30 W (max) |
| Supported Media | CD, CD-R, CD-RW, USB (MP3/WMA) |
| Radio Bands | FM (87.5 - 108 MHz) |
| Bluetooth | Yes (wireless streaming) |
| Output Power | 2 x 10 W RMS (stereo) |
| Display | LED digital display |
| Remote Control | Included |
| Speaker Configuration | 2-way bass reflex speakers (pair) |
| Auxiliary Input | 3.5 mm stereo jack |
| Headphone Jack | 3.5 mm stereo jack |
| Antenna | FM wire antenna (included) |
| Clock/Timer | Yes (alarm/sleep timer) |
| Cleaning | Wipe with dry soft cloth; do not use solvents |
| Safety Precautions | Do not expose to water or moisture; unplug during storms |
Frequently Asked Questions - HIF-9088TUMPN ROADSTAR
User questions about HIF-9088TUMPN ROADSTAR
0 question about this device. Answer the ones you know or ask your own.
Ask a new question about this device
Download the instructions for your Hi-Fi System in PDF format for free! Find your manual HIF-9088TUMPN - ROADSTAR and take your electronic device back in hand. On this page are published all the documents necessary for the use of your device. HIF-9088TUMPN by ROADSTAR.
USER MANUAL HIF-9088TUMPN ROADSTAR
CD/MP3 PLAYER WITH TURNTABLE, STEREO RADIO, CASSETTE TAPE AND USB/SD ENCODING
HIF-9088TUMP
Instruction manual
INDEX
English Page 1

- Your new unit was manufactured and assembled under strict ROADSTAR quality control. Thank you for purchasing our product. Before operating the unit, please read this instruction manual carefully. Keep it also handy for further future references.
- Votre nouvel appareil a été fabriqué et monté en étant soumis aux nombreux tests ROADSTAR. Nous espérons que cet appareil vous donnera entière satisfaction. Avant de vous adonner à ces activités, veuillez lire attentivement de manuel d'instructions. Conservezle à pontée de main à fin de référence ultérieure.
-
Vuestro nuevo sistema ha sido construido según las normas estrictas de control de calidad ROADSTAR. La felicitarnos y le damos las gracias por su elección de este aparado. Por favor leer el manual antes de poner en funcionamiento el equipo y guardar esta documentación en case de que se necesite nuevamente.
-
Ihr neues Gerät wurde unter Beachtung der strengen ROADSTAR-Qualitätsvorschriften gefertigt. Wir danken Ihnen für den Kauf unseres Produktes. Bitte lesen Sie diese Bedienungsanleitung durch, und heben Sie sie auf, um jederzeit darin nachschlagen zu können.
- Il vostro nuovo apparecchio è stato prodotto ed assemblato sotto lo stretto controllo di qualità ROADSTAR.


WARNINGS

The exclamation point within the triangle is a warning sign alerting the user of important instructions accompanying the product.

The lightening flash with arrowhead symbol within the triangle is a warning sign alerting the user of "dangerous voltage" inside the unit.

To reduce the risk of electric shock, do not remove the cover. No user serviceable parts inside the unit. Refer all servicing to qualified personnel.
230v\~
This unit operates on 230V \~ 50Hz. If the unit is not used for a long period of time, remove the plug from the AC mains.

This unit must not be exposed to moisture or rain.

The power switch in this unit is mounted on the secondary circuit and does not disconnect the whole unit from the mains in OFF position.

Ensure all connections are properly made before operating the unit.

This unit should be positioned so that it is properly ventilated. Avoid placing it, for example, close to curtains, on the carpet or in a built-in installation such as a bookcase.

Do not expose this unit to direct sunlight or heat radiating sources.
2
EnglishEng
HIF-9088TUMPN
CD/MP3 PLAYER WITH TURNABLE STEREO RADIO, CASSETE TAPE AND USB/SD ENCODING
INSTRUCTION MANUAL
Please read this instruction manual carefully and familiarize yourself with your new HiFi system before using it for the first time. Please retain this manual for future reference.
LOCATION OF CONTROLS
1) DUST COVER
2) CD PLAY/PAUSE BUTTON
3) CD SKIP UP
4) MP3 ALBUM BUTTON
5) DOWN ◀ BUTTON
6) CASSETTE EJECT BUTTON
7) VOLUME KNOB
8) MODE BUTTON
9) RECORD BUTTON
10) CD DOOR
11) CD DOOR OPEN BUTTON
the infra-red transmitter requires 2 pcs AAA size battery for operation.
BUTTON DESCRIPTION
1) NUMERIC KEYS.
2) INFO in cd/usb stop mode, press to select encoding bitrate.
3) REC in cd or phono mode, press to active recrdin function.
4) REP/INTRO/RAN in cd/usb mode, press to activ repeat / intro / random function.
5) PROGRAM in cd/usb mode, press to active programming function.
6) PLAY/PAUSE▶ in cd/usb mode, press once to start playback. press again to enter pause mode.
7) SKIP/SEARCH forward▶ press once to skip to next track, press & hold for search forward skip/search backward◀ press once to skip to previous tack.press & hold for search backward.
8) STOP■ in cd/usb mode, press to stop playback or cancel the stored program.
9) ALBUM up ▲/down▼ mp3 mode, press to select folder up or down.
10) USB/SD in cd/usb mode, press to select cd or usb or SD function repeatedly.
11) MUTE
12) BITRATE

4
EnglishEng
CONNECTING TO POWER
Before switching on make sure that the voltage of your electricity supply is the same as that indicated on the rating plate.
For your own safety read the following instructions carefully before attempting to connect this unit to the mains.
This unit is designed to operate on AC 230V 50Hz current only. Connecting it to other power sources may damage the unit.
CAUTION
To prevent electric shock disconnect from the mains before removing cover. No user serviceable parts inside. Refer servicing to qualified service personnel.
SAFETY PRECAUTION
Do not allow this unit to be exposed to rain or moisture.
Mains Supply: 230V 50Hz - AC only

This symbol means that this unit is double insulated. An earth connection is not required.
POWER SUPPLY
Remove the stereo carefully from the box, retaining the packaging for future use.
AC POWER OPERATION
Connect the plug to a mains power inlet 230V AC \~ 50 Hz.
MW/FM TUNER
Operation
- Set the Function Selector (15) to the RADIO position. The red Power Indicator (17) will light up.
- Select the desired frequency band with the Band Selector (16). - Tune to the desired radio station by turning the Tuning control (21).
ANTENNA
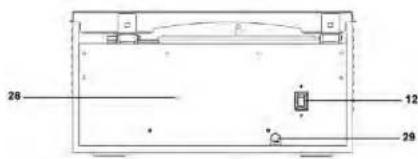
- For FM reception there is a built-in FM antenna wire (28) at the rear of the unit. Move the wire around to obtain the best reception.
- For MW reception the signals are picked up through a built-in ferrite antenna. Your may have to orient the unit to obtain the best reception.

5
FM & FM-STEREO RECEPTION
- Stereo reception is possible when the tuned FM station is broadcasting in stereo.
- When in FM Stereo mode and the station is broadcasting in Stereo, the STEREO indicator (19) lights up.
- When FM stations are weak and are disturbed, listening can be improved by switching the Band selector to FM (Mono). Reception will then be in MONO.
TURNTABLE OPERATION
Preparation
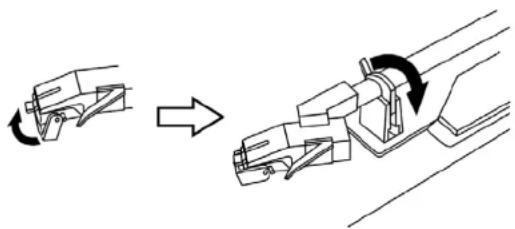
Open the Record Player Cover.
Release the Tonearm Clamp, and remove the stylus protector.
natural_image
Diagram showing a mechanical assembly with an arrow indicating rotation, no text or symbols presentListening to Records
- Set the Function Selector (15) to the PHONO position.
- Place a record on the turntable, over the central spindle. Place the EP adapter over the central spindle when playing 17cm EP records.
- Set the Speed Selector (24) to 33, 45 or 78 rpm according to the record.
- Release the tonearm clamp, and remove the protective cap from the stylus.
- Lift the Tonearm.
- Move the tonearm to the beginning of the record, or to the start of a particular track.
- Gently lower the tone arm onto the record o start playing.
- When the record is finished the tonearm will automatically stop. Lift the tonearm from the record and return it to the rest.
Notes: Do not stop or turn the platter manually.
Moving or jarring the turntable without securing the Tonearm clamp could result in damage to the Tonearm. Replace the protective cap on the stylus when not in use.
6
EnglishEng
PLAYING COMPACT DISC
- Getting start
- Turn function selector (15) to CD to select "CD/USB/SD" mode.
- Press "OPEN/CLOSE" button (11) to open the cd door (10).
- Place a cd with the printed side facing up inside the tray & then close the co door.
- focus search is performing, the lcd display (18) will show the track 1 playing time.
- Play / pause / stop mode ▶/■
-
Press the "PLAY/PAUSE" button (2) to start playback, the first track will start playback.
-
To interrupt, press the "STOP" button (2) once, the playing time will be freeze. Press again to resume normal playback.
- Skip/search mode (skip/search up ▶/ skip/search down ◀)
-
During play or pause mode, if "skip up" button (5) is pressed. it will go to next track and display the track no. and then remain the play or pause mode.
-
During play or pause mode, if "skip down" button (3) is pressed. it will go back to the beginning of the track, original track no. is display and remain the play or pause mode.
-
After step 2, press "skip down" button (5) again will go to the previous track and remain the play or pause mode.
-
if press and hold the "skip up/down button" during cd/mp3 playabck, the playing track will go fast forward or backward until the button being released.
- For mp3/wma disc
-
Press "ALBUM" button (4), the folder no. will goes up
-
Press "skip up" or skip down (5) button, the track no. change.
-
when the desired track is being selected, press the cd "PLAY/PAUSE" button (2) to start playback.
ID3 (TRACK/ALBUM TITLE) FUNCTION (BY REMOTE HANDSET)
- Press the "INFO" button during playback of MP3/WMA disc, the song title is being displayed. press the "INFO" button again to disable the function.
MP3/WMA TRACK FORMAT REQUIREMENT:
- MP3 bit rate : 32 kbps\~256 kbps and wma bit rate : 32 kbps \~ 320 kbps
- The performance of playing MP3 disc is various from the quality of recording disc and the method of recording. Furthermore, the searching lead-time for MP3-CD is longer than normal cd due to difference format.

7
REPEAT/INTRO/RANDOMMODE
Press the repeat/intro/random buttons (4) from Remote Control or press MODE on main unit before or during playback, a single track, single folder (MP3 only) or all the tracks can be played in difference mode as follow:
FOR CD
(1) REPEAT 1 (2) REPEAT ALL TRACK (3) RANDOM (4) INTRO → (5) OFF MODE

FOR MP3/WMA DISC
(1) REPEAT 1 (2) REPEAT 1 ALBUM (3) REPEAT ALL ALBUM
(6) OFF MODE ← (5) INTRO PLAY ← (4) RANDOM ←
- Repeat play
You can listen the desired tracks or album repeatedly by this function.
- Intro play
You can listen the beginning (10 seconds) of each track in a cd by this function & saving your time to search the desire song
- Random play
You can listen all the tracks or folder in a random order by this function
CD DISC PROGRAMMING
Up to 99 tacks can be programmed for CD or MP3 file and play in any order. before use, be sure the system is at stop mode before programming:
1. Set in CD/USB mode & stop the cd playback.
2. Press the "PROGRAM" button from Remote Control or "MODE" from the main unit, "MEMORY" will appear on LCD display (18). Moreover, it will indicate program no. and digits for album no. to be programmed.
3. Select a desired album by pressing ALBUM button.
4. Press the "program" or "mode" button to store the album into memory.
5. Select a desired track by pressing SKIP + OR SKIP - buttons.
6. Press the "program" or "mode" button to store the track into memory.
5. Repeat steps 3 / 4 / 5 / 6 to enter the tracks into the memory.
6. When all the desired tracks have been programmed, press cd "PLAY/PAUSE" button (2) to play the disc in assigned order.
7. To cancel the programmed file, press "STOP" button on remote handset until "MEMORY" is disappear on LCD display (18)
8
EnglishEng
PLAYBACK OF MP3/WMA SONG VIA USB STORAGE MEDIA OR MEMORY CARD CONNECTING
The system is able to decode and playback all MP3 /WMA file which stored in the memory media with USB connecting port or SD/MMC memory card.
- Set function selector (15) to CD mode and then press USB/SD button (10) on remote control to select "USB or CARD" mode.
- Plug-in the USB plug with the face up & make sure it going into completely or insert the memory card in the direction of the arrow as shown in the label on the underside of the MEMORY CARD slot cover. Insert straight without bending.
- Connecting the USB upside down or backwards could damage the audio system or the storage media (usb thumb drive / sd/mmc card). Check to be sure the direction is correct before connection.
- The system will start reading the storage media automatically after connecting, and LCD display (18) will show the first MP3/WMA file.
- Repeat the same playback procedure as playing CD/MP3 disc as above.
REMARK
- The system can detect and read the file under mp3 and wma format only though the usb port.
- If connect the system to MP3 player via the usb socket, due to variances in MP3 encoding format, some mp3 player may not be able to play via the usb socket. this is not a maul-function of the system.
ENCODING OF CD/PHONO INTO MP3 FILE
The system is able to ENCODE normal CD or TURNTABLE to MP3 format and recording at memory media with USB connecting port.
CD ENCODING
I) Ecnoding 1 track
- perform normal playback of the cd track you want to encode & record,
- press "REC" button (9) during the playback of the desire track, unit will display "USB" & "REC". Encoding is performing now.
- After completing of encoding, unit will stop playback automatically.
II) Encoding 1 disc
- Place a cd with the printed side facing up inside the tray & then close the co door
- press the "REC" button (9) after focus search completed. unit will display "USB & "REC". Encoding is performing now.
- After completing of encoding, unit will stop playback automatically.
REMARK:
- The recording speed is 1:1 and according to the actual plying time of the cd track
- The system will creat a "AUDIO" folder and then store the encoding track in it.


- The recording format is preset at - MP3 bit rate : 128 kbps, sampling rate : 44.1khz
- No song title will be recorded during encoding mode
- To interrupt the recroding, press the "RECORD" button again during record mode.
- Recording will be completed only entire song being encoded, if terminate the encoding process Intermediately, there is no track being recorded nor stored to the USB or SD/MMC card.
III) COPYING OF MP3/WMA FILE
If putting a MP3/WMA disc instead of a CD-DISC, the system will copy the files to the USB or SD/MMC card if press the "REC" button (9). The operation procedures is same as cd encoding as stipulate on above, and the system will switch to copying mode only if MP3/WMA file being read.
REMARK:
- The system will store the file to usb sorce first if both usb and sd slot are being occupied by storage media.
- If press the "record" button during playback of usb or sd source, the file will copy from usb to sd or sd to usb.
PHONO ENCODING
1) Set the function button to "PHONO" mode and then press the "REC" button (9) directly.
2) The LCD display with show the word "USB". Now the system is starting the encoding mode.
3) Start playback at PHONO for the track which you want to record to USB.
4) After finish of recoding, press and hold the "REC" button (9) until the LCD return to "PHONO" mode.
ENCODING BITRATE (BY REMOTE HANDSET)
You can select the desired BITRATE during ENCODING from CD or PHONO to USB, the selectable range from 32 / 64 /96 /128 / 192 / 256 Kbps.
1) Set in "PHONO" function (15) & remain stop mode.
2) Press the "BITRATE" function and the LCD display will show the default bitrate (128 Kbps)
3) Press skip ▶▶| or ◀◀ buttons (3) to select the desired bitrate for encoding.
4) Press again the "BITRATE" to confirm the setting and the lcd display (18) resume to "phono" mode
REMOVING OF USB / MEMORY CARD
To remove the USB / MEMORY CARD, turn off the power or switch the function mode to either CD, AUX or TUNER first. For USB port – un-plug it by pulling out the USB socket directly, for memory card – press the memory card inward & then release, now the card being partially eject and you can remove it by hand.

EnglishEng
CASSETTE ENCODING
1) Set the Function button (15) to "TAPE" mode and then press the "REC" button (9) directly.
2) The LCD display with show the word "USB" or "CARD" flashing, and then display "REC" flashing after few seconds. Now the system is starting the encoding mode.
3) Start playback at CASSETTE TAPE for the track which you want to record.
4) After finishing of recoding, press and hold the "STOP" button (31) until the LCD stops flashing and returns to "TAPE" mode.
LISTENING TO TAPE
GENERAL OPERATION
Cassette Playback:
Set the Function button (6) to "TAPE" mode. The system will start playback automatically after inserting the cassette tape.


PLAY

FAST FORWARD

EJECT
Fast Forward:
Press "TAPE FORWARD / EJECT" Button (6) half inwards during playback mode. The tape will wind forward.
Slightly press the “TAPE FORWARD / EJECT” Button (6) again to resume playback.
Stop and Eject :
Press the" TAPE FORWARD / EJECT " Button (6) completely inwards and the cassette tape will be ejected through the cassette door cover.

11
REMOVING OF USB / MEMORY CARD
To remove the USB / MEMORY CARD, turn off the power or switch the function mode to either AUX or TUNER first. For USB port – un-plug it by pulling out the USB socket directly, for memory card – press the memory card inward & then release, now the card being partially eject and you can remove it by hand.
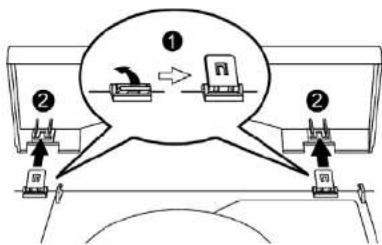
PHONE COVER ASSEMBLY
-
Push the metal bracket to rear side.
-
Connect the metal bracket to the phono cover
sTYLUS REPLACEMENT
Replacement of a worn stylus can be easily accomplished as follows:
-
To remove the old stylus, pull out the stylus assembly in direction shown, holding the head shell with your other hand.
-
Then install the new stylus by pushing it gently into the cartridge ( hold by the edge to prevent damage to stylus.) until it clicks into place.

12
EnglishEng
SPECIFICATIONS
Power Supply
AC: 230V \~ 50Hz
RC Battery: 2 x AAA (UM-4) 1.5V
Radio Frequency Coverage
FM: 87.5 - 108MHz
MW: 522 - 1620kHz
Design and specifications are subject to change without notice.

Correct Disposal of This Product
(Waste Electrical & Electronic Equipment)
This marking shown on the product or its literature, indicates that it should not be disposed with other household wastes at the end of its working life. To prevent possible harm to the environment or human health from uncontrolled waste disposal, please separate this from other types of wastes and recycle it responsibly to promote the sustainable reuse of material resources.
Household users should contact either the retailer where they purchased this product, or their local government office, for details of where and how they can take this item for environmentally safe recycling.
Business users should contact their supplier and check the terms and conditions of the purchase contract. This product should not be mixed with other commercial wastes for disposal.
STEREOFONNÍ SYSTÉM S PŘEHRÁVAČEM CD / CD-R (RW) MP3 / WMA, S KONEKTOREM USB A SE ČTEČKOU PAMĚTOVÝCH KARET SD / MMC, S ROZHLASOVÝM PŘIJÍMAČEM AM/FM, GRAMOFONEM, S KAZETOVÝM PŘEHRÁVAČEM A S DÁLKOVÝM OVLADAČEM
HIF-9088TUMPN
Návod k obsluze
natural_image
Diagram showing a mechanical assembly process with an arrow indicating rotation (no text or symbols present)PŘEHRÁNÍ GRAMOFONOVÉ DESKY
DOPLŇUJÍCÍ INFORMACE
NASAZENÍ KRYTU TALÍŘE GRAMOFONU
natural_image
Diagram showing a mechanical assembly process with an arrow indicating rotation (no text or symbols present)PREHRANIE GRAMOFÓNOVEJ PLATNE

- CD/MP3 PLAYER WITH TURNTABLE, STEREO RADIO, CASSETTE TAPE AND USB/SD ENCODING
- INDEX
- English Page 1
- WARNINGS
- HIF-9088TUMPN
- CD/MP3 PLAYER WITH TURNABLE STEREO RADIO, CASSETE TAPE AND USB/SD ENCODING
- LOCATION OF CONTROLS
- BUTTON DESCRIPTION
- CONNECTING TO POWER
- CAUTION
- SAFETY PRECAUTION
- POWER SUPPLY
- AC POWER OPERATION
- MW/FM TUNER
- FM & FM-STEREO RECEPTION
- TURNTABLE OPERATION
- Preparation
- Listening to Records
- PLAYING COMPACT DISC
- ID3 (TRACK/ALBUM TITLE) FUNCTION (BY REMOTE HANDSET)
- MP3/WMA TRACK FORMAT REQUIREMENT:
- REPEAT/INTRO/RANDOMMODE
- CD DISC PROGRAMMING
- PLAYBACK OF MP3/WMA SONG VIA USB STORAGE MEDIA OR MEMORY CARD CONNECTING
- REMARK
- ENCODING OF CD/PHONO INTO MP3 FILE
- CD ENCODING
- I) Ecnoding 1 track
- II) Encoding 1 disc
- REMARK:
- III) COPYING OF MP3/WMA FILE
- PHONO ENCODING
- ENCODING BITRATE (BY REMOTE HANDSET)
- REMOVING OF USB / MEMORY CARD
- EnglishEng
- CASSETTE ENCODING
- LISTENING TO TAPE
- GENERAL OPERATION
- Cassette Playback:
- Fast Forward:
- Stop and Eject :
- PHONE COVER ASSEMBLY
- sTYLUS REPLACEMENT
- SPECIFICATIONS
- Radio Frequency Coverage
- Correct Disposal of This Product
- (Waste Electrical & Electronic Equipment)
- STEREOFONNÍ SYSTÉM S PŘEHRÁVAČEM CD / CD-R (RW) MP3 / WMA, S KONEKTOREM USB A SE ČTEČKOU PAMĚTOVÝCH KARET SD / MMC, S ROZHLASOVÝM PŘIJÍMAČEM AM/FM, GRAMOFONEM, S KAZETOVÝM PŘEHRÁVAČEM A S DÁLKOVÝM OVLADAČEM
- Návod k obsluze
- PŘEHRÁNÍ GRAMOFONOVÉ DESKY
- DOPLŇUJÍCÍ INFORMACE
- NASAZENÍ KRYTU TALÍŘE GRAMOFONU
- PREHRANIE GRAMOFÓNOVEJ PLATNE
Brand : ROADSTAR
Model : HIF-9088TUMPN
Category : Hi-Fi System