
H-3246 - Deep fryer SILVERCREST - Free user manual and instructions
Find the device manual for free H-3246 SILVERCREST in PDF.


| Product Type | Deep Fryer |
| Brand | SilverCrest |
| Model | H-3246 (also known as SEF 2100 A1) |
| Power Consumption | 2100 W |
| Power Supply | 220-240 V ~ 50 Hz |
| Maximum Temperature | Approx. 190°C |
| Temperature Control | Adjustable thermostat with green pilot lamp |
| Thermal Cut-out | Yes, automatic shut-off on overheating |
| Viewing Window | Yes, in lid for monitoring frying |
| Permanent Filter | Yes, for odor reduction (not dishwasher safe) |
| Frying Basket | Removable with handle and "MAX FOOD LEVEL" marking |
| Frying Insert | Removable with handles, min and max fill level markings |
| Lid | Removable with unlock button and viewing window |
| Dishwasher Safe Parts | Lid, frying insert, casing (except permanent filter) |
| Cord Storage | Cable compartment |
| Carrying Handles | Yes, on sides of casing |
| Safety Features | Overheat protection; reset switch; supervision recommended |
| Warranty | 3 years from date of purchase |
| Intended Use | Household only, not for commercial use |
| Included Accessories | Casing, heating element, frying basket, frying insert, lid with viewing window, user manual |
Frequently Asked Questions - H-3246 SILVERCREST
User questions about H-3246 SILVERCREST
0 question about this device. Answer the ones you know or ask your own.
Ask a new question about this device
Download the instructions for your Deep fryer in PDF format for free! Find your manual H-3246 - SILVERCREST and take your electronic device back in hand. On this page are published all the documents necessary for the use of your device. H-3246 by SILVERCREST.
USER MANUAL H-3246 SILVERCREST
natural_image
Exterior view of a stainless steel double-fryer restaurant with food being opened (no visible text or labels)GB Stainless Steel Deep Fryer
Operating instructions
-
Important information before using for the first time.... 2
-
Part names (see foldout page) 2
-
Product description .... 3
-
Safety information.... 3
-
Before using for the first time 6
-
Before frying.... 6
-
Frying.... 7
-
After frying.... 8
-
Cleaning 9
-
Disposal 10
-
Technical data 10
-
Various tips .... 11
-
Warranty 12
1. Important information before using for the first time
Any person setting up, operating, cleaning or disposing of this appliance must have familiarised themselves with and understood the contents of these user instructions.
Please therefore keep these operating instructions so that they are available at any time.
If you sell or give away your appliance, please include the user instructions with it so that the next owner can also use it safely.
2. Part names (see foldout page)
1 Operating/Heating Element
2 Carrying Handle
3 Casing
4 Reset Switch
5 Heating Element
6 Cable Compartment
7 Hook to suspend the frying basket
8 Frying Insert with Handles
9 Temperature regulator
10 On/Off Switch and Pilot Lamp
11 Temperature Pilot Lamp
12 Lid
13 Viewing Window
14 Filter cover
15 Permanent filter
16 Handle with Unlock Button
17 Frying Basket
18 Marking "MAX FOOD LEVEL"
19 Handle
2 GB


3.1 Intended purpose
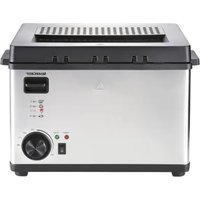
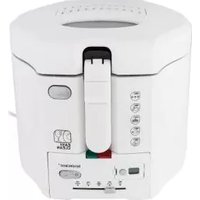
The Stainless Steel SilverCrest SEF 2100 A1 Deep-Fat Fryer has been solely constructed for preparing foodstuffs such as potato chips, vegetables, chicken wings or similar items. It is not suitable for any other purpose.
Only use the stainless steel fryer inside your home, never outdoors.
This product is intended for use in private households and is not suitable for commercial purposes.
3.2 Scope of supply
• 1 Stainless steel casing
• 1 Frying insert with handles
- 1 Heating element
- 1 Frying basket
• 1 Lid with viewing window
- 1 User instructions
3.3 Function
There are electrically operated heating coils inside the stainless steel casing that melt the frying fat and maintain its temperature.
The required frying temperature can be set using the temperature control device.
3.4 Symbols on the appliance

This symbol warns against touching hot surfaces.
4. Safety information
This appliance has been designed and built to the current state of the art. It complies with all relevant European safety directives. However, appliances of this type can be dangerous.
Your safety is worth 5 minutes of reading! It will not take longer than that to read through our safety instructions. You probably know most of this information already, but nonetheless, please read it through because one or more items of information might be new to you and could prevent possible damage.
4.1 Explanation of terms
The following signal terms are used in these user instructions:

Warning!
High risk: Ignoring this warning could result in a risk to life and limb.
Caution!
Medium risk: Ignoring this warning could lead to damage.
Note:
Low risk: Points to be noted when handling the appliance.

natural_image
Pure geometric diagram with crosshair and circular shapes, no text or symbols present4.2 General information
- Please read these user instructions carefully before use. They are a constituent part of the appliance and must be kept to hand at all times.
- Use the product only for the purpose described (see "3.1 Intended purpose" on page 3).
- To prevent damage, check that the mains voltage required (see type plate on the appliance) is compatible with your mains voltage as the appliance could be damaged if used with the wrong mains voltage.
- This appliance is not intended for use by persons (including children) with reduced physical, sensory or mental capabilities or lack of experience and/or lack of knowledge, unless either supervised by a person responsible for their safety or given instructions on the use of the appliance by such a person. Children should be supervised to ensure they do not play with the appliance.
- Please note that any claim under the warranty or for liability will be invalid if accessories are used that are not recommended in these user instructions, or if original spare parts are not used for repairs. This also applies to repairs undertaken by unqualified persons. You will find the service address in "13. Warranty" on page 12.
- If the appliance should develop a fault during the warranty period, it may only be repaired by our Service Centre. Otherwise all claims under warranty are null and void.
- Never leave this appliance unattended while it is in use.
- Ensure that it is not possible for anyone to trip over or to get caught up in or step on the mains cable.
- The machine should only be set up on a firm, dry, level, inflammable surface to prevent it from tipping over or sliding.
4.3 Protection against electric shock

Warning! The following safety information is intended to protect you against electric shock.
- Only plug the stainless steel fryer into a correctly installed socket outlet with earthing contact.
- Do not use the appliance if it has fallen on the floor, received a hard blow or fallen into water. In this case, please contact our Service Centre. You will find the service address in "13. Warranty" on page 12.
- The appliance must not under any circumstances be used if it is damaged. Have the appliance repaired in such cases by a qualified specialist. You will find the service address in "13. Warranty" on page 12.
- If the mains cable for this appliance is damaged, it must be replaced by the manufacturer or a person with similar qualifications in order to avoid a hazard.
- Never immerse the operating and heating elements 1 in water, nor should you clean these parts under running water.
- Do not touch the product, the mains cable or the mains plug with wet hands.
• Always unplug the mains cable by pulling out the plug. Never pull on the cable itself.
- Ensure that the mains cable is not kinked, twisted or crushed.


- Keep the mains cable away from hot surfaces, such as cooker hotplates.
- If you are not using the machine for a prolonged period of time, remove the plug from the wall socket. This is the only way to render the device completely current-free.
- Avoid using extension cables. An extension cable may only be used under very specific conditions:
- The extension cable must be able to handle the amount of current drawn by the device.
- The extension cable may not be suspended: keep children away from it and ensure that it is not possible for anybody to trip over it.
- Under no circumstances use a damaged extension cable.
- Do not connect any appliances other than this product to the mains socket, since it could cause an overload (do not use multi-way splitters of any kind).
- The device must not be operated with an external timer or separate remote control system such as a remote control socket.
4.4 Protection against the danger of fire

Warning! Since the appliance works with high temperatures, observe the following safety information to prevent a fire from starting.
- Keep flammable objects (e.g. curtains, paper) away from the appliance when it is in use.
- Maintain a distance of at least 50 cm from other objects to prevent them from catching fire.
- Only switch on the stainless steel fryer if it contains sufficient oil or liquid fat and under no circumstances exceed the
maximum quantities of food to be fried at one time specified in these operating instructions.
- The filling level of the stainless steel fryer with oil or fat must always be between the two markings on the inside of the frying insert 8 (lower marking = minimum, upper marking = maximum).
• Take care that there is always sufficient fat or oil in the fryer. - The appliance must never be placed immediately beneath a wall socket, as the heat it generates could damage the electrical installation.
- Never leave the appliance running when it is unattended. Damage is almost always indicated by the presence of a strong odour. If you notice any such odour, unplug the mains plug immediately and have the appliance inspected. You will find the service address in "13. Warranty" on page 12.
4.5 For the safety of your child

Warning! Children are often unaware of danger and are injured as a result. Please note therefore:
- Only allow children to use this device under the supervision of an adult.
- Ensure the machine is always kept out of the reach of children.
- Ensure that a child cannot pull down or tip the appliance onto himself or herself.
- Ensure that the packing foil does not become a deadly trap for a child. Packing film is not a toy.


4.6 Protection against scalds and burns

Warning! As the appliance operates at high temperatures, please observe the following safety information so that you do not burn or scald yourself.
- All the parts must be completely dry before you pour oil or liquid fat into the stainless steel fryer. Otherwise the heated fat could spit badly.
- You should ideally use frying oil or liquid frying fat.
- If you use solid frying fat you should first melt the blocks of fat slowly in a normal pan in order to avoid overheating and the fat spitting. Then pour the melted fat
carefully into the stainless steel fryer before switching the fryer on.
- You must only use oils or fats that do not foam and that are suitable for frying. Please refer to the packaging or label for further information.
- Hot steam is released during the frying process. Maintain an adequate distance from the steam.
- The fat may start spitting when melted again if it is too cold! Avoid this by making some holes with a fork in the re-solidified fat. Be careful not to damage the heating element 5 while doing so.
- Once hot, if you wish to transport the appliance, switch it off, pull out the mains plug, and wait until the appliance has cooled down.
5. Before using for the first time
-
Please clean the individual parts of the stainless steel fryer thoroughly.
-
Then carefully dry the individual parts (see "9. Cleaning" on page 9).
6. Before frying
- Place the stainless steel fryer on a level and stable surface.
- Pull the mains cable out of the cable compartment 6.
Caution! Make sure that the mains cable does not come into contact with the hot parts of the stainless steel fryer so that it is not damaged.
-
Press the unlock button on the handle 16 and lift off the lid 12 by pulling it slightly backwards.
-
Remove the frying basket 17.
-
Open the handle 19 out.
-
Fasten the handle 19 to the wire mesh of the frying basket 17.
6.1 Add the oil or fat
You should either use liquid frying oil or solid frying fat. You should melt solid frying fat in a frying pan or saucepan before adding it to the fryer.
Note: Never mix different types of fat or oil!
- Add oil or melted fat to the top marking of the frying insert 8 in the dry and empty stainless steel fryer.
Note: If you want to fry only small quantities, less oil or fat may be enough. However, the items to be fried must always be completely covered and the fat or oil must reach at least as far as the lower marking on the frying insert 8.
- Insert the mains plug into the mains socket.
6.2 Melt existing fat
If the fryer already contains solidified fat from an earlier frying session it must be melted in the fryer. You have to do this very carefully so that the melting fat does not start to spit or the fryer does not overheat.
- Insert the mains plug into the mains socket.
Caution! Ensure that you don't damage the heating element 5 with the fork.
- Use a fork to prick a few holes in the fat so that any steam formed can escape more easily.
- Press the unlock button on the handle 16 and place the lid 12 on the frying insert 8.
- Use the On/Off switch 10 to switch the stainless steel fryer on. The red pilot lamp lights up.
- Set the temperature control device 9 to 60 °C.
- Let the fat melt.
- Wait until the temperature pilot lamp 11 lights up or until the fat has melted completely.
7. Frying
- Use the On/Off switch 10 to switch the stainless steel fryer on.
- Press the unlock button on the handle 16 and place the lid 12 on the frying insert 8.
- Set the temperature control device 9 to the desired frying temperature.
Note: On MAX setting the frying temperature is about 190 °C.
Refer to the pack of what you are frying for the correct frying temperature.
The temperature pilot lamp 11 goes out. The oil or fat has now heated to the desired temperature. The temperature pilot lamp 11 lights up in green as soon as the oil or fat has reached the set temperature. To keep the oil or fat at temperature the thermostat automatically switches the heating on and off. You can see this when the temperature pilot lamp 11 regularly goes on and off.
Note: We recommend that you heat the oil for at least between 10 and 15 minutes before you start frying. To do this, place the lid 12 on the frying insert 8.
Note: You can leave the frying basket 17 in the fryer during heating.
- Press the unlock button on the handle 16 and lift off the lid 12 by pushing it slightly away from you.

Warning! When frying frozen items, pay attention to Tip 2 (see "12. Various tips" on page 11) to prevent spits of fat.
Caution! Please do not overfill the frying basket 17. Please read the food manufacturer's information about the optimum amount. The food to be fried must be completely covered by oil or fat.
In the frying basket 17 you will find a marking "MAX FOOD LEVEL" 18 that indicates the

maximum level to which items to be fried may be filled.
-
Remove the frying basket 17 from the stainless steel fryer and place the items to be fried in it.
-
Carefully replace the frying basket 17 in the stainless steel fryer.
-
Press the unlock button on the handle 16 and place the lid 12 on the frying insert 8.
You can observe the frying process through the viewing window 13 in the lid 12 at any time.
- While frying, occasionally remove the frying basket 17 from the oil or fat and carefully shake the contents by moving
the frying basket backwards and forwards.
7.1 Thermal cut-out
In the case of overheating, the stainless steel fryer switches off automatically, e.g. if there is no or insufficient oil or fat in the stainless steel fryer. This can also happen if there is solidified in the fryer that is melted too quickly.
If the thermal cut-out switches off the appliance, proceed as follows:
-
Let the oil or fat cool down.
-
Press the Reset switch 4 on the back of the operating element. The stainless steel fryer is now ready for frying again.
8. After frying
-
Press the unlock button on the handle 16 and lift off the lid 12 by pushing it slightly away from you.
-
Carefully remove the frying basket 17 from the frying insert 8 and shake off excess oil or fat over the fryer.
-
Drain the fried food by suspending the frying basket 17 in the frying insert 8. The frying insert 8 has a hook 7 for this purpose.
-
Pour the fried items into a bowl, sieve, etc.
-
Turn the temperature control device 9 to the lowest setting (anticlockwise as far as it will go).
-
Use the On/Off switch 10 to switch the stainless steel fryer off.
-
Remove the mains plug after every use.
-
Remove the frying basket 17 and the operating/heating element 1 to empty the fryer.
-
Remove the frying insert 8 from the casing 3 using the handles 2.

Warning! So that you do not burn yourself, leave the hot oil or fat to cool down before you pour it away!
- Pour away the oil or fat (see "9. Cleaning" on page 9).
8.1 Re-use the oil or fat
Frying oil and fat age and develop unhealthy substances. Please note therefore:
- Pour the oil or the still liquid fat through a filter (e.g. tea towel) to filter out food remains.
- The best place to store oil is in an oil bottle in the fridge.
- Fat can be poured back into the cleaned fryer, allowed to solidify and stored together with the fryer at room temperature.
8 GB


9. Cleaning
9.1 Cleaning the Appliance
To ensure your product gives you lasting service, you should clean it regularly.

Warning! To avoid the danger of an electric shock:
- Remove the mains plug before cleaning.
- The operating/heating element 1 must not under any circumstances be cleaned under running water. Only clean it with a damp cloth.
-
Remove the lid 12, frying basket 17 and the operating/heating element 1.
-
Store the operating/heating element 1 in a secure, dry place.
-
Remove the frying insert by the handles 8 and dispose of the oil or fat (see "10.3 Oil" on page 10).
-
Clean the lid 12, frying basket 17, frying insert 8 and casing 3 with a little mild detergent in hot water.
-
Then rinse them with clean water and dry them off carefully. Never use caustic or abrasive cleaning agents or cleaning materials such as scouring solution or steel wool.
-
The lid 12, frying insert 8 and casing 3 can be washed in the dishwasher.
Note: The permanent filter 15 is not dishwasher safe.
-
First replace the frying insert in the stainless steel fryer by the handles 8, then the operating/heating element 1 and lastly the frying basket 17.
-
Fold the handle 19 into the frying basket 17.
-
Roll up the mains cable and put it into the cable compartment 6.
Note: You can easily transport the stainless steel fryer by using the handles that are fitted on the sides.
- Always store the stainless steel fryer so that it is kept free of dust by ensuring that the lid 12 is always put on.
9.2 Cleaning the Filter
In the lid 12 there is a permanent filter 15, which should be cleaned after every use of the deep-fat fryer.
- Open the filte cover 14.

- Lift off the filter cover 14.

natural_image
Diagram of a device with a grid and an upward arrow, no text or symbols present- Remove the permanent filter 15.

- Carefully clean the permanent filter 15 in the sink with a mild detergent.
Note: The permanent filter 15 is not dishwasher safe.

-
Replace the permanent filter 15.
-
Replace the filter cover 14.
10. Disposal
10.1 Product

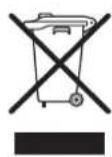
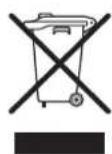
The symbol with the crossed-out rubbish bin on wheels means that within the European Union, the product must be disposed of to a sorted rubbish collection. This applies to the product and all accessories which are marked with this symbol. Marked products must not be disposed of via the regular domestic waste but must be handed in to a recycling centre for electrical or electronic devices. Recycling helps to reduce the use of raw materials and to relieve the environment. You can obtain information about disposal and the location of your nearest recycling centre from your local waste management service, for example, or Yellow Pages.
10.2 Packaging
If you wish to discard the packaging, please observe the applicable environmental regulations in your country. In Germany, you should dispose of the packaging via the Dual Recycling System (Grüner Punkt).
10.3 Oil
Dispose of used oil or fat by pouring it back into the original plastic bottle and sealing it firmly. Leave solid fat to solidify, then wrap it in paper.
Dispose of oil or fat residues in the refuse bin or according to the relevant respective national regulations.
11. Technical data
Power supply: 220 - 240 V \~ 50 Hz
Power consumption: 2100 W
Maximum temperature: about 190 °C
10 GB




Tip 1: How to avoid the excess formation of acrylamide
Acrylamide is a chemical substance that is formed whenever foods containing starch or a certain protein compound at prepared at temperatures over 100 °C.
- Wherever possible, you should avoid excess browning, high temperatures for baking or frying or fierce frying.
- You should not eat burnt food at all.
- When deep-frying, you should avoid temperatures of over 170 °C.
- Make sure that the colour of the fried items is "golden yellow" rather than brown or dark. Browning may develop very quickly. Use the viewing window to observe the browning level of the fried items.
Tip 2: How to fry frozen items perfectly every time
Caution!
- Preferably, thaw out frozen food at room temperature before frying. Remove as much ice and water as possible before placing the items in the fryer. Add the food as slowly and carefully as possible to the fryer because frozen food can abruptly and quickly cause the hot oil or fat to bubble.
-
Frozen food (-16 to -18°C) greatly cools down oil or fat, therefore it fries more slowly and may absorb too much oil or fat. You can prevent this as follows:
-
Never fry large quantities at the same time.
- Heat the oil for at least 15 minutes prior to frying.
- Set the temperature control device 9 to the temperature stated on the pack of the frozen food.
Tip 3: How to get rid of undesired aftertastes
Some foodstuffs, such as fish, leach liquid during frying. It collects in the frying oil or fat and thus impairs the smell and taste of the fried food.
To have neutral tasting oil or fat again, proceed as follows:
- Heat the oil or fat to 160^ C.
- Place two thin slices of bread or a few sprigs of parsley in the stainless steel fryer.
- Wait until the oil or fat no longer bubbles.
- Remove the bread or the parsley with a slotted spoon. The oil or fat has a neutral taste again.

natural_image
Pure geometric diagram with crosshair and circular shapes, no text or symbols present13. Warranty
The warranty for your appliance is valid for 3 years from the date of purchase. The warranty does not cover damage resulting from improper connection, the use of another manufacturer's parts, normal wear and tear, the use of force, improper use, or attempts to carry out repairs yourself. The appliance has been manufactured in accordance with strict quality guidelines and checked before leaving the factory.
Nonetheless, should operational faults occur, please contact the Service Centre first.
Please do not send in any appliance before contacting our Service Centre.
To enable us to process your request quickly, please have ready your proof of purchase and the product number (for this appliance: SEF 2100 A1).
Please contact our service hotline for guarantee claims and technical matters:
00800/4212 4212
(Monday to Friday between
8 a.m. and 4 p.m.)
E-mail: hoyer-gb@teknihall.com
Spis treści
natural_image
Three geometric crosshair symbols: a circle with radial lines, a black dot on the left, and a horizontal line with dots on the right (no text or labels)natural_image
Simple line drawing of a device with an upward arrow and a grid on top (no text or symbols)natural_image
Diagram showing a device with a grid connection and an arrow pointing to it (no text or symbols present)10. Utylizacja
10.1 Urządzenie

natural_image
Pure geometric diagram with crosshair and circular shapes without any text or symbolsnatural_image
Diagram of a device with a grid top and an upward arrow pointing to a component (no text or symbols)natural_image
Diagram of a kitchen appliance with a solar panel above it, showing a drop in the interior (no text or symbols)10. Ártalmatlanítás
10.1 A készülék
natural_image
Pure geometric diagram with intersecting lines and a circular pattern (no text or symbols)9. Čiščenje
natural_image
Diagram of a device with a grid array and an upward arrow, no text or symbols present- Izvlecite trajni filter 15.


natural_image
Diagram of a kitchen appliance with a drain and top panel, showing a downward arrow (no text or symbols)10. Odstranjevanje
10.1 Naprava
natural_image
Diagram of a device with a grid array and an upward arrow pointing to a component (no text or symbols)natural_image
Diagram of a kitchen appliance with a drain and top panel, showing a downward arrow (no text or symbols)10. Likvidace
10.1 Přístroj

natural_image
Pure geometric diagram with crosshair and circular shapes, no text or symbols presentnatural_image
Pure geometric diagram with crosshair and circular shapes without any text or symbols7.1 Ochrana proti prehriatiu
natural_image
Pure geometric diagram with crosshair and circular pattern (no text or symbols)9. Čistenie
natural_image
Diagram of a device with a grid top and an upward arrow pointing to a black rectangular component (no text or symbols)- Vyjmite permanentný filter 15.


natural_image
Simple line drawing of a kitchen appliance with a solar panel above it (no text or symbols)10. Likvidácia
10.1 Prístroj

natural_image
Pure geometric diagram with crosshair and circular shapes, no text or symbols presentnatural_image
Diagram of a device with a grid top and an upward arrow pointing to a black rectangular component (no text or symbols)natural_image
Diagram of a device with a grid top and a battery inside, showing no text or symbols


10. Entsorgung
10.1 Gerät



- Important information before using for the first time
- Part names (see foldout page)
- Intended purpose
- Scope of supply
- Function
- Symbols on the appliance
- Safety information
- Explanation of terms
- Caution!
- Note:
- General information
- Protection against electric shock
- Protection against the danger of fire
- For the safety of your child
- Protection against scalds and burns
- Before using for the first time
- Before frying
- Add the oil or fat
- Melt existing fat
- Frying
- Thermal cut-out
- After frying
- Re-use the oil or fat
- Cleaning
- Cleaning the Appliance
- Cleaning the Filter
- Disposal
- Product
- Packaging
- Oil
- Technical data
- Tip 1: How to avoid the excess formation of acrylamide
- Tip 2: How to fry frozen items perfectly every time
- Tip 3: How to get rid of undesired aftertastes
- Warranty
- Spis treści
- Utylizacja
- Urządzenie
- Ártalmatlanítás
- A készülék
- Čiščenje
- Odstranjevanje
- Naprava
- Likvidace
- Přístroj
- Ochrana proti prehriatiu
- Čistenie
- Likvidácia
- Prístroj
- Entsorgung
- Gerät
Brand : SILVERCREST
Model : H-3246
Category : Deep fryer