
KD-DV6102 - Car radio JVC - Free user manual and instructions
Find the device manual for free KD-DV6102 JVC in PDF.
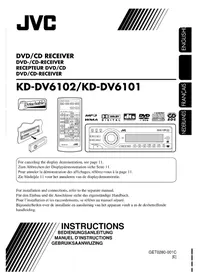


| Product type | Car stereo with DVD/CD player |
| Brand | JVC |
| Model | KD-DV6102 |
| Installation dimensions (W x H x D) | 182 mm x 52 mm x 158 mm |
| Panel dimensions (W x H x D) | 188 mm x 58 mm x 11 mm |
| Weight | 1.7 kg (without accessories) |
| Power supply | DC 14.4 V (11 V to 16 V allowable) |
| Maximum output power | 50 W x 4 channels |
| RMS output power | 19 W x 4 channels (4 Ω, 40 Hz-20 kHz, <0.8% THD) |
| Load impedance | 4 Ω (4 Ω to 8 Ω allowable) |
| Equalizer | 7 bands: 60 Hz, 150 Hz, 400 Hz, 1 kHz, 2.4 kHz, 6 kHz, 15 kHz; ±10 dB |
| FM frequency range | 87.5 MHz to 108.0 MHz |
| AM frequency range | MW: 522 kHz to 1620 kHz; LW: 144 kHz to 279 kHz |
| Compatible audio formats | DVD Video, VCD, Audio CD, MP3, WMA |
| Video color standard | PAL |
| Composite video output | 1 Vp-p / 75 Ω |
| Digital audio output | Optical (DIGITAL OUT) |
| RDS functions | PTY, TA, AF, REG, network follow-up |
| Dual Zone function | Yes (independent headphone listening) |
| Remote control | RM-RK230, CR2025 battery |
| Auxiliary input | Front AUX input (3.5 mm) |
| DVD region code | 2 |
| Operating temperature | 0 °C to +40 °C |
| Maintenance and cleaning | Clean the connectors with a cotton swab soaked in alcohol; wipe discs from the center outward |
Frequently Asked Questions - KD-DV6102 JVC
User questions about KD-DV6102 JVC
0 question about this device. Answer the ones you know or ask your own.
Ask a new question about this device
Download the instructions for your Car radio in PDF format for free! Find your manual KD-DV6102 - JVC and take your electronic device back in hand. On this page are published all the documents necessary for the use of your device. KD-DV6102 by JVC.
USER MANUAL KD-DV6102 JVC

MP3 WMA




For canceling the display demonstration, see page 11.
For installation and connections, refer to the separate manual.
INSTRUCTION MANUAL
INSTRUCTION MANUAL
GET0280-001C
[E]
Thank you for purchasing a JVC product.
Please read all instructions carefully before operation, to ensure your complete understanding and to obtain the best possible performance from the unit.
IMPORTANT FOR LASER PRODUCTS
- CLASS 1 LASER PRODUCT
- CAUTION: Do not open the top cover. There are no user serviceable parts inside the unit; leave all servicing to qualified service personnel.
- CAUTION: Visible and invisible laser radiation when open and interlock failed or defeated. Avoid direct exposure to beam.
- REPRODUCTION OF LABEL: CAUTION LABEL, PLACED OUTSIDE THE UNIT.
How to reset your unit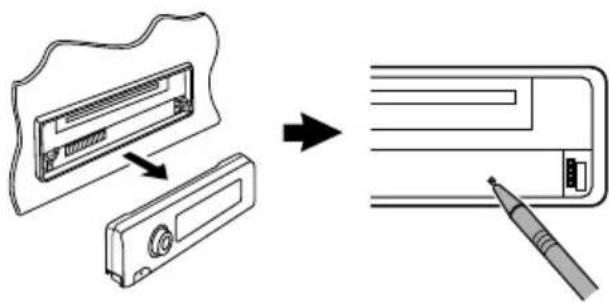
This will reset the microcomputer. Your preset adjustments will also be erased.
How to forcibly eject a disc
If a disc cannot be recognized by the receiver or cannot be ejected, eject the disc as follows.
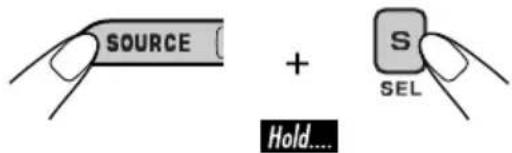
"PLEASE" and "EJECT" appear alternately on the display.
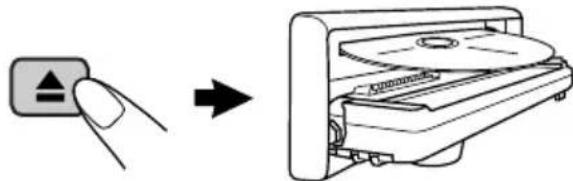
- If this does not work, reset your receiver.
- Be careful not to drop the disc when it ejects.
For security reasons, a numbered ID card is provided with this receiver, and the same ID number is imprinted on the receiver's chassis. Keep the card in a safe place, as it will help the authorities to identify your receiver if stolen.
WARNINGS:
- DO NOT install any receiver in locations where;
- it may obstruct the steering wheel and gearshift lever operations, as this may result in a traffic accident.
- it may obstruct the operation of safety devices such as air bags, as this may result in a fatal accident.
- it may obstruct visibility.
- DO NOT operate any receiver while manipulating the steering wheel, as this may result in a traffic accident.
- The driver must not watch the monitor while driving.
If the driver watches the monitor while driving, it may lead to carelessness and cause an accident.
- The driver must not put on the headphones while driving. It is dangerous to shut off the outside sounds while driving.
- If you need to operate the receiver while driving, be sure to look ahead carefully or you may be involved in a traffic accident.
- If the parking brake is not engaged, "DRIVER MUST NOT WATCH THE MONITOR WHILE DRIVING." appears on the monitor, and no playback picture will be shown.
- This warning appears only when the parking brake wire is connected to the parking brake system built in the car (refer to the Installation/Connection Manual).
This product incorporates copyright protection technology that is protected by U.S. patents and other intellectual property rights. Use of this copyright protection technology must be authorized by Macrovision, and is intended for home and other limited viewing uses only unless otherwise authorized by Macrovision. Reverse engineering or disassembly is prohibited.
Caution on volume setting:
Discs produce very little noise compared with other sources. Lower the volume before playing a disc to avoid damaging the speakers by the sudden increase of the output level.
*For safety.....
- Do not raise the volume level too much, as this will block outside sounds, making driving dangerous.
- Stop the car before performing any complicated operations.
*Temperature inside the car....
If you have parked the car for a long time in hot or cold weather, wait until the temperature in the car becomes normal before operating the unit.

How to read this manual
The following methods are used to make the explanations simple and easy-to-understand:
- Some related tips and notes are explained in "More about this receiver" (see pages 53 – 57).
- Button operations are mainly explained with the illustrations as follows:
 | Press briefly. |
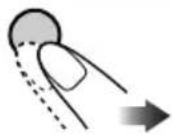 | Press repeatedly. |
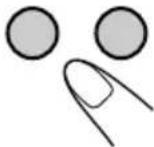 | Press either one. |
 | |
 | Press and hold until your desired response begins. |
 | Press and hold both buttons at the same time. |

How to use the M MODE button
If you press M MODE, the receiver goes into functions mode, then the number buttons and
▲/▼ buttons work as different function buttons.
Ex.: When number button 2 works as MO (monaural) button.
![graph TD A["M"] --> B["MODE"] B --> C["7 EQ 1"] B --> D["8 MQ 2"] B --> E["9 SSM 3"] B --> F["10 DUAL 4"] B --> G["11 RPT 5"] B --> H["12 RND 6"]](/content/2026/06/1238930/images/3ed35dbb2a8e2d2a53fd2ea031fc4d5d7b484e16047b8678c86fc1f83aeb7cb6.jpg)
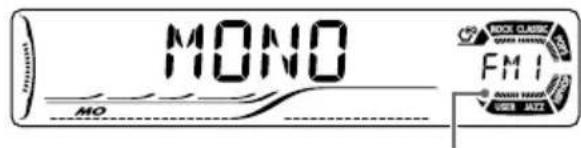
Time countdown indicator
To use these buttons for original functions again after pressing M MODE, wait for
5 seconds without pressing any of these buttons until the functions mode is cleared.
- Pressing M MODE again also clears the functions mode.
How to reset your unit 2
How to forcibly eject a disc 2
How to read this manual 4
How to use the M MODE button ..... 4
Introduction — Playable discs ...... 6
Control panel 7
Parts identification 7
Remote controller — RM-RK230 ..... 8
Main elements and features 8
Getting started 10
Basic operations 10
Canceling the display demonstrations ... 11
Setting the clock 11
Radio operations 12
Listening to the radio 12
Storing stations in memory 13
Listening to a preset station 14
FM RDS operations 15
Searching for your favorite FM RDS programme 15
Storing your favorite programmes ..... 16
Using the standby receptions ..... 16
Tracking the same programme —Network-Tracking Reception ...... 17
Disc operations 18
Playing a disc in the receiver ..... 18
Basic operations 20
DVD/VCD special functions ...... 22
Selecting subtitles 22
Selecting audio languages 22
Selecting multi-angle views 22
Disc menu operations 23
Zoom in 23
On-Screen disc operations 24
Basic on-screen bar operations 25
Basic control screen operations ...... 27
List screen operations 28
DVD setup menu 29
Basic setting procedure 29
Other disc operations 32
Basic operations 32
Changing the display information ..... 33
Selecting the playback modes 34
Dual Zone operations 35
Listening with headphones 35
Sound adjustments 36
Selecting preset sound modes ..... 36
Storing your own sound adjustments ..... 37
Adjusting the sound 38
General settings — PSM ...... 39
Basic procedure 39
Other main functions 42
Assigning titles to the sources 42
Detaching the control panel 43
CD changer operations 44
Playing discs in the CD changer .... 44
Changing the display information ..... 46
Selecting the playback modes 47
External component operations ...... 48
Playing an external component .... 48
DAB tuner operations 49
Listening to the DAB tuner ...... 49
Storing DAB services in memory ..... 50
Tuning in to a preset DAB service ..... 50
Tracing the same programme —Alternative Reception .... 50
Maintenance 51
Language codes 52
More about this receiver 53
Troubleshooting 58
Specifications....61
Discs you can play
You can play back the following discs (12 cm and 8 cm) on this receiver:
- DVD Video: Recorded in PAL color system with Region Code “2” (see below).
- DVD-R/DVD-RW recorded in the DVD-Video format can also be played (see page 54).
• Video CD (VCD)/audio CD
- MP3/WMA: Recorded either in CD-R/CD-RW or DVD-R/DVD-RW/DVD-ROM.
- CD-R/CD-RW: Compliant with ISO 9660 Level 1, ISO 9660 Level 2, Romeo, and Joliet.
- DVD-R/DVD-RW/DVD-ROM: Compliant with UDF-Bridge Format*1.
On some discs, the actual operations may be different from what is explained in this manual.
Discs cannot be played back
DVD-Audio, DVD-ROM (data), DVD-RAM, DVD-R/DVD-RW recorded in the DVD-VR format, CD-ROM, CD-I (CD-I Ready), Photo CD, etc.
- Playing back these discs will generate noise and damage the speakers.
Note on Region Code:
DVD players and DVD Video discs have their own Region Code numbers. This receiver can only play back DVD discs whose Region Code numbers include "2."
Examples:




If you insert a DVD Video disc of an incorrect Region Code
"REGION CODE ERROR!" appears on the monitor.
Caution for DualDisc playback
- The Non-DVD side of a "DualDisc" does not comply with the "Compact Disc Digital Audio" standard. Therefore, the use of Non-DVD side of a DualDisc on this product may not be recommended.
Digital audio formats
The System can play back the following digital audio formats.
Linear PCM: Uncompressed digital audio, the same format used for CDs and most studio masters.
Dolby Digital *2: Compressed digital audio, developed by Dolby Laboratories, which enables multi-channel encode to create the realistic surround sound.
DTS *3 (Digital Theater Systems):
Compressed digital audio, developed by Digital Theater Systems, Inc., which enables multi-channel like Dolby Digital. As the compression ratio is lower than for Dolby Digital, it provides wider dynamic range and better separation.
MPEG Audio: Another compressed digital audio which also enables multi-channel encode to create the realistic surround sound. However, this System downmix the multi-channel signals into 2 channels (decoded PCM) and play it back.
*1 A hybrid file system used to provide compatibility with ISO 9660 for accessing any type of files on the disc. (UDF stands for Universal Disk Format.) *2 Manufactured under license from Dolby Laboratories. “Dolby” and the double-D symbol are trademarks of Dolby Laboratories. *3 "DTS" and "DTS 2.0 + Digital Out" are trademarks of Digital Theater Systems, Inc.
“DVD Logo” is a trademark of DVD Format/Logo Licensing Corporation registered in the US, Japan and other countries.
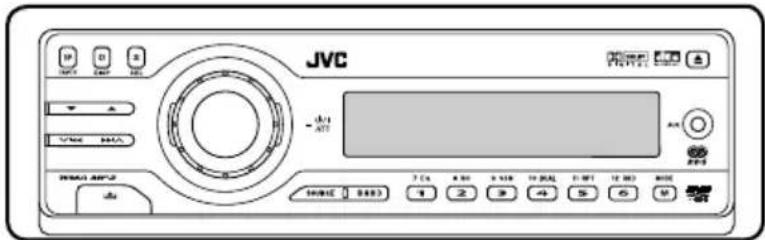
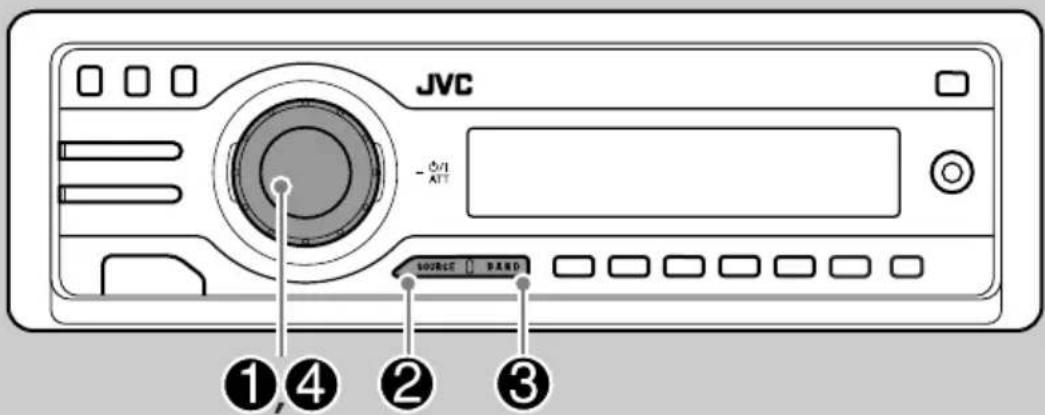
Parts identification
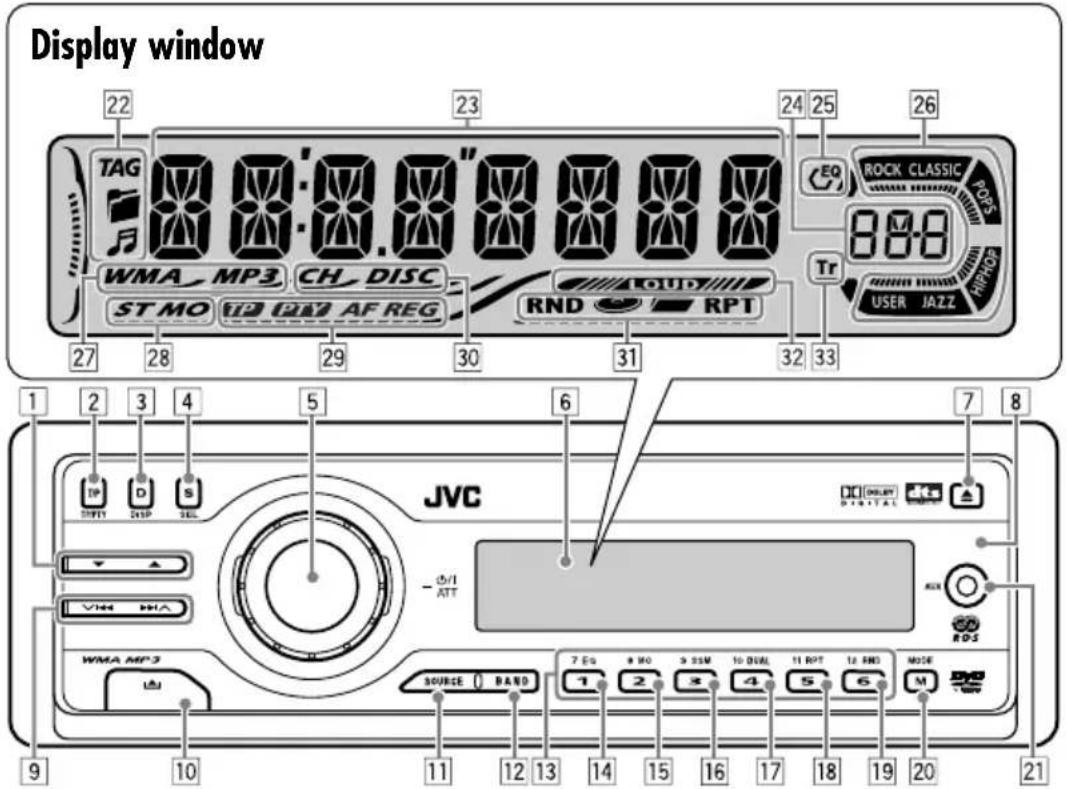
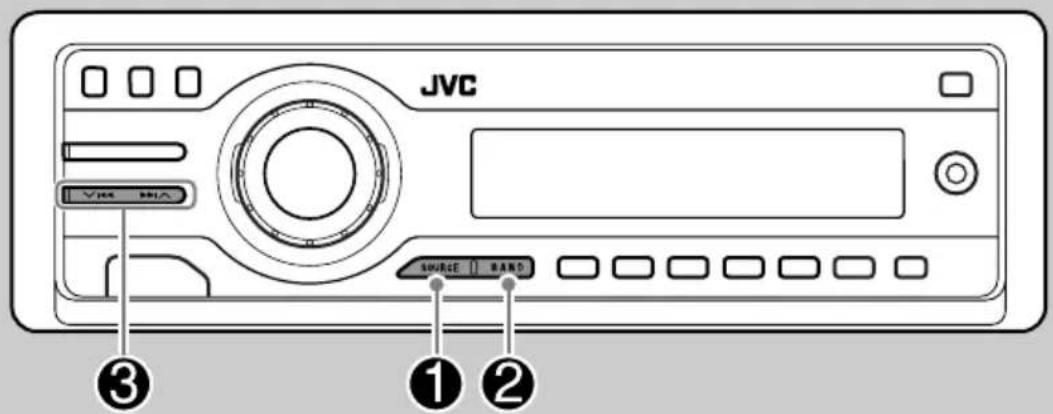
1 ▲ (up) / ▼ (down) buttons
- Function as Play / Stop buttons for DVD and VCDs.
2 T/P TP/PTY (traffic programme/programme type) button
3 D DISP (display) button
4 S SEL (select) button
5 • Control dial
• ⏻/1 ATT (standby/on attenuator) button
6 Display window
7 ▲ (eject) button
8 Remote sensor
9 ▼ |◀◀/▶▶| /buttons
10 (control panel release) button
11 SOURCE button
12 BAND button
13 Number buttons
14 EQ (equalizer) button
15 MO (monaural) button
16 SSM (Strong-station Sequential Memory) button
17 DUAL (dual zone) button
18 RPT (repeat) button
19 RND (random) button
20 M MODE button
21 AUX (auxiliary) input jack
Display window
22 Disc information indicators— TAG (ID3 Tag), ☐ (folder), 📌 (track/file)
23 Main display
24 Source display / Volume level indicator
25 EQ (equalizer) indicator
26 Sound mode indicators—ROCK, CLASSIC, POPS, HIP HOP, JAZZ, USER • also works as the time countdown indicator and level meter during play (see page 40).
27 Disc type indicators—WMA, MP3
28 Tuner reception indicators—ST (stereo), MO (monaural)
29 RDS indicators—TP, PTY, AF, REG
30 Playback source indicators— CH: Lights up for the CD changer. DISC: Lights up for the built-in DVD/CD player.
31 Playback mode / item indicators— RND (random), 📄 (disc), 📋(folder), RPT (repeat)
32 LOUD (loudness) indicator
33 Tr (track) indicator
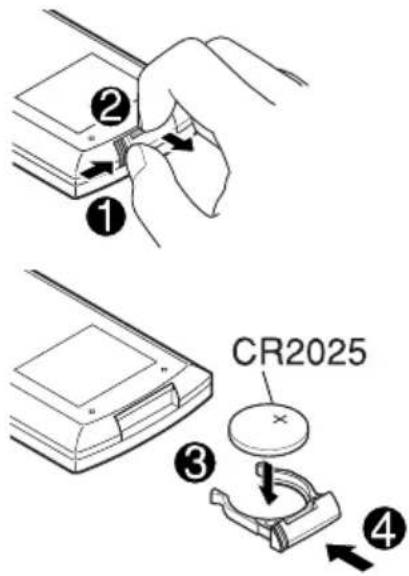
Installing the lithium coin battery (CR2025)
Before using the remote controller:
- Aim the remote controller directly at the remote sensor on the receiver. Make sure there is no obstacle in between.
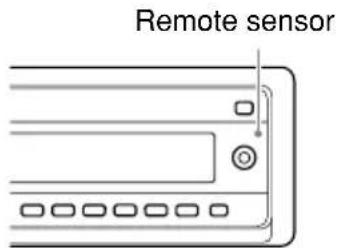
- Do not expose the remote sensor to strong light (direct sunlight or artificial lighting).
Warning:
- Store the battery in a place where children cannot reach to avoid risk of accident. • To prevent the battery from over-heating, cracking, or starting a fire:
- Do not recharge, short, disassemble, or heat the battery or dispose of it in a fire.
- Do not leave the battery with other metallic materials.
- Do not poke the battery with tweezers or similar tools.
- Wrap the battery with tape and insulate when throwing away or saving it.
Main elements and features
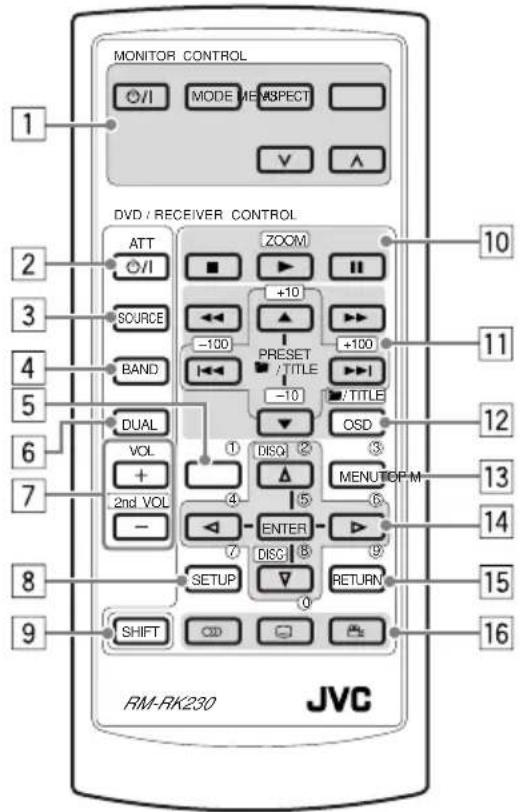
IMPORTANT:
If Dual Zone is activated (see page 35), the remote controller only functions for operating the DVD/CD player.
MONITOR CONTROL
1 Monitor control buttons* 1
- (standby/on), MODE, ASPECT, MENU, ∨ and ∧
DVD/RECEIVER CONTROL
2 ⏻/1 ATT (standby/on attenuator) button • Turns on and off the power and also attenuates the sound. 3 SOURCE button - Selects the source. 4 BAND button - Selects the FM/AM/DAB bands.
5 TOP M (menu) button* 2
• Display the DVD and VCD* 3 disc menu.
6 DUAL button
- Activate and deactivate Dual Zone.
7 VOL + / - buttons
- Adjusts the volume level.
- Also function as 2nd VOL +/- buttons when pressed with SHIFT button.
8 SETUP button* 2
9 SHIFT button
10 Basic disc operation buttons* 4:
■ (stop), ▶ (play), ■ (pause)
- ▶ (play) also function as ZOOM button when pressed with SHIFT button.
[11] Advanced disc operation/tuner operation buttons*5
For advanced disc operations:
• /TITLE ▲ / ▼
- Select the titles (for DVD) or folders (for MP3/WMA).
- |◀◀ / ▶▶▶| (reverse skip/forward skip)
- ◀◀/▶▶ (reverse search/forward search)*4
For FM/AM tuner operations:
- PRESET ▲ / ▼
- Changes the preset stations. • |◀◀/▶▶| – Functions to search for stations.
For DAB tuner operations:
- PRESET ▲ / ▼
- Changes the preset ensembles. • |◀◀/▶▶|
- Changes the ensembles if pressed briefly.
- Changes the ensembles rapidly if pressed and held.
12 OSD button
• Display the on-screen bar. - Also function as the ☐/TITLE button when pressed with SHIFT button. - You can directly select titles (for DVD) or folders (for MP3/WMA) using the number buttons (see page 21).
13 MENU button* 2
- Display the DVD and VCD*3 disc menu.
14 Menu operation buttons*2
- Cursor (, , , ) , and ENTER
- / : Also function as DISC + / - buttons when the source is "CD-CH."
15 RETURN button*2
16 Special function buttons
• DVD/VCD: 🎨 (audio) • DVD: .... (subtitle), ∞ (angle)
*1 Controllable only if your monitor is one of the JVC monitors — KV-MR9010 or KV-MH6510. *2 These buttons function as the number buttons when pressed with SHIFT button. *3 Only when PBC is not in use. *4 Not used for CD changer operations. *5 These buttons function as the +10/-10 and +100/-100 buttons when pressed with SHIFT button.
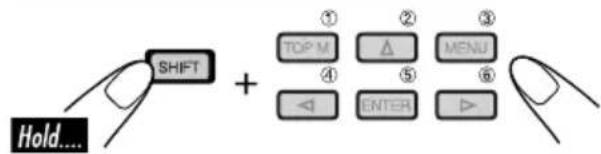
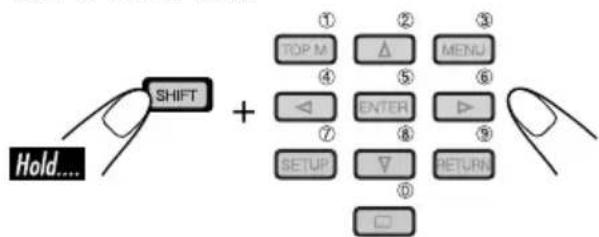
How to select a number
To select a number from 0 - 9:
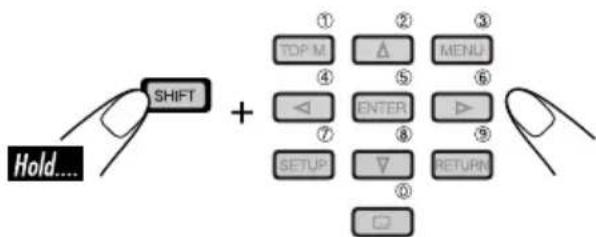
To select a number greater than 9:
![graph TD A["Shift"] --> B["+10"] B --> C["-100"] C --> D["+100"] D --> E["->"] E --> F["↓"] F --> G["① TOP M"] F --> H["② △"] F --> I["③ MENU"] F --> J["④ ⑤"] F --> K["⑥ ←"] F --> L["⑦ ENTER"] F --> M["⑧ ▶"] F --> N["⑨ SETUP"] F --> O["⑩ RETURN"] P["Hold...."] --> Q["SHIFT"]](/content/2026/06/1238930/images/69bc7679f49c768d923104d8c71ec4dc767cccc9f6c5bff1f4c9d27749ddf5de.jpg)
- +100/-100 buttons used only for searching MP3/WMA tracks number greater than 99.
Basic operations
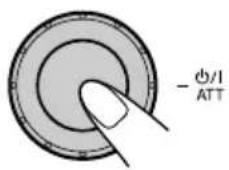
1
2
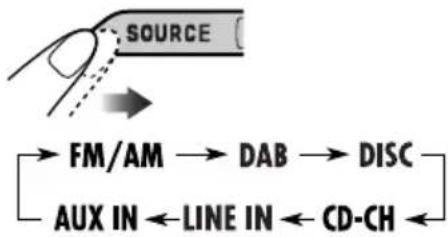
You cannot select some sources if they are not ready.
3
For FM/AM tuner only![graph TD A["BAND"] --> B["FM1"] B --> C["FM2"] C --> D["FM3"] D --> E["AM"] E --> F["Feedback Loop"] style A fill:#f9f,stroke:#333 style B fill:#ccf,stroke:#333 style C fill:#cfc,stroke:#333 style D fill:#fcc,stroke:#333 style E fill:#ffc,stroke:#333 style F fill:#cff,stroke:#333](/content/2026/06/1238930/images/dd711c82852b41d53b99e3afcdcffc412208d20400d182456c1ad1aed8b9541f.jpg)
For DAB tuner only![graph TD A["BAND"] --> B["DAB1"] B --> C["DAB2"] C --> D["DAB3"] D --> A](/content/2026/06/1238930/images/4af03e19cdee78f802a7641a51ec02583b81cdbab2584ef8d0a0527e0caeb50b.jpg)
4
Adjust the volume.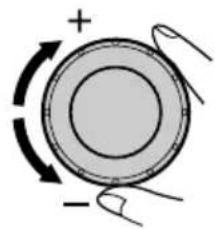
Volume level appears.
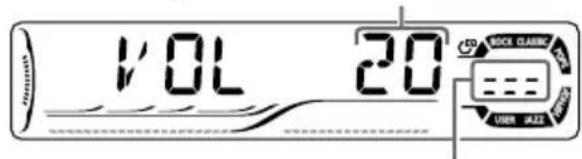
Volume level indicator
5
Adjust the sound as you want. (See pages 36 – 38.)
To drop the volume in a moment (ATT)
To restore the sound, press it again.
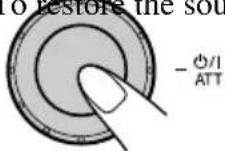
press it again.
To turn off the power
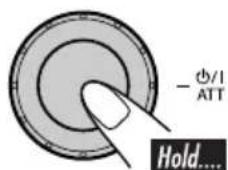
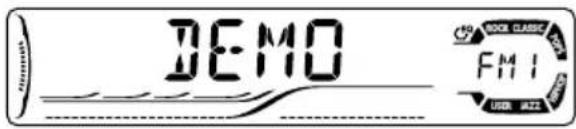
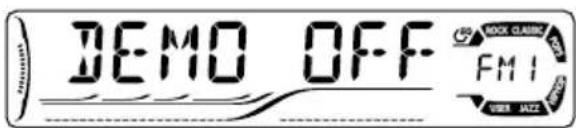
Canceling the display demonstrations
If no operations are done for about 20 seconds, the display demonstration starts.
[Initial: DEMO ON]—see page 39.
1
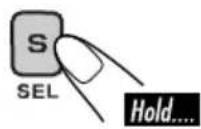
2
3
DEMO OFF ↔ DEMO ON
4 Finish the procedure.
To activate the display demonstration
In step 3 above...
DEMO OFF ↔ DEMO ON
Setting the clock
1
2 Set the hour and minute.
1 Select “CLOCK H” (hour), then adjust the hour. 2 Select "CLOCK M" (minute), then adjust the minute. 3 Select “24H/12H” (minute), then select “24H” (hour) or “12H” (hour).
3 Finish the procedure.
To check the current clock time when the power is turned off
Listening to the radio
1![graph TD A["SOURCE"] --> B["FM1/FM2/FM3/AM"] B --> C["End"]](/content/2026/06/1238930/images/e6bee3fcbb555fd9b8675b2634909d9fca70532e6ef92ead35441bfc09e00c3b.jpg)
2![graph TD A["BAND"] --> B["FM1"] B --> C["FM2"] C --> D["FM3"] D --> E["AM"] E --> A](/content/2026/06/1238930/images/238beba60630440a09a203f6952ca56e47681db026bab52d84e35aebeceac085.jpg)
Selected band appears.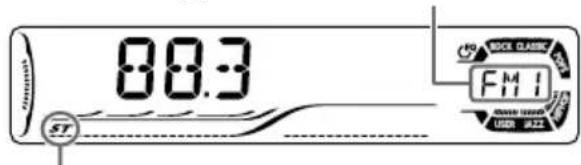
Lights up when receiving an FM stereo broadcast with sufficient signal strength.
To tune in to a station manually
In step ③ on the left column...
1
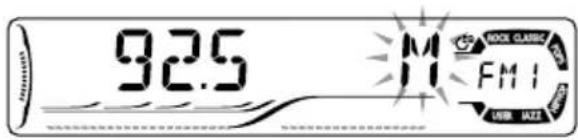
2 Select the desired station frequencies.
3
Start searching for a station.
When a station is received, searching stops.
To stop searching, press the same button again.
When an FM stereo broadcast is hard to receive
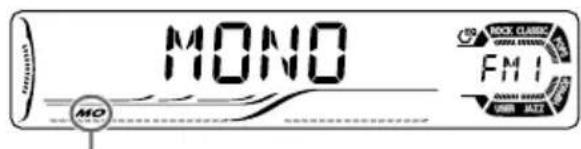
Lights up when monaural mode is activated.
Reception improves, but stereo effect will be lost.
To restore the stereo effect, repeat the same procedure. "MONO OFF" appears and the MO indicator goes off.
Storing stations in memory
You can preset six stations for each band.
■ FM station automatic presetting — SSM (Strong-station Sequential Memory)
![graph TD A["SOURCE"] --> B["FM1/FM2/FM3/AM"] B --> C["End"]](/content/2026/06/1238930/images/2b56048c7d86bd9afea8010de1a1b8a968204db043345f4c91e636fd86cf4c16.jpg)
2 Select the FM band (FM1 - FM3) you want to store into.
![graph TD A["BAND"] --> B["FM1"] B --> C["FM2"] C --> D["FM3"] D --> E["AM"] E --> A](/content/2026/06/1238930/images/402871593f93481942bf7b64886a3b8179901f12a4d3aef5903ef127202044f6.jpg)
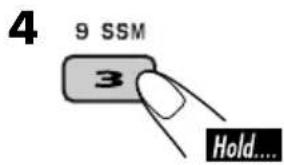
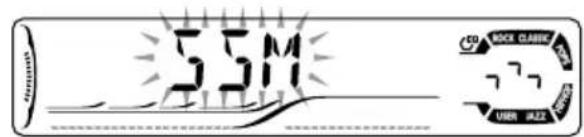
“SSM” flashes, then disappears when automatic presetting is over.
Local FM stations with the strongest signals are searched and stored automatically in the FM band.
To be continued....
Manual presetting
Ex.: Storing FM station of 92.5 MHz into the preset number 4 of the FM1 band.
1![graph TD A["SOURCE"] --> B["FM1/FM2/FM3/AM"] B --> C["End"]](/content/2026/06/1238930/images/72fa21d9da31eed2ae4abdcc092415a8a63df5ea7d1e2478ace46e643dcc3a5b.jpg)
2![graph TD A["BAND"] --> B["FM1"] A --> C["FM2"] A --> D["FM3"] B --> E["AM"] C --> E D --> E](/content/2026/06/1238930/images/6ecde58c5f691fa9d7223822184feef24f2d216d441dd4e6106c17cc24ae9bdb.jpg)
3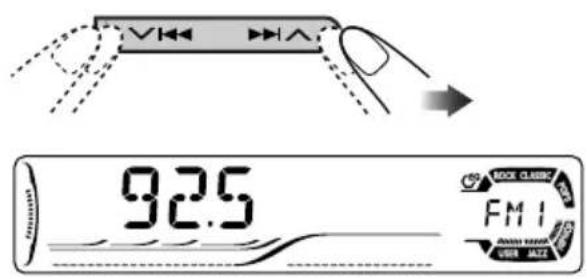
Preset number flashes for a while.
To check the current clock time while listening to an FM (non-RDS) or AM station
- For FM RDS stations, see page 17.
![graph LR A["DISP"] --> B["Frequency ↔ Clock"] B --> C["Arrow indicating direction"]](/content/2026/06/1238930/images/b380401a72d53134c72e7010d2b6f4177e65d0b6d388cfd0dd6f171211889544.jpg)
Listening to a preset station
1![graph TD A["SOURCE"] --> B["FM1/FM2/FM3/AM"] B --> C["End"]](/content/2026/06/1238930/images/70942df7cc274faf565a38fc7e26c6a18ee4a98cbc5efcea1f1afac88c557774.jpg)
2![graph TD A["BAND"] --> B["FM1"] B --> C["FM2"] C --> D["FM3"] D --> E["AM"] E --> A](/content/2026/06/1238930/images/0307622b4c1110a8ea4345d16aa7ecd6a1fcfd61b679efd651a83a66007e3965.jpg)
3 Select the preset station (1 - 6) you want.
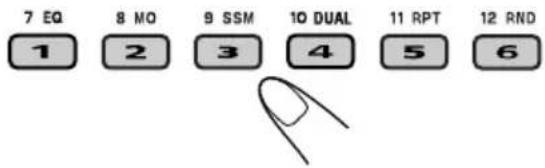
When using the remote controller....
or![graph TD A["▲"] --> B["PRESET / TITLE"] B --> C["▼"]](/content/2026/06/1238930/images/e8038c930afc2199802107e53a4311a48a6860fe8ca16ae038d42757d76ccdcc.jpg)
Searching for your favorite FM RDS programme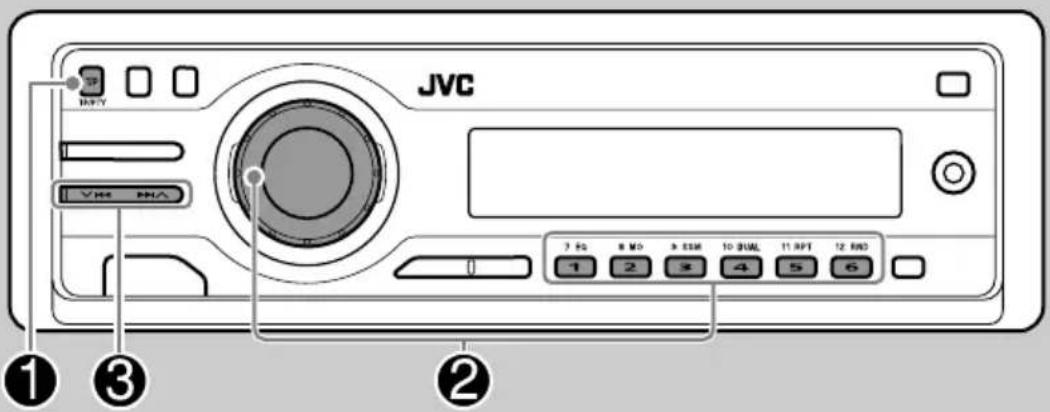
You can tune in to a station broadcasting your favorite programme by searching for a PTY code.
• To store your favorite programme, see page 16.
1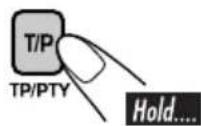
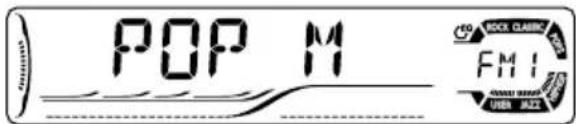
The last selected PTY code appears.
2 Select one of your favorite programme type.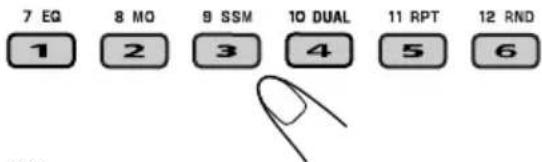
or
Select one of the twenty-nine PTY codes.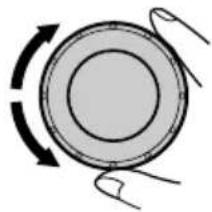
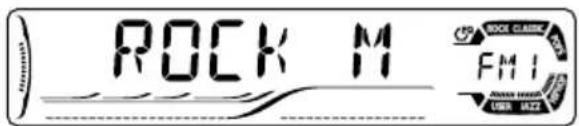
Ex.: When "ROCK M" is selected
3 Start searching for your favorite programme.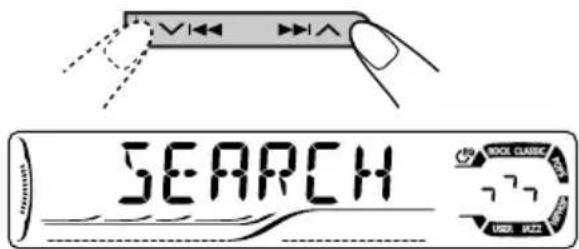
If there is a station broadcasting a programme of the same PTY code as you have selected, that station is tuned in.
PTY codes
NEWS, AFFAIRS, INFO, SPORT, EDUCATE, DRAMA, CULTURE, SCIENCE, VARIED, POP M (music), ROCK M (music), EASY M (music), LIGHT M (music), CLASSICS, OTHER M (music), WEATHER, FINANCE, CHILDREN, SOCIAL, RELIGION, PHONE IN, TRAVEL, LEISURE, JAZZ, COUNTRY, NATION M (music), OLDIES, FOLK M (music), DOCUMENT
What you can do with RDS
RDS (Radio Data System) allows FM stations to send an additional signal along with their regular programme signals. By receiving the RDS data, this receiver can do the following:
• Programme Type (PTY) Search (see page 15) • Temporarily switches to Traffic Announcement—TA Standby Reception. (See the right column.) • Temporarily switches to your favorite programme—PTY Standby Reception. (See pages 17 and 40.) - Tracing the same programme automatically —Network-Tracking Reception (see page 17) • Programme Search (see page 40)
Storing your favorite programmes
You can store six favorite programme types.
Preset programme types in the number buttons (1 to 6):
| 1 | 2 | 3 | 4 | 5 | 6 |
| POP M | ROCK M | EASY M | CLASSICS | AFFAIRS | VARIED |
1 Select a PTY code (see page 15).
2 Select the preset number (1 - 6) you want to store into.
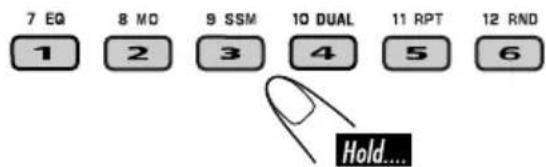
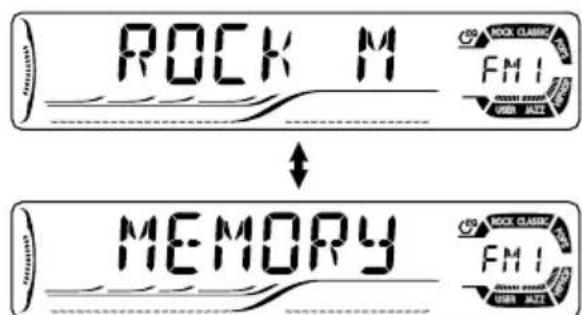
Ex.: When "ROCK M" is selected
3 Repeat steps 1 and 2 to store other PTY codes into other preset numbers.
4 Finish the procedure.
Using the standby receptions
TA Standby Reception
TA Standby Reception allows the receiver to switch temporarily to Traffic Announcement (TA) from any source other than AM.
- The volume changes to the preset TA volume level (see page 40).
To activate TA Standby Reception
The TP indicator either
lights up or flashes.
- If the TP indicator lights up, TA Standby Reception is activated.
- If the TP indicator flashes, TA Standby Reception is not yet activated. (This occurs when you are listening to an FM station without the RDS signals required for TA Standby Reception.) To activate TA Standby Reception, tune in to another station providing these signals. The TP indicator will stop flashing and remain lit.
To deactivate the TA Standby Reception
The TP indicator goes off.
PTY Standby Reception
PTY Standby Reception allows the receiver to temporarily switch to your favorite PTY program from any source other than AM.
To activate and select your favorite PTY code for PTY Standby Reception, see page 40.
The PTY indicator either lights up or flashes.
- If the PTY indicator lights up, PTY Standby Reception is activated.
- If the PTY indicator flashes, PTY Standby Reception is not yet activated. To activate PTY Standby Reception, tune in to another station providing these signals. The PTY indicator will stop flashing and remain lit.
To deactivate PTY Standby Reception, select "OFF" for the PTY code (see page 40). The PTY indicator goes off.
Tracking the same program—Network-Tracking Reception
When driving in an area where FM reception is not sufficient, this receiver automatically tunes in to another FM RDS station of the same network, possibly broadcasting the same program with stronger signals (see the illustration below).
When shipped from the factory, Network-Tracking Reception is activated.
To change the Network-Tracking Reception setting, see "AF-REG" on page 40.
Program A broadcasting on different frequency areas (01 – 05)
![graph TD A["Car"] --> B["Sensor 01"] B --> C["Sensor 02"] C --> D["Sensor 03"] D --> E["Sensor 04"] E --> F["Sensor 05"]](/content/2026/06/1238930/images/86f0fa5321e795daa1dfb18e89882f8f3179d41c595c6b9e4bb2f6870b4a78fc.jpg)
To check the current clock time while listening to an FM RDS station
![graph LR A["DISP"] --> B["Clock"] B --> C["Station name (PS)"] C --> D["Station frequency"] D --> E["Programme type (PTY)"]](/content/2026/06/1238930/images/427ab2f1f2ea36a24c99e58680ab7cbcfe2f6c373a03575c993c7ce84a00cd5f.jpg)
Playing a disc in the receiver
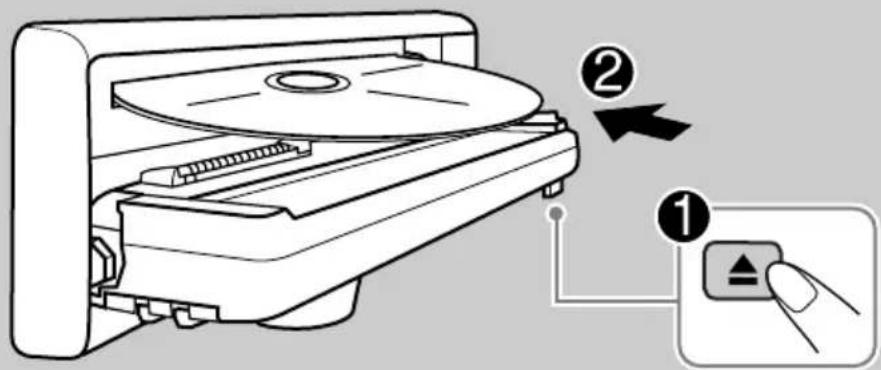
The disc type is automatically detected, and playback starts automatically (for DVD: automatic start depends on its internal program).
If the current disc is an audio CD, CD Text, MP3/WMA, or VCD without PBC, all tracks will be played repeatedly until you change the source or eject the disc.
- If a title list or disc menu appears while playing a DVD or VCD with PBC, see “Disc menu operations” on page 23.
The following marks are used to indicate the playable discs....


DVD Video Video CD with PBC only


Video CD with/without PBC
Audio CD/CD Text


MP3/WMA disc All discs listed here
Before performing any operations, make sure the following....
- Turn on the monitor for playing a DVD or VCD. If you turn on the monitor, you can also control the audio CD, CD Text, and MP3/WMA playback by referring to the monitor screen. (See pages 27 and 28.)
- For DVD playback, you can change the Setup Menu setting to your preference. (See pages 29 – 31.)
- The operations explained on pages 20 – 31 are using the remote controller.
- When you want to operate the DVD/CD player using the buttons on the control panel, see “Other disc operations” on pages 32 – 34.
If “∅” appears on the monitor when pressing a button, the receiver cannot accept an operation you have tried to do.
- In some cases, without showing “∅,” operations will not be accepted.
- Microsoft and Windows Media are either registered trademarks or trademarks of Microsoft Corporation in the United States and/or other countries.
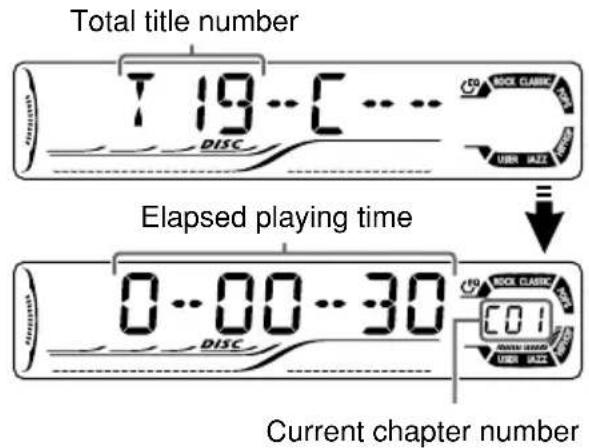
- When inserting a DVD disc:
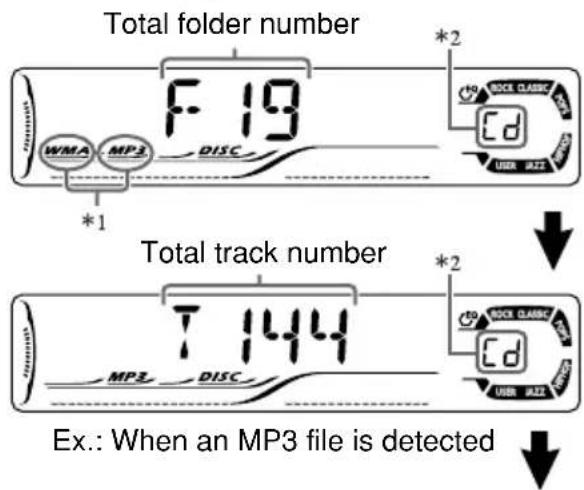
- When inserting an MP3/WMA disc:
Disc information appears automatically (see page 33).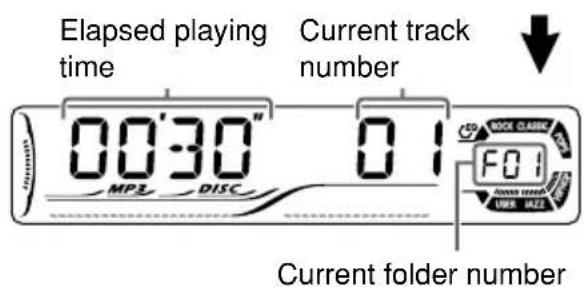
*1 Either the MP3 or WMA indicator lights up depending on the detected file.
*2 Does not light up for DVD-R/DVD-RW.
- When inserting a VCD:
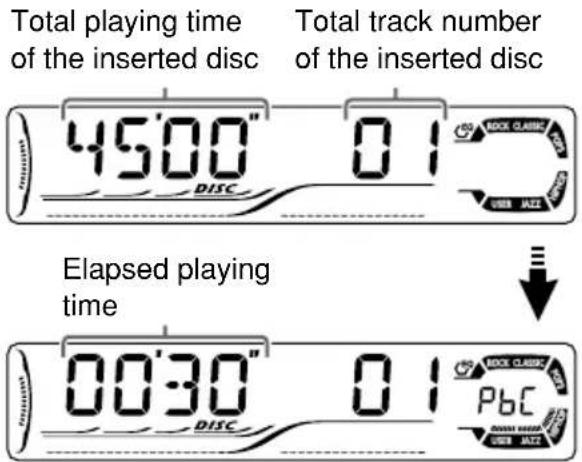
- When inserting a CD Text/audio CD:
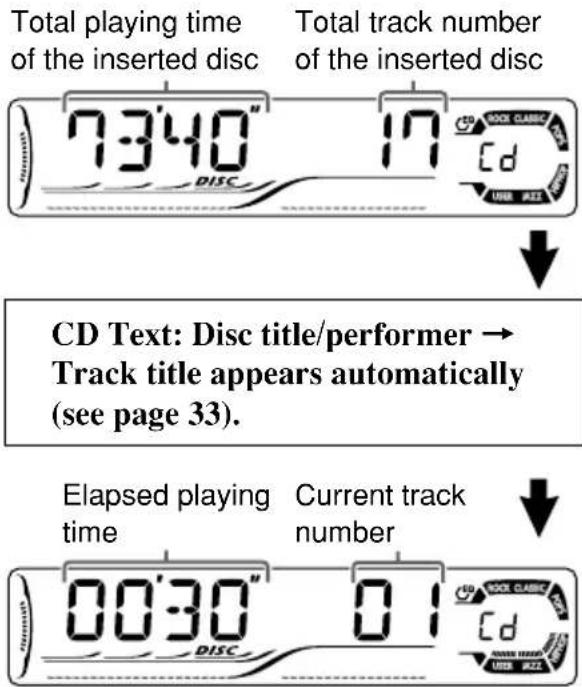
To eject the disc
Basic operations
| Operations Display indication and/or next operation | |
To stop play temporarily | “PAUSE” illuminates on the display. |
A still picture appears. Ⓐ Frame by frame playback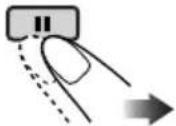 ⓑ Slow motion playback ⓑ Slow motion playback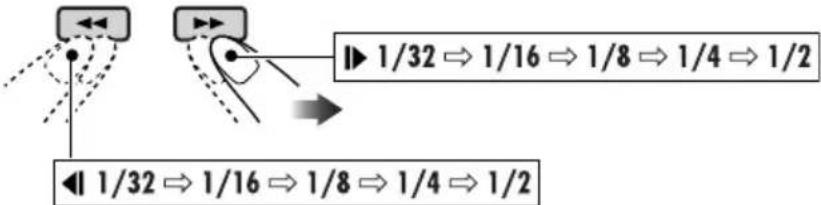 No sound comes out during Slow Motion Playback.When playing a VCD, Reverse Slow Motion Playback is prohibited.To resume normal play: No sound comes out during Slow Motion Playback.When playing a VCD, Reverse Slow Motion Playback is prohibited.To resume normal play: | |
To replay the previous scenes—One Touch Replay | The playback position moves back about 10 seconds before the current position.This function works only within the same title.For some DVDs, this function does not work. |
To stop playback | When you start playback again, playback starts from where it has been stopped(Resume play). |
| When you start playback again, playback starts from the beginning of the last track. | |
* During play, on-screen guide icons appear on the monitor for a while (see page 56).
To go to the next or previous chapters/tracks

• For DVD: During play or pause
To the following chapters/tracks.
To go back to the beginning of the current chapter/track, then the previous chapters/tracks.
To fast-forward or reverse the chapter/track

Reverses.
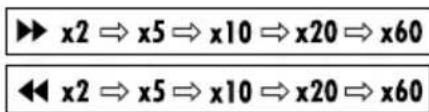
* The search speed changes to x2 ⇔ x10 for all discs (DVD, VCD, CD), but the information shown on the monitor is only for DVD/VCD.
To forward or reverse search the chapter/track

The information shown is only for DVD/VCD:
• To resume normal speed
To locate a particular title/chapter/track directly

- For DVD: During play or pause—select a chapter. During stop—select a title.
- For VCD: While PBC (see page 23) is not in use.
- For MP3/WMA: Select a track within the same folder.
Select the number corresponding to the item you want (see page 9).
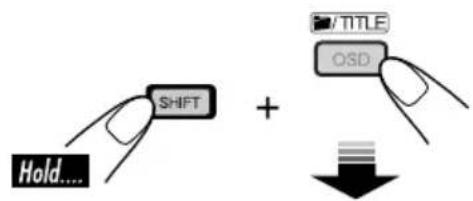
To locate a title/folder

To locate a particular title/folder

Within 10 seconds, press the number buttons (see page 9).
Selecting subtitles
You can select the language of the subtitle to be shown on the monitor.
- You can set the initial subtitle language using the setup menu (see page 30).

![graph TD A["Hand pointing at top"] --> B["Input Box 1/3"] B --> C["1/3"] C --> D["ENGLISH"]](/content/2026/06/1238930/images/2afd6a3636d50f3058fd68c2b38b4af10879dfacf1ce1d3762f1441f672814ce.jpg)
Ex.: When the disc has 3 options
Selecting audio languages
For DVD:
You can select the language to listen to if the disc has multiple audio languages.

![graph TD A["Hand pointing to ID card"] --> B["Text Input Box"] B --> C["1/3"] C --> D["ENGLISH"]](/content/2026/06/1238930/images/bf750f2e8658eb7dd2b0a5cfa20e237d2f41e00a6ab2eb72bd56428d184bf7a4.jpg)
Ex.: When the disc has 3 options
For VCD:
You can select the audio channel to play. (This is convenient when playing a Karaoke VCD.)

![graph TD A["Sensor"] --> B["ST"] B --> C["L"] C --> D["R"] D --> E["Output"] F["Sensor Input"] --> G["St"] G --> H["ST"] H --> I["Output"]](/content/2026/06/1238930/images/c9c5fcd30ddc921aca3c0b7be27cf7ff1c4b16479d71f0c1f0fca3bc8eaedd0a.jpg)
ST: To listen to normal stereo (left/right) playback.
L: To listen to the L (left) audio channel.
R: To listen to the R (right) audio channel.
Selecting multi-angle views
You can view the same scene at different angles if the disc has multi-angle views.

![graph TD A["Hand with sensor"] --> B["1/3"] B --> C["1"] C --> D["Car with 1/2 speedometer"] D --> E["Car with 1/2 speedometer"] E --> F["Car with 1/2 speedometer"] F --> G["Car with 1/2 speedometer"] G --> H["Car with 1/2 speedometer"] H --> I["Car with 1/2 speedometer"]](/content/2026/06/1238930/images/6c80eb007ff5300e21fbcbeafc34cc5e6753c7c46a06094da5d9e56337d7447b.jpg)
Ex.: When the disc has 3 multi-angle views
- For some DVDs and VCDs, changing the subtitle language, audio language (or audio channel) without using the disc menu is prohibited.
Disc menu operations
Menu-driven playback is possible while playing back a DVD with menu-driven features or a VCD with the PBC (Playback Control).
While playing a DVD

1
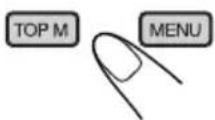
A title list or disc menu will appear on the monitor.
2 Select the item you want on the menu.
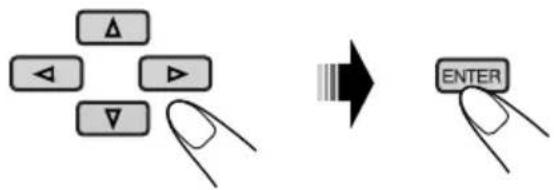
Selected item starts playback.
- On some discs, you can also select items using the corresponding number buttons.
While playing a VCD

- When a list of items is displayed on the monitor.
- To select a number greater than 9, see “How to select a number” on page 9.
To return to the previous menus
Canceling the PBC playback
1
2 Select a track to start normal playback using the number buttons (see page 9).
To resume the PBC function
Zoom in
1
![graph TD A["Hold...."] --> B["SHIFT"] B --> C["ZOOM"] C --> D["Zoom 1 ZOOM 2 ZOOM 3 ZOOM 4"] D --> E["ZOOM OFF"] E --> F["ZOOM 5ZOOM 6"] F --> G["Zoom 5ZOOM 6"] G --> H["ZOOM OFF"] H --> I["ZOOM 5ZOOM 6"] I --> J["Zoom 5ZOOM 6"] J --> K["ZOOM OFF"] K --> L["ZOOM 5ZOOM 6"] L --> M["ZOOM OFF"] M --> N…](/content/2026/06/1238930/images/eab574daf0231085e99b98bf3dcd7238db612795028eef619a4bfef7d247916b.jpg)
2 Move the zoomed-in portion.
To cancel zoom, select "ZOOM OFF" in step 1.
On-Screen disc operations
About the On-Screen Bar
You can check the disc information and use some functions through the on-screen bar.
- For audio CD, CD Text, and MP3/WMA disc you can also use the control screen and list screen (see pages 27 and 28).
On-Screen bars
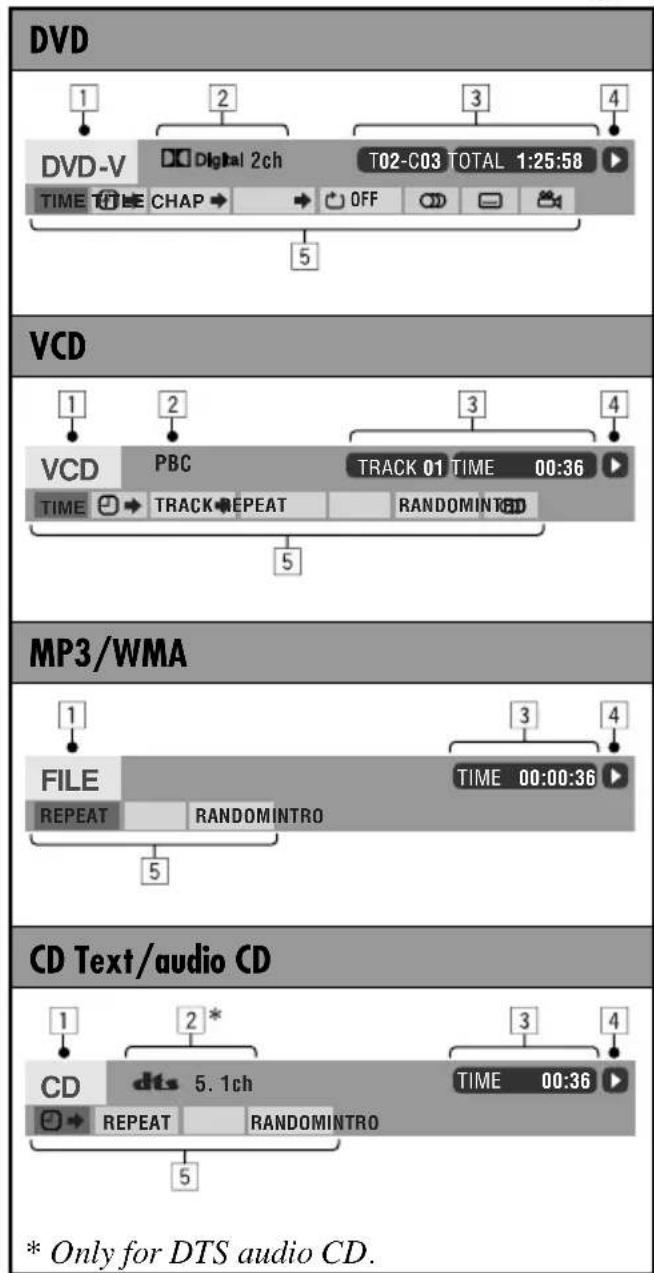
1 Disc type 2 • Audio signal format type (for DVD and DTS audio CD) - PBC (only for VCD) 3 Playback information
T02-C03 Current track/chapter
TRACK 01 Current track
TOTAL Elapsed playing time of the disc
T. REM Remaining disc time (for VCD)/remaining title time (for DVD-V)
TIME: Elapsed playing time of the current chapter/track.
REM: Remaining time of the current chapter/track.
4 Playback condition
Playback
Forward/reverse search
Forward/reverse slow-motion
Pause
Stop
5 Operation icons
TIME: Time indication
Time Search—Enter the elapsed playing time of the current title or of the disc.
TITLE→ Title Search
CHAP→ Chapter Search
TRACK→ Track Search
Change the audio language or audio channel.
Change the subtitle language.
Change the view angle.
OFF Repeat play (for DVD)
REPEAT Repeat play (for other discs)
INTRO Intro play
RANDOM Random play
Basic on-screen bar operations
1 Display the on-screen bar.

- For DVD/VCD:
(twice)
- For other discs:

2 Select an item.

3 Make a selection.
• If pop-up menu appears...
1
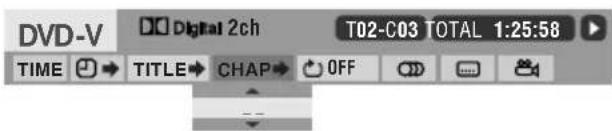
or
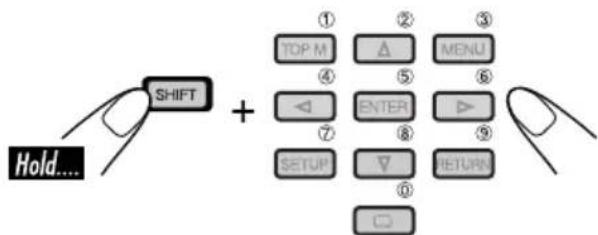
2
To erase the on-screen bar
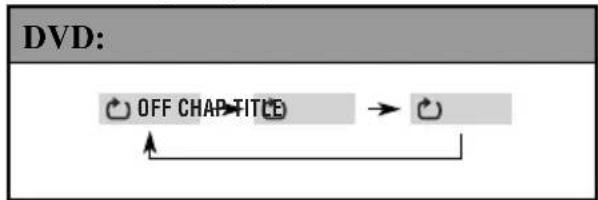
The selectable options for Repeat/Intro/Random plays:
OFF Repeat play
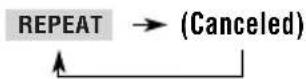
REPEAT Repeat play
VCD (while PBC is not in use):
MP3/WMA:
![graph TD A["REPEAT TRACK"] --> B["REPEAT FOLDER"] B --> C["(Canceled)"] C --> A](/content/2026/06/1238930/images/c6406cefeaf30aa4493bfc8e9db44ebe49e85a59b033d939bd78385a76c0a9e6.jpg)
CD Text/audio CD:

To be continued....
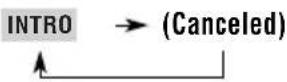
INTRO Intro play
VCD (while PBC is not in use):
MP3/WMA:
![graph TD A["INTRO TRACK"] --> B["INTRO FOLDER"] B --> C["(Canceled)"] C --> A](/content/2026/06/1238930/images/6a82829a1846ba3c87fa0e40967d3251d12ff52ffbd5ca53741b406cffd8f9a3.jpg)
CD Text/audio CD:

RANDOM Random play
VCD (while PBC is not in use):
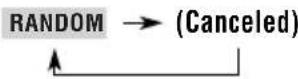
MP3/WMA:
![graph TD A["RANDOM FOLDER"] --> B["RANDOM DISC"] B --> C["(Canceled)"] C --> A](/content/2026/06/1238930/images/2f5ba90d0abe3f9b92b1578c4f47c31b84c9f611af2d651f79e14a058fa5b614.jpg)
CD Text/audio CD:
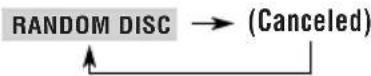
Refer also to page 25 for the following operations.
To change the time information
1 Select TIME. 2 Change the time information.
![graph LR A["TIME 0:00:58"] --> B["REM 0:11:23"] C["T. REM 0:35:24"] --> D["TOTAL 1:01:58"]](/content/2026/06/1238930/images/648cd8fc74d9097198cc9d9461874e1d17fbcab78f3968ab603cc4e1ee0e2fa8.jpg)
To search for a particular point by playing time
1 Select 2 Enter the elapsed playing time of the current title or of the disc.
Ex.: • To enter 1 (hours): 02 (minutes): 00 (seconds), press 1, 0, 2, 0, then 0.
• To enter 54 (minutes): 00 (seconds), press 0, 5, 4, 0, then 0. - It is always required to enter the hour digit (even “0” hour), but it is not required to enter trailing zeros (the last two digits in the examples above). • To correct a misentry, press...
3 Finish the procedure.
To search for a particular title/chapter/track
1 Select TITLE→, CHAP→, or TRACK→. 2 Enter the number.
![graph TD A["Hold...."] --> B["SHIFT"] B --> C["① TOP M"] B --> D["② △"] B --> E["③ MENU"] B --> F["④ △"] B --> G["⑤ ENTER"] B --> H["⑥ ▶"] B --> I["⑦ SETUP"] B --> J["⑧ ▽"] B --> K["⑨ RETURN"] B --> L["⑩ ◇"]](/content/2026/06/1238930/images/71c628e27b3d0518cc227f45f64a899f4d562bb70eeb6e5c3cffdcb8f415f1ab.jpg)
• To correct a misentry, press the number button until the correct number is entered.
3 Finish the procedure.
Basic control screen operations
You can search for and play the desired items through the control screen.
- The control screen automatically appears on the monitor when you insert a disc.
MP3/WMA control screen
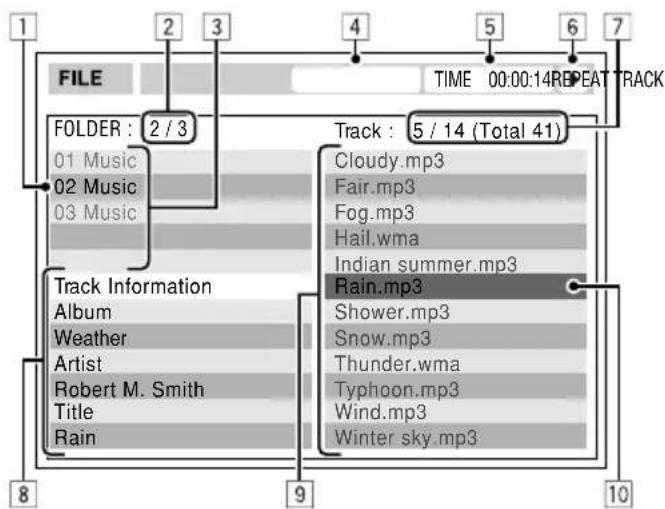
1 Current folder 2 Current folder number/total folder number 3 Folder list 4 Selected playback mode 5 Elapsed playing time of the current track 6 Operation mode icon
▶ (play), ■ (stop), ▪ (pause)
7 Current track number/total number of tracks in the current folder (total number of tracks on the disc) 8 Track information 9 Track list 10 Current track (highlighted bar)
To select a folder or track
1 Select "Folder" column or "Track" column on the control screen.
2 Select a folder or track.
CD Text/audio CD control screen

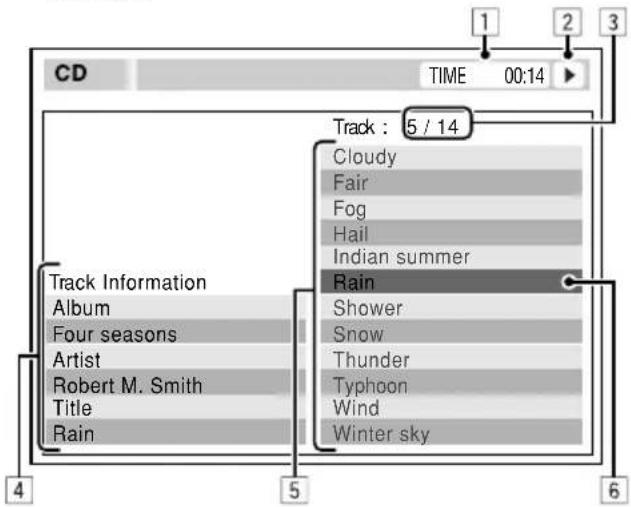
1 Elapsed playing time of the current track 2 Operation mode icon ▶ (play), ■ (stop), ▪ (pause), ▶▶ (fast-forward), ◀◀ (reverse) 3 Current track number/total number of tracks on the disc 4 Track information 5 Track list 6 Current track (highlighted bar)
To select a track
List screen operations
You can display the folder list/track list before starting play. On this list, you can confirm the contents and start playing a disc.
Folder/track list screens
Folder list (MP3/WMA)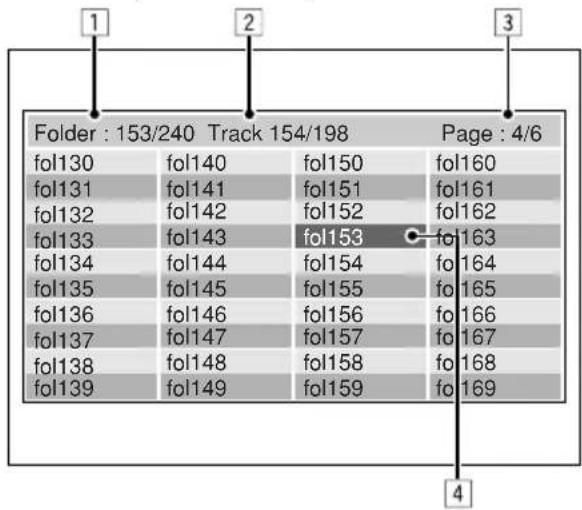
Track list (MP3/WMA/CD Text/audio CD)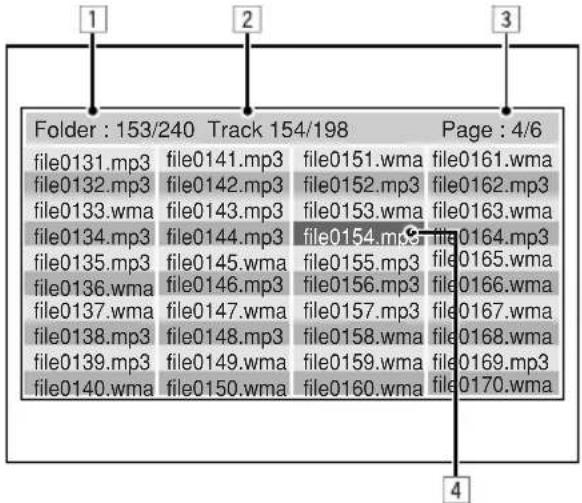
Ex.: Track list for MP3/WMA
1 Current folder number/total folder number (only for MP3/WMA) 2 Current track number/total number of tracks in the current folder 3 Current page/total number of the pages included in the list 4 Current folder/track (highlighted bar)
For MP3/WMA:
While stop...
1 Display the folder list.
Each time you press the button, the list screen comes on and goes off.
2 Select a folder on the list.
The track list of the selected folder appears.
To go back to the folder list
3 Select a track on the list.
![graph TD A["Δ"] --> B["◀"] C["▶"] --> D["▼"] E["→"] --> F["ENTER"]](/content/2026/06/1238930/images/5c672c3724bd00ffded632d7af7f3a904d50eba301aee0282e91aa8dee6a31bd.jpg)
For CD Text/audio CD:
While stop...
1 Display the track list.
Each time you press the button, the list screen comes on and goes off.
2 Select a track on the list.
![graph TD A["Input"] --> B["Left"] A --> C["Right"] A --> D["Down"] B --> E["Arrow to right"] C --> E D --> E E --> F["ENTER"]](/content/2026/06/1238930/images/88d6b803edca93d05522180de122315e621b4e22b2ac4618502318377a6f670b.jpg)
You can store the initial disc playback status.
- While playing, no change can be made on the setup menu.
Basic setting procedure
While stop...
1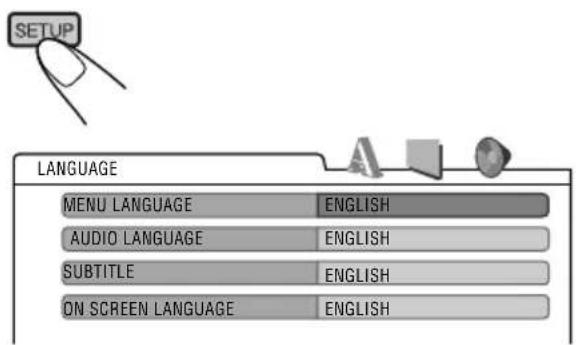
2
![graph TD A["◀"] --> B["▶"] B --> C["LANGUAGE ←→ PICTURE ←→ AUDIO ←"] C --> D["AUDIO"] D --> E["DIGITAL AUDIO OUTPUT: STREAM/PCM"] D --> F["DOWN MIX: STEREO"] D --> G["D. RANGE COMPRESSION: ON"]](/content/2026/06/1238930/images/30d328f343209b3910ff92c8125a1058dc952f53936ce3f3db1438b7c1dc7e05.jpg)
Ex.: When selecting the "AUDIO" menu
3 Select an item you want to set up.
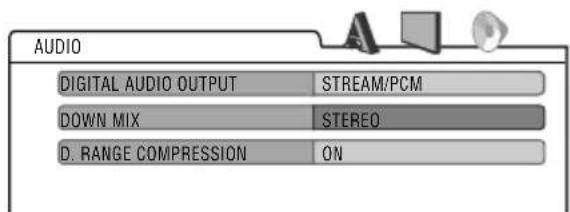
Ex.: When selecting "DOWN MIX"
4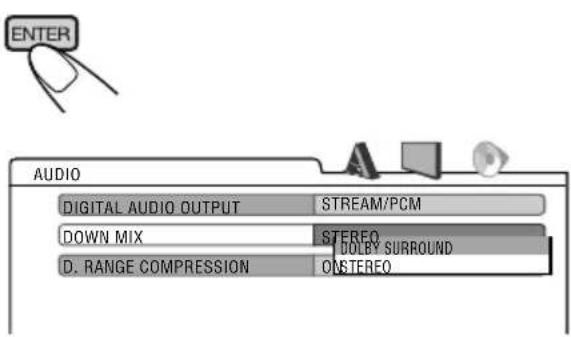
To set other items on the same menu
Repeat steps 3 to 6.
To set other items on other menus
Repeat steps 2 to 6.
To return to the normal screen

To be continued....

LANGUAGE menu
| Item Contents | |
| MENU LANGUAGE | Select the initial disc menu language. |
| AUDIO LANGUAGE | Select the initial audio language. |
| SUBTITLE | Select the initial subtitle language or erase the subtitle (OFF). |
| ON SCREEN LANGUAGE | Select the language for the Setup menu and some indications shown on the monitor. |
- For the LANGUAGE settings, see also the language codes list on page 52.
PICTURE menu
| Item Contents | |
MONITOR TYPE16:9 4:3 LETTER BOX 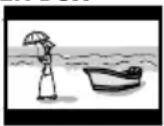 4:3 PAN SCAN 4:3 PAN SCAN 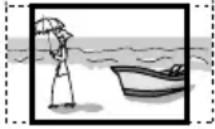 | Select the monitor type to watch a wide screen picture on your monitor.16:9 [MULTI]* : Select this when the aspect ratio of your monitor is 16:9.4:3 [MULTI]* LETTER BOX : Select this when the aspect ratio of your monitor is 4:3. While viewing a wide screen picture, the black bars appear on the top and the bottom of the screen.4:3 [MULTI]*PAN SCAN : Select this when the aspect ratio of your monitor is 4:3.While viewing a wide screen picture, the black bars do not appear; however, the left and right edges of the pictures will not be shown on the screen.* Select [MULTI] options for the multi-color system TVs. |
OSD POSITIONPosition 1 Position 2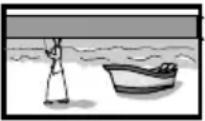 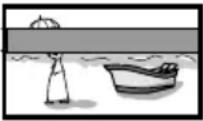 | Select the on-screen bar position on the monitor.1 : Higher position2 : Lower position |

AUDIO menu
| Item Contents | |
| DIGITAL AUDIO OUTPUT | Select the signal format to be emitted through the DIGITAL OUT (Optical) terminal on the rear. For details, see page 57.PCM ONLY: Select this when connecting an amplifier or a decoder incompatible with Dolby Digital, DTS, MPEG Audio, or connecting to a recording device.DOLBY DIGITAL/PCM: Select this when connecting an amplifier or a decoder compatible with Dolby Digital.STREAM/PCM: Select this when connecting an amplifier or a decoder compatible with Dolby Digital, DTS, and MPEG Audio. |
| DOWN MIX | When playing back a multi-channel DVD disc, this setting affects the signals reproduced through the LINE OUT jacks (and through the DIGITAL OUT terminal when “PCM ONLY” is selected for “DIGITAL AUDIO OUTPUT”).DOLBY SURROUND: Select this when you want to enjoy multi-channel surround audio by connecting an amplifier compatible with Dolby Surround to this receiver.STEREO: Normally select this. |
| D.RANGE COMPRESSION | You can enjoy a powerful sound at low or middle volume levels while playing a Dolby Digital software.AUTO: Select this to apply the effect to multi-channel encoded software (excluding 1-channel and 2-channel software).ON: Select this to always use this function. |
Other disc operations
In this section, you can learn how to use the buttons on the control panel in order to operate the DVD/CD player.
Basic operations
To stop playback
To start playback again
To eject a disc
To fast-forward or reverse the chapter/track
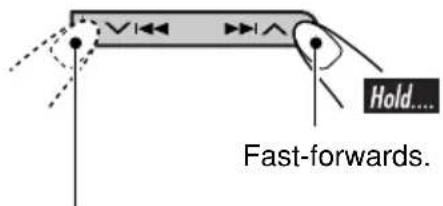
Reverses.
* The search speed changes to x2 ⇒ x10 for all discs (DVD, VCD, CD), but the information shown on the monitor is only for DVD/VCD.
To go to the next or previous chapters/tracks
For DVD: During play or pause
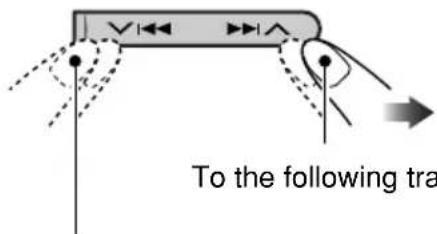
To the beginning of the current track, then the previous tracks.
To go to the next or previous folders

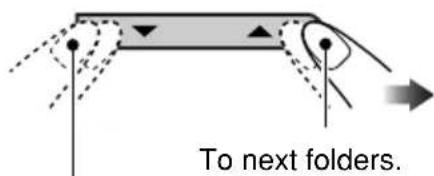
To previous folders.
To locate a particular title/chapter/folder/track directly

- For DVD: During play or pause—select a chapter.
During stop—select a title.
- For VCD: While PBC (see page 23) is not in use.
To select a number from 1 - 6:
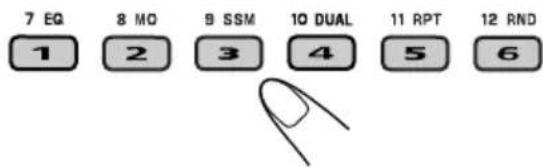
To select a number from 7 - 12:
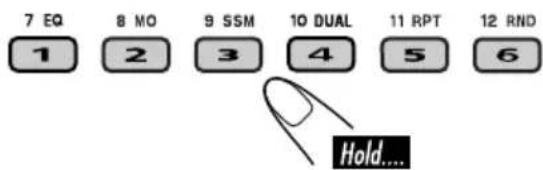
- The number buttons can also use to select item on the PBC menu.
- To use folder search on MP3/WMA discs, it is required that folders are assigned with 2-digit number at the beginning of their folder names—01, 02, 03, and so on.
• To select a particular track in a folder (for MP3/WMA disc) after selecting a folder:
To go to a chapter/track quickly

• For DVD: During play or pause. - For VCD: While PBC (see page 23) is not in use. - For MP3/WMA: Select a track within the same folder.
1
2
First time you press ▲ or ▼ button, the chapter/track skips to the nearest higher or lower chapter/track with a number of multiple ten (ex. 10th, 20th, 30th). Then each time you press the button, you can skip 10 chapters/tracks.
• After the last chapter/track, the first chapter/track will be selected and vice versa.
3
Each time you press the button consecutively, the next or previous chapters/tracks is located and played back.
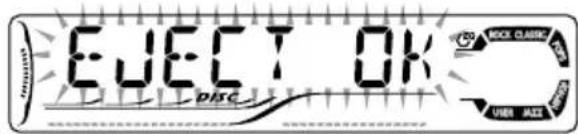
■ Prohibiting disc ejection
You can lock a disc in the loading slot.
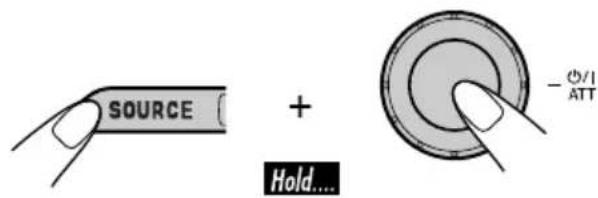
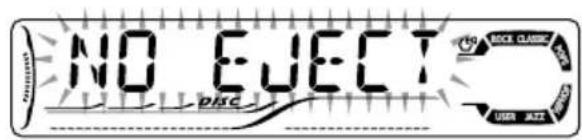
To cancel the prohibition, repeat the same procedure.
Changing the display information
- For MP3/WMA, CD Text, and audio CD, see page 46.
While playing a DVD
![graph TD A["Elapsed playing time"] --> B["Clock"] B --> C["Current title and Current chapter number"]](/content/2026/06/1238930/images/21716095acfeb59fdef5e96feb88a6229fd06eb86d8857fae14e8b279c3955e0.jpg)
While playing a VCD
![graph TD A["Elapsed playing time and Current track number"] --> B["Clock and Current track number"]](/content/2026/06/1238930/images/97d757dbd7c09ad2354fba9ce2160d6036694f62dbb6710d381c6dd27957160f.jpg)
Selecting the playback modes
You can use only one of the following playback modes at a time.
1
2 Select your desired playback mode.
Repeat play

• For DVD: During play or pause. - For VCD: While PBC (see page 23) is not in use.
11 RPT
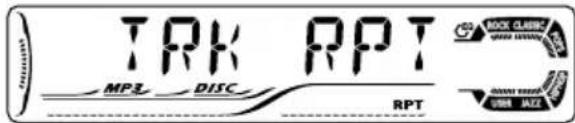
Ex.: When "TRK RPT" is selected while playing an MP3 disc
Mode Plays repeatedly
CHP RPT*1 : The current chapter.
- RPT lights up.
TIT RPT *1 : The current title.
- and RPT light up.
TRK RPT *2 : The current track.
- RPT lights up.
FLDR RPT*3 : All tracks of the current folder.
- and RPT light up.
RPT OFF : For DVD: Cancels Repeat play.
For other discs: All tracks of the disc.
Random play

- For VCD: While PBC (see page 23) is not in use.
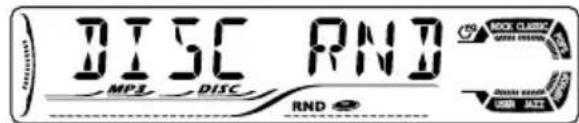
Ex.: When "DISC RND" is selected while playing an MP3 disc
Mode Plays at random
FLDR RND*3 : All tracks of the current folder, then tracks of the next folder and so on.
- RND and light up.
DISC RND : All tracks of the disc.
- RND and light up.
RND OFF : Cancels.
*1 Only while playing a DVD disc. *2 Except for DVD discs. *3 Only while playing an MP3 or WMA disc.
Listening with headphones
By connecting headphones to the 2nd AUDIO OUT plug on the rear, you can listen to the playback sound through the DVD/CD player while listening to another source through the speakers.

You can activate Dual Zone while listening to any source.
- When Dual Zone is in use, you can only operate the DVD/CD player using the remote controller.
On the remote controller:
1 Activate Dual Zone.
![graph TD A["DUAL ON"] --> B["DUAL OFF"] style A fill:#f9f,stroke:#333 style B fill:#ccf,stroke:#333](/content/2026/06/1238930/images/7d66c9d1bf208bb4330fc33ac5e6b2dcab53be644392bfcbac8e1fcbb24b86ac.jpg)
The source automatically changes to "DISC."
To select a different source to listen through the speakers, press SOURCE on the control panel.
- By using the buttons on the control panel, you can operate the newly selected source without affecting Dual Zone operations.
2 Adjust the headphone volume through the 2nd AUDIO OUT plug.
![graph TD A["Hold...."] --> B["SHIFT"] B --> C["VOL + 2nd VOL -"] C --> D["Directional Arrow"]](/content/2026/06/1238930/images/f305f9a535ff509e5f7fb176088faf7aa577353aa3ca9b34a6d8e5b5d132c04d.jpg)
3 Operate the DVD/CD player using the remote controller by referring to the monitor screen.
To cancel Dual Zone operations, repeat step 1. ("DUAL OFF" appears on the display.)
On the control panel:
You can also activate and deactivate Dual Zone.
The source automatically changes to "DISC" when Dual Zone is activated.
Cautions:
- DO NOT put on the headphones while driving a car. It is dangerous to shut off the outside sounds while driving.
- DO NOT put on the headphones before adjusting the 2nd VOL level properly; otherwise, it may damage your hearing.
Sound adjustments
Selecting preset sound modes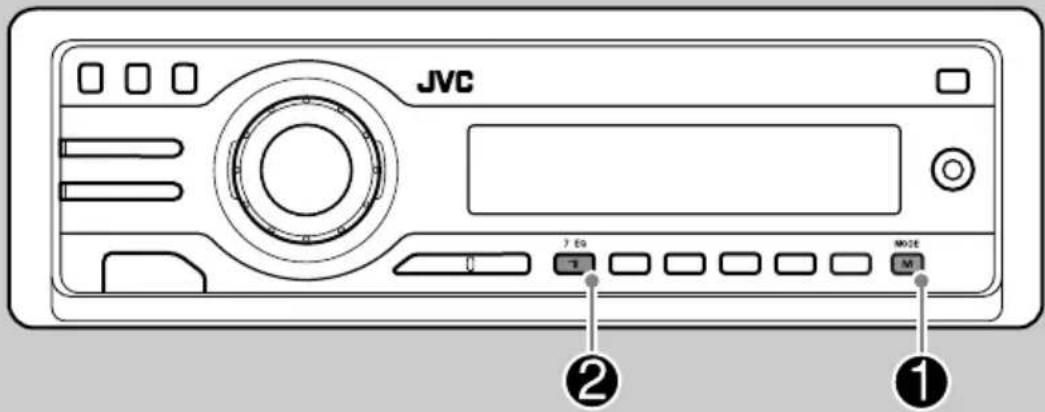
You can select a preset sound mode suitable to the music genre.


![graph TD A["7 EQ"] --> B["USER"] A --> C["ROCK"] A --> D["CLASSIC"] A --> E["JAZZ"] A --> F["HIP HOP"] A --> G["POPS"]](/content/2026/06/1238930/images/73da71770dbbe1fc753d8026428927245401222416f794f2c977ea79229b5cc3.jpg)
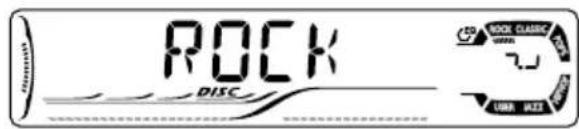
Ex.: When "ROCK" is selected
Indication pattern for each sound mode:
| ROCKUSER | |
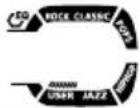 | 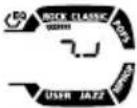 |
| CLASSICJAZZ | |
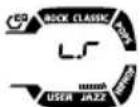 | 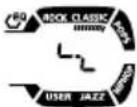 |
| HIP HOP POPS | |
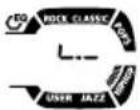 | 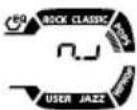 |
Storing your own sound adjustments
You can adjust the sound modes and store your own adjustments in memory.
1
2
![graph TD A["7 EQ"] --> B["1"] B --> C["USER → ROCK → CLASSIC"] B --> D["JAZZ ← HIP HOP ← POPS"]](/content/2026/06/1238930/images/eddf162f1255cd2fa0ffca522e7383d3ef74f678ab1464872b461d9b8350f28d.jpg)
3
Enter the sound adjustment mode.

4
Select a frequency to adjust.
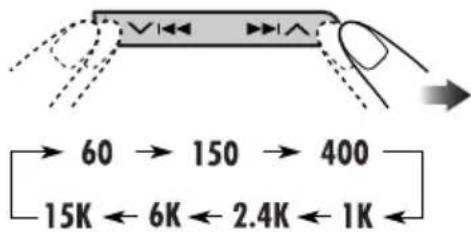
5
Adjust the level (-05 to +05).
6
Repeat steps 4 and 5 to adjust the other frequency bands.
7
Store the adjustments in the respective mode.

Sound modes (preset frequency level settings)
The list below shows the preset frequency level settings for each sound mode.
| Sound mode | Preset equalizing values | ||||||
| 60 Hz 15 | 0 Hz 400 Hz | 1 kHz 2.4 | kHz 6 kHz | 15 kHz | |||
| USER 00 00 00 | 00 00 00 00 | ||||||
| ROCK +03 +02 | 00 00 +01 | +02 +01 | |||||
| CLASSIC +01 | +03 +01 00 00 | +02 00 | |||||
| POPS 00 +02 00 | 00 00 +01 | +02 | |||||
| HIP HOP +04 | +01 -01 -02 | 00 +01 00 | |||||
| JAZZ | +03 +02 | +01 +01 | +01 +03 +01 | ||||
Adjusting the sound
You can adjust the sound characteristics to your preference.
1![graph LR A["SEL"] --> B["FAD"] B --> C["BAL"] C --> D["LOUD"] D --> E["VOL"] E --> F["VOL. A"] F --> G["SUB. W"]](/content/2026/06/1238930/images/b360103040c2b46858dbc6a3b9bc15cb7de4df58f65f3006f90a9ea89d3186f8.jpg)
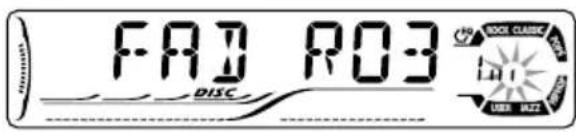
Ex.: When "FAD" is selected
2
Indication pattern changes as you adjust the level.
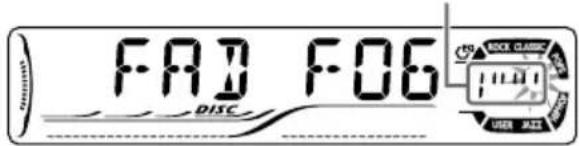
| Indication To do: Range | ||
| FAD*1(fader) | Adjust the front and rear speaker balance. | R06(Rear only) to F06(Front only) |
| BAL (balance) | Adjust the left and right speaker balance. | L06(Left only) to R06(Right only) |
| LOUD (loudness) | Boost low and high frequencies to produce a well-balanced sound at low volume level. | LOUD ON ↑LOUD OFF |
| SUB. W*2(subwoofer) | Adjust the subwoofer output level. | 00 (min.) to 08 (max.) |
| VOL. A*3(volume adjust) | Adjust and store the volume level of each source. | -05 (min.) to +05 (max.) |
| VOL*4(volume) | Adjust the volume. | 00 (min.) to 30 or 50 (max.)*5 |
*1 If you are using a two-speaker system, set the fader level to "00." *2 This takes effect only when a subwoofer is connected. *3 You cannot make an adjustment if the source is FM. "FIX" will appear. *4 Normally the control dial works as the volume control. So you do not have to select "VOL" to adjust the volume level. *5 Depending on the amplifier gain control setting. (See page 41 for details.)
Basic procedure
You can change PSM (Preferred Setting Mode) items listed in the table that follows.
1
2 Select a PSM item.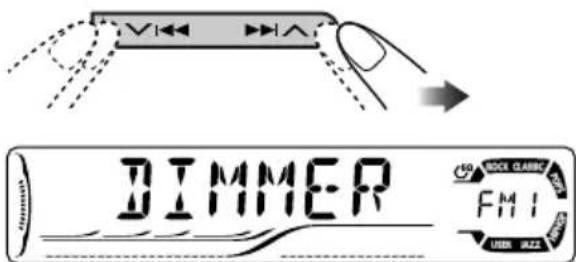
Ex.: When you select "DIMMER"
3 Adjust the PSM item selected.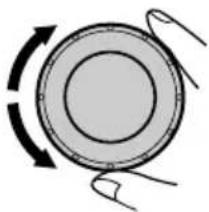
4 Repeat steps 2 and 3 to adjust the other PSM items if necessary.
5 Finish the procedure.
Indications Selectable settings, [reference page]
| DEMO Display demonstration | DEMO ON : [Initial]; Display demonstration will be activated automatically if no operation is done for about 20 seconds, [11]. DEMO OFF : Cancels. |
| CLOCK H Hour adjustment | 0 - 23 (1 - 12), [11] [Initial: 0 (0:00)] |
| CLOCK M Minute adjustment | 00 - 59, [11] [Initial: 00 (0:00)] |
| 24H/12H 24 hours or 12 hours time display | 12H ≌ 24H, [11] [Initial: 24H] |
| CLK ADJ Clock adjustment | AUTO : [Initial]; The built-in clock is automatically adjusted using the CT (clock time) data in the RDS signal. OFF : Cancels. |
To be continued....
Indications Selectable settings, [reference page]
| AF-REGAlternative frequency/regionalization reception | When the received signals from the current station become weak...AF : [Initial]; Switches to another station (the programme may differ from the one currently received), [17].The AF indicator lights up.AF REG : Switches to another station broadcasting the same programme.The AF and REG indicators light up.OFF : Cancels (not selectable when “DAB AF” is set to “AF ON”). |
| PTY-STBYPTY standby | Activates PTY Standby Reception with one of the 29 PTY codes, [17].OFF [Initial] and 29 PTY codes [15] |
| TA VOLTraffic announcement volume | [Initial: VOL 20]; VOL 00 — VOL 30 or 50*1, [16] |
| P-SEARCHProgramme search | ON : Using the AF data, the receiver tunes in to another frequency broadcasting the same programme as the original preset RDS station is if the preset station signals are not sufficient.OFF : [Initial]; Cancels. |
| DAB AF*2Alternative frequency reception | AF ON : [Initial]; Traces the programme among DAB services and FM RDS stations, [50].AF OFF : Cancels. |
| LEVELAudio level meter | ON : [Initial]; Activates the audio level indicator.OFF : Cancels; sound mode indicator is shown, [36]. |
| DIMMERDimmer | AUTO : [Initial]; Dims the display when you turn on the headlights.ON : Activates dimmer.OFF : Cancels. |
*1 Depends on the amplifier gain control. *2 Displayed only when DAB tuner is connected.
| Indications Selectable settings, [reference page] | |
| TELTelephone muting | MUTING 1/MUTING 2: Select either one which mutes the sounds while using the cellular phone.OFF : [Initial]; Cancels. |
| SCROLL*3 Scroll | ONCE : [Initial]; Scrolls the disc information once.AUTO : Repeats scrolling (5-second intervals in between).OFF : Cancels.Even if “SCROLL” is set to “OFF,” you can scroll the display by pressing D DISP for more than one second. |
| WOOFERSubwoofer cutoff frequency | LOW : Frequencies lower than 80 Hz are sent to the subwoofer.MID : [Initial]; Frequencies lower than 120 Hz are sent to the subwoofer.HIGH : Frequencies lower than 160 Hz are sent to the subwoofer. |
| HPFHigh pass filter | HPF ON : The cut-off frequency is chosen automatically according to the WOOFER setting (LOW/MID/HIGH) so that you can enjoy the low frequency effect (LFE) purely from the subwoofer if it is connected.HPF OFF : [Initial]; Cancels. |
| TAG DI S PTag display | TAG ON : [Initial]; Shows the ID3 tag while playing MP3/WMA tracks, [46].TAG OFF : Cancels. |
| REAR SPK*4 Rear speaker output | ON : [Initial]; Select this to turn on the rear speaker output.OFF : Cancels. |
| AMP GAINAmplifier gain control | You can change the maximum volume level of this receiver.LOW PWR : VOL 00 – VOL 30 (Select this if the maximum power of the speaker is less than 50 W to prevent them from damaging the speaker.)HIGH PWR : [Initial]; VOL 00 – VOL 50 |
*3 Some characters or symbols will not be shown (and will be blanked) on the display (Ex. “ABCå!d#” ⇔ “ABCA D”). *4 Displayed only when Dual Zone is activated (see page 35).
Assigning titles to the sources
You can assign titles to CDs (both in this receiver and in the CD changer).
| Sources | Maximum number of characters |
| DISC/CD-CH Up to 8 | characters (up to 30 discs) |
- You cannot assign a title to a DVD, VCD, CD Text, or an MP3/WMA disc.
1 Select the source.
- For a CD in this receiver: Insert a CD.
- For CDs in the CD changer: Select "CD-CH," then select a disc number.
2 Enter the title assignment mode.
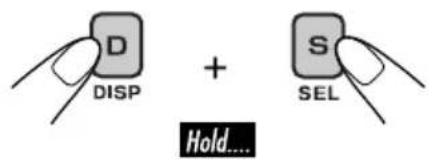
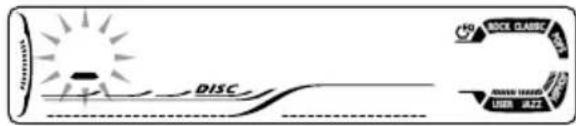
Ex.: When you select "DISC" as the source
3 Assign a title.
1 Select a character.
| A | B | C | D | E | F | G | H | I | J | K | L | M | N |
| O | P | Q | R | S | T | U | V | W | X | Y | Z | 0 | 1 |
| 2 | 3 | 4 | 5 | 6 | 7 | 8 | 9 | - | / | < | > | space |
2 Move to the next (or previous) character position.
3 Repeat steps 1 and 2 until you finish entering the title.
4 Finish the procedure.
To erase the entire title
In step 2 on the left column....
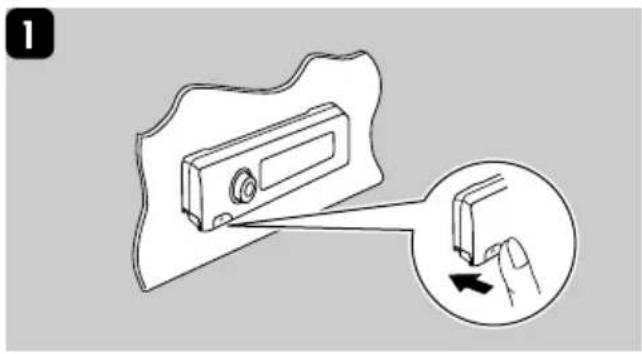
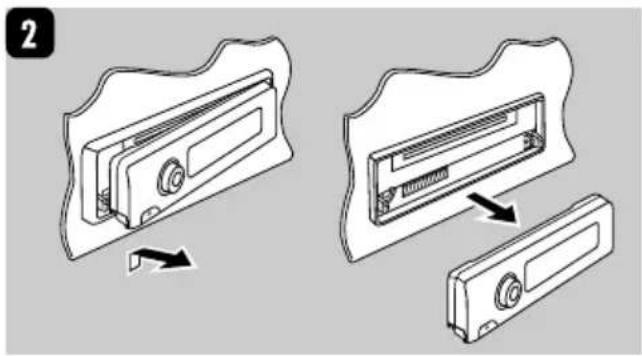
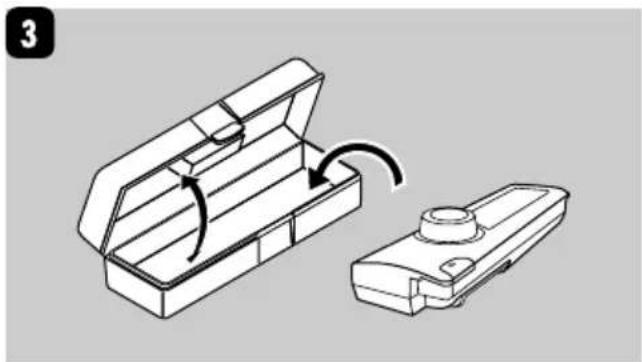
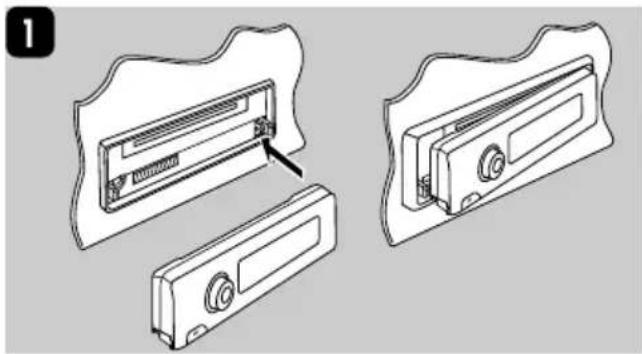
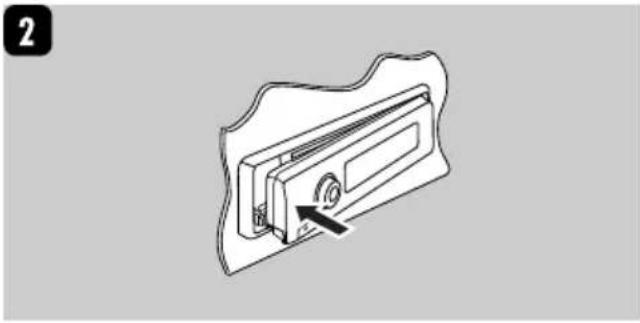
Detaching the control panel
When detaching or attaching the control panel, be careful not to damage the connectors on the back of the control panel and on the panel holder.
Detaching the control panel
Before detaching the control panel, be sure to turn off the power.
Attaching the control panel
Playing discs in the CD changer
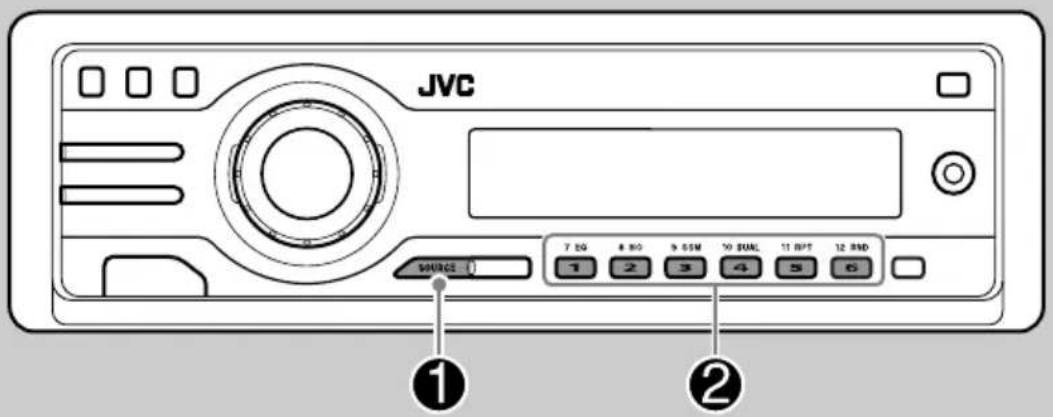
About the CD changer
It is recommended to use the JVC MP3-compatible CD changer with your receiver.
- You can also connect other CH-X series CD changers (except CH-X99 and CH-X100). However, they are not compatible with MP3 discs, so you cannot play back MP3 discs.
- You cannot use the KD-MK series CD changers with this receiver.
- Disc text information recorded in the CD Text can be displayed when a JVC CD Text compatible CD changer is connected.
Before operating your CD changer:
• Refer also to the Instructions supplied with your CD changer. - You cannot control and play any DVD, VCD, and WMA disc in the CD changer.
All tracks of the inserted discs in the magazine will be played repeatedly until you change the source or eject the magazine from the CD changer.
1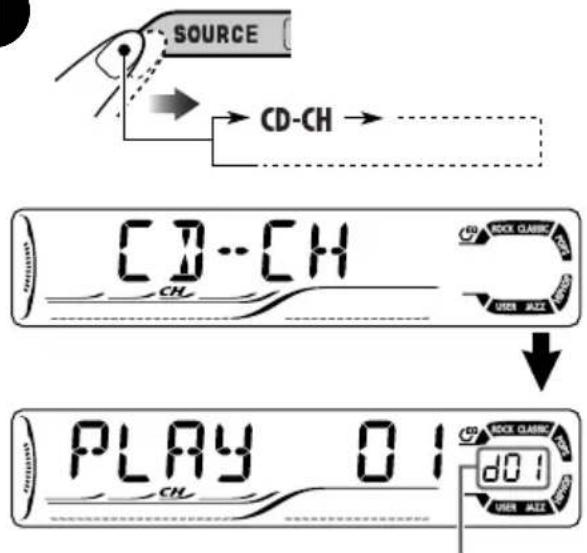
Selected disc number 2
Select a disc.
For disc number from 01 - 06:
For disc number from 07 - 12:
- When the current disc is an MP3 disc:
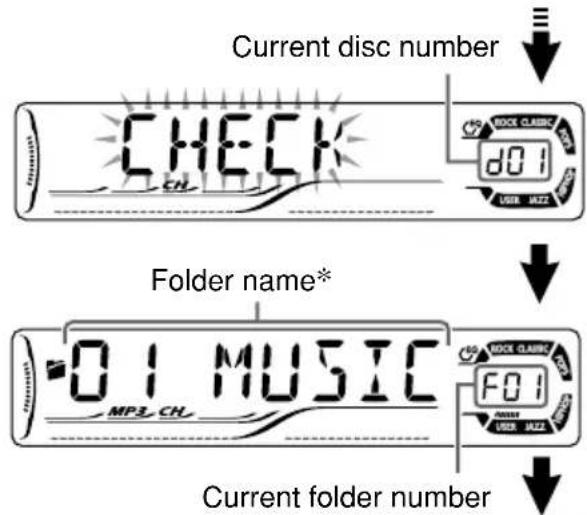
Disc information appears automatically (see page 46).
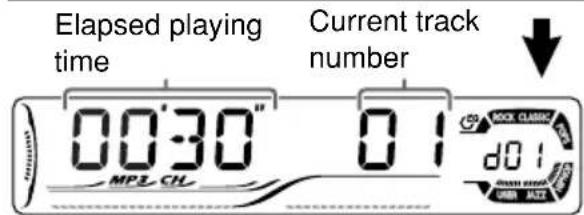
* "ROOT" appears if no folder is included in the disc. - When the current disc is an audio CD or a CD Text disc:
CD Text: Disc title/performer → Track title appear automatically (see page 46).
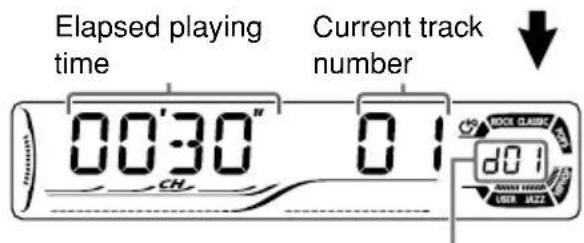
Current disc number
To fast-forward or reverse the track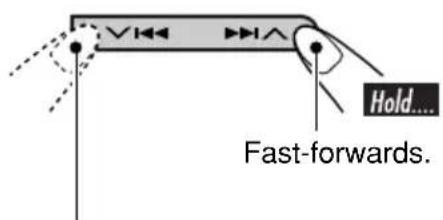
Reverses.
To go to the next or previous tracks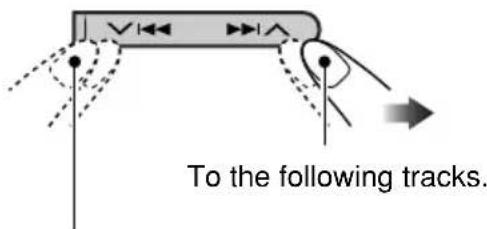
To the beginning of the current track, then the previous tracks.
To go to the next or previous folders (only for MP3 discs)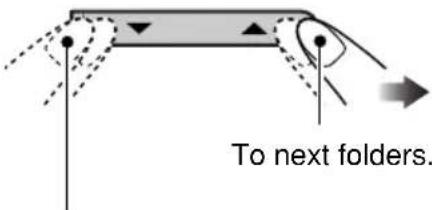
To previous folders.
To skip to a track quickly during play
- For MP3 disc, you can skip a track within the same folder.
Ex.: To select track 32 while playing track 6
To be continued...
2![graph TD A["Track 10"] --> B["→"] B --> C["Track 20"] C --> D["→"] D --> E["Track 30"] E --> F["..."]](/content/2026/06/1238930/images/119dc02e8b32165fa07cffe28382f1da52383528ed670615456f6b1ee42b2c96.jpg)
First time you press ▲ or ▼ button, the track skips to the nearest higher or lower track with a track number of multiple ten (ex. 10th, 20th, 30th).
Then each time you press the button, you can skip 10 tracks.
• After the last track, the first track will be selected and vice versa.
3![graph TD A["Track 31"] --> B["Track 32"] B --> C["..."]](/content/2026/06/1238930/images/5f6d8ce3270197364811982337403eba3e2096f4cd5021e38ecc968ef84b1402.jpg)
Changing the display information
While playing an audio CD or a CD Text![graph TD A["Elapsed playing time and Current track number"] --> B["Clock and Current track number"] B --> C["Disc title / performer *1"] C --> D["Track title *1\n( musicals up on the display)"]](/content/2026/06/1238930/images/01e94a3fb2d7a30a7ea76809ab366326b240f9c9fd8db36eef7225e33f541386.jpg)
*1 If no title is assigned to an audio CD, "NO NAME" appears. To assign a title to an audio CD, see page 42.
While playing an MP3 disc
- When "TAG DISP" is set to "TAG ON" (see page 41)
![graph TD A["Elapsed playing time and Current file number"] --> B["Clock and Current file number"] B --> C["Album name / performer (folder name*2)<br>(TAG lights up on the display)"] C --> D["Track title (file name*2)<br>(TAG lights up on the display)"]](/content/2026/06/1238930/images/1de4f942210e9da8fd80eef77101e610a002ee2966d2e5e259b4b344efe2b1e3.jpg)
*2 If an MP3 file does not have ID3 tags, folder name and file name appear. In this case, the TAG indicator will not light up.
- When "TAG DISP" is set to "TAG OFF"
![graph TD A["Elapsed playing time and Current file number"] --> B["Clock and Current file number"] B --> C["Folder name\n( lights up on the display)"] C --> D["File name\n( lights up on the display)"]](/content/2026/06/1238930/images/d35305fadb2a1a8a0d96eaf2e16840f390f02228afc8a0d0a104b1cb68965aa5.jpg)
Selecting the playback modes
You can use only one of the following playback modes at a time.
1
2 Select your desired playback mode.
Repeat play
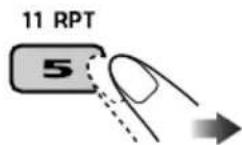
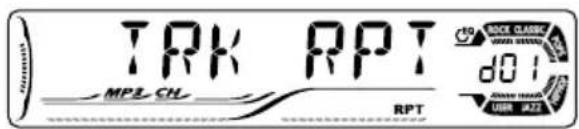
Ex.: When "TRK RPT" is selected while playing an MP3 disc
Mode Plays repeatedly
TRK RPT : The current track.
- RPT lights up.
FLDR RPT* : All tracks of the current folder.
• and RPT light up.
DISC RPT : All tracks of the inserted discs.
- and RPT light up.
RPT OFF : Cancels.
Random play
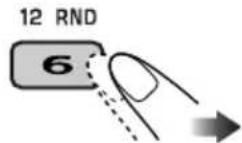
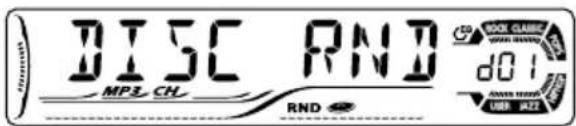
Ex.: When "DISC RND" is selected while playing an MP3 disc
Mode Plays at random
FLDR RND* : All tracks of the current folder, then tracks of the next folder and so on.
- RND and light up.
DISC RND : All tracks of the current disc.
- RND and light up.
MAG RND : All tracks of the inserted discs.
- RND lights up.
RND OFF : Cancels.
External component operations
Playing an external component

You can connect an external component to the LINE IN plug on the rear and AUX (auxiliary) input jack on the control panel.
- For connection, see Installation/Connection Manual (separate volume).
1![graph TD A["SOURCE"] --> B["LINE IN"] B --> C["AUX IN"]](/content/2026/06/1238930/images/5b8d8adc1e7a2fe231e93e408983cdc6d1eeff3b98b3d0950aaad5ba37def8df.jpg)
LINE IN: For selecting the external component connected to the LINE IN plug.
AUX IN: For selecting the external component connected to the AUX input jack.
(NOT compatible with digital signals.)
2 Turn on the connected component and start playing the source. 3 Adjust the volume.
4 Adjust the sound as you want. (See pages 36 - 38.)
Listening to the DAB tuner
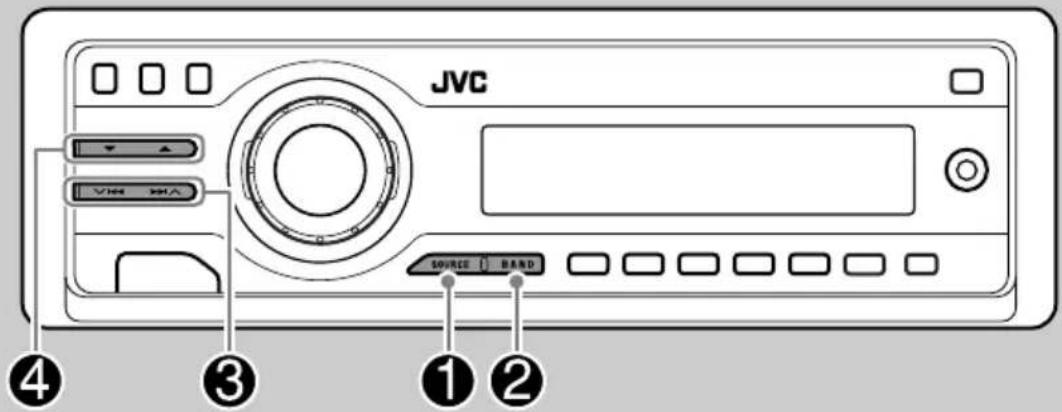
![graph TD A["SOURCE"] --> B["DAB1/DAB2/DAB3"] B --> C["Output"]](/content/2026/06/1238930/images/37fd22300c4241557cf2a2a2c5dd35ec2245f4d797bbe60ae0cda44e02b9ae6c.jpg)
![graph TD A["BAND"] --> B["DAB1"] A --> C["DAB2"] A --> D["DAB3"] style A fill:#f9f,stroke:#333 style B fill:#ccf,stroke:#333 style C fill:#ccf,stroke:#333 style D fill:#ccf,stroke:#333](/content/2026/06/1238930/images/f3323febafafba989994141e3aed99f4a6eee9d4620df8689f442764e4785f4d.jpg)

When an ensemble is received, searching stops.
To stop searching, press the same button again.

To tune in to an ensemble manually
In step ③ above...
2 Select the desired ensemble frequencies.
What is DAB system?
DAB can deliver CD quality sound without any annoying interference and signal distortion. Furthermore, it can carry text, pictures, and data. When transmitting, DAB combines several programmes (called “services”) to form one “ensemble.” In addition, each “service”—called “primary service”—can also be divided into its components (called “secondary service”).
A typical ensemble has six or more programmes (services) broadcast at the same time.
By connecting the DAB tuner, this receiver can do the following:
- Tracing the same programme automatically — Alternative Reception (see “DAB AF” on page 40).
It is recommended to use the DAB (Digital Audio Broadcasting) tuner KT-DB1000 with your receiver. If you have another DAB tuner, consult your JVC IN-CAR ENTERTAINMENT dealer.
• Refer also to the instructions supplied with your DAB tuner.
Storing DAB services in memory
You can preset six DAB services (primary) for each band.
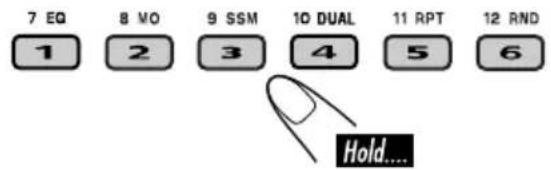
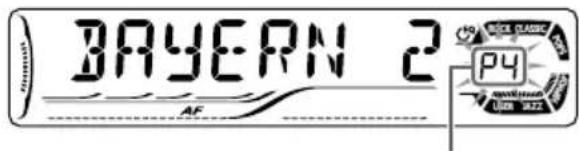
1 Perform steps ① to ④ on page 49 to select the service you want. 2 Select the preset number (1 - 6) you want to store into.
The preset number flashes for a while.
Tuning in to a preset DAB service
![graph TD A["SOURCE"] --> B["DAB1/DAB2/DAB3"]](/content/2026/06/1238930/images/ce970d2dca1800ba3876125b72ffe0c4fd4420497e5bcde12883012455d53463.jpg)
![graph TD A["BAND"] --> B["DAB1"] B --> C["DAB2"] C --> D["DAB3"] D --> E["Output"]](/content/2026/06/1238930/images/9c055e456192702e8ed9fac2ccf5771ac3ca59d6b0dd6cc96a39aced720d2873.jpg)
3 Select the preset DAB service (primary) number (1 - 6) you want.
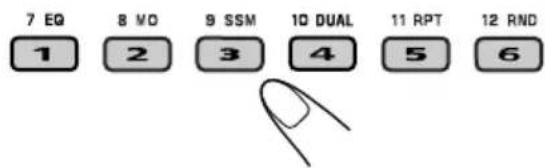
If the selected primary service has some secondary services, pressing the same button again will tune in to the secondary services.
Tracing the same programme — Alternative Reception
You can keep listening to the same programme by activating the Alternative Reception.
• While receiving a DAB service:
When driving in an area where a service cannot be received, this receiver automatically tunes in to another ensemble or FM RDS station broadcasting the same programme.
• While receiving an FM RDS station:
When driving in an area where a DAB service is broadcasting the same programme as the FM RDS station is broadcasting, this receiver automatically tunes in to the DAB service.
When shipped from the factory, Alternative Reception is activated.
To deactivate the Alternative Reception, see page 40.
To change the display information while tuning in to an ensemble
![graph TD A["DISP"] --> B["Service name"] B --> C["Ensemble name"] C --> D["Channel number"] D --> E["Frequency"] E --> F["Clock"]](/content/2026/06/1238930/images/7ac6e7beee28e029168e53abca65bd063fe04e82cdae73a66b9d10f4194b8bb7.jpg)
How to clean the connectors
Frequent detachment will deteriorate the connectors.
To minimize this possibility, periodically wipe the connectors with a cotton swab or cloth moistened with alcohol, being careful not to damage the connectors.
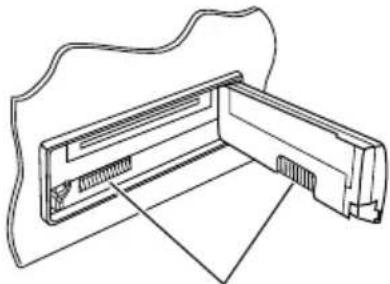
Connector
Moisture condensation
Moisture may condense on the lens inside the DVD/CD player in the following cases:
• After starting the heater in the car. • If it becomes very humid inside the car. Should this occur, the DVD/CD player may malfunction. In this case, eject the disc and leave the receiver turned on for a few hours until the moisture evaporates.
How to handle discs
When removing a disc from its case, press down the center holder of the case and lift the disc out, holding it by the edges.
Center holder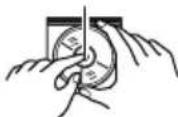
• Always hold the disc by the edges. Do not touch its recording surface.
When storing a disc into its case, gently insert the disc around the center holder (with the printed surface facing up).
- Make sure to store discs into the cases after use.
To keep discs clean
A dirty disc may not play correctly. If a disc does become dirty, wipe it with a soft cloth in a straight line from center to edge.
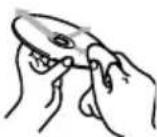
- Do not use any solvent (for example, conventional record cleaner, spray, thinner, benzine, etc.) to clean discs.
To play new discs
New discs may have some rough spots around the inner and outer edges. If such a disc is used, this receiver may reject the disc.
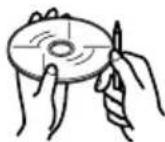
To remove these rough spots, rub the edges with a pencil or ball-point pen, etc.
Do not use the following discs:
| Code Language Code Language Code Language | |||||
| AA | Afar | IK | Inupiak | RN | Kirundi |
| AB | Abkhazian | IN | Indonesian | RO | Rumanian |
| AF | Afrikaans | IS | Icelandic | RW | Kinyarwanda |
| AM | Ameharic | IW | Hebrew | SA | Sanskrit |
| AR | Arabic | JI | Yiddish | SD | Sindhi |
| AS | Assamese | JW | Javanese | SG | Sangho |
| AY | Aymara | KA | Georgian | SH | Serbo-Croatian |
| AZ | Azerbaijani | KK | Kazakh | SI | Singhalese |
| BA | Bashkir | KL | Greenlandic | SK | Slovak |
| BE | Byelorussian | KM | Cambodian | SL | Slovenian |
| BG | Bulgarian | KN | Kannada | SM | Samoan |
| BH | Bihari | KO | Korean (KOR) | SN | Shona |
| BI | Bislama | KS | Kashmiri | SO | Somali |
| BN | Bengali, Bangla | KU | Kurdish | SQ | Albanian |
| BO | Tibetan | KY | Kirghiz | SR | Serbian |
| BR | Breton | LA | Latin | SS | Siswati |
| CA | Catalan | LN | Lingala | ST | Sesotho |
| CO | Corsican | LO | Laothian | SU | Sundanese |
| CS | Czech | LT | Lithuanian | SW | Swahili |
| CY | Welsh | LV | Latvian, Lettish | TA | Tamil |
| DZ | Bhutani | MG | Malagasy | TE | Telugu |
| EL | Greek | MI | Maori | TG | Tajik |
| EO | Esperanto | MK | Macedonian | TH | Thai |
| ET | Estonian | ML | Malayalam | TI | Tigrinya |
| EU | Basque | MN | Mongolian | TK | Turkmen |
| FA | Persian | MO | Moldavian | TL | Tagalog |
| FI | Finnish | MR | Marathi | TN | Setswana |
| FJ | Fiji | MS | Malay (MAY) | TO | Tonga |
| FO | Faroese | MT | Maltese | TR | Turkish |
| FY | Frisian | MY | Burmese | TS | Tsonga |
| GA | Irish | NA | Nauru | TT | Tatar |
| GD | Scots Gaelic | NE | Nepali | TW | Twi |
| GL | Galician | NO | Norwegian | UK | Ukrainian |
| GN | Guarani | OC | Occitan | UR | Urdu |
| GU | Gujarati | OM | (Afan) Oromo | UZ | Uzbek |
| HA | Hausa | OR | Oriya | VI | Vietnamese |
| HI | Hindi | PA | Panjabi | VO | Volapuk |
| HR | Croatian | PL | Polish | WO | Wolof |
| HU | Hungarian | PS | Pashto, Pushto | XH | Xhosa |
| HY | Armenian | PT | Portuguese | YO | Yoruba |
| IA | Interlingua | QU | Quechua | ZU | Zulu |
| IE | Interlingue | RM | Rhaeto-Romance | ||
More about this receiver
Basic operations
Turning on the power
- By pressing SOURCE on the receiver, you can also turn on the power.
Selecting the sources
- When no disc is loaded in the receiver, "DISC" cannot be selected.
- Without connecting to the CD changer or DAB tuner, “CD-CH” or “DAB” cannot be selected.
Turning off the power
- If you turn off the power while listening to a disc, disc play will start automatically, next time you turn on the power.
Tuner operations
Storing stations in memory
• During SSM search... - All previously stored stations are erased and stations are stored newly. - Received stations are preset in No. 1 (lowest frequency) to No. 6 (highest frequency). - When SSM is over, the station stored in No. 1 will be automatically tuned in. - When storing a station manually, a previously preset station is erased when a new station is stored in the same preset number.
FM RDS operations
- Network-Tracking Reception requires two types of RDS signals—PI (Programme Identification) and AF (Alternative Frequency) to work correctly. Without receiving these data correctly, Network-Tracking Reception will not operate.
- If a Traffic Announcement is received, the volume level (TA VOL) automatically changes to the preset level.
- If a DAB tuner is connected and Alternative Reception for DAB services (DAB AF) is activated, Network-Tracking Reception (AF-REG) is also activated automatically. On the other hand, Network-Tracking Reception cannot be deactivated without deactivating Alternative Reception. (See page 40.)
- If you want to know more about RDS, visit «http://www.rds.org.uk».
Disc operations
General
- In this manual, words “track” and “file” are interchangeably used when referring to MP3/WMA files and their file names.
- This receiver can also playback 8 cm discs.
- This receiver can only play back audio CD (CD-DA) files if different types of files are recorded on the same disc.
- The first track will be skipped if a different type of file is detected first.
- When a disc has been loaded, selecting “DISC” for the playback source starts disc play.
Inserting a disc
- When a disc is inserted upside down, "PLEASE" and "EJECT" appear alternately on the display. Press ▲ to eject the disc.
To be continued....
Playing a DVD-R/DVD-RW or CD-R/CD-RW
- Use only “finalized” discs.
- This receiver can play back only the files of the same type which is first detected if a disc includes both audio CD (CD-DA) files and MP3/WMA files.
- Only for CD-R/CD-RW: This receiver can play back multi-session discs; however, unclosed sessions will be skipped while playing.
- Some DVD-R/DVD-RW or CD-R/CD-RW may not play back on this receiver because of their disc characteristics, and for the following causes:
– Discs are dirty or scratched. - Moisture condensation occurs on the lens inside the receiver. – The pickup lens inside the receiver is dirty. - CD-R/CD-RW on which the files are written with “Packet Write” method. - DVD-R/DVD-RW which are not written in UDF-Bridge Format (eg. UDF format or ISO format). - There are improper recording conditions (missing data, etc.) or media conditions (stain, scratch, warp, etc.).
- DVD-RW/CD-RW may require a longer readout time since the reflectance of DVD-RW/CD-RW is lower than that of regular discs.
- Do not use the following DVD-R/DVD-RW or CD-R/CD-RW:
– Discs with stickers, labels, or protective seal stuck to the surface. – Discs on which labels can be directly printed by an ink jet printer.
Using these discs under high temperatures or high humidities may cause malfunctions or damages to discs.
Playing an MP3/WMA disc
- This receiver can play back MP3/WMA files with the extension code .mp3 or .wma (regardless of the letter case—upper/lower) recorded in either CD-R/CD-RW or in DVD-R/DVD-RW.
- This receiver can show the names of albums, artists (performer), and ID3 Tag (Version 1.0, 1.1, 2.2, 2.3, or 2.4) for MP3 files and WMA files.
- This receiver can display only one-byte characters. No other characters can be correctly displayed.
- This receiver can play back MP3/WMA files meeting the conditions below:
- Bit rate: MP3: 32 kbps — 320 kbps WMA: 32 kbps — 192 kbps
- Sampling frequency: 48 kHz, 44.1 kHz, 32 kHz (for MPEG-1) 24 kHz, 22.05 kHz, 16 kHz (for MPEG-2) 48 kHz, 44.1 kHz, 32 kHz (for WMA) – Disc format: ISO 9660 Level 1/Level 2, Romeo, Joliet, Windows long file name
- The maximum number of characters for file/folder names vary among the disc format used (includes 4 extension characters—.mp3 or .wma). – ISO 9660 Level 1: up to 12 characters – ISO 9660 Level 2: up to 31 characters – Romeo: up to 128 characters – Joliet: up to 64 characters
- Windows long file name: up to 128 characters
- This receiver can recognize the total of 1100 files, 250 folders (maximum of 999 files per folder).
- This receiver can play back the files recorded in VBR (variable bit rate).
The files recorded in VBR have a discrepancy in elapsed time display, and do not show the actual elapsed time. Especially, after performing the search function, this difference becomes noticeable.
- This receiver cannot play back the following files:
- MP3 files encoded with MP3i and MP3 PRO format.
- MP3 files encoded in an inappropriate format.
- MP3 files encoded with Layer 1/2. – WMA files encoded with lossless, professional, and voice format.
- WMA files which are not based upon Windows Media® Audio. – WMA files copy-protected with DRM. – WMA files recorded with MBR (Multiple Bit Rate) format.
- Files which have the data such as WAVE, ATRAC3, etc.
Changing the source
- If you change the source, playback also stops (without ejecting the disc).
Next time you select “DISC” for the playback source (without activating Dual Zone), disc play starts from where it has been stopped previously.
Ejecting a disc
- If the ejected disc is not removed within 15 seconds, the disc is automatically inserted again into the loading slot to prevent it from dust. (Disc will not play this time.)
DVD setup menu
- When the language you have selected is not recorded on a disc, the original language is automatically used as the initial language. In addition, for some discs, the initial languages settings will not work as you set due to their internal disc programming.
- While playing (or pausing), you cannot change these languages.
After you change any of these language settings, eject the disc and insert it (or another disc) again so that your setting takes effect.
- When you select “16:9 [MULTI]” for a picture whose aspect ratio is 4:3, the picture slightly changes due to the process for converting the picture width.
- Even if “4:3 [MULTI] PAN SCAN” is selected, the screen size may become “4:3 [MULTI] LETTER BOX” with some DVDs. This depends on how they are recorded.
General settings—PSM
- If you change the “AMP GAIN” setting from “HIGH PWR” to “LOW PWR” while the volume level is set higher than “VOL 30,” the receiver automatically changes the volume level to “VOL 30.”
Other main functions
- If you try to assign a title to a 31st disc, "NAMEFULL" flashes on the display. Delete unwanted titles before assignment. - Titles assigned to discs in the CD changer can also be shown if you playback the disc on the receiver.
DAB tuner operations
- Only primary DAB services can be presetted even when you store a secondary service.
- A previously preset DAB service is erased when a new DAB service is stored in the same preset number.
On-screen guide icons
During play, the following guide icons may appear for a while on the monitor.
: Appears at the beginning of a scene containing multi-subtitle languages (for DVD only). : Appears at the beginning of a scene containing multi-audio languages (for DVD only). : Appears at the beginning of a scene containing multi-angle views (for DVD only). : Playback II: Pause : Forward Slow Motion Playback (for DVD and VCD only) : Reverse Slow Motion Playback (for DVD only) : Forward search : Reverse search
About sounds reproduced through the rear terminals
- Through the analog terminals (Speaker out/LINE OUT/2nd AUDIO OUT): 2-channel signal is emitted.
When playing a multi-channel encoded disc, multi-channel signals are downmixed.
(AUDIO—DOWN MIX: see page 31.)
• Through DIGITAL OUT (optical):
Digital signals (Linear PCM, Dolby Digital, DTS, MPEG Audio) are emitted through this terminal. (For more details, see below.)
To reproduce multi-channel sounds such as Dolby Digital and DTS, connect an amplifier or a decoder compatible with these multi-channel sources to this terminal, and set “DIGITAL AUDIO OUTPUT” correctly. (See page 31.)
- About Dual Zone
While you are listening to the radio, CD changer, or external component through the speakers built into your car compartment, you can listen to the playback sound of this DVD/CD player using the headphones connected to the 2nd AUDIO OUT plug at the same time. (For details, see page 35.)
■ Output signals through the DIGITAL OUT terminal
Output signals are different depending on the “DIGITAL AUDIO OUTPUT” setting on the setup menu (see page 31).
| Playback Disc\DIGITAL AUDIO OUTPUT | Output Signals | ||
| STREAM/PCM DOLBY DIGITAL/PCM PCM ONLY | |||
| DVD 48 kHz, 16/20/24 bits Linear PCM | 48 kHz, 16 bits stereo Linear PCM | ||
| 96 kHz, Linear PCM | |||
| with DTS DTS bitstream 48 kHz, 16 bits stereo Linear PCM | |||
| with Dolby Digital Dolby Digital bitstream | 48 kHz, 16 bits stereo Linear PCM | ||
| with MPEG Audio MPEG bitstream | 48 kHz, 16 bits Linear PCM | ||
| Audio CD, Video CD 44.1 kHz, 16 bits stereo Linear PCM / 48 kHz, 16 bits stereo Linear PCM | |||
| Audio CD with DTS DTS bitstream 44.1 kHz, 16 bits stereo Linear PCM | |||
| MP3/WMA | 32/44.1/48 kHz, 16 bits Linear PCM | ||
What appears to be trouble is not always serious. Check the following points before calling a service center.
Symptoms Causes Remedies
| General | • Sound cannot be heard from the speakers. | The volume level is set to the minimum level. | Adjust it to the optimum level. |
| Connections are incorrect. Check the cords and connections. | |||
| • The receiver does not work at all. | The built-in microcomputer may have functioned incorrectly due to noise, etc. | Reset the receiver (see page 2). | |
| • Remote controller does not work. | Dual Zone is activated (see page 35). | While Dual Zone is activated, remote controller only functions for operating the DVD/CD player. | |
| FM/AM | • SSM automatic presetting does not work. | Signals are too weak. Store stations manually. | |
| • Static noise while listening to the radio. | The aerial is not connected firmly. | Connect the aerial firmly. | |
| Disc playback | • Disc cannot be played back. | Disc is inserted upside down. | Insert the disc correctly. |
| • CD-R/CD-RW or DVD-R/ DVD-RW cannot be played back.• Tracks on the CD-R/ CD-RW or DVD-R/ DVD-RW cannot be skipped. | CD-R/CD-RW or DVD-R/ DVD-RW is not finalized. | • Insert a finalized CD-R/ CD-RW or DVD-R/ DVD-RW.• Finalize the CD-R/CD-RW or DVD-R/DVD-RW with the component which you used for recording. | |
| • Disc cannot be recognized. | The DVD/CD player may have functioned incorrectly. | Eject the disc forcibly (see page 2). | |
| • “NO DISC” appears on the display. | Disc is inserted incorrectly. | Insert the disc correctly. | |
Symptoms Causes Remedies
| Disc playback | • Sound and picture are sometimes interrupted or distorted. | You are driving on rough roads. | Stop playback while driving on rough roads. |
| Disc is scratched. Change the disc. | |||
| Connections are incorrect. Check the cords and connections. | |||
| • No playback picture (DVD, VCD) appears on the monitor. | Parking brake wire is not connected properly. | See Installation/Connection Manual. | |
| • No picture appears on the monitor at all. | The video cord is not connected correctly. | Connect the video cord correctly. | |
| An incorrect input has been selected on the TV or monitor. | Select a correct input on the TV or monitor. | ||
| • The monitor shows black and white wavily pictures (DVD, VCD). | The disc (DVD, VCD) is recorded in NTSC format. | Change the disc. Use a disc recorded in PAL format (see page 6). | |
| • The left and right edges of the picture are missing on the screen. | “4:3 [MULTI] PAN SCAN” is selected when viewing on a conventional TV (aspect ratio 4:3). | Select “4:3 [MULTI] LETTER BOX.” (See page 30.) | |
| MP3/WMA playback | • Disc cannot be played back. | No MP3/WMA tracks are recorded on the disc. | Change the disc. |
| MP3/WMA tracks do not have the extension code <.mp3> or <.wma> in their file names. | Add the extension code <.mp3> or <.wma> to their file names. | ||
| MP3/WMA tracks are not recorded in a compliant format. | Change the disc. Record MP3/WMA tracks using a compliant application (see page 6). | ||
| MP3/WMA tracks are recorded in DVD+R/DVD+RW media. | Change the disc. Record MP3/WMA tracks using DVD-R/DVD-RW media. | ||
To be continued....
Symptoms Causes Remedies
| MP3/WMA playback | Noise is generated. The track played back is not an MP3/WMA file (although it has the extension code <.mp3> or <.wma>). | Skip to another track or change the disc. (Do not add the extension code <.mp3> or <.wma> to non-MP3 or WMA tracks.) |
| A longer readout time is required. | Readout time varies due to the complexity of the folder/ file configuration. | |
| Tracks cannot be played back as you have intended them to play. | Playback order is determined when the files are recorded. | |
| Elapsed playing time is not correct. | This sometimes occurs during play. This is caused by how the tracks are recorded on the disc. | |
| “PLEASE” and “EJECT” appear alternately on the display. | The current disc does not contain any MP3/WMA tracks. | |
| Correct characters are not displayed (e.g. album name). | This receiver can only display alphabets (capital: A - Z), numbers, and a limited number of symbols. | |
| CD changer | “NO DISC” appears on the display. | No disc is in the magazine. |
| Disc is inserted upside down. | ||
| “NO MAG” appears on the display. | No magazine is loaded in the CD changer. | |
| “RESET 8” appears on the display. | This receiver is not connected to the CD changer correctly. | |
| “RESET 1” – “RESET 7” appears on the display. | ____ | |
| The CD changer does not work at all. | The built-in microcomputer may function incorrectly due to noise, etc. |
AUDIO AMPLIFIER SECTION
Maximum Power Output:
Front: 50 W per channel
Rear: 50 W per channel
Continuous Power Output (RMS):
Front: 19 W per channel into 4 Ω, 40 Hz to 20 000 Hz at no more than 0.8% total harmonic distortion.
Rear: 19 W per channel into 4 Ω, 40 Hz to 20 000 Hz at no more than 0.8% total harmonic distortion.
Load Impedance: 4 Ω (4 Ω to 8 Ω allowance)
Equalizer Control Range:
Frequencies: 60 Hz, 150 Hz, 400 Hz, 1 kHz, 2.4 kHz, 6 kHz, 15 kHz
Level: ±10 dB
Signal-to-Noise Ratio: 70 dB
Audio Output Level:
Analog (2nd AUDIO OUT): 6 mW (at 16 Ω)
Digital (DIGITAL OUT: Optical):
Signal wave length: 660 nm
Output level: -21 dBm to -15 dBm
Line-Out Level/Impedance:
5.0 V/20 kΩ load (full scale)
Output Impedance: 1 kΩ
Subwoofer-Out Level/Impedance:
2.0 V/20 kΩ load (full scale)
Color System: PAL
Video Output (composite): 1 Vp-p/75 Ω
Other Terminals: LINE IN, CD changer
TUNER SECTION
Frequency Range:
FM: 87.5 MHz to 108.0 MHz
AM: (MW) 522 kHz to 1 620 kHz
(LW) 144 kHz to 279 kHz
[FM Tuner]
Usable Sensitivity: 11.3 dBf (1.0 μV/75 Ω)
50 dB Quieting Sensitivity:
16.3 dBf (1.8 μV/75 Ω)
Alternate Channel Selectivity (400 kHz): 65 dB
Frequency Response: 40 Hz to 15,000 Hz
Stereo Separation: 35 dB
Capture Ratio: 1.5 dB
[MW Tuner]
Sensitivity: 20 μV
Selectivity: 35 dB
[LW Tuner]
Sensitivity: 50 μV
DVD/CD PLAYER SECTION
Signal Detection System: Non-contact optical pickup (semiconductor laser)
Number of Channels: 2 channels (stereo)
Frequency Response:
DVD, fs=48 kHz/96 kHz: 16 Hz to 22,000 Hz
VCD, CD, MP3, WMA: 16 Hz to 20,000 Hz
Dynamic Range: 96 dB
Signal-to-Noise Ratio: 98 dB
Wow and Flutter: Less than measurable limit
MP3 (MPEG Audio Layer 3):
Max. Bit Rate: 320 kbps
WMA (Windows Media® Audio):
Max. Bit Rate: 192 kbps
GENERAL
Power Requirement:
Operating Voltage:
DC 14.4 V (11 V to 16 V allowance)
Grounding System: Negative ground
Allowable Operating Temperature:
0°C to +40°C
Dimensions (W × H × D):
Installation Size (approx.):
182 mm × 52 mm × 158 mm
Panel Size (approx.):
188 mm × 58 mm × 11 mm
Mass (approx.):
1.7 kg (excluding accessories)
Design and specifications are subject to change without notice.
2
![graph TD A["SOURCE"] --> B["FM/AM"] B --> C["DAB"] C --> D["DISC"] D --> E["AUX IN"] E --> F["LINE IN"] F --> G["CD-CH"]](/content/2026/06/1238930/images/e41febbac10865f2b7363e92320fd22098bc6f361b3fed45aba62d320a1d6643.jpg)
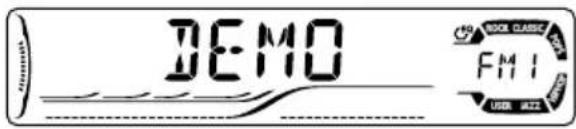
3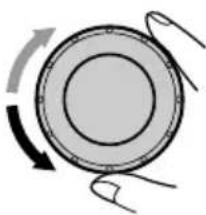
DEMO OFF ↔ DEMO ON
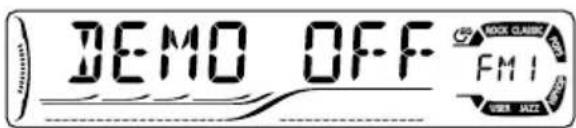
DEMO OFF ↔ DEMO ON
Clock setting
1
2![graph TD A["BAND"] --> B["FM1"] B --> C["FM2"] C --> D["FM3"] D --> E["AM"] E --> A](/content/2026/06/1238930/images/dbfa6668852040446d8bdf01527a600c256948b6d24b06359ff401f8319567c9.jpg)
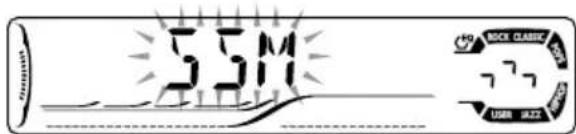
2![graph TD A["BAND"] --> B["FM1"] B --> C["FM2"] C --> D["FM3"] D --> E["AM"] E --> A](/content/2026/06/1238930/images/200381a2982700bd3170b6a1c2e4a9e9422834b67a28b0657fae90458e146394.jpg)
3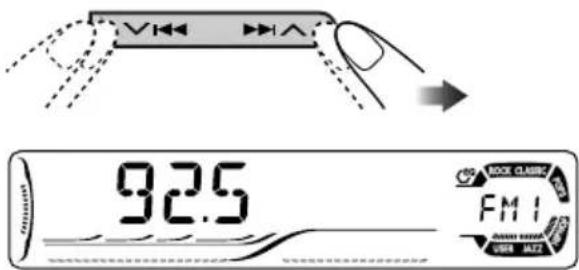
4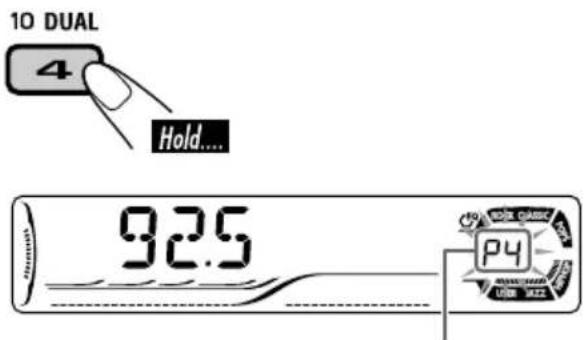
2![graph TD A["BAND"] --> B["FM1"] B --> C["FM2"] C --> D["FM3"] D --> E["AM"] E --> A](/content/2026/06/1238930/images/0eb143dab79942b7d3c97b59b0155ebc484d9d65ccdfc51296d0416f99c2640a.jpg)
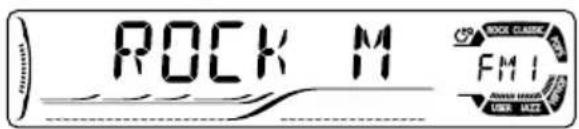
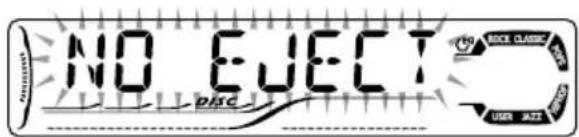
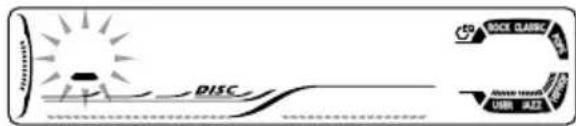
| A | B | C | D | E | F | G | H | I | J | K | L | M | N |
| O | P | Q | R | S | T | U | V | W | X | Y | Z | 0 | 1 |
| 2 | 3 | 4 | 5 | 6 | 7 | 8 | 9 | - | / | < | > | Leerzeichen | |
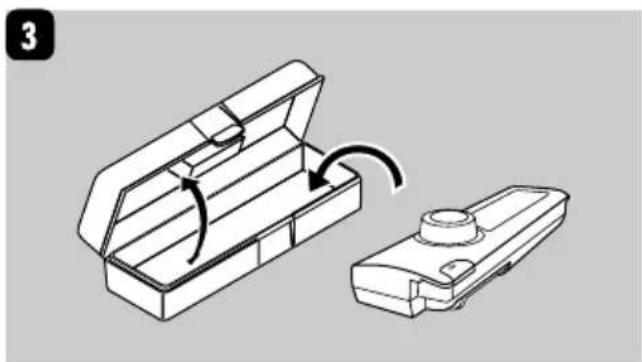
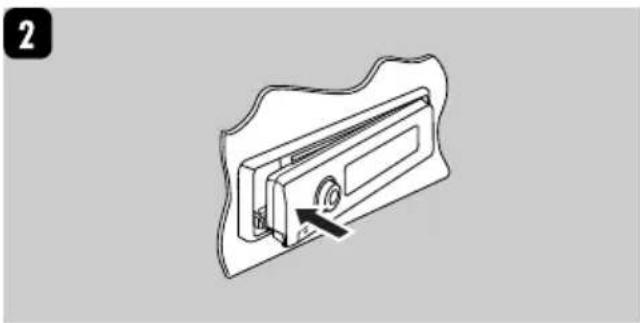
4
![graph TD A["SOURCE"] --> B["DAB1/DAB2/DAB3"]](/content/2026/06/1238930/images/0001a87ac9b8e1eb8540a4d840146e8da016d8f94d5cf46571e249c4bd91aabf.jpg)
![graph TD A["BAND"] --> B["DAB1"] B --> C["DAB2"] C --> D["DAB3"] D --> A](/content/2026/06/1238930/images/ef2d0b9ce1ba0e49d77bdc80e45758e97306c9be16d796b5d97e672641ed06b9.jpg)
![graph TD A["BAND"] -->|DAB1| B["DAB2"] A -->|DAB3| C["DAB2"] style A fill:#f9f,stroke:#333 style B fill:#ccf,stroke:#333 style C fill:#cfc,stroke:#333](/content/2026/06/1238930/images/65619102c22ef0798b9282c81da7e4123e48af3fab2e65e9f0dbe59782541bb8.jpg)
Connections
Analog (2nd AUDIO OUT): 6 mW (at 16 Ω)
Dimensions (W × H × D):
Mounting size (approx.):
182 mm × 52 mm × 158 mm
Panel size (approx.):
188 mm × 58 mm × 11 mm
Weight (approx.):
DEMO OFF ↔ DEMO ON
2![graph TD A["BAND"] --> B["FM1"] B --> C["FM2"] C --> D["FM3"] D --> E["AM"] E --> A](/content/2026/06/1238930/images/7e396fa0082ef34097f40b9f22c89e7288bc058a7e6080e1a4ba7e8925607055.jpg)
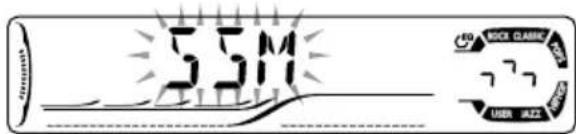
2![graph TD A["BAND"] --> B["FM1"] A --> C["FM2"] A --> D["FM3"] B --> E["AM"] C --> E D --> E](/content/2026/06/1238930/images/6bc44e58dab88ecb9b9faf9a3c3ce483399b1183e73df2a9936792beef2723ae.jpg)
3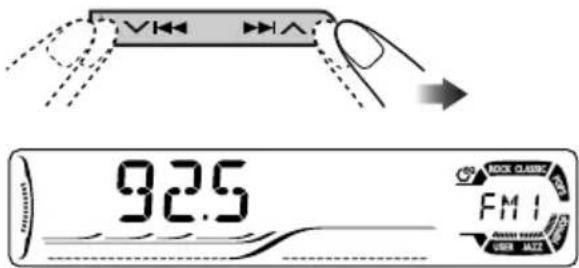
4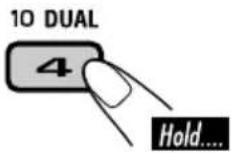
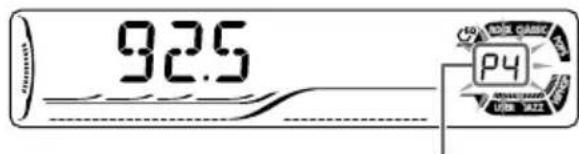
2![graph TD A["BAND"] --> B["FM1"] B --> C["FM2"] C --> D["FM3"] D --> E["AM"] E --> A](/content/2026/06/1238930/images/b71f800a709df3c4d909f3449ee431c7636c7e28a9283a25e3e483c68f5350ea.jpg)
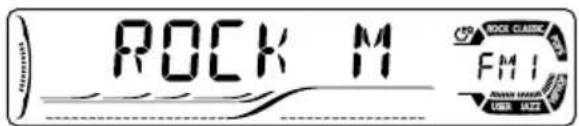
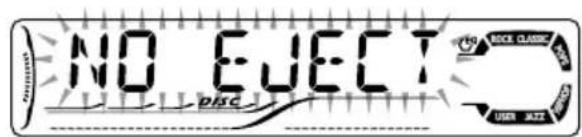
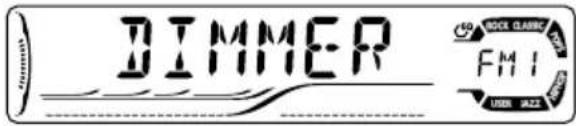
Ex.: When "DIMMER" is selected
| A | B | C | D | E | F | G | H | I | J | K | L | M | N |
| O | P | Q | R | S | T | U | V | W | X | Y | Z | 0 | 1 |
| 2 | 3 | 4 | 5 | 6 | 7 | 8 | 9 | - | / | < | > | espace | |
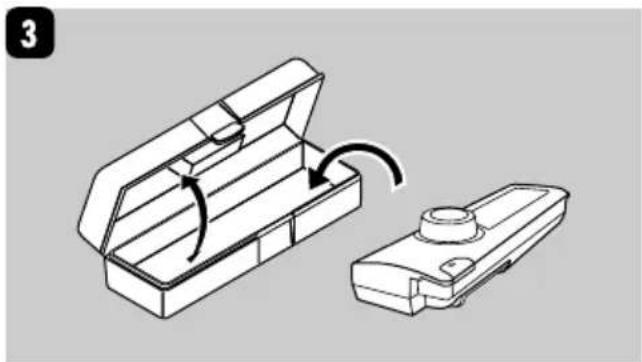
RPT OFF: Cancel.
Random playback
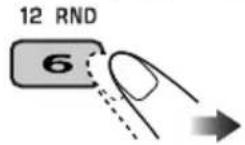
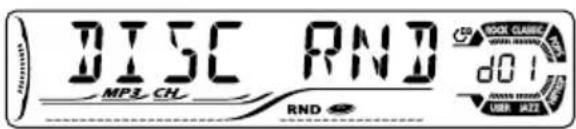
RND OFF: Cancel.
2
![graph TD A["BAND"] --> B["DAB1"] B --> C["DAB2"] C --> D["DAB3"] D --> A](/content/2026/06/1238930/images/70556b2ca5793e6600d55a1ea97a340765b212c3ca72c781fbd88ba00c42b5c7.jpg)
3
![graph TD A["BAND"] -->|DAB1| B["DAB2"] A -->|DAB3| C["End"]](/content/2026/06/1238930/images/ef1a440f238ffbf18f7580d2b364cf02b8112364a58b24a065f884f34d3cb614.jpg)
Connector
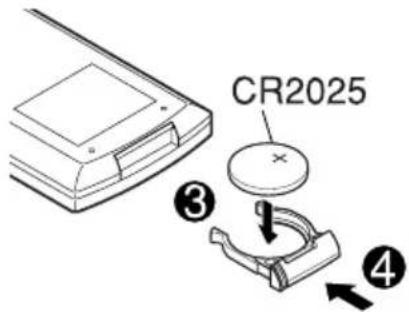
3
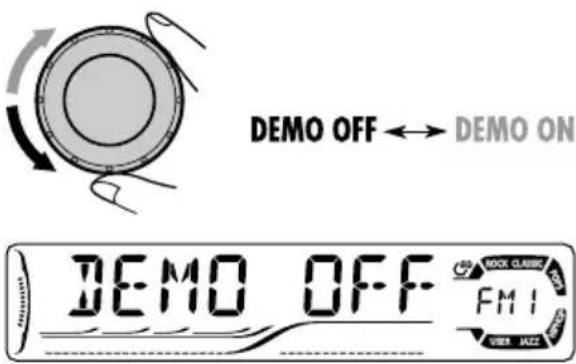
4 Complete the procedure.
DEMO OFF ↔ DEMO ON
3 Complete the procedure.
![graph TD A["SOURCE"] --> B["→ FM1/FM2/FM3/AM"] B --> C["→"]](/content/2026/06/1238930/images/9a61762eb65ea28e582433d312fa8d7fc0a9b2e4505f7149bbe0a054a803aa46.jpg)
2![graph TD A["BAND"] --> B["FM1"] B --> C["FM2"] C --> D["FM3"] D --> E["AM"] E --> A](/content/2026/06/1238930/images/cce14800bb8026f825d41a7667bead22d3e95eaa2d7ae5ed85ff66fe07c6fb91.jpg)
3 Search for a station.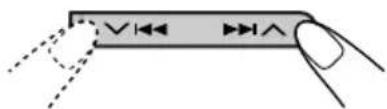
2![graph TD A["BAND"] --> B["FM1"] B --> C["FM2"] C --> D["FM3"] D --> E["AM"] E --> A](/content/2026/06/1238930/images/4b9bb7b10077b07f0f6c9f59007172c07f005a059d8d6f3ffdf012dda20d0422.jpg)
3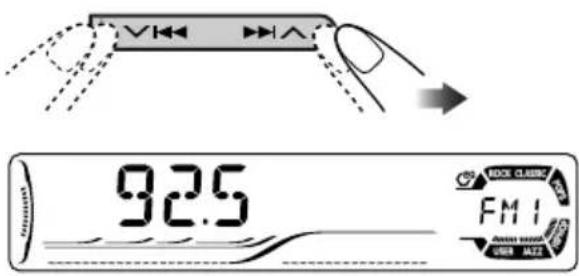
4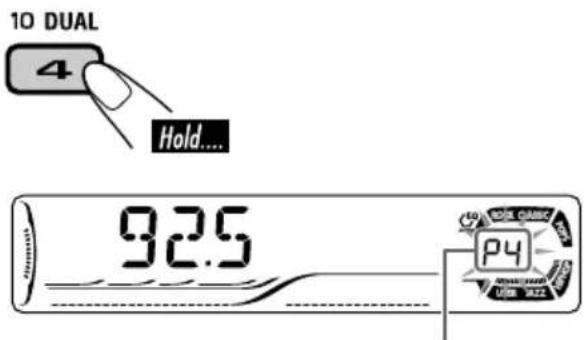
2![graph TD A["BAND"] --> B["FM1"] A --> C["FM2"] A --> D["FM3"] B --> E["AM"] C --> E D --> E](/content/2026/06/1238930/images/71855b1eae3d680448f678fbf59df471da9fc8c0301d1117ad69731442991cca.jpg)
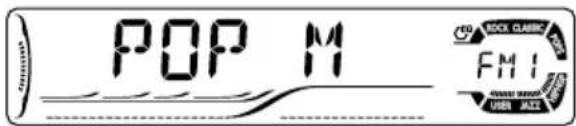
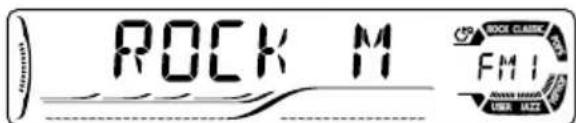
ST: Normal stereo reproduction (left/right).
![graph LR A["ZOOM 1 ZOOM 2 ZOOM 3 ZOOM 4"] --> B[" "] C["ZOOM UIT"] --> D[" "] E["ZOOM 5ZOOM 6"] --> F[" "]](/content/2026/06/1238930/images/7c34d48a28ab2520da9ae4e491c71783c7f08dc80f9818ad69ab44ac64aed9b6.jpg)
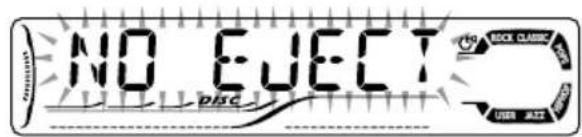
1 Activate Dual Zone.
![graph LR A["DUAL"] --> B["DUAL ON"] B --> C["DUAL OFF"]](/content/2026/06/1238930/images/71d55d0ec9bf0d0ca49d1db614926ac009e50801f16ab05f2af3004f3ea0916c.jpg)
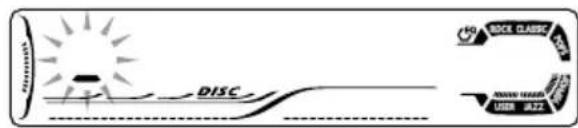
| A | B | C | D | E | F | G | H | I | J | K | L | M | N |
| O | P | Q | R | S | T | U | V | W | X | Y | Z | 0 | 1 |
| 2 | 3 | 4 | 5 | 6 | 7 | 8 | 9 | - | / | < | > | spatie |
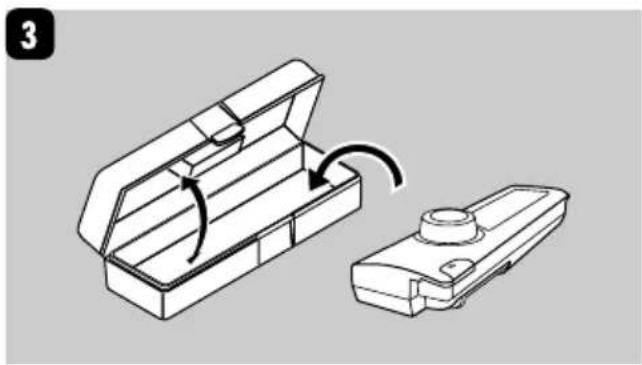

![graph TD A["SOURCE"] --> B["DAB1/DAB2/DAB3"]](/content/2026/06/1238930/images/172a36f3c116f7e5a2c5992c576b9d69701429136f284eb33446e177a3641245.jpg)
![graph TD A["BAND"] -->|DAB1| B["DAB2"] A -->|DAB3| C["Output"] style A fill:#f9f,stroke:#333 style B fill:#ccf,stroke:#333 style C fill:#cfc,stroke:#333](/content/2026/06/1238930/images/0082463a61501ca84785147d3ac458aa3c7e2bcc277fd99fd0fdb269adf9d051.jpg)
![graph TD A["BAND"] --> B["DAB1"] A --> C["DAB2"] A --> D["DAB3"] style A fill:#f9f,stroke:#333 style B fill:#ccf,stroke:#333 style C fill:#ccf,stroke:#333 style D fill:#ccf,stroke:#333](/content/2026/06/1238930/images/10e71fdd85d9772c4d357af46e491dc9c0f8f95bd0fd000d7249fdd783905c44.jpg)
Connection
Condensation
– The pickup lens in the receiver is dirty.
- More about Dual Zone
Having trouble with operation?
Please reset your unit.
Refer to the page on how to reset your unit.
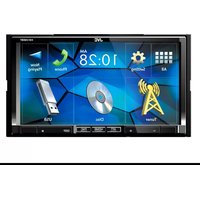
- IMPORTANT FOR LASER PRODUCTS
- HOW TO FORCIBLY EJECT A DISC
- WARNINGS
- CAUTION ON VOLUME SETTING
- FOR SAFETY
- TEMPERATURE INSIDE THE CAR
- HOW TO READ THIS MANUAL
- HOW TO USE THE M MODE BUTTON
- INTRODUCTION — PLAYABLE DISCS
- CONTROL PANEL
- REMOTE CONTROLLER — RM-RK
- GETTING STARTED
- RADIO OPERATIONS
- FM RDS OPERATIONS
- DISC OPERATIONS
- DVD/VCD SPECIAL FUNCTIONS
- ON-SCREEN DISC OPERATIONS
- DVD SETUP MENU
- OTHER DISC OPERATIONS
- DUAL ZONE OPERATIONS
- SOUND ADJUSTMENTS
- GENERAL SETTINGS — PSM
- OTHER MAIN FUNCTIONS
- CD CHANGER OPERATIONS
- EXTERNAL COMPONENT OPERATIONS
- DAB TUNER OPERATIONS
- MAINTENANCE
- LANGUAGE CODES
- MORE ABOUT THIS RECEIVER
- TROUBLESHOOTING
- SPECIFICATIONS
- DISCS YOU CAN PLAY
- DISCS CANNOT BE PLAYED BACK
- NOTE ON REGION CODE
- IF YOU INSERT A DVD VIDEO DISC OF AN INCORRECT REGION CODE
- CAUTION FOR DUALDISC PLAYBACK
- DIGITAL AUDIO FORMATS
- DTS *3 (DIGITAL THEATER SYSTEMS)
- PARTS IDENTIFICATION
- DISPLAY WINDOW
- INSTALLING THE LITHIUM COIN BATTERY (CR2025)
- BEFORE USING THE REMOTE CONTROLLER
- WARNING
- MAIN ELEMENTS AND FEATURES
- IMPORTANT
- MONITOR CONTROL
- DVD/RECEIVER CONTROL
- FOR ADVANCED DISC OPERATIONS
- FOR FM/AM TUNER OPERATIONS
- FOR DAB TUNER OPERATIONS
- HOW TO SELECT A NUMBER
- BASIC OPERATIONS
- TO DROP THE VOLUME IN A MOMENT (ATT)
- TO TURN OFF THE POWER
- CANCELING THE DISPLAY DEMONSTRATIONS
- TO ACTIVATE THE DISPLAY DEMONSTRATION
- SETTING THE CLOCK
- TO CHECK THE CURRENT CLOCK TIME WHEN THE POWER IS TURNED OFF
- LISTENING TO THE RADIO
- TO TUNE IN TO A STATION MANUALLY
- START SEARCHING FOR A STATION
- WHEN AN FM STEREO BROADCAST IS HARD TO RECEIVE
- STORING STATIONS IN MEMORY
- FM STATION AUTOMATIC PRESETTING — SSM (STRONG-STATION SEQUENTIAL MEMORY)
- SELECT THE FM BAND (FM1 - FM3) YOU WANT TO STORE INTO
- MANUAL PRESETTING
- TO CHECK THE CURRENT CLOCK TIME WHILE LISTENING TO AN FM (NON-RDS) OR AM STATION
- LISTENING TO A PRESET STATION
- WHEN USING THE REMOTE CONTROLLER
- PTY CODES
- WHAT YOU CAN DO WITH RDS
- STORING YOUR FAVORITE PROGRAMMES
- USING THE STANDBY RECEPTIONS
- TA STANDBY RECEPTION
- TO ACTIVATE TA STANDBY RECEPTION
- TO DEACTIVATE THE TA STANDBY RECEPTION
- PTY STANDBY RECEPTION
- TRACKING THE SAME PROGRAM—NETWORK-TRACKING RECEPTION
- PLAYING A DISC IN THE RECEIVER
- THE FOLLOWING MARKS ARE USED TO INDICATE THE PLAYABLE DISCS
- BEFORE PERFORMING ANY OPERATIONS, MAKE SURE THE FOLLOWING
- TO GO TO THE NEXT OR PREVIOUS CHAPTERS/TRACKS
- TO FAST-FORWARD OR REVERSE THE CHAPTER/TRACK
- TO FORWARD OR REVERSE SEARCH THE CHAPTER/TRACK
- TO LOCATE A PARTICULAR TITLE/CHAPTER/TRACK DIRECTLY
- TO LOCATE A TITLE/FOLDER
- TO LOCATE A PARTICULAR TITLE/FOLDER
- SELECTING SUBTITLES
- SELECTING AUDIO LANGUAGES
- FOR DVD
- FOR VCD
- SELECTING MULTI-ANGLE VIEWS
- DISC MENU OPERATIONS
- WHILE PLAYING A DVD
- SELECT THE ITEM YOU WANT ON THE MENU
- WHILE PLAYING A VCD
- TO RETURN TO THE PREVIOUS MENUS
- CANCELING THE PBC PLAYBACK
- TO RESUME THE PBC FUNCTION
- ZOOM IN
- MOVE THE ZOOMED-IN PORTION
- ABOUT THE ON-SCREEN BAR
- BASIC ON-SCREEN BAR OPERATIONS
- DISPLAY THE ON-SCREEN BAR
- SELECT AN ITEM
- MAKE A SELECTION
- TO ERASE THE ON-SCREEN BAR
- TO CHANGE THE TIME INFORMATION
- TO SEARCH FOR A PARTICULAR POINT BY PLAYING TIME
- TO SEARCH FOR A PARTICULAR TITLE/CHAPTER/TRACK
- BASIC CONTROL SCREEN OPERATIONS
- TO SELECT A FOLDER OR TRACK
- CD TEXT/AUDIO CD CONTROL SCREEN
- TO SELECT A TRACK
- LIST SCREEN OPERATIONS
- FOLDER/TRACK LIST SCREENS
- FOR MP3/WMA
- FOR CD TEXT/AUDIO CD
- BASIC SETTING PROCEDURE
- SELECT AN ITEM YOU WANT TO SET UP
- TO SET OTHER ITEMS ON THE SAME MENU
- TO SET OTHER ITEMS ON OTHER MENUS
- TO RETURN TO THE NORMAL SCREEN
- TO STOP PLAYBACK
- TO START PLAYBACK AGAIN
- TO EJECT A DISC
- TO GO TO THE NEXT OR PREVIOUS FOLDERS
- TO LOCATE A PARTICULAR TITLE/CHAPTER/FOLDER/TRACK DIRECTLY
- TO GO TO A CHAPTER/TRACK QUICKLY
- PROHIBITING DISC EJECTION
- CHANGING THE DISPLAY INFORMATION
- SELECTING THE PLAYBACK MODES
- SELECT YOUR DESIRED PLAYBACK MODE
- REPEAT PLAY
- MODE PLAYS REPEATEDLY
- RANDOM PLAY
- MODE PLAYS AT RANDOM
- LISTENING WITH HEADPHONES
- ON THE REMOTE CONTROLLER
- ACTIVATE DUAL ZONE
- ADJUST THE HEADPHONE VOLUME THROUGH THE 2ND AUDIO OUT PLUG
- ON THE CONTROL PANEL
- CAUTIONS
- STORING YOUR OWN SOUND ADJUSTMENTS
- SOUND MODES (PRESET FREQUENCY LEVEL SETTINGS)
- ADJUSTING THE SOUND
- BASIC PROCEDURE
- ASSIGNING TITLES TO THE SOURCES
- SELECT THE SOURCE
- ENTER THE TITLE ASSIGNMENT MODE
- ASSIGN A TITLE
- FINISH THE PROCEDURE
- TO ERASE THE ENTIRE TITLE
- DETACHING THE CONTROL PANEL
- ATTACHING THE CONTROL PANEL
- PLAYING DISCS IN THE CD CHANGER
- ABOUT THE CD CHANGER
- SELECT A DISC
- TO SKIP TO A TRACK QUICKLY DURING PLAY
- WHILE PLAYING AN MP3 DISC
- PLAYING AN EXTERNAL COMPONENT
- LISTENING TO THE DAB TUNER
- TO TUNE IN TO AN ENSEMBLE MANUALLY
- WHAT IS DAB SYSTEM
- STORING DAB SERVICES IN MEMORY
- TUNING IN TO A PRESET DAB SERVICE
- TRACING THE SAME PROGRAMME — ALTERNATIVE RECEPTION
- TO CHANGE THE DISPLAY INFORMATION WHILE TUNING IN TO AN ENSEMBLE
- HOW TO CLEAN THE CONNECTORS
- MOISTURE CONDENSATION
- HOW TO HANDLE DISCS
- TO KEEP DISCS CLEAN
- TO PLAY NEW DISCS
- TURNING ON THE POWER
- SELECTING THE SOURCES
- TURNING OFF THE POWER
- TUNER OPERATIONS
- GENERAL
- INSERTING A DISC
- PLAYING A DVD-R/DVD-RW OR CD-R/CD-RW
- PLAYING AN MP3/WMA DISC
- CHANGING THE SOURCE
- EJECTING A DISC
- GENERAL SETTINGS—PSM
- ON-SCREEN GUIDE ICONS
- ABOUT SOUNDS REPRODUCED THROUGH THE REAR TERMINALS
- OUTPUT SIGNALS THROUGH THE DIGITAL OUT TERMINAL
- AUDIO AMPLIFIER SECTION
- TUNER SECTION
- [FM TUNER]
- [MW TUNER]
- [LW TUNER]
- DVD/CD PLAYER SECTION
- CLOCK SETTING
- RANDOM PLAYBACK
- CONDENSATION
- HAVING TROUBLE WITH OPERATION
- PLEASE RESET YOUR UNIT
Brand : JVC
Model : KD-DV6102
Category : Car radio