
KS-BTA200 - Car speakers JVC - Free user manual and instructions
Find the device manual for free KS-BTA200 JVC in PDF.
| Product Type | Bluetooth Adapter for Car Stereo |
| Brand and Model | JVC KS-BTA200 |
| Power Supply | 12 V DC (11–16 V admissible), negative ground |
| Power Consumption | 70 mA |
| Weight | 150 g (without accessories) |
| Dimensions (approx.) | 5 × 3 × 1 cm |
| Operating Temperature | 0 °C to +40 °C |
| Bluetooth Version | Certified Bluetooth 1.2 |
| Bluetooth Range | Less than 10 m |
| Supported Bluetooth Profiles | HSP, HFP, A2DP, AVRCP, SPP, OPP |
| Bluetooth Output Power | +4 dBm max (Class 2) |
| Main Functions | Hands-free calls (dialing, reception, phonebook), Bluetooth audio streaming, voice command, SMS reading |
| Car Stereo Compatibility | Exclusively JVC Bluetooth-compatible car stereos |
| Supplied Accessories | Interface adapter, microphone with clip, Velcro strips, signal cable |
| Maintenance and Cleaning | Clean with a soft, dry cloth. Do not use chemicals. |
| Safety | Use on 12 V negative ground vehicles. Do not raise the volume excessively to stay attentive to the road. |
Frequently Asked Questions - KS-BTA200 JVC
User questions about KS-BTA200 JVC
0 question about this device. Answer the ones you know or ask your own.
Ask a new question about this device
Download the instructions for your Car speakers in PDF format for free! Find your manual KS-BTA200 - JVC and take your electronic device back in hand. On this page are published all the documents necessary for the use of your device. KS-BTA200 by JVC.
USER MANUAL KS-BTA200 JVC
natural_image
Line drawing of a JVC Bluetooth device with attached cable and connector (no text or symbols)
Bluetooth®
INSTRUCTIONS
BEDIENUNGSANLEITUNG
MANUEL D'INSTRUCTIONS
GEBRUIKSAANWIJZING
Enter below the Model
No. and Serial No. which are located on the top or bottom of the cabinet.
Retain this information for future reference.
Model No.
Serial No.
Declaration of Conformity with regard to the R&TTE Directive 1999/5/EC
C€0536
English:
Hereby, JVC, declares that this KS-BTA200 is in compliance with the essential requirements and other relevant provisions of Directive 1999/5/EC.
Deutsch:
Thank you for purchasing a JVC product.
Please read all instructions carefully before operation, to ensure your complete understanding and to obtain the best possible performance from the unit.
INFORMATION (For U.S.A.)
This equipment has been tested and found to comply with the limits for a Class B digital device, pursuant to Part 15 of the FCC Rules. These limits are designed to provide reasonable protection against harmful interference in a residential installation. This equipment generates, uses and can radiate radio frequency energy and, if not installed and used in accordance with the instructions, may cause harmful interference to radio communications. However, there is no guarantee that interference will not occur in a particular installation. If this equipment does cause harmful interference to radio or television reception, which can be determined by turning the equipment off and on, the user is encouraged to try to correct the interference by one or more of the following measures:
– Reorient or relocate the receiving antenna.
– Increase the separation between the equipment and receiver.
- Connect the equipment into an outlet on a circuit different from that to which the receiver is connected.
- Consult the dealer or an experienced radio/TV technician for help.
Caution:
Changes or modifications not approved by JVC could void the user's authority to operate the equipment.
Information for Users on Disposal of Old Equipment

natural_image
Symbol of a trash bin crossed with a diagonal line, no text or numbers presentThis symbol is only valid in the European Union.
This symbol indicates that the product with this symbol should not be disposed as general household waste at its end-of-life. If you wish to dispose of this product, please do so in accordance with applicable national legislation or other rules in your country and municipality. By disposing of this product correctly, you will help to conserve natural resources and will help prevent potential negative effects on the environment and human health.
Dear Customer, This apparatus is in conformance with the valid European directives and standards regarding electromagnetic compatibility and electrical safety. European representative of Victor Company of Japan, Limited is: JVC Technology Centre Europe GmbH Postfach 10 05 52 61145 Friedberg Germany
Warnings
• USE WITH DC 12 V NEGATIVE GROUND VEHICLES.
If your vehicle is not of 12 V Negative Ground type, a voltage inverter is required, which can be purchased at a JVC car audio (IN-CAR ENTERTAINMENT) dealer.
- This adapter has been designed exclusively for use with JVC's car receivers. Do not use this adapter with any other car receiver.
Precautions
- This adapter is designed for use with Bluetooth devices (cellular phone and audio players).
- Do not raise the volume level too much, as this will block outside sounds, making driving dangerous.
- Do not perform complicated operations while driving; otherwise, it may result in an accident.
- While driving, do not perform any complicated operation such as dialling the numbers, using phone book, etc. When you perform these operations, stop your car in a safe place.
- Some Bluetooth devices may not be connected to this unit depending on the Bluetooth version of the device.
- This unit may not work for some Bluetooth devices.
- Connecting condition may vary depending on circumstances around you.

natural_image
Simple line drawing of a hand making a thumbs-up gesture (no text or symbols)
About Bluetooth

Bluetooth®
Bluetooth is a short-range wireless radio communication technology for the mobile device such as cellular phones, portable PCs, and other devices. The bluetooth devices can be connected without cables and communicate each other.
- The Bluetooth word mark and logos are owned by the Bluetooth SIG, Inc. and any use of such marks by Victor Company of Japan, Limited (JVC) is under licence. Other trademarks and trade names are those of their respective owners.
- The serial number is printed on the label placed on the bottom of the adapter unit.
To send or receive voice and data between this adapter and your Bluetooth device must be within 10 m in distance.
However, the transmission distance may be shorter depending on the circumstances around you.
Bluetooth profile
This adapter supports the following Bluetooth profiles;
HSP (Headset Profile)
HFP (Hands-Free Profile)
A2DP (Advanced Audio Distribution Profile)
AVRCP (Audio/Video Remote Control Profile)
SPP (Serial Port Profile)
OPP (Object Push Profile)
Pairing and PIN Code
When you connect a Bluetooth device to your car receiver through this adapter for the first time, make pairing between the adapter and the device. Pairing allows Bluetooth devices to communicate each other. To make pairing, you may need to enter the PIN (Personal Identification Number) code of your Bluetooth device you want to connect.
General information
- This adapter supports only JVC's Bluetooth-Ready car receivers.
- Refer to the list (included in the box) to see the countries where you may use the Bluetooth® function.
Features
By using this adapter, you can operate Bluetooth devices with your receiver as follows:
- Making/receiving a call
- Calling from phonebook
- Calling by voice command
- Calling from call histories
- Redial
- Missed Call
-
Received Call
-
Calling by preset numbers
- Receiving the SMS (Short Message Service)/Text Message
- Playback a Bluetooth audio player
Available functions differ depending on the type of your receiver and Bluetooth devices.
Introduction
Introduction ...... 3
Warnings....3
Precautions....3
About Bluetooth....4
General information 4
Getting Started......6
Installation 6
Connecting to the receiver 8
Check the type of your receiver 9
Menu structures 10
Connection
Bluetooth Connection ...... 12
Selecting a Source 12
Registering a Bluetooth device — Pairing ..... 12
Connecting/Disconnecting the device 17
Bluetooth Phone
Bluetooth Phone Operations...... 19
Selecting a Source 19
Receiving a call.... 19
Calling a number in the phone book...... 20
Advanced Operations......21
Calling by voice command 21
Calling a number from the call history...... 22
Calling the last call number directly — Redial....23
Answering a waiting call 23
Using preset numbers.... 24
Calling by entering a phone number 25
Receiving an SMS (Short Message Service)/Text Message....27
Reading an SMS/Text Message 27
Bluetooth Audio
Bluetooth Audio Operations......29
Selecting a source....29
Playback operations....29
Settings
Other Settings ....30
Basic procedure 30
Setting items 31
Others
Troubleshooting......32
Specifications ....33

natural_image
Simple line drawing of a raised index finger (no text or symbols)Installation
Warning
Avoid installing the adapter unit and the microphone unit in the following places.
— Where they would hinder your safety driving.
- Where they would be exposed to direct sunlight or heat directly from the heater or placed in an extremely hot place.
- Where they would be subject to rain, water splashes or excessive humidity.
— Where they would be subject to dust.
- Where they would be positioned on an unstable place.
- Where they could damage the car's fittings.
- Where radio wave interferes (EX.: trunk, etc.).
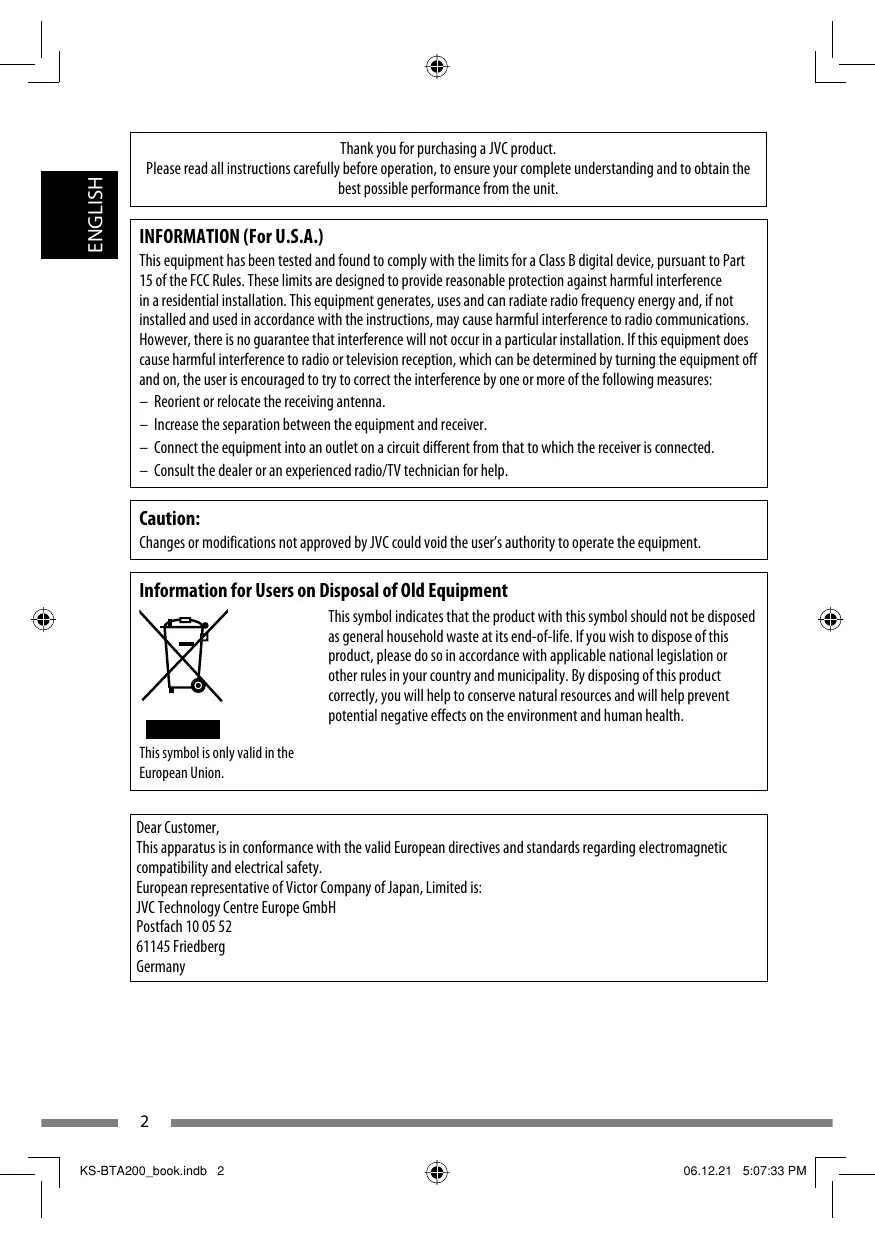
Mounting the adapter unit
Wipe clean the selected surface sufficiently, and affix the Velcro tape.
- If the Velcro tape (hard) adheres to the car mat directly, you may install this unit without using the Velcro tape (soft).
- The serial number is printed on the label placed on the bottom of the unit. Do not cover up the label with the velcro tape.
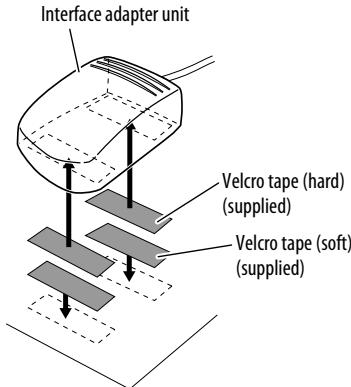
Installing the microphone unit
1 Attach the microphone to the microphone clip.
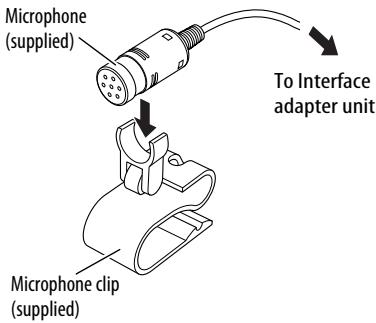
To adjust the microphone angle
natural_image
Diagram of a cable connector with rotating arm and cable attachment (no text or symbols)2 Install the microphone unit.
To install on the sun visor
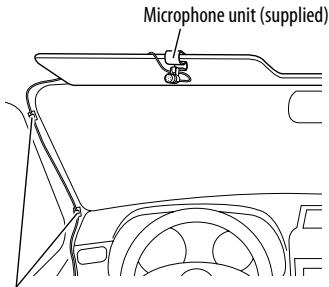
Secure the microphone cord using cord clamps (not supplied) if necessary.
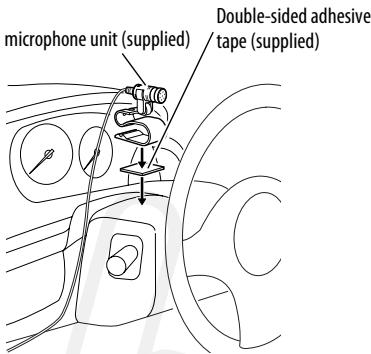
To install on the steering column
Install the microphone unit on the top side of the steering column.
Connecting to the receiver
Typical connection
Turn off the power to the receiver and turn off the vehicle's ignition switch before connecting or disconnecting the unit.
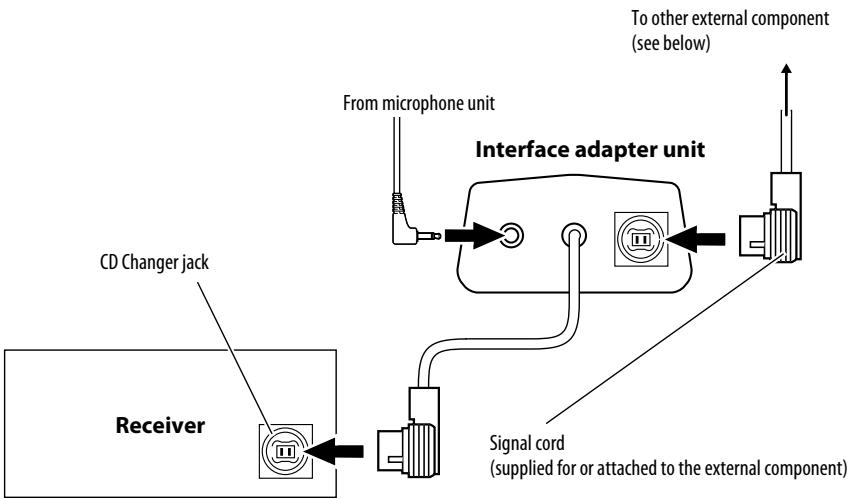
- You can connect the following external components to this adapter;
- CD Changer
- SIRIUS Satellite radio
- XM Satellite radio
- DAB tuner
- Interface adapter for iPod
- D. player interface adapter
- Line Input Adapter
- Aux Input Adapter
• See also the installation manual supplied with your receiver.
Checking the type of your receiver
Operating procedures through a receiver are different depending on the type of the receiver.
Check the type of your receiver by the chart below.
- If your answer is "Yes," follow .
- If your answer is "No," follow →.
Is your receiver KD-NX5000?

Type A

Is your receiver equipped with the built-in monitor?

Type B

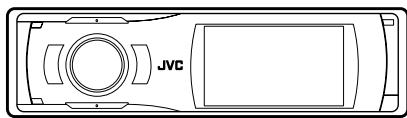
Is your receiver equipped with the 3 Dimensional Liquid Crystal Display?

Type C

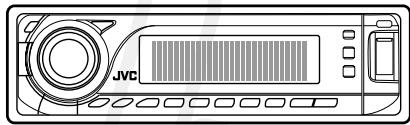
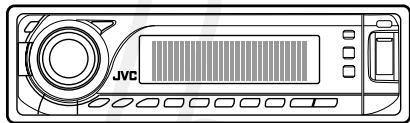
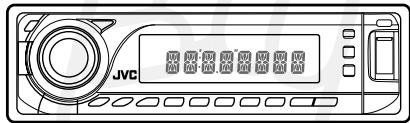
Type D
- Menu operations are different depending on the type of your receiver.
For details, see also the instructions supplied with your receiver.
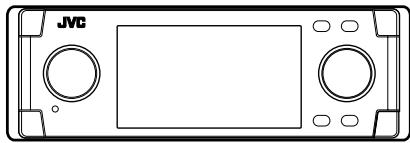
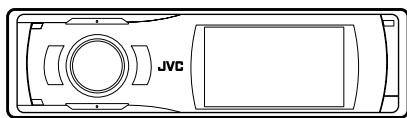
Example: type of the receiver
Type A
natural_image
Front view of a JVC gaming controller panel with control buttons and display screen (no text or symbols)Type B

natural_image
Top-down schematic of a JVC (Junction Vehicle) vehicle showing front, top, and side views with no text or symbols beyond the label 'JVC'
natural_image
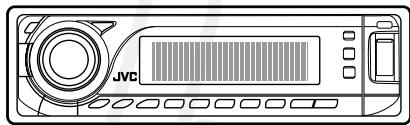
Front view of a blank computer monitor with JVC button at bottom (no text or symbols on screen)Type C

natural_image
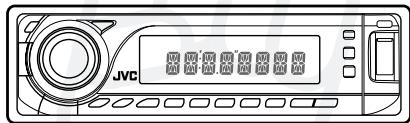
Front view of a JVC audio recording device with control buttons and display (no text or symbols visible)Type D

Menu structures
Indication language
In this manual, English indications are used for purpose of explanation. You can change the indication language to other than English for some receivers. Refer to the instruction manual supplied with your receiver.
Bluetooth Phone
| Dial / Dial Menu / DIAL *1 | Select the method to make a call. | |
| Redial / REDIAL *2 | Select a phone number from the list of the phone numbers you have dialed. page 22. | |
| Received Calls / RECEIVE *2 | Select a phone number from the list of the received calls. page 22. | |
| Phonebook / PH BOOK *2 | Select a name, then phone number from the phone book of the connected cellular phone. page 20. | |
| Missed Calls / MISSED *2 | Select a phone number from the list of the missed calls. page 22. | |
| Phone number / NUMBER | Enter the phone number. page 25. | |
| Voice / Voice Dialing / VOICE *3 | You can call by voice command. page 21. | |
| Message *1,2,4 | You can read a message from the following message histories. | |
| Unread | Messages you have not read. page 27. | |
| Read | Messages you have read. page 27. | |
| Unsent | Messages you have not sent. page 27. | |
| Sent | Messages you have sent. page 27. | |
| Open / OPEN *5 | Make the unit ready to establish a new Bluetooth connection. Select this when establishing a Bluetooth connection with a device for the first time, from the device. page 12. | |
| Search / SEARCH *5 | Make the unit ready to establish a new Bluetooth connection. Select this when establishing a Bluetooth connection with a device for the first time, from the unit. The unit searches for available new devices. page 14. | |
| Special Device / SPECIAL *5 | Shows the list of Bluetooth devices which require some special procedure to establish Bluetooth connection. Select a device you want to connect. page 15. | |
| Connection / Connect / CONNECT *6 | After selecting a device from among the registered devices, establish the connection with it. page 17. | |
| Disconnection / Disconnect / DISCNNCT *1 | Disconnect the current device before connecting another device. page 18. | |
| Delete Pair / DELETE *6 | Delete the registered devices. page 16. | |
| Setup / Settings / SETTING | Change the settings. page 30. | |
| Auto Connect / AUTO CNT | You can set to connect a Bluetooth device automatically when the receiver is turned on. | |
| Auto Answer / AUTO ANS*7 | You can set the receiver to receive or reject the incoming calls automatically. | |
| Message Info *2, 4, 7 | You can set the receiver inform when you receive an SMS/Text Message. | |
| Microphone Level / Mic Setting / MIC SET *7 | Adjust a microphone volume. | |
| Version / VERSION *8 | Display the software and hardware versions. | |

Bluetooth Audio
| Open / OPEN *5 | Make the unit ready to establish a new Bluetooth connection. Select this when establishing a Bluetooth connection with a device for the first time, from the device. page 12. | |
| Search / SEARCH *5 | Make the unit ready to establish a new Bluetooth connection. Select this when establishing a Bluetooth connection with a device for the first time, from the unit. The unit searches for available new devices. page 14. | |
| Special Device / SPECIAL *5 | Shows the list of Bluetooth devices which requires some special procedure to establish Bluetooth connection. Select a device you want to connect. page 15. | |
| Connection / Connect / CONNECT *6 | After selecting a device from among the registered devices, establish the connection with it. page 17. | |
| Disconnection / Disconnect / DISCNNCT *1 | Disconnect the current device before connecting another device. page 18. | |
| Delete Pair / DELETE *6 | Delete the registered devices. page 16. | |
| Setup / Settings / SETTINGS | Change the settings. page 30. | |
| Version / VERSION *8 | Display the software and hardware versions. | |
*1 Selectable only when the device is connected.
*2 Selectable only when your cellular phone is equipped with the function.
*3 Selectable only when your cellular phone is equipped with the voice recognition system.
*4 Excluding type D.
*5 Selectable only when "New Device" is selected.
*6 Selectable only when the registered device is selected.
*7 Not selectable for "New Device".
*8 If you wish to receive more information about Bluetooth, visit our JVC web site.
- For details of the menu operations, refer to the instruction manual supplied with your receiver.
- Indications on the display (monitor) and button names vary among the receivers.
ex. SOURCE: SRC
■: ■ / BACK
MENU: AV MENU, AV Menu
Bluetooth Phone: Bluetooth PHONE, BT-PHONE
New Device: New device, NEW DEVICE
Preparation: Turn on the Bluetooth function of the Bluetooth device.
Selecting a source
Before you connect a Bluetooth device, change the source to the Bluetooth device.
for Type A
Press and hold MENU to call up the Bluetooth menu or press SRC repeatedly to select "Bluetooth Audio."
for Type B/Type C/Type D
You can select "Bluetooth Phone" and "Bluetooth Audio" as the source.
Press SOURCE repeatedly to select "Bluetooth Phone" or "Bluetooth Audio."
Registering a Bluetooth device — Pairing
When you connect a Bluetooth device for the first time, register and make pairing between the unit and the device.
- Pairing may not be possible with some Bluetooth devices.
To connect from the other Bluetooth device
Use "Open" to establish connection with a Bluetooth device from the device.
for Type A
1 Display "Bluetooth Phone" screen or select "Bluetooth Audio" as the source.
2 Press ▲/▼ to select "New Device."
3 Display the menu, then select "Mode" "Open."
4 Press |◀◀/▶▶|/▲/▼ to enter the PIN (Personal Identification Number) Code, then select "Connect."

Select a number.
ENT: Enter the number.
- Refer to the instruction manual supplied with your receiver.
- You can enter any number you like (1-digit to 16-digit numbers).
- Some devices have their own PIN code. Enter the specified PIN code to the unit.
5 Use the Bluetooth device to search for the unit.
- Enter the same PIN code (as entered in the above step) on the device to be connected.
"Connected (and the device name)" appears on the display.
for Type B
1 While "Bluetooth Phone" or "Bluetooth Audio" is selected as the source, select "New Device."
2 Display the menu, then select "Bluetooth" "Open."
3 Enter the PIN (Personal Identification Number) Code.
Refer to the instruction manual supplied with your receiver.
- You can enter any number you like (1-digit to 16-digit numbers).
- Some devices have their own PIN code. Enter the specified PIN code to the unit.
4 Use the Bluetooth device to search for the unit.
- Enter the same PIN code (as entered in the above step) on the device to be connected.
"Connected (and the device name)" appears on the display.
for Type C
1 While "Bluetooth Phone" or "Bluetooth Audio" is selected as the source, select "New Device."
2 Press MODE, then select "Open."
3 Use the following buttons to enter the PIN (Personal Identification Number) Code.
I◄◄/►►I: Move the entry position.
▲/▼: Select a number.
5: Delete all entries.
1: Enter the number.
- You can enter any number you like (1-digit to 16-digit numbers).
- Some devices have their own PIN code. Enter the specified PIN code to the unit.
4 Use the Bluetooth device to search for the unit.
- Enter the same PIN code (as entered in the above step) on the device to be connected.
"Connected (and the device name)" appears on the display.
for Type D
1 While "Bluetooth Phone" or "Bluetooth Audio" is selected as the source, press |◀◀/▶▶| to select "NEW."
2 Press ▼, then select "OPEN."
3 Use the following buttons to enter the PIN (Personal Identification Number) Code.
I◄◄/►►I: Move the entry position.
VOLUME +/- (Control dial):
Select a number.
▼: Enter the number.
- You can enter any number you like (1-digit to 16-digit numbers).
- Some devices have their own PIN code. Enter the specified PIN code to the unit.
4 Use the Bluetooth device to search for the unit.
- Enter the same PIN code (as entered in the above step) on the device to be connected.
"CONNECT (and the device name)" appears on the display.
Registering a Bluetooth device — Pairing (continued)
To connect an available device from the unit
Use "Search" to establish connection with a Bluetooth device from the unit.
for Type A
1 Display "Bluetooth Phone" screen or select "Bluetooth Audio" as the source.
2 Press ▲/▼ to select "New Device."
3 Display the menu, then select "Mode" "Search."
The unit searches for the devices and displays the list of the available devices.
4 Select a device name you want to connect.
5 Press |◀◀/▶▶|/▲/▼ to enter the PIN (Personal Identification Number) Code of the device to be connected, then select "Connect."
|◀◀/▶▶|/▲/▼:
Select a number.
ENT: Enter the number.
- Refer to the instruction manual supplied with your receiver.
"Connected (and the device name)" appears on the display.
for Type B
1 While "Bluetooth Phone" or "Bluetooth Audio" is selected as the source, select "New Device."
2 Display the menu, then select "Bluetooth" "Search."
The unit searches for the devices and displays the list of the available devices.
3 Select a device name you want to connect.
4 Enter the PIN (Personal Identification Number) Code of the device to be connected.
- Refer to the instruction manual supplied with your receiver.
"Connected (and the device name)" appears on the display.
for Type C
1 While "Bluetooth Phone" or "Bluetooth Audio" is selected as the source, select "New Device."
2 Press MODE, then select "Search."
The unit searches for the devices and displays the list of the available devices.
3 Select a device name you want to connect.
4 Use the following buttons to enter the PIN (Personal Identification Number) Code of the device to be connected.
I◄◄/►►I: Move the entry position.
▲/▼: Select a number.
5: Delete all entries.
1: Enter the number.
"Connected (and the device name)" appears on the display.
for Type D
1 While "Bluetooth Phone" or "Bluetooth Audio" is selected as the source, press |◀◀/▶▶| to select "NEW."
2 Press ▼, then select "SEARCH."
The unit searches for the devices and displays the list of the available devices.
3 Select a device name you want to connect.
4 Use the following buttons to enter the PIN (Personal Identification Number) Code of the device to be connected.
I◄◄/►►I: Move the entry position.
VOLUME +/- (Control dial):
Select a number.
▼: Enter the number.
"CONNECT (and the device name)" appears on the display.
To connect a special device
Some Bluetooth devices require some special procedures to establish Bluetooth connection for the first time. You need to select the device name for those Bluetooth devices before you register it.
for Type A
1 Display "Bluetooth Phone" screen or select "Bluetooth Audio" as the source.
2 Press ▲/▼ to select "New device."
3 Display the menu, then select "Mode" "Special Device."
The list of special devices appears on the display.
4 Select a device name you want to connect.
5 Connect the selected device using "Open (page 12)" or "Search (page 14)."
for Type B
1 While "Bluetooth Phone" or "Bluetooth Audio" is selected as the source, select "New device."
2 Display the menu, then select "Bluetooth" "Special Device."
The list of special devices appears on the display.
3 Select a device name you want to connect.
4 Connect the selected device using "Open (page 13)" or "Search (page 14)."
Registering a Bluetooth device — Pairing (continued)
for Type C
1 While "Bluetooth Phone" or "Bluetooth Audio" is selected as the source, select "New device."
2 Press MODE, then select "Special Device."
The list of special devices appears on the display.
3 Select a device name you want to connect.
4 Connect the selected device using "Open (page 13)" or "Search (page 14)."
for Type D
1 While "Bluetooth Phone" or "Bluetooth Audio" is selected as the source, press |◀◀/▶▶| to select "NEW."
2 Press ▼, then select "SPECIAL."
3 Select a device name you want to connect.
4 Connect the selected device using "OPEN (page 13)" or "SEARCH (page 14)."
To delete the registered device
You can register up to five Bluetooth devices. If you want to connect a 6th device, delete one of the registered devices.
for Type A
1 Display "Bluetooth Phone" screen or select "Bluetooth Audio" as the source.
2 Press ▲/▼ to select a registered device you want to delete.
3 Display the menu, then select "Mode" "Delete Pair."
4 Select "Yes" to delete the device.
- If you select "No," the procedure is canceled.
for Type B
1 While "Bluetooth Phone" or "Bluetooth Audio" is selected as the source, select a registered device you want to delete.
2 Display the menu, then select "Bluetooth" "Delete Pair."
3 Select "Yes" to delete the device.
- If you select "No," the procedure is canceled.
for Type C
1 While "Bluetooth Phone" or "Bluetooth Audio" is selected as the source, select a registered device you want to delete.
2 Press MODE, then select "Delete Pair."
3 Select "Yes" to delete the device.
- If you select "No," the procedure is canceled.
for Type D
1 While "Bluetooth Phone" or "Bluetooth Audio" is selected as the source, press |◀◀/▶▶| to select a registered device you want to delete.
2 Press ▼, then select "DELETE."
3 Select "YES" to delete the device.
- If you select "NO," the procedure is canceled.
Connecting/Disconnecting the device
To connect a device manually
Only one device can be connected at a time for each source ("Bluetooth Phone" and "Bluetooth Audio").
for Type A
1 Display "Bluetooth Phone" screen or select "Bluetooth Audio" as the source.
2 Press ▲/▼ to select a registered device.
3 Select "Mode" "Connection" to connect a selected device.
for Type B
1 While "Bluetooth Phone" or "Bluetooth Audio" is selected as the source, select a registered device.
2 Display the menu, then select "Bluetooth" "Connect" to connect a selected device.
for Type C
1 While "Bluetooth Phone" or "Bluetooth Audio" is selected as the source, use ▲/▼ to select a registered device.
2 Press MODE, then select "Connect" to connect a selected device.

Connecting/Disconnecting the device (continued)
for Type D
1 While "Bluetooth Phone" or "Bluetooth Audio" is selected as the source, press |◀◀/▶▶| to select a registered device.
2 Press ▼, then select "CONNECT" to connect a selected device.
Note
You can connect the Bluetooth cellular phone automatically when the receiver is turned on.
See "Auto Connect" on page 31.
To disconnect a device
You can disconnect a Bluetooth device.
for Type A
1 Display "Bluetooth Phone" screen or select "Bluetooth Audio" as the source.
2 Select "Mode" "Disconnection" to disconnect a device.
for Type B
1 Select "Bluetooth Phone" or "Bluetooth Audio" as the source.
2 Display the menu, then select "Bluetooth" "Disconnect" to disconnect a device.
for Type C
1 Select "Bluetooth Phone" or "Bluetooth Audio" as the source.
2 Press MODE, then select "Disconnect" to disconnect a device.
for Type D
1 Select "Bluetooth Phone" or "Bluetooth Audio" as the source.
2 Press ▼, then select "DISCNNCT" to disconnect a device.
- Before you use a Bluetooth device with your receiver, connect a Bluetooth device. See "Bluetooth Connection" on page 12.
- When the sound is stopped or interrupted during the use of a Bluetooth device, try the following remedies.
- Turn Off, then turn On the power to the receiver.
- (When sound is not yet restored,) Connect the device again. See "Connecting/Disconnecting the device" on page 17.
- For details of the menu operations, refer to the instruction manual supplied with your receiver.
- Indications on the display (monitor) and button names vary among the receivers.
ex. SOURCE: SRC ■: ■ / BACK MENU: AV MENU, AV Menu Bluetooth Phone: Bluetooth PHONE, BT-PHONE New Device: New device, NEW DEVICE
Selecting a source
Before you operate the Bluetooth phone function, change the source to "Bluetooth Phone."
for Type A
Press and hold MENU to call up the Bluetooth menu or press PHONE on the remote controller.
for Type B/Type C/Type D
Press SOURCE repeatedly to select "Bluetooth Phone."
Receiving a call
If you receive a call, "Receiving Call (and name, phone number if acquired)" appears on the display.
Press one of the following buttons.
The source changes to Bluetooth Phone and you can receive the incoming call.
Type A
Any key (except ⏻/l/ATT, +/−, MAP, SRC and ▲.)
Type B/Type C/Type D
Any key (except ⏻/l/ATT and VOL +/−.)
for the Touch Panel model
You can also press the message "Receiving Call" displayed on the touch panel to receive a call.
- When another call comes in while talking, see "Answering a waiting call" on page 23.
To end the call or reject an incoming call, press and hold one of the above buttons.
Note
You can set the receiver to receive or reject the incoming call automatically. See "Auto Answer" on page 31.
Calling a number in the phone book
You can call a number from the phone book in the connected cellular phone.
Before you use this function, transfer the phone book memory of the cellular phone to this unit (Refer to the instruction manual supplied with your cellular phone).
- With some cellular phones, the phone book memory is transferred automatically.
for Type A
1 Display the dial menu.
2 Select "Phonebook."
3 Select a name from the list.
The list of phone numbers appears.
4 Select a phone number you want and press ENT.
for Type B
1 Display the dial menu.
2 Select "Phonebook."
3 Select a name from the list.
The list of phone numbers appears.
4 Select a phone number you want.
for Type C
1 Display the dial menu.
2 Select "Phonebook."
3 Select a name from the list.
The list of phone numbers appears.
4 Select a phone number you want and press the number button 1.
for Type D
1 Display the dial menu.
2 Select "PH BOOK."
3 Select a name from the list.
The list of phone numbers appears.
4 Select a phone number you want and press ▼.
Calling by voice command
If your cellular phone is equipped with the voice recognition system, you can make a call by your voice.
for Type A
1 Display "Bluetooth Phone" screen.
2 Press and hold MENU.
"Say" appears on the display.
- You can also select voice dialing function from the dial menu. To use the function, select "Voice" from the dial menu.
- If your cellular phone does not support the voice recognition system, "Error" appears.
3 Speak the name you want to call.
- Pronounce slowly and clearly.
for Type B
1 Press and hold MENU.
"Say Name" appears on the display.
- You can also select voice dialing function from the dial menu. To use the function, select "Voice Dialing" from the dial menu.
- If your cellular phone does not support the voice recognition system, "Error" appears.
2 Speak the name you want to call.
- Pronounce slowly and clearly.
for Type C
1 Press and hold MODE.
"Say" appears on the display.
- You can also select voice dialing function from the dial menu. To use the function, select "Voice" from the dial menu.
- If your cellular phone does not support the voice recognition system, "Error" appears.
2 Speak the name you want to call.
- Pronounce slowly and clearly.
for Type D
1 Press and hold MODE.
"SAY" appears on the display.
- You can also select voice dialing function from the dial menu. To use the function, select "VOICE" from the dial menu.
- If your cellular phone does not support the voice recognition system, "ERROR" appears.
2 Speak the name you want to call.
- Pronounce slowly and clearly.
Calling a number from the call history
This unit has three kinds of call histories — redial, received calls and missed calls. You can call a number using these call histories.
for Type A
1 Display the dial menu.
2 Select a call history.
You can select from the following call histories;
Redial:
Calls recently made.
Received Calls:
Calls recently received.
Missed Calls:
Calls recently missed.
3 Select a name (if acquired) or phone number, then press ENT.
for Type B
1 Display the dial menu.
2 Select a call history.
You can select from the following call histories;
Redial:
Calls recently made.
Received Calls:
Calls recently received.
Missed Calls:
Calls recently missed.
3 Select a name (if acquired) or phone number.
for Type C
1 Display the dial menu.
2 Select a call history.
You can select from the following call histories;
Redial:
Calls recently made.
Received Calls:
Calls recently received.
Missed Calls:
Calls recently missed.
3 Select a name (if acquired) or phone number, then press number button 1.
for Type D
1 Display the dial menu.
2 Select a call history.
You can select from the following call histories;
REDIAL:
Calls recently made.
RECEIVED:
Calls recently received.
MISSED:
Calls recently missed.
3 Select a name (if acquired) or phone number, then press ▼.
Calling the last call number directly — Redial
This function is available only when the remote controller supplied with your receiver has the PHONE button.
On the remote controller only
1 Press and hold PHONE.
The last called phone number is displayed.
2 Press PHONE.
Answering a waiting call
If your cellular phone is equipped with the call waiting function, you can put the current call on hold and answer the waiting call.
Press one of the following buttons.
To restore the on-hold call, press one of the following buttons again.
- When you end one call, you can connect to the other.
Type A
Any key (except ⏻/l/ATT, +/−, MAP, SRC and ▲.)
Type B/Type C/Type D
Any key (except ⏻/l/ATT and VOL +/−.)
for the Touch Panel model
You can also press the message "Receiving
Call" displayed on the touch panel.
Using preset numbers
You can preset up to six phone numbers.
To store a preset number
for Type A
1 Select a phone number you want to preset from the number list (Phonebook, Redial, Received Calls or Missed Calls.)
2 Press and hold ENT to display the preset list.
3 Select a preset number you want to store into, then press ENT.
for Type B
1 Select a phone number you want to preset from the number list (Phonebook, Redial, Received Calls or Missed Calls.)
2 Press and hold ENT to display the preset list.
for the Touch Panel model
Press and hold a phone number on the touch panel.
3 Select a preset number you want to store into.
for Type C/Type D
1 Select a phone number you want to preset from the number list (Phonebook, Redial, Received Calls or Missed Calls.)
2 Press and hold a number button on the receiver you want to store the phone number into.
To call a preset phone number
for Type A/Type B
1 Press and hold ▲/▼ to display the preset list.
for the Touch Panel model
Display the preset list.
2 Select a preset number you want to call.
for Type C/Type D
Press a number button on the receiver you want to call.
Calling by entering a phone number
You can make a call by entering a phone number on the receiver.
for Type A
1 Display the dial menu.
2 Select "Phone Number."
3 Press |◀◀/▶▶|/▲/▼ to enter a phone number, then select "Dial."
|◀◀/▶▶|/▲/▼:
Select a number.
ENT: Enter a number.
Note
You can store the entered phone number into the preset list. Select "Store" in the step 3 to display the preset list. Select a preset number you want to store into, then press ENT.
for Type B
1 Display the dial menu.
2 Select "Phone Number."
3 Enter a phone number.
Refer to the instruction manual supplied with your receiver.
Note
You can store the entered phone number into the preset list. Press and hold ENT or press "PRESET" on the touch panel to display the preset list. Select a preset number you want to store into.

for Type C
1 Display the dial menu.
2 Select "PHONE NUMBER."
3 Press |◀◀/▶▶|/▲/▼ to enter a phone number, then press the number button 1.
I◄◄/►►I: Move the entry position.
▲/▼: Select a number.
5: Delete all entries.
Note
You can store the entered phone number into the preset list. Press and hold a number buttons you want to store into.
for Type D
1 Display the dial menu.
2 Select "NUMBER."
3 Press |◀◀/▶▶|, VOLUME +/- to enter a phone number, then press ▼.
I◄◄/►►I: Move the entry position.
VOLUME +/− (Control dial):
Select a number.
Note
You can store the entered phone number into the preset list. Press and hold a number buttons you want to store into.
Receiving an SMS (Short Message Service)/ Text Message
If your cellular phone can use SMS (Short Message Service)/Text Message, you can read the messages on the display (monitor) of the receiver.
When you receive a message, "Receiving Message/Receiving MSG/RCV MSG" appears on the display (monitor).
for Type A/Type B
Press ENT or "YES" on the touch panel to read the message.
for Type C
Press 1 to read the message.
For Type D
"RCV MSG" appears on the display to tell you the arrival of the message.
- You cannot read the received message on the display.
To read the message later (only for type A/B/C)
Press ■ or 3 (for Type C) when you receive an SMS/Text Message. Received message is stored in Unread in message histories.
Note
You can set to ignore the arrival of the message when you receive an SMS/Text Message. Refer to "Message Info" on page 31.
Reading an SMS/Text Message
for Type A
1 Display "Bluetooth Phone" screen.
2 Select "Mode" "Message."
3 Select a message history.
You can select one of the following message histories;
Unread:
Messages not read yet.
Read:
Messages already read.
Unsent:
Messages not sent yet.
Sent:
Messages already sent.
4 Select a message you want to read.
for Type B
1 Select "Bluetooth" "Message Menu."
2 Select a message history.
You can select one of the following message histories;
Unread:
Messages not read yet.
Read:
Messages already read.
Unsent:
Messages not sent yet.
Sent:
Messages already sent.
3 Select a message you want to read.
for Type C
1 Press MODE, then select "Message Menu."
2 Select a message history.
You can select one of the following message histories;
Unread:
Messages not read yet.
Read:
Messages already read.
Unsent:
Messages not sent yet.
Sent:
Messages already sent.
3 Select a message you want to read.
for Type D
Not Available for this type.
- Before you use a Bluetooth device on your receiver, connect a Bluetooth device. See "Bluetooth Connection" on page 12.
- When sound is stopped or interrupted during the use of a Bluetooth device, try the following remedies.
- Turn Off, then turn On the power to the receiver.
- (When sound is not yet restored,) Connect the device again. See "Connecting/Disconnecting the device" on page 17.
- For details of the menu operations, refer to the instruction manual supplied with your receiver.
- Indications on the display (monitor) and button names vary among the receivers.
ex. SOURCE: SRC ■: ■ / BACK Bluetooth Audio: Bluetooth AUDIO, BT-AUDIO
Selecting a source
Before you operate the Bluetooth audio device, change the source to "Bluetooth Audio."
for Type A
You can select "Bluetooth Audio" as the source.
Press SRC repeatedly to select "Bluetooth Audio."
for Type B/Type C/Type D
You can select "Bluetooth Audio" as the source.
Press SOURCE repeatedly to select "Bluetooth Audio."
Playback operations
for Type A/Type B
▶: Start playback
▶/Ⅱ: Start playback/Pause
▶▶I: Forward skip
Reverse skip
■: Stop
for Type C
1: Start playback
3: Stop
▶▶I: Forward skip
Reverse skip
for Type D
▲: Start playback
▶▶▶I: Forward skip
Reverse skip
Basic procedure
for Type A
1 Display "Bluetooth Phone" screen or select "Bluetooth Audio" as the source.
2 Select "Mode" "Setup" from the menu.
3 Select an item.
See "Setting items" on the next page.
4 Press the following buttons to change the settings.
▲/▼: Change the setting.
ENT: Confirm the setting.
for Type B
1 Display the menu, then select "Bluetooth" "Settings".
2 Select an item.
See "Setting items" on the next page.
3 Change the settings.
Refer to the instruction manual supplied with your receiver.
for Type C
1 Press MODE, then select "Settings."
2 Select an item.
See "Setting items" on the next page.
3 Press the following buttons to change the settings.
▲/▼: Change the setting.
1: Confirm the setting.
for Type D
1 While "Bluetooth Phone" or "Bluetooth Audio" is selected as the source, press ▼/|◄◄/►► to select "SETTINGS."
2 Select an item.
See "Setting items" on the next page.
3 Press the following buttons to change the settings.
VOLUME +/− (Control dial):
Change the setting.
▼: Confirm the setting.
Setting items
You can change the following items in Setting menu (_: initial):
Auto Connect
You can set to connect a Bluetooth device automatically when the receiver is turned on.
Off: Does not connect any device automatically.
Last: Connects with the last connected device.
Order: Connects with the available registered device found at first.
Auto Answer
You can set the receiver to receive or reject incoming calls automatically.
Off: The receiver does not answer calls automatically. Answer the calls manually.
On: The receiver receives incoming calls automatically.
Reject: The unit rejects all incoming calls.
Message Info
You can set the receiver to inform the arrival of the message when you receive an SMS (Short Message Service)/Text Message.
Auto: The receiver rings and informs you of the arrival of the message.
Manual: The receiver does not inform you of the arrival of the message.
Microphone Level / Mic Setting
Adjust a microphone volume.
Level: 1, 2, 3
Version
Display the software and hardware versions.
What appears to be trouble is not always serious. Check the following points before calling a service center.
| Symptoms | Remedies |
| Bluetooth device does not detect the unit. | This unit can be connected with one Bluetooth cellular phone and one Bluetooth audio device at a time.While connecting a device, this unit cannot be detected from another device. Disconnect currently connected device and search again. |
| The unit does not detect the Bluetooth device. | Check the Bluetooth setting of the device.Search from the Bluetooth device. After detecting the unit, select “Open” on the unit to connect the device. |
| “Device Unfound/UNFOUND” appears on the display. | Check the Bluetooth setting of the device, then search again. |
| The unit does not make pairing with the Bluetooth device. | Enter the same PIN Code to the unit and target device.Select the device name from “Special Device,” then connect again. |
| “Connection Error/ERR CNT” appears on the display. | Select “Connect” to connect the device again. |
| Echo or noise occurs. | Adjust the position of the microphone unit. |
| “Error/ERROR” appears on the display. | Try the function again.(If the message appears again)The connected device is not equipped with the function. |
| “Loading/LOADING” appears on the display. | Try the function again. |
| “Please Wait/WAIT” appears on the display. | Wait until the message goes off.(If the message does not go off)Turn Off, then turn On the power to the receiver. |
| “Reset 08/RESET 8” appears on the display. | Check the connection between the adapter and the unit.Turn Off, then turn On the power to the receiver. |
| Phone sound quality is poor. | Reduce the distance between the unit and the Bluetooth cellular phone.Move the car to a place where you can get a better signal reception. |
| Sound is interrupted or skipped during playback of a Bluetooth audio device. | Place the Bluetooth audio device nearer to the adapter.Disconnect the connected Bluetooth cellular phone.Turn Off, then turn On the power to the receiver.(When sound is not yet restored,) connect the device again. |
| The connected audio device cannot be controlled. | Check whether the connected audio device supports AVRCP. |
Bluetooth information:
If you wish to receive more information about Bluetooth, visit our JVC web site.
Specifications
GENERAL
Power Requirement:
Operating Voltage:
DC 14.4 V (11 V to 16 V allowance)
Grounding System: Negative ground
Current consumption: 70 mA
Allowable Operating Temperature:
0^ to +40^ (32°F to 104°F)
Dimensions (W × H × D):
70 mm × 34.5 mm × 90 mm
(2^-13 / 16'' × 1^-3 / 8'' × 3^-9 / _16'')
Mass (approx.):
150 g (0.32 lbs)
(excluding accessories)
BLUETOOTH SECTION
Bluetooth Version:
Bluetooth 1.2 certified
Output Power:
+4 dBm Max. (Power class 2)
Service Area:
Within 10 m (10.9 yd.)
Profile:
HSP (Headset Profile)
HFP (Hands-Free Profile)
A2DP (Advanced Audio Distribution Profile)
AVRCP (Audio/Video Remote Control Profile)
SPP (Serial Port Profile)
OPP (Object Push Profile)
Design and specifications are subject to change without notice.
natural_image
Symbol of a trash bin crossed with no text or labels, representing waste sorting or disposal (no text present)natural_image
Simple line drawing of a raised index finger (no text or symbols)
Über Bluetooth

Bluetooth®
A2DP (Advanced Audio Distribution Profile)
AVRCP (Audio/Video Remote Control Profile)
SPP (Serial Port Profile)
OPP (Object Push Profile)
natural_image
Simple line drawing of a raised index finger (no text or symbols)
Einbau
Warnung
natural_image
Diagram of a cable connector with a rotating cable and cable housing (no text or symbols)natural_image
Front view of a JVC gaming controller panel with control buttons and display screen (no text or symbols)Typ B

natural_image
Top-down schematic of a JVC (Junction Vehicle) device showing front, top, and side views with no text or symbols beyond the label 'JVC'
natural_image
Front view of a blank computer monitor with JVC button at bottom (no text or symbols on screen)Typ C

natural_image
Front view of a JVC audio recording device with control buttons and display (no text or symbols visible)Typ D


Menü-Strukturen
Anzeigesprache
Microphone Level / Mic Setting
Abmessungen (B × H × T):
70 mm × 34,5 mm × 90 mm
Gewicht (ca.):
A2DP (Advanced Audio Distribution Profile)
AVRCP (Audio/Video Remote Control Profile)
SPP (Serial Port Profile)
OPP (Object Push Profile)
natural_image
Symbol of a trash bin crossed with no text or labels, representing waste sorting or disposal (no text present)natural_image
Simple line drawing of a hand making a thumbs-up gesture (no text or symbols)
natural_image
Simple line drawing of a raised index finger (no text or symbols)
Installation
Avertissement
natural_image
Diagram of a cable connector with a rotating cable and cable attachment (no text or symbols)2 Installez le microphone.
- Radio satellite XM
- Tuner DAB
natural_image
Front view of a JVC gaming controller panel with control buttons and display screen (no text or symbols)Type B

natural_image
Top-down schematic of a JVC (Junction Vehicle) device showing front, top, and side views with no text or symbols beyond the label 'JVC'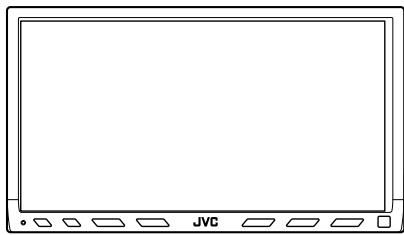
natural_image
Front view of a blank computer monitor with JVC button at bottom (no text or symbols on screen)Type C

natural_image
Front view line drawing of a JVC audio recording device (no text or symbols on body)Type D

Structures de menu
Microphone Level / Mic Setting
Dimensions (L × H × P):
70 mm × 34,5 mm × 90 mm
Masse (approx.):
natural_image
Symbol of a trash bin crossed with a diagonal line, no text or labels presentnatural_image
Simple line drawing of a hand making a right index finger (no text or symbols)
Meer over Bluetooth

Bluetooth®
HSP (Headset Profile)
HFP (Hands-Free Profile)
A2DP (Advanced Audio Distribution Profile)
AVRCP (Audio/Video Remote Control Profile)
SPP (Serial Port Profile)
OPP (Object Push Profile)
natural_image
Simple line drawing of a raised index finger (no text or symbols)
Installeren
Waarschuwing
natural_image
Diagram of a cable connector with a rotary switch and rotating arm (no text or symbols)natural_image
Front view of a JVC gaming controller panel with control buttons and display screen (no text or symbols)Type B

natural_image
Top-down schematic of a JVC (Junction Vehicle) device showing front, top, and side views with no text or symbols beyond the label 'JVC'
natural_image
Front view of a blank computer monitor with JVC button at bottom (no text or symbols on screen)Type C

natural_image
Front view of a JVC audio recording device with control panel and buttons (no text or symbols on body)Type D


Menu-structuur
Microphone Level / Mic Setting
Bluetooth 1,2 certified
Uitgangsvermogen:
+4 dBm Max. (Power class 2)
Gebruiksgebied:
binnen 10 meter
Profiel:
HSP (Headset Profile)
HFP (Hands-Free Profile)
A2DP (Advanced Audio Distribution Profile)
AVRCP (Audio/Video Remote Control Profile)
SPP (Serial Port Profile)
OPP (Object Push Profile)
natural_image
Symbol of a trash bin crossed with a diagonal line, no text or numbers presentnatural_image
Simple line drawing of a raised index finger (no text or symbols)Acerca de Bluetooth

Bluetooth®
HSP (Headset Profile)
HFP (Hands-Free Profile)
A2DP (Advanced Audio Distribution Profile)
AVRCP (Audio/Video Remote Control Profile)
SPP (Serial Port Profile)
natural_image
Simple line drawing of a hand making a thumbs-up gesture (no text or symbols)
Instalación
Advertencia
natural_image
Diagram of a cable connector with a rotating cable and cable attachment (no text or symbols)natural_image
Front view of a JVC gaming controller panel with control buttons and display screen (no text or symbols)Tipo B

natural_image
Top-down schematic of a JVC (Junction Vehicle) device showing front, top, and side views with no text or symbols beyond the label 'JVC'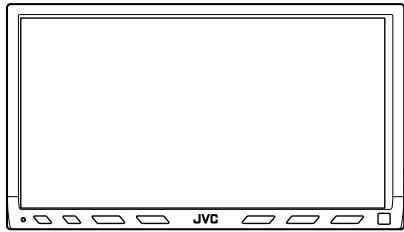
natural_image
Front view of a blank computer monitor with JVC button at bottom (no text or symbols on screen)Tipo C
natural_image
Front view of a JVC audio recording device with control buttons and display (no text or symbols visible)Tipo D


Microphone Level / Mic Setting
Bluetooth 1,2 certified
Potencia de salida:
HSP (Headset Profile)
HFP (Hands-Free Profile)
A2DP (Advanced Audio Distribution Profile)
AVRCP (Audio/Video Remote Control Profile)
SPP (Serial Port Profile)
natural_image
Symbol of a trash bin crossed with a diagonal line, no text or labels presentnatural_image
Simple line drawing of a hand making a right index finger (no text or symbols)Bluetooth

Bluetooth®
natural_image
Simple line drawing of a raised index finger (no text or symbols)
Installazione
Attenzione
natural_image
Technical line drawing of a mechanical clamp or connector with a cable and rotating arrow (no text or symbols)natural_image
Front view of a JVC gaming controller panel with control buttons and display screen (no text or symbols)Tipo B
natural_image
Top-down schematic of a JVC (Junction Vehicle) device showing front, top, and side views with no text or symbols beyond the label 'JVC'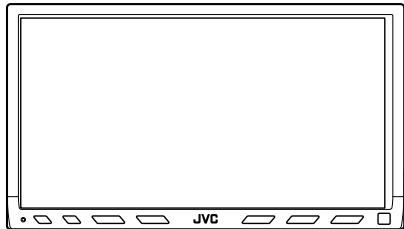
natural_image
Front view of a flat-screen monitor with JVC buttons at the bottom (no text or symbols on screen)Tipo C
natural_image
Front view line drawing of a JVC audio recording device (no text or symbols on body)Tipo D

Struttura dei menu
Bluetooth Phone: Bluetooth PHONE, BT-PHONE New Device: New device, NEW DEVICE
Microphone Level / Mic Setting
Dimensioni (L × A × P):
70 mm × 34,5 mm × 90 mm
Peso (circa):
natural_image
Symbol of a trash bin crossed with a diagonal line, no text or labels presentnatural_image
Simple line drawing of a raised index finger (no text or symbols)Sobre Bluetooth

Bluetooth®
HSP (Headset Profile)
HFP (Hands-Free Profile)
A2DP (Advanced Audio Distribution Profile)
AVRCP (Audio/Video Remote Control Profile)
SPP (Serial Port Profile)
OPP (Object Push Profile)
Emparelhamento e código PIN
natural_image
Simple line drawing of a raised index finger (no text or symbols)
Instalação
Advertência
natural_image
Diagram of a cable connector with a rotating cable and cable housing (no text or symbols)natural_image
Front view of a JVC gaming controller panel with control buttons and display screen (no text or symbols)Tipo B

natural_image
Top-down schematic of a JVC (Junction Vehicle) vehicle showing front, top, and side views with no text or symbols beyond the label 'JVC'
natural_image
Front view of a blank computer monitor with JVC button at bottom (no text or symbols on screen)Tipo C

natural_image
Front panel of a JVC audio recording device with control buttons and display screen (no text or symbols visible)Tipo D
Microphone Level / Mic Setting
Bluetooth 1,2 certified
Potência de saída:
HSP (Headset Profile)
HFP (Hands-Free Profile)
A2DP (Advanced Audio Distribution Profile)
AVRCP (Audio/Video Remote Control Profile)
SPP (Serial Port Profile)
OPP (Object Push Profile)
natural_image
Symbol of a trash bin crossed out by two diagonal lines (no text or numbers present)
natural_image
Simple line drawing of a raised index finger (no text or symbols)
natural_image
Simple line drawing of a hand making a thumbs-up gesture (no text or symbols)
Εγκατάσταση
Προειδοποίηση
natural_image
Diagram of a cable connector with a rotating cable and cable attachment (no text or symbols)natural_image
Front view of a JVC gaming controller panel with control buttons and display screen (no text or symbols)Τύπος Β

natural_image
Top-down schematic of a JVC (Junction Vehicle) device showing front, top, and side views with no text or symbols beyond the label 'JVC'
natural_image
Front view of a blank computer monitor with JVC button at bottom (no text or symbols on screen)Τύπος Ε

natural_image
Front view of a JVC audio recording device with control buttons and display (no text or symbols visible)Τύπος D

Διάρθρωση του μενού
Γλώσσα ενδείξεων
Bluetooth Phone: Bluetooth PHONE, BT-PHONE
New Device: New device, NEW DEVICE
Επιλογή πηγής
Microphone Level / Mic Setting
natural_image
Symbol of a trash bin crossed with a diagonal line, no text or numbers presentnatural_image
Simple line drawing of a raised index finger (no text or symbols)
เกี่ยวกับ Bluetooth

Bluetooth®
natural_image
Simple line drawing of a raised index finger (no text or symbols)
การติดตั้ง
คำเตือน
natural_image
Diagram of a cable connector with a rotating cable and cable housing (no text or symbols)natural_image
Front view of a JVC gaming controller panel with control buttons and display (no text or symbols)ประเภทB
natural_image
Top-down schematic of a JVC (Junction Vehicle) device showing front, top, and side views with no text or symbols beyond the label 'JVC'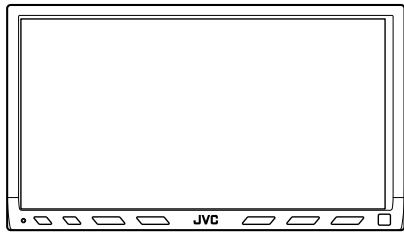
natural_image
Front view of a blank computer monitor with JVC button at bottom (no text or symbols on screen)ประเภทC
natural_image
Front view line drawing of a JVC audio recording device (no text or symbols on body)ประเภทD
โครงสร้างเมนู
ภาษาที่ระบุ
Bluetooth Phone: Bluetooth PHONE, BT-PHONE New Device: New device, NEW DEVICE
Bluetooth Phone: Bluetooth PHONE, BT-PHONE
New Device: New device, NEW DEVICE
การเลือกแหล่งสัญญาณ
Microphone Level / Mic Setting
- Bluetooth®
- INSTRUCTIONS
- Declaration of Conformity with regard to the R&TTE Directive 1999/5/EC
- C€0536
- English:
- Deutsch:
- INFORMATION (For U.S.A.)
- Caution:
- Information for Users on Disposal of Old Equipment
- Warnings
- Precautions
- About Bluetooth
- Bluetooth profile
- Pairing and PIN Code
- General information
- Features
- Introduction
- Introduction ...... 3
- Getting Started......6
- Connection
- Bluetooth Connection ...... 12
- Bluetooth Phone
- Bluetooth Phone Operations...... 19
- Advanced Operations......21
- Bluetooth Audio
- Bluetooth Audio Operations......29
- Settings
- Other Settings ....30
- Others
- Troubleshooting......32
- Specifications ....33
- Installation
- Warning
- Mounting the adapter unit
- Installing the microphone unit
- Attach the microphone to the microphone clip.
- Install the microphone unit.
- To install on the steering column
- Connecting to the receiver
- Typical connection
- Checking the type of your receiver
- Example: type of the receiver
- Menu structures
- Indication language
- Selecting a source
- for Type A
- for Type B/Type C/Type D
- Registering a Bluetooth device — Pairing
- To connect from the other Bluetooth device
- Use the Bluetooth device to search for the unit.
- for Type B
- for Type C
- for Type D
- Registering a Bluetooth device — Pairing (continued)
- To connect an available device from the unit
- Use the following buttons to enter the PIN (Personal Identification Number) Code of the device to be connected.
- To connect a special device
- To delete the registered device
- Connecting/Disconnecting the device
- To connect a device manually
- Connecting/Disconnecting the device (continued)
- Note
- To disconnect a device
- Receiving a call
- Calling a number in the phone book
- Calling by voice command
- Calling a number from the call history
- Calling the last call number directly — Redial
- On the remote controller only
- Answering a waiting call
- Press one of the following buttons.
- Type A
- Using preset numbers
- To store a preset number
- To call a preset phone number
- Calling by entering a phone number
- Receiving an SMS (Short Message Service)/ Text Message
- To read the message later (only for type A/B/C)
- Reading an SMS/Text Message
- Press SRC repeatedly to select "Bluetooth Audio."
- Press SOURCE repeatedly to select "Bluetooth Audio."
- Playback operations
- for Type A/Type B
- Basic procedure
- Setting items
- Auto Connect
- Auto Answer
- Message Info
- Microphone Level / Mic Setting
- Version
- Bluetooth information:
- Specifications
- GENERAL
- BLUETOOTH SECTION
- Über Bluetooth
- Einbau
- Warnung
- Menü-Strukturen
- Anzeigesprache
- Avertissement
- Installez le microphone.
- Structures de menu
- Masse (approx.):
- Meer over Bluetooth
- Installeren
- Waarschuwing
- Menu-structuur
- Acerca de Bluetooth
- Instalación
- Advertencia
- Bluetooth
- Installazione
- Attenzione
- Struttura dei menu
- Sobre Bluetooth
- Emparelhamento e código PIN
- Instalação
- Advertência
- Potência de saída:
- Εγκατάσταση
- Προειδοποίηση
- Διάρθρωση του μενού
- Γλώσσα ενδείξεων
- Επιλογή πηγής
- เกี่ยวกับ Bluetooth
- การติดตั้ง
- คำเตือน
- โครงสร้างเมนู
- การเลือกแหล่งสัญญาณ
Brand : JVC
Model : KS-BTA200
Category : Car speakers