
D70H - Phone SAGEM - Free user manual and instructions
Find the device manual for free D70H SAGEM in PDF.
| Product type | DECT cordless phone (GAP standard) |
| Brand | SAGEM |
| Model | D70H |
| Handset dimensions | 140 x 51 x 30 mm |
| Handset weight | 152 g |
| Base power supply | 230 V, 50/60 Hz via supplied mains adapter |
| Battery type | 3 approved AAA rechargeable batteries |
| Standby time | 240 hours |
| Talk time | 15 hours |
| Indoor range | Up to 50 meters |
| Outdoor range | Up to 300 meters in open space |
| Directory capacity | 150 entries (name, number, icon) |
| Number of radio channels | 120 |
| Frequency range | 1.88 - 1.90 GHz |
| Main functions | Call, handsfree, call transfer, intercom, call log, SMS, answering machine (depending on model) |
| Security | Keypad lock, emergency number, base code (0000 by default) |
| Ringtone customization | Silent mode, internal/external ringtones, adjustable keypad beeps |
| Settings | Language, date/time, contrast, programmable keys |
| Maintenance | Clean with a slightly damp cloth (avoid dry cloth) |
| Recycling | Used batteries must be disposed of at a collection point (town hall, store) |
Frequently Asked Questions - D70H SAGEM
User questions about D70H SAGEM
0 question about this device. Answer the ones you know or ask your own.
Ask a new question about this device
Download the instructions for your Phone in PDF format for free! Find your manual D70H - SAGEM and take your electronic device back in hand. On this page are published all the documents necessary for the use of your device. D70H by SAGEM.
USER MANUAL D70H SAGEM
Intercommunication 19
You have purchased a SAGEM D70H handset and we thank you for your trust. All the functionalities of your handset are compatible with SAGEM D70T/V and SAGEM D50T/V products.
Furthermore, the SAGEM D70H handset can also be registered to other compatible base stations for simple telephone operations, within the European GAP standard.
For further information we suggest that you refer to the Sagem web site: http://www.sagem.com/faq or to the user guide of your main DECT terminal.
For your comfort and safety, we ask that you read the following paragraph carefully:
Recommendations and safety instructions

Your DECT telephone must not be installed in a humid room (wash room, bathroom, laundry room, kitchen, etc.) unless it is 1.50m away from a water point, or outside. Your telephone must be operated at temperatures ranging from 5^ to 45^ .

Only use the supplied power adapter, connect it to the base socket according to the installation instructions provided in this booklet and the indications on the identification label affixed to it (voltage, current, electric network frequency) ^(1) . Your unit must be connected to a mains outlet located nearby, the mains outlet must remain easily accessible.

This telephone was designed for use on the public switched telephone network (PSTN). In case of a problem you must first contact your reseller. Only use the supplied telephone cord. To avoid damaging your handset, only use certified rechargeable AAA batteries, never use non rechargeable batteries. Insert the batteries in the handset battery compartment respecting polarity.

For your personal safety, never place your handset on the base without the batteries, or without the battery cover, you could get an electric shock.

At the end of their useful life, batteries must be disposed of according to the recycling instructions presented in this booklet.

Your DECT telephone has an inside radio range of about 50 metres and up to 300 metres in open space. The immediate presence of metal parts (of a television for example), or of any electric appliance may result in range reduction.

Some sensitive medical equipment and safety equipment may be affected by the radio-frequency transmissions of your telephone. In all cases, we ask that you respect the safety recommendations.

In areas where storms are frequent, we recommend that you protect your telephone line using a surge protection device.
This equipment does not function in the case of an electric network shutdown: for emergency calls, it is recommended to use another unit during power cuts ^(2) .
The CE marking certifies that the product meets the essential requirements of Directive 1999/5/CE of the European Parliament and of the Council pertaining to microwave radio equipment and telecommunication terminal equipment, for the safety and health of users, for electromagnetic interference. Furthermore, it efficiently uses the frequency spectrum attributed to ground and spatial communication to prevent damaging interference.
The manufacturer declares that the products have been produced in compliance with APPENDIX III of Directive R&TTE 1999/5/CE.
(1) : With the exception of IT scheme installations defined in the EN60950 standard.
(2) : In that case, use a self-contained cord telephone.


CONTENTS
Your Hand set 1
Unpacking 1
Your desk charger 1
Your handset 2
Connection 4
Getting started 6
Making a call 7
Receiving a call 7
During a call 8
Handsfree 8
Call transfer 8
Ending a call 9
Register your new hand set on a base 9
Your phonebook 11
Viewing the phonebook 11
Creating an entry 12
Using a phonebook entry to place a call 13
Searching for a contact 13
Performing a quick search 13
Performing a refined search 14
Editing an entry 14
Deleting an entry 15
Call log 16
Viewing the received and dialed call log 16
Calling the last number dialed (Redial) 17
Calling a number listed in the dialed and
received call log 17
Viewing the events log 18
Intercommunication 19
Communication between two handsets 19
Transferring a part of or the entire
phonebook to another handset 20
Monitoring a room 21
Browse through menus 23
Register your other hand set on a base 23
Other Functions 23
SMS service - Mini-messages 24
SMS settings 24
Accessories 25
Security 25
Your ring tones 25
Settings 25
Answering machine (depending on model) 26
Appendix 27
Care and Maintenance 27
Problems 27
Features 28
Environment 29


MEMO


YOUR HAND SET
Information in this user brochure concerns units from the D70T/V SAGEM range. Information will or will not be displayed on your screen depending on your type of base and your operator.
The SAGEM D70H hand set can also be registered with other compatible bases for simple telephone functions in compliance with the European GAP standard.
Unpacking
Place the box in front of you, open it and make sure it contains the following items:
- a desk charger fitted with its power supply unit,
one handset, - one battery compartment cover,
- three rechargeable batteries,
this user guide.
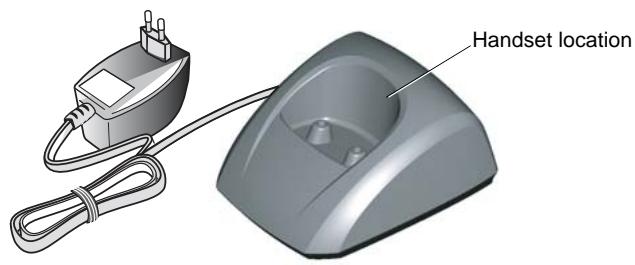
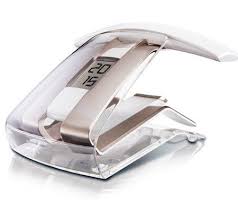
Your desk charger


Your handset
With its user-friendly design, you will appreciate how easy it is to hold and its quality during conversations.

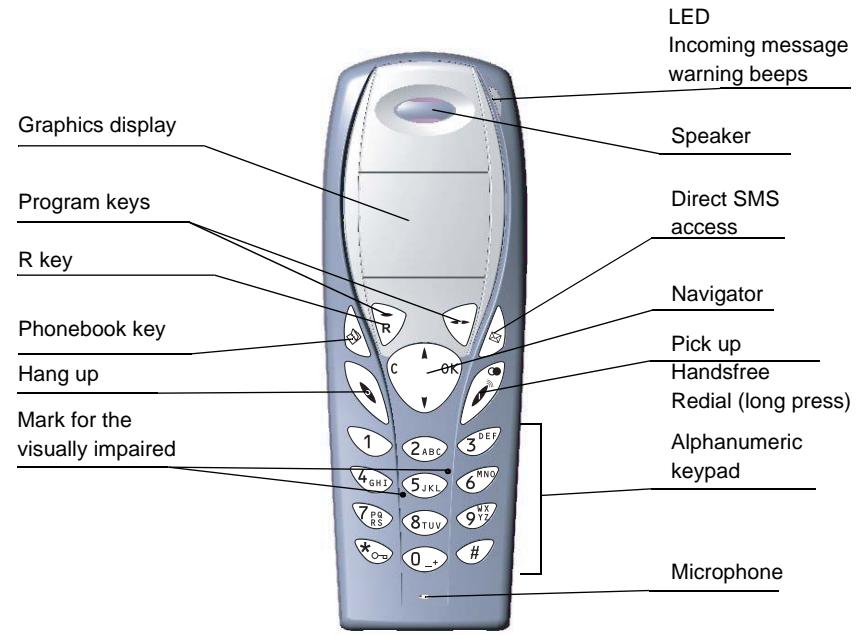
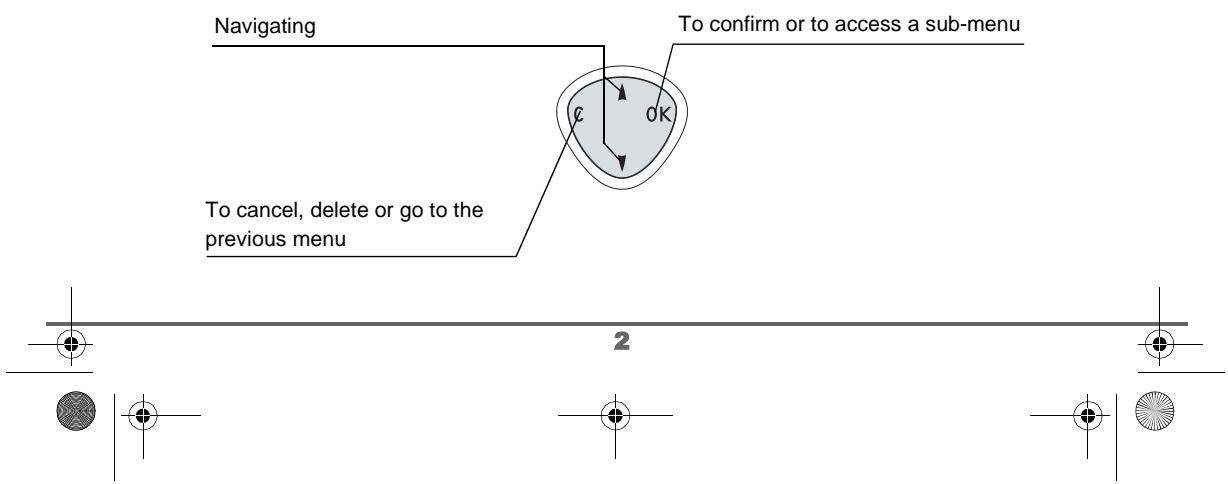
The navigator key, a rapid selection tool.
YOUR TELEPHONE
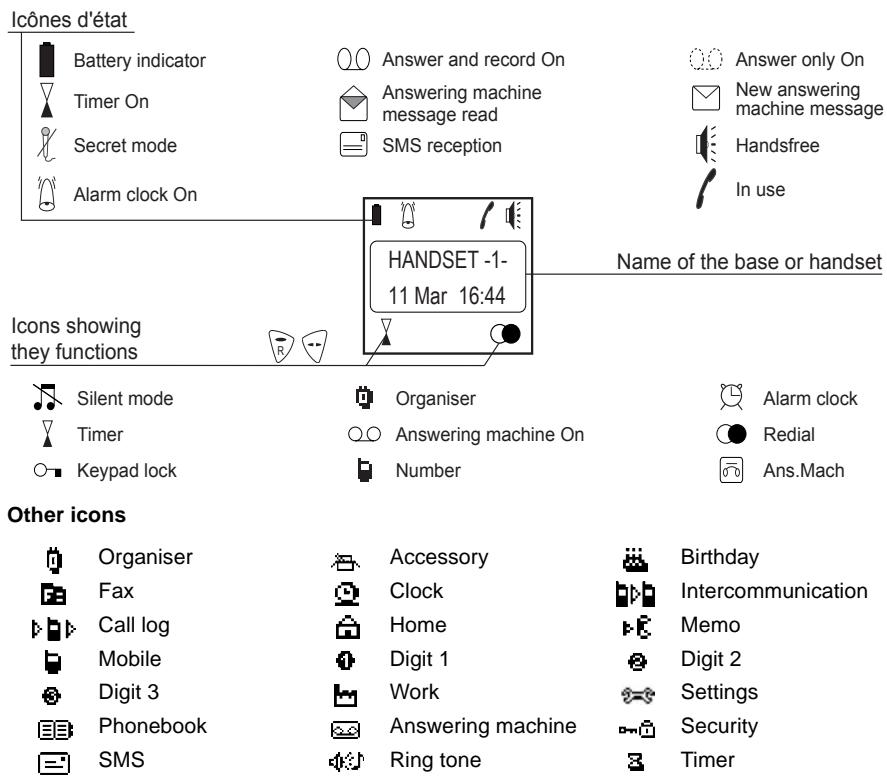
The visual display of your handset

When the battery strength icon shows a minimum charge, the display backlight is turned off until the telephone is recharged.

YOUR TELEPHONE
Connection

Before making any connections, please refer to the safety instructions presented at the beginning of this user guide.
Starting your desk charger
Put the support where you want it and connect the power lead to the mains plug.
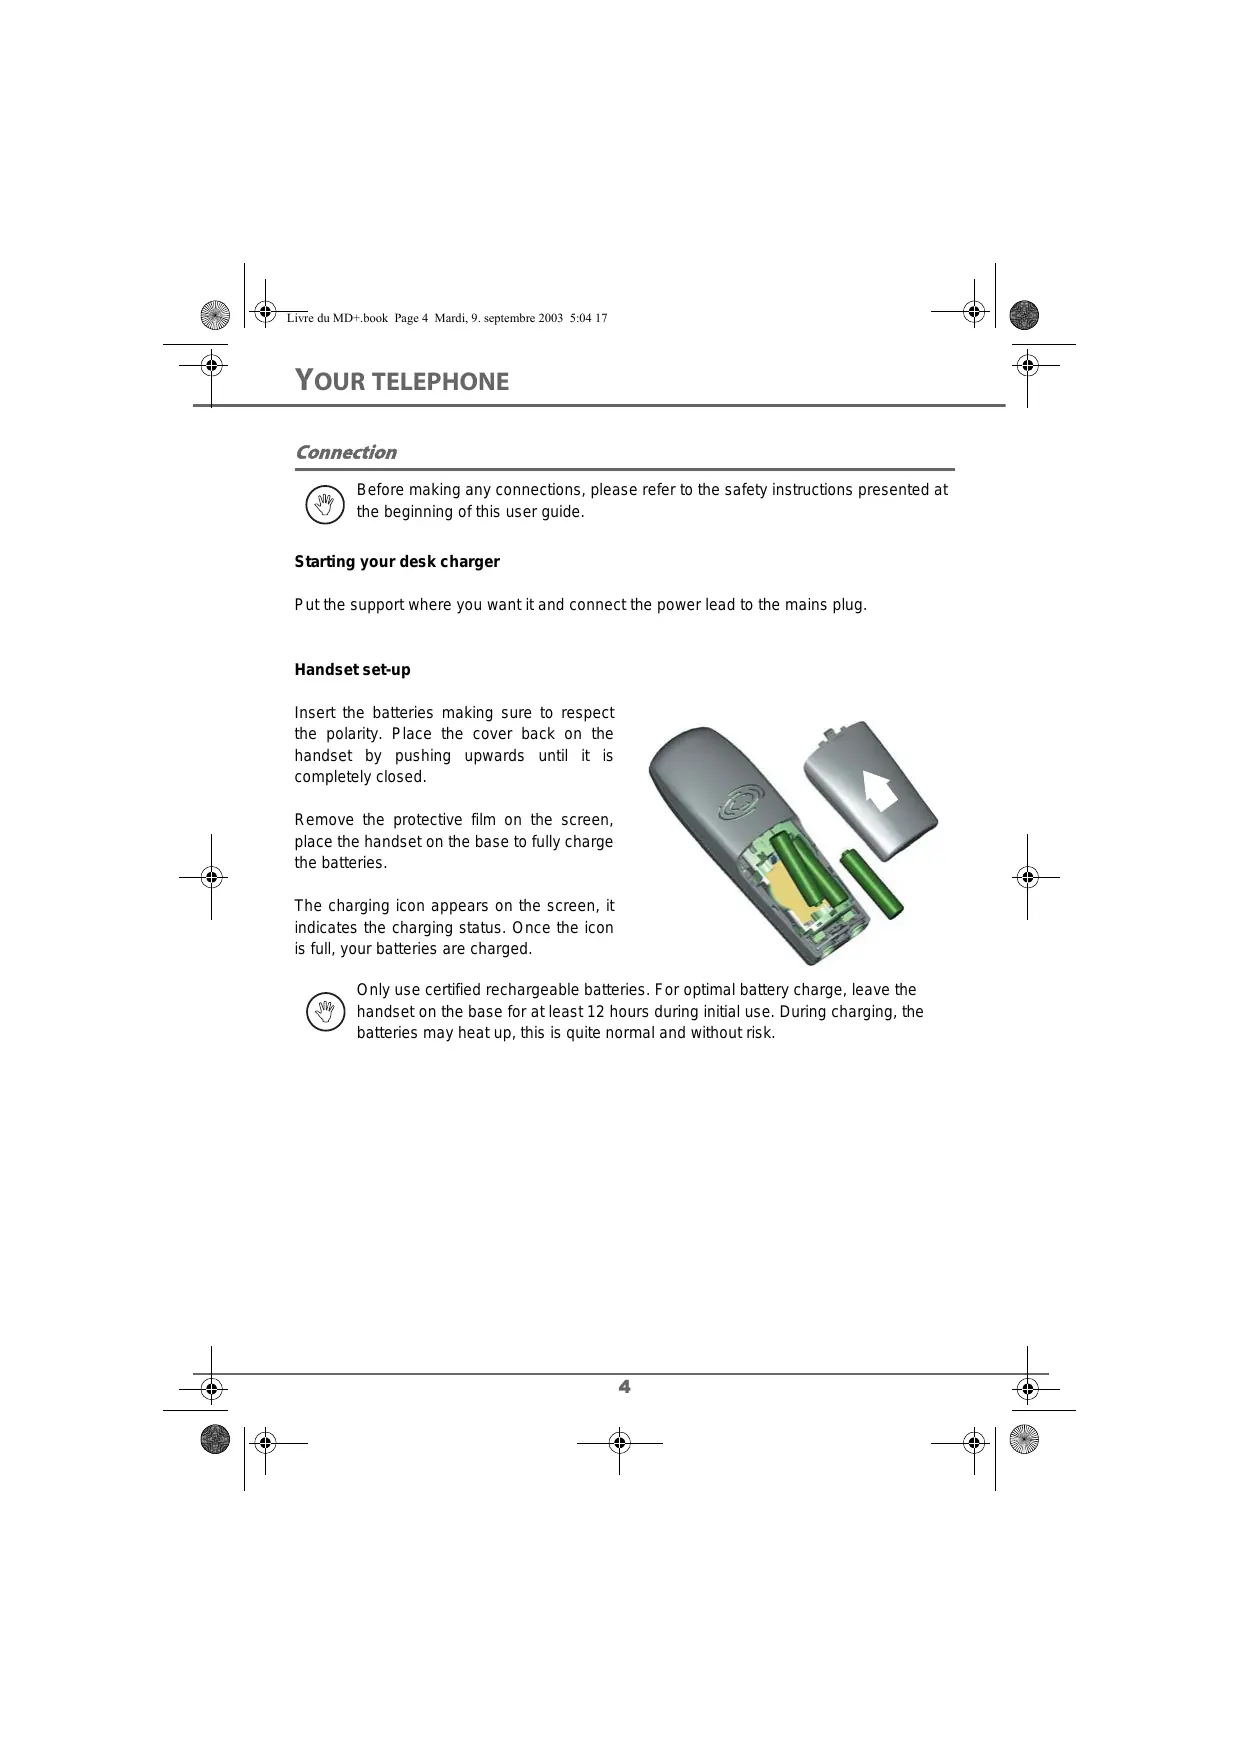
Handset set-up
Insert the batteries making sure to respect the polarity. Place the cover back on the handset by pushing upwards until it is completely closed.
Remove the protective film on the screen, place the handset on the base to fully charge the batteries.
The charging icon appears on the screen, it indicates the charging status. Once the icon is full, your batteries are charged.


Only use certified rechargeable batteries. For optimal battery charge, leave the handset on the base for at least 12 hours during initial use. During charging, the batteries may heat up, this is quite normal and without risk.

YOUR TELEPHONE
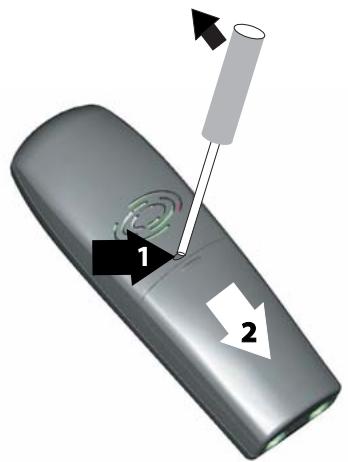
Replacing the batteries
Rechargeable batteries must be used with your handset. Proceed as follows:
Take the handset and turn it around so that the battery compartment is accessible.
Insert a sharp object (pen, paper clip...) perpendicularly in hole 1 as shown in the illustration and lift it upwards, slide it downwards as shown by marker 2 and do exactly what is explained in the previous paragraph.


GETTING STARTED
To use your SAGEM D70H hand set on the public telephone network from your base, you must register and match it with a base compatible with the European GAP standard.
Get the user brochure on the base to which you want to register, match your SAGEM D70H hand set and find the paragraph concerning the registering or matching of an additional hand set.
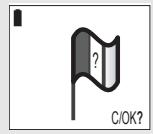
You have just put the batteries in your hand set and closed the flap. A drawing of a three-colored flag is displayed on the screen.
On the navigator key

press OK.
The language selection screen is displayed. Press or until the desired language is displayed. Validate with Confirm l .
An installation guide is automatically launched. Two messages: "Auto Help Guide for installation" and "Link your handset with base" are consecutively displayed on the screen.
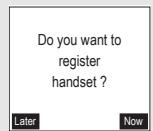
Then "Do you want to register handset ?" is displayed. Press Now
To stop the procedure, press Later
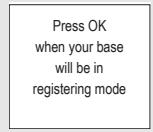
When the message "Press OK when your base will be in registering mode" is displayed, turn your base to matching mode, then from the navigator, press OK.
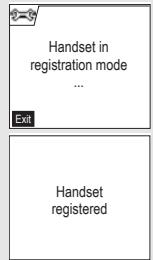
"Handset in registration mode..." is displayed on the screen to tell you that the base search procedure has started.
At the end of the procedure, the message "Handset registered" is displayed on the screen.


GETTING STARTED
If an error occurs, the message "Fail" is displayed and the message "Do you want to register handset ?" is again displayed on the screen. Press Now to restart registration.
Then the installation guide suggests that you adjust or complete the following parameters:
- date and time,
hand set name.
external call tone.
A thank you message is displayed on the screen at the end of the procedure.
Making a call
Enter the name of your contact using the keypad keys.
If you enter an invalid digit, press C on the navigator key to erase the incorrect digit. Press the green key on your handset to make the call.

You can also make a call by:
- Pressing the green key to access the line.
- Dialing your contact's number.
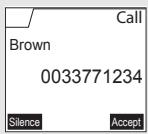
Receiving a call
When you receive a call your telephone rings. If you have subscribed to a "Caller display" service, the caller's information appears on the screen (unless your caller has enabled the anonymous mode), otherwise the "Caller unknown" screen is displayed.
Pick up by pressing the green key or 日 . To turn off the ringer, press
the red key or
At the end of the conversation, press the red key


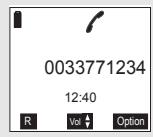
During a call
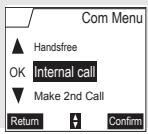
During a call, numerous options are accessible by pressing Option
ect the desired option in the following list:
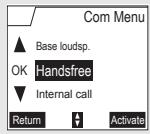
- Handsfree: to activate the handset speaker.
- Internal call: to transfer the call to another handset.
- Make 2nd Call: to make a second call.
- Secret mode: to mute the handset microphone.
- Phonebook: to access the phonebook.
- Calls: to access the call log.
- Record conv.: to record the conversation in progress (depending on model).
- Base loudsp.: to activate the base loudspeaker (model with answering machine).
Handsfree
While having a conversation with your contact, you can enable the handset or base loudspeaker. Press Option
Select Handsfree or Base loudsp. (model with answering machine). Press Activate l

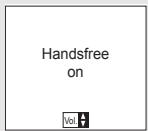
When pressing the green key while engaged in a conversation you automatically activate the handsfree mode of the handset, by pressing it again you deactivate the handsfree mode.
The message Handsfree on appears on the screen. Increase or decrease the audio volume using or .
Call transfer
You can now transfer the call in progress to another hand set.
During communication, press Option
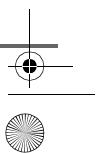
Using the or arrow, select Internal call. Press Confirm

8


GETTING STARTED
The list of handsets registered to the base appears.
Select the handset you want to call using or . Press Call.
The handset called rings, once someone picks up transfer the call by pressing the red key.
To retake the call before it is picked up by the handset called, press Return.
Ending a call
At the end of the conversation, press the red key.
Register your new hand set on a base
To register a new hand set on a base it is necessary to:
- put the hand set to registration mode,
- put the base to matching mode.
Then matching (mutual recognition of the base and the new hand set) will be done automatically (registration may take several seconds).
Get hold of the hand set to register:
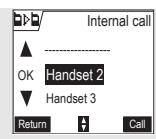
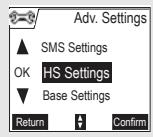
On the navigator key, press or until the screen displays Settings, confirm with OK.
Select Adv. Settings using keys or . Press Confirm
Select HS Settings using keys or . Press Confirm .
Select Registration. Press Confirm
The hand set switches to registering mode.
On the base:
Set the base with which you want to link the hand set to matching mode:
If you have a base incorporating an answering machine, simulta
neously press the two top pushbuttons of the base for several seconds.

GETTING STARTED
If you have a base that does not incorporate an answering machine, press the push button on the base for several seconds.
The green light of the base quickly flashes. The base is in matching mode.
The second hand set and the base both try to hook up. Matching may take several seconds.
Once the hand set is registered, the hand set automatically exits from the matching mode and indicates end of registration.

You can also put your base in matching mode using a hand set already registered by selecting the matching function in the Adjustment/Advanced Adjustment/Base Management menu.

YOUR PHONEBOOK
You can store 150 phonebook entries in your phonebook.
Each phonebook entry can contain the name of your contact which can be a maximum of 16 characters long (spaces included), your contact's telephone number up to 24 digits and an icon identifying the type of number (work, home, mobile...).
You can associate a unique ring tone to each entry and thus create your own call groups. (To do so, you must activate the call display service on your handset; contact your service provider to find out about this service.)
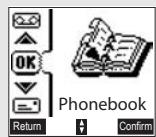
Viewing the phonebook
On the navigator key l press or until the Phonebook screen is displayed, press OK to confirm (you can also use to directly access your phonebook).
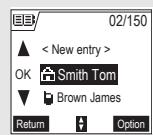
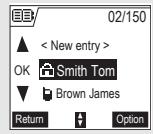
The list of phonebook entries organised in alphabetical order appears.

The first time you access your phonebook, only the New entry element appears in the list.
Select the entry you want to view using or . Once you have selected it, press OK to confirm.

You can call the number that is associated to the entry directly by pressing the green key.
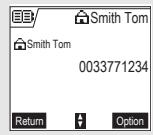
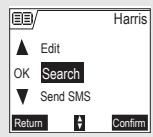
Once the entry appears on the screen, press Option to display all of the available actions that can be executed via the phonebook entry:
-View: to view the entry data.
- Call: to call the number associated to the entry.
- Edit: to edit the entry (name, number, icon).
- Search: to search for another entry.
- Send SMS: to send an SMS to a number associated to the entry.
- Ring tone: to assign a unique ring tone to your handset that will be used each time this number calls you ( caller display service mandatory)
- Add number: to enter a new number for the same name.
- New entry: to create a new entry in the phonebook.
- Delete: to delete the entry from your phonebook.
Select the action you wish to perform using or . Press Confirm .
To exit the phonebook, press the red key
Creating an entry
On the navigator key , press or until the Phonebook screen is displayed, press OK to confirm.
Select New entry. Press Confirm
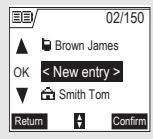
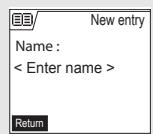
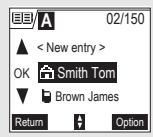
The name input screen appears.
Using the keypad keys, enter the name of your contact by pressing successively on the corresponding keys. In case of a mistake, press C to erase one character at a time.
Once you are done making your changes, press Confirm
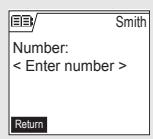
The number input screen appears.
Now, enter the name of your contact using the keypad keys. In case of a mistake, press C to delete one character at a time.
Once you are done making your changes, press Confirm.
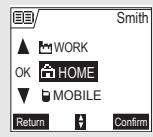
Select an icon for this number, using or to specify the type of number:
- For a home telephone number
- For a work telephone number
- For a mobile telephone number
- For a FAX number
- To differentiate numbers 1, 2 or 3.
Once the icon is selected, press Confirm
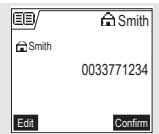
The information entered appears on your screen.
To change this information, press Edit
The information is accurate. Press Confirm
A new entry is created. It appears in the phonebook list. The name of this entry corresponds to the beginning of your contact's name which is preceded by a number type icon.
Using a phonebook entry to place a call
On the navigator key , press or until the Phonebook screen is displayed, press OK to confirm.
The list of alphabetical phonebook entries appears.
Select your contact using or .
Press the green key to make the call.
Your telephone displays the number called and automatically dials it.
Searching for a contact
When referring to your phonebook, you can search for a contact by:
- navigating through the list using , ,
using quick search,
using refined search.
Performing a quick search
Access your phonebook list, press successively on the keypad key which corresponds to the first letter of the name you are searching for so as to make it appear at the top of the screen.
Once the first letter of the name is displayed, wait a moment.
The phonebook selects the first name in the list that starts with the selected letter.
Press or to select the specific entry that you wish to view or call, press OK to confirm.

Performing a refined search
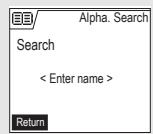
In the phonebook menu, press Option.
Select Search. Press Confirm
Using the keypad, enter the first two letters of the contact you are searching for.
The phonebook positions itself to the entry which comes closest to those two characters.
Press or to select the specific entry that you wish to view or call, press OK to confirm.
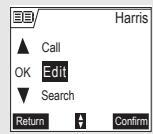
Editing an entry
To edit a phonebook entry (change the name, the number and/or the number type icon), enter the phonebook, select the entry you want to edit and confirm using OK to display it on the screen.
Once the entry is displayed on the screen, press Option
Select Edit using or . Press Confirm.
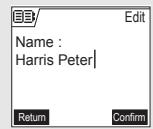
You enter the name input screen. The cursor is at the end of the name.
The information is accurate. Press Confirm
- To correct the name, press C on the navigator key to delete characters. Make your corrections using the keypad keys by pressing successively on the corresponding keys. Once you are finished, press Confirm
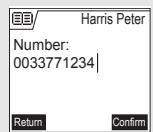
You enter the name input screen. The cursor is at the end of the number.
The information is accurate. Press Confirm
- To correct the number, press C on the navigator key to delete the numbers. Enter the new number and press Confirm.

You enter the number type icon selection screen.
Select the icon according to the type of number entered using or . Press Confirm .
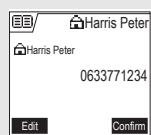
The edited entry appears on the screen.
To change this information, press Edit
The information is accurate. Press Confirm
To exit the menu, press the red key
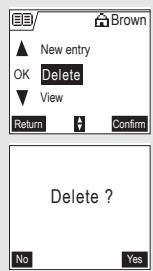
Deleting an entry
To delete an entry, enter the phonebook, select the entry, confirm using OK to display it on the screen. Press Option
Select Delete using or . Press Confirm .
A confirmation screen asks you if you wish to delete the entry.
If you do not wish to delete the entry, press No
- To delete the entry, press Yes. The entry is deleted from the phonebook.
To exit the menu, press the red key


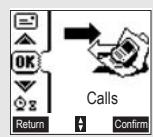
CALLLOG
This menu enables you to view the call or event lists of your telephone.
The dialed call log presents the calls you made.
The received call log presents the calls you received.
The event log groups together all the new events that took place in your absence:
- reception of an SMS,
- calls received during your absence,
- messages from a messaging service.
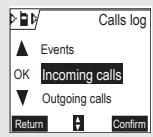
Viewing the received and dialed call log
On the navigator key

press
or
until the Calls screen is
displayed, press OK to confirm.
Choose Incoming calls or Outgoing calls, using or . Press

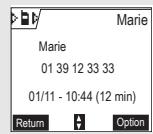
The presentation screen for the last call received or dialed appears.
This screen presents the following information (depending on the service provider and subscription):
the full name of your contact,
the telephone number, date, time and duration of the call.
To view the previous calls, use or . The calls are organized in chronological order, from the most recent call to the oldest call.
By pressing Option, a list of various executable actions appears:
- Call: To call the number.
- No.>PhBook: To store the name and number in the phonebook.
- Send SMS: To send an SMS to your contact.
-Delete all: To delete all calls.
-Delete: To delete the call currently viewed. - View: To view the selected call again.
To return to the call view screen, press Return
To exit the menu, press the red key


Calling the last number dialed (Redial)
Your telephone has a shortcut key that can be used to automatically redial the last number dialed.
From the idle screen, press and hold the green key until the Call log screen appears. Release, the last dialed number appears. Press the green key again. The number is dialed automatically.

You can view the other dialed calls by pressing or on the
navigator key
Calling a number listed in the dialed and received call log
On the navigator key 心 press or until the Calls screen is displayed, press OK to confirm.
Select Outgoing calls or Incoming calls, using or . Press Confirm.
The presentation screen for the last call received or dialed appears. Use or to locate the contact you wish to call. The calls are organized in chronological order, from the most recent call to the oldest call.
Once the call is displayed on the screen, press the green key. The number is dialed automatically.
Viewing the events log
If one or more new events occurred during your absence, the information screen "NEW EVENTS View?" appears.
If you do not wish to view the event log at this time, press No
To view the event log, press Yes

The event log has been viewed, the information screen appears. You can however view it again via the "Call log".
A summary screen appears. It informs you as to the various events that took place during your absence:
- the new SMS received,
- the new messages on the answering machine (depending on the model),
the calls received during your absence, - the messages from a messaging service.

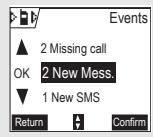
Choose the event using or . Press Confirm
The event appears on the screen.
INTERCOMMUNICATION
This menu is used for handset management and is only visible when two or more handsets are registered to the same base. You can then:
- communicate between handsets free of charge,
- transfer a portion or the entire phonebook from one handset to another.
use a handset to monitor a room.
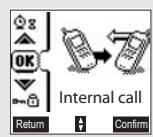
Communication between two handsets

To be able to communicate with each other, the two handsets must be registered to the same base and be within the base range.
To call another handset,
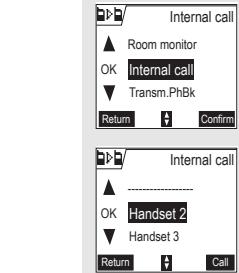
on the navigator key , press or until the Internal call screen is displayed, press OK to confirm.
Select Internal call using or . Press Confirm.
The list of handsets registered to the base appears.
Select the handset you want to call using or . Press Call.
The handset selected rings. Press the green key to answer the call with the second handset.
To end the call, press the red key

You can easily call another handset if you know the number. From the idle screen, enter the handset number. Then press the green key .


Transferring a part of or the entire phonebook to another handset
Each one of your handsets has its own phonebook. However, if you do not wish to enter the same contact list several times, you can use the transfer function to easily make handset-to-handset phonebook transfers.
On the navigator key , press or until the Internal call screen is displayed, press OK to confirm.
Select Transm.PhBk using or . Press Confirm.

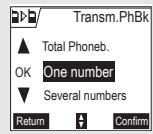
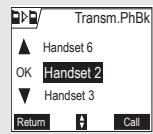
You can choose to transfer:
the entire phonebook,
- a number in the phonebook,
or numerous numbers,
using or . Press Confirm.
Press or , select the handset to which you would like to transfer the phonebook. Press Call
The target handset rings. Pick up by pressing the green key
A screen appears prompting you to accept the transfer mode. Press Yes
Depending on the type of transfer you selected, follow one of the procedures below:
- To transfer the entire phonebook, wait a few seconds. Once the operation is done, a screen indicating the end of the transfer will appear.
-
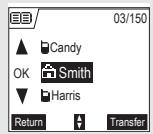
To transfer a single number, take the sender handset and proceed as follows:
-
Select the number to be transferred using or .
- Press Transfer to send the data to the target handset.
Wait until the transfer is done. Once it is done, a screen indicating the end of the transfer will appear.
INTERCOMMUNICATION
-
If you have elected to transfer numerous numbers, take the sender handset and proceed as follows:
-
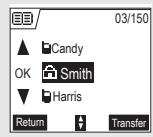
Select one of the numbers to be transferred in the phonebook using or .
- Press Transfer to send the data to the target handset.
Wait for the transfer to be executed. Once it is done, you are taken back to the list of numbers in the phonebook.
- Select the next number to be transferred using or and press
Transfer
Repeat the procedure until all desired numbers have been
transferred. Press Return to exit.
Monitoring a room
You can use your handset to monitor a room. This allows you, for example, to monitor a baby's room.
To do so, place one of the handsets in the room to be monitored. This unit will be in "sender" mode.
The other handset will remain with you, it is in "receiver" mode.
On the receiver handset:
On the navigator key , press or until the Internal call screen is displayed, press OK to confirm.
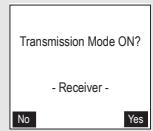
Select Room monitor using or . Press Confirm .
Select the sender handset using or . Press Call.
The sender handset rings, pick up using the green key


On the receiver handset:
A screen invites you to activate the monitor mode (sender mode). Press
Yes.
Both handsets are now in monitor mode.
- Place the sender handset in the room to be monitored.

The handset in sender mode does not ring to notify you of incoming calls. It can therefore be placed in a room where someone is sleeping.
- Keep the receiver handset with you.
When in monitor mode, the receiver handset can be used to make calls.

To make a call: press Call and dial the number.
To answer a call, press the green key
At the end of the call, the handset will automatically return in monitor mode.
To stop monitoring, press Stop on one or the other handsets.

Browse through menus
- Menu are organized in a hierarchical tree structure. Using the menu block diagram, identify the path giving access to the selected function and follow the instructions below:
On the navigator key _ on , press or until the required path or function is displayed; confirm with OK. Repeat the operation until the function is displayed on the screen and confirm with OK.
For any further information concerning the functions above, refer to the base user brochure.
Register your other hand set on a base
To use your SAGEM D70H hand set on the public telephone network from your base, you must register and match it with a base compatible with the European GAP standard.
Get the user brochure on the base on which you want to register it, match your SAGEM D70H hand set and find the paragraph corresponding to the registration or matching of an additional hand set.
To register a new hand set on a base it is necessary to:
- put the hand set to registration mode,
- put the base to matching mode.
Then matching (mutual recognition of the base and the new hand set) will be done automatically (registration may take several seconds).
Get hold of the hand set to register:
On the navigator key, press or until the screen displays
Settings, confirm with OK.
Select Adv. Settings using keys or . Press Confirm
Select HS Settings using keys or . Press Confirm
OTHER FUNCTIONS
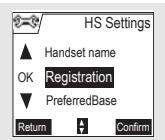
Select Registration. Press Confirm
The hand set switches to registering mode.
On the base:
Set the base with which you want to link the hand set to matching mode:
- If you have a base incorporating an answering machine, simultaneously press the two top pushbuttons of the base for several seconds.
- If you have a base that does not incorporate an answering machine, press the push button on the base for several seconds.
The green light of the base quickly flashes. The base is in matching mode.
The second hand set and the base both try to hook up. Matching may take several seconds.
Once the hand set is registered, the hand set automatically exits from the matching mode and indicates end of registration.

You can also put your base in matching mode using a hand set already registered by selecting the matching function in the Adjustment/Advanced Adjustment/Base Management menu.
SMS service - Mini-messages
This menu is used to write and manage SMSs (also called mini-messages). Depending on your operator, you can:
send and read an SMS,
display SMSs with a magnifying glass,
- display memory status,
empty an SMS file.
SMS settings
This sub-menu makes it possible to modify and personalize the SMS parameters. You can :
- enable or disable the SMS service (depending on the model and the operator)
- modify the SMS center number,
adjust the terminal number,

OTHER FUNCTIONS

- modify the period of validity (depending on the model and the operator),
- modify the notification (depending on the model and the operator),
- configure your users or your SMS boxes (depending on the model and the operator).
Accessories
This menu is used to customize the following parameters:
- adjust, enable or disable the wake-up feature,
- adjust, enable or disable the timer,
- adjust, enable or disable the birthday and agenda reminders.
Security
This menu is used to customize the security parameters. You can
lock the key pad,
- program an emergency number,
modify the base code,
define the credit time duration,
define the prohibited prefixes,
- authorize or prohibit communications with several hand sets,
- conceal your telephone number.
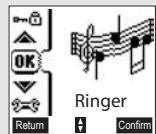
Your ring tones
This menu is used to customize the tone. You can:
- enable or disable the silence mode,
- modify the current tone,
- enable or disable key pad beeping,
- download and manage downloadable melodies (depending on the operator).
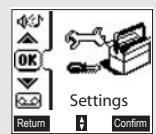
Settings
This menu is used to customize the adjustment parameters of your hand set and your base. You can :
- modify the language displayed on the screen,
- program function keys,
- modify the date and time, adjust the contrast,
- enable or disable automatic hang-up and off-hook,
- manage the options of your hand set, your base and your line (depending on the model and the operator).
OTHER FUNCTIONS
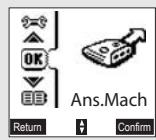
Answering machine (depending on model)
This menu is used to modify and customize the answering machine. You can:
- enable or stop your answering machine,
- listen to and erase recorded messages.
- record, modify or erase a personal announcement,
- enter a private code, enable or disable the call filter,
- modify the message duration,
- switch to recording mode,
define the number of rings before the answering machine answers.

Care and Maintenance
Use a slightly damp cloth to wipe the base and handset, do not use a dry cloth as this may cause electrostatic charges.
Problems
Refer to the table presented below in case of an operational malfunction:
| Problems | Remedies |
| The base indicator light is not lit | Make sure that: · the power adapter is properly connected to a power socket. · your fuse and circuit-breaker are in working order and that the power socket is powered. |
| The handset display is blank | Make sure the batteries are properly installed. Place the handset on the base and fully charge the batteries. To increase the life of your batteries, you can perform this operation about every two months. If these precautionary measures do not resolve this issue, replacement batteries are available through your reseller. As time goes by, you may notice a slight decrease in battery performance. Use your handset until the battery is fully discharged, and then charge it for at least 12 hours. |
| The handset does not ring during an incoming call | Make sure that the telephone is properly connected and that you have a dial tone. Make sure your telephone is not set to silent mode. Make sure you are not in the privileged access mode. |
| No radio link between the handset and base The network indicator icon flashes | Make sure the handset is registered by moving closer to the base, if it is registered correctly, the handset screen should display its own handset number. Otherwise, register the handset to the base. See "Register your other hand set on a base", page 23. |
| You obtain a "busy" dial tone for each dialed number | Make sure no one else is using another handset (if the intrusion mode is active). Make sure that the dial mode (tone or pulse dialing) is compatible with your telephone line or your automatic branch exchange. Make sure your time limit has not run out (if activated). Make sure you are not on call restriction (if activated) |
| You cannot send or receive SMSs | Make sure you have subscribed to a caller display service. Find out if the SMS service is in fact activated on your line. Obtain the server numbers from your service provider and make sure they are identical to the numbers on your handset. Have you provided your contacts with the right terminal number? |


FEATURES
| Functions | Default settings | Functions | Default settings |
| SMS | Confidential | Off | |
| SMS sending centre | Depending on the service | RING TONES | |
| SMS reception centre | Depending on the service | Ringer (Ext/Int) | Actualités / Carmen |
| ACCESSORIES | Silent mode | Off | |
| Alarm clock | Off | Beeps | All active |
| Timer | Off | SETTINGS | |
| SECURITY | Program keys | Silence/Alarm clock | |
| Keypad lock | Off | Date/Time | 00:00 / 01/01/03 |
| Emergency | Off | Auto Hang up | Off |
| Base code | 0000 | Auto Pick up | Off |
| Time limit | Off | Language | Selection during set up |
| Restriction | Off | INTERCOMMUNICATION | |
| Intrusion | Off | Room monitor | Off |

| Telephone features | |||
| Number of channels | 10 x 12 = 120 | Charging time | 6 hours |
| Radio frequency band | 1,88 - 1,90 GHz | Autonomy | |
| Duplex mode | TDMA | standby time | 240 hours |
| Spacing between | 1,728 MHz | talk time | 15 hours |
| Bit rate | 1152 kbit/s | Handset range | |
| Modulation | GFSK | open space | up to 300 m |
| Vocoding | ADPCM | inside building | up to 50 m |
| Transmitting power | 250 mW | Handset dimensions | 140 x 51 x 30 mm |
| Base operating voltage | 230 V , 50/60 Hz | Handset weight | 152 g |
All of this data is provided to you for information purposes only. Sagem SA reserves the right to make any changes without notice.

ENVIRONMENT
Preserving the environment in a durable developmental logic is a primary concern for SAGEM SA.
SAGEM SA industrial sites comply with the environmental standards for emissions produced by all of its activities.
Design guidelines for this product were put into place to minimize the environmental impact during its life cycle.
The improvement axes defined in the eco-design program during the development of the D70T/V product were as follows:
Defining environmentally friendly packaging:
- Optimizing the packaging size in order to use a minimum of raw material.
- Using recycled and recyclable materials.
Improving the recyclable character of the product at the end of life:
- Reducing the number of materials used in making the product.
- Taking into account, during the design phase, the dismantling of the used product for recycling.
- Avoiding the use of PBDE flame retardants.
This user guide is printed on recycled paper.

The presence of this logo on the packaging indicates that SAGEM SA pays a contribution to the ECO-EMBALLAGES company. This contribution allows ECO-EMBALLAGES to develop infrastructures working with local authorities to improve package recovery and recycling.

The batteries found in the product must never be discarded in the environment or in refuse containers used for other waste. Waste collection points are made available in town halls, retails stores, and large surface stores for the disposal of such products.

- Intercommunication 19
- Recommendations and safety instructions
- CONTENTS
- Your Hand set 1
- Getting started 6
- Your phonebook 11
- Call log 16
- Other Functions 23
- Appendix 27
- Features 28
- Environment 29
- MEMO
- YOUR HAND SET
- Unpacking
- Your desk charger
- Your handset
- YOUR TELEPHONE
- Connection
- Starting your desk charger
- Handset set-up
- Replacing the batteries
- GETTING STARTED
- Making a call
- Receiving a call
- During a call
- Handsfree
- Call transfer
- Ending a call
- Register your new hand set on a base
- On the base:
- YOUR PHONEBOOK
- Viewing the phonebook
- Creating an entry
- Using a phonebook entry to place a call
- Searching for a contact
- Performing a quick search
- Performing a refined search
- Editing an entry
- Deleting an entry
- CALLLOG
- Viewing the received and dialed call log
- Calling the last number dialed (Redial)
- Calling a number listed in the dialed and received call log
- Viewing the events log
- INTERCOMMUNICATION
- Communication between two handsets
- Transferring a part of or the entire phonebook to another handset
- Monitoring a room
- On the receiver handset:
- Browse through menus
- Register your other hand set on a base
- OTHER FUNCTIONS
- Select Registration. Press Confirm
- SMS service - Mini-messages
- SMS settings
- Accessories
- Security
- Your ring tones
- Settings
- Answering machine (depending on model)
- Care and Maintenance
- Problems
- FEATURES
- ENVIRONMENT
- Defining environmentally friendly packaging:
- Improving the recyclable character of the product at the end of life:
- This user guide is printed on recycled paper.
Brand : SAGEM
Model : D70H
Category : Phone