761-034 - Grill Axley - Free user manual and instructions
Find the device manual for free 761-034 Axley in PDF.

User questions about 761-034 Axley
0 question about this device. Answer the ones you know or ask your own.
Ask a new question about this device
Download the instructions for your Grill in PDF format for free! Find your manual 761-034 - Axley and take your electronic device back in hand. On this page are published all the documents necessary for the use of your device. 761-034 by Axley.
USER MANUAL 761-034 Axley
natural_image
Exterior view of a modern black ASX 190 electric grill with visible brand logo (no text or symbols on main body)EN User instructions for LPG grill
Värna om miljön!
Care for the environment!
Must not be discarded with household waste! This product contains electrical or electronic components that should be recycled. Leave the product for recycling at the designated station e.g. the local authority's recycling station.
SE - Bruksanvisning i original
EN - Operating instructions (Translation of the original instructions)
Jula reserves the right to make changes. In the event of problems, please contact our service department.
www.jula.com
Tillverkare/ Produsent / Produenci/ Manufacturer
Jula AB, Box 363, 532 24 SKARA
Importör/ Importør/ Importer/ Importer
Date of production: 2015-12-11
© Jula AB
SVENSKA....4
SÄKERHETSANVISNINGAR....4
TEKNISKA DATA 5
BESKRIVNING 6
MONTERING 8
MONTERING AV GASBEHÄLLARE 8
HANDHAVANDE 9
UNDERHÄLL 10
FELSÖKNING....11
NORSK 13
SIKKERHETSINSTRUKSER....13
TEKNISKE DATA 14
BESKRIVELSE....15
MONTERING AV GASSBEHOLDER 17
BRUK 18
VEDLIKEHOLD 19
FEILS∅KING....20
POLSKI 22
ZASADY BEZPIECZEŃSTWA 22
DANE TECHNICZNE 23
OPIS 24
MONTAŻ BUTLI GAZOWEJ 26
OBSŁUGA 27
KONSERWACJA 28
WYKRYWANIE USTEREK 29
ENGLISH 31
SAFETY INSTRUCTIONS 31
TECHNICAL DATA 32
DESCRIPTION 33
FITTING THE GAS CYLINDER....36
OPERATION....36
MAINTENANCE 38
TROUBLESHOOTING 39
MONTERING/MONTAZ/INSTALLATION 40
SÄKERHETSANVISNINGAR
| Nr. | Betegnelse Antall Nr. | Betegnelse Antall | |||||
1 Håndtak, lokk 1 stk. 14 Dryppskål 1 stk.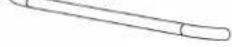 |  | ||||||
2 Brikke 2 stk. 15 Ventilhus, side- | brenner | 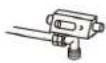 | 1 stk. | ||||
| 3 Lokk | 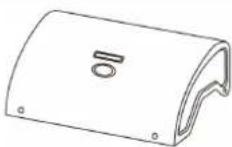 | 1 stk. 16 Holder,innstil-lingsbryter |  | 4 stk. | |||
| 4 Varmholdingsrist | [SDY3] | 1 stk. 17 Innstillingsbry-ter |  | 4 stk. | |||
| 5 Flammebeskyttelse | 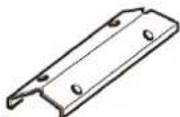 | 3 stk. 18 Sidebrenner | 1 stk.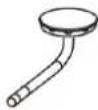 | ||||
| 6 | Hovedbrenner | 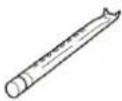 | 3 stk. 19 Venstre panel,vogn |  | 1 stk. | ||
| 7 | Grillrister | 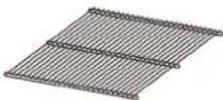 | 2 stk. | 20 | Frontpanel,vogn |  | 1 stk. |
| 8 | Håndtak med krok | 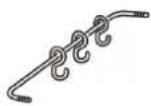 | 1 stk. 21 Høyre panel,vogn |  | 1 stk. | ||
| 9 | Hylle, venstre | 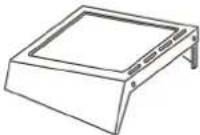 | 1 stk. | 22 | Plastfot | 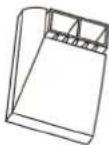 | 2 stk. |
| 10 | Grill | 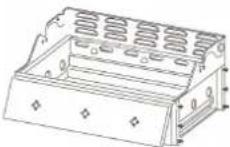 | 1 stk. 23 Bunnpanel,vogn | 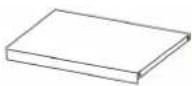 | 1 stk. | ||
| 11 | Rist til sidebrenner | [Z7SZ] | 1 stk. | 24 | Hjuldeksel |  | 2 stk. |
Read the operating instructions carefully before use!
Please retain for future reference.
- The LPG grill is only intended for outdoor use.
- Do not move the LPG grill during use.
- Never try to modify the LPG grill, as it can be dangerous and cause personal injury and property damage.
- Parts that are sealed from the factory may not be changed by the user.
DANGER!
If there is a smell of gas:
- Shut off the gas supply to the LPG grill.
– Extinguish all flames, do not use electrical equipment. - Open the cover and ventilate the area.
– Leak-test the gas pipes with soapy solution.
– Immediately contact the gas supplier or the fire brigade if the smell of gas remains.
IMPORTANT! If these instructions are not followed, there is a risk of fire and/or explosion. It is the user's responsibility to ensure that the LPG grill is correctly assembled, installed and maintained. If all of the instructions are not followed, there is a risk of personal injury and/or property damage. Modifications to the LPG grill, improper use or failure to follow the instructions invalidates the guarantee.
WARNING
- The LPG grill's parts may be hot. Do not let children near the LPG grill.
- Do not store or use petrol or other flammable substances in the proximity of the grill.
Safety instructions
- Leak-test all connections according to the instructions after every change of gas cylinder, or if the LPG grill has not been used for a longer time.
- The LPG grill is only intended for household use and is not suitable for commercial use.
- Never use a gas cylinder that displays signs of damage.
- Do not store a reserve gas cylinder under or near the product.
- Never use the LPG grill when you are tired or under the influence of drugs, alcohol or medication.
- Never use charcoal, lighter fluid, lava stones, petrol, paraffin oil or alcohol in the LPG grill.
- Petrol and other flammable substances may not be stored or used closer than 8 metres from the LPG grill.
- The minimum distance from the LPG grill to combustible materials is 1 metre from the sides and the back. Do not use the LPG grill when carrying out construction using flammable materials.
- Do not use the LPG grill if it is not completely assembled or if all parts are not correctly installed and tightened.
- Clean the LPG grill carefully and check it regularly. Clean and check the hose before each use. Replace the hose before use if it shows signs of wear, damage or leakage.
-
Only use original spare parts. Use of other parts can be dangerous and invalidate the guarantee.
-
A working fire extinguisher must always be available during use. Oil or fat that burns cannot be extinguished with water. Use a class B or C powder-extinguisher or suffocate the fire with earth, sand or bicarbonate.
- The LPG grill must stand on a solid surface and may not be used on boats or in recreational vehicles.
- Never leave the LPG grill unattended when it is lit. Keep children and pets at a safe distance from the LPG grill when it is being used.
- Do not move the LPG grill during use.
- Always open the cover carefully and slowly. The heat and the steam from under the cover can cause burns.
• Always put the gas hose as far away from hot surfaces and dripping fat as possible. - Keep hoses away from the grill's hot parts.
- Close the valve on the gas cylinder once you are finished using it.
- The grill surfaces must never be completely covered over.
- Do not block the ventilation openings in the cover.
- Use protective gloves when handling hot parts.
Read these instructions carefully before assembly and use.
- Assemble the LPG grill on a large, clean surface. Look at the list of parts and the assembly illustrations. Assembly requires two persons.
• Always use protective gloves. - Carry out assembly on flat, hard surface without holes or chinks so that there is no risk of losing small parts and assembly parts.
- Do not assemble or move the LPG grill on soft floors or carpets that can be damaged.
- Go through the steps in the set order for correct assembly.
- Remove all protective plastic before assembly.
- Do not force pieces together as this can cause personal injury and/or damage to property.
- First use your fingers to tighten all assembly parts. When an assembly step is complete, you can go back and tighten the parts with tools.
IMPORTANT! Handle all parts carefully in order to avoid cutting injuries.
TECHNICAL DATA
| Injector size Main burner 0,91 mm |
| Injector size Side burner 0.90 mm |
| Gas categori I3B/P(30) |
| Power Main burner 10,5KW (750g/h) |
| Power Side burner 3,5kW(255g/h) |
| Total power 14KW (1005g/h) |
| Type of gas G30 Butan, G31 propan |
| Gas pressure 30 mbar |
DESCRIPTION
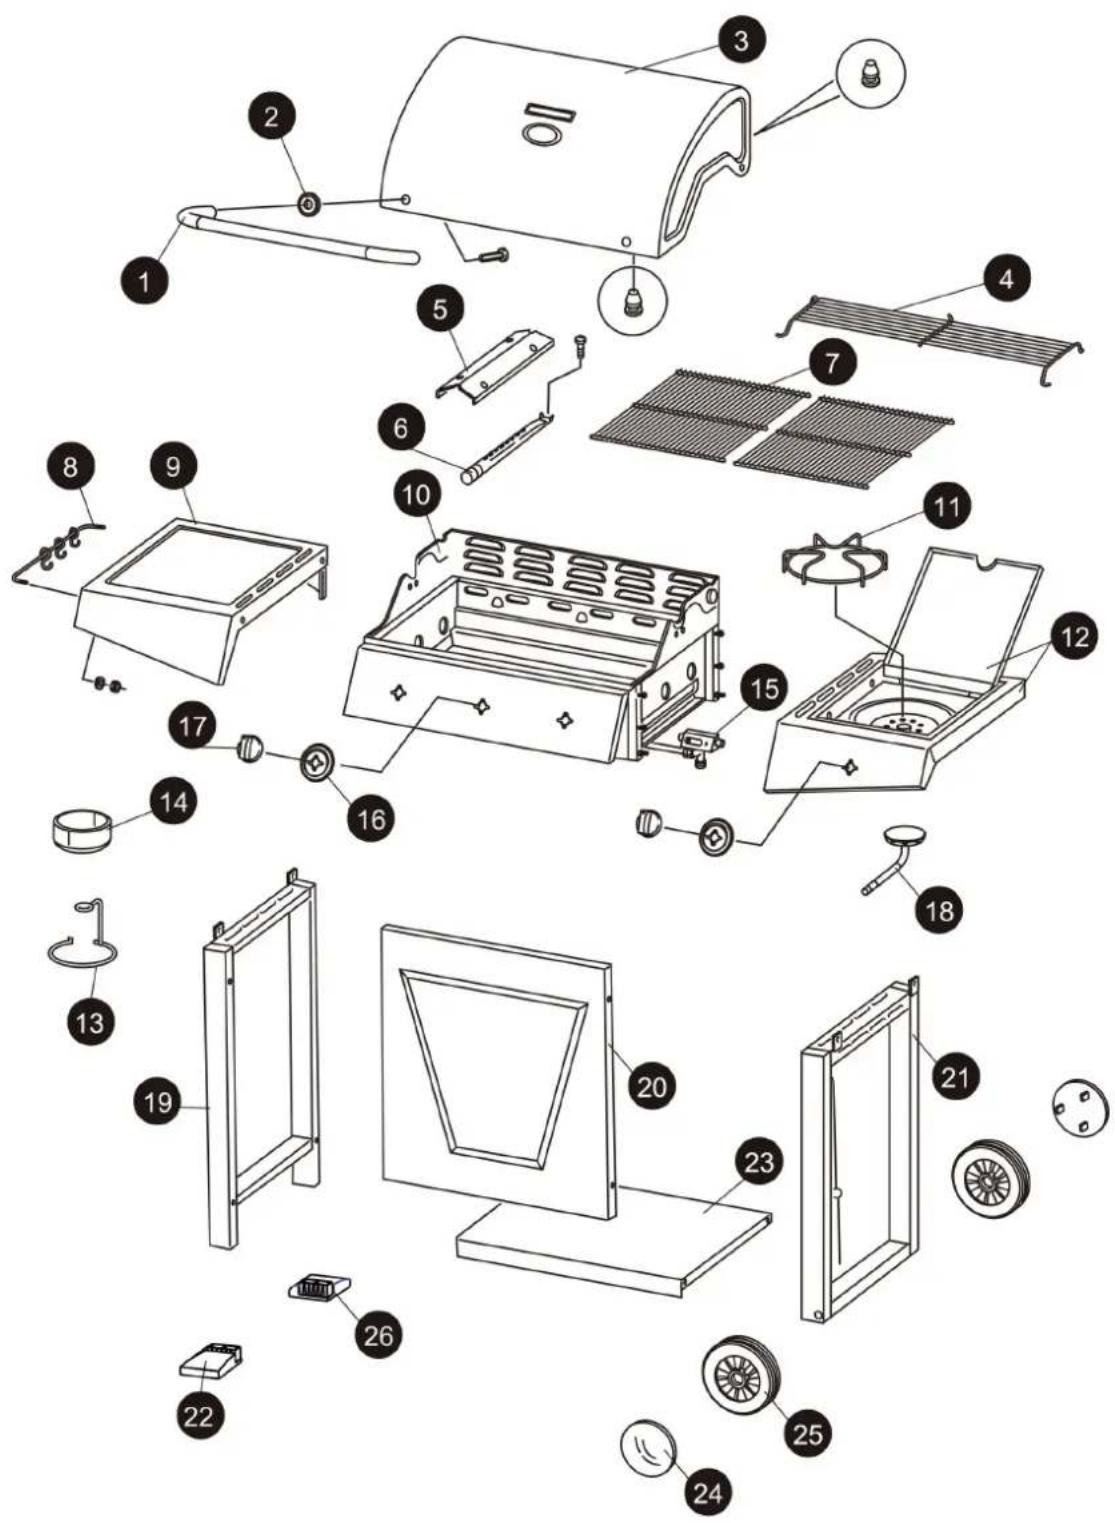
| No. | Name Number No. Name Number | |||||
| 1 | Handle, cover 1 14 Drip pan 1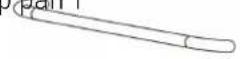 |  | ||||
| 2 | Washer 2 15 Valve housing, | side burner | 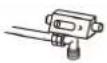 | 1 | ||
| 3 | Cover 1 16 Holder, gas | control knob |  | 4 | ||
| 4 | Warming rack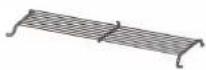 1 17 Gas control 1 17 Gas control  | knob | | 4 | ||
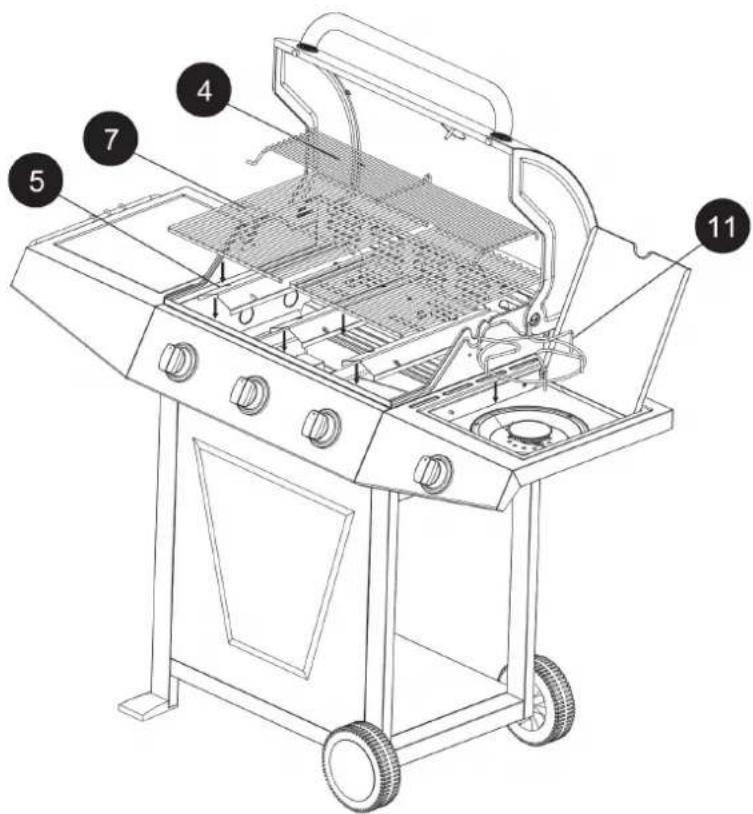
| 5 | Flame guard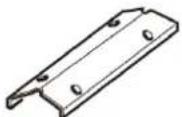 3 18 Side burner 3 18 Side burner 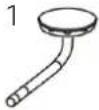 | |||||
| 6 | Main burner | 3 19 Left panel, trolley 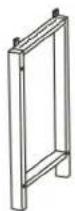 | 1 | |||
| 7 | Grill grate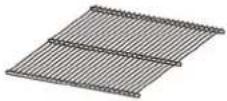 | 2 | 20 | Front panel, trolley 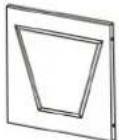 | 1 | |
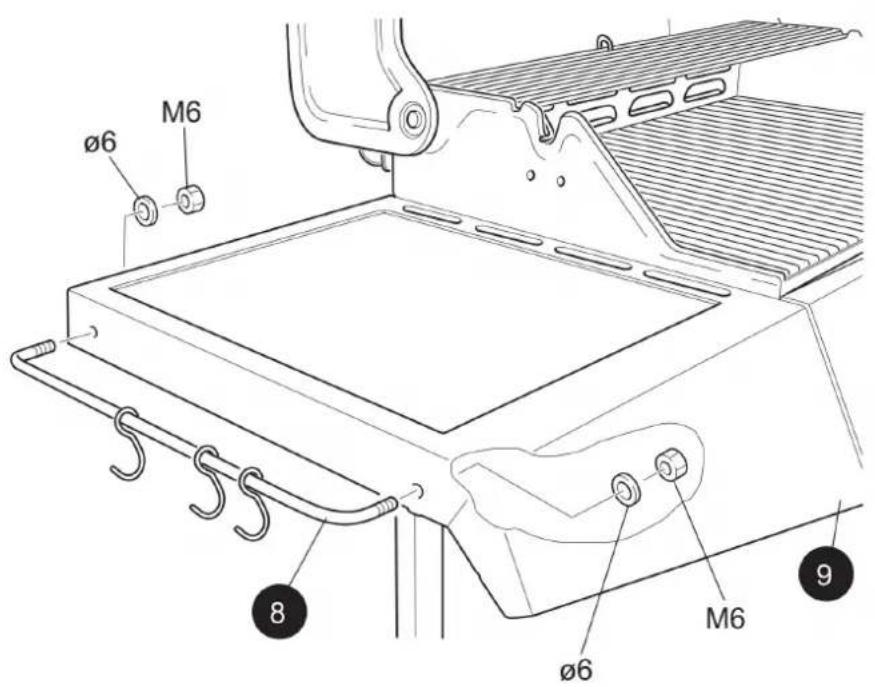
| 8 | Handle with hooks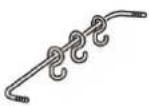 | 1 21 Right panel, trolley [GTY2] | 1 | |||
| 9 | Shelf, left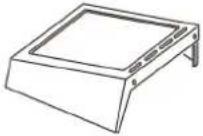 | 1 | 22 | Plastic foot 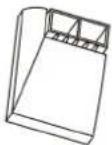 | 2 | |
| 10 | Grill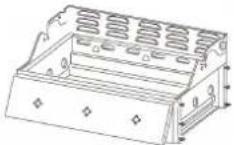 | 1 23 Bottom panel, trolley 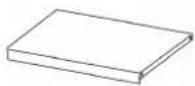 | 1 | |||
| 11 | Grate for side burner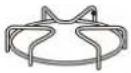 | 1 24 Wheel cover  | ||||
12 Shelf, right 1 25 Whee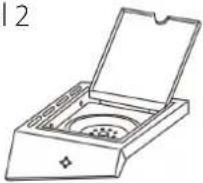 | 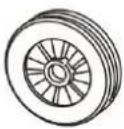 | |||||
| 13 Holder for drip pan | 1 | |||||
Assembly parts
| Name Dimension | ion Part Number | ||
| AA M5 x 12 8 |  | ||
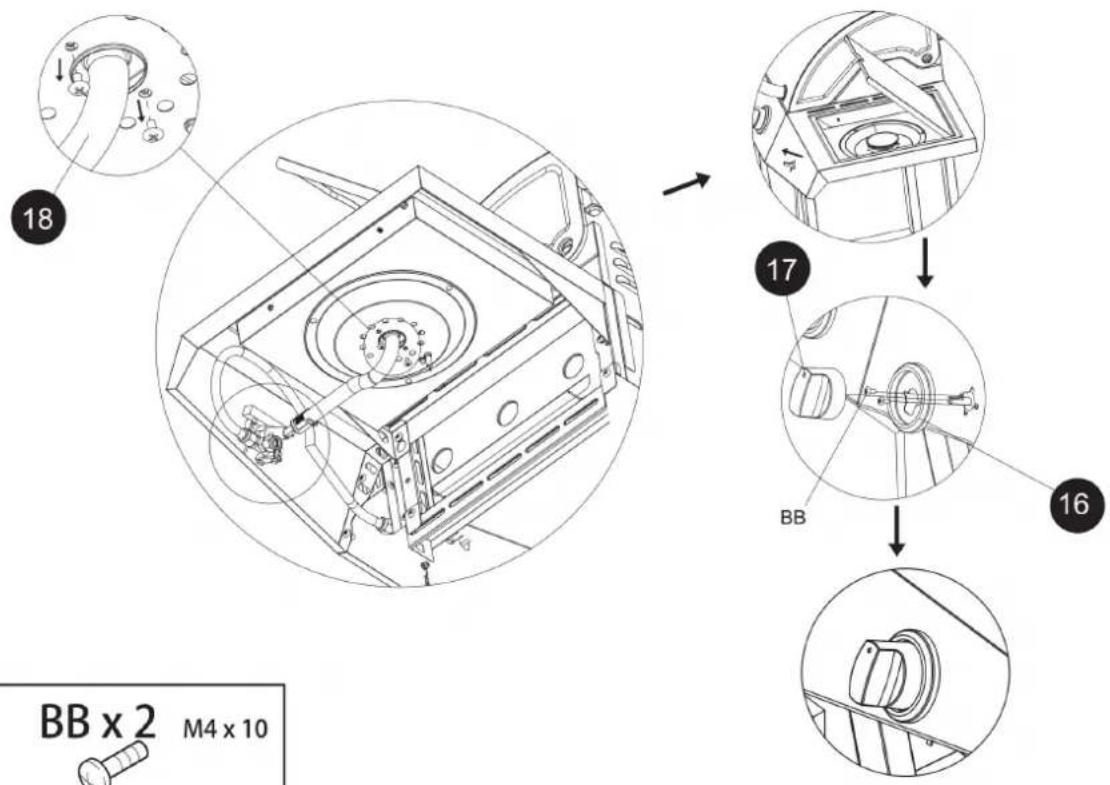
| BB M4 x 10 2 |  | ||
| CC ST5 x 8 8 |  | ||
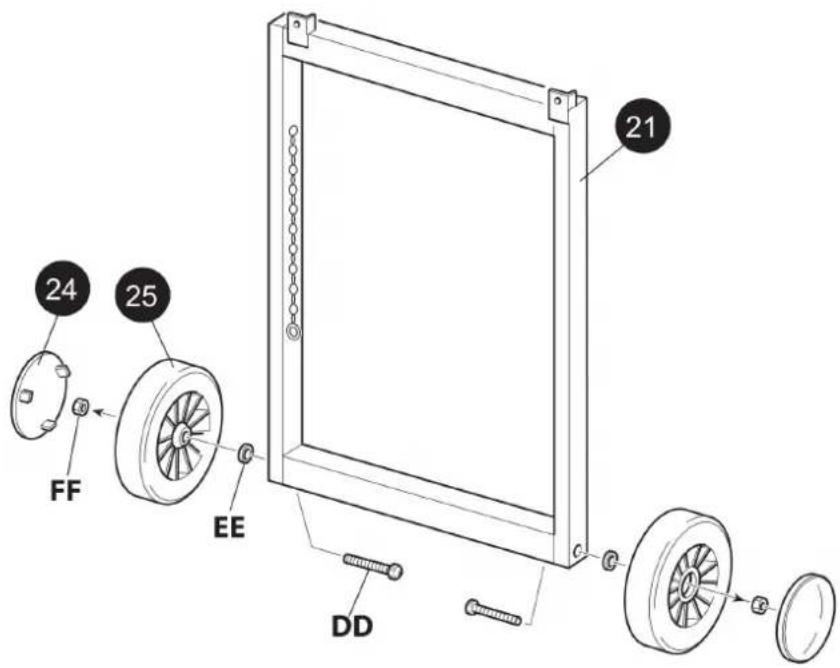
| DD | M10 x 75 | 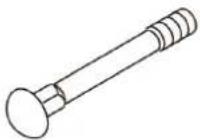 | 2 |
| EE | D10 | [WKAT] | 2 |
| FF | M10 | [H8ZV] | 2 |
- Use a standard G30/G31 gas cylinder with an external thread valve.
- Use a standard length hose, at most 1.5 metres. The entire hose must be well-visible so that it can be checked after fitting.
WARNING Only use regulators and gas cylinders recommended by the manufacturer. It is dangerous to use another regulator and invalidates the guarantee.
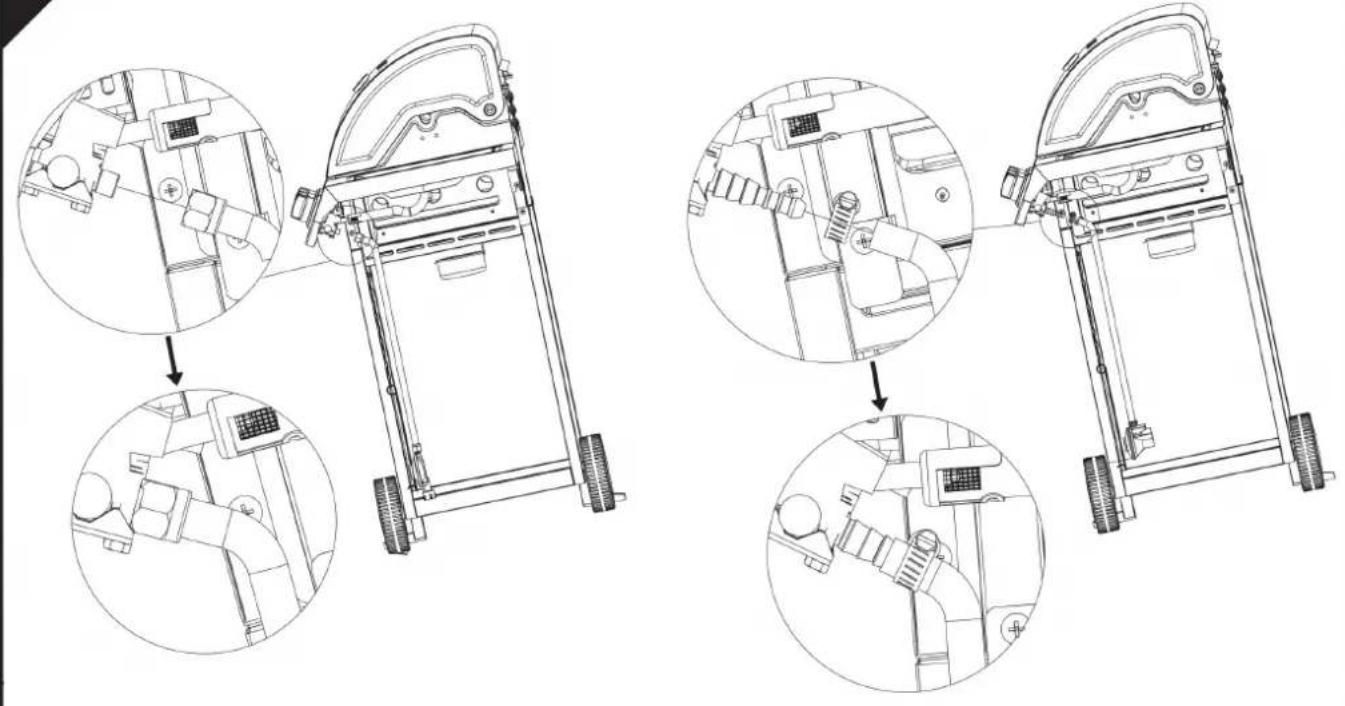
Connecting the gas cylinder
- Before connecting, check that the gas cylinder's connection, regulator, burner and burner ports are free.
- Connect the gas hose to the cylinder by screwing the knob clockwise as far as it goes. Check that the hose has not become twisted.
Disconnecting the gas cylinder
- Before disconnecting, check that the gas cylinder's valve is closed.
- Disconnect the gas hose from the gas cylinder by screwing the knob counter-clockwise until it loosens.
• Always carry out a leak test after connecting.
DANGER! Do not replace the gas cylinder in the vicinity of a source of ignition.
Leak test (may only be carried out in a well-ventilated area)
- Check that all the gas control knobs are closed.
- Open the gas valve.
- Check all the system's gas connections, including all valve connections, hose connections and regulator connections, by rubbing soapy solution on them.
- Bubbles form where there are any leaks. Close the gas valve and tighten the leaking connection. Repeat the test. If bubbles form again, close the gas valve and contact the retailer. Do a leak test once a year and after each time the gas cylinder has been removed or replaced.
NOTE! NEVER carry out a leak test with the help of an open flame.
OPERATION
WARNING
- Before each use, check that the LPG grill is correctly assembled.
- Leave at least 1 metre of free space around the grill during use.
- Never use the grill indoors or in an enclosed area.
- Do not block the flow of ventilation air around the grill.
Before igniting
Check the gas hose before the gas valve is opened. Immediately replace the hose if it shows signs of wear or damage. Leak test before use. Do not use the grill if there is a smell of gas.
Preparation
If you want to prevent food from sticking to the grate, you can rub a small amount of cooking oil on it before each time you grill.
NOTE! The grill's colour might change somewhat the first time you use the grill. This is normal.
Ignition
- Read these instructions before igniting.
- Open the cover.
- Check that all knobs are in position •.
- Connect the regulator to the gas cylinder's valve and open the valve.
- Press in and turn the gas control knob counter-clockwise to about position 1/4 until a clicking sound is heard and the burners are ignited.
- Set the desired flame size between positions 1/4 and 1/2.
If the grill does not ignite after several attempts, it can be ignited manually as described below.
- Open the cover.
- Check that all gas control knobs are in position •
- Slowly open the gas valve or the regulator if it is not already open.
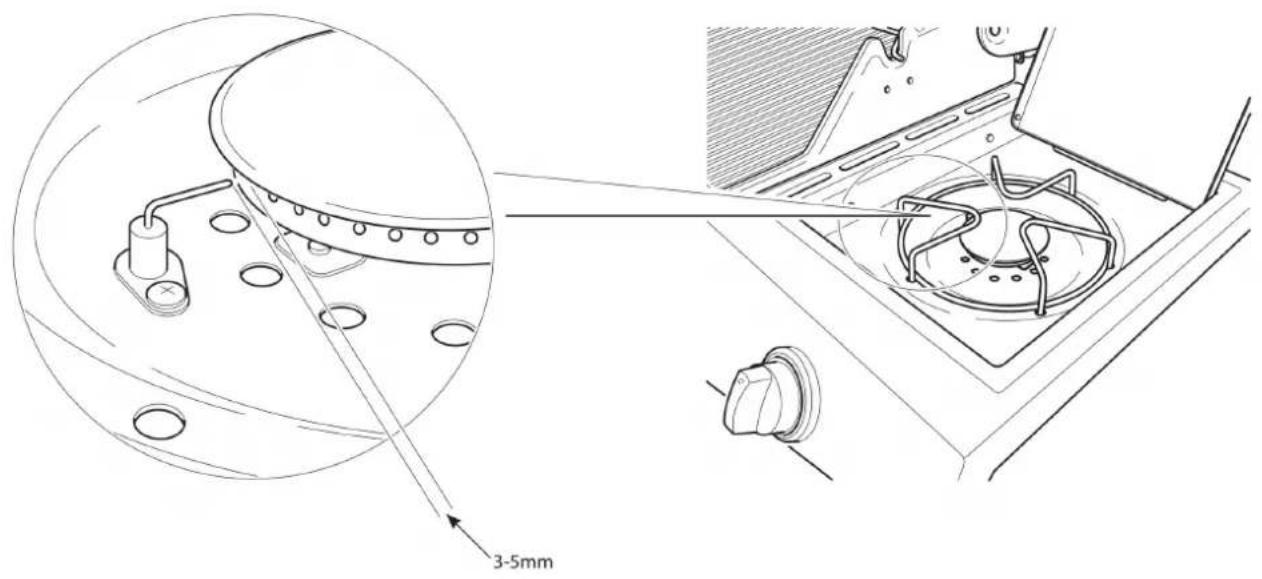
- Put a match in the match holder.
- Insert the holder with the lit match through the grate to the burner you wish to ignite.
- Press in and turn the gas control knob to position 1/2.
- If the burner does not ignite within 5 seconds, turn the gas control knob to position • . Wait 5 minutes for the gas to disperse and try again.
- When the burner is ignited, turn the gas control knob to the desired position.
After grilling
When finished grilling, turn all the burners to position HI and let them burn for 5 minutes. This burns off food residue left over from grilling and makes it easier to clean the grill. The cover must be open throughout this step. When you are finished, turn all the gas control knobs completely clockwise to off-position and shut off the gas supply at the cylinder. Wait until the grill has sufficiently cooled before you close the cover.
Tips
- On the upper grate (warming rack) you can keep cooked food warm, toast bread or cook food in aluminium foil.
- Use the side burner as a normal kitchen oven for cooking, browning or frying.
- For the side burner, a cooking pot with a bottom diameter of 160-240 mm is recommended.
- The risk of high flames is reduced if you use lean meat and avoid high temperatures.
- More delicate food, such as fish and greens, should be packed in aluminium foil and grilled indirectly or placed on the upper grate (warming rack).
- Use long grill thongs or a grill turner instead of a fork to turn the meat, so that the juices do not seep out.
- When you grill directly on the grate, you can set the burners to different levels so that food requiring different inner temperatures can be cooked at the same time.
- Use the liquid holder to reduce the risk of flames and to get a juicier meat. Before you begin grilling, remove the grate and put a robust, shallow cooking pan directly on the burners. Fill it halfway with water, fruit juice or another flavoured liquid. Put the grate back in place and put the food over the pan.
- Rotating skewers, grill baskets, vertical chicken holders and other accessories can vary grilling, reduce cooking times and simplify cleaning up afterward.
- Clean the grate with a grill brush after completed grilling. Use protective gloves and carefully remove deposits while the grates are still warm.
- Let the grill cool after each use. Grease the clean grates with a thin protective layer of cooking oil. Empty the drip pan, wipe the grill externally with a mild cleaning agent and cover the grill with suitable protection.
MAINTENANCE
Clean the grill after each use and if it has stood unused for a longer period.
NOTE!
- The grill and all parts much have properly cooled down before cleaning.
- Never throw water on the grill while the surfaces are still hot.
• Always use protective gloves when handling hot parts.
Grill grate
Clean the grill grate with warm, soapy water. Remove food residue with a mild cleaning agent and a soft sponge. Rinse the grate and let it dry thoroughly.
Maintaining the burners
For normal use, it is enough to burn off deposits after grilling in order to keep the burner clean. The burner should be removed and cleaned once a year or more often if there is a lot of deposits. Check that there are no blockages (debris, insects) in the burner ports or the burner pipes. Clean the pipes with a pipe cleaner. Use a steel brush to remove corrosion. Make sure that the burner pipes are positioned correctly above the valve outlets when you put the burner back into place.
Grill
Regularly scrape off grease from the grill with a soft plastic or wooden scraper. All grease does not have to be removed from the grill. Clean as needed with warm water and washing-up liquid and a soft rag or nylon dish brush. Remove the grill surfaces and the burners before thoroughly cleaning. The gas control knobs and the manifold must not be immersed in water. Check that the burners work correctly after reassembly. Check all screw connections once a year and tighten as needed. Cover the grill if it is outdoors for long periods, especially in winter.
Storage
Store the grill in a dry, cool place. Cover the burners with aluminium foil so that insects and other debris do not collect in the burner ports. If the product is stored indoors, the gas cylinder must be disconnected. Do not store the gas cylinder indoors. The gas cylinder must always be stored outdoors, out of the reach of children, in a dry, well-ventilated area, isolated from heat or ignition sources.
TROUBLESHOOTING
| PROBLEM POSSIBLE CAUSE SOLUTION | ||
| The burner cannot be ignited with the igniter. The | the battery is flat. Replace the AA battery. | |
| Cables or electrodes are covered by food residue. | Clean the cables and/or electrodes with alcohol. | |
| Electrode and burner are wet. Wipe them with a rag. | ||
| Electrode is damaged – sparks in the damaged area. | Replace the electrode. | |
| Cable loose or disconnected. Connect the cable or | replace the electrode/cable. | |
| The cable short-circuits (sparks form between the igniter and the electrode). | Replace the ignition cable/electrode. | |
| Defective igniter. Replace the ignition cable/electrode. | ||
| The burner will not ignite with a match. No gas flow. | Check if the gas cylinder is empty. If the gas | cylinder is empty, replace or refill it, or read more under "Sudden reduction of gas flow or flame height". |
| Connection nut and regulator incorrectly connected. | Turn the connection nut one half to a three-quarter turn toward stop. Turn only by hand, do not use tools. | |
| Blockage of gas flow. Clean the gas hose. Check that the hose is not bent or folded. | ||
| Cobwebs or insect nests in the burner pipe. Clean the burner pipe. | ||
| Burner ports are clogged or blocked. Clean the burner ports. | ||
| Sudden reduction of gas flow or flame height. | Gas cylinder is empty. | Replace or refill the gas cylinder. |
| Excessive flow, safety device may have been triggered. | Turn the gas control knob to off-position, wait 30 seconds and ignite the grill. If the flames are still low, reset the safety device by turning the gas control knob to the off-position and close the gas valve. Disconnect the regulator. Turn the gas control knob to position HIGH and wait 1 minute. Turn the gas control knob to the off-position, connect the regulator and leak-test the connections. Open the gas valve slowly, wait 30 seconds and ignite the grill according to the ignition instructions. | |
| Irregular flame, the flame does not run along the whole burner. | Burner ports are clogged or blocked. Clean the burner ports. | |
| The flame is yellow or orange. | A new burner may have oil residue from manufacturing. | Let the grill burn for 15 minutes with the cover closed. |
| Cobwebs or insect nests in the burner pipe. Clean the burner pipe. | ||
| Food residues, grease or salt on the burner. | Clean the burner. | |
| The valve is not directed toward the injector pipe. | Check that the burner pipe is correctly connected to the injector. | |
| The flame dies out. Strong or gusty wind. | Do not use the grill in strong wind. | |
| Low gas level. | Replace or refill the gas cylinder. | |
| The flow limiter valve has been triggered. Adjust (lower) the temperature. | ||
| Long-lasting grease fire. | Grease has run down from the food and built up on the burner system. | Turn the gas control knob to off-position and close the gas valve. Close the cover and let the flame burn out. When the grill has cooled, remove all parts and clean them. |
| Backfire (fire in burner pipe). | Burner and/or burner pipe is blocked. | Clean the burner and/or clean the burner pipe. |
| The inside of the cover is peeling. | The cover is made of stainless steel and is not painted. | Grease build-up has burned and peeled. Clean carefully. |
1
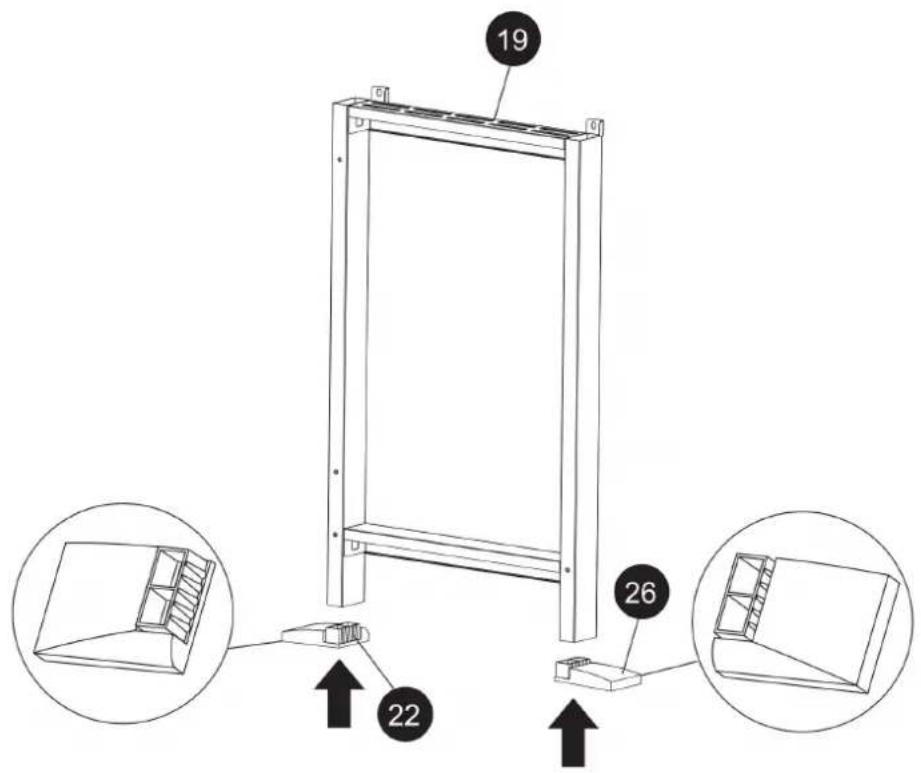
2
| DD x 2 M10 x 75 | |
| EE x 2 D10 | |
| FF x 2 M10 |
3
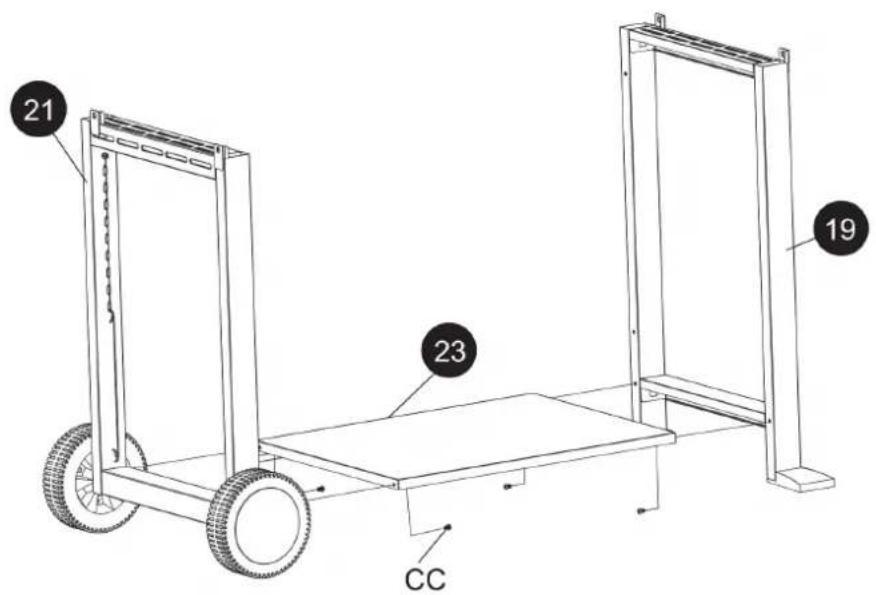
CC x 4 ST5 x 8

4
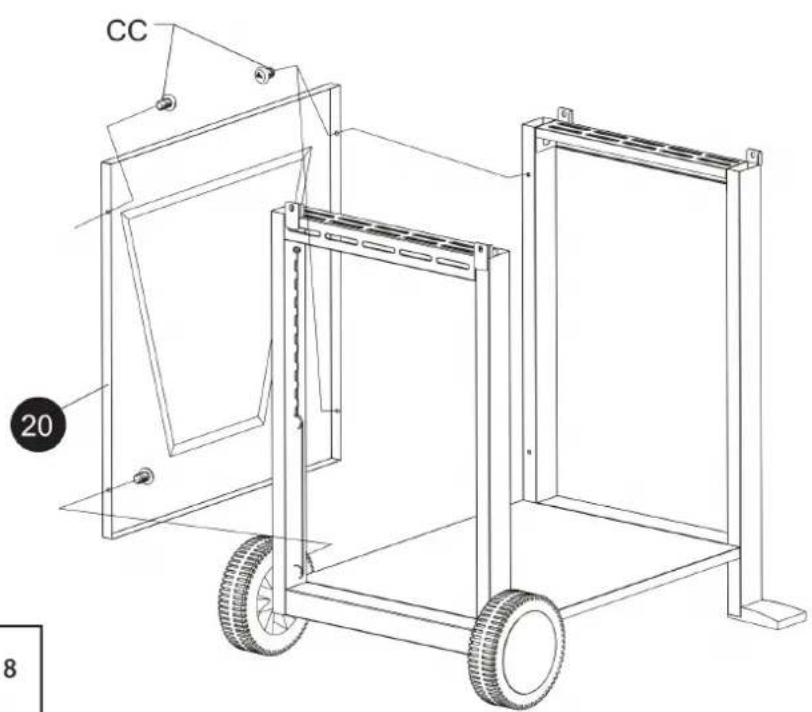
CC x 4 ST5 x 8

5
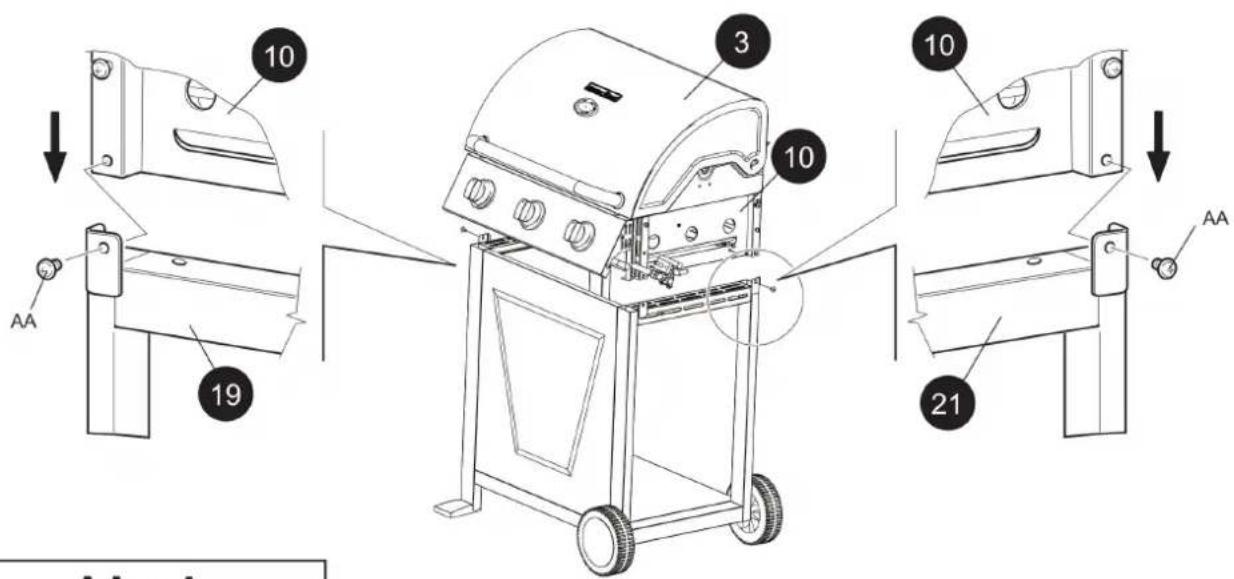
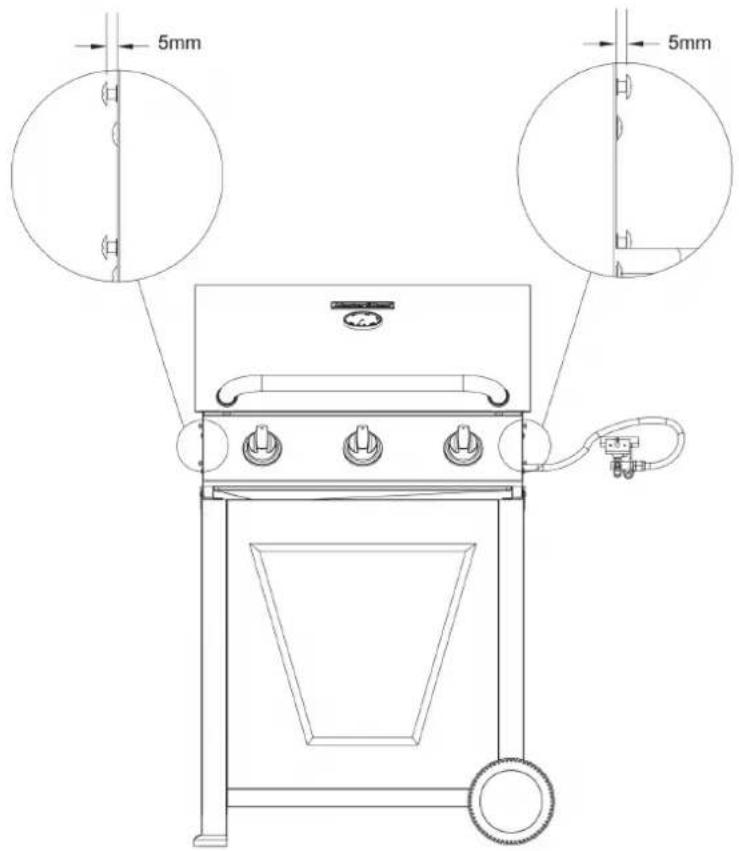
M5 x 12
AA x 4

6
7
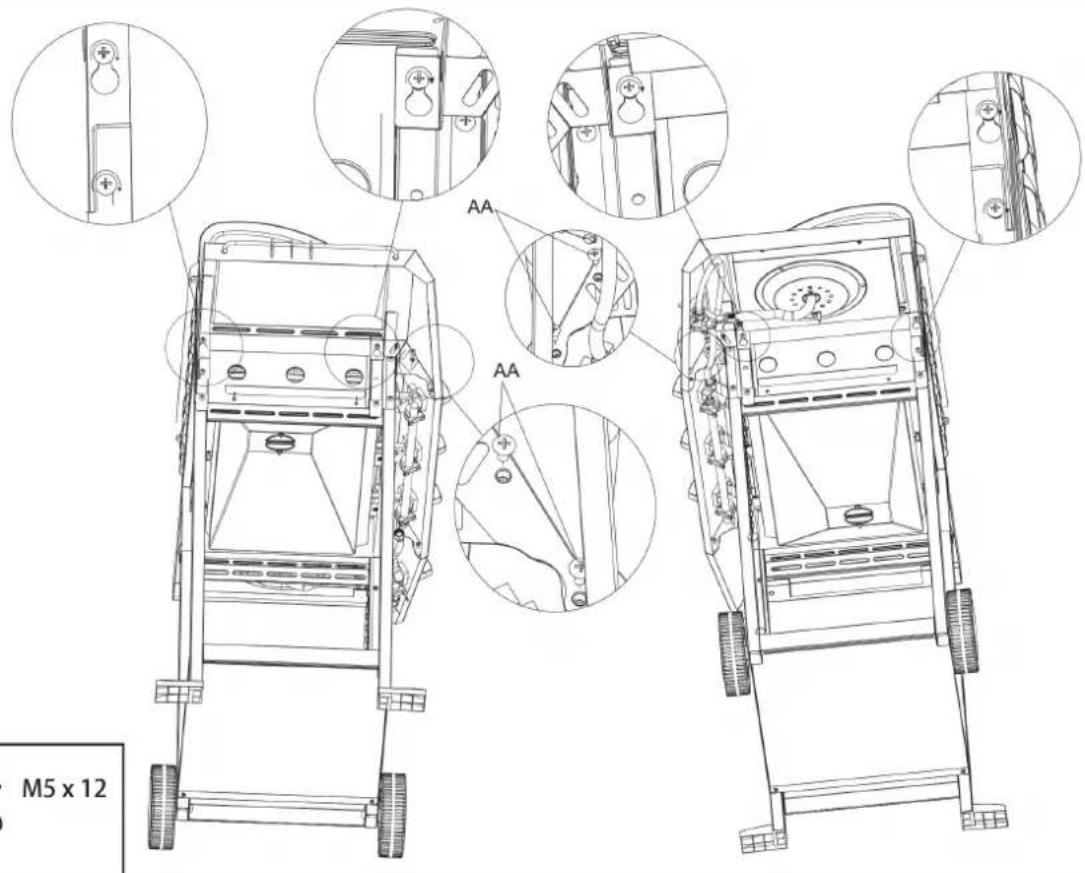
AA x 4

8

11
12
13
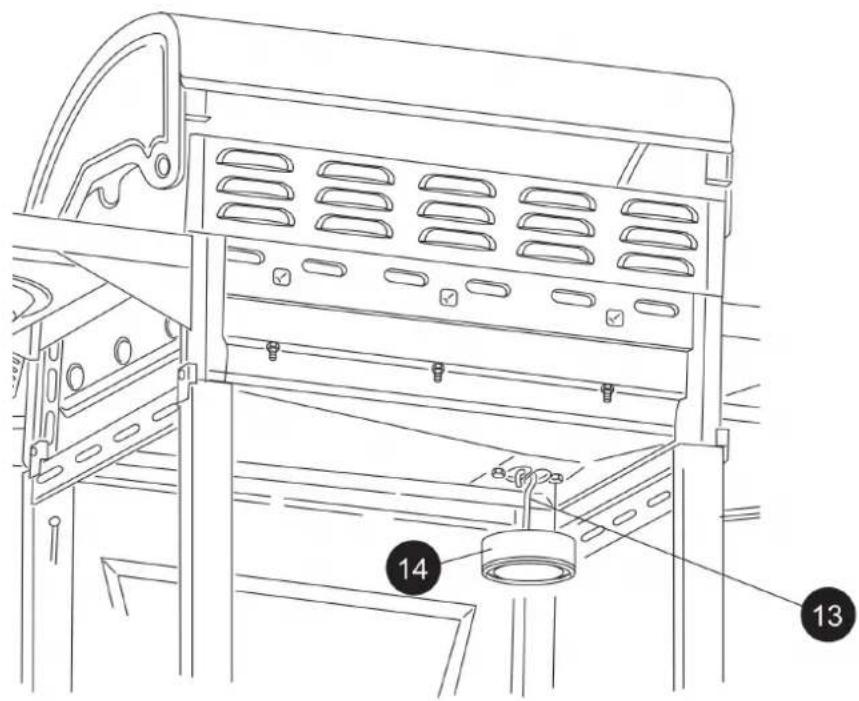
14
15
16
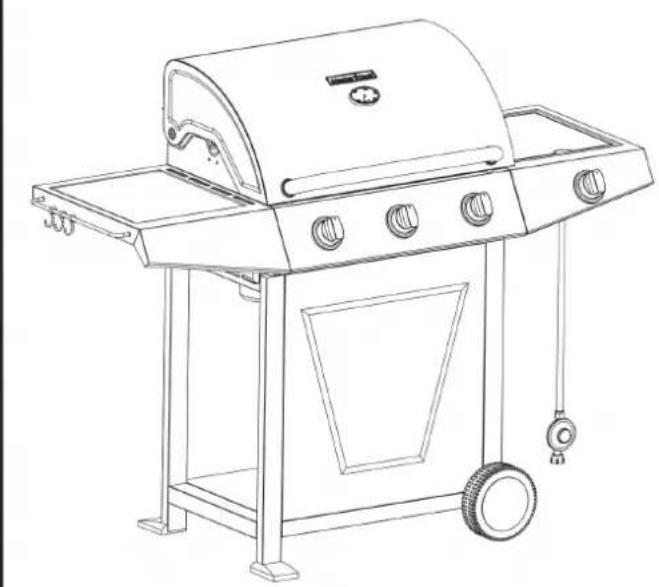
natural_image
Line drawing of a simple gas stove with handlebars and wheels (no text or symbols)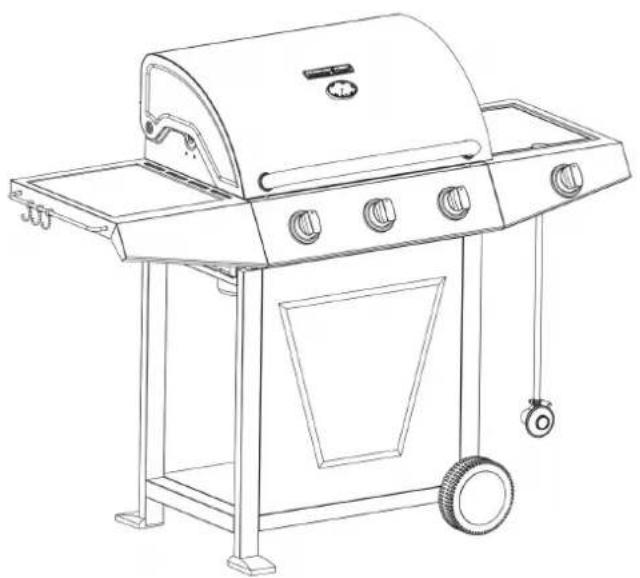
natural_image
Line drawing of a simple gas stove with handlebars and wheels (no text or symbols)CE
EC DECLARATION OF CONFORMITY
EG FÖRSÄKRAN OM ÖVERENSSTÄMMELSE
EF SAMSVARSERKLÆRING
DEKLARACJA ZGODNOŚCI WE

Jula AB, Box 363, SE-532 24 SKARA, SWEDEN
Gas Appliance Directive (GAD) 2009/142/EC
EN 498:2012, EN 484:1998
Where applicable, name and address of the notified body involved: Där tillämpbart, namn och adress hos involverat kontrollorgan: Når det kreves, navn og adresse til det aktuelle meldte organet: Jeśli ma zastosowanie - nazwa i adres organu kontrolnego:
IMQ S.p.A.
This product was CE marked in year -12
Skara 2015-11-30
Stefan Rundberg
PRODUCT MANAGER