
TY-CF55VW50 - TV PANASONIC - Free user manual and instructions
Find the device manual for free TY-CF55VW50 PANASONIC in PDF.
| Product Type | Mounting kit for LCD screens |
| Brand | PANASONIC |
| Model | TY-CF55VW50 |
| Compatibility | Professional LCD screens |
| Supported configuration | 1×1 (single screen) or 2×2 (quad screen) |
| Materials | Metal (steel or aluminum) |
| Kit contents (1×1) | 2 top/bottom parts, 2 right/left parts, 4 L-shaped corners, 16 screws, manual |
| Kit contents (2×2) | 4 top/bottom parts, 4 right/left parts, 4 L-shaped corners, 4 T-connectors, 32 screws, manual |
| Number of screws provided | 16 (1×1) or 32 (2×2) |
| Approximate dimensions (per piece) | Not specified, suitable for medium-sized screens |
| Supported weight (estimated) | Up to 50 kg per screen |
| Required installation | Flat surface, protective sheet, screwdriver |
| Maintenance and cleaning | Soft, dry cloth |
| Safety | Use only the provided screws; do not place the screen on its edges |
| Spare parts and repairability | Not available separately; replace entire kit |
| General information | Compliant with European directives 2002/96/EC and 2006/66/EC |
Frequently Asked Questions - TY-CF55VW50 PANASONIC
User questions about TY-CF55VW50 PANASONIC
0 question about this device. Answer the ones you know or ask your own.
Ask a new question about this device
Download the instructions for your TV in PDF format for free! Find your manual TY-CF55VW50 - PANASONIC and take your electronic device back in hand. On this page are published all the documents necessary for the use of your device. TY-CF55VW50 by PANASONIC.
USER MANUAL TY-CF55VW50 PANASONIC
© Panasonic Corporation 2012
使用说明书
盖框套件
亲爱的 Panasonic产品用户
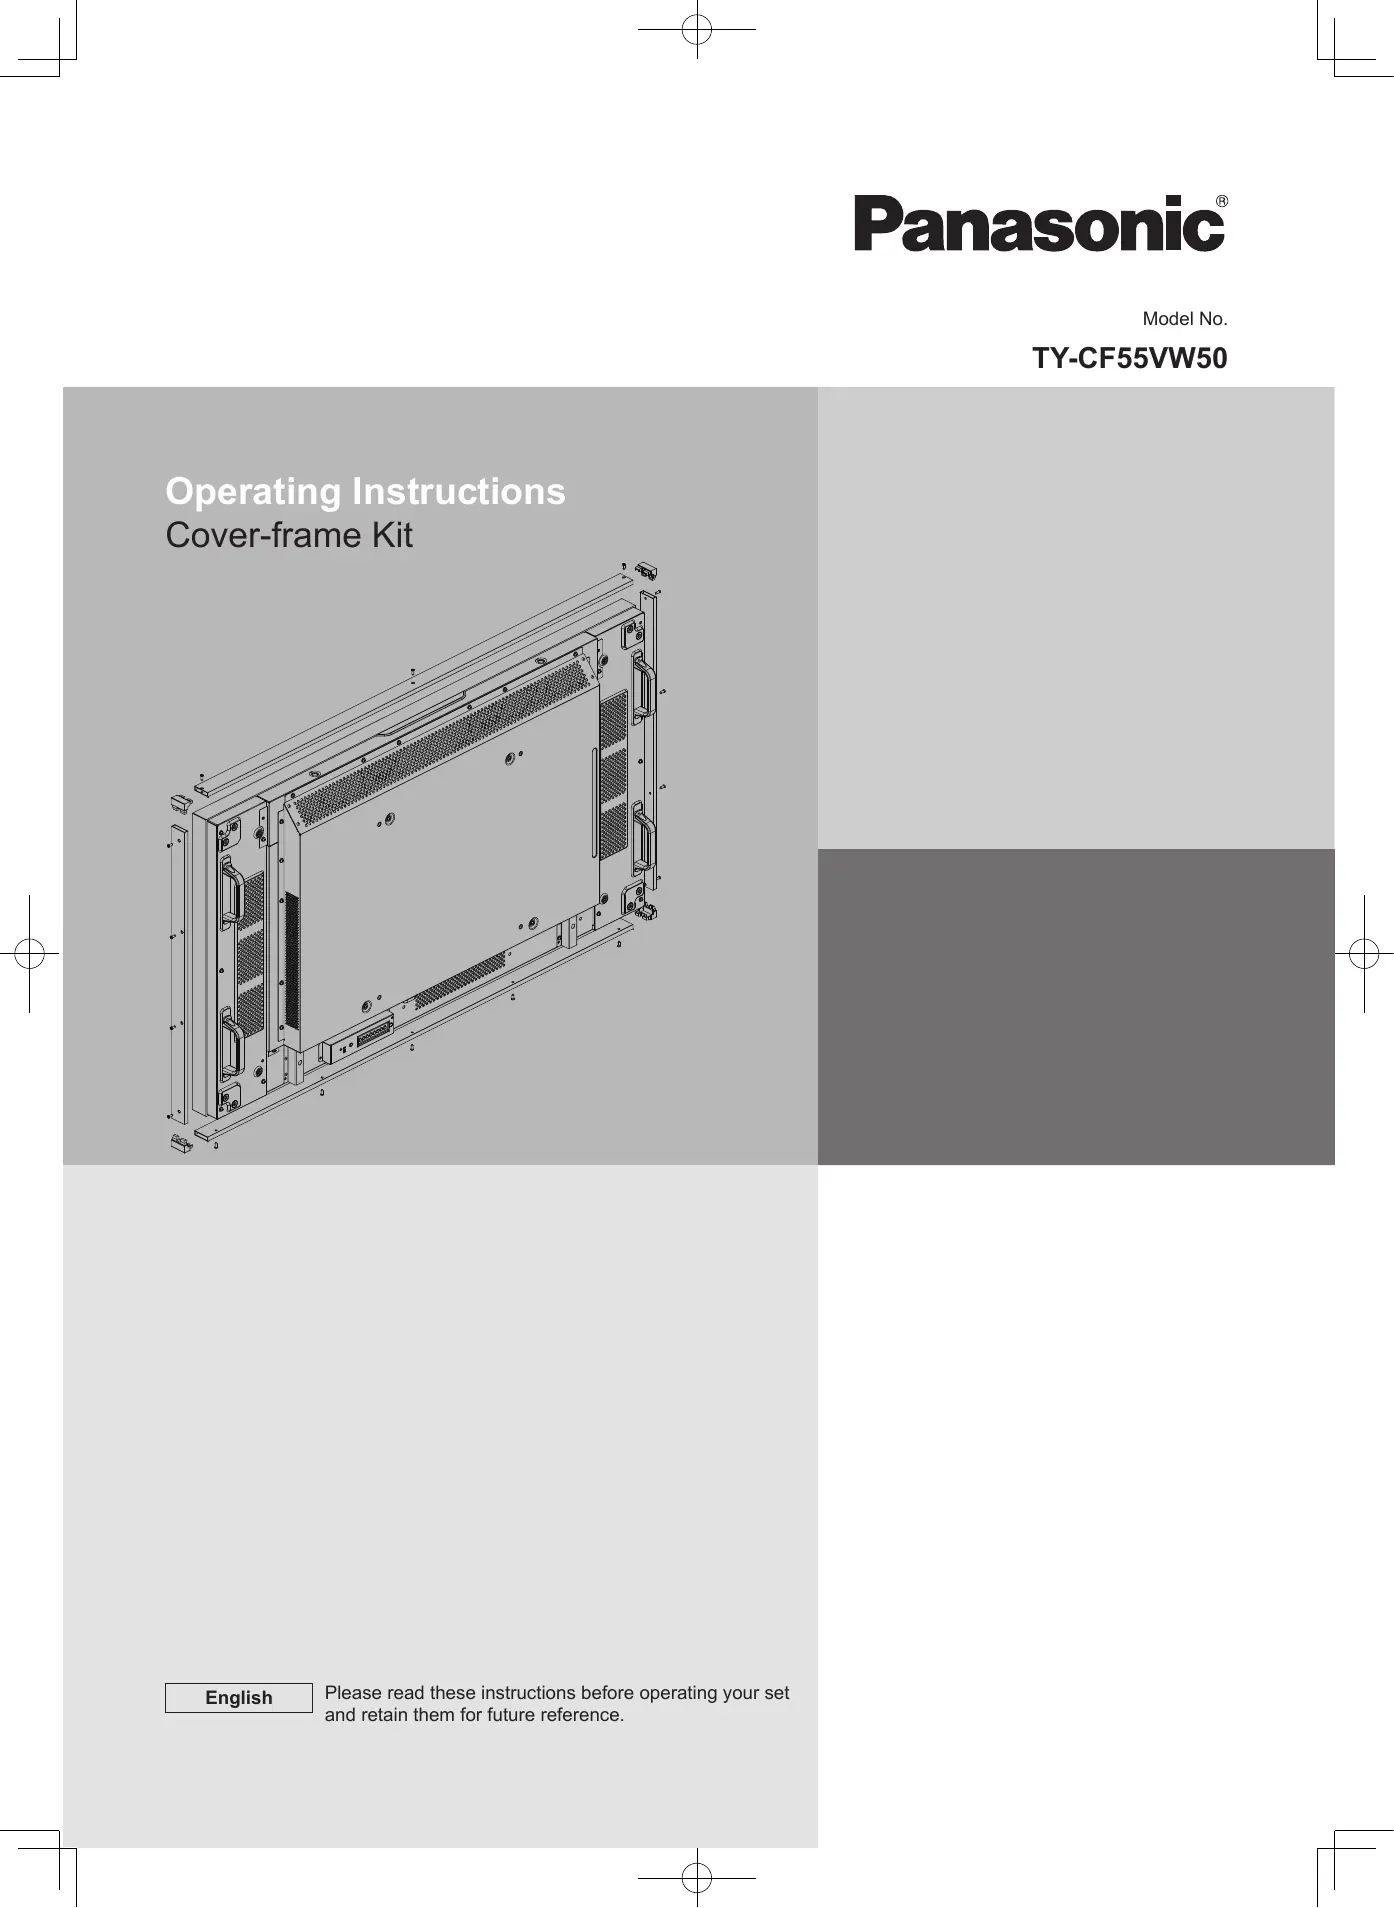
Operating Instructions
Cover-frame Kit
Dear Panasonic Customer
Welcome to the Panasonic family of customers. We hope that you will have many years of enjoyment from your new LCD Display.
To obtain maximum benefit from your set, please read these Instructions before making any adjustments, and retain them for future reference.
Retain your purchase receipt as well, and record the model number and serial number of your set in the space provided on the rear cover of these instructions.
Visit our Panasonic Web Site http://panasonic.net
Table of Contents
Basic Composition Kit. 1
1× 1 Single-display Formation. 1
2× 2 Multiple-display Formation 1
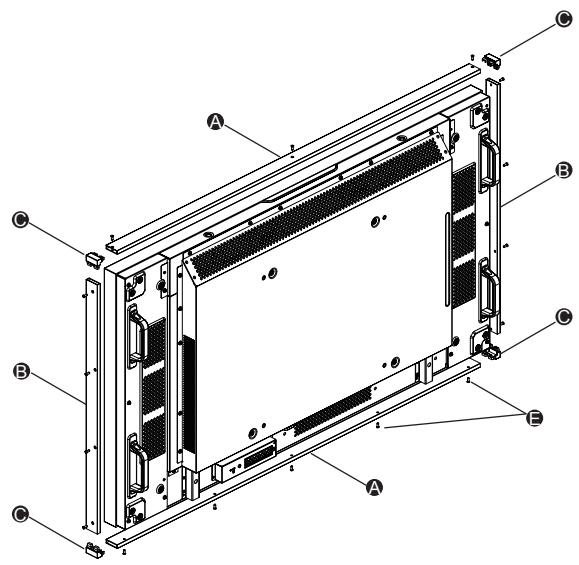
Basic Composition Kit
| Item | Description | Quantity |
| A | Top Frame / Bottom Frame | 2 |
| B | Right Frame / Left Frame | 2 |
| C | L-Corner | 4 |
| D | T-Joint | 4 |
| E | Screws | 16 |
| F | Setup Manual | 1 |
NOTE: Use the supplied screws only. The screws other than those supplied may cause damage to the display.

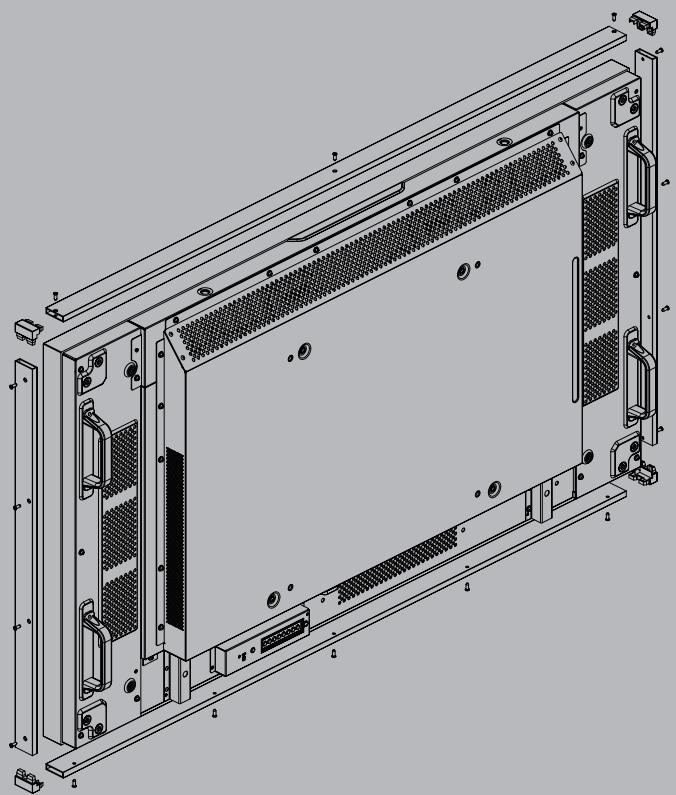
1x1 Single-display Formation
| Item | Description | Quantity |
| A | Top Frame / Bottom Frame | 2 |
| B | Right Frame / Left Frame | 2 |
| C | L-Corner | 4 |
| E | Screws | 16 |
| F | Setup Manual | 1 |
- Spread a protective sheet on a flat surface, such as a desk, and place the display on it. Be careful to never rest display on its edges, damage may occur from doing this.
- Attach the Top and Bottom Frames A with supplied screws E.
- Attach the L-Corners to both sides of Top Frame and Bottom Frame.
- Attach the Right and Left Frames ③ with supplied screws.
NOTE: This 1 × 1 formation requires one basic-composition kit.
Four T-Joints will be left unused.
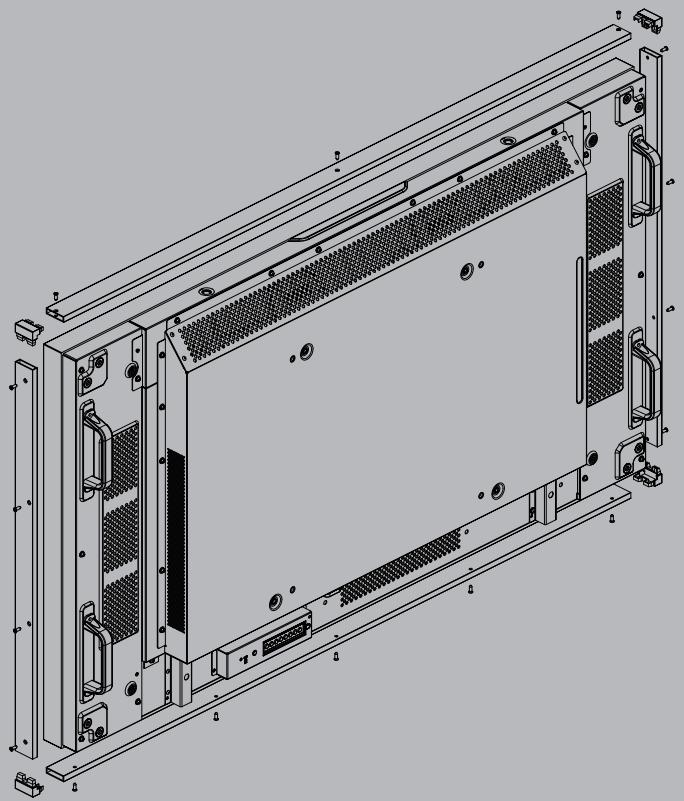
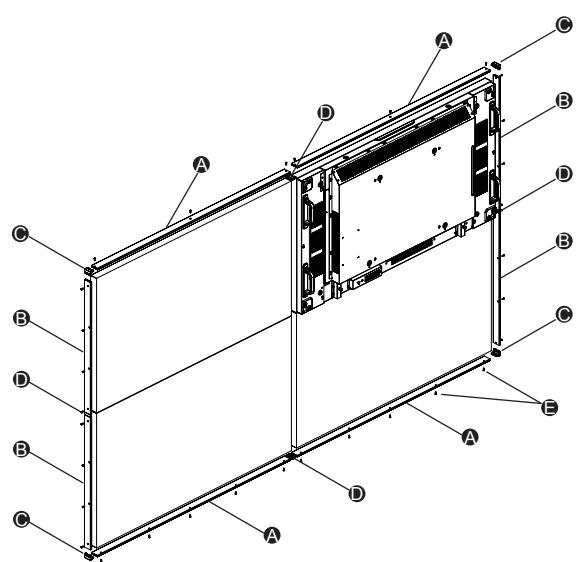
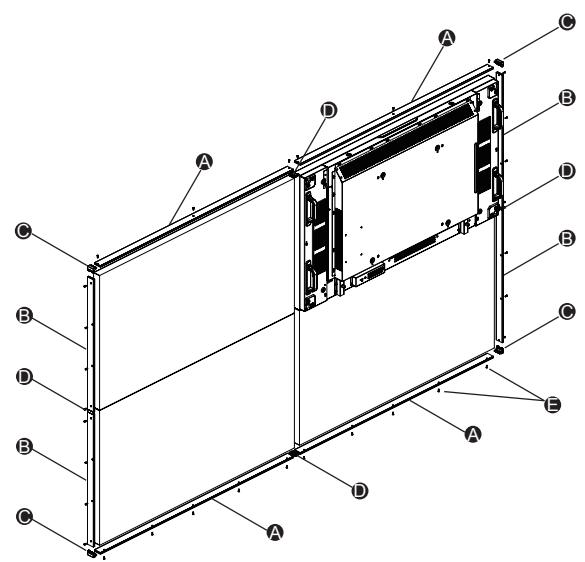
2 × 2 Multiple-display Formation
| Item | Description | Quantity |
| A | Top Frame / Bottom Frame | 4 |
| B | Right Frame / Left Frame | 4 |
| C | L-Corner | 4 |
| D | T-Joint | 4 |
| E | Screws | 32 |
| F | Setup Manual | 1 |
- Attach four Top and Bottom Frames A with supplied screws E.
- Attach four Right and Left Frames 3 with supplied screws 3.
- Attach four T-Joints D for each frame.
- Attach four L-Corners G to four edges.
NOTE: This 2 × 2 formation requires two basic-composition kits.
Four L-Corners G and four T-Joints D will be left unused.
Information for Users on Collection and Disposal of Old Equipment and used Batteries
These symbols on the products, packaging, and/or accompanying documents mean that used electrical and electronic products and batteries should not be mixed with general household waste.
For proper treatment, recovery and recycling of old products and used batteries, please take them to applicable collection points, in accordance with your national legislation and the Directives 2002/96/EC and 2006/66/EC.
By disposing of these products and batteries correctly, you will help to save valuable resources and prevent any potential negative effects on human health and the environment which could otherwise arise from inappropriate waste handling.
For more information about collection and recycling of old products and batteries, please contact your local municipality, your waste disposal service or the point of sale where you purchased the items.
Penalties may be applicable for incorrect disposal of this waste, in accordance with national legislation.
For business users in the European Union
If you wish to discard electrical and electronic equipment, please contact your dealer or supplier for further information.
[Information on Disposal in other Countries outside the European Union]
These symbols are only valid in the European Union. If you wish to discard these items, please contact your local authorities or dealer and ask for the correct method of disposal.
Note for the battery symbol (bottom two symbol examples):
This symbol might be used in combination with a chemical symbol. In this case it complies with the requirement set by the Directive for the chemical involved.
Customer's Record
The model number and serial number of this product can be found on its rear panel. You should note this serial number in the space provided below and retain this book, plus your purchase receipt, as a permanent record of your purchase to aid in identification in the event of theft or loss, and for Warranty Service purposes.
Model Number
Serial Number
KHe yIaIbIPJIbIK KocblbICTap D naJaIaNMa KaIaNbl.
Eypona OdaftbHaH e3re eJndepin HndipicHne naJaHaN6ay TypaIb aKnapaT
HbIwaH TeK Eypona OdaFbIHJa XapaMdbI.
ErepocbIeHIMdiXoYbIH3KeNCE,KeprilikTIekJIeTTIKHeMeceDnnepePi3reXaBaplaCbIN,EHdipicTe naJaanhaBaydbInDypbICediciHcpaHbI3.
HΦopmaζIOHHbI ΚeHTp Panasonic
Ka3aKCTaH MeH OpTa A3nJaH KOhBipay WaJy YIiH.
Ka3aKCTaH MeH OpTa A3nJaH KOhBipay WaJy YIiH.
KoHcTpkyi1x13OHNIMINCNPiEEM 1
KoHcTpkyiia 2x23 KjIbKOMa DnCpIeMaM 1
KoHcTpPyKciia 1x1 3 OdHm dncnpeecM
Ka3aKCTaH MeH OpTa A3nJaan KOhbpay WaJy YIiH.
ДязвонковиЗ Казхетани Лентрально Азп: +7 (7272) 98-09-09
3anns nokynz
Homep moen ta cepiHn Homep cboTO npncToPO3TaOBoHn Ha 3aHni nanei. 3aHniTb cepHn Homep y pRok, HabeHn HxKHe, Ta 36epeKtB zu INCTpyKzIO, a TAKoK BaU che, y kocTi CBIOCTBa npo KynIBIO Ha BnPaOK KpaIckn abo 3ary6bnHn CboTO npncToIO, a TAKoK dIy OTPMaHHraPANTIHnx nocnyr.
Homep mojeli
CepiHnH Homep
- 使用说明书
- 盖框套件
- 亲爱的 Panasonic产品用户
- Operating Instructions
- Cover-frame Kit
- Dear Panasonic Customer
- Table of Contents
- Basic Composition Kit
- 1x1 Single-display Formation
- × 2 Multiple-display Formation
- Information for Users on Collection and Disposal of Old Equipment and used Batteries
- For business users in the European Union
- [Information on Disposal in other Countries outside the European Union]
- Note for the battery symbol (bottom two symbol examples):
- Customer's Record
- Eypona OdaftbHaH e3re eJndepin HndipicHne naJaHaN6ay TypaIb aKnapaT
- KoHcTpPyKciia 1x1 3 OdHm dncnpeecM
- 3anns nokynz
Brand : PANASONIC
Model : TY-CF55VW50
Category : TV