VT-1201 BN - Iron Vitek - Free user manual and instructions
Find the device manual for free VT-1201 BN Vitek in PDF.


| Product Type | Steam Iron |
| Model | VT-1201 BN |
| Brand | Vitek |
| Power Supply | 220-240 V ~ 50 Hz |
| Power Consumption | 1850-2200 W |
| Soleplate Material | Not specified (assumed stainless steel or ceramic) |
| Water Tank Capacity | Not specified (typical ~250-300 ml) |
| Spray Function | Yes, via spray button (4) |
| Steam Supply | Adjustable via steam supply regulator (3) |
| Additional Steam Release | Yes, via button (5) for vigorous steam |
| Anti-Drip System | Yes, prevents water leakage at low temperatures |
| Self-Clean Function | Yes, via self-clean button (14) |
| Temperature Control | Adjustable regulator (11) with fabric settings: •, ••, •••, MAX |
| Indicator Light | Heating element on/off indication (9) |
| Safety Features | Automatic shut-off not mentioned; manual unplug required |
| Water Type | Tap water; mix with distilled if hard |
| Usage Orientation | Vertical storage recommended |
| Cord Length | Not specified |
| Weight | Not specified (typical ~1.2 kg) |
| Dimensions | Not specified |
| Guarantee | Details from dealer; minimum service life 3 years |
Frequently Asked Questions - VT-1201 BN Vitek
User questions about VT-1201 BN Vitek
0 question about this device. Answer the ones you know or ask your own.
Ask a new question about this device
Download the instructions for your Iron in PDF format for free! Find your manual VT-1201 BN - Vitek and take your electronic device back in hand. On this page are published all the documents necessary for the use of your device. VT-1201 BN by Vitek.
USER MANUAL VT-1201 BN Vitek
natural_image
Simple line drawing of a curved, segmented object with a circled number 15 on the side (no text or symbols on the object itself)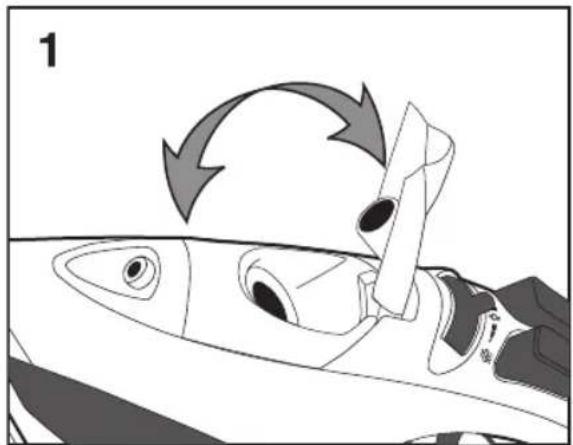
natural_image
Illustration of a fish being pulled by a knife, showing anatomical features and motion direction (no text or symbols)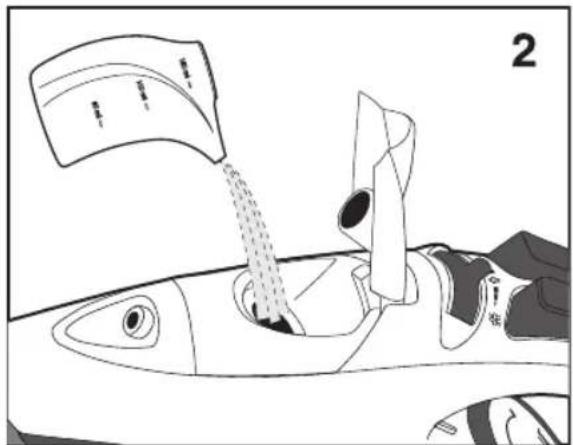
natural_image
Illustration of a fish being lifted by a curved object, showing internal components and motion (no text or symbols)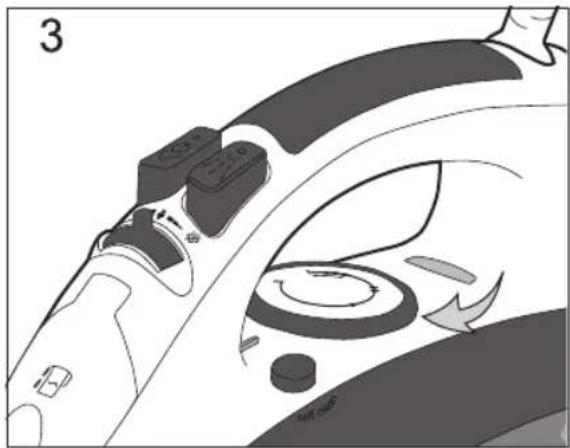
natural_image
Diagram of a car interior showing steering wheel, dashboard, and steering wheel (no text or symbols)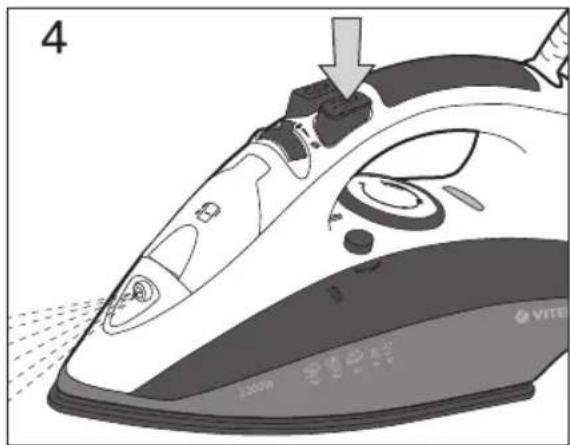
natural_image
Illustration of a steam iron with steam rising, showing mechanical components and smoke (no text or symbols)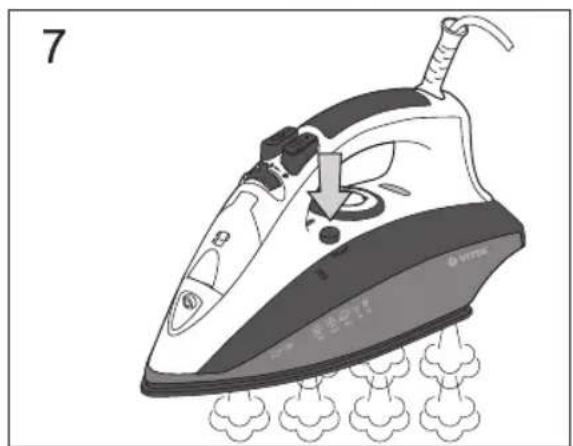
natural_image
Illustration of a steam iron with steam rising, showing internal components and smoke plumes (no text or symbols)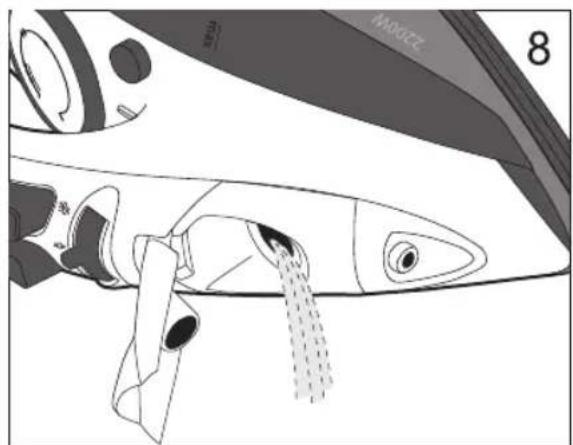
natural_image
Line drawing of a mechanical component with a water drain, showing internal parts and a numbered label (8) in the corner.ENGLISH
STEAM IRON
DESCRIPTION
- Water spray nozzle
- Water tank lid
- Steam supply regulator
- Spray button
- Additional steam release button
- Handle
- Power cord protection
- Base
- Heating element on/off indication
- Water tank
- Temperature regulator
- Maximal water level indication
- Iron soleplate
- Self clean button
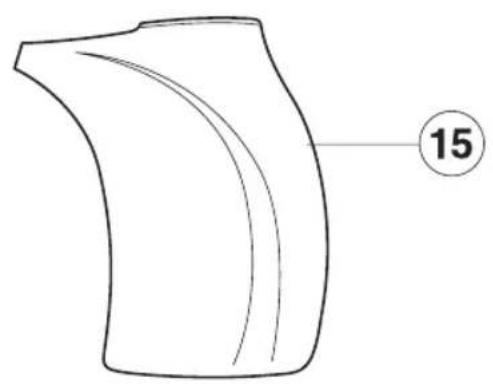
- Measuring cup
SAFETY MEASURES
Before using the unit, please read the instructions carefully and pay attention to the illustrations.
- Before switching on the unit, make sure that your home electricity supply corresponds to the voltage of current specified on the unit.
- Power cord is equipped with a euro plug; insert it into the socket, with secure grounding.
- In order to avoid risk of fire do not use adapters while connecting the appliance to the outlet.
- In order to avoid overloading of the power network do not switch on several appliances with high power consumption simultaneously.
- Use the unit only for the intended purposes.
- Use the iron only on the ironing board.
- Place the iron on a flat stable surface.
• Always unplug the unit while filling the water tank with water. -
While using the unit, make sure that the water tank lid is firmly closed
-
Close supervision is necessary when children or infirm persons are near the unit.
- Never leave the working unit unattended.
• Always unplug the unit if you do not use it. - In order to avoid electric shock do not immerse the unit into water or other liquids.
- Do not fill the water tank with scented liquids, vinegar, starch solution, descaling reagents, chemical agents etc.
- Avoid contact with hot surfaces or outgoing steam of the iron in order to avoid getting burns.
- Make sure that the power cord is not hanging over the edge of the ironing board and make sure that it does not touch heated surfaces.
- To unplug the unit always take it by the plug, do not pull by the power cord.
- Before taking the unit away for storage, pour out the remaining water and let the unit cool down.
- Pour out water only after you have unplugged the unit.
- Do not use the unit if the plug or the power cord is damaged or if there are other damages in the unit.
- In order to avoid electric shock do not repair the unit yourself. If there are some damages in the unit apply to the authorized service center.
BEFORE USAGE
• Take out the iron from the package and remove the protective cartoon covering from the iron soleplate (13).
- Make sure that the electrical supply voltage corresponds to the iron's operating voltage.
Note:
The iron's heating element is broken in during the first use; it is normal for a small amount of smoke to be released.
ENGLISH
CHOICE OF WATER
- To fill the water tank use regular tap water. If the water is hard then it is recommended to mix it with distilled water at a ratio of 1:1, if the water is very hard, mix it with distilled water at a ratio of 1:2 or use only distilled water.
Note:
Do not fill the water tank (10) with scented liquids, vinegar, starch solutions, descaling reagents, chemical substances etc.
FILLING THE WATER TANK
Make sure that the iron is disconnected from electrical power before filling it with water.
- Set the steam release regulator (3) to the position of steam vapor OFF.
- Open the water tank lid (2).
- Fill the water tank with water (10). Close the lid (2).
Note:
- Do not fill it with water above MAX. indication.
- If you need to refill the water tank during ironing, turn off the iron and unplug the power cord from the outlet.
- When you finish ironing, open the water tank lid (2) and pour out the remaining water.
IRONING TEMPERATURE
Before ironing test the heated iron on the old cloth to be sure that the iron soleplate (13) and the water tank (10) are clean.
- Always check the recommended iron temperature indicated on the tag before ironing.
- If the tag does not list the recommended ironing temperature, but you know the type of fabric, then use the following table to determine the proper temperature.
Determination of Fabric type/temperature
| • | Synthetics, nylon, acryl, polyester(low temperature) |
| •• | Silk/wool (medium temperature) |
| ••• | Cotton/linen (high temperature) |
- This table is only for smooth materials. Fabrics of other types (crimped, raised etc.) are best ironed at low temperature.
- First sort items by ironing temperature: wool with wool, cotton with cotton etc.
- The iron heats up faster than is cools down. For this reason it is recommended to begin ironing at low temperature (for instance synthetic fabrics). After that, move to higher temperature ironing. Cotton and linen should be ironed after all the others.
- If an item is made from a mix of fabrics, then the iron should be set for the fabric with the lowest ironing to (for instance if an item is made from 60% polyester and 40% cotton, it should be ironed at the temperature used for ironing polyester “•”).
- If you cannot define the fabric the item is made from, find a place on it that is hidden while wearing and, on practice select the ironing temperature (always start at the lowest and gradually raise it until you get the desired result.)
- Corduroy and other fabrics that start glossy quickly should be ironed strictly in one direction (along the lines) with slight pressure.
- To avoid appearance of glossy spots on the synthetic and silk fabrics, iron them back-side.
SETTING THE IRONING TEMPERATURE
- Place the iron on the base (8).
- Insert the power plug into the outlet.
- Set the temperature regulator (11) to the required ironing temperature: “•”, “••”, “•••” or “max” (depending on the type
ENGLISH
of fabric), the (9) indicator will light up.
- When the soleplate temperature (13) reaches the desired temperature value, the (9) indicator will go out, you can start ironing.
Note: While steam ironing set the temperature «•••» or «MAX».
WATER SPRAYER
- You can dampen the fabric by pressing the spray button (4) several times.
- Make sure that there is enough water in the water tank (10).
IRONING
- Place the iron on the base (8).
- Insert the power plug into the outlet.
- Set the temperature regulator (11) to the required ironing temperature: “•”, “••”, “•••” or “max” (depending on the type of fabric), the (9) indicator will light up.
- When the soleplate temperature (1) reaches the desired temperature point, the (9) indicator will go out, you can start ironing.
- When you finish ironing set the (11) regulator to the "min" position.
- Pull the plug out of the socket and let the iron cool down completely.
STEAM IRONING
For steam ironing set the temperature regulator to «●●●» or «MAX». The iron has an anti-drop valve, which stops water supply, when the soleplate temperature is too low it prevents the appearance of drops out of the soleplate openings (13). While heating or cooling down of the soleplate (13), you will hear clicks of opening/closing of the anti-drop valve it means that the valve works normally.
- Place the iron on the base (8).
- Insert the power plug into the outlet.
-
Make sure that there is enough water in the water tank (10).
-
Set the temperature regulator (11) to the required ironing temperature: “●●●” or “max”, the (9) indicator will light up.
- When the soleplate temperature (13) reaches the desired temperature point, the (9) indicator will go out, you can start ironing.
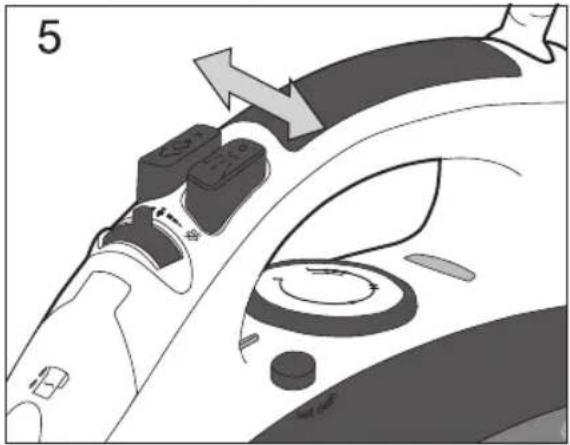
- Turn the steam supply regulator (3) to set the intensity of steaming, steam will start outgoing from the openings of the sole-plate (13).
- When you finish ironing set the (11) regulator to the "min" position and the steam supply regulator (3) to the left position.
- Pull the plug out of the socket and let the iron cool down completely.
ATTENTION!
If during the operation steam is not constantly supplied, check whether the temperature regulator (11) is set properly.
ADDITIONAL STEAM RELEASE
Additional steam release function is useful when ironing folds and can only be used at high ironing temperatures (when the iron temperature regulator (11) is set to “••••” or “max”).
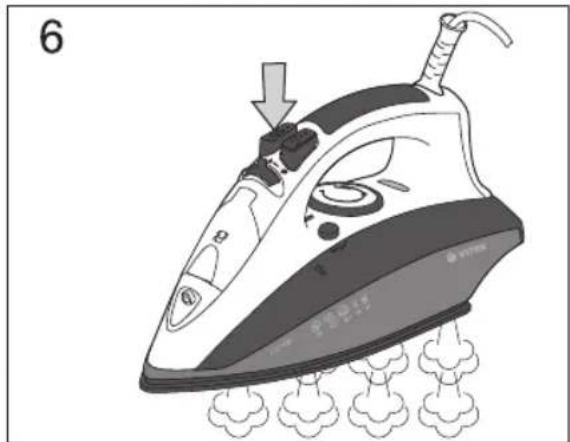
- When the additional steam release button (5) is pressed, steam will be vigorously released from the openings in the iron soleplate.
Note: In order to avoid leakage of water from steam openings, press the additional steam supply button (5) with 4-5 sec. interval.
STEAM CHAMBER CLEANING
To prolong lifetime of the iron we recommend cleaning the steam chamber, especially in the regions with “hard” water.
- Set the steam supply regulator (3) to the steam release OFF position.
- Fill the water tank (10) till the MAX mark (12).
ENGLISH
- Put the iron on the base (8).
- Insert the power plug into the outlet.
- Set the temperature regulator (11) to the MAX. temperature: "max" the (9) indicator will light up.
- When the soleplate temperature (13) reaches the desired temperature point, the (9) indicator will go out, you can start cleaning of the iron chamber.
- Unplug the iron, set the temperature regulator (11) to the «MIN» position.
- Pull the plug out of the socket.
- Hold the iron above the sink, press and hold the button (14).
- Boiling water together with scale will be throwing out from the openings in the iron soleplate (13).
- Slightly sway the iron back and forth, until water goes out of the water tank (10).
- Place the iron on the base (8) and let it cool down completely.
- When the soleplate (13) cools down completely, wipe it with a dry cloth.
- Before you take the iron for storing, make sure that there is no water in the water tank (10) and that the iron soleplate (13) is completely dry.
CARE AND CLEANING
- Before cleaning the iron, make sure that it is turned off and has cooled completely.
- Wipe the iron's outer surface with a damp cloth and then wipe dry.
- Sediment on the iron soleplate can be removed with a cloth soaked in vinegar-water solution.
- After removing sediment, polish the sole-plate with a dry cloth.
- Do not use abrasive substances to clean the soleplate and body of the iron.
- Avoid touching the iron soleplate with sharp metal objects.
STORAGE
- Turn the temperature regulator (11) anticlockwise till MIN position, set the steam
release regulator (3) to the steam release OFF position.
- Remove the power plug from the outlet.
- Open the water tank lid (2), turn over the iron and pour out any remaining water from the water tank (10).
- Close the lid (2).
- Set the iron vertically and allow it to cool completely.
- Keep iron at dry cool place in vertical position out of the reach of children.
TECHNICAL CHARACTERISTICS
Power requirements: 220-240 V \~ 50 Hz
Power consumption: 1850-2200 W
Specifications subject to change without prior notice.
MINIMUM SERVICE LIFE - 3 YEARS
GUARANTEE
Details regarding guarantee conditions can be obtained from the dealer from whom the appliance was purchased. The bill of sale or receipt must be produced when making any claim under the terms of this guarantee.

This product conforms to the EMC-Requirements as laid down by the Council Directive 89/336/EEC and to the Law Voltage Regulation (73/23 EEC)
DEUTSCH
BÜGELEISEN
BESCHREIBUNG
A production date of the item is indicated in the serial number on the technical data plate. A serial number is an eleven-unit number, with the first four figures indicating the production date. For example, serial number 0606xxxxxxx means that the item was manufactured in June (the sixth month) 2006.
DE
- ENGLISH
- STEAM IRON
- DESCRIPTION
- SAFETY MEASURES
- Before using the unit, please read the instructions carefully and pay attention to the illustrations.
- BEFORE USAGE
- Note:
- The iron's heating element is broken in during the first use; it is normal for a small amount of smoke to be released.
- CHOICE OF WATER
- FILLING THE WATER TANK
- IRONING TEMPERATURE
- SETTING THE IRONING TEMPERATURE
- Note: While steam ironing set the temperature «•••» or «MAX».
- WATER SPRAYER
- IRONING
- STEAM IRONING
- ATTENTION!
- ADDITIONAL STEAM RELEASE
- STEAM CHAMBER CLEANING
- CARE AND CLEANING
- STORAGE
- TECHNICAL CHARACTERISTICS
- MINIMUM SERVICE LIFE - 3 YEARS
- GUARANTEE
- DEUTSCH
- BÜGELEISEN
- BESCHREIBUNG
- DE
Brand : Vitek
Model : VT-1201 BN
Category : Iron