
DSN-6410 - Server D-LINK - Free user manual and instructions
Find the device manual for free DSN-6410 D-LINK in PDF.


| Product Type | Network Storage Server |
| Brand | D-Link |
| Model | DSN-6410 |
| Form Factor | Rackmount (1U) |
| Dimensions (W x H x D) | 440 x 43 x 500 mm |
| Weight | Approximately 10 kg |
| Power Supply | 250W AC, 100-240V, 50-60Hz |
| Processor | Intel Xeon E3-1220 v5 (quad-core, 3.0 GHz) |
| RAM | 8 GB DDR4 ECC (expandable up to 32 GB) |
| Storage Bays | 4 x 3.5" SATA III (hot-swappable) |
| Network Interfaces | 2 x Gigabit Ethernet (RJ-45) |
| USB Ports | 2 x USB 2.0, 2 x USB 3.0 |
| Cooling | 2 x 40mm system fans |
| Management | Web GUI, SSH, SNMP v2/v3 |
| RAID Support | RAID 0, 1, 5, 6, 10 |
| Supported Protocols | SMB/CIFS, NFS, iSCSI, FTP, AFP |
| Security Features | Encrypted access, firewall, LDAP integration |
| Operating System | Embedded Linux with D-Link firmware |
| Maintenance | Clean with dry cloth; avoid liquids; ensure proper ventilation |
| Spare Parts | Power supply unit, system fans, hard drives (standard SATA) |
| Reparability | User-replaceable: drives, PSU, memory modules |
Frequently Asked Questions - DSN-6410 D-LINK
User questions about DSN-6410 D-LINK
0 question about this device. Answer the ones you know or ask your own.
Ask a new question about this device
Download the instructions for your Server in PDF format for free! Find your manual DSN-6410 - D-LINK and take your electronic device back in hand. On this page are published all the documents necessary for the use of your device. DSN-6410 by D-LINK.
USER MANUAL DSN-6410 D-LINK
Building Networks for People
Quick Installation Guide DSN-6000 series
iSCSI IP SAN storage
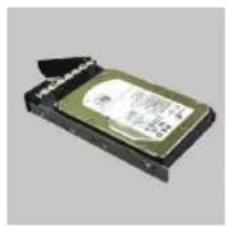
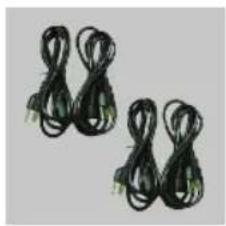
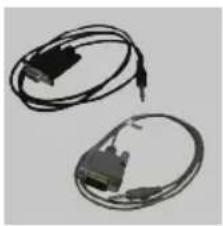
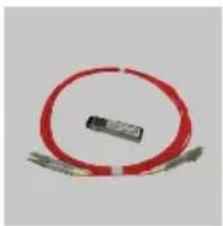
Package Contents
If any of the items are missing, please contact your reseller.
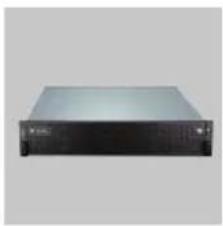
natural_image
Front view of a black server rack unit (no visible text or labels)IP SAN storage HDD trays
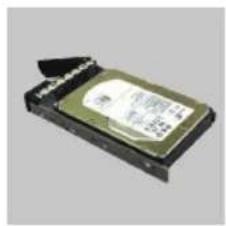
natural_image
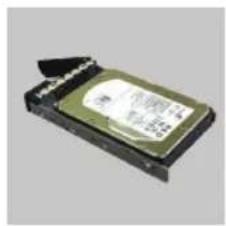
Exterior view of a beige hard drive (no visible text or symbols)ys
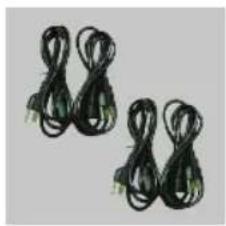
natural_image
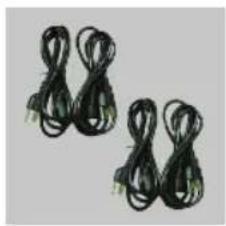
Two black cables with connectors, no visible text or symbolsPower cords
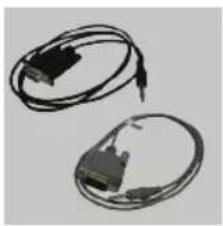
natural_image
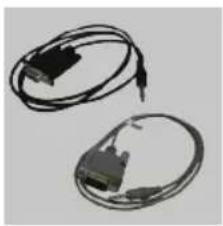
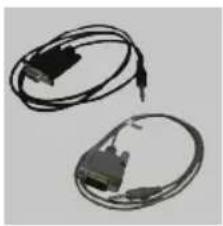
Two black cables with connectors, one open and one closed, shown against a plain background (no text or symbols visible)RS-232 cables
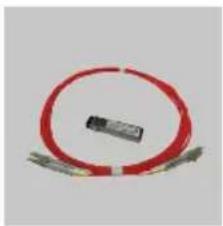
natural_image
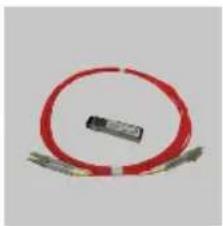
Pure electrical circuit lines without any symbolsand cable for DSN-6410/ 6420 only
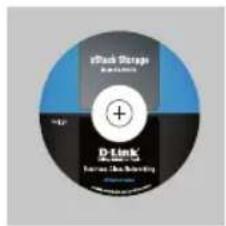
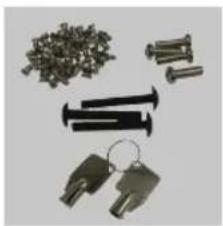
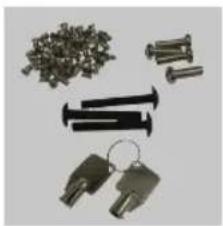
CD Keys, screws for
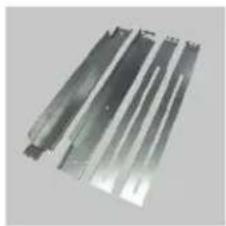
natural_image
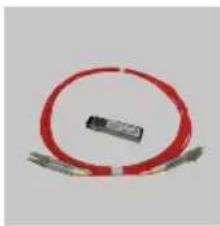
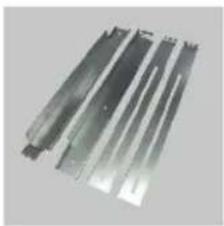
Metallic rectangular metal strips with no visible text or markingsRail kitGBIC transceiver
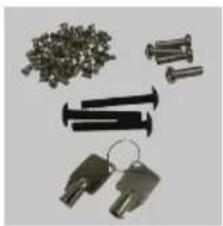
natural_image
Collection of mechanical parts including bolts, keys, and a chain (no text or symbols visible)drives and rail kit
Before installation
Before starting, prepare the following items.
- A host with a Gigabit Ethernet NIC or iSCSI HBA.
- CAT 5e, or CAT 6 network cables for management port and iSCSI data ports.
- Prepare storage system configuration plan.
- Prepare management port and iSCSI data ports network information. When using static IP, please prepare static IP addresses, subnet mask, and default gateway.
- 10GbE switches (recommended). Or 10GbE switches with LCAP / Trunking (optional).
- CHAP security information, including CHAP username and secret (optional).
Install drives
Note: Skip this section if you purchased a solution populated with drives.
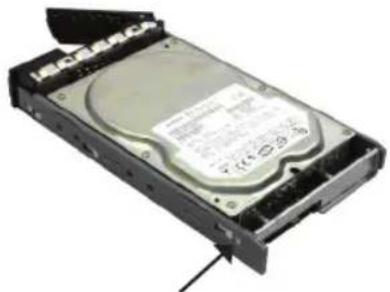
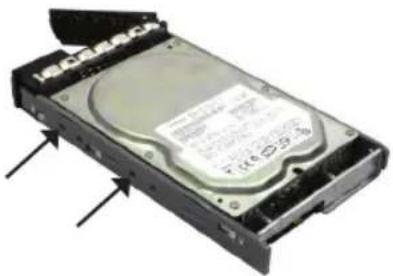
To install SAS or SATA drives with no Bridge Board use the front mounting holes:
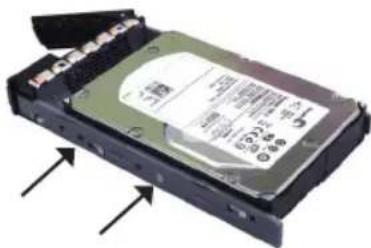
natural_image
Close-up of a hard disk drive with visible internal components and mounting bracket (no text or symbols)To install SATA drives with Bridge Board (DSN-654), fit the Bridge Board first.
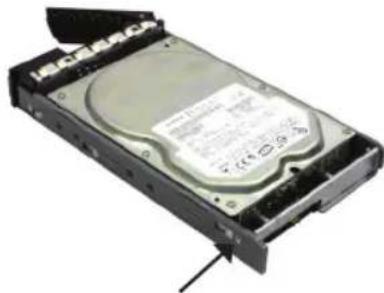
natural_image
Exterior view of a hard disk drive housing (no visible text or labels)Then install the drive using the rear mounting holes:
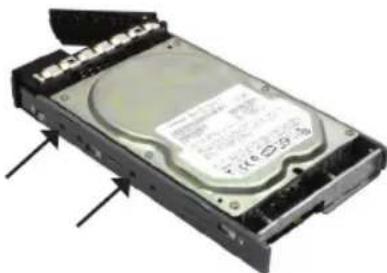
natural_image
Internal view of a hard disk drive with visible mounting bracket and drive casing (no text or symbols)Drive slot numbering
| Slot 1 Slot 4 Slot 7 | Slot 10 | ||
| Slot 2 Slot 5 Slot 8 | Slot 11 | ||
| Slot 3 Slot 6 Slot 9 | Slot 12 |
Hard drives can be installed into any slot in the enclosure. Slot numbering will be reflected in web UI.
Note: It is advisable to install at least one drive in slots 1 \~ 4. System event logs are saved to drives in these slots; If no drives are fitted the event logs will be lost in the event of a system reboot.
Deployment
Please refer to the following topology and have all the connections ready.
- Setup the hardware connection before powering on servers. Connect console cable, management port cable, and iSCSI data port cables in advance.
- In addition, installing an iSNS server is recommended for dual controller system.
- Power on IP SAN storage and JBOD (optional) first, and then power on hosts and iSNS server.
- To ensure MPIO is set-up automatically it is recommended that you log on the target twice (from controller 1 then controller 2).
Note: iSNS server is recommended for dual controller system.
DSN-6110: 1GbE to SAS/ SATA IP SAN storage, Single controller.
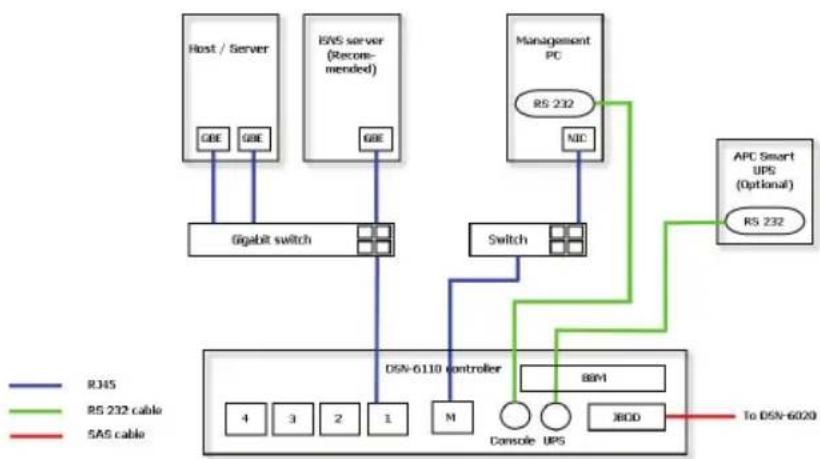
flowchart
graph TD
    A["Host / Server"] -->|GBE| B["Gigabit switch"]
    C["EVS server (Recommended)"] -->|GBE| B
    D["Management PC"] -->|RS 232| E["Switch"]
    F["APC Smart UPS (Optional)"] -->|RS 232| E
    B --> G["DSN-6110 controller"]
    E --> G
    G --> H["4"]
    G --> I["3"]
    G --> J["2"]
    G --> K["1"]
    H --> L["Console UPS"]
    I --> L
    J --> L
    K --> L
    L --> M["BBM"]
    M --> N["JBDD"]
    N --> O["To DSN-6020"]
    style A fill:#f9f,stroke:#333
    style C fill:#f9f,stroke:#333
    style D fill:#f9f,stroke:#333
    style F fill:#f9f,stroke:#333
    style G fill:#ccf,stroke:#333
    style H fill:#ccf,stroke:#333
    style I fill:#ccf,stroke:#333
    style J fill:#ccf,stroke:#333
    style K fill:#ccf,stroke:#333
    style L fill:#ccf,stroke:#333
    style M fill:#cfc,stroke:#333
    style N fill:#cfc,stroke:#333
DSN-6120: 1GbE to SAS/ SATA IP SAN storage, Dual redundant controller.
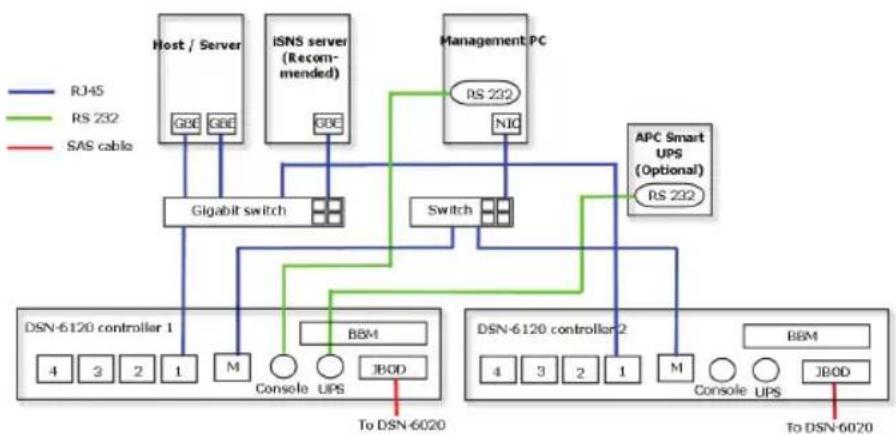
flowchart
graph TD
    A["Host / Server"] --> B["Gigabit switch"]
    C["ISNS server (Recommended)"] --> D["Switch"]
    E["Management PC"] --> F["Switch"]
    G["APC Smart UPS (Optional)"] --> H["Switch"]
    I["DSN-6120 controller 1"] --> J["Console UPS"]
    K["DSN-6120 controller 2"] --> L["Console UPS"]
    M["SAS cable"] --> N["To DSN-6020"]
    O["RJ45"] --> P["G3E G3E"]
    Q["RS 232"] --> R["G3E"]
    S["BBM"] --> T["M"]
    U["JBOD"] --> V["To DSN-6020"]
    W["RS 232"] --> X["NJC"]
    Y["4 3 2 1"] --> Z["M"]
    AA["4 3 2 1"] --> AB["M"]
    AC["4 3 2 1"] --> AD["M"]
    AE["4 3 2 1"] --> AF["M"]
    AG["4 3 2 1"] --> AH["M"]
    AI["4 3 2 1"] --> AJ["M"]
    AK["4 3 2 1"] --> AL["M"]
    AM["4 3 2 1"] --> AN["M"]
    AO["4 3 2 1"] --> AP["M"]
    AQ["4 3 2 1"] --> AR["M"]
    AS["To DSN-6020"] --> AT["BBM"]
    AU["To DSN-6020"] --> AV["JBOD"]
DSN-6410: 10GbE to SAS/ SATA IP SAN storage, Single controller.
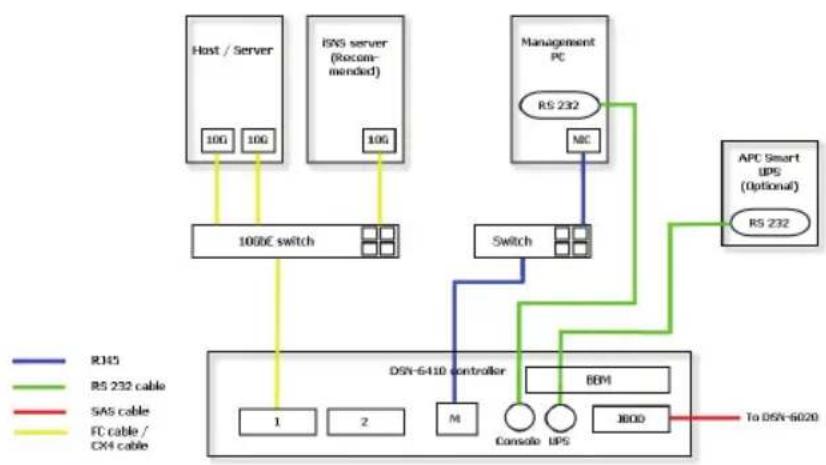
flowchart
graph TD
    A["Host / Server"] -->|10G 10G| B["1060E switch"]
    C["ISNS server (Recommended)"] -->|10G| B
    D["Management PC"] -->|RS 232| E["Switch"]
    F["APC Smart UPS (Optional)"] -->|RS 232| E
    G["DSV-6410 controller"] --> H["1"]
    G --> I["2"]
    G --> J["M"]
    G --> K["BBM"]
    G --> L["Console UPS"]
    G --> M["J800"]
    G --> N["To DSV-6020"]
    style A fill:#f9f,stroke:#333
    style C fill:#f9f,stroke:#333
    style D fill:#f9f,stroke:#333
    style F fill:#f9f,stroke:#333
    style G fill:#ccf,stroke:#333
    style H fill:#cff,stroke:#333
    style I fill:#cff,stroke:#333
    style J fill:#cff,stroke:#333
    style K fill:#cff,stroke:#333
    style L fill:#cff,stroke:#333
    style M fill:#cff,stroke:#333
    style N fill:#ffc,stroke:#333
DSN-6420: 10GbE to SAS/ SATA IP SAN storage, Dual redundant controller.
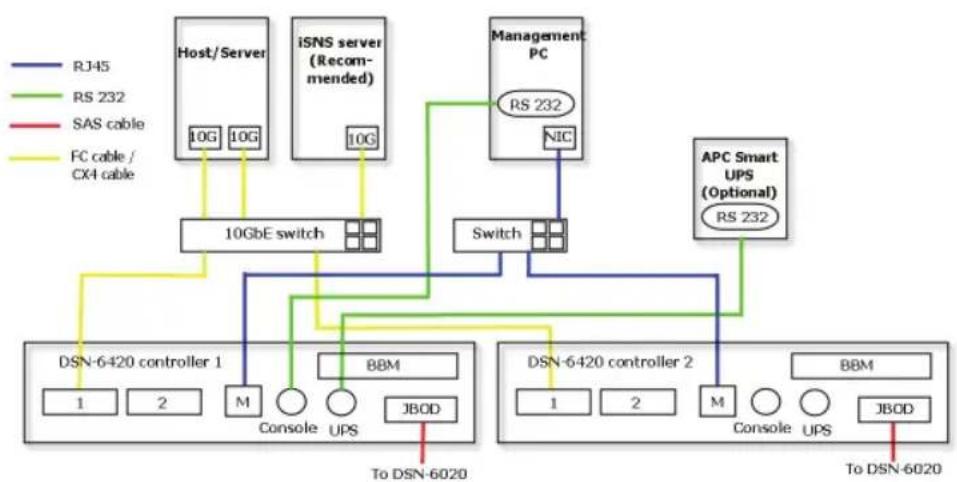
flowchart
graph TD
    A["DSN-6420 controller 1"] -->|1| B["1"]
    A -->|2| C["2"]
    D["DSN-6420 controller 2"] -->|1| E["1"]
    D -->|2| F["2"]
    G["DSN-6420 controller 1"] -->|M| H["M"]
    I["DSN-6420 controller 2"] -->|M| J["M"]
    K["DSN-6420 controller 1"] -->|Console| L["UPS"]
    M["DSN-6420 controller 2"] -->|Console| N["UPS"]
    O["DSN-6420 controller 1"] --> P["JBOD"]
    Q["DSN-6420 controller 2"] --> R["JBOD"]
    S["DSN-6420 controller 1"] --> T["10GbE switch"]
    U["DSN-6420 controller 2"] --> V["10GbE switch"]
    W["iSNS server (Recommended)"] --> X["10G"]
    Y["Management PC"] --> Z["RS 232"]
    AA["RJ45"] --> AB["10G"]
    AC["RS 232"] --> AD["10G"]
    AE["SAS cable"] --> AF["10G"]
    AG["FC cable / CX4 cable"] --> AH["10GbE switch"]
    AI["APC Smart UPS (Optional) RS 232"] --> AJ["RS 232"]
    AK["To DSN-6020"] --> AL["To DSN-6020"]
Configuration
1.Web UI
The D-Link DSN-6000 family includes a simple to use Graphical User Interface (GUI) for integration and management. Be sure to connect the LAN cable, open a browser and enter:
http://192.168.0.32
A dialog box for authentication will pop up.
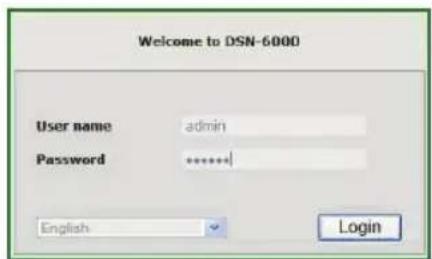
User name: admin
Default password: 123456
After login, choose the functions that list on the left hand side to start your configuration.
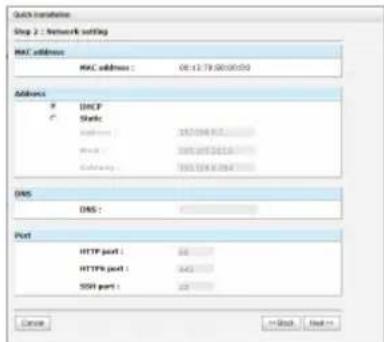
2. Quick installation
Please make sure that there are some free drives installed in this system. Please check the hard drive details in "/Volume configuration / Physical disk".
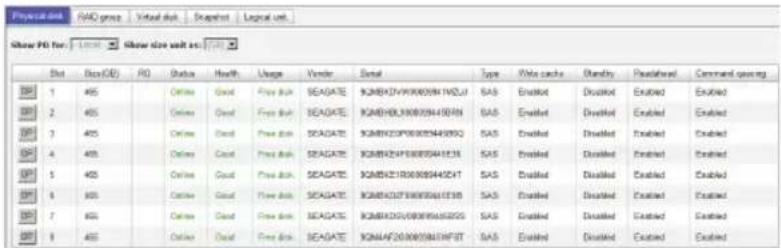
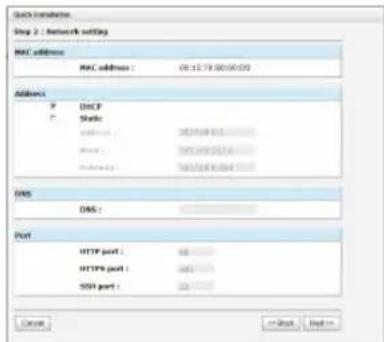
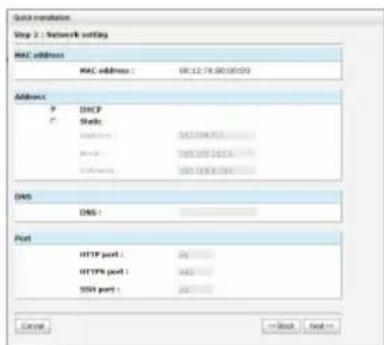
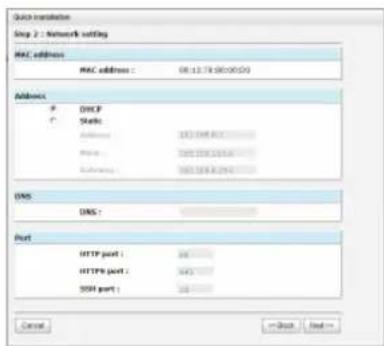
Step1: Click the "Quick installation"; follow the steps to set up system name and date / time. Step2: Confirm the management port and DNS IP addresses are correct, and click "Next".
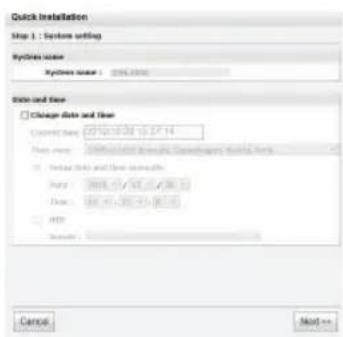
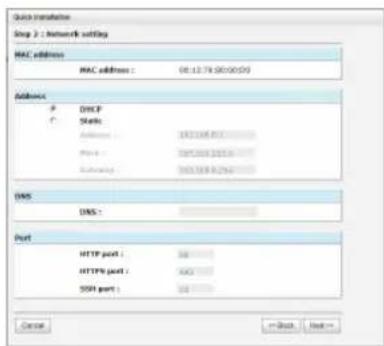
Step 1 Step 2
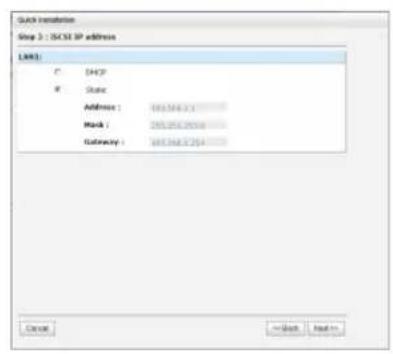
Step 3: Set up the data port IP and click "Next".
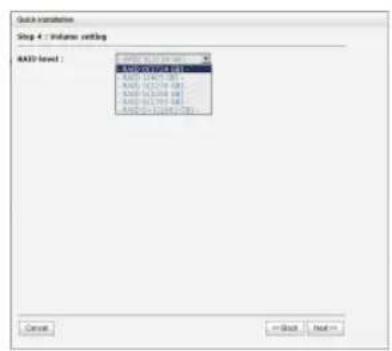
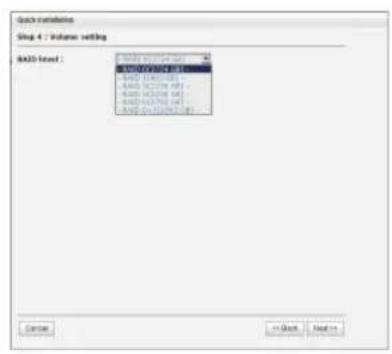
Step 4: Set up the RAID level and volume size and click "Next".
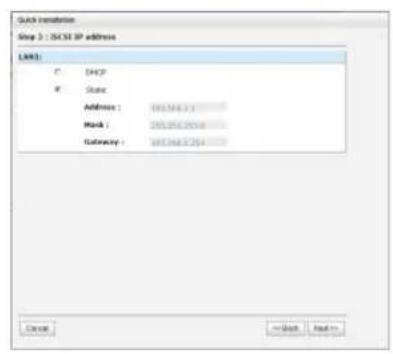
Step 3
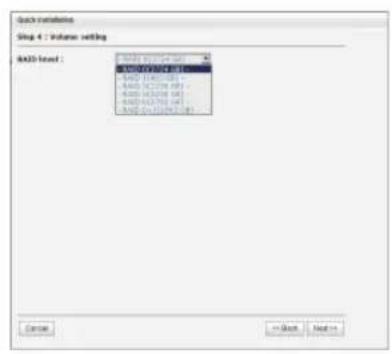
Step 4
Step 5: Check all items, and click "Finish".
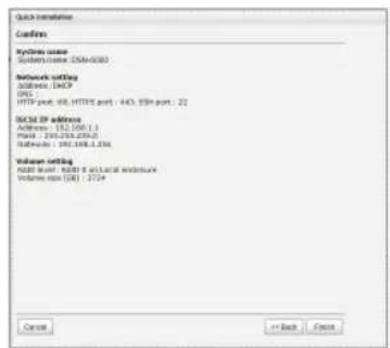
Step 5
Step 6: Done.
3.Logon Microsoft iSCSI initiator
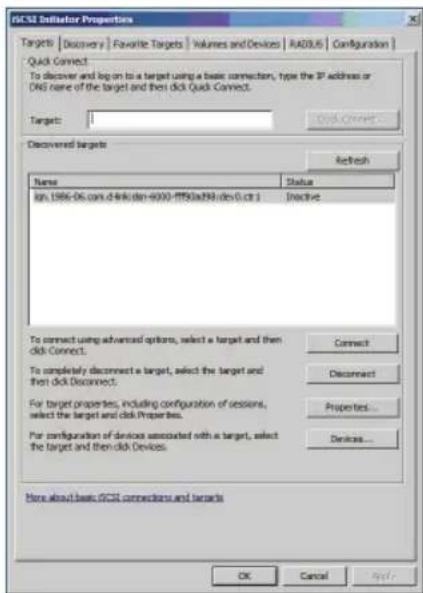
Here are the step by step instructions to setup Microsoft iSCSI Initiator. Please visit Microsoft website for latest iSCSI initiator. This example is based on Microsoft Windows Server 2008 R2.
Connect
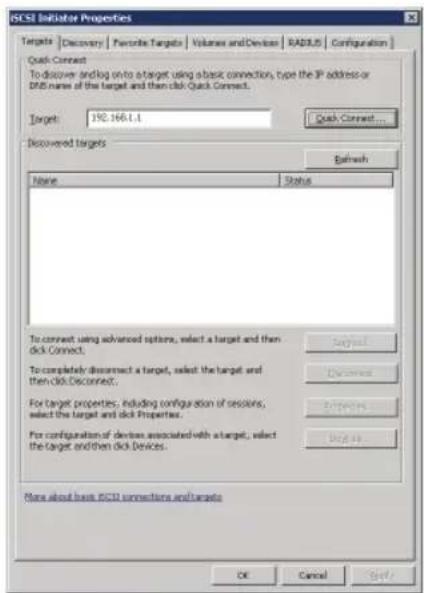
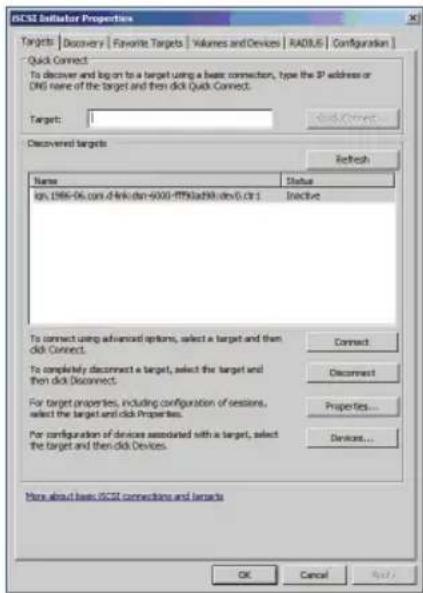
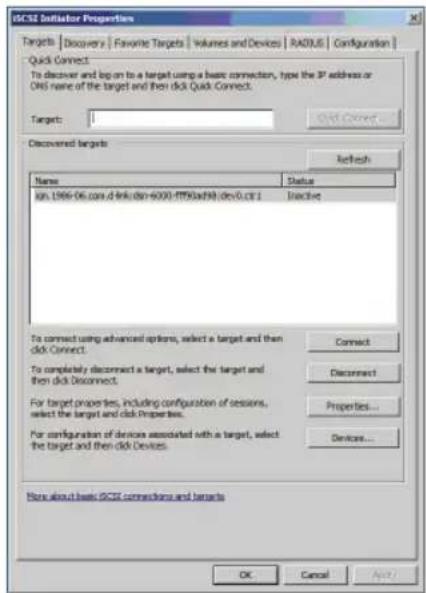
- Run Microsoft iSCSI Initiator.
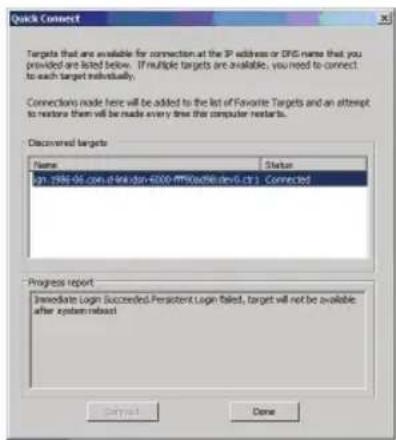
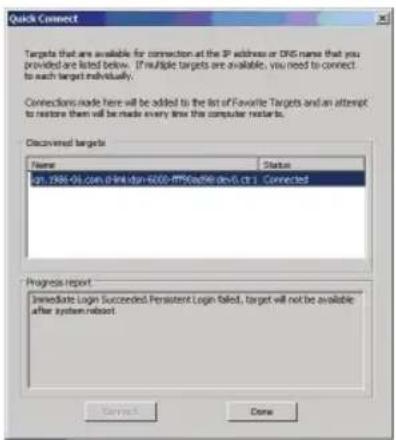
2.Input IP address or DNS name of the target. And then click "Quick Connect".
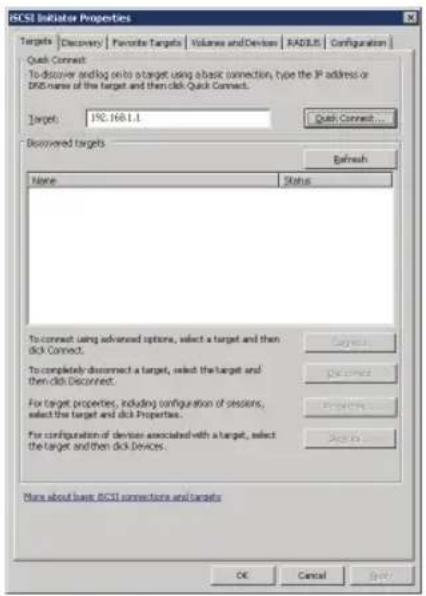
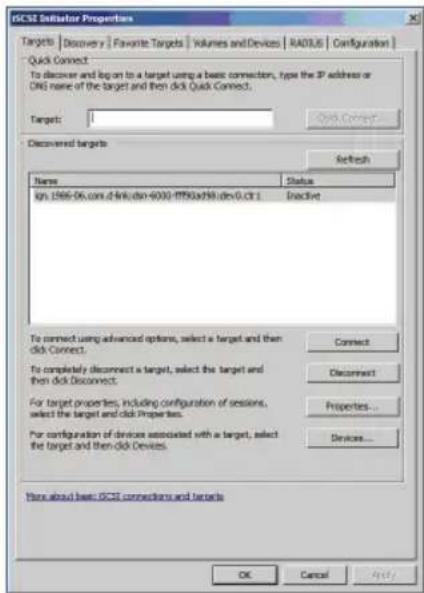
3.Click "Done".
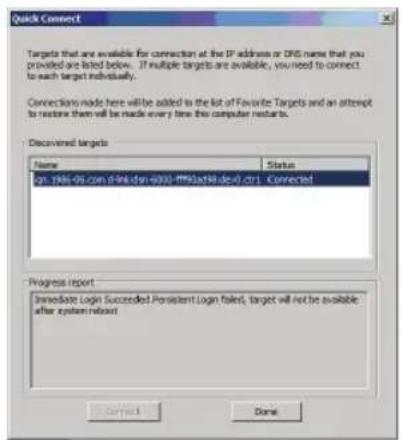
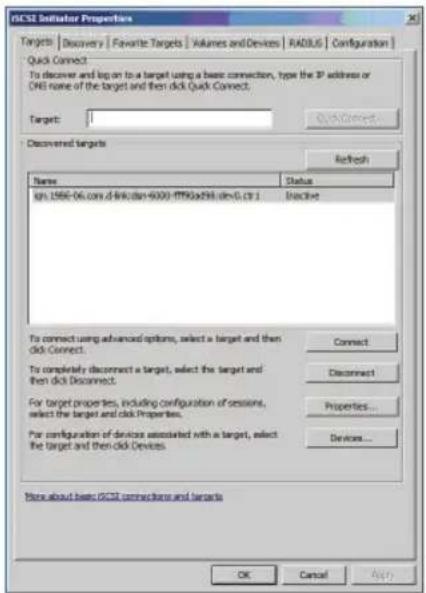
- Your Computer can now connect to an iSCSI disk.
TECHNICAL SUPPORT
You can find software updates and user documentation on the D-Link website.
Tech Support for customers in
Australia:
Tel: 1300-766-868
24/7 Technical Support
Web: http://www.dlink.com.au
E-mail: support@dlink.com.au
India:
Tel: +91-22-27626600
Toll Free 1800-22-8998
Web: www.dlink.co.in
E-Mail: helpdesk@dlink.co.in
Singapore, Thailand, Indonesia, Malaysia, Philippines, Vietnam:
Singapore - www.dlink.com.sg
Philippines - www.dlink.com.ph
Vietnam - www.dlink.com.vn
Korea:
Tel : +82-2-2028-1810
Monday to Friday 9:00am to 6:00pm
24/7 Technical Support
Web: http://www.dlink.co.nz
E-mail: support@dlink.co.nz
South Africa and Sub Sahara Region:
Tel: +27-12-665-2165
08600 DLINK (for South Africa only)
Monday to Friday 8:30am to 9:00pm South Africa Time
Web: http://www.d-link.co.za
E-mail: support@d-link.co.za
Saudi Arabia (KSA):
Tel: +966 01 217 0008
Fax: +966 01 217 0009
Saturday to Wednesday 9.30AM to 6.30PM
Thursdays 9.30AM to 2.00 PM
E-mail: Support.sa@dlink-me.com
D-Link Middle East - Dubai, U.A.E.
Plot No. S31102,
Jebel Ali Free Zone South,
P.O.Box 18224, Dubai, U.A.E.
Tel: +971-4-8809022
Fax: +971-4-8809066 / 8809069
Technical Support: +971-4-8809033
General Inquiries: info.me@dlink-me.com
Tech Support: support.me@dlink-me.com
Egypt
1, Makram Ebeid Street - City Lights Building
Nasrcity - Cairo, Egypt
Floor 6, office C2
Tel.: +2 02 26718375 - +2 02 26717280
Technical Support: +2 02 26738470
General Inquiries: info.eg@dlink-me.com
Tech Support: support.eg@dlink-me.com
Kingdom of Saudi Arabia
Office # 84
Al Khaleej Building ( Mujamathu Al-Khaleej)
Opp. King Fahd Road, Olaya
Riyadh - Saudi Arabia
Tel: +966 1 217 0008
Technical Support:
+966 1 2170009 / +966 2 6522951
General Inquiries: info.sa@dlink-me.com
Tech Support: support.sa@dlink-me.com
Pakistan
Islamabad Office:
61-A, Jinnah Avenue, Blue Area,
Suite # 11, EBC, Saudi Pak Tower,
Islamabad - Pakistan
Tel.: +92-51-2800397, 2800398
Fax: +92-51-2800399
Karachi Office:
D-147/1, KDA Scheme # 1,
Opposite Mudassir Park, Karsaz Road,
Karachi – Pakistan
Phone: +92-21-34548158, 34326649
Fax: +92-21-4375727
Technical Support: +92-21-34548310, 34305069
General Inquiries: info.pk@dlink-me.com
Tech Support: support.pk@dlink-me.com
TECHNICAL SUPPORT
Iran
Unit 5, 5th Floor, No. 20, 17th Alley, Bokharest
St., Argentine Sq.,
Tehran IRAN
Postal Code: 1513833817
Tel: +98-21-88880918,19
+98-21-88706653,54
General Inquiries: info.ir@dlink-me.com
Tech Support: support.ir@dlink-me.com
ISRAEL
בִרְרָה לַעֹר
20
49348 n"ɔ,170n n"ɔ
7060.τ.π
073-277-11-77 :1970
Web:www.dlink.com.tr
Teknik Destek: support.tr@dlink.com.tr
Notes
D-Link®
Building Networks for People
natural_image
Front view of a black server rack unit (no visible text or labels)natural_image
Exterior view of a beige hard drive (no visible text or symbols)natural_image
Two black cables with green connectors, no visible text or symbolsКабели питания
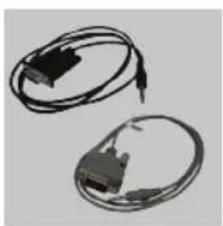
natural_image
Two black cables with connectors, one open and one closed, against a plain background (no text or symbols visible)Кабели RS-232
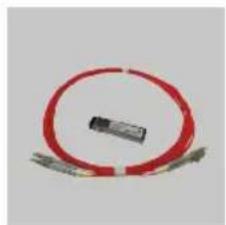
natural_image
Pure electrical circuit lines without any symbolsnatural_image
Close-up of metallic rectangular metal strips with no visible text or markingsnatural_image
Collection of mechanical parts including bolts, screws, and key holders (no text or symbols visible)natural_image
Close-up of a hard disk drive with visible internal components and mounting features (no text or symbols)РУССКИЙ
natural_image
Exterior view of a hard disk drive (no visible text or labels)natural_image
Internal view of a hard disk drive with mounting bracket and drive casing (no visible text or labels)Нумерация слотов
War 1 War 2
War 3
War 4

War 5
Шаг 6: Выполнено.
Building Networks for People
natural_image
Front view of a black server rack unit (no visible text or labels)natural_image
Exterior view of a hard drive (no visible text or symbols)natural_image
Two black cables tied in a row against a plain gray background (no text or symbols visible)Cable de Poder
natural_image
Two black cables with connectors, one open and one closed, against a plain background (no text or symbols visible)Cables RS-232
natural_image
Pure electrical circuit lines without any symbolsnatural_image
Metallic rectangular metal strips with no visible text or markingsKit de RielTransceiver
natural_image
Collection of mechanical parts including bolts, keys, and a chain (no text or symbols visible)natural_image
Close-up of a hard disk drive with visible internal components and mounting bracket (no text or symbols)natural_image
Exterior view of a hard disk drive housing (no visible text or labels)natural_image
Internal view of a hard disk drive housing with mounting bracket and drive casing (no visible text or labels)Paso 1 Paso 2
iSCSI IP SAN storage
包裝內容
natural_image
Front view of a black server rack unit (no visible text or labels)IP SAN storage
natural_image
Exterior view of a beige hard drive (no visible text or symbols)硬碟盤(硬碟為選購)
natural_image
Three black cables with white connectors, arranged in a row (no text or symbols visible)電源供應器
natural_image
Two black cables with connectors, one open and one closed, against a plain background (no text or symbols visible)RS-232線
natural_image
Pure electrical circuit lines without any symbols僅適用於DSN-6410/6420)
光碟片 鑰匙,螺絲機架鎖GBIC transceiver(
natural_image
Metallic rectangular metal strips with no visible text or markings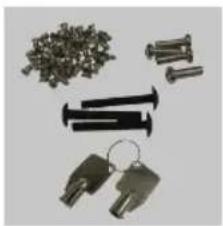
natural_image
Collection of mechanical parts including bolts, keys, and a chain (no text or symbols visible)安裝前注意事項
安裝前,請先準備下列品項:
natural_image
Close-up of a hard disk drive with visible internal components and mounting holes (no text or symbols)先試Bridge Board (DSN-654)再將硬碟固定安裝
natural_image
Exterior view of a hard disk drive housing with visible internal components and mounting bracket (no text or symbols)請用螺絲將硬碟固定後完成安裝
natural_image
Internal view of a hard disk drive with mounting bracket and drive casing (no visible text or labels)硬碟插槽排序
步驟 1
步驟 2
步驟4
步驟5
步驟 6:完成
- 進入 Microsoft iSCSI initiator
中文
- 點選 “Done”
- 您的電腦已連線至 iSCSI 磁碟
Building Networks for People
Panduan Instalasi Singkat DSN-6000 Series
iSCSI IP SAN Storage
Isi Paket
natural_image
Front view of a black server rack unit (no visible text or labels)IP SAN Storage Penampan HDD
natural_image
Exterior view of a beige hard drive (no visible text or symbols)ban HDD
natural_image
Three black cables with white connectors, arranged in a row (no text or symbols visible)Kabel listrik
natural_image
Two black cables with connectors, one open and one closed, against a plain background (no text or symbols visible)Kabel RS-232
natural_image
Pure diagram of a red circular component with two gray connectors, no text or symbols present.natural_image
Metallic metal strips with grooves, no visible text or markingsPerangkat Rel
natural_image
Collection of mechanical parts including bolts, screws, and key holders (no text or symbols visible)natural_image
Close-up of a hard disk drive with visible internal components and mounting bracket (no text or symbols)natural_image
Exterior view of a hard disk drive (no visible text or labels)natural_image
Internal view of a hard disk drive with mounting bracket and drive casing (no visible text or labels)Sistem penomoran lubang hard disk
| Lubang 1 Lubang 4 | Lubang 7 Lubang 10 | |
| Lubang 2 Lubang 5 | Lubang 8 Lubang 11 | |
| Lubang 3 Lubang 6 | Lubang 9 Lubang 12 |
Langkah 1
Langkah 2
Langkah 3: Atur data mengenai alamat IP kemudian klik "Next". Langkah 4: Atur level RAID dan ukuran volume kemudian klik "Next".
Langkah 3
Langkah 4
- Klik "Done".
- Komputer anda sekarang terhubung dengan disk iSCSI.
DUKUNGAN TEKNIS
- Quick Installation Guide DSN-6000 series
- Package Contents
- Before installation
- Install drives
- Deployment
- Configuration
- 1.Web UI
- Quick installation
- State
- 3.Logon Microsoft iSCSI initiator
- Connect
- TECHNICAL SUPPORT
- Tech Support for customers in
- Australia:
- India:
- Singapore, Thailand, Indonesia, Malaysia, Philippines, Vietnam:
- Korea:
- South Africa and Sub Sahara Region:
- Saudi Arabia (KSA):
- D-Link Middle East - Dubai, U.A.E.
- Egypt
- Kingdom of Saudi Arabia
- Pakistan
- Iran
- ISRAEL
- Notes
- D-Link®
- 包裝內容
- 安裝前注意事項
- 安裝前,請先準備下列品項:
- 中文
- Panduan Instalasi Singkat DSN-6000 Series
- Isi Paket
- DUKUNGAN TEKNIS
Brand : D-LINK
Model : DSN-6410
Category : Server