
First Kitchen 6683 - Food processor OBH NORDICA - Free user manual and instructions
Find the device manual for free First Kitchen 6683 OBH NORDICA in PDF.


| Product Type | Food Processor |
| Brand | OBH Nordica |
| Model | First Kitchen 6683 |
| Dimensions (approx.) | 30 x 25 x 40 cm |
| Weight (approx.) | 4.5 kg |
| Power Supply | 220-240 V ~ 50/60 Hz |
| Power Consumption | 800 W |
| Bowl Capacity | 1.5 L (main bowl), 1 L (blender) |
| Speed Settings | Variable + Pulse function |
| Main Functions | Chopping, blending, mixing, kneading, slicing, shredding |
| Accessories Included | Stainless steel chopping blade, dough hook, whisk, slicing/shredding discs set |
| Material | Plastic body, stainless steel blades, glass blender jug |
| Safety Features | Safety lock on lid, non-slip feet, overload protection |
| Cleaning | Removable parts dishwasher safe (top rack); wipe motor unit with damp cloth |
| Maintenance | Check blades for sharpness regularly; store accessories dry |
| Spare Parts Availability | Bowls, blades, discs available via OBH Nordica service centers |
| Repairability | Repairable by authorized service; user-replaceable accessories |
| Country of Origin | China (estimated) |
Frequently Asked Questions - First Kitchen 6683 OBH NORDICA
User questions about First Kitchen 6683 OBH NORDICA
0 question about this device. Answer the ones you know or ask your own.
Ask a new question about this device
Download the instructions for your Food processor in PDF format for free! Find your manual First Kitchen 6683 - OBH NORDICA and take your electronic device back in hand. On this page are published all the documents necessary for the use of your device. First Kitchen 6683 by OBH NORDICA.
USER MANUAL First Kitchen 6683 OBH NORDICA
First Kitchen Kitchen machine
Powerful with perfect results
natural_image
Modern kitchen stand mixer with whisk and bowl, no visible text or symbols
OBH NORDICA
First Kitchen Kitchen machine

natural_image
Black and white photo of a modern kitchen stand mixer with control panel and side dish (no visible text or symbols)OBH Nordica Denmark A/S
Ole Lippmanns Vej 1
2630 Taastrup
Tlf.: 43 350 350
www.obhnordica.dk
Tekniske data
OBH Nordica 6681
OBH Nordica Sweden AB
Box 58
163 91 Spånga
Tel 08-445 79 00
www.obhnordica.se
Tekniska data
OBH Nordica 6681
220-240V växelström
700 watt
Rett Deler Hastighet
OBH Nordica Norway AS
Postboks 5334, Majorstuen
0304 Oslo
Tlf: 22 96 39 30
www.obhnordica.no
Tekniske data
OBH Nordica 6681
Laitteen osat
Before you use the kitchen machine for the first time, please read the instruction manual carefully and save it for future use.
Wash all removable parts in warm water with a washing-up liquid before use.

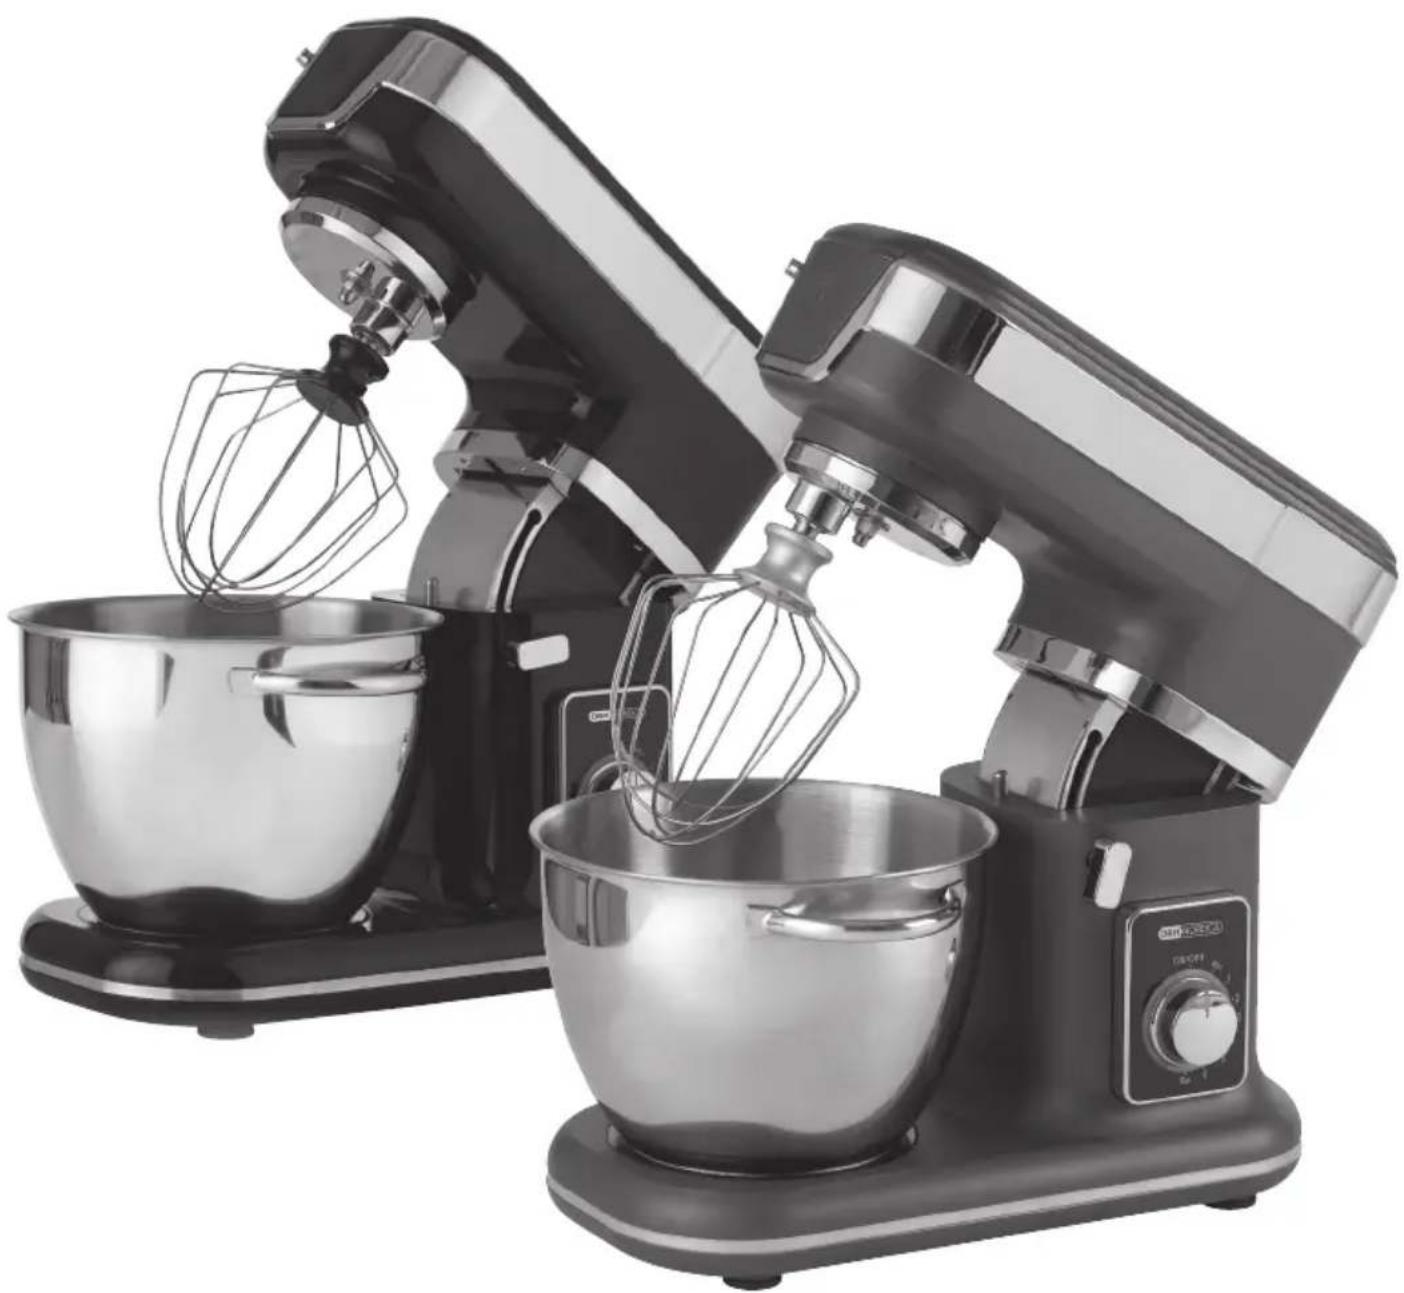
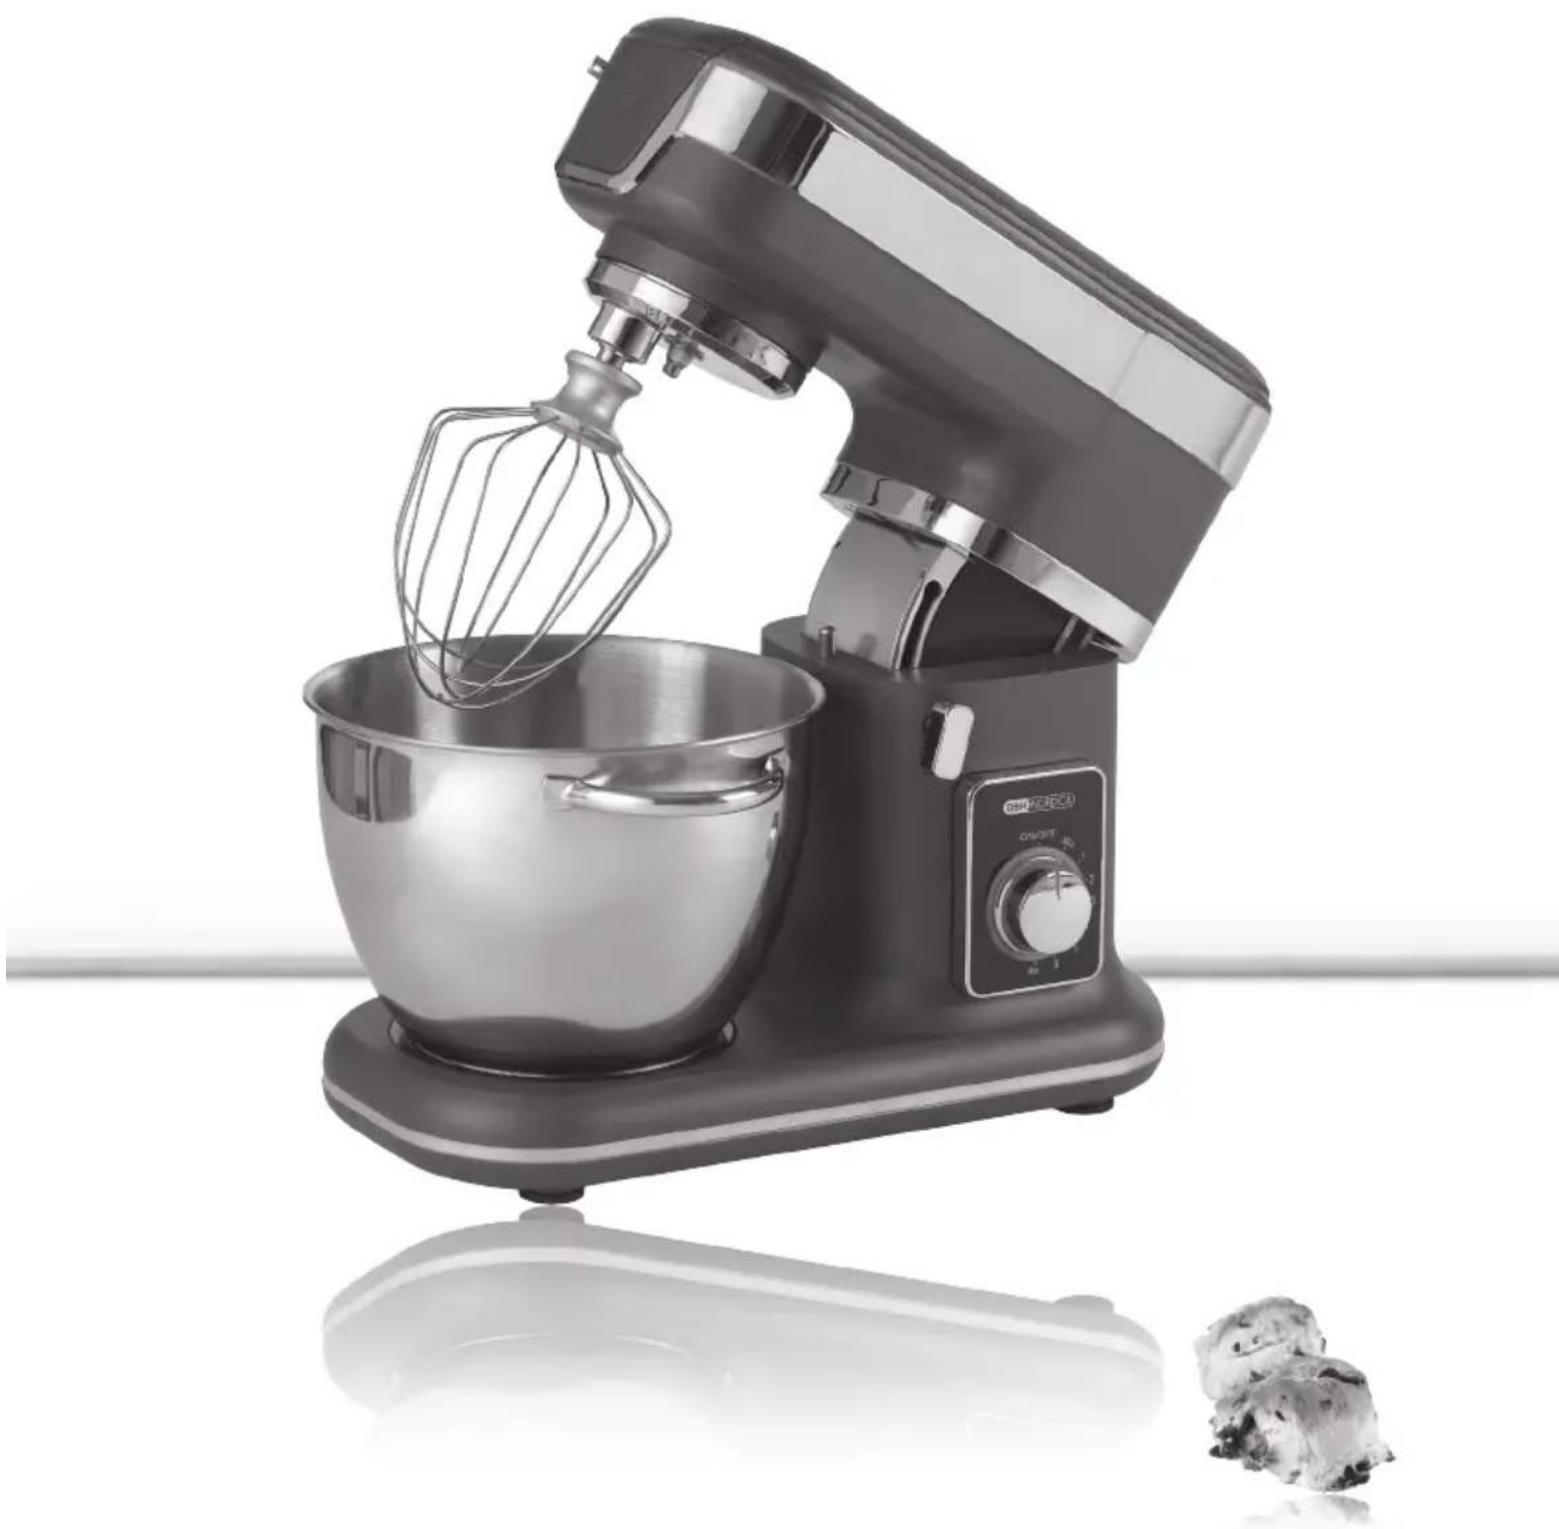
Parts of the appliance
- Mixer head
- Speed selector
- Coupling for mounting of parts (not shown)
- Release handle for release of mixer head
- Removable cover for coupling to meat grinder and vegetable grinder
- Release button for cover and meat grinder and vegetable grinder
- Bowl
- Lid
- Bracket for bowl
-
The kitchen machine comprises the following accessories:
-
Spatula (for shortcrust pastry, cake pastry, mashed potatoes, cake stuffing, glazing etc.)
- Whisk (for whipping e.g. egg, cream, pancake and layer cake pastry, soufflé)
- Dough hook (for yeast dough)
How to use the kitchen machine
Clean bowl and accessories in hot water with added mild detergent before use. Rinse well and wipe thoroughly.
Put the kitchen machine on a plane and stable surface. Set the speed selector at ON/OFF and make sure that the kitchen machine is not connected to a power socket, when mounting the bowl and accessories. Press the release handle and place the mixer head in vertical position. Position the bowl in the bowl bracket on the kitchen machine. Turn the bowl clockwise until it is firmly attached to the bowl bracket.
Next, mount the wanted accessory (spatula, dough hook or whisk) on the coupling for mounting of parts, press the part upwards and turn it counterclockwise to secure it on the coupling.
Add ingredients. Take care not to overfill the machine – Max quantity is 2 kg. Press the release handle to lower the mixer head – keep your hand on the mixer head when lowering it into the bowl and apply the plug to a socket. Mount the lid on the bowl. Switch on the machine by turning the speed selector to the wanted speed between 1 and 6. See instructions for selection of speed on the following page. Always be sure to have ingredients in the bowl before switching on the kitchen machine
Follow recipe instructions. When you are finished with the recipe, set the speed switch to 0 and disconnect the plug from the power socket. Remove the lid from the bowl. Press the release button and place the mixer head in a vertical position and remove the accessory. Remove the bowl from the bracket by turning the bowl counter-clockwise.
Note: When mixing heavy types of dough etc. the machine should only be used for 10 minutes at a time and then let it cool off for ten minutes.
Clean the parts as described in the section "Cleaning and maintenance".
Overheating
The kitchen machine comprises a thermostat to ensure a long life of the appliance and which will be activated if the motor gets overcharged. In case the thermostat is activated, switch off the appliance and disconnect the plug from the power socket and wait for about 20 minutes before switching on the appliance again.
Setting the speed
Apply the plug to a power socket and switch on. It is recommended that you always start at the lowest speed and then increase the speed a little at a time. Put the lid on the bowl in order to avoid splashes. See the table below as to recommended settings of speed.
Using the mixer accessories
The guide below offers suggestions for speed settings. Start at speed level 1 and then increase speed in accordance with the recipe.
Recipe Accessory Speed
Cakes (mixtures and homemade) Spatula 3
Shortcrust pastry Spatula 3
Mashed potatoes Spatula 4
Glazing Spatula 4
Egg whites (for meringues etc.) Whisk 6
Whipped cream
Blancmange powder
Bread
Whisk 6
Whisk 1
Dough hook
3
Put all liquid ingredients in the bowl and then add the dry ingredients. Always stay near the kitchen machine during use. Always add ingredients as close to the sides of the bowl as possible and not directly into the rotating tool.
First, put all liquid ingredients in the bowl and then add the dry ingredients. Always stay near the kitchen machine during use. If the lid is not mounted during whipping etc., start at low
speed until the ingredients are well mixed. This will reduce the risk of the contents splashing from the bowl. Always add ingredients as close to the sides of the bowl as possible and not directly into the rotating tool.
When preparing cake mixtures, use speed level 2 for low speed, speed level 4 for medium speed, and speed level 6 for high speed. To obtain the best results, mixtures should be processed for the amount of time stated on the package.
Mixtures containing large amounts of liquid must be processed at low speed to avoid splashing. Increase speed when the mixture has thickened.
For mixing thin types of dough choose the medium speed. Switch off the kitchen machine regularly to clean the sides by using a rubber spatula.
Shortcrust pastry is one of the thickest types of dough, but you can make the mixing easier by:
- Adding butter or margarine of room temperature
- Adding the ingredients one at a time and mixing the ingredients well before adding a new ingredient.
- Adding one cup of flour at a time.
If there are difficulties in mixing the dough, increase the speed.
If by mistake something gets stuck in the tool, or the motor stops, switch off the machine and remove the plug from the power socket. Solve the problem or reduce the amount in the bowl. Let the motor cool off for 5 minutes before the kitchen machine is switched on again.
If by mistake something gets stuck in the tool by mistake, or the motor stops, press the on/off button and remove the plug from the power socket. Solve the problem or reduce the amount in the bowl. Allow the motor to cool off for 5 minutes before the kitchen machine is switched on again.
Use the whisk for whipping egg whites, cream, and similar. The whisk is not suited for thick mixtures such as dough and mashed potatoes.
The kitchen machine can whip a minimum of 2 large egg whites / 1 cup of cream. Whipping is more efficient when the whisk is completely submerged in the liquid. A hand mixer is recommended for smaller amounts.
Egg whites
Put the egg whites into the completely clean bowl. Attach the bowl to the bowl bracket and whip the egg whites. Avoid splashing by gradually increasing the speed to the wanted speed level. See guide below.
Amount Speed
2-4 egg whites 5 - 6
6 or more egg whites 4 - 5
Egg whites are whipped quickly. Keep an eye on the egg whites to avoid whipping them for too long.
Whipped cream
Pour cold cream into the cooled bowl. Put the bowl into the bowl bracket and whip. Avoid splashing by gradually increasing the speed to the wanted rate.
Amount Speed
1 cup 5-6
12 litre 4-5
Cream is whipped fast, so keep an eye during whipping.
| Accessory Ingredients Max Cooking time Speed | ||||
| Whisk | Cream 250 ml 10 minutes | 5-6 | ||
| Egg whites 12 pieces. 3 minutes | ||||
| Dough hooks | Flour 1250 g | 10 minutes 5-6 | ||
| Salt 15 g | ||||
| Yeast 20 g | ||||
| Sugar 10 g | ||||
| Water | 1 l | |||
| Grease | 20 g | |||
| Spatula | Flour 100 g | 5 minutes | 1-4 | |
| Sugar | 100 g | |||
| Margarine | 100 g | |||
| Egg 2 pieces | ||||
| Pork | 2000 g | 3 minutes | ||
Cleaning and maintenance
Always unplug before cleaning.
Bowl and accessories can be rinsed in hot water with added mild detergent. These parts must not be washed in a dishwasher and the motor base must never be immersed into water or other liquids. Wipe the motor base and the mixer head with a damp cloth. Avoid using scouring powder or other abrasive cleaners which may scratch or dull the surface. Wipe all parts thoroughly dry before storing the kitchen machine.
IMPORTANT: THE MOTOR BASE MAY NEVER BE IMMERSED IN WATER OR ANY OTHER KIND OF LIQUID.
Safety instructions
- Read the instructions carefully before use and keep the manual for future use.
- Only connect the appliance to 230 Volt AC and only use the appliance for its intended purpose.
- Always unplug the appliance when irregularities occur during use. Unplug after use, when parts are attached or detached, and before cleaning and maintenance.
- The appliance should never be immersed into water or other liquids.
-
This appliance is not intended to be operated by persons (including children) with limited physical, sensory, or mental ability, or with little experience with or knowledge of the appliance, unless supervised or instructed in using the appliance by a person who is responsible for their safety.
-
Children should be under supervision to ensure that they do not play with the appliance. Children are not always capable of perceiving and assessing possible risks. Teach children to treat electrical units with proper respect.
- Do not let the supply cord hang over the edge of the table.
- Never place the unit on or near hot plates, open fire, or similar.
- The appliance should only be used under supervision.
- Always check appliance, cord and power plug for damage before use. If the supply cord is damaged, the manufacturer, the service agent, or a similar qualified person must replace it in order to avoid hazard.
- It is recommended that the appliance is additionally protected according to power legislation with a fault current protective device (RCD with a release current up to 30 mA). Contact a licensed electrician.
- The appliance is for domestic use only.
- If the appliance is used for other than the intended purpose, or used in violation of the instruction manual, the buyer is entirely responsible for any consequences. Any damages to the product or other things are not covered by the warranty.
Disposal of the appliance

Legislation requires that all electrical and electronic equipment must be collected for reuse and recycling. Electrical and electronic equipment marked with the symbol indicating separate collection of such equipment must be returned to a municipal waste collection point.
Warranty
Claim according to valid law. Machine stamped receipt shall be enclosed if one wishes to make a complaint. The appliance shall be returned to the store where it was purchased.
OBH Nordica Denmark A/S
Ole Lippmanns Vej 1
DK-2630 Taastrup
Tel.: 43 350 350
www.obhnordica.dk
Technical data
OBH Nordica 6681
220-240 volt AC
700 watt
6 settings of speed
Accessories:
Spatula
Dough hooks
Whisks
CE
These instructions are subject to alterations or improvements.
Olive bread
0,5 l water
35 g yeast
1 tbsp acacia honey
15 g salt
5 g ground pepper
0,5 dl olive oil
50 g coarsely chopped green olives
50 g coarsely chopped black olives
400 g durum flour
400 g wheat flour
Dissolve the yeast in lukewarm water in the bowl and mix at speed level 1. Add acacia honey, salt, pepper, and olive oil and whisk until smooth at speed level 1-2. Add durum- and wheat flour a little at a time until the mixture is smooth. Do not let the mixture become too dry and heavy – you may not need to add all the flour.
Brush an appropriately sized baking tin with olive oil and pour the paste into the tin. Brush the paste with olive oil and sprinkle with olives and garlic.
Bake in a preheated oven at 190°C for approximately 30 min.
French baguette
750 g water
250 g wholemeal flour
250 g durum flour
500 g wheat flour
30 g salt
20 g yeast
30 g honey
Ingredients of your choice, e.g. spices, soaked kernels, sunflower kernels, olives, raisins, berries.
Put all ingredients in the bowl and knead the dough for approximately 6 min. at medium speed. The dough must stay soft. Allow the dough to rest in the bowl for 3 x 45 min., kneading it well between swellings.
Pour the dough onto the table and turn it over in durum flour. Part the dough into appropriate sizes and put the breads on a baking sheet. Place the sheet in a 250^ C preheated oven (not hot-air) and set the oven to 220^ C. Bake the bread for approximately for 15-20 min. depending on the size of the bread.
Bread with sun-dried tomatoes
15 g yeast
6 dl cold water
100 g graham flour
1 tsp sugar
1 ½ tbsp coarse salt
850 g wheat flour
50 sun-dried tomatoes
Mix yeast and water in the bowl at low speed, then add graham flour, sugar, and salt. Add graham flour gradually and increase speed level slowly. The dough must remain smooth and not become too dry. Leave it to swell under cover for min. 8 hours. Soak the tomatoes in water.
Chop the tomatoes finely and knead them into the dough. Shape the bread as you wish and allow it to swell again for an hour. Bake the bread at 190^ C for 45 min.
Food bread
500 g wheat flour
100 g rye flour (or other flour type of your choice)
25 g yeast
2 tsp salt
2 tsp sugar
3.5 dl lukewarm water
Dissolve yeast with the water in the bowl and mix with the rest of the ingredients. Mix the dough well for 5-6 min – increase speed slowly. More flour is added if the dough appears to be too wet.
Allow the dough to swell in the bowl for approximately 1 hour. and C°. Knead the dough well once more. Part the dough into two separate breads and leave them to swell on the baking sheet for approximately 45 min. Finally bake the breads at 185°C for approximately 45 min.
Tea buns – Approx. 22 pcs.
700 g water
1 kg wheat flour
30 g salt
20 g yeast
100 g durum flour
20 g honey
Put all ingredients in the bowl and knead for approximately 6 min at medium speed. The dough must remain soft. Allow the dough to rest in the bowl for 3 x 45 min, kneading it well between swellings.
Put the dough onto the table and turn it over in durum flour. Part the dough into appropriate sizes and place the buns on the baking sheet. Put the sheet in a 250^ C preheated oven (not hot-air) and set the oven to 220^ C. Bake the buns for 15-20 min depending on their size. Keep an eye on the buns – they are done when they have turned golden brown, and if the bread sounds hollow when tapped at the bottom.
Swedish kanelbullar (cinnamon buns) – Approx. 28 pcs.
25 g yeast
75 g margarine
2 ½ dl milk
12 dl sugar
2 tsp salt
7 ½ dl wheat flour
Stuffing:
50 g margarine
2 tbsp sugar
1 tbsp cinnamon
Slice the butter thinly and put it in the bowl. Add most of the flour, sugar, and salt. Heat the milk to approximately 37^ C and dissolve the yeast in it (remember not to overheat the milk). Add the mixture to the bowl and mix until the dough is smooth and shiny.
Leave it to swell in a warm place for approximately 30 min while preheating the oven to 225-250°C. Take the dough out of the bowl and knead it lightly.
Unroll the dough into approximately 25 x 5 cm. Now apply stuffing. Start by distributing margarine over the dough. Then sprinkle the dough with sugar and cinnamon. Roll the dough into one roll, then cut the dough into approximately 20 pieces, about 2 cm in width. Place each bun cut-side up on a baking sheet covered with baking paper. Allow the buns to swell under a kitchen towel for approximately 30 min.
Brush the buns with egg and sprinkle with sugar (e.g. pearl sugar), and bake them in the middle of the oven for 6-8 minutes.
Banana and chocolate muffins – Approx. 26 pcs.
500 g wheat flour
2 tsp baking powder
150 g nuts of your own choice
250 g cane sugar
2 eggs
1 dl light syrup
5 dl light milk
1 dl liquid grease
200 g dark chocolate
1 large banana
Mix eggs, syrup, flour, and grease well at XX speed and add flour, cane sugar, and baking powder together with the finely crushed nuts. Add crushed chocolate and mashed banana by turning it over in the mixture.
Distribute the mixture into muffin tins and bake at 200^ C for approximately 25-30 min.
Simple chocolate cake
150 g butter
3 dl sugar
1.45 dl wheat flour
2 tsp vanilla sugar
4 tbsp cocoa powder
2 eggs
Cream
Berries of your choice
Lemon balm
Preheat the oven to 200^ C. Pour sugar, flour, cocoa, and eggs into the bowl. Melt the butter and add it to the other ingredients. Stir thoroughly at lowest speed and increase speed after a little while.
Pour the mixture into a spring form or a tart tray and bake for approximately 12 min. The cake is more delicious if it is a little soft in the middle. Serve the cake on a plate garnished with whipped cream, fresh berries, and a strip of lemon balm.
Lucia buns – Approx. 35 pcs.
50 g yeast
100 g butter
5 dl milk
250 g curd cheese
1 g safran
1 1/2 dl sugar
1/2 tea spoon salt
Approx. 17 dl flour
Topping: Raisins
Brushing: 1 egg
Mix the yeast in the lukewarm milk and add the melted butter. Add the remaining ingredients holding back some of the flour. Mix the dough till blank and elastic. Add more flour if necessary.
Let the dough rise for approx. 40 min. Mix the dough again and mould it into the traditional Lucia shaped buns. Place the buns on a baking sheet, and add raisins as topping. Let the buns rise again underneath a damp cloth for about 30 min. after which the buns are glazed with egg and baked in the oven at 200 °C for about 5-8 min and for the larger buns for 10-15 min.
Italian mince buns
500 g lean pork mince
2 loaves of white bread without crust
12 dl stock
1 egg
2 tbsp shredded grana cheese
1 tsp dried rosemary
1 crushed garlic clove
2 tbsp freshly chopped parsley
12 tsp salt
12 tsp pepper
2 tbsp olive oil
Crumble the bread into the bowl and cover with stock. Allow it to draw for 15 min. Add mince and mix thoroughly at low speed. Add egg, cheese, rosemary, parsley, and garlic, and season with salt and pepper. Mould the mixture into small round buns and fry them on all sides on a pan – for about 10 min. Shake the pan often to ensure that the buns keep their round shape.
Grilled Greek meat balls
250 g beef mince
250 g pork mince
1 tbsp olive oil
1 egg
4 tbsp parmesan cheese
1 tbsp chopped parsley
1 tsp dried basil
2 crushed garlic cloves
12 tsp zest from an organic lemon
Metal or bamboo grilling skewers
Put all ingredients into the bowl and mix thoroughly. Allow the mixture to rest in a cool place for about 1 hour. Soak the skewers if you are using bamboo skewers. Mould the mixture into oblong meatballs, and slide them onto the skewers – there is room for at least two meatballs on each skewer. Brush with olive oil or a grilling oil of your choice, and grill the skewers for 8-10 min. depending on size. Turn over and brush often.
Mince bread with feta cheese and bacon
500 g veal mince
1 egg
1 dl oatmeal
2 dl milk
1 jar of diced feta cheese
2 garlic cloves
Sliced bacon
1 tsp Provence herbs
Salt and pepper
Mix mince with egg, garlic, and spices in the bowl at low-to-medium speed. Add feta cheese carefully when the mince is well mixed. Pour the mixture into well-greased ovenproof tray and mould it into bread shape. Cover the mince bread with bacon slices and bake it in the oven at 225^ C for about 1 hour.
Turkey meat balls
500 g turkey mince
1 finely chopped onion
1 tsp curry
2 tbsp flour
2 eggs
2 dl skimmed milk
1 bundle of chopped dill
Sea salt
Freshly ground pepper
Put the meat into the bowl and stir thoroughly. Add onion, salt, pepper, and the rest of the ingredients. Mould into meat balls and fry them in oil on a frying pan at medium heat. 4-6 min. on each side.
natural_image
Modern kitchen stand mixer with whisk and bowl, no visible text or symbols on the main subject

- First Kitchen Kitchen machine
- OBH NORDICA
- OBH Nordica Denmark A/S
- Tekniske data
- OBH Nordica Sweden AB
- Tekniska data
- Rett Deler Hastighet
- OBH Nordica Norway AS
- Laitteen osat
- Parts of the appliance
- How to use the kitchen machine
- Overheating
- Setting the speed
- Using the mixer accessories
- Recipe Accessory Speed
- Egg whites
- Amount Speed
- Whipped cream
- Cleaning and maintenance
- IMPORTANT: THE MOTOR BASE MAY NEVER BE IMMERSED IN WATER OR ANY OTHER KIND OF LIQUID.
- Safety instructions
- Disposal of the appliance
- Warranty
- Technical data
- CE
- Olive bread
- French baguette
- Bread with sun-dried tomatoes
- Food bread
- Tea buns – Approx. 22 pcs.
- Swedish kanelbullar (cinnamon buns) – Approx. 28 pcs.
- Banana and chocolate muffins – Approx. 26 pcs.
- Simple chocolate cake
- Lucia buns – Approx. 35 pcs.
- Italian mince buns
- Grilled Greek meat balls
- Mince bread with feta cheese and bacon
- Turkey meat balls
Brand : OBH NORDICA
Model : First Kitchen 6683
Category : Food processor