
SB-900 - Flash externe NIKON - Notice d'utilisation et mode d'emploi gratuit
Retrouvez gratuitement la notice de l'appareil SB-900 NIKON au format PDF.


| Type de produit | Flash externe pour appareil photo reflex |
| Marque | Nikon |
| Modèle | SB-900 |
| Nombre guide (ISO 100, 35 mm, FX, éclairage standard) | 34 m / 111,5 pi |
| Nombre guide (ISO 200, 35 mm, FX, éclairage standard) | 48 m / 157,5 pi |
| Distance de prise de vue (TTL/Auto Aperture/Non-TTL auto) | 0,6 à 20 m (2 à 66 pi) |
| Modes flash disponibles | i-TTL, Auto Aperture, Non-TTL auto, Distance-priority manuel, Manuel, Stroboscopique (Repeating) |
| Puissance de flash (pleine puissance) | 1/1 à 1/128 par incréments de 1/3 IL |
| Durée d'éclair (pleine puissance) | Environ 1/880 s |
| Alimentation | 4 piles AA (alcaline, lithium, Oxyride, Ni-MH) |
| Temps de recyclage minimal (alcaline neuves) | Environ 4,0 s |
| Nombre d'éclairs minimal (alcaline neuves) | 110 |
| Dimensions (L × H × P) | 78,0 × 146,0 × 118,5 mm |
| Poids (sans piles) | Environ 415 g |
| Modes d'éclairage | Standard, centré, uniforme (Even) |
| Inclinaison de la tête | -7° à +90° (crans à -7°, 0°, 45°, 60°, 75°, 90°) |
| Rotation de la tête | 180° à gauche et à droite (crans à 0°, 30°, 60°, 90°, 120°, 150°, 180°) |
| Système de flash sans fil | Advanced Wireless Lighting (3 groupes), SU-4 type |
| Fonctions spéciales | i-TTL, FP High-Speed Sync, FV Lock, AF-assist, modélisation, compensation d'exposition |
| Accessoires fournis | Pied de flash AS-21, diffuseur Nikon SW-13H, jeu de filtres colorés SJ-900, support de filtre SZ-2, étui SS-900 |
| Entretien et nettoyage | Nettoyer avec un chiffon doux sec. Ne pas utiliser de solvants. |
| Sécurité | Protection thermique (Thermal Cut-out) intégrée. Ne pas démonter. Éviter l'humidité. |
| Mise à jour du firmware | Possible via l'appareil photo compatible |
FOIRE AUX QUESTIONS - SB-900 NIKON
Questions des utilisateurs sur SB-900 NIKON
0 question sur cet appareil. Repondez a celles que vous connaissez ou posez la votre.
Poser une nouvelle question sur cet appareil
Téléchargez la notice de votre Flash externe au format PDF gratuitement ! Retrouvez votre notice SB-900 - NIKON et reprennez votre appareil électronique en main. Sur cette page sont publiés tous les documents nécessaires à l'utilisation de votre appareil SB-900 de la marque NIKON.
MODE D'EMPLOI SB-900 NIKON
Autofocus Speedlight
SB-900
User's Manual
About this user's manual
How to find what you are looking for
You can search for relevant page references using the following methods.

Table of contents ...
(A-6)
You can search by item, such as operation method, flash mode or function.

Simple search by objective
(A-4)
You can search according to your objective without knowing the specific name or term of the item you are looking for.

Speedlight functions
(B-4)
You can search for a particular SB-900 function. This is handy when you know the name of a function and want more information.

Index
F-22
You can search using the alphabetical index.

Troubleshooting
(F-2)
You can determine the cause if there is a problem with your Speedlight.

Camera and lens combinations
This manual has been compiled with the assumption that the SB-900 will be used in combination with a camera compatible with CLS (Nikon Creative Lighting System) and a CPU lens.

Tips on identifying CPU Nikkor lenses
CPU lenses have CPU contacts.
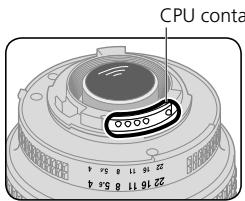
- The SB-900 cannot be used with IX-Nikkor lenses.

Terms used in this user's manual
Default settings: the function and mode settings at the time of purchase are referred to as the "default settings."
CLS (Nikon Creative Lighting System): the Nikon Creative Lighting System is often referred to as "CLS."
ISO sensitivity: "ISO sensitivity" is a generic term that covers both the imaging sensitivity of digital SLR cameras and the film sensitivity of 35mm film based cameras.
Marks used in this manual

Describes a point to which you should pay particular attention in order to avoid Speedlight malfunction or mistakes during shooting.

Includes information or tips to make Speedlight use easier.
Simple search by objective
You can search for specific explanations according to your objective.
About Speedlight parts and indications
| I want to know about | Key words | page |
| The name of each part | Speedlight parts | C-2 |
| The meaning of each icon (displayed) | LCD panel | C-10 |
| The meaning of the warning symbols | Warning indications | F-3 |
About settings and operation
| I want to know about | Key words | page |
| The functions and usage of control buttons | Control buttons | C-8 |
| The types of batteries that can be used | Suitable batteries | C-4 |
| The minimum recycling time and the number of flashes per recycling time per type of battery | The minimum recycling time and the number of flashes per recycling time | F-20 |
| When to replace the batteries | Replacing/recharging batteries | C-27 |
| How to change settings using “Custom settings” | Custom settings | C-20 |
| How to perform test firings | Test firing | D-59 |
| How to tilt or rotate the flash head | Adjusting the flash head | D-26 |
| How to reset various settings | Two-button reset | C-9 |
| How to illuminate the LCD panel | Using the SB-900 in dim light | C-24 |
| How to enhance the readability of the LCD panel | Enhancing the LCD panel's readability | C-25 |
| How to change the standby lead time | Standby function | C-23 |
| How to monitor the remote flash units by sound | Sound monitor | C-24 |
| How to lock the control buttons to avoid mistakes | Key lock | C-9 |
About flash photography
| I want to know about | Key words | page |
| About the flash modes | Flash modes and functions | D-1 |
| How to take pictures in the simplest way | Basic operation | C-4 |
| How to take portrait photos emphasizing the main subject | Illumination pattern: Center-weighted | D-24 |
| How to take formal group shots | Illumination pattern: Even | D-24 |
| How to take more natural-looking shots of flowers and dolls | Wireless multiple flash shooting | D-39 |
| How to take pictures with soft shadows cast on a wall | Bounce flash operation | D-26 |
| How to take pictures of both the subject and background at night | Slow-sync flash | D-55 |
| How to take pictures using multiple flash units | Wireless multiple flash shooting | D-39 |
| How to confirm lighting conditions | Modeling illumination | D-61 |
| How to take brighter (or darker) pictures of both the subject and background | Exposure compensation | D-38 |
| How to take brighter (or darker) pictures of the subject | Flash output level compensation | D-37 |
| How to take pictures without the subject's eyes appearing red | Red-eye reduction | D-56 |
| How to shoot a moving subject with stroboscopic multiple-exposure effects | Repeating flash | D-17 |
| How to take pictures under fluorescent light and incandescent light and balance the lights' color effects | Flash photography with color filters | D-33 |
| How to take pictures adding specific color to the scene | Flash photography with color filters | D-33 |
| How to perform autofocus flash photography in dim lighting | AF-assist Illuminator | D-58 |
| How to shoot a fast moving subject using wireless multiple flash shooting | SU-4 type wireless multiple flash operation | D-50 |
About accessories
| I want to know about | Key words | page |
| About cameras compatible with the SB-900 | Compatible cameras | B-2 |
| How to use the SB-900 with cameras not compatible with Nikon Creative Lighting System | Using the SB-900 with non-CLS-compatible SLR cameras | E-2 |
| How to use the SB-900 with Nikon COOLPIX cameras | For usage with i-TTL-compatible COOLPIX cameras | E-3 |
| About optional accessories that are available | Optional accessories | F-11 |
Others
| I want to know about | Key words | page |
| Tips on Speedlight care | Tips on Speedlight care | F-7 |
| SB-900 specifications | Specifications | F-14 |
| The latest Nikon product information | Life-long learning | A-16 |
| How to update the firmware | Firmware update | F-10 |
A
Preparation
About this user's manual .A-2
How to find what you are looking for A-2
Simple search by objective .A-4
For your safety. A-8
Check before Use .A-14
B
About the SB-900
SB-900 features B-2
Main functions. B-4
C
Operation
Speedlight parts. C-2
Basic operations. C-4
Control buttons. C-8
LCD C-10
Custom functions and settings.. C-20
Batteries C-27
D
Flash modes and functions
i-TTL mode. D-2
Auto aperture flash. D-5
Non-TTL auto flash. D-8
Distance-priority manual flash. D-11
Manual mode D-14
Repeating flash .D-17
Determining the aperture, flash output level and shooting distance in the Distance priority, Manual and Repeating flash mode. D-22
Switching illumination pattern .D-24
Bounce flash operation .D-26
Taking close-up photographs with bounce-down flash. D-30
Flash photography with color filters .D-33
Flash output level compensation and exposure compensation .D-37
Wireless multiple flash shooting. D-39
-
Flash shooting in Advanced Wireless Lighting. D-43
SU-4 type wireless multiple flash shooting .D-50 Available functions to be set on the camera .D-55 -
Auto FP High-Speed Sync mode
- Flash Value Lock (FV Lock)
- Slow-sync flash
Red-eye reduction/Red-eye reduction with slow-sync flash - Rear-curtain sync
Flash shooting support functions. D-57
- Power zoom function
- AF-Assist Illuminator
- Setting the ISO sensitivity
Test firing function - Modeling illuminator function
FX-/DX selection
E
For use with cameras other than CLS compatible SLR cameras
Using the SB-900 with non-CLS-compatible SLR cameras. E-2
For usage with i-TTL-compatible COOLPIX cameras. E-3
F
Tips on Speedlight care and reference information
Troubleshooting F-2
Notes on continuous flash shooting. F-5
Thermal Cut-out. F-6
Tips on Speedlight care. F-7
Notes on batteries. F-8
About the LCD panel . F-9
Updating firmware. F-10
Optional accessories. F-11
Specifications. F-14
Index F-22
For your safety
Before using your product, please read the following safety precautions carefully and thoroughly to ensure correct and safe use and to help prevent damage to your Nikon product or injury to yourself or others.
For quick reference by those who use the product, please keep these safety instructions near the product.
In this manual, safety instructions are indicated with these symbols:
WARNING
Disregarding instructions marked with this symbol could result in personal injury, or death and property damage.
CAUTION
Disregarding instructions marked with this symbol could result in property damage.
WARNINGs for Speedlights
- If corrosive liquids seep from the batteries and get in your eyes, immediately wash your eyes with running water and consult with a doctor. Your eyes could be seriously damaged if they are not treated quickly.
- If corrosive liquids seep from the batteries and come in contact with your skin or clothes, wash immediately with running water. Prolonged contact could injure your skin.
- Never attempt to disassemble or repair the flash unit by yourself, as this could result in you receiving an electric shock and could also cause the unit to malfunction; such malfunction could lead to personal injury.
- If the flash unit is dropped and damaged, do not touch any exposed interior metal parts. Such parts, especially the Speedlight's capacitor and associated parts, could be in a high-charge state and if touched could cause an electric shock. Disconnect the power or remove the batteries and be sure that you do not touch any of the product's electrical components, and then bring the flash unit to your local Nikon dealer or authorized service center for repair.
- If you detect heat, smoke or notice a burning smell, immediately stop operation and remove the batteries to prevent the unit from catching on fire or melting. Allow the flash unit to cool down so that you can safely touch it and remove the batteries. Then bring the unit to your local Nikon dealer or authorized service center for repair.
- The flash unit should never be submerged in liquid or exposed to rain, saltwater or moisture unless it is properly protected from the liquids and moisture. Underwater use requires a certified underwater housing. If water or moisture gets inside the unit, this could cause the unit to catch on fire or cause an electric shock. In such instances you should immediately remove the batteries from the Speedlight and then bring the unit to your local Nikon dealer or authorized service center for repair.
Note: electronic devices that are penetrated by water or moisture are often not economically repairable.
- Do not use the unit in the presence of flammable or explosive gas. If the flash unit is operated in areas where there is a flammable gas, including propane, gasoline and dust, it could cause an explosion or fire.
- Do not fire the flash unit directly at the driver of a moving car, as this could temporarily impair the driver's vision and cause an accident.
- Do not fire the flash unit directly into the eyes of someone that is at close range, as it could damage the retinas of their eyes. Never fire the flash unit closer than 1 meter from infants.
- Do not fire the unit while the flash head is touching a person or object. Such use can result in the person being burned, and/or their clothes igniting from the heat of the flash's firing.
- Keep small accessories out of the reach of children to avoid the possibility of the accessory being swallowed. If an accessory is accidentally swallowed, immediately consult with a doctor.
- Use only the batteries specified in this user's manual. Batteries other than those specified could leak corrosive liquids, explode or catch on fire or otherwise not perform satisfactorily.
- Do not mix battery types, brands or old and new batteries, as the batteries could leak corrosive liquids, explode or catch on fire. When using more than one battery in a product, always use identical batteries that were purchased at the same time.
- Non-rechargeable batteries such as manganese, alkaline-manganese and lithium batteries should never be charged in a battery charger because they could leak corrosive liquids, explode or catch on fire.
- When using standard size (AA, AAA, C, D) or other common rechargeable batteries such as NiCd and Ni-MH battery types, or when recharging them, be sure to use only the battery charger specified by the battery maker and read the instructions thoroughly. Do not recharge these batteries with their terminals reversed in the charger or before the batteries have cooled off sufficiently because they could leak corrosive liquids, explode or catch on fire. The same caution also applies to using the rechargeable batteries that may be supplied by the photo product's manufacturer.
CAUTIONS for Speedlights
- Do not touch the flash unit with wet hands, as this could cause an electric shock.
- Keep the flash unit away from children to prevent them from putting the unit in or near their mouth, or otherwise touching a dangerous part of the product; as such contact could cause an electric shock.
- Do not apply strong physical shocks to the unit, as this could cause a malfunction that could cause the unit to explode or catch on fire.
- Never use active agents that contain flammable substances such as paint thinner, benzene or paint remover to clean the unit, and never store the unit in locations containing chemicals such as camphor and naphthalene, as this could damage the plastic case, cause a fire or cause an electric shock.
- Remove any batteries from the unit before storing the unit for a long time to prevent the unit from catching on fire or leaking corrosive liquids.
WARNINGs for Batteries
- Never heat or throw batteries into a fire, as this could cause the batteries to leak corrosive liquids, generate heat or explode.
- Do not short-circuit or disassemble the batteries because this could cause the batteries to leak corrosive liquids, generate heat or explode.
- Do not mix battery types, brands or old and new batteries, as this could cause the batteries to leak corrosive liquids, generate heat or explode.
- Do not install batteries in the reverse direction as this could cause the batteries to leak corrosive liquids, generate heat or explode. Even if only one battery is installed in reverse it will cause the Speedlight to malfunction.
- Be sure to use the battery charger specified by the battery maker to avoid the possibility of batteries leaking corrosive liquids, generating heat or exploding.
- Do not carry or store batteries along with metallic materials such as necklaces and hair pins because such materials could cause the batteries to short-circuit, leading to battery leakage, heat generation or an explosion. In addition, specially when carrying a quantity of batteries, place them carefully in a storage case that prevents the battery terminals from touching another battery's terminals because if they touch in reverse order it could also cause the batteries to short-circuit, leading to battery leakage, heat generation or an explosion.
-
If corrosive liquids seep from the batteries and get in your eyes, immediately wash your eyes with running water and consult with a doctor. Your eyes could be seriously damaged if they are not treated quickly.
-
If corrosive liquids seep from the batteries and come in contact with your skin or clothes, wash immediately with running water. Prolonged contact could injure your skin.
- Always follow the warnings and instructions printed on the batteries to avoid activities that could cause the batteries to leak corrosive liquids, generate heat or catch on fire.
- Be sure to use only batteries specified in this user's manual, to avoid the possibility of batteries leaking corrosive liquids, generating heat or exploding.
- Never open the casing surrounding batteries or use batteries whose casing has been breached as such batteries could leak corrosive liquids, generate heat or explode.
- Keep batteries out of the reach of children to help avoid the possibility of them being swallowed. If a battery is accidentally swallowed, immediately consult with a doctor.
- Batteries should not be submerged in water, exposed to rain, moisture or saltwater unless they are properly protected from the wet environment. If water or moisture gets inside the batteries, this could cause them to leak corrosive liquids or generate heat.
- Do not use any battery that appears abnormal in any way, including a change in color or shape. Such batteries could leak corrosive liquids or generate heat.
- Stop recharging rechargeable batteries if you notice that recharging is not completed within the specified time to help prevent the possibility of the battery leaking corrosive liquids or generating heat.
- When recycling or disposing of batteries, be sure to insulate their terminals with tape. If the battery's positive and negative terminals shortcircuit after coming into contact with metallic objects, it could cause fire, heat generation or an explosion. Dispose of used batteries in accordance with local government regulations
- Non-rechargeable batteries should never be charged in a battery charger because they could leak corrosive liquids or generate heat.
- Remove dead batteries from your equipment immediately, as they could leak corrosive liquids, generate heat or explode.
CAUTION for Batteries
Do not throw or apply strong physical shocks to the batteries as this could cause batteries to leak corrosive liquids, generate heat or explode.
Symbol for separate collection applicable in European countries


This symbol indicates that this product is to be collected separately. The following apply only to users in European countries.
- This product is designated for separate collection at an appropriate collection point. Do not dispose of as household waste
- For more information, contact the retailer or the local authorities in charge of waste management.
Foreword
Thank you for purchasing the Nikon Speedlight SB-900. To get the most out of your Speedlight, please read this user's manual and the separate booklet "A collection of example photos" thoroughly before use.
This user's manual explains SB-900 functions, operation methods, specifications, etc., and the separate "A collection of example photos" provides an overview of the SB-900's flash-shooting capabilities with example photos.
In addition, keep your camera user's manual handy for quick reference.
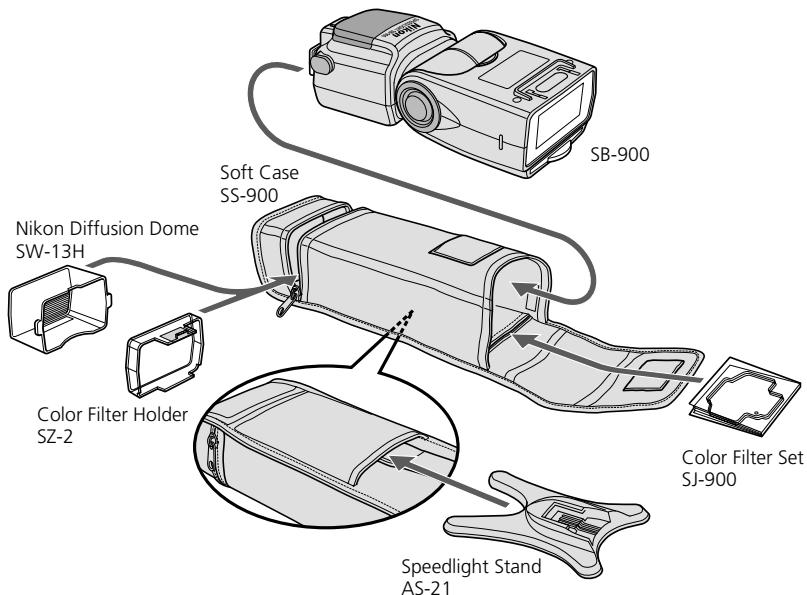
Included items
The SB-900 comes with the following accessories. Check that all items are included before use.
Speedlight Stand AS-21
Soft Case SS-900
Nikon Diffusion Dome SW-13H
User's manual (this manual)
Color Filter Set SJ-900
A collection of example photos
Color Filter Holder SZ-2
Warranty card

Tips on using the Speedlight
Take trial shots
Make trial shots before photographing important occasions like weddings or graduations.
Have Nikon spot-check your Speedlight regularly
Nikon recommends that you have your Speedlight serviced by an authorized dealer or service center at least once every two years.
Use your Speedlight with Nikon equipment
The Nikon Speedlight SB-900's performance has been optimized for use with Nikon brand cameras/accessories including lenses.
Camera/accessories made by other manufacturers may not meet Nikon's criteria for specifications, and nonconforming cameras/accessories could damage the SB-900's components. Nikon cannot guarantee the SB-900's performance when used with non-Nikon products.
Life-long learning
As part of Nikon's "Life-long learning" commitment to ongoing product support and education, continually-updated information is available on-line at the following sites:
For users in the U.S.A.:
http://www.nikonusa.com/
For users in Europe:
http://www.europe-nikon.com/support
- For users in Asia, Oceania, the Middle East, and Africa:
http://www.nikon-asia.com/
Visit these sites to keep up-to-date with the latest product information, tips, answers to frequently-asked questions (FAQs), and general advice on digital imaging and photography. Additional information may be available from the Nikon representative in your area. See the URL below for contact information:
http://nikonimaging.com/
This section explains the features and key functions of the SB-900.
- SB-900 features. B-2
- Main functions B-4
Features of the SB-900
The SB-900 is a high-performance CLS-compatible Speedlight with a large guide number of 34/48 (ISO 100/200, m) (111.5/157.5, ft.) (at the 35mm zoom position in Nikon FX format with standard illumination pattern, 20^ / 68^ .)
- Combined with a CLS-compatible camera, the SB-900 can easily perform various types of flash operations, such as i-TTL auto flash and wireless multiple flash (D-39).
- Three types of illumination patterns (standard, center-weighted and even) are available to match different shooting preferences.
- FX/DX selection enables the setting of the light distribution angle in accordance with the camera's image area between FX- and DX-formats, and provides effective and high-quality lighting.
- Power zoom function automatically adjusts the zoom position to match the lens focal length from 17 mm to 200 mm (in FX format)/12 mm to 200 mm (in DX format). When the built-in wide-flash adapter is used or the Nikon Diffusion Dome is attached, the zoom position is automatically set to match a wide-angle lens with much shorter focal length.
- Bounce flash (D-26) or close-up flash photography can be easily performed (D-30).
- Custom functions are provided to allow for various settings (C-20).
Compatible cameras
The SB-900 has been optimized for use with CLS-compatible SLR cameras.
- For usage with non-CLS-compatible SLR cameras and with i-TTL-compatible COOLPIX cameras, see "Using the SB-900 with non-CLS-compatible SLR cameras." (E-1)
CLS-compatible SLR cameras
D3, D700, D2 Series, D300, D200, D80, D70 Series, D60, D50, D40 Series, F6, etc.
i-TTL-compatible COOLPIX cameras
COOLPIX 8800, COOLPIX 8400, COOLPIX P5000, COOLPIX P5100, etc.
What is the Nikon Creative Lighting System (CLS)?
The SB-900 features the Nikon Creative Lighting System (CLS). This system offers additional flash shooting possibilities with digital cameras by taking advantage of your camera's digital communication capabilities. CLS is available when the SB-900 is used with compatible Nikon cameras.
The SB-900 offers these major features:
i-TTL mode
This is a Nikon Creative Lighting System TTL auto flash mode. Monitor pre-flashes are fired at all times. The subject is correctly exposed by the light from the flash lighting and the exposure is less affected by ambient light (R D-2).
Advanced Wireless Lighting
With Advanced Wireless Lighting, wireless multiple flash operation in the TTL (i-TTL) mode can be accomplished with CLS-compatible digital SLRs. In this mode, you can divide the remote flash units into three groups and control the flash output independently for each group, expanding your range of creative multiple-flash shooting techniques (D-43).
FV Lock (Flash Value Lock)
Flash Value, or "FV," is the amount of flash exposure for the subject. Using FV Lock with compatible cameras, you can lock in the appropriate flash exposure for the main subject. This flash exposure is locked in, even if you change the aperture or composition, or zoom the lens in and out. (D-55).
■ Flash Color Information Communication
When the SB-900 is used with compatible digital SLRs, color temperature information is automatically transmitted to the camera. In this way, the camera's white balance is automatically adjusted to give you the correct color temperature when taking photographs with the SB-900.
Auto FP High-Speed Sync
High-Speed flash synchronization at a compatible camera's highest shutter speed is possible. This is useful when you want to use a wider aperture to achieve shallow depth of field to blur the background (D-55).
AF-Assist illuminator
In autofocus operation, the SB-900 emits AF-Assist illumination, which matches the wider AF area of CLS-compatible cameras. With cameras supporting this function, autofocus photography in dim lighting is possible even when the camera's focus point (focus area) is changed (D-58).
Flash modes and functions on the SB-900
i-TTL mode (D-2)
The camera controls the SB SB-900's flash output level by measuring the light reflected from the subject when the SB-900 fires a series of monitor pre-flashes.

Auto-Aperture flash mode (D-5)
The SB-900 controls the flash output level by measuring the flash illumination reflected back from the subject using the sensor for Non-TTL auto flash and combining this with information from the camera, such as the ISO sensitivity and the aperture setting.

Non-TTL Auto flash mode (D-8)
The SB-900 controls the flash output level by measuring the flash illumination reflected back from the subject using the sensor for Non-TTL auto flash.

Distance Priority manual flash mode (D-11)
If you preset the aperture and the distance to the subject, the SB SB-900 will automatically take control of correct light output.

Manual flash mode (D-14)
By setting the aperture and the flash output level, you can manually set the exposure and the distance to the subject.

Repeating flash mode (D-17)
The SB-900 fires repeatedly to create stroboscopic multiple-exposure effects. This operation is useful when shooting fast-moving subjects.

ching illumination pattern (D-24)
You can select one of three types of illumination pattern (standard, center-weighted and even) in accordance with your objective.
Bounce flash
D-26)
By tilting or rotating the flash head, you can bounce the light off a ceiling or wall to make use of reflected light.
Close-up flash photography (D-30)
Close up flash photography can be achieved with use of the built-in wide-flash adapter and the flash head tilted down.
Using color filters
(D-33)
You can compensate for the color of a light source or create interesting effects by changing the light from the filters to a different color.
Flash output level compensation/Exposure compensation
Flash output level compensation is performed by modifying the flash output level for the flash illuminated subject only. Exposure compensation is performed by intentionally modifying the correct exposure to modify both the subject and background exposure.
Wireless multiple flash (D-39)
- Advanced Wireless Lighting (D-43)
In this mode, you can divide the remote flash units into three groups and set the flash mode and flash output level compensation values separately for each group as well as the master flash unit.
SU-4-type wireless multiple flash (D-50)
You can perform SU-4 type wireless multiple flash in two ways: in which the wireless remote flash units start and stop firing in sync with the master flash unit, and in which the remote flash units only start firing in sync with the master.
Functions that are set on the camera
FP Auto FP High-Speed Sync (D-55)
The SB-900 automatically fires at faster shutter speeds than the camera's sync shutter speed.
FV Lock (Flash Value Lock) (D-55)
Since it is possible to lock in the flash exposure level for the subject, you can alter picture composition while keeping the brightness of the subject constant.
Slow-Sync (D-55)
The flash is controlled at a slow shutter speed to obtain the correct exposure for both the main subject and background in low-light situations.
Red-Eye Reduction flash mode/Red-Eye Reduction Slow-Sync (D-56)
Red-eye effect, which causes the subject's eyes to appear red in color photographs, is reduced.
Rear-Curtain flash sync (D-56)
Rear-curtain flash sync creates a picture in which the blur of a moving subject appears behind the subject and not in front. In this mode, the flash fires just before the rear curtain starts to close.
Support functions
Power zoom function (D-57)
Automatically adjusts the zoom position to match the lens focal length.
Setting the ISO sensitivity (D-60)
The ISO sensitivity is automatically set based on information from the camera.
AF-Assist illuminator (D-58)
This enables you to perform autofocus flash photography when there is not enough light for normal autofocus operation.

Test firing
You can verify whether the subject will receive the correct exposure by test firing the SB-900.

Modeling illuminator (D-61)
Before actually shooting you can check the illumination and the shadows cast on the subject.
FX/DX selection (D-62)
The SB-900 automatically selects the suitable light distribution angle, in accordance with the camera's image area (between FX-format (36 x 24) and DX-format (24 x 16)).
SB-900 status and settings functions
Custom setting (C-20)
Various settings can be made while checking the status on the LCD panel.
Two-button reset (C-9)
This function resets various settings to their default values.

Key lock

The control buttons can be locked to prevent them from being pressed accidentally.
LCD panel illumination setting (C-24)
This function sets the LCD panel illumination to on or off.
LCD panel contrast setting (C-25)
This function adjusts the contrast of the LCD panel.
Standby function (C-28)
This function automatically puts the SB-900 in standby mode to conserve battery power.
Continuous flash (F-5)
The SB-900 fires continuously in sync with continuous shooting.
Thermal Cut-out (F-6)
This function protects the SB-900 from high operating temperatures. If the temperature of the unit rises to a certain level, the SB-900 will switch to protective shutdown mode.
Self firmware update (F-10)
Speedlight firmware can be updated through the camera.
C Operation
This section explains the Speedlight parts, meaning of each display, and also covers basic procedures for flash photography.
- Speedlight parts C-2
Basic operation C-4
Control buttons C-8
LCD C-10 - Custom functions and settings C-20
Batteries C-27
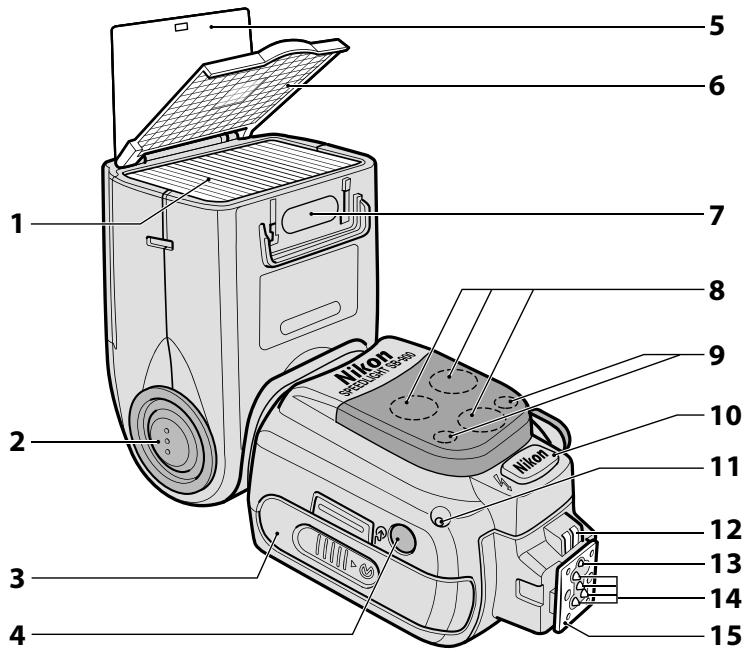
1 Flash head
2 Flash head tilting/rotating lock release button (C-6)
3 Battery chamber lid
4 Light sensor window for wireless remote flash (D-40)
5 Built-in bounce card (D-28)
6 Built-in wide-flash adapter (D-31)
7 Filter detector (D-35)
8 AF-assist illuminator (D-58)
9 Ready-light (at remote setting) (D-42)
10 External power source terminal (supplied with cover) (F-12)
11 Light sensor for Non-TTL auto flash (D-5, D-8)
12 External AF-assist illuminator contacts
13 Mount pin
14 Hot-shoe contacts
15 Mounting foot
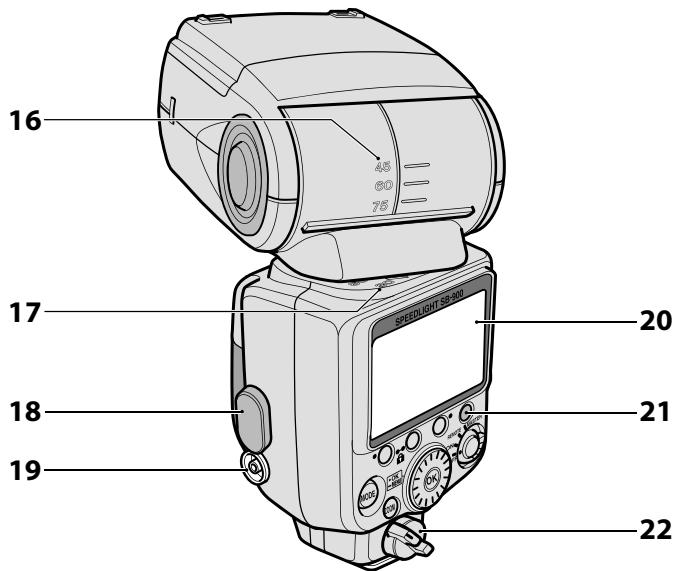
16 Flash head tilting angle scale (D-26)
17 Flash head rotating angle scale (D-26)
18 Sync terminal cover
19 Sync terminal
20 LCD panel (C-10)
21 Ready-light (C-7, D-42)
22 Mounting foot lock lever (C-5)
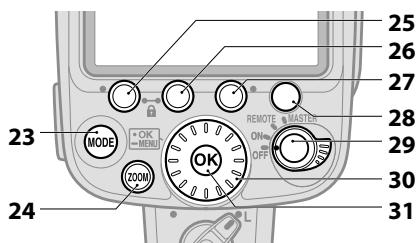
Control buttons (C-8)
23 [MODE] button
24 [ZOOM] button
25 Function button 1
26 Function button 2
27 Function button 3
28 Test firing button
29 Power ON-OFF switch/ wireless setting switch
30 Selector dial
31 [OK] button
Basic operation
This section covers basic procedures in i-TTL mode in combination with a CLS-compatible camera. i-TTL mode enables you to easily take flash photography with well balanced lighting.
STEP 1 Inserting the batteries
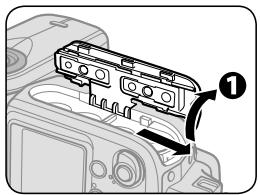
① Slide the battery chamber lid open.
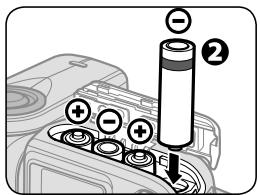
Insert the batteries following the [+] and [-] marks as shown.
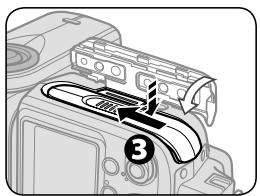
3 Close the battery chamber lid.
Suitable batteries
Insert four AA-type penlight batteries of any of the following types:
Alkaline-manganese (1.5 V)
Lithium (1.5 V)
OxyrideTM (1.5 V)
Ni-MH (Nickel Metal Hydride) (1.2 V)
- When replacing batteries, use fresh batteries of the same brand.
- For more on batteries, refer to "Batteries" and "Notes on batteries." (C-27, F-8)
STEP 2 Attaching the SB-900 to the camera
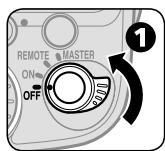
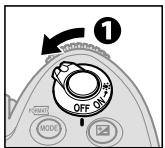
Make sure the SB-900 and the camera body are turned off.
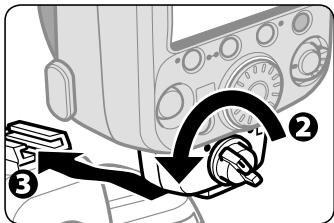
Rotate the mounting foot lock lever to the left.
③ Slide the SB-900's mounting foot into the camera's accessory shoe.
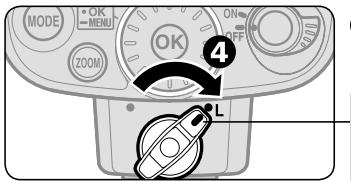
4 Turn the lock lever to "L."
To lock the Speedlight in place, turn the lock lever clockwise until it stops at the mounting foot lock index.
Detaching the SB-900 from the camera
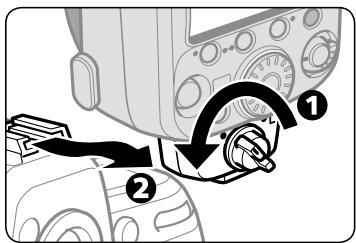
1 Turn the lock lever 90^ to the left.
Slide the SB-900's mounting foot from the camera's accessory shoe.
If the SB-900's mounting foot cannot be removed from the camera's accessory shoe:
- The mount pin remains inserted in the camera's accessory shoe. Turn the lock lever 90^ to the left again, and slide the SB-900 slowly out.
- Never forcibly remove the SB-900.
STEP 3 Adjusting the flash head
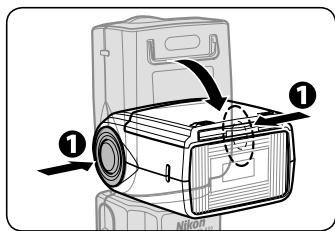
Hold down the flash head tilting/rotating lock release button to adjust the flash head to the horizontal/ front position.
- The flash head is locked at horizontal/ front and 90^ .
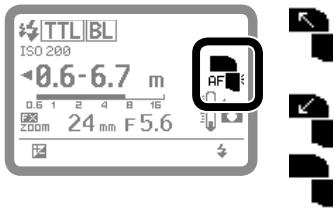
LCD indicator for flash head status
- Flash head is set at angle other than horizontal/front. (Flash head is tilted up or rotated to the right or left.)
- Flash head is set at -7^ . (Flash head is tilted down.)
- Flash head is set at horizontal/front.
STEP 4 Turning the SB-900 and camera on
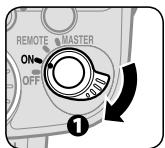
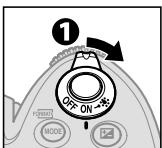
1Turn the SB-900 and the camera body on.
To turn the SB-900 on, turn the [Power ON-OFF] switch to [ON].
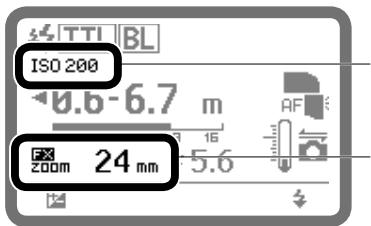
When using i-TTL mode
- ISO sensitivity is set automatically.
- Angle of coverage is automatically set according to lens in use.
STEP 5 Selecting the flash mode
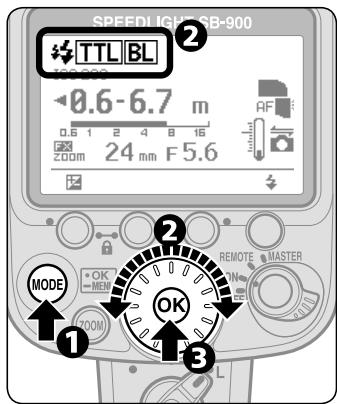
Press the [MODE] button.
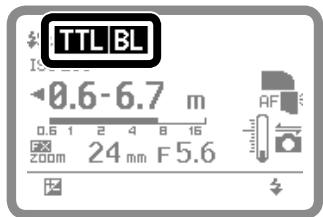
Rotate the selector dial to indicate TTL BL on the LCD.
Press the [OK] button.
Changing the flash mode
Rotate the selector dial to display available flash mode icons on the LCD.
Flash mode icons (C-10)

- Only flash modes that are available are displayed onon the LCD.
- The flash mode can also be selected by pressing the [MODE] button.
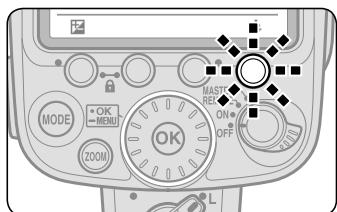
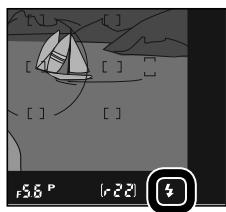
Make sure that the readylight on the SB-900 or in the camera's viewfinder is on before shooting.
- When no ready-light indicator appears, lightly press the shutter release button to activate the ready-light.
Names and functions of control buttons
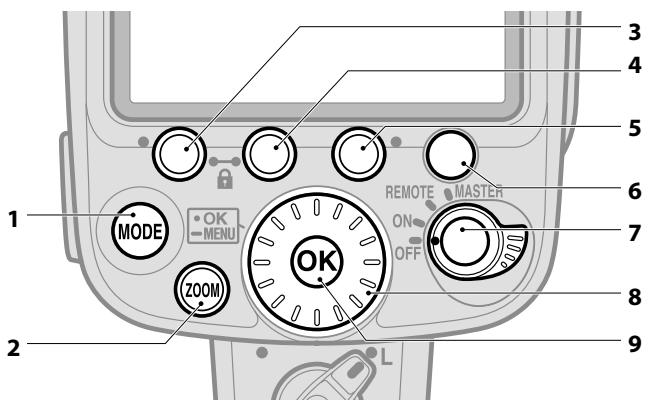
1 [MODE] button: Press to select flash mode. (C-10)
2 [ZOOM] button: Press to adjust zoom position. (D-57)
3 Function button 1:
4 Function button 2:
5 Function button 3:
- Press to select which item to change.
- Functions differ according to selected mode and status of the SB-900. (C-17)
6 Test firing button:
- Controls test firing (D-60) and modeling illuminator. (D-61)
The button setting for test firing/modeling illumination can be changed with the custom function. (C-22)
7 Power ON-OFF/wireless setting switch:
- Rotate to turn power on and off.
Controls the master and/or remote flashes when using wireless multiple flash shooting. (D-39) - To control master and/or remote flashes, rotate the switch while holding down the button in the center of the switch.
8 Selector dial: Rotate to change selected item. The selected item is highlighted on the LCD. (C-9)
9 [OK] button:
- Lightly pressing the [OK] button confirms selected setting.
- Hold the [OK] button down for one second to display custom function. (C-21)

Control button operation
The basic control of SB-900 functions is as follows:
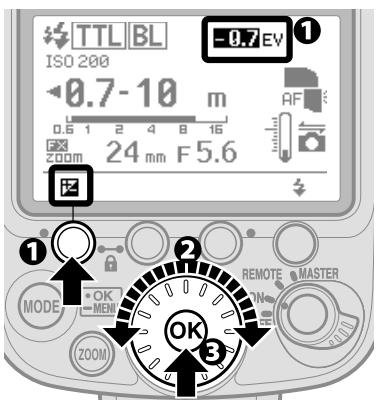
1 Select function to be changed and press the button that controls the function.
- The selected function is highlighted.
Change the setting by rotating the selector dial.
- Rotating the dial clockwise increases the value of the setting, and counterclockwise, decreases the value.
Press the [OK] button to confirm setting.
- Once confirmed, the highlighted item returns to normal display.
- If the [OK] button is not pressed, the highlighted item is confirmed and returns to normal display after 8 seconds.

Two-button operation
Two-button reset
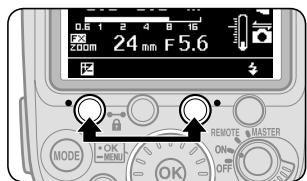
Pressing the "Function buttons" 1 and 3 (indicated with a green dot) simultaneously for two seconds resets all settings (except custom setting) to default settings.
After reset settings, the LCD is highlighted once and then returns to normal display.
Key lock function
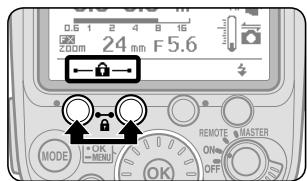
Pressing the "Function buttons" 1 and 2 (indicated with a key mark) simultaneously locks control buttons.
- The POWER ON-OFF/wireless setting switch and the test firing buttons remain unlocked.
- A key icon is displayed on the LCD while buttons are locked.
- To cancel the key lock function, press the two buttons again for two seconds.
LCD panel
Icons on the LCD show the status of settings.
- Displayed icons vary according to selected flash modes and settings.
- Settings that can be changed are highlighted.
Flash mode icons
| 洛 | Monitor pre-flashes |
| TTL | i-TTL |
| BL | Balanced Fill-Flash |
| FP | Auto FP High-Speed Sync |
| A | Auto Aperture flash |
| A | Non-TTL auto flash |
| GN | Distance-priority manual flash |
| M | Manual flash |
| RPT | Repeating flash |
Flash icons
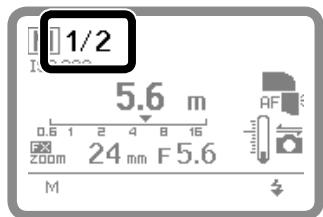
1/2 Flash output level at manual mode
- For more information about manual mode, see D-16.
ISO sensitivity

ISO 200
ISO sensitivity
Distance information
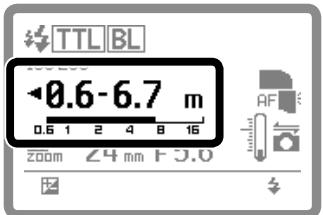
- i-TTL/Auto Aperture flash/ Non-TTL auto flash
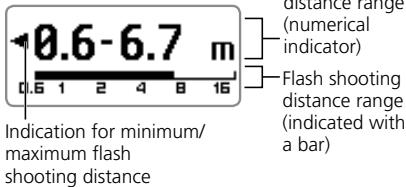
- Distance priority manual flash
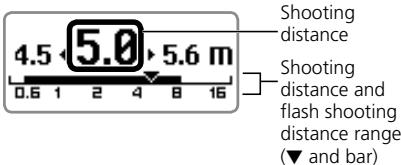
- Manual flash/repeating flash
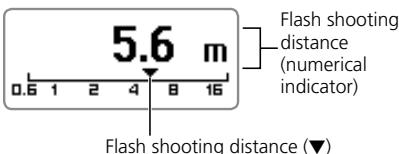
- The measuring distance unit can be changed to "ft" in custom setting. (C-25)
Zoom position
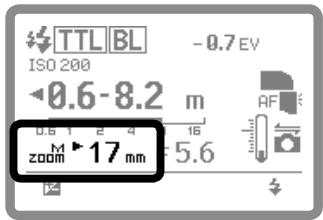
| zoom | Power zoom |
| M zoom | Manual setting of angle of coverage |
| M zoom | Power zoom is not possible (manual only) |
| 17 mm | Angle of coverage at the maximum wide-angle position |
| 200 mm | Angle of coverage at the maximum telephoto position |
| 200 mm | Angle of coverage with manual setting when the built-in wide-flash adapter is not working |
Light distribution angle
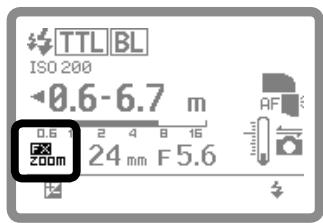
| DX ZOOM | Light distribution for DX-format image area with power zoom on |
| FX ZOOM | Light distribution for FX-format image area with power zoom on |
| DXM ZOOM | Light distribution for DX-format image area when the angle of coverage is manually set |
| FXM ZOOM | Light distribution for FX-format image area when the angle of coverage is manually set |
| DXM ZOOM | Light distribution for DX-format image area with power zoom off |
| FXM ZOOM | Light distribution for FX-format image area with power zoom off |


indication with power zoom on
LCD icon varies according to the camera in use.
- FX/DX icon appears: D3, D700
- D300, D60, D40 series
- Neither FX nor DX icon appears: Camera not equipped with FX/DX image area selection
Aperture value
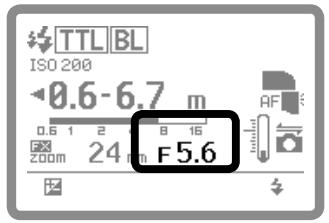
| F 5.6 | Aperture value (camera setting) |
| F 5.6 | Aperture value (SB-900 setting) |
| F 5.6 | Selected aperture value is out of SB-900 flash output control range (camera setting) |
Flash output level compensation
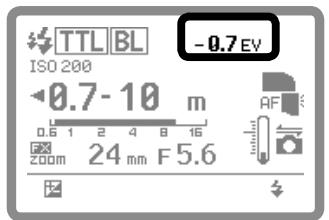
| -0.7EV | Flash output level compensation |
- For flash output level compensation, see D-37.
SB-900 condition
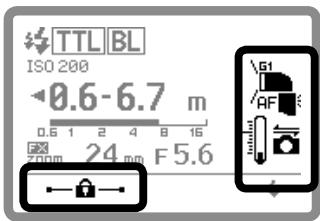
| 51 | Type of attached color filter |
| Illumination pattern: Standard | |
| Illumination pattern: Center-weighted | |
| Illumination pattern: Even | |
| Bounce flash operation | |
| Tilt 7° down | |
| Back light is on | |
| AF | AF-assist illumination |
| Communicating with a CLS compatible camera | |
| Thermal Cut-out on | |
| Thermal Cut-out off | |
| Key lock |
Test firing button functions
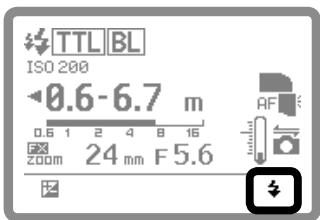
| Test firing | |
| Modeling illumination |
Examples of LCD displays in wireless multiple flash shooting
Displayed icons vary according to selected flash mode and settings.
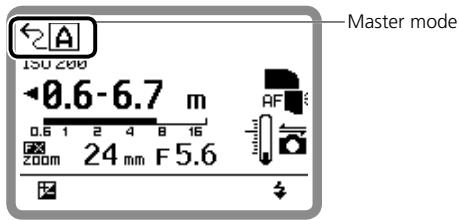
Master mode (with Advanced Wireless Lighting) (D-43)
Flash mode, flash output level compensation
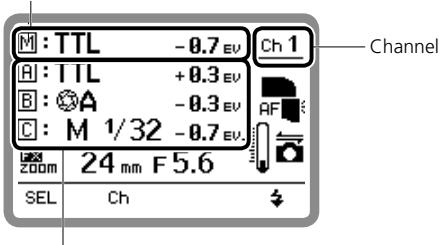
Flash mode, flash output level compensation, amount of light at manual setting from A, B or C group
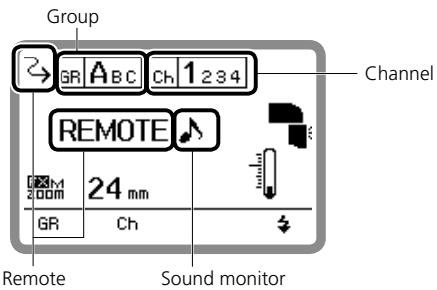
Remote mode (with Nikon Advanced Wireless Lighting) (D-43)
■ Master flash unit at repeating flash (with Nikon Advanced Wireless Lighting) (D-49)
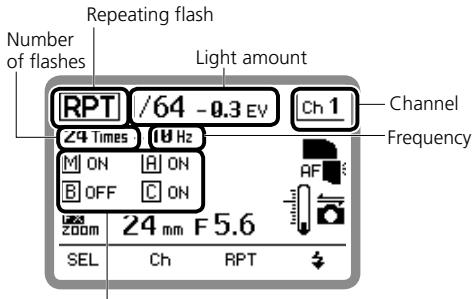
Master and group A, B or C unit fires (ON)/does not fire (OFF)
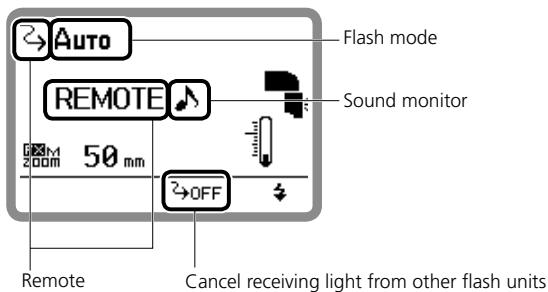
■ Master mode (with SU-4 type wireless multiple flash shooting) (D-50)
Remote mode (with SU-4 type wireless multiple flash shooting) (D-50)
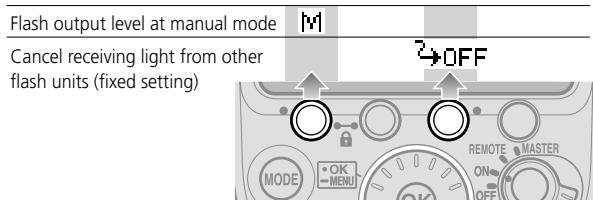
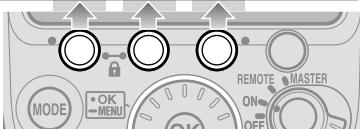
Functions controlled by Function buttons
Functions controlled by each button vary according to selected mode and settings.
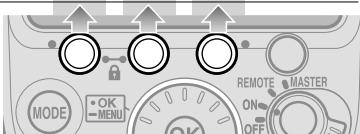
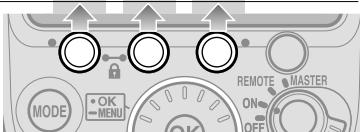
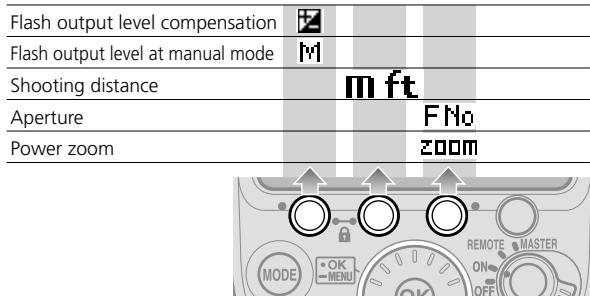
- The assigned function for each button is indicated by the following icons.
- When no function is assigned to a button, no icon appears above the switch on the LCD.
When using a single flash unit
| Flash output level compensation value | M | |||
| Flash output level at manual mode | ||||
| Aperture | FNo | |||
| Shooting distance | mft | |||
| Value of underexposure at TTL | A | |||
| Number of flashes | Times | |||
| Frequency | Hz | |||
| Power zoom | ZOOM | |||
| Change aperture/frequency | Hz/FNo |
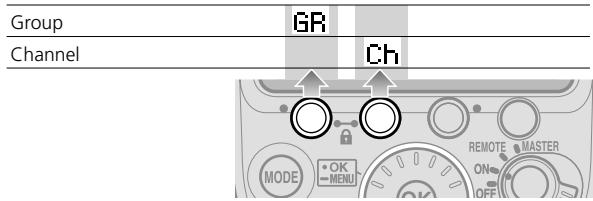
When using a SB-900 as master flash unit (with Nikon Advanced Wireless Lighting) (D-43)
| Change the selected group | SEL | |||
| Channel | Ch | |||
| Flash output level compensation | # | |||
| Flash output level at manual mode | M | |||
| Aperture | F No | |||
| Value of underexposure at TTL | # | |||
| Power zoom | ZOOM |
When using a SB-900 as master flash unit (with SU-4 type wireless multiple flash shooting) (D-50)
■ When using the SB-900 as a remote flash unit (with Nikon Advanced Wireless Lighting) (D-43)
■ When using the SB-900 as a remote flash unit (with SU-4 type wireless multiple flash shooting) (D-50)
■ Master flash unit at repeating flash (with Nikon Advanced Wireless Lighting) (D-49)
| Change the selected group | SEL | ||
| Channel | Ch | ||
| Select item in the 2nd tree | RPT | ||
| Light emit/not emit | ON/OFF | ||
| Flash output level | M | ||
| Number of flashes | Times | ||
| Frequency | Hz | ||
| Power zoom | ZOOM |
Custom functions and settings
Various operations for the SB-900 can be easily set using the LCD.
- Displayed icons vary according to the combination of camera and status of SB-900.
- Items that cannot be changed or set are indicated with grid squares.
- In the "My menu" display, only selected "My menu" items appear on the LCD. To show all items, select "Full menu." (C-25)
Custom functions and icons
| A | Non-TTL auto flash mode (C-22) |
| ←[PPT] | Repeating flash setting of master flash unit (C-22) |
| M | Flash output level at manual mode (C-22) |
| SU-4 | SU-4 type wireless multiple flash shooting (C-22) |
| Illumination pattern (C-22) | |
| / | Test firing button (C-22) |
| FLASH | Flash output level of test firing in i-TTL mode (C-23) |
| FX/DX | FX/DX selection (C-23) |
| ZOOM | Power zoom off (C-23) |
| AF | AF-assist illuminator/flash firing off (C-23) |
| STBY | Standby function (C-23) |
| ISO | ISO sensitivity (C-24) |
| REROV | Ready-light setting of remote flash units (C-24) |
| LIGHT | LCD panel illuminator (C-24) |
| Thermal Cut-out (C-24) | |
| Sound monitor (C-24) | |
| LCD | LCD panel contrast (C-25) |
| m/ft | Unit of measuring distance (C-25) |
| WP | Zoom position setting if the built-in wide-flash adapter is broken (C-25) |
| "My menu" setting (C-25) | |
| VER. | Version of firmware (C-25) |
| RESET | Reset custom setting (C-25) |

Custom setting
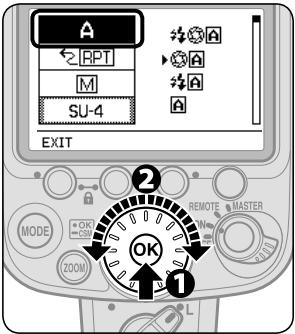
Press the [OK] button for approx. one second to display the custom setting
Rotate the selector dial to choose the desired custom functions to be set, and press the [OK] button.
- Highlighted item can be set.
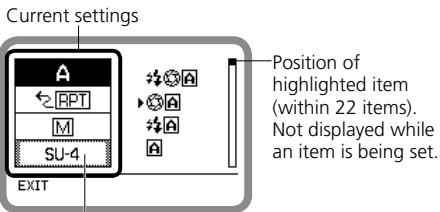
Items that cannot be changed or set are indicated with grid squares.
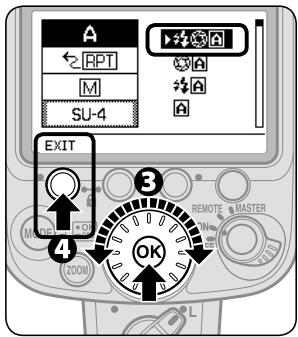
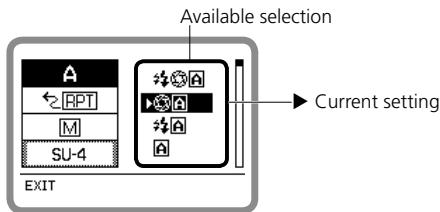
Rotate the selector dial to highlight the chosen setting, then press the [OK] button to set.
- Highlighted while setting.
- Options are displayed.
- Press the [OK] button to return display for item selection.
Press the Function button 1 [EXIT] to return to the normal display.
- The LCD returns to normal display.
Available Custom functions and settings
(Bold: default)
| A | Non-TTL auto flash mode (D-5, D-8) Setting Non-TTL auto flash mode |
| ### | Auto aperture flash (with modeling illumination) |
| ### | Auto aperture flash (without modeling illumination) |
| ### | Non-TTL auto flash (with modeling illumination) |
| A | Non-TTL auto flash (without modeling illumination) |
| ←RPT | Repeating flash setting of master flash unit (D-49) The master flash unit's repeating flash setting for multiple flash shooting |
| ON | [ON]: Repeating flash on [OFF]: Repeating flash off |
| M | Flash output level at manual mode (uD-16) Setting flash output level compensation step between M1/1 and M1/2 in manual mode |
| M1/1 | [ON]: Compensation with 1/3 EV step is available |
| M1/2 | [OFF]: Compensation with 1 EV step is not available |
| ON | |
| OFF |
| SU-4 | SU-4 type wireless multiple flash shooting (D-50) Set SU-4 type wireless multiple flash shooting |
| ON | [ON]: SU-4 type wireless multiple flash on [OFF]: SU-4 type wireless multiple flash off |
| Illumination pattern (D-24) Select illumination pattern | |
| CW | [CW]: Center-weighted |
| [STD]: Standard | [EVENT]: Even |
| EVEN | |
| Test firing button (D-60, D-61) Select test firing button function | |
| FLASH MODELING | [FLASH]: Test firing [MODELING]: Modeling illumination |
| FLASH | Flash output level of test firing in i-TTL mode (D-60) Set flash output level of test firing in i-TTL mode |
| M1/128 | M1/128: Approx. 1/128 |
| M1/32 | M1/32: Approx. 1/32 |
| M1/1 | M1/1: Ful |
| FX/DX | FX/DX selection (D-62) Select the light distribution angle in accordance with the camera's image area between FX- and DX-format. |
| MZOOM | FX←→DX: Automatically set according to the camera FX: Nikon FX format (36 x 24) DX: Nikon DX format (24 x 16) |
| FX←DX | |
| FX | |
| DX | |
| M | Power zoom off (D-57) Select Power zoom on/off |
| ZOOM | |
| ZOOM | ON: Power zoom off (only for manual setting) OFF: Power zoom on (manual setting is not available) |
| ON | |
| OFF | |
| AF | AF-assist illuminator/flash firing off (D-58) Set AF-assist illumination on/off and flash on/off |
| AF | |
| ON | ON: Activate AF-assist illumination OFF: Cancel AF-assist illumination AF ONLY: Restrict flash firing (only AF-assist illumination fires) |
| OFF | |
| AF ONLY | |
| STBY | Standby function (C-28) Adjusting the time before the standby function is activated |
| AUTO | AUTO: the SB-900 turns off when the camera's exposure meter turns off |
| 40 | 40: 40 seconds |
| 80 | 80: 80 seconds |
| 160 | 160: 160 seconds |
| 300 | 300: 300 seconds |
| --- | ---: Standby function canceled |
Custom functions and settings
| ISO | ISO sensitivity (D-60) Setting ISO sensitivity. ISO sensitivity range is ISO 3 to 8000. |
| 64 | 100: ISO 100 |
| 80 | |
| 100 | |
| 125 | |
| 160 |
| REAR:FRONT REAR FRONT | Ready-light setting on remote flash units (D-42) Select the setting of ready-light on remote flash unit/s in multiple flash shooting for low battery power consumption. |
| REAR, FRONT: Front (at remote setting) and rear ready-lights on REAR: Rear ready-light on FRONT: Front ready-light on (at remote setting) |
| LIGHT | LCD panel illuminator (E-F-9) Setting the LCD panel illuminator to turn on or off |
| ON OFF | ON: Turn on OFF: Turn off |
| Thermal Cut-out (F-6) Setting the Thermal Cut-out function on or off | |
| ON: OFF | ON: Thermal Cut-out on OFF: Thermal Cut-out off |
| Sound monitor (D-42, F-6) When the SB-900 is used as a wireless remote flash unit, or the overheat detection is on, the sound monitor function can be activated or cancelled. | |
| ON: OFF | ON: Sound on OFF: Sound off |
| LCD panel contrast (F-9) Adjust the brightness of the LCD panel. Contrast levels are displayed on the LCD in a nine-step graph. | |
| + 5 levels in 9 steps | |
| m/ft | Unit of measuring distance Set the unit of measuring distance |
| ft | m: meters ft.: feet |
| WP2 | Zoom position setting if the built-in wide-flash adapter is broken (F-4) Select whether the zoom position is manually set or fixed if the built-in wide flash adapter is broken. |
| ON | ON: Available OFF: Not available |
| "My menu" setting (C-26) Select items displayed on the LCD in custom setting. | |
| FULL | FULL: Display all items MY MENU: Display items only selected as "My menu" SET UP: Set up the "My menu" items |
| →MY MENU SET UP | |
| VER. | Version of firmware (F-10) Show firmware version. |
| 5.00 | |
| RESET | Reset custom setting Reset custom setting except unit of measuring distance and "My menu" items to default setting. |
| YES | YES: Reset to default NO: Do not reset |
My menu
When frequently used custom setting items are set as "My menu," only the selected items are displayed on the LCD in the custom setting.
- "My menu" items can be changed at any time.
- To display all items, select "Full."
How to set "My menu"
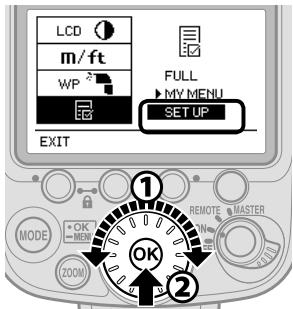
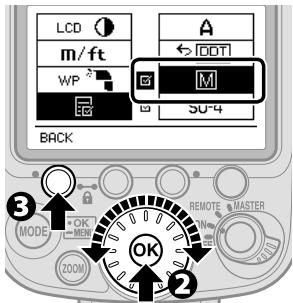
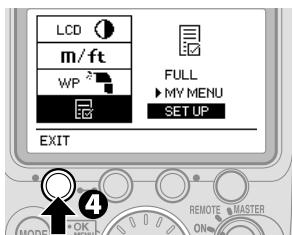
1 Select "SET UP" in "My menu," and press the [OK] button.
Select items to be set as "My menu" items, and press the [OK] button.
- Pressing the [OK] button displays l in the check box of the selected item.
- For items that cannot be selected, no check box appears.
- To cancel the l mark, press the [OK] button again.
Repeat Step 2 to select all desired items, then press Function button 1 [BACK] to return to set-up mode.
4 Press [EXIT] to exit custom setting.
- The LCD returns to normal display.
Replacing/recharging batteries
Refer to the following table to determine when to replace or recharge batteries according to how long the ready-light takes to come on.
| Alkaline | 20 seconds or more |
| Lithium | 10 seconds or more |
| Oxyride | 10 seconds or more |
| Ni-MH | 10 seconds or more |
- If batteries are weak, the flash head zooms back and forth even when the SB-900 is turned on, making a distinctive sound. In this case, replace the batteries even if an external power source is used.
Low battery power indicator

When battery power is low, the icon shown at the left appears on the LCD and the SB-900 stops working.
Replace or recharge batteries.

Minimum recycling time and number of flashes for each type of batteries
For minimum recycling time and number of flashes for each battery type, refer to "Specifications". (F-21)
External power sources (optional)
Using an optional external power source increases the number of flash firings and provides faster recycling times. (F-12)
Standby function to conserve battery power

If the SB-900 and the camera are not used for more than a specified time, the Standby function is automatically activated to conserve battery power.
- The Standby function activates when the camera's exposure meter is turned off (default setting).
To cancel Standby
- Turn the [Power ON-OFF/wireless setting] switch to [ON], [REMOTE] or [MASTER].
- Press the [Test firing] button.
- Press the camera's shutter release button halfway.
Adjusting the lead time before the Standby function is activated
- The lead time before the Standby function is activated can be adjusted by custom setting (C-23).
Explanation of the SB-900's flash modes and functions
- This section explains SB-900 flash modes and functions in combination with CLS compatible cameras and CPU lenses. Functions and LCD displays vary when other types of cameras are used.
- For camera functions and settings, refer to the camera's user's manual.
i-TTL mode D-2
- Auto aperture flash D-5
Non-TTL auto flash D-8
- Distance priority manual flash. D-11
- Manual mode. D-14
- Repeating flash D-17
- Determining the aperture, flash output level and shooting distance in the Distance-priority, Manual and Repeating flash mode .D-22
- Switching illumination pattern D-24
- Bounce flash operation D-26
- Taking close-up photographs with bounce-down flash
- Flash photography with color filters D-33
- Flash output level compensation and exposure compensation
- Wireless multiple flash shooting. D-39
Available functions to be set on the camera ......... D-55
- Flash shooting support functions D-57
Information obtained by monitor pre-flashes and exposure control information is integrated by the camera to automatically adjust flash output levels.
- TTL is recommended for standard shooting situations.
- To take pictures using SB-900 set in i-TTL mode, see "Basic operation" (C-4).
- i-TTL Automatic Balanced Fill-Flash mode and Standard i-TTL mode are available.
i-TTL Automatic Balanced Fill-Flash
Adjust the flash output level automatically for a well-balanced exposure of the main subject and background. TTLBL appears on the LCD.
Standard i-TTL
The main subject is correctly exposed regardless of background brightness. This is useful when you want to highlight the main subject. [TTL] appears on the LCD.
Setting the i-TTL mode
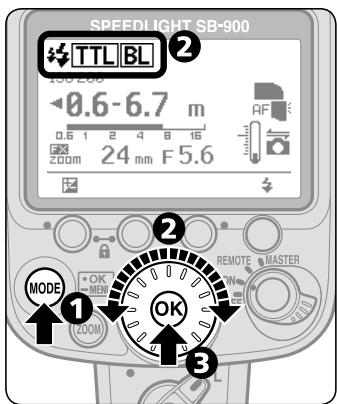
Press the [MODE] button.
2 Rotate selector dial to indicated TTLBL or TTL.
Press the [OK] button to confirm.
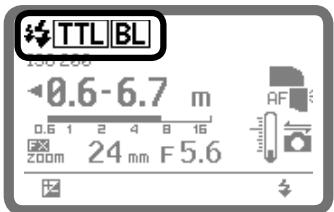
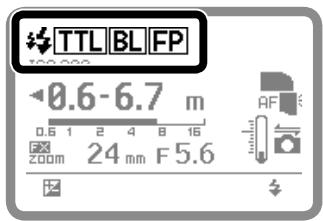
Display for i-TTL mode
Monitor pre-flashes
TTL : i-TTL
BL : Automatic Balanced Fill Flash
FP : Auto FP High-Speed Sync is set on the camera

Monitor pre-flashes
- In i-TTL mode, immediately before the flash fires, the SB-900 fires a series of imperceptible pre-flashes to analyze the information of the subject.
SB-900 flash shooting distance range
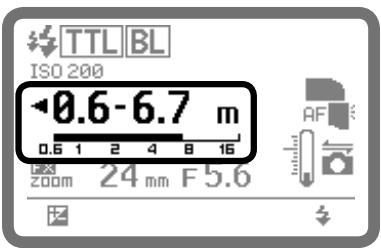
The flash shooting distance range is indicated by numbers and a bar chart on the LCD.
- Set the shooting distance within this range.
- The range varies depending on ISO sensitivity, camera's image area setting, illumination pattern, angle of coverage and aperture. For more information, see "Specifications." (F-16)

Auto setting of ISO sensitivity, aperture and focal length
When using with a CLS-compatible camera and a CPU lens, SB-900's ISO sensitivity, aperture and focal length are automatically set according to camera setting.
- For more information about the ISO sensitivity range, see the camera's user's manual.

When insufficient light for correct exposure is indicated
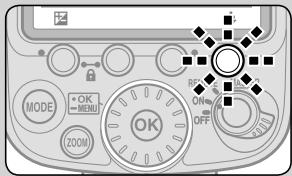
- When the SB-900 fires at full flash output level, ready-lights on the SB-900 and in the camera's viewfinder blink for approx. three seconds after shooting.
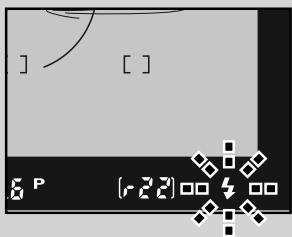
-
In this case, underexposure may occur. To compensate the exposure, use a wider aperture or move closer to the subject and reshoot.
-
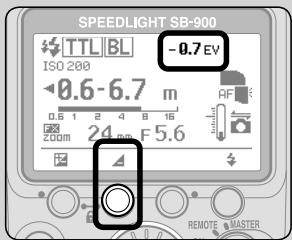
The underexposure value (-0.3 to -3.0 EV) is displayed on the SB-900's LCD panel for approx. three seconds while the above ready-lights blink.
-
Pressing Function button 2 recalls display of underexposure value in TTL mode.

Changing camera's metering mode
- When camera's metering mode is changed to spot metering while i-TTL Automatic Balanced Fill-Flash is selected, the TTL mode automatically changes to the standard i-TTL mode.
- In such case, the TTL mode automatically changes to the i-TTL Automatic Balanced Fill-Flash, after changing camera's metering mode to Multi-pattern or Center-weighted.
Auto aperture flash
The SB-900's built-in sensor measures the flash illumination reflected from the subject and controls the flash output in combination with data automatically transmitted from the camera and lens to the SB-900, including the ISO sensitivity value, the exposure compensation value, the aperture and focal length of the lens.
Setting the Auto aperture flash mode
Auto aperture flash can be changed to Non-TTL auto flash (D-8) by using the custom setting. (C-22)
- The default setting is Auto aperture flash (with monitor pre-flashes).
- When no aperture information is transmitted from camera to the SB-900, flash mode is automatically set to Non-TTL auto flash.
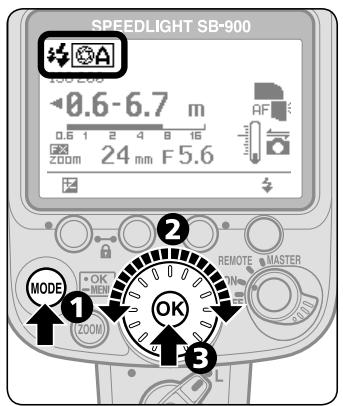
Press the [MODE] button.
2 Rotate selector dial to indicate A or A.
3Press the [OK] button to confirm the setting.
Display for Auto aperture flash
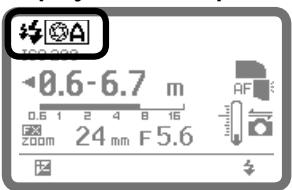
:Monitor pre-flashes on
A : Auto aperture flash on

Monitor pre-flashes
- Monitor pre-flashes on or off can be set by using the custom setting. (C-22)
- The SB-900 fires a series of imperceptible monitor pre-flashes immediately before the flash fires to obtain information on the subject.
- To perform the Auto FP-High Speed Sync (D-55) or FV Lock (D-55), activate the monitor pre-flashes.
Flash shooting distance range in Auto aperture flash mode
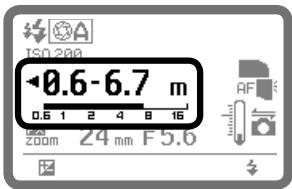
The flash shooting distance range is indicated by numbers and a bar chart in the LCD.
- Set the shooting distance within this range.
- The range varies depending on ISO sensitivity, camera's image area setting, illumination pattern, angle of coverage and aperture. For more information, see "Specifications." (F-16)

Notes on using a telephoto lens in the Auto aperture flash mode
- When shooting a distant subject using a telephoto lens in "Auto aperture flash" mode, underexposure may occur even though the subject is within the flash shooting distance range.
- Use of the i-TTL mode is recommended.
Taking a picture in Auto aperture flash mode
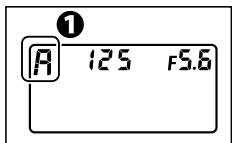
1 Camera's control panel
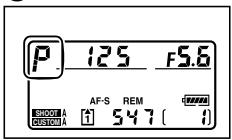
1 Set the camera's exposure mode to "P" (Programmed Auto) or "A" (Aperture-Priority Auto).
While using a CPU lens which has an aperture ring
While using a CPU lens which has an aperture ring, lock the lens aperture at minimum. For details, see lens' user's manual.
Camera's control panel
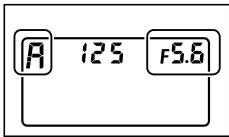
With the camera's exposure mode set to "A", set the aperture on the camera while reading the flash shooting distance range on the SB-900's LCD.
- Decide the aperture value by referring to the chart.
③Compose the picture, confirm that the ready-light is on, then shoot.
Insufficient light for correct exposure
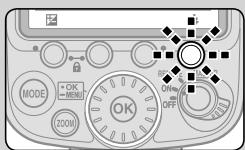
- When the SB-900 fires at full flash output level, readylights on the SB-900 and in the camera's viewfinder blink for approx. three seconds after shooting.
- In this case, underexposure may occur. To compensate the exposure, use a wider aperture or move closer to the subject and reshoot.
Checking the correct exposure before shooting
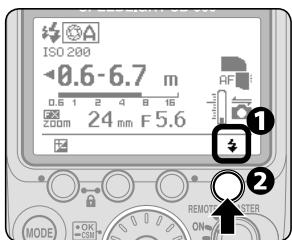
1 Confirm the test firing indicator appears on the LCD.
Make the necessary settings on the SB-900 and camera and press the test firing button to fire the flash.
- Ready-lights blinking after shooting may indicate insufficient light for correct exposure. In this case, set a wider aperture on the camera or lens, or move closer to the subject.
Non-TTL auto flash
The SB-900's built-in sensor measures the flash illumination reflected from the subject, automatically controlling the SB-900's light output to give the correct exposure. This allows you to make exposure compensation easily by varying the aperture set on the camera or lens.
Setting the Non-TTL auto mode
Non-TTL auto flash can be changed to Auto aperture flash (D-5) by using the custom setting. (C-22)
- Default setting is "Auto aperture flash" (with monitor pre-flashes).
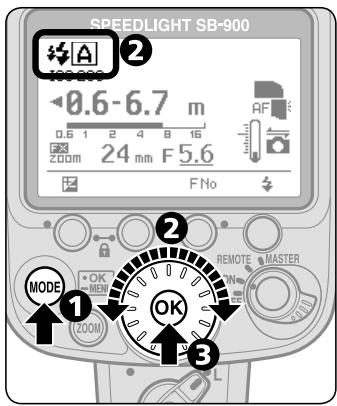
Press the [MODE] button.
2 Rotate selector dial to indicate A.
3Press the [OK] button to confirm the setting.
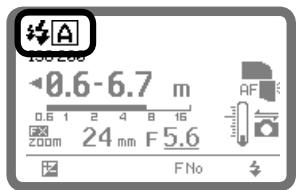
Display for Non-TTL auto flash
Monitor pre-flashes on
A: Non-TTL auto flash on
Monitor pre-flashes
- Monitor pre-flashes on or off can be set by using the custom setting. (C-22)
- When the monitor pre-flashes are activated, the SB-900 fires a series of imperceptible monitor pre-flashes immediately before the flash fires to obtain information on the subject.
- To perform the Auto FP-High Speed Sync (D-55) or FV Lock (D-55), activate the monitor pre-flashes.
Flash shooting distance range in Non-TTL auto flash mode
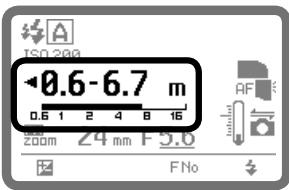
The flash shooting distance range is indicated by numbers and a bar chart on the LCD.
- Set the shooting distance within this range.
- The range varies depending on ISO sensitivity, camera's image area setting, illumination pattern, angle of coverage and aperture. For more information, see "Specifications." (F-16)
When using a telephoto lens in the Non-TTL auto flash mode
- When shooting using a telephoto lens in Non-TTL auto flash mode, underexposure may occur even though the subject is within flash shooting distance range.
- Use of the i-TTL mode is recommended.
Taking a picture in Non-TTL auto flash mode
Camera's control panel
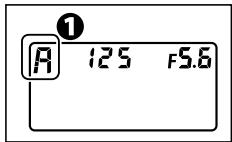
1 Set the camera's exposure mode to "A" (Aperture-Priority Auto) or "M" (Manual).
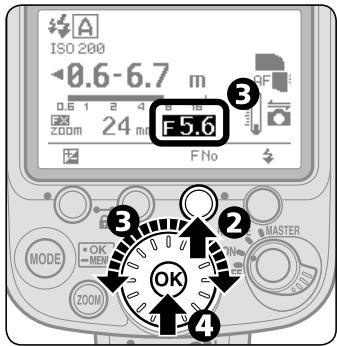
Press the Function button 3.
3 Set the aperture by rotating the selector dial while reading the flash shooting distance range on the SB-900's LCD.
4 Press the [OK] button.
Set the aperture value decided in step 3 on the camera or lens.
Set the camera to its highest flash sync shutter speed.
7 Compose the picture, confirm that the ready-light is on, then shoot.
Insufficient light for correct exposure
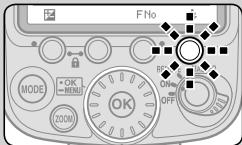
- When the SB-900 fires at full flash output level, ready-lights on the SB-900 and in the camera's viewfinder blink for approx. three seconds after shooting.
- In this case, underexposure may occur. To compensate the exposure, use a wider aperture or move closer to the subject and reshoot.
Checking the correct exposure before shooting
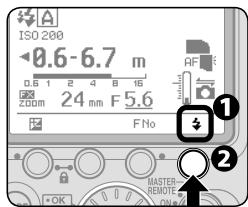
D-10
1 Confirm the test firing indicator appears on the LCD.
Make the necessary settings on the SB-900 and camera and press the test firing button to fire the flash.
- Ready-lights blinking after shooting may indicate insufficient light for correct exposure. In this case, set a wider aperture on the camera or lens, or move closer to the subject.
Distance priority manual flash
In this flash mode, when you enter the shooting distance value, the SB-900 automatically controls the light output according to the aperture set. You can take pictures that have the same exposure even when shooting at different apertures.
- Flash output level is automatically compensated by changing the flash output level compensation value.
- Underexposure is not indicated in Distance-priority manual flash mode.
Setting the Distance-priority manual flash
Distance-priority manual flash is not available when the SB-900's flash head is adjusted to other than the horizontal/front or bounce-down flash position.
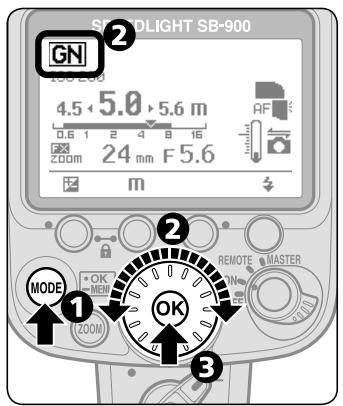
Press the [MODE] button.
2 Rotate selector dial to indicate GN.
Press [OK] button to confirm the setting.
Display for Distance-priority manual flash (at 5 m shooting distance)
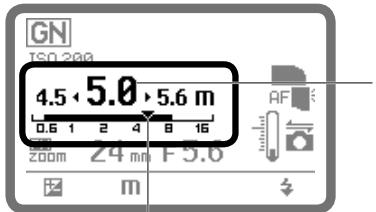
Shooting distance (numerical indicator)
Shooting distance and flash shooting distance range (▼ and bar) When (▼) appears on the shooting distance range indication (bar), the SB-900 fires with appropriate flash output.
Shooting in Distance priority manual flash mode
Camera's control panel
1 Set the camera's exposure mode to "A" (Aperture-Priority Auto) or "M" (Manual).
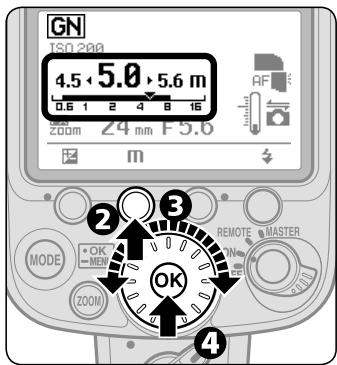
Press the Function button 2.
Set the shooting distance by rotating the selector dial.
- The shooting distance varies depending on ISO sensitivity within a range between 0.3m and 20m .
4 Press the [OK] button.
Set the aperture on the camera.
-
Aperture should be calculated using the calculation formula. (D-22)
-
The aperture on the SB-900 cannot be set directly.
⑤Compose the picture, confirm that the ready-light is on, then shoot.
Flash shooting distance range in "Distance-priority manual flash" mode
| 0.3 | 0.4 | 0.5 | 0.6 | 0.7 | 0.8 | 0.9 | 1.0 | 1.1 | 1.3 | 1.4 | 1.6 |
| 1.8 | 2.0 | 2.2 | 2.5 | 2.8 | 3.2 | 3.6 | 4.0 | 4.5 | 5.0 | 5.6 | 6.3 |
| 7.1 | 8.0 | 9.0 | 10 | 11 | 13 | 14 | 16 | 18 | 20 |
See charts for flash shooting distance range.
- If the desired shooting distance is not on the chart, select a shorter shooting distance (e.g. when your desired shooting distance is 2.7m , select 2.5m ).
When the flash head is rotated in Distance-priority manual flash mode
- When the flash head is rotated to other than the horizontal/front or bounce-down flash position in Distance-priority manual flash, the flash mode is automatically changed to Auto aperture flash mode or Non-TTL auto flash mode.
- In this case, when the flash head is adjusted to horizontal/front or bounce-down flash position again, the flash mode is automatically changed to Distance-priority manual flash mode.

Insufficient light for correct exposure
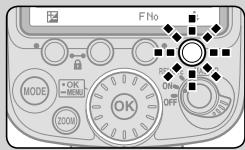
- When the SB-900 fires at full flash output level, ready-lights on the SB-900 and in the camera's viewfinder blink for approximately three seconds after shooting.
- In this case, underexposure may occur. To compensate, use a wider aperture or move closer to the subject and reshoot.
Manual mode
In Manual flash mode, you select the aperture and flash output level. In this way, you can control the exposure and flash shooting distance when shooting subjects where the correct exposure is difficult to obtain in the TTL or Non-TTL auto flash mode.
- The flash output level can be set from M1/1 (full output) to M1/128 to match your creative preferences.
- Underexposure is not indicated in Manual mode.
Setting Manual mode
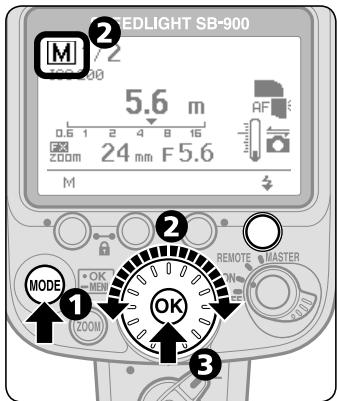
Press the [MODE] button.
Rotate selector dial to indicate M.
3Press the [OK] button to confirm the setting.
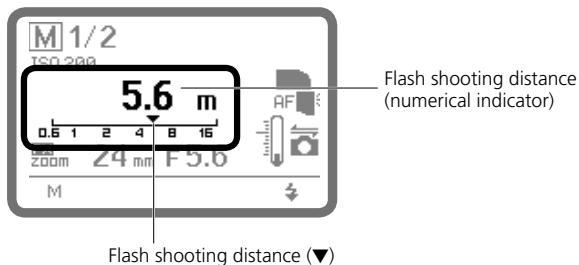
Display for Manual mode
Taking a picture in Manual mode
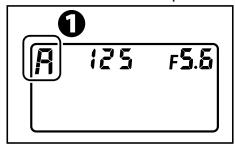
Camera's control panel
1 Set the camera's exposure mode to "A" (Aperture-Priority Auto) or "M" (Manual).
Determine the flash output level and aperture to match the flash shooting distance.
- Flash output level and aperture should be calculated using the calculation formula. (D-23)
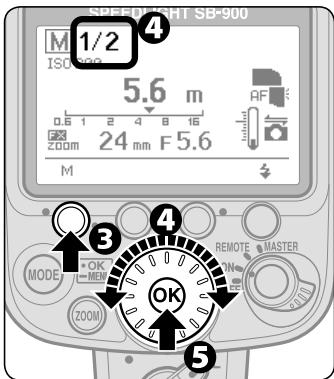
Press the Function button 1.
Set the flash output level by rotating the selector dial.
Press the [OK] button.
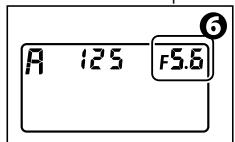
Camera's control panel
Set the aperture on the camera.
- The aperture on the SB-900 cannot be set directly.
- The shooting distance indicated matches the selected flash output level and aperture.
7Compose the picture, confirm that the ready-light is on, then shoot.
Setting the flash output level
Press the Function button 1, and then rotate the selector dial to change the flash output level.
- When you rotate the selector dial clockwise, the indicated denominator decreases (flash output level increases).

- When you rotate the selector dial counterclockwise, the indicated denominator increases (flash output level decreases).

- The flash output level changes in ± 1/3 steps except between 1/1 and 1/2 . 1/32 (-0.3) and 1/64 (+0.7) represent the same flash output level.
- In default setting, flash output level compensation between 1/1 and 1/2 is ± 1 step. This step can be changed to ± 1/3 using custom setting (C-22). With some cameras, and when using faster shutter speeds with a flash output level greater than M1/2, actual flash output may decrease to M1/2 level.
1 / 1 1 / 2 (20 1 / 64 1 / 128
- (large) ← —— flash output level → (small) —
distant← shooting distance near
Repeating flash
In Repeating flash mode, the SB-900 fires repeatedly during a single exposure, creating stroboscopic multiple-exposure effects. This operation is useful when shooting fast-moving subjects.
- Be sure to use fresh or fully charged batteries and allow enough time for the flash to recycle between each repeating flash session.
- Use of a tripod is recommended to prevent camera/flash shake, because slower shutter speeds are used.
- Underexposure is not indicated in Repeating flash mode.
Setting the Repeating flash
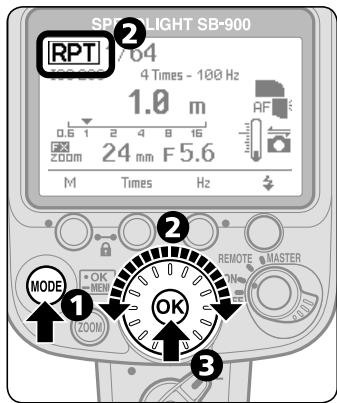
Press the [MODE] button.
Rotate selector dial to indicate RPT.
Press the [OK] button to confirm the setting.
Display for Repeating flash
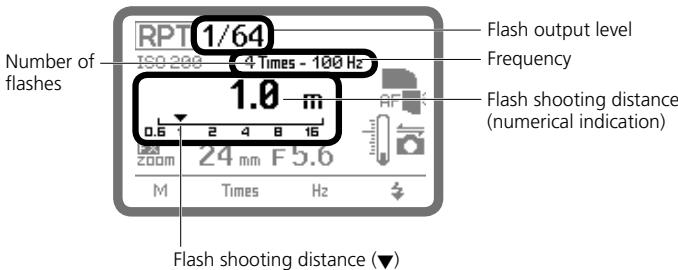
Setting the flash output level, the number of repeating flashes, and the frequency (Hz) per frame
- The number of flashes (Times) represents the number of times the flash fires per frame.
- The frequency (Hz) represents the number of times the flash fires per second.
- The number of flashes is the maximum flash firing number. Because the Speedlight fires during a single exposure, the actual number of repeating flashes per frame falls below the one set as the shutter speed increases or the number of flashes per second decreases.
- Referring to the table below, set the flash output level, the frequency, and the number of repeating flashes separately for each picture.
Maximum number of repeating flashes per frame
| Frequency | Flash output level | ||||||||||||
| M1/8 | M1/8-1/3EV | M1/8-2/3EV | M1/16 | M1/16-1/3EV | M1/16-2/3EV | M1/32 | M1/32-1/3EV | M1/32-2/3EV | M1/64 | M1/64-1/3EV | M1/64-2/3EV | M1/128 | |
| 1Hz | 14 | 16 | 22 | 30 | 36 | 46 | 60 | 68 | 78 | 90 | 90 | 90 | |
| 2Hz | |||||||||||||
| 3Hz | 12 | 14 | 18 | 30 | 36 | 46 | 60 | 68 | 78 | 90 | 90 | 90 | |
| 4Hz | 10 | 12 | 14 | 20 | 24 | 30 | 50 | 56 | 64 | 80 | 80 | 80 | |
| 5Hz | 8 | 10 | 12 | 20 | 24 | 30 | 40 | 44 | 52 | 70 | 70 | 70 | |
| 6Hz | 6 | 7 | 10 | 20 | 24 | 30 | 32 | 36 | 40 | 56 | 56 | 56 | |
| 7Hz | 6 | 7 | 10 | 20 | 24 | 26 | 28 | 32 | 36 | 44 | 44 | 44 | |
| 8Hz | 5 | 6 | 8 | 10 | 12 | 14 | 24 | 26 | 30 | 36 | 36 | 36 | |
| 9Hz | 5 | 6 | 8 | 10 | 12 | 14 | 22 | 24 | 28 | 32 | 32 | 32 | |
| 10Hz | 4 | 5 | 6 | 8 | 9 | 10 | 20 | 22 | 26 | 28 | 28 | 28 | |
| 20Hz | |||||||||||||
| 30Hz | |||||||||||||
| 40Hz | |||||||||||||
| 50Hz | |||||||||||||
| 60Hz | |||||||||||||
| 70Hz | |||||||||||||
| 80Hz | |||||||||||||
| 90Hz | |||||||||||||
| 100Hz | |||||||||||||
Shooting with Repeating flash
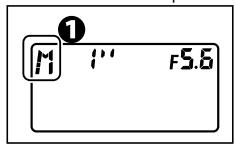
Camera's control panel
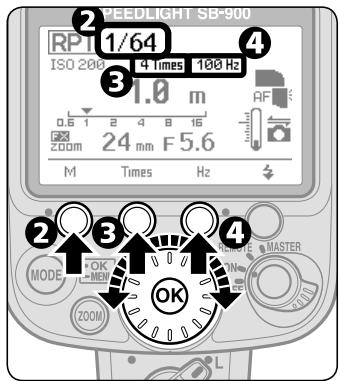
Camera's control panel
1 Set the camera's exposure mode to "M" (Manual).
Press the Function button 1, rotate the selector dial to set flash output level, and press the [OK] button to confirm.
Available flash output level is 1/8 - 1/128 .
Press the Function button 2, rotate the selector dial to set number of flashes, and press the [OK] button to confirm.
Press the Function button 3, rotate the selector dial to set frequency, and press the [OK] button to confirm.
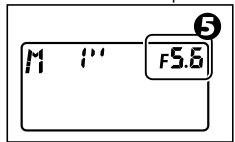
Determine the guide number according to the set flash output level and focal length, then calculate the correct aperture from the guide number and shooting distance. Finally, set this aperture on the camera.
- The guide number and aperture should be calculated using the calculation formula. (E D-22)
- The aperture on the SB-900 cannot be set directly.
- The shooting distance indicated matches the selected flash output level and aperture.
Camera's control panel
Set the shutter speed.
- Use the following equation to determine the shutter speed and use a shutter speed one or more steps slower than the calculated shutter speed.
Shutter speed = Number of flashes per frame ÷ Frequency of flashes (Hz)
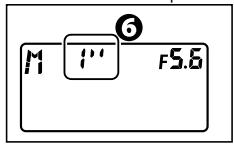
- For example, if the number of flashes per frame is 10 and the frequency is 5Hz , divide 10 by 5 to get a shutter speed of 2 seconds or slower. (Set shutter speeds of slower than 2 seconds.)
- B (bulb) can be used for the shutter speed.
7Compose the picture, confirm that the ready-light is on, then shoot.
Making sure the flash fires correctly before shooting
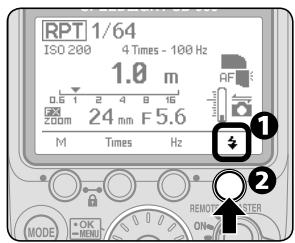
1 Confirm the test firing indicator appears on the LCD.
2 Confirm all shooting settings on the SB-900 and the camera are the same as for actual shooting, and then press the test firing button.
- Pressing the test firing button fires the flash for the selected frequency and number of flashes.
V Exposure compensation in Repeating flash mode
- The flash shooting distance calculated in Step ⑤ is the correct exposure for the first flash in the sequence. Therefore, repeating flash at this flash output level will result in overexposure of any overlapping images.
- To prevent this, set a smaller aperture on the camera as needed.
When the aperture value is not displayed in the SB-900's LCD
- Camera's aperture data is not transmitted to the SB-900.
- Press the Function button 3 for one second to highlight f-number and set appropriate aperture value on the SB-900.
Determining the aperture, flash output level and shooting distance
In Distance-priority, Manual and Repeating flash modes, use the guide number table and the following equation to calculate the aperture, flash output level, and shooting distance to obtain the correct exposure.
- The guide number (GN at ISO 100; m/ft) indicates the amount of light generated by the flash.
- The larger the number, the greater the flash output.
ISO sensitivity factors
For sensitivities, multiply the guide number by the factors shown in the table below.
| ISO | 25 | 50 | 100 | 200 | 400 | 800 | 1600 | 3200 | 6400 |
| Factors | 0.5 | 0.71 | 1 | 1.4 | 2 | 2.8 | 4 | 5.6 | 8 |
Guide number (GN at ISO 100; m/ft)
The table below shows the guide numbers while using the standard illumination pattern when the SB-900 is mounted on a Nikon FX format camera.
- For others, see "Specifications" (F-18).
| Flash output level | Zoom position (mm) | ||||||||||||||||
| 14mm | 17 | 18 | 20 | 24 | 28 | 35 | 50 | 70 | 85 | 105 | 120 | 135 | 180 | 200 | |||
| WP + BA | BA | WP | |||||||||||||||
| 1/1 | 13/42.7 | 16/52.5 | 17/55.8 | 22/72.2 | 23/75.5 | 24/78.7 | 27/88.6 | 30/98.4 | 34/111.5 | 40/131.2 | 44/144.1 | 47/154.2 | 49.5/162.4 | 51/167.3 | 51.5/169.0 | 54/117.2 | 56/183.7 |
| 1/2 | 9.1/29.9 | 11.3/37 | 12/39.3 | 15.5/50.9 | 16.2/53.1 | 16.9/55.4 | 19/62.3 | 21.2/69.6 | 24/78.7 | 28.2/92.5 | 31.1/102.0 | 33.2/108.9 | 35/114.8 | 36.4/118.1 | 38.1/119.4 | 39.5/125.0 | 39.5/129.6 |
| 1/4 | 6.5/21.3 | 8/26.2 | 8.5/27.9 | 11/36.1 | 11.5/37.7 | 12/39.3 | 13.5/44.3 | 15/49.2 | 17/55.8 | 20/65.6 | 22/72.2 | 23.5/77.1 | 24.7/81.0 | 25.5/83.7 | 25.7/84.3 | 27/88.6 | 28/91.9 |
| 1/8 | 4.5/14.8 | 5.6/18.8 | 6/19.7 | 7.7/25.3 | 8.1/26.6 | 8.4/27.6 | 9.5/31.2 | 10.6/34.8 | 12/39.3 | 14.1/46.3 | 15.5/50.9 | 16.6/54.5 | 17.5/57.4 | 18/59.0 | 18.2/59.7 | 19/62.3 | 19.7/64.6 |
| 1/16 | 3.2/10.5 | 4/13.1 | 4.2/13.8 | 5.5/18.0 | 5.7/19.7 | 6/19.7 | 6.7/21.9 | 7.5/24.6 | 8.5/27.9 | 10/32.8 | 11/36.1 | 12.7/38.4 | 12.7/40.4 | 12.7/41.7 | 13.5/42.0 | 13.5/44.3 | 14/45.9 |
| 1/32 | 2.2/7.2 | 2.8/9.2 | 3/9.8 | 3.8/12.5 | 4/13.1 | 4.2/13.8 | 4.7/15.4 | 5.3/17.4 | 6/19.7 | 7/23.0 | 7.7/25.3 | 8.3/27.2 | 8.7/28.5 | 9/29.5 | 9.1/29.9 | 9.5/31.2 | 9.8/32.1 |
| 1/64 | 1.6/5.2 | 2/6.6 | 2.1/6.9 | 2.7/8.9 | 2.8/9.2 | 3/9.8 | 3.3/10.8 | 3.7/12.1 | 4.2/13.8 | 5/16.4 | 5.5/18.0 | 5.8/19.0 | 6.1/20.0 | 6.3/20.7 | 6.4/21.0 | 6.7/21.9 | 7/23.0 |
| 1/128 | 1.1/3.6 | 1.4/4.6 | 1.5/4.9 | 1.9/6.2 | 2/6.6 | 2.1/6.9 | 2.3/7.5 | 2.6/8.5 | 3/9.8 | 3.5/11.5 | 3.8/12.5 | 4.1/13.5 | 4.3/14.1 | 4.5/14.8 | 4.5/15.4 | 4.7/15.4 | 4.9/16.1 |
BA: With the Nikon Diffusion Dome attached
- WP: With the wide-flash adapter in place
Calculating the correct aperture
Determine the guide number by referring to the guide number table. The correct guide number depends on the flash output level and zoom position. Next, calculate the correct aperture by using the equation below. The correct aperture depends on ISO sensitivity and shooting distance (m/ft.).
f/stop (aperture) = Guide number (GN at ISO 100; m/ft.) × ISO sensitivity factor ÷ Shooting distance (m/ft)
For example, for an ISO sensitivity of 400 (or ISO sensitivity factor: 2), with the zoom position adjusted to 28mm , and the flash output level set to M1/1:
Referring to the guide number table, determine the guide number as 30/98.4 (m/ft.).
When the shooting distance is 4m (13.1 ft.), the correct aperture value is:
30/98.4 (GN at ISO 100, m/ft) × 2 (ISO sensitivity factor for ISO 400) ÷ 4/13.1 (shooting distance; m/ft.) = 15 (aperture)
- Set the smaller aperture value (larger f-number) than calculated above on the camera.
Obtaining the correct flash output level
When the shooting distance and aperture are fixed, calculate the guide number (GN at ISO 100; m/ft.) by using the equation below, based on shooting distance and aperture:
Guide number (GN at ISO 100; m/ft.) = Shooting distance (m/ft) × Aperture (f/) ÷ ISO sensitivity factor
Referring to the guide number table, determine an appropriate flash output level corresponding to the guide number obtained above, then set the same value on the SB-900. For example, for the shooting distance of 6m (19.7 ft) with an aperture of f/8 and the ISO sensitivity of 400 (ISO sensitivity factor: 2):
6/19.7 (shooting distance; m/ft.) × 8 (aperture value) ÷ 2 (ISO sensitivity factor of ISO 400) = 24/79 (GN at ISO 100; m/ft.)
- When the zoom position is adjusted to 35~mm , set M1/2 flash output level on the SB-900, which can be obtained from GN 24/79 (m/ft.) corresponding to the zoom position of 35~mm referring to the guide number table.
- In Distance-priority manual flash operation, the correct flash output level is automatically determined by the SB-900 according to the shooting distance, aperture and ISO sensitivity that are set.
Calculating the shooting distance
Determine the guide number by referring to the guide number table. The correct guide number depends on the flash output level and zoom position. Next, calculate the shooting distance by using the equation below. The shooting distance (m/ft.) depends on ISO sensitivity and aperture.
Shooting distance (m / ft.) = Guide number (GN at ISO 100; m/ft.) × ISO sensitivity factor ÷ Aperture (f/)
Switching illumination pattern
In flash photography, the center of the image is most illuminated, while the edges are darker. The SB-900 provides three types of illumination patterns with different light falloff at edges. Select suitable type according to the shooting environment.
- For sample images of three types of illumination patterns, see the separate volume "A collection of example photos." Pp. 2-3
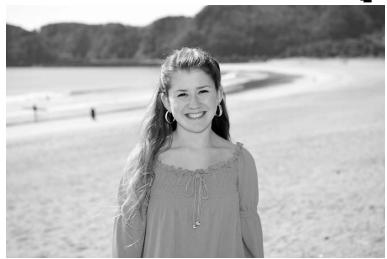
Standard

Center-weighted
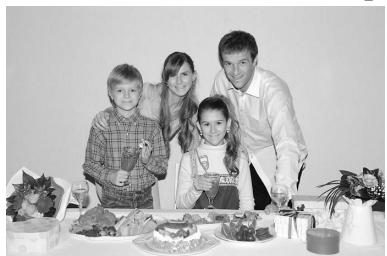
Even
- The basic illumination pattern type for common flash shooting environment.
-
To match the image circle of digital cameras, light falloff at the edge of image is less than shooting with existing external flash unit.
-
The center-weighted pattern provides larger guide numbers at the center of the image than other illumination patterns at the same focal length (the light falloff at the edge will be greater than other illumination patterns).
-
Suitable for shots, such as portraits, in which the light falloff at the edge of an image can be ignored.
-
The light falloff at the edge of the image is less than with the standard illumination pattern.
- Suitable for shooting group photographs indoors, in which sufficient light is required without light falloff at the edges.

To set/confirm illumination pattern
The illumination pattern can be set using custom setting. (C-22)
- Standard is the default setting.
- The selected illumination pattern is indicated with an icon on the LCD.
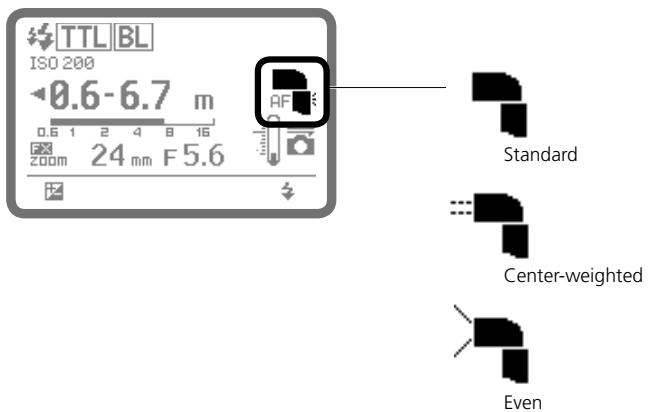
Bounce flash operation
You can tilt or rotate the SB-900's flash head to bounce the light off the ceiling or walls, providing more natural-looking pictures of people with softer shadows. Also, you can soften the shadows even more by using the Nikon Diffusion Dome.
- For more details and comparative example photos, see the separate booklet, "A collection of example photos" Pp. 4-9.
Setting the flash head
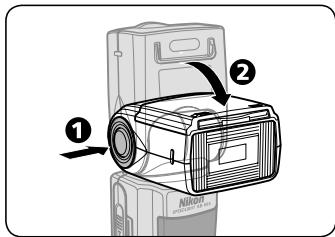
Tilt or rotate the SB-900's flash head by holding down the flash head tilting/rotating lock release button.
- The SB-900's flash head tilts up 90^ and down -7^ , and rotates horizontally 180^ to the left and right.
- Set the flash head at a click stop at the angles shown.
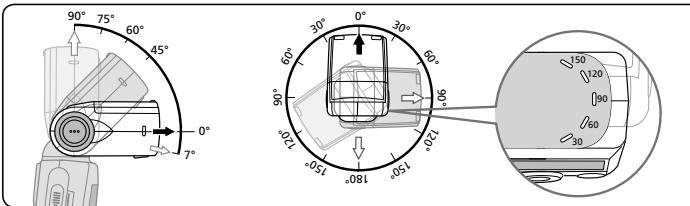
Setting flash head tilting/rotating angles, and choosing the reflecting surface
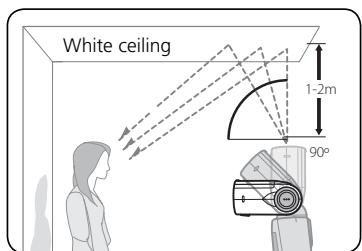
- Good results are generally obtained most simply when the flash head is tilted up and you use the ceiling as a reflecting surface.
- Rotate the flash head horizontally to get the same effect when you hold the camera in the vertical position.
Take care not to let light from the flash unit illuminate the subject directly. - The effective distance between the flash
head and the reflecting surface is approx. 1 m (3.3 ft.) to 2 m (6.6 ft.) depending on the shooting conditions.
- In color photography, select white or highly reflective surfaces to bounce the light off of. Otherwise, your pictures will come out with an unnatural color cast similar to that of the reflecting surface.
Bounce flash operation
Camera's control panel
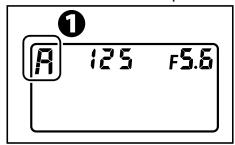
Setting the camera's exposure mode and metering system.
- Set the exposure mode to Aperture-Priority Auto (A) or Manual (M).
- Set the metering system to Matrix Metering "O" or Center-Weighted Metering "O".
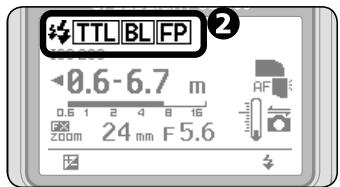
Setting the SB-900's flash mode.
- Set the flash mode to i-TTL, Auto Aperture, or Non-TTL auto.
Setting the camera's aperture.
- In bounce flash, use an aperture 2 to 3 stops wider than with normal flash photography, and adjust it according to the results.
- In Non-TTL auto flash, set the same aperture on the SB-900 as is set on the camera.
- In Manual exposure mode, set the shutter speed.
Adjust the flash head and shoot.
Setting the aperture in bounce flash operation
- In bounce flash, there is a light loss of 2 to 3 stops when compared with normal flash photography (with flash head adjusted to horizontal/front). Therefore, you should use a two- or three-step wider aperture (small f-number), and adjust it according to the results.
- When the flash head is adjusted to other than the horizontal/front position, the flash shooting distance range indicator on the SB-900 disappears. To ensure correct exposure, first confirm the flash shooting distance range and aperture with the flash head in the normal position. Next, set this aperture on the camera.

Using the built-in bounce card
- In bounce flash photography, use the SB-900's built-in bounce card to create a highlight in the subject's eyes, making the eyes look more vibrant and avoiding illuminating the front of the subject.
- Tilt the flash head up 90^ to use this feature most effectively.
Setting the built-in bounce card
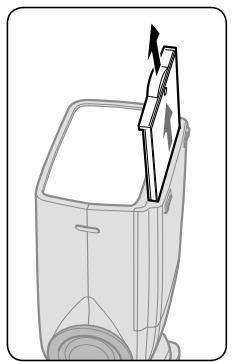
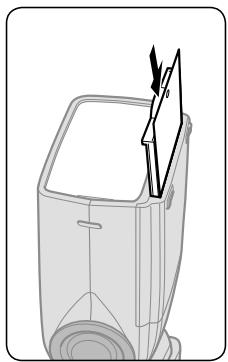
Pull out the bounce card and the wide-flash adapter and, while holding the bounce card, slide the wide-flash adapter back into place inside the flash head.
- To insert the bounce card, pull out the wide-flash card again and slide both cards together back into place.
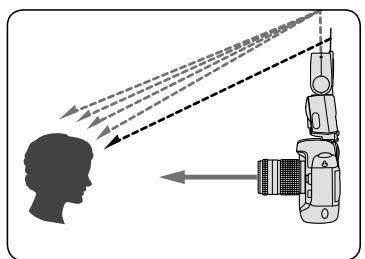
Shooting with the Nikon Diffusion Dome
- By attaching the provided Nikon Diffusion Dome over the flash head, you can diffuse the light even more when doing bounce flash, creating extremely soft light with virtually no shadows.
- With the camera in either the horizontal or vertical position, you get the same effect.
- Good results are generally obtained when the flash head is tilted up 60^ .
- When the Nikon Diffusion Dome is attached and when the camera's image area is set to FX format, the zoom position is automatically set at 12mm , 14mm or 17mm , and 8mm , 10mm or 11mm while setting the camera's image area to DX format.
Attaching the Nikon Diffusion Dome
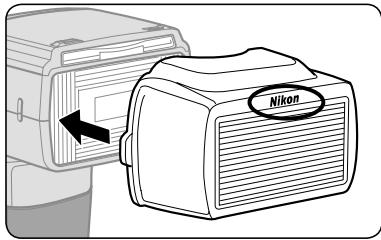
Attach the Nikon Diffusion Dome as shown in the illustration with the Nikon logo facing up.
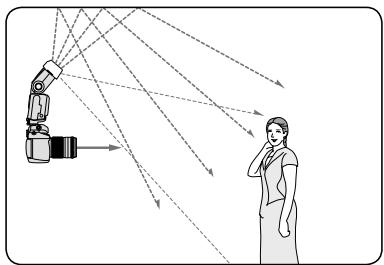
Notes when using the Nikon Diffusion Dome
- The distance between the camera and subject differs from the center of the frame to the periphery, so the peripheral area might not be sufficiently lit in some cases.
Taking close-up photographs with bounce-down flash
When the distance between the camera and subject is less than approx. 2 m (6.6 ft.), you can take more natural-looking close-up pictures using the wide-flash adapter.
- Be careful when using a long lens that the light from the flash is not obstructed by the lens barrel.
- Vignetting may occur in close-up flash photography due to the illumination pattern, lens in use, focal length setting, etc. Therefore, make test shots before shooting an important assignment.
- When the SB-900 is attached to the camera and used as the only flash unit, tilting down the flash head is recommended to ensure sufficient illumination of the lower portion of the subject in close-up photography.
- A bounce-down icon appears when the flash head is tilted down.
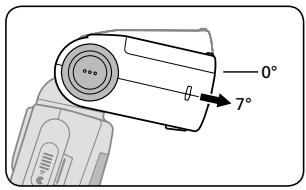
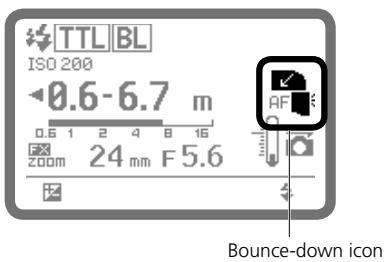

Setting the built-in wide-flash adapter
Slowly pull out the wide-flash adapter all the way, and position it over the flash head.
Then slide the bounce card back into place inside the flash head.
- When the built-in wide-flash adapter is attached and when the camera's image area is set to FX format, the zoom position is automatically set at 12mm , 14mm or 17mm , and 8mm , 10mm or 11mm while setting the camera's image area to DX format.
- To set the zoom position manually, go to custom setting and set "Zoom position setting if the built-in wide-flash adapter is broken off accidentally" to [ON] (manual setting is available). (C-25)
- To put the built-in wide-flash adapter back into place, lift it and push it into the flash head as far as it will go.
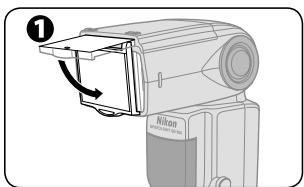
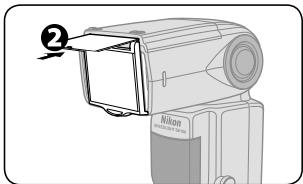
Taking close-ups with bounce-down flash
Camera's control panel
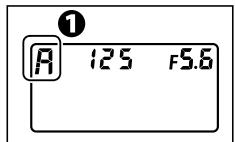
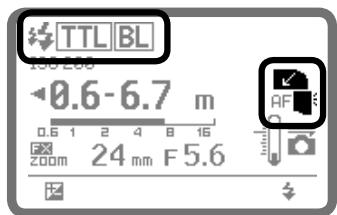
Setting the camera's exposure mode and metering mode.
- Set the exposure mode to Aperture-Priority Auto (A) or Manual (M).
- Set the metering mode to Matrix Metering "O" or Center-Weighted Metering "O".
Set the SB-900's flash mode.
Position the built-in wide-flash adapter.
Tilt the flash head down.
Confirm the ready-light is on then shoot.
When shooting subjects closer than 0.6m (2 ft.)
- With the SB-900 attached to the camera, sufficient illumination of the subject cannot be obtained.
- In this case, use the SB-900 off-camera by attaching the optional TTL Remote Cord as shown below.
- When monitor pre-flashes are fired, distance information from the lens is used to determine the correct exposure. In this case, position the camera (A) and the SB-900 (B) at equal distances from the subject.
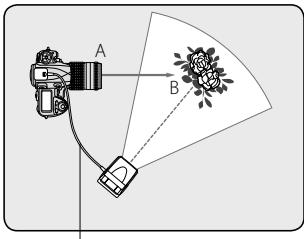
Use TTL Remote Code SC-29, SC-28 or SC-17.
Setting the aperture in off-camera close-up flash operation
- Calculate the aperture by using this equation and table.
- To ensure the correct exposure, use an aperture smaller (larger f-number) than the one obtained from the equation.
| ISO sensitivity | 100 | 200 | 400 | 800 | 1600 | 3200 | 6400 |
| Factor (m/ft) | 2/6.6 | 2.8/9.2 | 4/13 | 5.6/18 | 8/26.2 | 8/26.2 | 16/52.5 |
f/stop ≥ Factor ÷ Flash-to-subject distance
- For example, at an ISO sensitivity of 100 with a subject 0.5m (1.6 ft.) away and the wide-flash adapter in place, the suggested aperture is:
f / stop ≥ 2 ÷ 0.5 = 4 (in meters)
f / stop ≥ 6.6 ÷ 1.6 = approx.4 (in feet)
Notes on using a wideangle lens
- Generally, when using a wide-angle lens, the distance between the camera and subject differs from the center of the frame to the periphery, so the peripheral area might not be sufficiently lit in some cases.
Flash photography with color filters
Two types of color filters are supplied with the SB-900 for taking flash pictures under fluorescent lighting and for use with incandescent/tungsten lighting.
The optional Color Filter Set SJ-3 is available. (F-11)
- Four types of color filters for changing the color of the light from the flash are optionally available.
- For more details on photo examples with color balanced using color filters, see the separate booklet, "A collection of example photos" P. 10.
Using color filters
| Filters | Purpose |
| Fluorescent filters (FL-G1, FL-G2) | Balance the color of light from the flash to match that of fluorescent lighting |
| Incandescent filters (TN-A1, TN-A2) | Balance the color of light from the flash to match that of incandescent or tungsten lighting |
| Color filters (Optional) | Create interesting effects by changing the color of the light from the filters |
- Corresponding light source for each type of color compensation filter differs slightly. FL-G1 provides a greater compensation effect than FL-G2, and TN-A1, greater than TN-A2. Select the appropriate filter according to the results.

Notes on using color filters
- These filters are consumable items. When they fade in color or deteriorate, replace them with the backup filters provided.
- Do not use these filters when taking pictures with repeating flash, as the heat can damage them.
- The heat generated from the flash head can deform color filters. However, this will not affect their performance.
- Scratches on the filters will have no effect on performance unless the filters fade in color.
- To remove dust or dirt, wipe the filter lightly with a soft, clean cloth.
How to use color filters
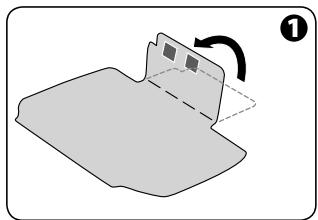
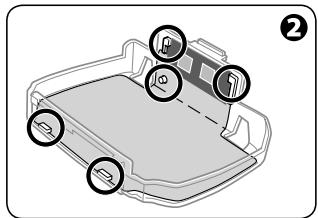
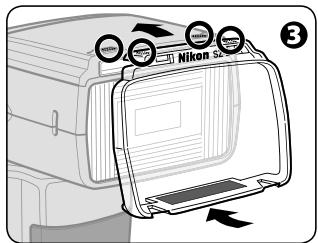
1 Fold along the line marked on the color filter.
Attach the filter to the filter holder as shown in the diagram.
- Align the identification codes (silver marks) on the filter with the black portion on the holder.
- Insert the tip of the filter into the slit on the holder, then align the positioning hole on the filter with the projection on the holder.
V Attach the filter securely to the filter holder without creasing the filter or leaving any gaps.
Place the filter holder on the flash head with the Nikon logo facing up, as shown in the diagram, and insert into the slit at the top.
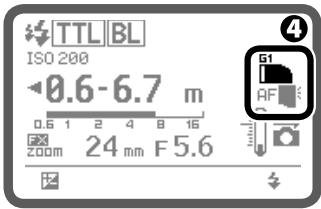
LCD indication while attaching an FL-G1 filter
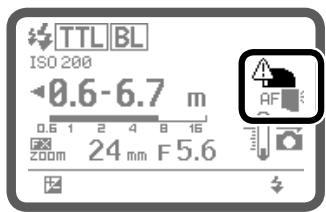
Warning
4 Confirm the color filter indicator is displayed.
- Filter mounted and filter type indicators will be displayed.
-
Do not block the filter detector window.
-
If the warning shown in the figure in the left below appears on the LCD, the filter is not properly attached. Remove and reattach.
Balancing light from the flash using color filters
When using SB-900 with a camera equipped with filter detection (such as D3, D700)
- When a color filter is attached to the SB-900 while the camera's white balance is set to AUTO or FLASH, filter information is automatically transmitted to the camera, and the camera's optimum white balance is automatically adjusted to give the correct color temperature.
When using SB-900 with a camera not equipped with filter detection (such as D2 series, D300, D200, F6)
- Set the camera's white balance according to the filter in use.
■ White balance/exposure compensation value depends on camera in use
| Camera Filter | D3¹¹, D700 | D2 series, D300, D200, D100, D80, D70 series, D60, D40 series, D1X, D1H | D1, D50 |
| FL-G1 | Auto, Flash | Not compatible | Not compatible |
| FL-G2 | Auto, Flash | Not compatible | Not compatible |
| TN-A1 | Auto, Flash | Incandescent (fine tune +3), +1.0 EV²² | Not compatible |
| TN-A2 | Auto, Flash | Direct sunlight (fine tune +3), +0.3 EV²² | Not compatible |
| Color filters (RED, BLUE, YELLOW, AMBER) | Auto, Flash, Direct sunlight | Auto, Flash, Direct sunlight (+0.7²² EV with AMBER) | Auto, Flash, Direct sunlight (+0.7²² EV with AMBER) |
1 D3 camera with either firmware A or firmware B version 2.00 or later. (F-10)
2 Set the camera's white balance and exposure compensation value.
- For more details on the white balance, see your camera user's manual.
Flash output level compensation and exposure compensation
Making flash output level compensation
You can make exposure compensation for the flash illuminated subject only without affecting the background exposure by modifying the SB-900's flash output level.
- As a basic guide, some plus compensation may be necessary to make the main subject brighter, and some minus compensation to make it darker.
- Flash output level compensation is possible in i-TTL auto flash, Auto Aperture flash, Non-TTL auto flash and Distance-priority manual flash modes.
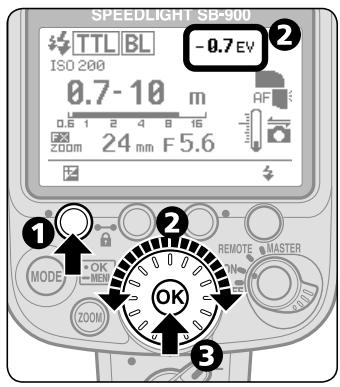
Press the Function button 1 to highlight the Flash output level compensation value.
Turn the selector dial to set desired flash output level compensation value.
- The compensation value can be set in 1/3 steps from +3.0 to -3.0 EV.
Press the [OK] button.
V Canceling flash output level compensation
- To cancel, turn the selector dial to return the compensation value to "0".
- The flash output level compensation cannot be canceled by turning the SB-900 off.
For cameras with a built-in flash featuring the exposure compensation function
- You can also set the flash output level on the camera. For details, see your camera user's manual.
- If you compensate the flash output level on both the camera and the SB-900, the exposure is modified by the sum total of both compensation values.
- In this case, the SB-900's LCD panel shows only the compensation value set on the SB-900.
Making exposure compensation
Exposure compensation allows you to make both the subject and background brighter or darker by intentionally modifying the correct flash exposure. This is useful when a subject of extremely high or low reflectivity is included in the scene or when you want to create flash photographs to match your creative preferences.
- Some plus compensation may be necessary when the background includes a highly reflective surface. Likewise, some minus compensation may be required when the background is dark or includes subjects of low reflectivity.
In i-TTL and Auto Aperture flash mode
- Make exposure compensation on the camera. For more details, see your camera user's manual.
In Non-TTL auto flash and Manual flash mode
- In the Non-TTL auto flash mode, the correct exposure can be obtained when the same aperture is set on the camera as that set on the SB-900. Therefore, to make exposure compensation, vary the aperture set on the camera while retaining the aperture set on the SB-900 or vice versa.
- In the Manual flash mode, calculate the proper aperture for the correct exposure from the guide number and the shooting distance (D-22). Then, use a larger or smaller aperture on the camera to make exposure compensation.
- As a basic guide, set a wider aperture on the camera or lens to make the main subject brighter or a smaller aperture to make it darker.
Wireless multiple flash shooting
With the SB-900, the "Advanced" and "SU-4 type" wireless flash operations are available.
- The Advanced Wireless Lighting mode is automatically set as the default. Advanced Wireless Lighting is recommended for standard multiple flash photography.
- SU-4 type wireless multiple flash, set the wireless flash mode to "SU-4" in the custom setting. (C-22)
Flash shooting with Advanced Wireless Lighting
- Available when the SB-900 is used with CLS-compatible cameras.
- Compatible with i-TTL flash mode.
- In this mode, you can divide the remote flash units into three groups and set the flash mode and flash output level compensation values separately for each group.
SU-4 type wireless multiple flash shooting
- SU-4 type wireless multiple flash is particularly suitable for shooting fast moving subjects as both the master flash unit and remote flash units fire simultaneously.
- There are no restrictions as to which cameras can be used.
- Speedlight featuring wireless multiple flash capability can be used either as the master or remote flash unit.
- Speedlights compatible with TTL auto flash can be used as the master flash unit. The optional Wireless Slave Flash Controller SU-4 is necessary when you want to use these Speedlights as remote flash units.
- The camera's built-in flash can also be used as a master flash unit.
Master flash unit and remote flash unit(s)
In this user's manual, a flash unit mounted on the camera, the camera's built-in flash, or the one directly connected to the camera via a TTL Remote Cord is called the master flash unit. All other flash units are called remote flash units.
Notes on performing wireless multiple flash photography
- To avoid accidental firing, turn off the camera and all flash units before mounting the master flash unit on or connecting it to the camera.
- The master flash unit cannot be test-fired.
- The brightness of the flash illumination is inversely proportional to the square of the distance between the flash unit and the subject. For example, if the distance between Speedlight A and the subject is 1 m (3.3 ft.), and Speedlight B is 2 m (6.6 ft.) and both A and B have the same guide numbers, the combined brightness of the two Speedlights will be:
- A : B = 1 : 4 (in meters) or approx. 11:44 (in feet)
- See the instruction manuals of your cameras and Speedlights.
Notes on remote flash
Take care of the following.
Notes on setting a remote flash unit
- When using a Speedlight that has a standby function as a remote flash unit, make sure that the standby function is set to "OFF," or select a standby duration that is long enough in the custom setting.
- The standby function of the SB-900, SB-800, SB-600 and SB-80DX is canceled when wireless remote flash mode is set. Make sure that there is sufficient battery power.
- The SB-50DX's standby duration is automatically extended to approx. one hour when it is set to wireless remote flash mode.
- Set the angle of coverage of the remote flash units wider than the picture angle, so that the subject will receive sufficient illumination even when the angle of the flash head is off axis from the subject. When the flash-to-subject distance is very short, set the angle of coverage wide enough to achieve sufficient light.
Notes on setting up the remote flash units
- In most cases, position the remote flash unit(s) closer to the subject than the camera, so that light from the master flash unit can reach the light sensor of the remote flash unit(s). This is particularly important when holding a remote flash unit in your hand.
-
Data communication cannot be performed properly if there is an obstacle between the master unit and remote flash units.
-
Take care not to let light from the remote flash unit enter the camera lens directly or indirectly in i-TTL auto flash mode. Also, prevent light from entering the master flash unit's light sensor window for Non-TTL auto flash (in Auto Aperture or Non-TTL auto flash mode). Otherwise, the correct exposure cannot be obtained.
- There is no limit to the number of remote flash units that can be used together. However, when using many remote flash units, light may be unintentionally picked up by the light sensor of the master flash unit and interfere with correct operation. The practical number of remote flash units for wireless multiple flash shooting are three. In Advanced Wireless Lighting, for practical purposes, the number of remote flash units should be limited to three for one group.
- Use the provided Speedlight Stand AS-21 for stable placement of the remote flash units.
- Be sure to perform test firing after setting up all flash units.
Using the Speedlight Stand
Use the provided Speedlight Stand AS-21 for stable placement of the remote flash units.
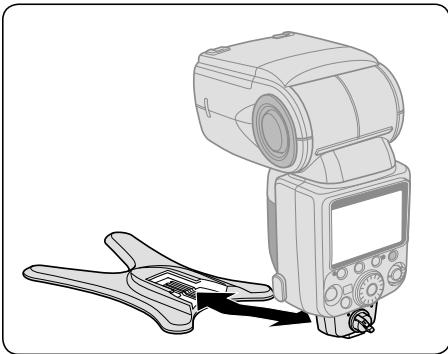
- Attach the SB-900 to the Speedlight Stand in the same way that you attach it to the camera's accessory shoe. The same is true when detaching it from the camera.
- Speedlights SB-15 and SB-27 cannot be used with the AS-21.

Confirming shooting situations in wireless multiple flash operation
You can confirm wireless multiple flash operation by checking the ready-light on the SB-900 or the sound monitor during and after shooting.
- When the SB-900 is used as a wireless remote flash unit, you can monitor its operation by listening to the sound monitor. This function can be activated or canceled using custom setting (C-24). This function is set to activate as the default.
- To save battery power, the ready-lights on the remote flash units can be turned off in the custom setting. The rear ready-light is set to light up and the front ready-light is set to blink as the default. (C-24)
Confirming flash operation using the ready-light or sound monitor
| Ready-light of master flash unit | Ready-light of remote flash unit | Sound monitor | Speedlight condition |
| Lights up | The rear ready-light lights up and the front ready-light blinks. | One beep | Ready to fire |
| Lights up or does not come on (not blinking) | The rear ready-light lights up, and the front ready-light blinks or goes out. | Two short beeps | Fired properly |
| Blinks for approx. 3 sec. | Quickly blinks for approx. 3 sec. | Three long beeps for approx. 3 sec. | Both the master and remote flash units have fired at full output but light may have been insufficient for correct exposure. Use a wider aperture and reshoot. |
| Lights up or does not come on (not blinking) | Quickly blinks for approx. 3 sec. | Three long beeps for approx. 3 sec. | The light sensor of remote flash could not receive correctly the command light from master flash. The light sensor could not detect when to stop firing in sync with the master flash unit, because a strong reflection from the remote flash unit itself or light from another remote flash unit may have entered the light sensor window. Change the direction or position of the remote flash unit and reshoot. |
| Normal operation | Normal operation | Warning chime rings twice (when the SB-900 detects high temperature), or once (for each flash firing) | The SB-900's temperature has risen as a result of the flash being fired multiple times in quick succession. Wait until the SB-900 cools down. |
| Goes out | Goes out | Warning chime rings twice. | The SB-900's temperature has risen to a certain level and the SB-900 enters protective shutdown mode. Wait until the SB-900 cools down. |
Flash shooting in Advanced Wireless Lighting
When the SB-900 is used with Nikon CLS-compatible cameras, Advanced Wireless Lighting is possible. In this mode, you can divide the remote flash units into three groups and set the flash mode and flash output level compensation values separately for each group as well as the master flash unit. This is defined as Flash Shooting in the Advanced Wireless Lighting.
To take photos with repeating flash, see custom setting. (C-22)
- For more details on the example photos in Advanced Wireless Lighting, see the separate booklet, "A collection of example photos" Pp. 16-19.
Mechanism of the Advanced Wireless Lighting
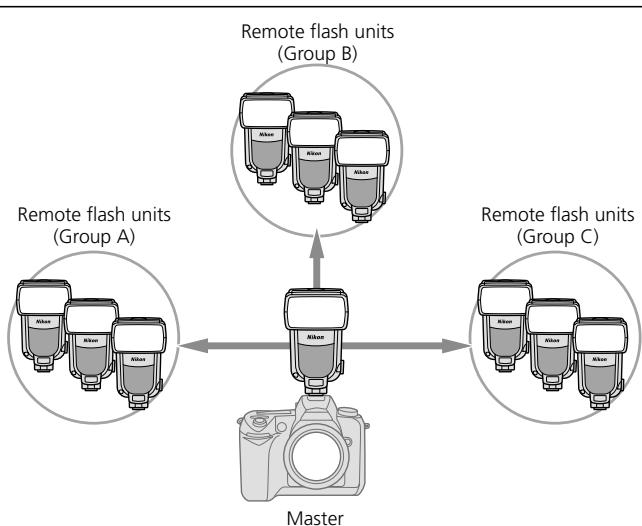
- Remote flash units can be set up to a maximum of three groups (A, B, C).
- Single or several remote flash units can be allocated for one group.
- For a total of four groups including the master and other remote flash units in three groups, you can set the flash mode and flash output level compensation values separately for each group.
- Select one of the four available channels through which the master and remote flash units exchange data.
- If another photographer uses the same type of wireless remote flash setup close by, your remote flash units may accidentally fire in sync with that photographer's master flash unit. To avoid this, use a different channel number.
Flash set-up in the Advanced Wireless Lighting
Arrange the master and remote flash units within the range as instructed in the illustration below.
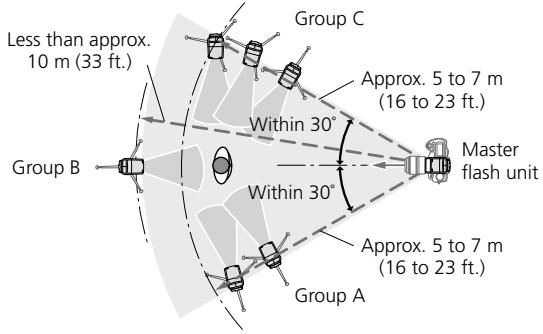
- Direct the light sensor window of the remote flash units toward the master flash.
- As a basic guide, the effective shooting distance between the master and remote flash units is approx. 10m (33 ft.) or less in the front position, and approx. 7m (23 ft.) at both sides. These ranges vary slightly depending on the ambient light.
- Be sure to place all remote flash units that are set in the same group close together.
See "Notes on the remote flash". (D-40)
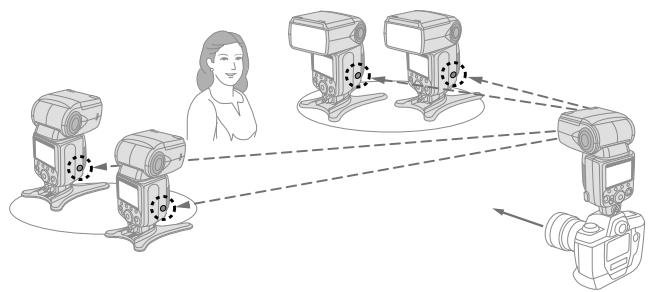
Setting the SB-900 to Advanced Wireless Lighting
You can set the SB-900 to Advanced Wireless Lighting using the Power ON-OFF switch/wireless setting switch.
- Turn the switch while holding down the button on the center.
Setting the SB-900 as the master flash unit
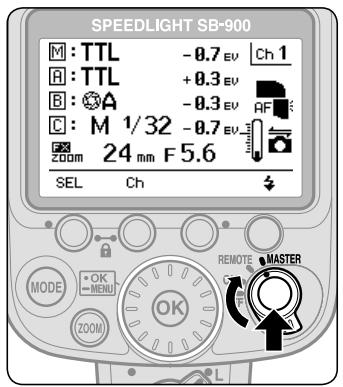
- Align the index on the Power ON-OFF switch/wireless setting switch to MASTER.
Setting the SB-900 as the remote flash unit

- Align the index on the Power ON-OFF switch/wireless setting switch to REMOTE.
Flash shooting in Advanced Wireless Lighting
In this mode, set the following items on either the master flash unit or the remote flash units.
| Item | Speedlight to be set | Remarks |
| Flash mode | Master flash unit | ·The following five flash modes are available: ·i-TTL mode ·Auto Aperture flash* ·Non-TTL auto flash* ·Manual flash ·Flash canceled ·Set the flash mode of the remote flash units on the master flash unit. ·The flash mode can be set independently on the master flash unit and for each group of remote flash units. |
| Flash output level compensation | Master flash unit | ·Flash output level compensation values of the remote flash units can also be set on the master flash unit. ·The flash output level compensation values can be set independently on the master flash unit and for each group of remote flash units. |
| Channel*2 | Master and remote flash units | ·Select one of the four available channels. ·Be sure to set the same channel number for both the master flash unit and remote flash units. |
| Group | Remote flash unit | ·A maximum of 3 groups (A, B, C) |
1 Auto Aperture flash is automatically set. When the SB-900 cannot receive lens information such as focal length and aperture, the flash mode automatically switches to Non-TTL auto flash.
2 If another photographer uses the same type of wireless remote flash setup close by, your remote flash units may accidentally fire in sync with that photographer's master flash unit. To avoid this, use a different channel number.
Flash shooting in Advanced Wireless Lighting
1. Setting the flash mode, flash output level compensation values, and channel number on the master flash unit
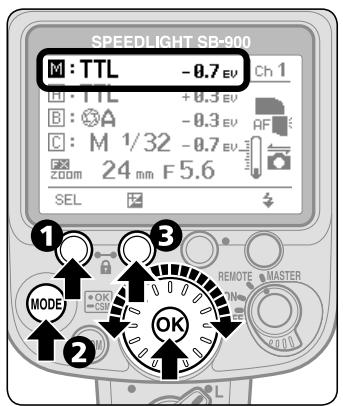
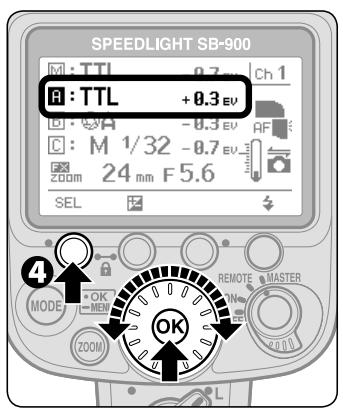
Press the Function button 1 on the master flash unit to highlight "M".
Press the [MODE] button, then turn the selector dial to choose the desired flash mode, and press the [OK] button.
Press the Function button 2, then turn the selector dial to choose the desired flash output level compensation value, and press the [OK] button.
Press the Function button 1 to highlight Group "R", and press the [OK] button.
- Turn the selector dial to choose a group other than "R".
Repeat procedures 2, 3 above to set the flash mode and flash output level compensation values of the remote flash units in Group "A".
In the same way with Group A, set the flash mode and flash output level compensation values of the remote flash units in Groups "B" and "C".
Press the Function button 2, then turn the selector dial to set a channel number, and press the [OK] button.
2. Setting a group and channel number on the remote flash units
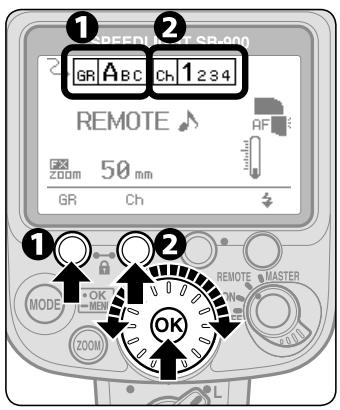
Press the Function button 1, then turn the selector dial to choose a desired group name, and press the [OK] button.
- Group name and channel number being set appears larger.
- For remote flash units where the flash mode and flash output level compensation values are to be set identically, place these flash units into the same group.
Press the Function button 2, then turn the selector dial to choose the desired channel number, and press the [OK] button.
- Be sure to choose the same channel number as set on the master flash unit.
![NIKON SB-900 - Press the Function button 2, then turn the selector dial to choose the desired channel number, and press the [OK] button. - 1](/content/2025/01/116068/images/9aaeb4e2369f0e3a8ff9949ed9c89946dff7386a7907e82dafb3a2c15e904f14.jpg)
Commander function
- The "Commander function" enables the SB-900 to trigger remote flash units without firing itself. To activate the "Commander function," set the SB-900 as the master flash unit and set its flash mode to "Flash canceled."
- This operation will normally not affect the correct exposure of the subject, although the exposure might be affected if the subject is close and a high ISO sensitivity has been set. To limit this effect as much as possible, bounce the light by tilting or rotating the SB-900's flash head.
- Refer to "Commander mode" in your camera user's manual when using a camera's built-in flash as a master flash unit to trigger the remote flash unit (SB-900) in the commander mode.

Repeating flash shooting
In the Advanced Wireless Lighting, the repeating flash operation is possible.
- The Repeating flash mode can be activated or canceled using the custom setting. (C-22)
LCD display in the repeating flash mode
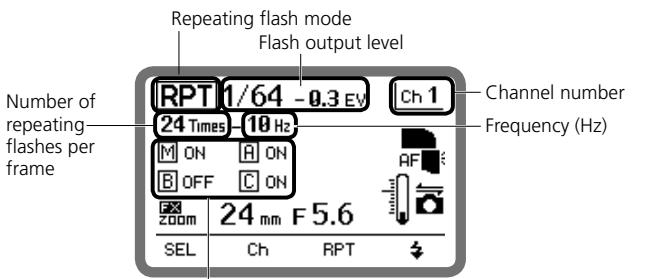
Flash firing of master flash unit and remote flash units (ON/OFF) in Group A (B, C) activated/canceled
- In the repeating flash mode, the flash mode can be set to either the Repeating flash activated or Repeating flash canceled only.
- In the repeating flash mode, all settings of flash output level, frequency and the number of repeating flashes per frame are common to both the master flash unit and remote flash units.
- Referring to "Repeating flash shooting", set the flash output level, frequency, and the number of repeating flashes per frame. (D-17)
SU-4 type wireless multiple flash shooting
SU-4 type wireless multiple flash is particularly suitable for shooting fast moving subjects as both the master flash unit and remote flash units fire simultaneously.
- SU-4 type wireless multiple flash can be performed in two ways: (1) In the AUTO (auto) mode, in which the wireless remote flash units start and stop firing in sync with the master flash unit, and (2) in the M (manual) mode, in which the wireless remote flash units only start firing in sync with the master flash unit.
Suitable cameras and Speedlights
| Suitable cameras | Suitable master Speedlight | Suitable remote Speedlights |
| No limitation | • Speedlights compatible with Non-TTL auto, Distance-priority manual flash and manual flash and monitor pre-flashes that can be canceled in those modes • Camera's built-in flash with monitor pre-flashes that can be canceled. | • Speedlights compatible with SU-4 type wireless flash operation • Speedlights connected to the optional Wireless Slave Flash Controller SU-4. |
Setting the SB-900 to SU-4 type wireless multiple flash
To perform SU-4 type wireless multiple flash, set the wireless flash mode to "SU-4" in the custom setting. (C-22)
- Use the Wireless setting switch to switch over the SB-900 to the master or remote flash unit.
- Hold down the button on the center to turn the Wireless setting switch.
Setting the SB-900 as the master flash unit

- Align the index on the Wireless setting switch with [MASTER].
Setting the SB-900 as the remote flash unit
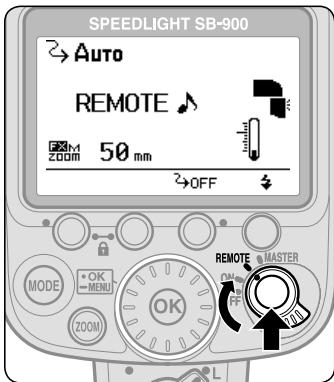
- Align the index on the Wireless setting switch with [REMOTE].

Master and remote flash units' available flash modes in the SU-4 type wireless multiple flash operation
Master flash unit
- Non-TTL auto, Distance-priority manual flash and manual flash modes can be set.
- Press the [MODE] button, then turn the selector dial to choose the desired flash mode.
- When the SB-900 is set as the master flash unit, monitor pre-flashes will not fire.
Remote flash unit
- AUTO (auto) and M (manual) modes are available.
- Press the [MODE] button, then turn the selector dial to choose AUTO or M mode.
Auto (auto) mode:
- In the A mode, the remote flash units start and stop firing in sync with the master flash unit.
- The maximum distance the SB-900's light sensor can detect is approximately 7m (23 ft.) or less in the front position of the master unit.
M (manual) mode:
- In the M mode, the remote flash units only start firing in sync with the master flash unit.
- The maximum detectable distance of the SB-900's light sensor can detect is approx. 40m (131 ft.) in the front position of the master unit.
The flash output level can be set from M1/1 to M1/128.
SU-4 type wireless multiple flash shooting
Canceling monitor pre-flashes
In SU-4 type wireless multiple flash, cancel the monitor pre-flashes of the master flash unit, since monitor pre-flashes cause incorrect exposure.
- When the SB-900 is set as the master flash unit, monitor pre-flashes will not fire.
- For other Speedlights, be sure to cancel the master flash unit's monitor pre-flashes. For how to cancel the master flash unit's monitor pre-flashes, refer to the user's manual of each Nikon Speedlight.
Procedures for SU-4 type wireless multiple flash shooting
Camera's control panel
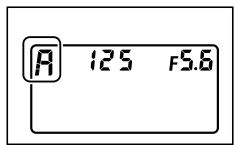
Remote flash unit's LCD panel
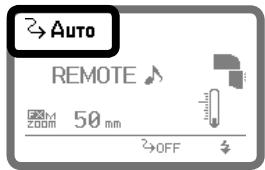
Master flash unit's LCD panel
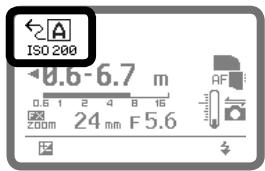
1 Set the camera's exposure mode to A (Aperture-Priority Auto) or M (Manual).
2 Set up all Speedlights (both master and remote flash units) as the SU-4 type wireless multiple flash mode.
Set the flash mode of the remote flash units to AUTO (auto) or M (manual).
4 Set the flash mode of the master flash unit.
- Set it to Non-TTL auto, Distance-priority manual or Manual flash mode, when the remote flash units are set to AUTO (auto).
- Set it to Manual flash mode, when the remote flash units are set to M (manual).
⑤ Confirm the aperture, flash output level and flash shooting distance, then shoot.
To prevent the remote flash units from firing accidentally
With the SU-4 type wireless multiple flash, note the following:
- Do not leave the power of the remote flash units on. Otherwise, ambient electric noise due to a discharge of static electricity, or other electromagnetic wave, etc. may trigger them accidentally. Be sure to turn the power off.
Adjusting the flash output level of the remote flash units in the M (manual) mode
Adjusting the flash output level manually
- Use the following equation to determine the proper manual flash output level of the remote flash unit, depending on your creative preferences.
GN = F × D , where GN is the guide number of the remote flash unit (in meters/feet), F is the lens aperture in use, and D is the distance between the remote flash unit and the subject (in meters/feet).
For example, with the SB-900's zoom position adjusted to 18 mm, using an ISO sensitivity of 100, standard illumination pattern, in FX-format, shooting a subject at a distance of 2 m (6.6 ft.) with a lens aperture of f/5.6, then GN (in meters) = 5.6 × 2 = 11.2, or GN (in feet) = 5.6 × 6.6 = approx. 37. Therefore, to get the correct exposure, refer to the Guide Number table (F-19) and adjust the flash output level to M1/4.
- Refer to "Determining the aperture, flash output level and flash shooting distance in the Distance-priority manual and Manual flash mode" (D-22).
Adjusting the flash output level in Non-TTL auto flash (A); applicable when using a Speedlight compatible with Non-TTL auto flash mounted on the SU-4 (optional)
- Non-TTL auto flash (A) can also be selected on the remote flash unit. In this case, the remote flash unit controls the flash output based on the aperture and ISO sensitivity set on the remote flash unit, and automatically stops firing in sync with the master flash unit (D-8).
1 Set the same ISO sensitivity on the remote flash unit as set on your camera.
Set the same aperture on both the lens and the remote flash unit to obtain the correct exposure.
- Depending on your creative preferences, you can intentionally overexpose or underexpose the picture by modifying the aperture.
- The above setting is applicable only when both the master and remote flash units face the same direction.
Refer to "Flash shooting distance range" (F-16) for more details.
Available functions to be set on the camera
The following functions are available when used with cameras so equipped. Set these functions on the camera. They cannot be set on the SB-900 directly.
- For detailed information regarding camera functions and settings, refer to your camera user's manual.
Auto FP High-Speed Sync mode
High-Speed flash synchronization at a compatible camera's highest shutter speed is possible.
- The Auto FP High-Speed Sync mode is automatically set when the shutter speed exceeds the camera's sync shutter speed.
- This is useful when you want to use a wider aperture to achieve shallow depth of field to blur the background without worrying about sync shutter speed.
- Auto FP High-Speed sync also operates in the Advanced Wireless Lighting mode.
- Available flash modes are i-TTL, Auto Aperture flash with monitor pre-flashes, Non-TTL auto flash with monitor pre-flashes, Distance-priority manual flash, and Manual flash when using a single flash unit.
- For flash shooting distance range in the TTL auto flash mode and the guide numbers in the Auto FP High-Speed Sync mode, refer to "Specifications."
■ Flash Value Lock (FV Lock)
Using FV Lock, you can lock in the appropriate flash exposure, while keeping the subject illumination constant even if you change the composition.
- The flash exposure (brightness) remains the same even when you change the aperture or zoom the lens in and out, because the flash output level automatically follows.
- It is possible to take up to a several number of frames during FV Lock operation.
- Available flash modes are i-TTL, Auto Aperture flash with monitor pre-flashes and Non-TTL auto flash with monitor pre-flashes.
- FV stands for Flash Value, meaning flash illuminated subject exposure.
Slow-sync flash
The flash is controlled at a slow shutter speed to obtain the correct exposure for both the main subject and background in low-light situations.
- Since slow shutter speeds are normally used, use of a tripod is recommended to prevent camera shake.
- For more details on the example photos, see the separate booklet, "A collection of example photos" Pp. 12-15.
Available functions to be set on the camera
Red-eye reduction/Red-eye reduction with slow-sync flash
To prevent your subject's eyes from appearing red in color pictures shot in dim light, the SB-900 fires three flashes at reduced output just before the picture is taken.
- In the Red-eye reduction with slow sync flash, red-eye reduction is combined with slow-sync flash.
- Since slow shutter speeds are normally used in red-eye reduction with slow-sync flash, use of a tripod is recommended to prevent camera shake.
Rear-curtain sync
In normal flash photography, when shooting fast-moving subjects at slow shutter speeds, unnatural-looking pictures can occur, because the subject frozen by the flash appears behind or within the blurred movement (see photo below right).
Rear-curtain flash sync creates a picture in which the blur of a moving subject (for example, the taillights of a car) appears behind the subject and not in front.
- In front-curtain sync, the flash fires immediately after the front curtain opens completely; in rear-curtain sync, the flash fires just before the rear curtain starts to close.
- Since slow shutter speeds are usually used, use a tripod to prevent camera shake.
- This function does not operate in Repeating flash operation.
- In multiple flash, the master flash unit can be set to either front-curtain or rear-curtain sync flash. However, the remote units cannot be set to rear-curtain sync flash. (D-39)
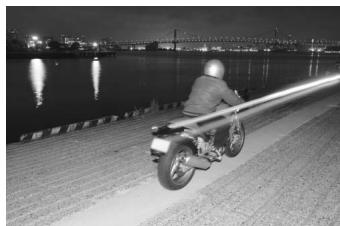
Front-curtain sync
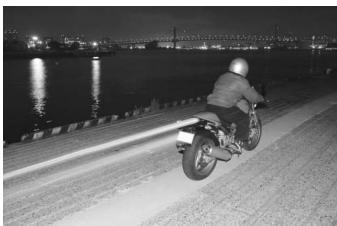
Rear-curtain sync
Flash shooting support functions

Power zoom function
The power zoom function automatically adjusts the zoom position to match the lens focal length.
- Zoom positions to be automatically adjusted differ depending on lllumination pattern. For more details, refer to "Specifications." (F-17)
- The available zoom positions to be automatically adjusted at standard illumination pattern intensity are between 17 mm and 200 mm in FX format, and 12 mm and 200 mm in DX format, without steps.
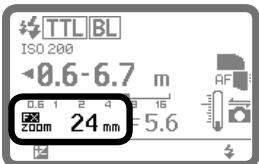
Power zoom function activated
Setting the zoom position manually
When you want to change the zoom position to one that does not match the focal length, you should adjust the zoom position manually.
- A small “ ” above the “ZOOM” indication appears on the LCD panel while manually setting the zoom position.
- Press the [ZOOM] button, then turn the selector dial to set the zoom position.
- Turn the selector dial clockwise to increase the value, and counter-clockwise to decrease the value.
- You can also adjust the zoom position by pressing the [ZOOM] button. In this case, the value increases every time you press the [ZOOM] button. Note that the zoom position changes to the widest position next to the most telephoto position.
Canceling the power zoom function
The power zoom function can be canceled in the custom setting. (C-23)
When the power zoom function is canceled
- The zoom-head can be manually adjusted, but the zoom position indicator does not change even if the lens is zoomed, a lens is changed, or the power turned on or off.
An " appears on the LCD panel. - See "Setting the zoom position manually" above for setting the zoom position.
AF-Assist Illuminator
When the light is too dim for normal autofocus operation, the SB-900's AF-Assist illuminator enables you to perform autofocus photography.
- The SB-900's AF-Assist Illuminator supports the dynamic-area AF system.
- You can set the SB-900's AF-Assist Illuminator to activate or cancel in the custom setting mode. (C-23)
- The AF-Assist Illuminator cannot be used with cameras not compatible with CLS and COOLPIX cameras.
Notes on using the AF-Assist Illuminator
- The AF-Assist Illuminator is available, if an AF lens is mounted and the camera's focus mode is set to S (Single Servo AF with focus priority), AF-A, or AF.
- The effective shooting distance with the AF-Assist Illuminator is approx. 1 m to 10m (3.3 to 33 ft.) from the center of the image with a 50mm f/1.8 lens. The shooting distance varies depending on the lens in use.
- With a D3 camera, for example:
- Suitable lens focal length is between 17mm and 135mm . Focus areas for each focal length, in which autofocusing is available, are as follows:
| 17 mm - 19 mm | 20 mm - 105 mm | 106 mm - 135 mm |
- The AF-Assist illuminator will not light up, if the camera's autofocus is locked or the SB-900's ready-light does not come on.
Refer to your camera user's manual for more information.
AF-assist illuminator/flash firing off
You can set the SB-900's AF-Assist Illuminator and flash firing to activate or cancel in the custom setting. (C-23)

AF-Assist Illuminator is activated. (Default)

AF-Assist Illuminator is canceled. No "AF" appears.
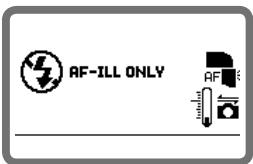
: The SB-900's actual flash firing is canceled. The AF-Assist Illuminator only comes on

If autofocus is impossible while using the AF-Assist illuminator, focus manually.
If the focus indicator does not appear in the camera's viewfinder even though the AF-Assist illuminator turns on, focus manually.

Using the SB-900 off-camera
When using the SB-900 off-camera with the TTL Remote Cord SC-29, autofocus flash photography in dim light is possible, because the SC-29 features an AF-Assist illuminator function. (F-11)

For cameras having a built-in Speedlight
- Even when the camera's AF-assist illuminator is set to activate, the SB-900's AF-Assist illuminator is given priority and the camera's AF-Assist illuminator does not light up.
- The camera's AF-assist illuminator lights up only when the SB-900's AF-Assist illuminator is canceled.

Setting the ISO sensitivity
The ISO sensitivity is automatically set based on the information transmitted from the camera to the Speedlight.
Setting the ISO sensitivity manually
You can set the ISO sensitivity manually using the custom setting. (C-24)
- The available ISO sensitivity range is ISO 3 to 8000. Note that the ISO sensitivity set on the camera is given priority.

Test firing function
You can determine whether the subject will receive the correct exposure by test firing the SB-900 before actually taking the picture by pressing the [Test firing] button.
- The SB-900 fires at M1/128 flash output in the i-TTL flash mode. The amount of flash output can be modified in the custom setting. (C-23)
- In Auto Aperture/Non-TTL auto flash operations, the SB-900 fires at a flash output controlled by the aperture set.
- In the Manual mode, the SB-900 fires at the flash output value set.
- In wireless multiple flash photography, the SB-900 does not perform test firing if it is set as a master flash unit.
Setting the test firing
Set to activate the test firing in the custom setting. (C-22)
- When the test firing is activated, the test firing icon appears on the LCD panel.


Modeling illuminator function
Press the [Test firing] button and the flash fires repeatedly at a reduced flash output level. This is useful for checking the illumination and the shadows cast on the subject before actually taking the picture.
- The flash fires as a Modeling illuminator for a maximum of approx. 1.5 seconds.
- This function operates only after the ready-light comes on.
Setting the modeling illuminator using the [Test firing] button
Set to activate the Modeling illuminator in the custom setting. (C-22)
- When the Modeling illuminator is activated, the modeling illuminator icon appears on the LCD panel.
![NIKON SB-900 - Setting the modeling illuminator using the [Test firing] button - 1](/content/2025/01/116068/images/50b57a8155ba7bf9e4adfa3df662b18e512ffccc4f4201437cb53cbd2e032df6.jpg)
Modeling illumination using camera's depth-of-preview button
When the depth-of-preview button on a camera compatible with the modeling illumination is pressed, the Modeling illuminator fires. For details, see your camera user's manual.
- This function can be performed without activating the SB-900's Modeling illuminator in the custom setting.
Modeling illuminator in the Advanced Wireless Lighting (D-43)
When the [Test firing] button on the master flash unit is pressed, the Modeling illuminator of the highlighted master unit or the remote flash unit group fires at the set flash output value.
- If the master flash unit and grouped remote flash units are not highlighted, the Modeling illuminator on the master flash unit only fires (except when the master flash unit's flash firing is set to cancel.)
- When the camera's depth-of-preview button is pressed, the Modeling illuminators of the master and all other remote flash units fire at the set flash output value at the selected mode.
Modeling illuminator in SU-4 type wireless multiple flash operation (D-50)
Only the Modeling illuminator on the master flash unit fires.
- SU-4 remote flash units also fire according to the modeling illumination of the master flash unit, but these are not Modeling illuminators.

Do not release the shutter while the Modeling illuminator is firing
If you release the shutter while the master flash unit's Modeling illuminator is firing, correct exposure cannot be obtained.
Flash shooting support functions
FX/DX selection
When mounted on a camera that can select an image area between FX-format (36 × 24) and DX-format (24 × 16), the SB-900 automatically selects the suitable light distribution angle, in accordance with the camera's image area setting. For details, see your camera user's manual.
Automatic switching between FX-/DX-format
Based on information from the camera, the light distribution angle is automatically switched according to the FX-format (36 × 24) and DX-format (24 × 16) .
- Icon on the LCD panel shows the status of the format set.
X : DX-format
:FX-format
FX/DX indication with power zoom on
LCD icon varies according to the camera in use.
- FX/DX icon appears: D3, D700
- DDX icon appears: D300, D60, D40 series
- Neither FX nor DX icons appear: Cameras not equipped with FX/DX image area selection
Manual switching of light distribution angle
When manual zoom position setting is activated, the light distribution angle can be switched manually in the custom setting. (C-23)
- Icon on the LCD panel shows the format set.
DXM : DX-format
:Power zoom function is canceled in the custom setting
XM : FX-format
:Power zoom function is canceled in the custom setting
E
For use with cameras other than CLS compatible SLR cameras
Refer to this chapter when using the SB-900 with cameras other than CLS-compatible SLR cameras.
Using the SB-900 with non-CLS-compatible SLR cameras E-2
- For use with i-TTL-compatible COOLPIX cameras E-3
Using the SB-900 with non-CLS-compatible SLR cameras
Using the SB-900 with non-CLS-compatible SLR cameras is possible with the exception of some functions.
- The SB-900's available functions vary depending on cameras in use.
See your camera user's manual as well.

Differences between CLS-compatible cameras and those not compatible with CLS
| CLS-compatible cameras | Non-CLS-compatible cameras | |
| Camera communication icon | Displayed | Not displayed |
| Available flash mode | i-TTL mode Auto Aperture flash Non-TTL auto flash Distance-priority manual flash Manual flash Repeating flash | Non-TTL auto flash Distance-priority manual flash Manual flash Repeating flash |
| ISO sensitivity setting | Auto | Custom set |
| Available wireless multiple flash shooting | Advanced Wireless Lighting SU-4 type | SU-4 type |
| Flash shooting using color filters | Possible | Possible (Filter information not transferred) |
| FV Lock flash | Possible | Not possible |
| Auto FP High-Speed sync. | Possible | Not possible |
| Rear-curtain sync flash | Possible | Depends on the camera in use |
| AF-Assist illuminator | Possible (supporting dynamic-area AF system) | Not possible |
| Firmware update | Possible (with compatible cameras only) | Not possible |
For usage with i-TTL-compatible COOLPIX cameras
Using the SB-900 with i-TTL compatible COOLPIX cameras is possible, with the exception of some functions.
- The SB-900's available functions vary depending on cameras in use.
See your camera user's manual together.
For use with i-TTL compatible COOLPIX cameras:
| i-TTL compatible COOLPIX cameras | |
| Available flash mode | i-TTL modeNon-TTL auto flashDistance-priority manual flashManual flash |
| Available wireless multiple flash shooting*1 | SU-4 type |
| FV Lock flash | Not possible |
| Auto FP High-Speed sync. | Not possible |
| AF-Assist illuminator | Not possible |
| Firmware update | Not possible |
*1 Note that wireless multiple flash using the COOLPIX's built-in flash as a master flash unit and the SB-900 as a remote flash unit cannot be performed.
Adjusting the zoom position when used with i-TTL compatible COOLPIX cameras
- The power zoom function automatically adjusts the zoom position to match the lens focal length. In this case, zoom AUTO appears on the LCD panel, but the zoom position does not appear on the LCD panel.
F
Tips on Speedlight care and reference information
Optional accessories, troubleshooting, Speedlight care, specifications, etc. are presented here.
- Troubleshooting F-2
Notes on continuous flash shooting .F-5
Thermal Cut-out . F-6 - Tips on Speedlight care .F-7
Notes on batteries . F-8
About the LCD panel . F-9 - Updating firmware . F-10
- Optional accessories .F-11
Specifications F-14 - Index F-22
Troubleshooting
If a warning indicator appears, use the following chart to determine the cause of the problem before you take your Speedlight to a retailer or Nikon representative for repair.
Problems with the SB-900
| Problem | Cause | Solution | Ref. page |
| The power cannot be turned on. | The batteries are not correctly installed. | Insert the batteries correctly. | C-4 |
| Battery power is weak. | Replace the batteries. | C-27 | |
| The ready-light does not light up. | The standby function is activated. | Turn on the power. | C-28 |
| Battery power is weak. | Replace the batteries. | C-27 | |
| A strange sound can be heard caused by the flash head zooming back and forth even when the SB-900 is turned on. | Battery power is weak. | Replace the batteries. | C-27 |
| The flash shooting distance range does not appear. | The flash head is not set to the horizontal/front position. | Set the flash head to the horizontal/front position. | C-6 |
| Aperture information has not been received from the camera. | · Confirm the camera setting. · Mount the SB-900 to a camera. | — | |
| ISO sensitivity information has not been received from the camera. | |||
| The SB-900 cannot receive the focal length information from the camera. | Turn off the SB-900 and camera, and turn on them again. | — | |
| Zoom position does not set automatically. | The built-in wide-flash adapter is in use or the Nikon Diffusion Dome is attached. | · Remove the wide-flash adapter or the Diffusion Dome. · Set the following custom setting to manual setting: “Zoom position setting if the built-in wide-flash adapter is broken off accidentally.” | D-29 D-31 C-25 |
| Power zoom function is canceled. | Activate the auto power zoom function. | D-57 | |
| The SB-900 does not work even when any button is pressed. | Control buttons are locked. | Cancel key lock. | C-9 |
| The SB-900 does not fire. | “Canceling flash firing” is activated in the custom setting. | Cancel “Canceling flash firing” in custom setting. | C-23 |
| Master and remote flash units cannot transmit the command because they are positioned too near. | Place the master and remote flash units at an appropriate distance from each other. | D-44 D-51 | |
| The SB-900's temperature may rise | Wait until the SB-900 cools down naturally. | F-6 | |
| Warning indicator | Cause | Solution | Ref. page |
| " Battery Power Weak "indicator appears. | All operations have stopped due to low battery power. | Replace the batteries. | C-27 |
| Warning beeps sound and warning icon appears when the camera's shutter release button is pressed. | The SB-900's temperature rises and the SB-900 may be damaged. | Wait until the SB-900 cools down naturally. | F-6 |
| "Thermal Cut-out "indicator appears. | All operations have stopped because the SB-900's temperature has risen and the SB-900 may be damaged. | Wait until the SB-900 cools down naturally. | F-6 |
| WARNING! "Safety circuit activation "indicator appears. | All functions other than the power switch are inoperable because of power abnormalities. | Turn off the power, remove the batteries, and contact your retailer or Nikon representative. | — |
| The ready-light blinks after firing. | Underexposure may have occurred even with the flash firing at maximum output. | Use a wider aperture or move closer to the subject and reshoot. | D-4 D-7 D-10 D-13 D-42 |
| Warning beeps sound for approx. three seconds in the remote flash unit. | Underexposure may have occurred even with the flash firing at maximum output. | Use a wider aperture, move closer to the subject or change the position of the remote flash unit and reshoot. | D-42 |
| "Filter detection failure "indicator appears. | The attached color filter has not been detected. | Confirm whether the color filter is correctly attached. | D-34 |
| F5.6 | The lens aperture is beyond flash distance range. | Reset the aperture. | — |
| FEE | The lens aperture is not set at minimum. | Set the aperture to minimum. | — |
| F | The camera is turned off. | Turn the camera on. | — |

If the built-in wide-flash adapter is broken off accidentally
- The wide-flash adapter may break if subjected to a strong shock while on the flash head.
- In this case, contact your retailer or Nikon representative.
- When the wide-flash adapter is broken off, it is no longer possible to set the zoom position to the desired position. To adjust the zoom position, go to the custom setting "Zoom position setting if the built-in wide-flash adapter is broken off accidentally" (C-25).

Microcomputer characteristics
The SB-900 incorporates a microcomputer to control flash operations. In rare cases, the SB-900 may not work properly even after fresh batteries are properly installed. If this happens, replace the batteries while the SB-900 is turned on.
Notes on continuous flash shooting
To prevent the SB-900 from overheating, allow the SB-900 to cool down for at least 10 minutes after the maximum number of continuous firings have been performed as shown in the table below.
- Setting the "Thermal Cut-out" function is recommended. (F-6)

Do not exceed the maximum number of continuous firings, as this may cause the SB-900 to overheat or degrade.
Maximum number of continuous firings
| Flash mode | Max. number of continuous firings (at 6 frames/sec.) |
| i-TTL | 15 or less |
| Non-TTL auto | |
| Manual flash mode (flash output level: M1/1, M1/2) | |
| Manual flash mode (flash output level: M1/4 to M1/128) | 40 or less |

Notes for battery temperature
While operating continuous flash shooting, batteries may also generate heat. When replacing batteries after continuous flash shooting, note not to get burned.
Thermal Cut-out
The SB-900 features thermal cut-out, which offers protection against raised operating temperature.
- This feature is controlled from the Custom Settings menu. (C-24)
- The selected setting is shown by an icon.
Thermal Cut-out: On

- The temperature of the SB-900 is shown in three stages.
- If the temperature of the unit rises as a result of the flash being fired multiple times in quick succession, a warning will be displayed and the SB-900 will enter protective shutdown mode.
Temperature warning indicators
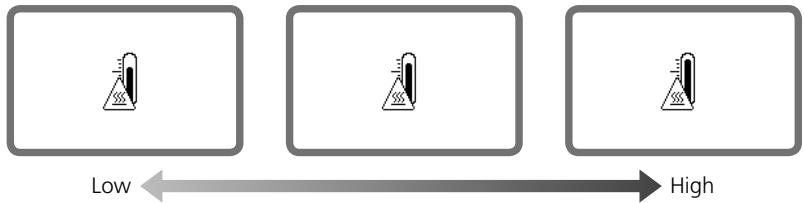
- Wait until the SB-900 cools down.
Operation can be resumed once the warning is no longer displayed.
Thermal Cut-out: Off

- The temperature of the SB-900 is shown in three stages.
- If the temperature of the unit rises as a result of the flash being fired multiple times in quick succession, a warning icon will be displayed. If sound is turned on, a warning beep will sound each time the camera shutter-release button is pressed.
Temperature warning indicators
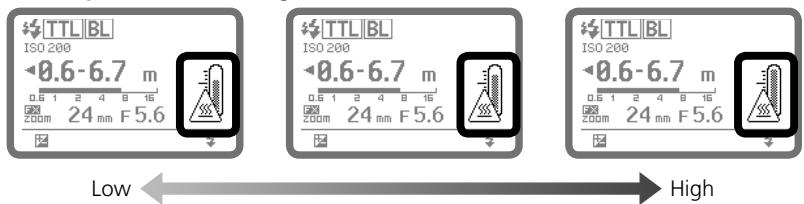
- Stop firing and wait until the SB-900 cools down.
Operation can be resumed once the warning is no longer displayed.
Tips on Speedlight care

WARNING

Never use thinner, benzene, or other active agents when cleaning the Speedlight,
as this may damage the Speedlight or cause it to catch on fire. Using these agents may also impair your health.
Cleaning
- Use a blower brush to remove dirt and dust from the SB-900 and clean it with a soft, clean cloth. After using the SB-900 near saltwater, wipe the flash unit with a soft, clean cloth moistened slightly with plain water to remove the salt, then dry it using a dry cloth.
- On rare occasions, the LCD may turn on or go dark, due to static electricity. This is not a malfunction. The display will soon return to normal.
- Do not drop the SB-900 or hit it against a hard surface, as this may damage its precision mechanisms. Do not apply strong pressure to the LCD panel.
Storage
- Store the SB-900 in a cool, dry place to prevent malfunctions due to high humidity, as well as the growth of mold or mildew.
- Keep the SB-900 away from chemicals such as camphor or naphthalene. Avoid exposing the SB-900 to magnetic waves from TVs or radios.
- Do not use or leave the SB-900 in locations subject to high temperatures such as those encountered near a heater or stove, as this may cause damage.
- When not using the SB-900 for more than two weeks, be sure to remove the batteries to prevent malfunctions due to battery leakage.
- Take the SB-900 out once a month, insert the batteries, and fire the unit several times to reform the capacitor.
Operating location
- An extreme temperature change can cause condensation to form inside the SB-900. When subjecting the SB-900 to sudden and extreme temperature changes, place it inside an airtight container such as plastic bag. Leave it inside the container for a while before exposing it gradually to the outside temperature.
- Avoid exposing the SB-900 to strong magnetism or radio waves from TVs or high-voltage power transmission towers, as this may cause it to malfunction.
Suitable batteries
Use four AA-type batteries of any of the following types:
- Alkaline-manganese (1.5V) batteries
- Lithium (1.5V) batteries
OxyrideTM (1.5V) batteries -
Ni-MH (1.2V) batteries
-
High-power manganese batteries are not recommended.
- Depending on battery specifications, when batteries become hot, the SB-900's safety circuits are activated, cutting off power. This often occurs when the flash unit is operated in the repeating flash mode. Battery power will recover when the temperature returns to normal.
- Be sure to read the user's manuals for your rechargeable batteries and battery charger for detailed information on how to handle and recharge the batteries.
- Never attempt to charge batteries that are not rechargeable batteries, as they could explode.
Notes on handling batteries
- Because flash consumes a large amount of battery power, batteries may not operate properly before reaching the end of their stated lifespan or the number of charges/discharges as specified by the battery manufacturer.
- When replacing batteries, replace all four batteries at the same time. Do not mix battery types or brands or use old with new batteries.
- When installing batteries, turn off the power of the Speedlight and never reverse the polarity of the batteries.
- If the battery terminals become soiled, remove dirt and smudges before use, as this may cause malfunction.
- Battery power tends to weaken as the temperature drops. It also gradually decreases when batteries are not used for a long time and recovers after a short break following intensive use. Be sure to check battery power and replace the batteries with fresh ones if you notice any delays in the recycling time.
- Do not store batteries in locations subject to high temperatures and high humidity.

Ni-MH
Recyclingrechargeable batteries
To protect the environment, do not dispose of used rechargeable batteries yourself. Instead, take these batteries to your nearest recycling center.
About the LCD panel

Characteristics of the LCD panel
- Due to the directional characteristics of LCDs, the LCD panel is difficult to read when viewed from above. However, it can be seen clearly from a somewhat lower angle.
- The LCD panel becomes darker at high temperatures (approx. 60^ / 140^ ), but returns to normal at normal temperatures (20^ / 68^) .
- The LCD's response time slows down at low temperatures (approx. 5^ / 41^ and below), but returns to normal at normal temperatures (20^ / 68^) .

LCD panel illuminator ON/OFF
Press any button on the SB-900 to turn the illuminator on (when the SB-900 power is on) and make the LCD panel easier to read.
- The illuminator goes off if the SB-900 is not operated for 16 seconds.
- To cancel the LCD panel illumination, go to the custom setting (C-24) and turn it off.
- Even if the LCD panel illuminator is set to OFF, the SB-900's LCD panel illuminator turns on when the camera's control panel illuminator is turned on. The LCD panel illuminator also lights up when the custom setting is displayed.

Adjusting the LCD panel's contrast
The contrast of the LCD panel can be adjusted in the custom setting (C-25).
- There are nine contrast levels.
Updating firmware
The latest Nikon firmware can be downloaded from Nikon's website. Firmware is updated through the camera.
- For users in the U.S.A.: http://www.nikonusa.com/
- For users in Europe: http://www.europe-nikon.com/support
- For users in Asia, Oceania, the Middle East, and Africa: http://www.nikon-asia.com/
- Additional information may be available from the Nikon representative in your area. See the URL below for contact information: http://nikonimaging.com/
Cameras compatible with SB-900 firmware update
D3\*1, D700
*1 D3 camera with either firmware A or firmware B version 2.00 or later.
- See the custom setting section to determine which version of firmware you are using (C-25).
- If your camera is not compatible with firmware updates, please contact a Nikon representative in your area.
Optional accessories
Speedlight Stand AS-21
Same as that provided with this SB-900.
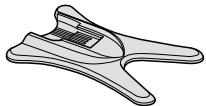
Color Filter Set SJ-3
A total of 20 filters in 8 models are provided.
- FL-G1 (for fluorescent lighting)
- FL-G2 (for fluorescent lighting)
TN-A1 (for incandescent lighting)
TN-A2 (for incandescent lighting)
·BLUE
YELLOW -
RED
AMBER -
Color filters are consumable items and subject to a gradual deterioration in color due to the heat generated when the flash fires. Therefore, it is recommended to check and replace these filters when necessary.
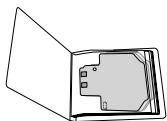
Water Guard WG-AS1, WG-AS2, WG-AS3
Useful to protect the camera's hot shoe contact when SB-900 is mounted on a Nikon digital SLR camera.
WG-AS1: for D3
WG-AS2: for D300
WG-AS3: for D700
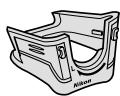
Wireless Slave Flash Controller SU-4
Useful for wireless multiple flash photography, the SU-4 features a built-in, movable light sensor and an accessory shoe for attachment of a remote flash unit. The SU-4's light sensor triggers the remote unit to fire in sync with the master unit.
TTL Remote Cord SC-28/17 (approx. 1.5m / 4.9 ft)
The SC-28/17 provides i-TTL auto flash operation when the SB-900 is used off-camera. Flash shoes come with one tripod socket and two TTL multiple flash terminals.
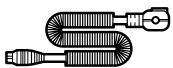
TTL Remote Cord SC-29 (approx. 1.5m / 4.9 ft)
The SC-29 provides i-TTL auto flash operation when the SB-900 is used off-camera. The SC-29 features an AF-assist illuminator function. (The SC-29 is not equipped with a TTL multiple flash terminal.)
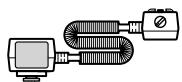

External power source
Use of an optional external power source provides a stable power supply, increases the number of flash firings and shortens recycling time.

Nikon DC Unit SD-7
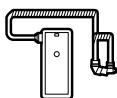
Nikon High-Performance Battery Pack SD-8A
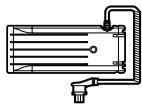
Nikon High-Performance Battery Pack SD-9
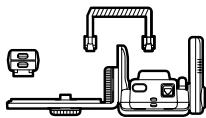
Power Bracket Unit SK-6
- Use of other external power source brands may cause accidents, or could damage the SB-900's components. Nikon cannot guarantee the SB-900's performance when used with non-Nikon products.
Connecting to an external power source
To use an external power source, remove the cover and connect its power cord to the SB-900's external power source terminal.
- Do not use the power cord SC-16 when connecting the SB-900 to the Nikon DC Unit SD-7; use the SC-16A instead.
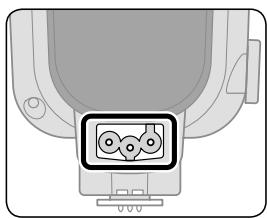
Specifications
| External power source | Batteries | Min. recycling time (approx.)*1 | Min. number of flashes*/recycling time*1 |
| Nikon DC Unit SD-7 | C-type Alkaline-manganese x 6*2 | 2.0 sec. | 320/2.0 – 30 sec. |
| C-type Ni-MH (Nickel Metal Hydride) x 6*3 | 1.5 sec. | 280/1.5 – 30 sec. | |
| C-type Ni-MH (Nickel Metal Hydride) x 6*4 | 1.5 sec. | 260/1.5 – 30 sec. | |
| Nikon High-Performance Battery Pack SD-8A*5 | AA-type Alkaline-manganese x 6 | 2.0 sec. | 300/2.0 – 30 sec. |
| AA-type Lithium x 6 | 2.2 sec. | 550/2.2 – 120 sec. | |
| AA-type OxyrideTM x 6 | 1.8 sec. | 320/1.8 – 30 sec. | |
| AA-type Ni-MH (2600 mAh) x 6 | 1.5 sec. | 260/1.5 – 30 sec. | |
| AA-type Ni-MH (eneloop) x 6 | 1.5 sec. | 250/1.5 – 30 sec. | |
| Nikon High-Performance Battery Pack SD-9*5 | AA-type Alkaline-manganese x 4 | 1.8 sec. | 280/1.8 – 30 sec. |
| AA-type Lithium x 4 | 2.4 sec. | 500/2.4 – 120 sec. | |
| AA-type OxyrideTM x 4 | 1.4 sec. | 280/1.4 – 30 sec. | |
| AA-type Ni-MH (eneloop) x 4 | 1.1 sec. | 350/1.1 – 30 sec | |
| AA-type Alkaline-manganese x 8 | 1.1 sec. | 450/1.1 – 30 sec. | |
| AA-type Lithium x 8 | 1.4 sec. | 840/1.4 – 120 sec. | |
| AA-type OxyrideTM x 8 | 1.0 sec. | 440/1.0 – 30 sec. | |
| AA-type Ni-MH (eneloop) x 8 | 1.0 sec. | 520/1.0 – 30 sec. | |
| Power Bracket Unit SK-6*5 | AA-type Alkaline-manganese x 4 | 2.2 sec. | 190/2.2 – 30 sec. |
| AA-type Lithium x 4 | 3.2 sec. | 420/3.2 – 120 sec. | |
| AA-type OxyrideTM x 4 | 2.0 sec. | 240/2.0 – 30 sec. | |
| AA-type Ni-MH (2600 mAh) x 4 | 1.9 sec. | 240/1.9 – 30 sec. | |
| AA-type Ni-MH (eneloop) x 4 | 1.9 sec. | 230/1.9 – 30 sec. |
1: When firing the Speedlight at full output once every 30 seconds (120 seconds with lithium batteries).
2: Use AA-type alkaline-manganese batteries with SB-900.
3: Use AA-type Ni-MH (2600 mAh) batteries with SB-900.
4: Use AA-type Ni-MH (eneloop) batteries with SB-900.
*5: Use the same type batteries with both SB-900 and external power source.
- With fresh batteries. Performance may vary depending on battery freshness or battery specifications.
- With modeling illumination using the SD-8A or SK-6, the SD-8A or SK-6 may not work for flash output operation. In this case, the power is provided only by the batteries in the SB-900. This is not a malfunction.
Specifications
| Electronic construction | Automatic Insulated Gate Bipolar Transistor (IGBT) and series circuitry |
| Guide number (at 35 mm zoom position, in FX-format, standard illumination pattern, 20°C/68°F) | 34/111.5 (ISO 100, m/ft), 48/157.5 (ISO 200, m/ft) |
| Flash shooting distance range (TTL auto flash/Auto Aperture flash/Non-TTL auto flash) | 0.6 m to 20 m (2 to 66 ft.) (varies depending on camera's image area setting, illumination pattern, ISO sensitivity, zoom position, and lens aperture in use) |
| Illumination pattern | There are three types of Illumination pattern: standard, even and center-weighted The light distribution angle is automatically adjusted to the camera's image area in both FX and DX formats |
| Available flash mode | • TTL • Auto Aperture flash • Non-TTL auto flash • Distance-priority manual flash • Manual flash • Repeating flash |
| Other available functions | Test firing, monitor pre-flashes, AF-assist illuminator, and Modeling illuminator |
| Nikon Creative Lighting System | A variety of flash operations are available with compatible cameras: i-TTL mode, Advanced Wireless Lighting, FV Lock flash, Flash color information communication, Auto FP High-Speed sync, and Wide-area AF-Assist Illuminator |
| Multiple flash operation | • Advanced Wireless Lighting • SU-4 type wireless multiple flash |
| Flash exposure control set on the camera | Camera's sync. modes: Slow-sync, Red-eye reduction in slow-sync, Front-curtain sync, Rear-curtain sync, Rear-curtail slow-sync Shooting functions: Auto FP High-Speed sync, FV Lock flash |
| Bounce capability | Flash head tilts down to -7° or up to 90° with click-stops at -7°, 0°, 45°, 60°, 75°, 90° Flash head rotates horizontally 180° to the left and right with click-stops at 0°, 30°, 60°, 90°, 120°, 150°, 180° |
| Power ON/OFF | Rotate the Power ON-OFF switch to turn the SB-900 on or off Standby function can be set |
| Power source | Use four AA-type batteries of any of the following types: • Alkaline-manganese (1.5V) batteries • Lithium (1.5V) batteries • Oxyride™ (1.5V) batteries • Ni-MH (1.2V) batteries For minimum number of flashes and recycling time of each battery, see F-21. |
| Ready-light | The SB-900 is fully recycled: Rear ready-light lights up and the front light blinks. Insufficient light for correct exposure (in i-TTL, Auto Aperture flash, Non-TTL Auto flash, or Distance-priority manual flash operations): both rear and front (in remote setting) ready-lights blink. |
| Flash duration (approx.) | 1/880 sec. at M1/1 (full) output 1/1100 sec. at M1/2 output 1/2550 sec. at M1/4 output 1/5000 sec. at M1/8 output 1/10,000 sec. at M1/16 output 1/20,000 sec. at M1/32 output 1/35,700 sec. at M1/64 output 1/38,500 sec. at M1/128 output |
| Mounting foot lock lever | Provides secure attachment of SB-900 to camera's accessory shoe using locking plate and mount pin to prevent accidental detachment. |
| Flash output level compensation | -3.0 to +3.0 EV in increments of 1/3 steps in the i-TTL auto flash, Auto Aperture flash, Non-TTL auto flash and Distance-priority manual flash |
| Custom setting | 22 items |
| Other functions | ISO sensitivity setting, Recalling the underexposure value in the TTL auto flash mode, Resetting the settings, Key lock, Thermal Cut-out, firmware update |
| Dimensions (W × H × D) | Approx. 78.0 × 146.0 × 118.5 mm (3.0 × 5.7 × 4.7 in.) |
| Weight (without batteries) | Approx. 415 g (14.6 oz.) |
| Accessories supplied | Speedlight Stand AS-21, Nikon Diffusion Dome SW-13H, Color Filter Set SJ-900, Color Filter Holder SZ-2, Soft Case SS-900 |
- These performance specifications are applicable when fresh batteries are used at normal temperatures (20 °C/68 °F).
- Specifications and design are subject to change without notice.
- Oxyride battery is a registered trademark of Matsushita Electric Industrial Co., Ltd.
- Other products and brand names are trademarks or registered trademarks of their respective companies.

Flash shooting distance range (for i-TTL auto flash, Auto Aperture flash and Non-TTL auto flash mode)
The flash shooting distance range of the SB-900 is between 0.6m and 20m (2.0 ft. and 65.6 ft.). The flash shooting distance range differs depending on the camera's image area, illumination pattern, ISO sensitivity, zoom position and flash output level.
- The following table is for FX-format and standard illumination pattern.
- The flash shooting distance range for each setting can be seen in the LCD display (C-11).
In FX-format, standard illumination pattern
| ISO sensitivity | Zoom position (mm) | |||||||||||||||||||||||||||||||||||||||||||||||||||||||||||||||||||||||||||||||||||||||||||||||||||||||||||||||||||||||||||
| 6400 | 3200 | 1600 | 800 | 400 | 200 | 100 | 14BA/WP | 14BA | 14WP | 17 | 18 | 20 | 24 | 28 | 35 | 50 | 70 | 85 | 105 | 120 | 135 | 180 | 200 | |||||||||||||||||||||||||||||||||||||||||||||||||||||||||||||||||||||||||||||||||||||||||||||||||||||
| Aperture | 2.8 | 2 | 1.4 | 2.3 | 2.9 | 3.1 | 3.9 | 3.9 | 4.3 | 4.8 | 5.2 | 5.9 | 7 | 7.8 | 8.3 | 8.8 | 9 | 9 | 9.5 | 9.9 | ||||||||||||||||||||||||||||||||||||||||||||||||||||||||||||||||||||||||||||||||||||||||||||||||||||||||
BA: With the Nikon Diffusion Dome attached
- WP: With the wide-flash adapter in place
Angle of coverage (in FX-format)
| Zoom position set | Angle of coverage (°) | |
| Vertical | Horizontal | |
| 12 (BA/WP)*1 | 120 | 130 |
| 14 (BA/WP)*2 | 110 | 120 |
| 17 (BA/WP)*3 | 100 | 110 |
| 17*4 | 77 | 96 |
| 18*4 | 74 | 93 |
| 20*4 | 69 | 87 |
| 24 | 60 | 78 |
| 28 | 53 | 70 |
| 35 | 45 | 60 |
| 50 | 34 | 46 |
| 70 | 26 | 36 |
| 85 | 23 | 31 |
| 105 | 20 | 27 |
| 120 | 18 | 25 |
| 135 | 17 | 24 |
| 180*5 | 15 | 21 |
| 200*5 | 14 | 20 |
BA: With the Nikon Diffusion Dome attached
WP: With the wide-flash adapter in place
1 In center-weighted illumination pattern
2 In standard illumination pattern
3 In even illumination pattern
4 In standard or center-weighted illumination pattern
*5 In standard or even illumination pattern
Angle of coverage (in DX-format)
| Zoom position set | Angle of coverage (°) | |
| Vertical | Horizontal | |
| 8 (BA/WP)*1 | 120 | 130 |
| 10 (BA/WP)*2 | 110 | 120 |
| 11 (BA/WP)*3 | 100 | 110 |
| 12*4 | 74 | 93 |
| 14*4 | 66 | 85 |
| 16 | 60 | 78 |
| 17 | 57 | 75 |
| 18 | 55 | 72 |
| 20 | 50 | 67 |
| 24 | 44 | 58 |
| 28 | 39 | 52 |
| 35 | 32 | 44 |
| 50 | 25 | 34 |
| 70 | 20 | 27 |
| 85 | 17 | 24 |
| 105*5 | 16 | 22 |
| 120*5 | 15 | 21 |
| 135*5 | 14 | 20 |
| 180*5 | 13 | 19 |
| 200*5 | 13 | 18 |
BA: With the Nikon Diffusion Dome attached
WP: With the wide-flash adapter in place
1 In center-weighted illumination pattern
2 In standard illumination pattern
3 In even illumination pattern
4 In standard or center-weighted illumination pattern
*5 In standard or even illumination pattern

Guide number table
The SB-900 guide numbers differ depending on the camera's image area, illumination pattern, ISO sensitivity, zoom position and flash output level.
ISO 100· m
| Zoom position (mm) | FX-format | DX-format | ||||
| Standard illumination | Center-weighted illumination | Even illumination | Standard illumination | Center-weighted illumination | Even illumination | |
| 8 (BA+WP) | - | - | - | - | 13 | - |
| 8 (BA) | - | - | - | - | 16 | - |
| 8 (WP) | - | - | - | - | 17 | - |
| 10 (BA+WP) | - | - | - | 13 | - | - |
| 10 (BA) | - | - | - | 16 | - | - |
| 10 (WP) | - | - | - | 17 | - | - |
| 11 (BA+WP) | - | - | - | - | - | 13 |
| 11 (BA) | - | - | - | - | - | 16 |
| 11 (WP) | - | - | - | - | - | 17 |
| 12 (BA+WP) | - | 13 | - | - | - | - |
| 12 (BA) | - | 16 | - | - | - | - |
| 12 (WP) | - | 17 | - | - | - | - |
| 12 | - | - | - | 23 | 26 | - |
| 14 (BA+WP) | 13 | - | - | - | - | - |
| 14 (BA) | 16 | - | - | - | - | - |
| 14 (WP) | 17 | - | - | - | - | - |
| 14 | - | - | - | 25 | 29 | - |
| 16 | - | - | - | 27 | 32 | 22 |
| 17 (BA+WP) | - | - | 13 | - | - | - |
| 17 (BA) | - | - | 16 | - | - | - |
| 17 (WP) | - | - | 17 | - | - | - |
| 17 | 22 | 25 | - | 29 | 33 | 23 |
| 18 | 23 | 26 | - | 30 | 34 | 24 |
| 20 | 24 | 27 | - | 31 | 36 | 25 |
| 24 | 27 | 32 | 22 | 34 | 40 | 32 |
| 28 | 30 | 36 | 24 | 36 | 43 | 33 |
| 35 | 34 | 40 | 31 | 40 | 47 | 37 |
| 50 | 40 | 46 | 36 | 46 | 51 | 43 |
| 70 | 44 | 50.5 | 41 | 49.5 | 53 | 49 |
| 85 | 47 | 52 | 44 | 51 | 58 | 50.5 |
| 105 | 49.5 | 53 | 49 | 52.5 | - | 51 |
| 120 | 51 | 56 | 50 | 54 | - | 51.5 |
| 135 | 51.5 | 58 | 50.5 | 56 | - | 52.5 |
| 180 | 54 | - | 51.5 | 56.5 | - | 53 |
| 200 | 56 | - | 52 | 57 | - | 54 |
BA: With the Nikon Diffusion Dome attached
- WP: With the wide-flash adapter in place
Guide number table (in FX-format)
Standard illumination pattern, at ISO 100; m/ft
| Flash output level | Zoom position (mm) | ||||||||||||||||
| 14mm | 17 | 18 | 20 | 24 | 28 | 35 | 50 | 70 | 85 | 105 | 120 | 135 | 180 | 200 | |||
| WP+BA | BA | WP | |||||||||||||||
| 1/1 | 13/42.7 | 16/52.5 | 17/55.8 | 22/72.2 | 23/75.5 | 24/78.7 | 27/88.6 | 30/98.4 | 34/111.5 | 40/131.2 | 44/144.1 | 47/154.2 | 49.5/162.4 | 51/167.3 | 51.5/169.0 | 54/117.2 | 56/183.7 |
| 1/2 | 9.1/29.9 | 11.3/37.3 | 12/39.3 | 15.5/50.9 | 16.2/53.1 | 16.9/55.4 | 19/62.3 | 21.2/69.6 | 24/78.7 | 28.2/92.5 | 31.1/102.0 | 33.2/108.9 | 35/114.8 | 36.4/118.1 | 38.1/119.4 | 39.5/129.6 | |
| 1/4 | 6.5/21.3 | 8/26.2 | 8.5/27.9 | 11/36.1 | 11.5/37.7 | 12/39.3 | 13.5/44.3 | 15/49.2 | 17/55.8 | 20/65.6 | 22/72.2 | 23.5/77.1 | 24.7/81.0 | 25.5/83.7 | 25.7/84.3 | 27/88.6 | 28/91.9 |
| 1/8 | 4.5/14.8 | 5.6/18.8 | 6/19.7 | 7.7/25.3 | 8.1/26.6 | 8.4/27.6 | 9.5/31.2 | 10.6/34.8 | 12/39.3 | 14.1/46.3 | 15.5/50.9 | 16.6/54.5 | 17.5/57.4 | 18/59.0 | 18.2/59.7 | 19/62.3 | 19.7/64.6 |
| 1/16 | 3.2/10.5 | 4/13.1 | 4.2/13.8 | 5.5/18.0 | 5.7/19.7 | 6/19.7 | 6.7/21.9 | 7.5/24.6 | 8.5/27.9 | 10/32.8 | 11/36.1 | 12.7/38.4 | 12.7/40.4 | 12.8/41.7 | 13.5/42.0 | 14/43.5 | 14/45.9 |
| 1/32 | 2.2/7.2 | 2.8/9.2 | 3/9.8 | 3.8/12.5 | 4/13.1 | 4.2/13.8 | 4.7/15.4 | 5.3/17.4 | 6/19.7 | 7/23.0 | 7.7/25.3 | 8.3/27.2 | 8.7/28.5 | 9/29.5 | 9.1/29.9 | 9.5/31.2 | 9.8/32.1 |
| 1/64 | 1.6/5.2 | 2/6.6 | 2.1/6.9 | 2.7/8.9 | 2.8/9.2 | 3/9.8 | 3.3/10.8 | 3.7/12.1 | 4.2/13.8 | 5/16.4 | 5.5/18.0 | 5.8/19.0 | 6.1/20.0 | 6.3/20.7 | 6.4/21.0 | 6.7/21.9 | 7/23.0 |
| 1/128 | 1.1/3.6 | 1.4/4.6 | 1.5/4.9 | 1.9/6.2 | 2/6.6 | 2.1/6.9 | 2.3/7.5 | 2.6/8.5 | 3/9.8 | 3.5/11.5 | 3.8/12.5 | 4.1/13.5 | 4.3/14.1 | 4.5/14.8 | 4.5/15.4 | 4.7/15.4 | 4.9/16.1 |
Guide number table (in DX-format)
Standard illumination pattern, at ISO 100; m/ft
| Flash output level | Zoom position (mm) | |||||||||||||||||||
| 10mm | 12 | 14 | 16 | 17 | 18 | 20 | 24 | 28 | 35 | 50 | 70 | 85 | 105 | 120 | 135 | 180 | 200 | |||
| WP +BA | BA | WP | ||||||||||||||||||
| 1/1 | 13/42.7 | 16/52.5 | 17/55.8 | 23/75.5 | 25/82.0 | 27/88.6 | 29/95.1 | 30/98.4 | 31/101.7 | 34/111.5 | 36/18.1 | 40/131.2 | 46/150.9 | 49.5/162.4 | 51/167.3 | 52.5/172.2 | 24.8/81.4 | 25.7/84.3 | 56.5/185.4 | 57/187 |
| 1/2 | 9.1/29.9 | 11.3/37 | 12/39.3 | 16.2/53.1 | 17.6/57.7 | 19/62.3 | 20.5/67.3 | 21.2/69.6 | 21.9/71.9 | 24/78.7 | 25.4/83.3 | 28.2/92.5 | 32.5/106.6 | 35/114.8 | 37.1/181.7 | 17.5/57.4 | 18.1/59.4 | 39.9/130.9 | 40.3/132 | |
| 1/4 | 6.5/21.3 | 8/26.2 | 8.5/27.9 | 11.5/37.7 | 12.5/41.0 | 13.5/44.3 | 14.5/47.6 | 15/49.2 | 15.5/50.9 | 17/58.8 | 20/59.0 | 23/65.6 | 24.7/75.0 | 25.5/81.0 | 26.2/83.7 | 12.4/40.7 | 12.8/42.0 | 28.2/92.5 | 28.5/93.5 | |
| 1/8 | 4.5/14.8 | 5.6/18.8 | 6/19.7 | 8.1/26.6 | 8.8/28.9 | 9.5/31.2 | 10.2/33.5 | 10.6/34.8 | 10.9/35.8 | 12.7/39.3 | 12.7/41.7 | 14.1/46.3 | 16.2/53.1 | 17.5/57.4 | 18.5/59.0 | 8.7/28.5 | 9/29.5 | 19.9/65.3 | 20.1/65.9 | |
| 1/16 | 3.2/10.5 | 4/13.1 | 4.2/13.8 | 5.7/18.7 | 6.2/20.3 | 6.7/21.9 | 7.2/23.6 | 7.5/24.6 | 7.7/25.3 | 8.5/27.9 | 9/29.5 | 10/32.8 | 11.5/40.4 | 12.7/41.7 | 13.1/43.0 | 6.2/20.3 | 6.4/20.3 | 14.1/46.3 | 14.2/46.6 | |
| 1/32 | 2.2/7.2 | 2.8/9.2 | 3/9.8 | 4/13.1 | 4.4/14.4 | 4.7/15.4 | 5.1/16.7 | 5.3/17.4 | 5.4/17.7 | 6/19.7 | 6.3/20.7 | 7/23.0 | 8.1/26.6 | 8.7/28.5 | 9/29.5 | 4.3/30.2 | 4.5/14.8 | 9/32.5 | 10/32.8 | |
| 1/64 | 1.6/5.2 | 2/6.6 | 2.1/6.9 | 2.8/9.2 | 3.1/10.2 | 3.3/10.8 | 3.6/11.8 | 3.7/12.1 | 3.8/12.5 | 4.2/13.8 | 4.5/14.8 | 5/18.7 | 6.1/20.0 | 6.3/20.7 | 6.5/21.3 | 3.1/10.2 | 3.2/10.5 | 7/10.5 | 7.1/23.0 | |
| 1/128 | 1.1/3.6 | 1.4/4.6 | 1.5/4.9 | 2/6.6 | 2.2/7.2 | 2.3/7.5 | 2.5/8.2 | 2.6/8.5 | 2.7/8.9 | 3/10.2 | 3.1/11.5 | 3.5/13.1 | 4/14.1 | 4.5/14.8 | 4.6/15.1 | 2.1/6.9 | 2.2/7.2 | 4.9/16.1 | 5/16.4 | |
BA: With the Nikon Diffusion Dome attached
- WP: With the wide-flash adapter in place
Guide number table (with Auto FP High-Speed Sync)
Standard illumination pattern, at ISO 100; m/ft (in FX-format)
| Flash output level | Zoom position (mm) | ||||||||||||||||
| 14mm | 17 | 18 | 20 | 24 | 28 | 35 | 50 | 70 | 85 | 105 | 120 | 135 | 180 | 200 | |||
| WP+BA | BA | WP | |||||||||||||||
| 1/1 | 6/19.7 | 7/424.3 | 7/825.6 | 10.1/33.1 | 10.6/34.8 | 11/36.1 | 12.4/40.7 | 13.8/45.3 | 15.6/51.2 | 18.4/6.04 | 20.2/66.3 | 21.6/70.9 | 22.8/74.8 | 23.4/76.8 | 23.7/77.6 | 24.8/81.4 | 25.7/84.3 |
| 1/2 | 4.2/13.8 | 5.2/17.1 | 5.5/18.0 | 7.1/23.3 | 7.4/24.3 | 7.7/25.3 | 8.7/28.5 | 9.7/31.8 | 11/42.7 | 13/46.6 | 14.2/49.9 | 15.2/49.9 | 16.1/52.8 | 16.5/54.1 | 16.7/54.8 | 17.5/57.4 | 18.1/59.4 |
| 1/4 | 3/9.8 | 3.7/12.1 | 3.9/12.8 | 5/16.4 | 5.3/17.4 | 5.5/18.0 | 6.2/20.3 | 6.9/22.6 | 7.8/25.6 | 9.2/30.2 | 10.1/33.1 | 10.8/35.4 | 11.4/37.4 | 11.7/38.4 | 11.8/38.7 | 12.4/40.7 | 12.8/42.0 |
| 1/8 | 2.1/6.9 | 2.6/8.5 | 2.7/8.9 | 3.5/11.5 | 3.7/12.1 | 3.8/12.5 | 4.3/14.1 | 4.8/15.7 | 5.5/18.0 | 6.5/21.3 | 7.1/22.3 | 7.6/24.9 | 8/26.2 | 8.2/26.9 | 8.3/27.2 | 8.7/28.5 | 9/29.5 |
| 1/16 | 1.5/4.9 | 1.8/5.9 | 1.9/6.2 | 2.5/8.2 | 2.6/8.5 | 2.7/8.9 | 3.1/10.2 | 3.4/11.2 | 3.9/22.8 | 4.6/15.1 | 5/16.4 | 5.4/17.7 | 5.7/18.7 | 5.8/19.0 | 5.9/19.4 | 6.2/20.3 | 6.4/21.0 |
| 1/32 | 1/3.3 | 1.3/4.7 | 1.3/4.7 | 1.7/5.6 | 1.8/5.9 | 1.9/6.2 | 2.1/6.9 | 2.4/7.9 | 2.7/8.9 | 3.2/10.5 | 3.5/11.5 | 3.8/12.5 | 4/13.1 | 4.1/13.5 | 4.1/13.5 | 4.3/14.1 | 4.5/14.8 |
| 1/64 | 0.7/2.3 | 0.9/3.0 | 0.9/3.0 | 1.2/3.9 | 1.3/4.7 | 1.3/4.7 | 1.5/4.9 | 1.7/5.6 | 1.9/6.2 | 2.3/7.5 | 2.5/8.2 | 2.7/8.9 | 2.8/9.2 | 2.9/9.5 | 2.9/10.2 | 3.1/10.5 | 3.2/10.5 |
| 1/128 | 0.5/1.6 | 0.6/2.0 | 0.6/2.0 | 0.8/2.6 | 0.9/3.0 | 0.9/3.0 | 1/3.3 | 1.2/3.9 | 1.3/4.7 | 1.6/5.2 | 1.7/5.6 | 1.9/6.2 | 2/6.6 | 2/6.6 | 2/6.9 | 2.1/6.9 | 2.2/7.2 |
Standard illumination pattern, at ISO 100; m/ft (in DX-format)
| Flash output level | Zoom position (mm) | |||||||||||||||||||
| 10mm | 12 | 14 | 16 | 17 | 18 | 20 | 24 | 28 | 35 | 50 | 70 | 85 | 105 | 120 | 135 | 180 | 200 | |||
| WP +BA | BA | WP | ||||||||||||||||||
| 1/1 | 6/19.7 | 7.4/24.3 | 7.8/25.6 | 10.5/34.4 | 11.5/37.7 | 12.4/40.7 | 13.3/43.6 | 13.8/45.3 | 14.2/45.6 | 15.6/51.2 | 16.5/54.1 | 18.4/60.4 | 21.1/69.2 | 22.7/74.5 | 23.4/76.8 | 24.1/79.1 | 24.8/81.4 | 25.7/84.3 | 26/85.3 | 26.2/86.0 |
| 1/2 | 4.2/13.8 | 5.2/17.1 | 5.5/18.0 | 7.4/24.3 | 8.1/26.6 | 8.7/28.5 | 9.4/31.8 | 9.7/32.8 | 10/36.1 | 11/38.0 | 11.6/38.0 | 13/42.7 | 14.9/48.9 | 16.5/54.1 | 17.7/55.8 | 17.5/57.4 | 18.1/59.4 | 18.3/59.4 | 18.5/60.7 | |
| 1/4 | 3/9.8 | 3.7/12.1 | 3.9/12.8 | 5.2/17.1 | 5.7/18.7 | 6.2/20.3 | 6.6/21.7 | 6.9/22.6 | 7.1/23.3 | 7.8/25.6 | 8.2/26.9 | 9.2/30.2 | 11.5/34.4 | 11.7/37.1 | 12.2/38.4 | 12.4/39.3 | 12.8/40.7 | 13/42.0 | 13.1/43.0 | |
| 1/8 | 2.1/6.9 | 2.6/8.5 | 2.7/8.9 | 3.7/12.1 | 4/13.1 | 4/14.1 | 4.3/15.4 | 4.7/15.7 | 4.8/16.4 | 5/19.0 | 5.5/19.0 | 6.5/21.3 | 7.4/24.3 | 8/26.2 | 8.2/26.9 | 8.5/27.9 | 8.7/28.5 | 9/29.5 | 9.1/29.9 | |
| 1/16 | 1.5/4.9 | 1.8/5.9 | 1.9/6.2 | 2.6/8.5 | 2.8/9.2 | 3.1/10.2 | 3.3/10.8 | 3.4/11.2 | 3.5/22.8 | 3.9/13.5 | 4.1/15.1 | 4.6/17.1 | 5.2/18.8 | 5.6/19.0 | 5.8/19.7 | 6/20.3 | 6.2/21.0 | 6.4/21.3 | 6.5/21.3 | |
| 1/32 | 1/3.3 | 1.3/4.7 | 1.3/4.7 | 1.8/5.9 | 2/5.6 | 2.1/6.9 | 2.3/7.5 | 2.4/7.9 | 2.5/8.2 | 2.7/8.9 | 2.9/9.5 | 3.2/10.5 | 3.7/12.1 | 4/13.5 | 4.1/13.8 | 4.2/14.1 | 4.3/14.8 | 4.5/14.8 | 4.6/15.1 | |
| 1/64 | 0.7/2.3 | 0.9/3.0 | 0.9/3.0 | 1.3/4.7 | 1.4/4.6 | 1.5/4.9 | 1.6/5.2 | 1.7/5.6 | 1.7/5.6 | 1.9/6.2 | 2/6.6 | 2.3/7.5 | 2.6/8.5 | 2.8/9.2 | 2.9/9.5 | 3/10.2 | 3.2/10.5 | 3.2/10.5 | 3.2/10.5 | |
| 1/128 | 0.5/1.6 | 0.6/2.0 | 0.6/2.0 | 0.9/3.0 | 1/3.3 | 1/3.3 | 1/1.3 | 1/2.6 | 1/2.9 | 1/3.9 | 1/4.7 | 1/6.4 | 1/8/5.2 | 2/6.6 | 2/6.6 | 2/6.9 | 2.1/7.2 | 2.2/7.2 | 2.3/7.5 | |
- Guide numbers in tables above are for when the SB-900 is mounted to the D3 camera and with 1/500 sec. shutter speed.
- Guide number with Auto FP High-Speed Sync varies depending on the camera's shutter speed. For example, when the shutter speed is changed from 1/500 sec. to 1/1000 sec., the guide number decreases 1 EV. The faster the shutter speed, the smaller the guide number.
BA: With the Nikon Diffusion Dome attached - WP: With the wide-flash adapter in place
Min. number of flashes/recycling time of each battery
| Batteries | Min. recycling time (approx.)* | Min. number of flashes*/ recycling time* |
| Alkaline-manganese (1.5V) | 4.0 sec. | 110/4.0 – 30 sec. |
| Lithium (1.5V) | 4.5 sec. | 230/4.5 – 120 sec. |
| Oxyride™ (1.5V) | 3.0 sec. | 125/3.0 –30 sec. |
| Ni-MH (2600 mAh) | 2.3 sec. | 190/2.3 – 30 sec. |
| Ni-MH (eneloop) | 2.3 sec. | 165/2.3 – 30 sec. |
- When firing the Speedlight at full output once every 30 seconds (120 seconds with lithium batteries).
- While AF-assist illuminator, power zoom and LCD panel illumination are off.
-
With fresh batteries. Performance may vary depending on battery freshness or battery specifications.
-
Refer to the "Speedlight parts" (C-2) and "LCD panel" (C-10) for each part name and display indications.
Symbol
i-TTL Automatic Balanced Fill-Flash.. D-2
i-TTL-compatible COOLPIX cameras ... B-2, E-3
i-TTL mode D-2
A
Accessories .F-11
A collection of example photos.... Separate
AF-Assist illuminator B-3,D-58
AF-ILL ONLY. D-59
Aperture. D-23
Aperture value. C-13
Auto aperture flash. D-5
AUTO (auto) mode. D-51
Auto FP High-Speed Sync. D-55
B
Batteries C-4, C-27, F-8
Bounce-down flash D-30
Bounce flash operation D-26
Built-in bounce card. D-28
Built-in wide-flash adapter D-31
C
Canceling monitor pre-flashes.. D-52
Cancel receiving light from
other flash units. C-18
Center-weighted illumination pattern ....D-24
Channel. D-46
Close-up photography D-30
CLS. A-3
CLS-compatible SLR cameras. B-2
Color filters. D-33
Color filter holder D-34
Color filter set. .F-11
Commander function. D-48
Continuous firing. F-5
Control buttons. C-8
COOLPIX cameras. B-2, E-3
CPU Nikkor lenses.. A-3
Custom functions and settings.. C-20
D
Default settings.. A-3
Distance information. C-11
Distance priority manual flash. D-11
DX-format C-23, D-62
E
Even illumination pattern. D-24
Exposure compensation D-38
External power source. F-12
F
Filter detector C-2
Flash color information communication.... B-3
Flash firing off. C-23, D-59
Flash head C-6, D-26
Flash head tilting/rotating lock
release button C-6, D-26
Flash mode. D-1
Flash mode icons C-10
Flash shooting distance range. C-11
Flash shooting in Advanced
Wireless Lighting. D-43
Flash output level. D-18, D-23
Flash output level compensation ... C-13, D-37
Flash output level compensation value ...D-37
Fluorescent filters. D-33
Front-curtain sync. D-56
Function button. C-17
FX/DX selection. C-23, D-62
FX-format C-23, D-62
FV Lock. D-55

Group. D-43
Groups of remote flash units. D-43
Guide number D-22
Guide number table.. .F-18

Highlight. C-10
Highlight in the subject's eyes. D-28

Icons. C-10
Illumination pattern C-22, D-24
Incandescent filters. D-33
Included items .A-14
Indication for insufficient light for correct exposure......D-4, D-7, D-10, D-13
ISO sensitivity. A-3, C-11
ISO sensitivity factors D-22

Key lock. C-9

LCD panel. C-10,F-9
LCD panel illuminator C-24,F-9
Light distribution angle C-12
Light sensor for Non-TTL auto flash. D-5, D-8
Light sensor window for wireless remote flash. D-40
Low battery power indicator. C-27

Manual mode . D-14
MASTER. D-45, D-50
Master flash unit. D-39
Metering mode. D-4
Min. number of flashes.. D-18, F-21
Min. recycling time .F-13,F-21
M (manual) mode D-51
MODE button .C-8
Modeling illuminator. D-61
Monitor pre-flashes. D-3, D-6, D-9
Mount pin .C-5
Mounting foot lock lever. C-5
Multiple flash shooting .D-39
My menu. C-26

Nikon Creative Lighting System (CLS)...... B-3
Nikon Diffusion Dome. D-29
Non-CLS-compatible cameras E-2
Non-TTL auto flash. C-22, D-8

OK button C-8, C-21

Power ON-OFF/wireless setting switch C-8, D-45, D-50
Power zoom function. D-57

Ready-light C-7, D-42
Ready-light on the remote flash unit. C-2, D-42
Rear-curtain sync. D-56
Recycling time. D-18, F-21
Red-eye reduction. D-56
Red-eye reduction with slow-sync flash ...D-56
REMOTE D-45, D-50
Remote flash units. D-39
Repeating flash. C-22, D-17, D-49
Replacing batteries. C-27
Reset C-25
S
SB-900 condition. C-14
Selector dial. C-8, C-9
Setting the ISO sensitivity. C-24, D-60
Shooting distance. C-11, D-23
Slow-sync flash D-55
Soft case. A-14
Sound monitor. C-24, D-42
Speedlight stand D-41
Speedlight parts. C-2
Standard illumination pattern. D-24
Standard i-TTL. D-2
Standby function C-23, C-28
SU-4 type wireless multiple flash shooting. C-22, D-50
T
Table of flash shooting distance ranges...F-16
Table of zoom positions.. F-17
Test firing D-60
Thermal Cut-out. C-24, F-6
TTL Remote Cord. .F-11
Two-butoon reset. C-9
U
Updating firmware.. .F-10

Value of underexposure at TTL.....C-17,D-4
Version of firmware .C-25

Warning indicators.. F-3
Warranty card. A-14
Water Guard. F-11
Wireless multiple flash shooting.. D-39
Wireless slave flash controller.. F-11

ZOOM button C-8
Zoom position. D-57
Zoom position icons. C-12
No reproduction in any form of this manual, in whole or in part (except for brief quotation in critical articles or reviews), may be made without written authorization from NIKON CORPORATION.
- Autofocus Speedlight
- SB-900
- User's Manual
- About this user's manual
- How to find what you are looking for
- Camera and lens combinations
- Tips on identifying CPU Nikkor lenses
- Terms used in this user's manual
- Marks used in this manual
- Simple search by objective
- About Speedlight parts and indications
- About settings and operation
- About flash photography
- About accessories
- Others
- A
- Preparation
- B
- About the SB-900
- C
- Operation
- D
- Flash modes and functions
- E
- For use with cameras other than CLS compatible SLR cameras
- F
- Tips on Speedlight care and reference information
- For your safety
- WARNING
- CAUTION
- WARNINGs for Speedlights
- CAUTIONS for Speedlights
- WARNINGs for Batteries
- CAUTION for Batteries
- Symbol for separate collection applicable in European countries
- Foreword
- Included items
- Tips on using the Speedlight
- Take trial shots
- Have Nikon spot-check your Speedlight regularly
- Use your Speedlight with Nikon equipment
- Life-long learning
- Features of the SB-900
- Compatible cameras
- CLS-compatible SLR cameras
- i-TTL-compatible COOLPIX cameras
- What is the Nikon Creative Lighting System (CLS)?
- i-TTL mode
- Advanced Wireless Lighting
- FV Lock (Flash Value Lock)
- ■ Flash Color Information Communication
- Auto FP High-Speed Sync
- AF-Assist illuminator
- Flash modes and functions on the SB-900
- i-TTL mode (D-2)
- Auto-Aperture flash mode (D-5)
- Non-TTL Auto flash mode (D-8)
- Distance Priority manual flash mode (D-11)
- Manual flash mode (D-14)
- Repeating flash mode (D-17)
- ching illumination pattern (D-24)
- Bounce flash
- D-26)
- Close-up flash photography (D-30)
- Using color filters
- (D-33)
- Flash output level compensation/Exposure compensation
- Wireless multiple flash (D-39)
- Functions that are set on the camera
- FP Auto FP High-Speed Sync (D-55)
- FV Lock (Flash Value Lock) (D-55)
- Slow-Sync (D-55)
- Red-Eye Reduction flash mode/Red-Eye Reduction Slow-Sync (D-56)
- Rear-Curtain flash sync (D-56)
- Support functions
- Power zoom function (D-57)
- Setting the ISO sensitivity (D-60)
- AF-Assist illuminator (D-58)
- Test firing
- Modeling illuminator (D-61)
- FX/DX selection (D-62)
- SB-900 status and settings functions
- Custom setting (C-20)
- Two-button reset (C-9)
- Key lock
- LCD panel illumination setting (C-24)
- LCD panel contrast setting (C-25)
- Standby function (C-28)
- Continuous flash (F-5)
- Thermal Cut-out (F-6)
- Self firmware update (F-10)
- C Operation
- Basic operation
- STEP 1 Inserting the batteries
- Suitable batteries
- STEP 2 Attaching the SB-900 to the camera
- Detaching the SB-900 from the camera
- STEP 3 Adjusting the flash head
- STEP 4 Turning the SB-900 and camera on
- STEP 5 Selecting the flash mode
- Changing the flash mode
- Flash mode icons (C-10)
- Make sure that the readylight on the SB-900 or in the camera's viewfinder is on before shooting.
- Names and functions of control buttons
- Control button operation
- Two-button operation
- Two-button reset
- Key lock function
- LCD panel
- ISO sensitivity
- Distance information
- Zoom position
- Light distribution angle
- indication with power zoom on
- Aperture value
- Flash output level compensation
- SB-900 condition
- Test firing button functions
- Examples of LCD displays in wireless multiple flash shooting
- Master mode (with Advanced Wireless Lighting) (D-43)
- Remote mode (with Nikon Advanced Wireless Lighting) (D-43)
- Functions controlled by Function buttons
- When using a single flash unit
- When using a SB-900 as master flash unit (with Nikon Advanced Wireless Lighting) (D-43)
- When using a SB-900 as master flash unit (with SU-4 type wireless multiple flash shooting) (D-50)
- ■ When using the SB-900 as a remote flash unit (with Nikon Advanced Wireless Lighting) (D-43)
- ■ When using the SB-900 as a remote flash unit (with SU-4 type wireless multiple flash shooting) (D-50)
- ■ Master flash unit at repeating flash (with Nikon Advanced Wireless Lighting) (D-49)
- Custom functions and settings
- Custom setting
- Available Custom functions and settings
- My menu
- How to set "My menu"
- Replacing/recharging batteries
- Low battery power indicator
- Minimum recycling time and number of flashes for each type of batteries
- External power sources (optional)
- Standby function to conserve battery power
- To cancel Standby
- Adjusting the lead time before the Standby function is activated
- Explanation of the SB-900's flash modes and functions
- i-TTL Automatic Balanced Fill-Flash
- Standard i-TTL
- Setting the i-TTL mode
- Monitor pre-flashes
- SB-900 flash shooting distance range
- Auto setting of ISO sensitivity, aperture and focal length
- When insufficient light for correct exposure is indicated
- Changing camera's metering mode
- Auto aperture flash
- Setting the Auto aperture flash mode
- Display for Auto aperture flash
- Flash shooting distance range in Auto aperture flash mode
- Notes on using a telephoto lens in the Auto aperture flash mode
- Taking a picture in Auto aperture flash mode
- Insufficient light for correct exposure
- Checking the correct exposure before shooting
- Non-TTL auto flash
- Setting the Non-TTL auto mode
- Flash shooting distance range in Non-TTL auto flash mode
- When using a telephoto lens in the Non-TTL auto flash mode
- Taking a picture in Non-TTL auto flash mode
- Distance priority manual flash
- Setting the Distance-priority manual flash
- Display for Distance-priority manual flash (at 5 m shooting distance)
- Shooting in Distance priority manual flash mode
- When the flash head is rotated in Distance-priority manual flash mode
- Manual mode
- Setting Manual mode
- Display for Manual mode
- Taking a picture in Manual mode
- Setting the flash output level
- Repeating flash
- Setting the Repeating flash
- Display for Repeating flash
- Setting the flash output level, the number of repeating flashes, and the frequency (Hz) per frame
- Shooting with Repeating flash
- Set the shutter speed.
- Making sure the flash fires correctly before shooting
- V Exposure compensation in Repeating flash mode
- When the aperture value is not displayed in the SB-900's LCD
- Determining the aperture, flash output level and shooting distance
- ISO sensitivity factors
- Guide number (GN at ISO 100; m/ft)
- Calculating the correct aperture
- Obtaining the correct flash output level
- Calculating the shooting distance
- Switching illumination pattern
- To set/confirm illumination pattern
- Bounce flash operation
- Setting the flash head
- Tilt or rotate the SB-900's flash head by holding down the flash head tilting/rotating lock release button.
- Setting flash head tilting/rotating angles, and choosing the reflecting surface
- Setting the camera's exposure mode and metering system.
- Setting the SB-900's flash mode.
- Setting the camera's aperture.
- Adjust the flash head and shoot.
- Setting the aperture in bounce flash operation
- Using the built-in bounce card
- Setting the built-in bounce card
- Shooting with the Nikon Diffusion Dome
- Attaching the Nikon Diffusion Dome
- Notes when using the Nikon Diffusion Dome
- Taking close-up photographs with bounce-down flash
- Setting the built-in wide-flash adapter
- Slowly pull out the wide-flash adapter all the way, and position it over the flash head.
- Then slide the bounce card back into place inside the flash head.
- Taking close-ups with bounce-down flash
- Setting the camera's exposure mode and metering mode.
- Set the SB-900's flash mode.
- Position the built-in wide-flash adapter.
- Tilt the flash head down.
- Confirm the ready-light is on then shoot.
- When shooting subjects closer than 0.6m (2 ft.)
- Setting the aperture in off-camera close-up flash operation
- Notes on using a wideangle lens
- Flash photography with color filters
- Notes on using color filters
- How to use color filters
- Confirm the color filter indicator is displayed.
- Balancing light from the flash using color filters
- When using SB-900 with a camera equipped with filter detection (such as D3, D700)
- When using SB-900 with a camera not equipped with filter detection (such as D2 series, D300, D200, F6)
- ■ White balance/exposure compensation value depends on camera in use
- Flash output level compensation and exposure compensation
- Making flash output level compensation
- V Canceling flash output level compensation
- For cameras with a built-in flash featuring the exposure compensation function
- Making exposure compensation
- In i-TTL and Auto Aperture flash mode
- In Non-TTL auto flash and Manual flash mode
- Wireless multiple flash shooting
- Flash shooting with Advanced Wireless Lighting
- SU-4 type wireless multiple flash shooting
- Master flash unit and remote flash unit(s)
- Notes on performing wireless multiple flash photography
- Notes on remote flash
- Notes on setting a remote flash unit
- Notes on setting up the remote flash units
- Using the Speedlight Stand
- Confirming shooting situations in wireless multiple flash operation
- Flash shooting in Advanced Wireless Lighting
- Mechanism of the Advanced Wireless Lighting
- Flash set-up in the Advanced Wireless Lighting
- Setting the SB-900 to Advanced Wireless Lighting
- Setting the SB-900 as the master flash unit
- Setting the SB-900 as the remote flash unit
- Setting the flash mode, flash output level compensation values, and channel number on the master flash unit
- Setting a group and channel number on the remote flash units
- Press the Function button 1, then turn the selector dial to choose a desired group name, and press the [OK] button.
- Press the Function button 2, then turn the selector dial to choose the desired channel number, and press the [OK] button.
- Commander function
- Repeating flash shooting
- LCD display in the repeating flash mode
- Suitable cameras and Speedlights
- Setting the SB-900 to SU-4 type wireless multiple flash
- Master and remote flash units' available flash modes in the SU-4 type wireless multiple flash operation
- Master flash unit
- Remote flash unit
- Auto (auto) mode:
- M (manual) mode:
- Canceling monitor pre-flashes
- Procedures for SU-4 type wireless multiple flash shooting
- To prevent the remote flash units from firing accidentally
- Adjusting the flash output level of the remote flash units in the M (manual) mode
- Adjusting the flash output level manually
- Adjusting the flash output level in Non-TTL auto flash (A); applicable when using a Speedlight compatible with Non-TTL auto flash mounted on the SU-4 (optional)
- Available functions to be set on the camera
- Auto FP High-Speed Sync mode
- ■ Flash Value Lock (FV Lock)
- Slow-sync flash
- Red-eye reduction/Red-eye reduction with slow-sync flash
- Rear-curtain sync
- Flash shooting support functions
- Power zoom function
- Setting the zoom position manually
- Canceling the power zoom function
- When the power zoom function is canceled
- Notes on using the AF-Assist Illuminator
- AF-assist illuminator/flash firing off
- If autofocus is impossible while using the AF-Assist illuminator, focus manually.
- Using the SB-900 off-camera
- For cameras having a built-in Speedlight
- Setting the ISO sensitivity
- Setting the ISO sensitivity manually
- Test firing function
- Setting the test firing
- Modeling illuminator function
- Setting the modeling illuminator using the [Test firing] button
- Modeling illumination using camera's depth-of-preview button
- Modeling illuminator in the Advanced Wireless Lighting (D-43)
- Modeling illuminator in SU-4 type wireless multiple flash operation (D-50)
- Do not release the shutter while the Modeling illuminator is firing
- FX/DX selection
- Automatic switching between FX-/DX-format
- FX/DX indication with power zoom on
- Manual switching of light distribution angle
- Using the SB-900 with non-CLS-compatible SLR cameras
- Differences between CLS-compatible cameras and those not compatible with CLS
- For usage with i-TTL-compatible COOLPIX cameras
- Adjusting the zoom position when used with i-TTL compatible COOLPIX cameras
- Troubleshooting
- If the built-in wide-flash adapter is broken off accidentally
- Microcomputer characteristics
- Notes on continuous flash shooting
- Maximum number of continuous firings
- Notes for battery temperature
- Thermal Cut-out
- Thermal Cut-out: On
- Temperature warning indicators
- Thermal Cut-out: Off
- Tips on Speedlight care
- Never use thinner, benzene, or other active agents when cleaning the Speedlight,
- Cleaning
- Storage
- Operating location
- Notes on handling batteries
- Recyclingrechargeable batteries
- About the LCD panel
- Characteristics of the LCD panel
- LCD panel illuminator ON/OFF
- Adjusting the LCD panel's contrast
- Updating firmware
- Cameras compatible with SB-900 firmware update
- D3\*1, D700
- Optional accessories
- Speedlight Stand AS-21
- Color Filter Set SJ-3
- Water Guard WG-AS1, WG-AS2, WG-AS3
- Wireless Slave Flash Controller SU-4
- TTL Remote Cord SC-28/17 (approx. 1.5m / 4.9 ft)
- TTL Remote Cord SC-29 (approx. 1.5m / 4.9 ft)
- External power source
- Connecting to an external power source
- Specifications
- Flash shooting distance range (for i-TTL auto flash, Auto Aperture flash and Non-TTL auto flash mode)
- Guide number table
- Guide number table (in FX-format)
- Standard illumination pattern, at ISO 100; m/ft
- Guide number table (in DX-format)
- Guide number table (with Auto FP High-Speed Sync)
- Standard illumination pattern, at ISO 100; m/ft (in FX-format)
- Standard illumination pattern, at ISO 100; m/ft (in DX-format)
- Min. number of flashes/recycling time of each battery
- Symbol
- S
- T
- U
Marque : NIKON
Modèle : SB-900
Catégorie : Flash externe